1
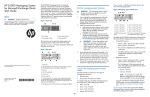
HP E5000 Messaging System
for Microsoft Exchange Quick
Start Guide
The HP E5000 Messaging System for Microsoft Exchange
is the general name for several E5x00 hardware-software
solutions for Microsoft Exchange. Each messaging system
features HP server blades and dense disk storage
combined in a single 3U chassis, as shown in
Figure 1 (page 1), and Microsoft Exchange setup utilities.
The Microsoft Windows Server operating system is
preinstalled and activated on all systems.
Figure 1 HP E5000 Messaging System—all models
Figure 3 E5300 Messaging System sample network
cabling
IMPORTANT: Included with your messaging system
is the Recovery DVD. This DVD is used to restore
the system to factory defaults and should be kept in
a safe place.
Supporting documentation
For additional information, see the following titles:
•
HP E5000 Messaging System for Microsoft Exchange
Administrator Guide
•
HP StorageWorks 3U Storage System Rail Kit
Installation Instructions in the rail kit
•
HP StorageWorks 2U Storage System Rail Kit
Installation Instructions to rack expansion disk
enclosures
1. Disk drawer
2. Server blade 1, Bay 1
•
3. Server blade 2, Bay 2
For messaging system titles, browse to www.hp.com/go/
E5000. Select HP Support & Drivers and your product.
Then select Manuals. The localized versions of this Quick
Start Guide are also located on the Manuals page.
The instructions in this quick start guide apply to all
messaging system models unless otherwise noted.
Refer to Figure 2 (page 1) to locate components
referenced elsewhere in this guide.
1. Client/MAPI network
2. Replication network
HP Integrated Lights-Out 2 User Guide
3. File share witness
4. Domain controller
Figure 4 E5500 and E5700 Messaging Systems sample
network cabling
Install the messaging system hardware
Figure 2 E5000 Messaging System rear view
© Copyright 2011 Hewlett-Packard Development Company, L.P.
WARNING! The messaging system is heavy.
Always use at least two people to move the storage
system into the rack.
edition: 1
January 2011
The information in this document is subject to change without
notice.
Printed in Puerto Rico
1.
www.hp.com
2.
1. 2–port Ethernet module (server blades 1 and 2) (2)
2. SAS I/O module (2)
3. Power button
4. Power supply (2)
5. 2–port Ethernet module (server blades 1 and 2) (2, on E5500 and
E5700 models only)
If you ordered the messaging system without the rack,
install the rail kit and messaging system chassis by
following the HP StorageWorks 3U Storage System
Rail Kit Installation Instructions, packaged with the
rail kit.
Install any expansion disk enclosures.
a. Add expansion disk enclosures to the rack by
following the HP StorageWorks 2U Storage
System Rail Kit Installation Instructions, packaged
with the rail kit.
b. Cable the expansion disk enclosures to the
messaging system chassis. For recommended
cabling, see Figure 5 (page 2) and
Figure 6 (page 2).
IMPORTANT: Ensure that cabling in the back
of the rack does not interfere with system
operation or maintenance. Bind cables loosely
with cable ties and route excess out of the way,
along the side of the rack.
6. Management port (for iLO-2 and Enclosure Manager)
3.
Page 1
2. Replication network
3. File share witness
4. Domain controller
For more information about connecting the messaging
system to your network, or to cable your network
differently from these examples, see the HP E5000
Messaging System for Microsoft Exchange
Administrator Guide.
4.
Connect the messaging system power cords to the
rack power supply using standard procedures.
Connect the messaging system network cables.
See the following cabling examples. Use the short
Ethernet cable that comes with the messaging system
for the replication network connection.
*5697-0686*
1. Client/MAPI network
Power on the messaging system
1.
Turn on any expansion disk enclosures.
2.
Turn on the messaging system by pushing the power
button on the back of the chassis, as shown in “E5000
Messaging System rear view” (page 1).
NOTE: Changing the network configuration of the
EMU and iLO-2 management processor makes them
inaccessible unless you connect the EMU to the
network you configured them for.
Once the messaging system power is on, turn on the
server blades if they do not automatically power on.
e.
4.
5.
Configure the EMU and iLO-2 network ports
The EMU and iLO-2 ports come preconfigured with static
addresses, which need to be configured to either DHCP
or appropriate static addresses for your network
environment.
The preconfigured static addresses are:
•
EMU: 10.0.0.10
•
Server blade1 iLO-2: 10.0.0.11
•
Server blade2 iLO-2: 10.0.0.12
•
Subnet mask: 255.255.255.0
NOTE: The EMU must share a LAN with the server
blades.
1.
2.
3.
4.
Connect a system in the environment (or a laptop) to
the EMU port, as shown in Figure 2 (page 1). Use
an Ethernet cable connected directly to the system or
through a switch. Configure the NIC on your system
to a static address of 10.0.0.20 with the subnet mask
defined above.
Open a web browser and log into iLO-2 for each
server blade, using the addresses listed above and
the Administrator password from the blade pullout
tab in the front of the messaging system.
Configure the iLO-2 networking settings using the tools
under the Administration tab in the web browser
instance for each server. Optionally change the
Administrator password before changing the network
settings.
Using a secure shell application (putty, for example),
log in to the EMU using the address listed above. The
Administrator password is on the label attached to
the messaging system. Configure the following:
a. Change your EMU password by typing set
password at the command line prompt.
b. To change the static IP address, type the
command set ipconfig static at the
command line prompt and follow the instructions.
c. To change the EMU addressing to DHCP, type
set ipconfig dhcp at the command line
prompt.
Access the messaging system
Connect to the messaging system using either the remote
console (iLO-2) described above or a direct (KVM)
connection, as shown in “For direct access” (page 2).
The iLO-2 remote console is the recommended method.
For instructions on using each access method, see the HP
E5000 Messaging System for Microsoft Exchange
Administrator Guide or the HP Integrated Lights-Out 2 User
Guide.
Review report and complete installation
configuration.
Figure 6 Cabling four additional expansion disk enclosures
Click Finish. This completes the system configuration
for one server. Next you will configure the server for
Microsoft Exchange.
Run the Quick Deployment Tool and configure
Exchange Server 2010 on the server configured in
the previous steps.
For instructions on running the Quick Deployment
Tool, see the HP E5000 Messaging System for
Microsoft Exchange Administrator Guide.
When you have completed the E5000 Configuration
Wizard and the Quick Deployment Tool for server 1 and
server 2, the messaging system is ready for use.
Cabling expansion disk enclosures
Configure the messaging system
The messaging system should be powered up and the
network ports cabled for your network configuration,
including the EMU port. Complete the following steps, first
on server1 and then on server 2. Do not start on the second
server until you have completed the steps on server 1.
1. Enter your locale information in the Windows setup
dialog and accept the license terms. The Windows
setup will complete in approximately 15 minutes and
the HP E5000 Messaging System Configuration
Wizard will start.
2. Enter the EMU Administrator password as instructed
in the E5000 Configuration Wizard window:
If your product includes expansion disk enclosures, be sure
to rack and cable the expansion disk enclosures before
powering on the messaging system for initial configuration.
The following figures show the correct cabling of expansion
disk enclosures to the messaging system chassis.
Numbers represent the order of attachment.
Figure 5 Cabling two additional expansion disk enclosures
For direct access
To use a direct (KVM) connection for the initial
configuration, follow these steps:
1. Attach the SUV cable (supplied with the messaging
system) to the port on the front of the server blade, as
shown in Figure 7 (page 2).
2. Connect the following cables (not supplied) to the free
ends of the SUV cable in this sequence:
a. keyboard
b. mouse
c. monitor cable
d. power cable
Figure 7 KVM console connections
The wizard automatically runs a diagnostics program
to ensure that the messaging system is correctly
configured. An error message appears describing
any configuration errors and how to fix them. When
the configuration is correct, the E5000 Configuration
Wizard resumes.
3.
Step through each menu option in the wizard to
complete the minimum required configuration.
a. Set time zone.
b. Set Administrator password.
c. Set network configuration.
d. Identify computer name.
Page 2