1
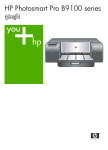
HP Photosmart Pro B9100 series
User Guide
Copyrights and trademarks
© 2006 Hewlett-Packard Development
Company, L.P.
Hewlett-Packard Company
notices
The information contained in this
document is subject to change without
notice.
All rights reserved. Reproduction,
adaptation, or translation of this
material is prohibited without prior
written permission of Hewlett-Packard,
except as allowed under copyright
laws.
The only warranties for HP products
and services are set forth in the express
warranty statements accompanying
such products and services. Nothing
herein should be construed as
constituting an additional warranty. HP
shall not be liable for technical or
editorial errors or omissions contained
herein.
Trademarks
HP, the HP logo, and Photosmart are
property of Hewlett-Packard
Development Company, L.P.
Microsoft and Windows are registered
trademarks of Microsoft Corporation.
Mac, the Mac logo, and Macintosh are
registered trademarks of Apple
Computer, Inc.
Adobe® and Adobe Photoshop® are
trademarks of Adobe Systems
Incorporated.
Other brands and their products are
trademarks or registered trademarks of
their respective holders.
Regulatory model
identification number
SNPRB-0504
For regulatory identification purposes,
the product is assigned a Regulatory
Model Number. The Regulatory Model
Number for the product is
SNPRB-0504. This regulatory number
should not be confused with the
marketing name (HP Photosmart Pro
B9100 series) or product number
(Q5736A).
Environmental statements
For Environmental Stewardship
information, see the electronic Help.
Contents
1
2
3
4
5
Welcome.................................................................................................................3
Find more information .............................................................................................3
Printer parts ............................................................................................................4
Printer menu ...........................................................................................................8
Basic printing.......................................................................................................11
Media trays ...........................................................................................................11
Load the main tray ................................................................................................12
Load the specialty media tray ...............................................................................13
Choose the right paper or other media .................................................................18
Specialty media .............................................................................................18
Supported sizes .............................................................................................19
Tips .......................................................................................................................20
Print from a software program ..............................................................................20
Change print settings ...........................................................................................21
Change the print speed or quality .................................................................22
Set the paper type .........................................................................................22
Print in grayscale ...........................................................................................23
Set the default print settings .................................................................................23
Optimize print quality for slow computers .............................................................24
Make the HP Photosmart Pro B9100 series the default printer ............................24
Color management..............................................................................................25
What is color management? .................................................................................25
Use the HP Photosmart Pro print plug-in for Adobe Photoshop® ........................26
Start the HP Photosmart Pro print plug-in .....................................................27
Change the HP Photosmart Pro print plug-in defaults ..................................27
Install the HP Photosmart Pro print plug-in ...................................................27
Use application-based color management ...........................................................27
Use printer-based color management ..................................................................29
Care and maintenance........................................................................................33
Leave the printer on .............................................................................................33
Replace the ink cartridges ....................................................................................33
Check the ink levels ......................................................................................34
Replace the ink cartridges .............................................................................34
Replace faulty printheads .....................................................................................36
Clean the printer ...................................................................................................39
Clean the printer ............................................................................................39
Clean the printheads automatically ...............................................................40
Clean the printhead nozzles manually ..........................................................40
Align and calibrate the printer ...............................................................................42
Print a test page ...................................................................................................42
Print a sample page .............................................................................................43
Download printer software updates ......................................................................43
Uninstall the printer software ................................................................................44
Troubleshooting..................................................................................................45
Printer software installation problems ..................................................................45
HP Photosmart Pro B9100 series User Guide
1
Printer hardware problems ...................................................................................46
Printing problems ..................................................................................................47
Error messages ....................................................................................................50
Paper errors ..................................................................................................51
Printer setup errors ........................................................................................52
Ink cartridge and printhead errors .................................................................53
Network errors ...............................................................................................54
6 HP support ..........................................................................................................57
Support process ...................................................................................................57
HP support by phone ............................................................................................57
Phone support period ....................................................................................57
Placing a call .................................................................................................57
After the phone support period ......................................................................58
Additional warranty options ..................................................................................58
A Networking...........................................................................................................59
Networking basics (Windows and Mac) ................................................................59
Internet connection ........................................................................................60
Recommended network configurations .........................................................60
Ethernet network without Internet access ..............................................60
Ethernet network with Internet access by dial-up modem .....................60
Ethernet network with broadband Internet access provided by a router 61
Connect the printer to the network .......................................................................61
Install the printer software on a Windows computer .............................................62
Install the printer software on a Mac ....................................................................63
Use the embedded web server ............................................................................64
Print a network settings page ...............................................................................64
B Specifications......................................................................................................65
System requirements ............................................................................................65
Printer specifications ............................................................................................66
C HP Warranty.........................................................................................................69
Index............................................................................................................................71
2
HP Photosmart Pro B9100 series printer
1
Welcome
Thank you for purchasing an HP Photosmart Pro B9100 series printer.
Designed especially for professional and serious amateur photographers, this printer
provides the following advanced technologies and features:
●
●
●
●
●
●
An 8-color system that yields rich, bright, fade-resistant, and color-accurate photos,
especially when used with HP Advanced Photo Paper.
Four dual-color printheads that provide up to four times faster printing than previous
technologies.
Support for a very wide range of media sizes and types, from 7.6 x 13 cm to
32 x 48 cm (3 x 5 inches to 13 x 19 inches), and from light photo stock to 1.5 mm
rigid media.
Automatic ink nozzle monitoring and cleaning and on-the-fly nozzle substitution, for
minimum downtime.
Closed-loop color calibration for assured color accuracy.
Advanced color management with the HP Photosmart Pro print plug-in for Adobe
Photoshop®, which streamlines your color management workflow.
This section includes the following topics:
●
●
●
Find more information
Printer parts
Printer menu
Find more information
The printer comes with the following documentation:
●
●
●
●
Quick Start guide: Read this document first, to learn how to set up the printer and
install the printer software.
User Guide: The User Guide is the book you are reading. This book describes the
basic features of the printer and contains troubleshooting information.
Electronic Help: The electronic Help describes the printer software features and
contains software troubleshooting information.
After you have installed the HP Photosmart printer software on a computer, open
and explore the HP Photosmart Help:
– Windows: From the Start menu, select Programs or All Programs, point to
HP, HP Photosmart Pro B9100 series, and then click HP Photosmart Printer
Help.
– Mac: Select Help, Mac Help in the Finder, and then choose Library,
HP Photosmart Printer Help.
HP Solution Center (Windows only): The HP Solution Center provides information
about all of your HP devices.
– Learn about the printer and its software, and view troubleshooting solutions,
including informative How Do I? animations
– Update your printer software
– Change printer settings
HP Photosmart Pro B9100 series User Guide
3
Chapter 1
– Order supplies
– Start HP Photosmart Premier software
After you have installed the HP Photosmart printer software on a computer, open
and explore the HP Solution Center.
Windows: Right-click the HP Digital Imaging Monitor icon on the Windows
taskbar, and then click Launch/Show HP Solution Center.
Note In this user guide, printer software refers to the HP Photosmart software
that comes on the CD with the printer. The printer driver is the part of the printer
software which controls the printer.
Printer parts
Front of printer
4
1
Printer screen: Check the ink levels and see print or error messages here.
2
Control panel: Use these buttons to open and navigate the printer menu, cancel print jobs,
and respond to prompts on the printer screen.
3
Top door: Lift to gain access to the printheads and to clear paper jams.
4
Specialty media tray (closed): Lower to insert a single sheet of rigid or thick media, such as
card stock. Place the media with the side to be printed facing up in this tray. Do not load
media thicker than 1.5 mm, or more than one sheet at a time.
5
Ink cartridge door: Press the raised bumps at the top of the door to open the door and insert
or remove ink cartridges.
6
On button: Press to turn on the printer. Flashes blue if the printer is busy.
7
Output tray: Print jobs come out here. For easier access to the main tray, you can remove
the output tray by sliding it towards you.
8
Main tray: Place a stack of plain paper or photo paper in this tray for printing. Place the media
into this tray with the side to be printed facing down.
HP Photosmart Pro B9100 series printer
Back of printer
1
USB port: Use this port to connect the printer to a computer.
2
Ethernet port: Use this port to connect the printer to a network.
3
Rear door: Remove this door to clear paper jams.
4
Rear paper slot: Print jobs from the specialty media tray pass back and forth through this slot
before being ejected on the output tray at the front of the printer. Check that there is enough
room behind the printer for the paper to pass back and forth through the slot without any
obstructions. When you are printing from the specialty media tray, the space behind the printer
should be equivalent to the length of paper you are printing on.
5
Rear door releases: Press the two releases on either side of the rear paper slot to remove
the rear door.
6
Power cord connection: Use this port to connect the power cord included with the printer.
HP Photosmart Pro B9100 series User Guide
5
Chapter 1
Paper trays
6
1
Main tray: Place a stack of photo paper, plain paper, or other non-rigid media in this tray for
printing. Load the media in portrait orientation and with the side to be printed facing
down. Squeeze the main tray release to lengthen or shorten the main tray, depending on the
size of paper you are loading.
2
Output tray: Print jobs come out here. For easier access to the main tray, remove this tray
by pulling it out towards you.
3
Specialty media tray (open): Insert a single sheet of rigid or thick media, such as card stock,
in this tray. Load the media with the side to be printed facing up.
4
Main tray release: Squeeze this release and pull it towards you to extend or retract the main
tray extension, or to remove the tray from the printer.
5
Paper catch: Flip up to keep print jobs from falling off the output tray extension.
6
Output tray extension: Pull it towards you to extend the output tray to catch the printed paper
as it is ejected from the printer.
HP Photosmart Pro B9100 series printer
Main tray
1
Paper-width guide: Adjust this guide to fit close to the left edge of the paper in the tray by
pressing the button on the front of the guide and sliding the guide across.
2
Paper-size markings: Refer to these markings to guide you for loading paper in the correct
orientation.
3
Main tray extension: Extend the main tray to load larger sizes of paper. Fully extended, the
main tray can hold up to 32 x 48 cm (13 x 19 inch) paper.
4
Main tray release: Squeeze this release and pull it towards you to extend or retract the main
tray extension, or to remove the tray from the printer.
5
Paper stops: Align the paper against these stops so that the paper feeds correctly into the
printer.
6
Paper-length guide: Adjust this guide to fit close to the end of the paper in the tray.
HP Photosmart Pro B9100 series User Guide
7
Chapter 1
Control panel
1
Printer screen: Use this screen to view menus and messages.
2
Menu: Press to view the printer menu.
3
Previous: Press to navigate to a previous menu option.
4
OK: Press to select a menu option or respond to a prompt on the printer screen.
5
Next: Press to navigate to the next menu option.
6
Cancel: Press to exit a menu option or to stop the current print job.
7
Attention light: Flashes red if an error requiring user action occurs. An error message is also
displayed on the printer screen. Appears solid amber if there is an unrecoverable error. For
more information, see Troubleshooting.
8
Ink level dots: These dots show you the position of each colored ink cartridge in the ink
cartridge stalls below. When the printer is idle, the printer screen displays a bar graph to
indicate the ink level of each cartridge in the order of the colored dots.
Printer menu
Press Menu to open the printer menu.
To navigate the printer menu
● Press or to scroll through the menus or options displayed on the printer screen.
● Any menu with a triangle next to it has submenus or options. Press OK to display
the submenus or options.
● Press Cancel to exit the current menu.
The printer menu structure
The following options are available from the printer menu.
●
●
8
Print test page: Select this option to print a test page containing information about
the printer such as the condition of the ink cartridges, the printer serial number, and
the firmware version. See Print a test page.
Print sample page: Select this option to print a sample photo. See Print a sample
page.
HP Photosmart Pro B9100 series printer
●
●
●
●
●
Network settings:
– Show IP address: Select this option to view the printer IP address (a numeric
address that identifies the printer on a network).
– Print network settings page: Select this option to print a network configuration
page that you can use to troubleshoot network connections or for the initial
network setup. See Print a network settings page.
– Reset network settings: Select this option to reset the printer network settings
to the factory defaults.
Clean printheads: Select this option to clean the printheads if you notice white lines
or single-color streaks on the photos you print. After the cleaning finishes, the printer
prints a test page. See Clean the printheads automatically.
Calibrate printer:
– Align printheads: Select this option to align the printheads. Load Letter or A4sized HP Advanced Photo Paper - Glossy in the main tray before you start
this procedure to achieve best results.
– Closed loop calibration: Select this option to calibrate the printer color. The
printer makes automatic adjustments and corrections using HP proprietary
technology to give consistent and accurate color reproduction. Load Letter or
A4-sized HP Advanced Photo Paper - Glossy in the main tray before you start
this procedure to achieve best results.
– Reset closed loop calibration: Select this option to reset the printer color
calibration to the default settings. Load Letter or A4-sized HP Advanced Photo
Paper - Glossy in the main tray before you start this procedure to achieve best
results.
Language: Select this option to indicate the language you want used on the printer
screen.
Show ink level percentage: Select this option to show the ink level for each of the
ink cartridges.
Note 1 The ink levels shown are an estimate only. Actual ink volumes may
vary.
Note 2 Ink in the cartridges included in the printer box is used for printer
initialization. Ink from these cartridges, as well as from replacement
cartridges, is also used to keep print nozzles clear and ink flowing smoothly.
HP Photosmart Pro B9100 series User Guide
9
Chapter 1
10
HP Photosmart Pro B9100 series printer
2
Basic printing
This section contains the following topics:
●
●
●
●
●
●
●
●
●
Media trays
Load the main tray
Load the specialty media tray
Choose the right paper or other media
Tips
Print from a software program
Change print settings
Set the default print settings
Make the HP Photosmart Pro B9100 series the default printer
Media trays
The printer has two media trays:
●
●
Main tray: The main tray can hold and automatically load multiple sheets of media.
Only thin, flexible media can be loaded into this tray, due to the bending that media
is subject to as it passes through the printer from this tray.
Specialty media tray: The specialty media tray is designed primarily for thick, rigid
media. Paper from this tray is fed straight through the printer, without being bent.
When you use this tray, check that there is clear space behind the printer at least
equal to the length of the media you are printing on. Load one sheet of media at a
time into this tray, and be sure that the media is no thicker than 1.5 mm. Single
sheets of lightweight paper can also be loaded into this tray.
Both trays support a wide range of media sizes, from 7.6 x 12.7 cm to 32 x 48 cm
(3 x 5 inches to 13 x 19 inches). See Choose the right paper or other media for a
description of specific paper types for use with this printer.
Use the following guidelines for determining which tray to load a particular type of media
into:
Media
Main tray
Specialty media tray
Photo, Inkjet, and Plain
Papers
Recommended
Supported
Supported
Recommended
Not supported
Recommended
Examples: HP Advanced
Photo Paper; Brochure,
photo, inkjet, and plain
papers
Digital Fine Art Papers
<220 gsm
Examples: Photo Rag
Digital Fine Art Papers
>220 gsm
HP Photosmart Pro B9100 series User Guide
11
Chapter 2
(continued)
Media
Main tray
Specialty media tray
Not supported
Recommended
Not supported
Not supported
Examples: Canvas; Photo
Rag; Watercolor paper
Rigid Media
Examples: Photo board
Any media thicker than
1.5 mm
Note You do not need to remove media from the main tray before you use the
specialty media tray.
Load the main tray
To load the main tray
1. Remove the output tray completely by grasping the sides of the tray with both hands
and sliding it out towards you. The main tray is now accessible.
2.
3.
Move the paper-width and paper-length guides to make room for the paper.
Place a stack of paper in the main tray, in portrait orientation and with the side
to be printed facing down. Align the paper against the right side of the tray and
against the paper stops at the back of the tray. Check that the stack of paper is no
higher than the top of the paper-width guide.
Tip For easier access or for loading larger sizes of media, extend the main
tray by squeezing the main tray release and pulling the tray towards you. You
can remove the tray from the printer if necessary, by grasping the sides of
the tray with both hands and pulling it towards you.
12
HP Photosmart Pro B9100 series printer
4.
5.
6.
If you extended or removed the main tray to load paper, push in the main tray to the
end of the paper by squeezing the release and pushing in the tray, and push the tray
back into the printer until it is fully seated. Be sure to adjust the length of the main
tray and reseat the tray in the printer before you adjust the paper-length and
paper-width guides or the paper will jam.
Adjust the paper-width and paper-length guides so they rest gently against the edges
of the paper.
Check that the paper is lying flat in the tray.
Replace the output tray. If you are printing on paper larger than 21.6 x 28 cm
(8.5 x 11 inches), pull out the output tray extension by holding the output tray with
one hand and pulling out the extension with your other hand. Flip up the paper catch.
Note If you are using non-HP brands of glossy media in the main tray, and the
printer does not feed the paper or feeds multiple sheets through at once, try
reducing the number of sheets in the main tray to 20 sheets, or use the specialty
media tray to print on one sheet at a time.
Load the specialty media tray
It is recommended that before you print on expensive specialty media, you practice using
the specialty media tray by loading a single sheet of plain paper and printing an image
or document.
HP Photosmart Pro B9100 series User Guide
13
Chapter 2
For information on loading canvas media, see To load canvas in the specialty media
tray. For all other types of media, see To load the specialty media tray.
Note You do not need to remove media from the main tray before you use the
specialty media tray.
To load the specialty media tray
1. Check that there is space behind the printer for the paper to pass back and forth
through the rear paper slot. The space behind the printer should be equivalent to
the length of the paper you are printing on.
2. Lower the specialty media tray.
Wait while the printer raises the printhead assembly in preparation for printing.
14
3.
Pull out the output tray extension by holding the output tray with one hand and pulling
out the extension with your other hand. Flip up the paper catch at the end of the
output tray extension to prevent paper from falling onto the floor.
4.
Load one sheet with the side to be printed facing up on the specialty media tray.
Feed the media into the printer until the back edge of the media (the edge nearest
you) is lined up with the dashed white line on the tray. For large sizes of media, the
media will project through the rear paper slot at the back of the printer.
If you are using tabbed paper, insert the paper so the tab feeds in first.
HP Photosmart Pro B9100 series printer
Align the right edge of the media against the raised edge of the tray and not against
the side of the printer. Misaligned media can result in skewing or other printing
problems, including paper jams.
Tip If the media is curled, you can open the top door to check that the media
feeds under the rollers smoothly. Be sure to close the top door again.
5.
Press OK on the printer.
To load canvas in the specialty media tray
1. Lower the specialty media tray.
Wait while the printer raises the printhead assembly in preparation for printing.
HP Photosmart Pro B9100 series User Guide
15
Chapter 2
16
2.
Pull out the output tray extension by holding the output tray with one hand and pulling
out the extension with your other hand. Flip up the paper catch at the end of the
output tray extension to prevent paper from falling onto the floor.
3.
Load one sheet of canvas media with the side to be printed facing up on the
specialty media tray.
a. Open the top door to check that the media feeds under the rollers smoothly.
HP Photosmart Pro B9100 series printer
b.
c.
4.
Feed the media into the printer until the back edge of the media (the edge
nearest you) is lined up with the dashed white line on the tray. For large sizes
of media, the media will project through the rear paper slot at the back of the
printer.
Close the top door.
Select Canvas as the media type in the printer driver on the computer, and then
click Print to send your print job to the printer.
The printer checks that the media is flat enough to print on.
If the media is not flat enough, the printer screen displays Paper jam. Remove
media and check flatness. Press OK to continue. If this occurs, remove the media
from the back of the printer. Place the media in a plastic bag and gently bend it until
it lies flat. Load the media again. If the problem persists, use a different, flatter sheet
of media.
HP Photosmart Pro B9100 series User Guide
17
Chapter 2
Note Store media in a plastic bag to prevent curling.
5.
Press OK on the printer.
Note When you print on certain types of media, the printer does not fully eject
the media from the printer. Grasp the media with both hands and pull it from the
front of the printer.
Choose the right paper or other media
For a list of available HP inkjet paper, or to purchase supplies, go to:
●
●
●
●
www.hpshopping.com (U.S.)
www.hpshopping.ca (Canada)
www.hp.com/eur/hpoptions (Europe)
www.hp.com (All other countries/regions)
To get the best and longest-lasting results from the printer, choose from these high quality
papers.
To print
Use this paper or media
High quality, long lasting prints and
enlargements
HP Advanced Photo Paper
This paper is available in several finishes,
including glossy and satin-matte. Not all
finishes are available in all countries/
regions or in every paper size.
Color calibration and printhead alignment HP Advanced Photo Paper - Glossy
Casual photos from e-mail and the Web
Plain paper
Text documents, draft versions, and test
pages
Plain paper
Specialty media
The printer prints on a variety of HP and non-HP specialty media. Experiment with some
of the types listed here for special effects:
●
●
●
●
●
●
HP Hahnemuhle Smooth Fine Art Paper
HP Hahnemuhle Watercolor Paper
HP Aquarella Art Paper
HP Artist Matte Canvas
Photo Rag
Photo Board (up to 1.5 mm in thickness only)
Some media types may not be available in all countries/regions. Check with your local
media provider.
Warning Do not load media thicker than 1.5 mm, as it can damage the printer.
18
HP Photosmart Pro B9100 series printer
Supported sizes
Both trays support paper sizes ranging from 7.6 x 12.7 cm to 32 x 48 cm (3 x 5 inches
to 13 x 19 inches), including:
Metric
● 10 x 15 cm (with or without tab)
● Panorama 10 x 30 cm
● 13 x 18 cm
● A3
● A4 (including Panorama)
● A5
● A6
● B4
● B5
● E
Imperial
● Index card 3 x 5 inches
● Index card 4 x 6 inches
● Index card 5 x 8 inches
● 3.5 x 5 inches
● 4 x 6 inches (with or without a tab)
● Panorama 4 x 10 inches
● Panorama 4 x 11 inches
● Panorama 4 x 12 inches
● 5 x 7 inches
● 8 x 10 inches
● 11 x 14 inches
● 11 x 17 inches
● 12 x 12 inches
● 13 x 19 inches (B+)
U.S.
● Letter
● Legal
● Executive
● Tabloid
Japan
● L
● 2L
● Hagaki
● Ofuku Hagaki
HP Photosmart Pro B9100 series User Guide
19
Chapter 2
Envelopes
● Envelope No. 10
● A2 envelope
● C6 envelope
● DL envelope
Warning Do not load media thicker than 1.5 mm, as it can damage the printer.
Tips
Keep your paper in good condition for printing
● Store the photo paper in its original packaging or in a resealable plastic bag to
prevent excessive curling, which can prevent proper feeding.
● Keep the paper flat in a cool, dry place. If the corners curl, place the paper in a plastic
bag and gently bend it in the opposite direction until it lies flat.
● Handle the paper by the edges to prevent smears and fingerprints on the surface.
● Do not leave media in the main tray when you are not printing, because the media
can curl when left exposed to the air.
Paper loading tips
● Be sure to adjust the length of the main tray to match the paper size you are using
and reseat the tray back in the printer before you set the paper-length guide against
the paper. If you set the paper-length guide first, and then adjust the tray length, the
paper might jam.
● Load only one type and size of paper at a time in the main tray.
● After loading paper, extend the output tray extension and flip up the paper catch to
hold your printed pages. This prevents printed pages from dropping off the output
tray.
Print tips
● If you are printing photos, transfer the photos from your digital camera to the
computer using the steps outlined in your camera documentation. You can then
open the photos in your image editing software program and print them from there.
● For information on installing the printer software, see Networking.
● Be sure to download the latest printer software update every couple of months to
ensure you have the latest features and improvements. For more information,
see Download printer software updates.
Print from a software program
Follow the steps below to print a photo or document using the basic printer settings. To
modify the settings, see Change print settings. To use the more advanced color
management settings, see Color management.
20
HP Photosmart Pro B9100 series printer
To print from a software program (Windows)
1. Make sure you have paper loaded correctly.
2. On the File menu in your software program, click Print.
3. Select the HP Photosmart Pro B9100 series as the printer. If you have already set
the HP Photosmart Pro B9100 series as the default printer, you can skip this step.
The HP Photosmart Pro B9100 series will already be selected.
4. If you need to change settings, click the button that opens the Properties dialog
box. Depending on your software program, this button might be called Properties,
Options, Printer Setup, or Printer.
5. Select the appropriate options for your print job by using the features available in
the Advanced, Printing Shortcuts, Features, and Color tabs.
Tip You can easily select the appropriate options for your print job by
choosing one of the predefined print tasks on the Printing Shortcuts tab.
Click a type of print task in the Printing Shortcuts box. The default settings
for that type of print task are set, and summarized on the Printing
Shortcuts tab. If necessary, you can adjust the settings here, or you can
make your changes on the other tabs in the Properties dialog box.
6.
7.
Click OK to close the Properties dialog box.
Click Print or OK to begin printing.
To print from a software program (Mac)
1. Make sure you have paper loaded correctly.
2. On the File menu in your software program, click Page Setup.
3. Select the HP Photosmart Pro B9100 series as the printer. If you have already set
the HP Photosmart Pro B9100 series as the default printer, you can skip this step.
The HP Photosmart Pro B9100 series will already be selected.
4. Select the paper size from the Paper Size pop-up menu, and then click OK to save
the settings.
5. On the File menu in your software program, click Print.
6. Select the appropriate options for your print job using the features available on the
panes.
Tip Define print tasks for print jobs that you do often in the Presets pop-up
menu.
7.
Click Print to begin printing.
Change print settings
This section contains the following topics:
●
●
●
Change the print speed or quality
Set the paper type
Print in grayscale
Note The electronic Help provides more information on the many print settings
available in the printer driver. To learn how to open the electronic Help, see Find
more information.
HP Photosmart Pro B9100 series User Guide
21
Chapter 2
Change the print speed or quality
To change the print speed or quality (Windows)
1. Open the Printer Properties dialog box.
2. Click the Features tab.
3. In the Paper Type drop-down list, select the type of paper that you have loaded.
4. In the Print Quality drop-down list, select the appropriate quality setting for your
project:
– FastDraft: Prints at the fastest printing speed.
– Normal: Provides the best balance between print quality and speed. This is the
appropriate setting for most documents.
– Best: Provides high quality printing.
– Maximum dpi: Provides the highest quality prints possible, but requires longer
to print than Best and requires a large amount of disk space.
To change the print speed or quality (Mac)
1. Open the Print dialog box.
2. Choose the Paper Type/Quality pane.
3. Click the Paper tab.
4. From the Quality pop-up menu, select the appropriate speed and quality setting for
your project:
– FastDraft: Prints at the fastest printing speed.
– Normal: Provides the best balance between print quality and speed. This
setting is appropriate for most documents.
– Best: Provides high quality printing.
– Maximum dpi: Provides the highest quality prints possible, but requires longer
to print than Best and requires a large amount of disk space.
Set the paper type
The default paper type setting for printing is based on the printing shortcut you select. If
you print on special papers, you can change the paper type from the Properties dialog
box.
To select a specific paper type (Windows)
1. Open the Printer Properties dialog box.
2. Click the Features tab.
3. Click More in the Paper Type drop-down list, and then select the paper type that
you want to use.
4. Click OK.
5. Select any other print settings that you want, and then click OK.
To select a specific paper type (Mac)
1. Open the Print dialog box.
2. Choose the Paper Type/Quality pane.
3. Click the Paper tab.
22
HP Photosmart Pro B9100 series printer
4.
5.
In the Paper Type pop-up menu, click the appropriate paper type.
Choose any other print settings that you want, and then click Print.
Print in grayscale
You can print documents or photos in grayscale for dramatic black and white photos.
To print in grayscale (Windows)
1. Open the Printer Properties dialog box.
2. Click the Color tab, and then click Print in Grayscale in the Color Options area.
3. In the Print in Grayscale drop-down list, select one of the following:
– Composite gray
– Gray inks only
4. Select any other print settings you want, and then click OK.
To print in grayscale (Mac)
1. Open the Print dialog box.
2. Choose the Paper Type/Quality pane.
3. Click the Paper tab.
4. In the Color pop-up menu, choose Grayscale.
5. Choose any other print settings that you want, and then click Print.
Note For more information on color settings in the printer driver, see Color
management.
For more information on the HP printer driver:
● Windows: Right-click the HP Digital Imaging Monitor icon on the Windows taskbar
and then select Launch/Show HP Solution Center. Click Onscreen Guide and
select the Help for your device. In the print dialog itself, right-click any option and
click the What's This? box to learn more about that option.
● Mac: Choose Help, Mac Help in the Finder, and then choose Library,
HP Photosmart Printer Help.
Set the default print settings
If you frequently print photos or documents on the same size and type of paper, you can
set print defaults or presets with all your preferred settings.
To change the default print settings (Windows)
1. In the HP Solution Center, click Settings, point to Print Settings, and then click
Printer Settings.
2. Make changes to the print settings, and then click OK.
To create presets (Mac)
1. On the File menu in your software program, click Print.
2. Choose the settings on each pane that you want to use frequently.
HP Photosmart Pro B9100 series User Guide
23
Chapter 2
3.
4.
In the Presets pop-up menu, choose Save as.
Type the name of your new preset, and then click OK.
Optimize print quality for slow computers
The HP Photosmart Pro B9180 printer is capable of printing large images at high
resolution. The associated files for such images are necessarily very large. The printer
relies on your pc’s ability to efficiently transfer these large files as the image is being
printed. If you have a computer that is too slow, in CPU speed or RAM capacity for
example, the print quality will not be optimum. There are several things you can do to
improve the print quality when printing from a slow computer:
1.
2.
3.
4.
5.
6.
Close all open applications except the one you are printing from. Make sure there
are no processes running in the background.
Change your color management option to "Managed by Application." See Color
management for more information.
Do not use/disable color management.
If you are printing a landscape image, rotate it into portrait orientation and select
portrait orientation in the driver before printing.
Increase your system's RAM capacity.
Increase your system's processor speed, or upgrade to a faster processor.
Make the HP Photosmart Pro B9100 series the default
printer
Windows 2000
1. On the Windows taskbar, click Start, point to Settings, and then click Printers.
2. Right-click the HP Photosmart printer icon, and then click Set as Default Printer.
Windows XP
1. On the Windows taskbar, click Start, and then click Control Panel.
2. Open Printers and Faxes.
3. Right-click the HP Photosmart printer icon, and then click Set as Default Printer.
Mac
1. In the System Preferences, click Print & Fax, and then click Printing.
2. Choose an option from the Selected printer in Print Dialog pop-up menu.
If you want the default printer always to be the same printer, choose that printer from
the menu. The default printer does not change even after you print to a different
printer.
If you want the default printer always to be the one you last printed to, choose Last
printer used from the menu. The default printer changes whenever you print to a
different printer.
24
HP Photosmart Pro B9100 series printer
3
Color management
This section contains the following topics:
●
●
●
●
What is color management?
Use the HP Photosmart Pro print plug-in for Adobe Photoshop®
Use application-based color management
Use printer-based color management
Note In this user guide, printer software refers to the HP Photosmart software
that comes on the CD with the printer. The printer driver is the part of the printer
software which controls the printer.
What is color management?
Color management affects the way the colors in your photos are printed. Because the
printer, image editing software programs, the operating system, and imaging devices
such as cameras, scanners, and monitors, all display colors differently, the color
management strategy you choose affects whether colors are printed more or less
accurately.
Color management is based on color spaces1. Most imaging devices use the RGB2 color
space, while commercial printers use the CMYK3 color space. The differences between
the two color spaces can cause printed photos to look markedly different from what you
see on the monitor.
Color management is a complex subject and a detailed discussion is beyond the scope
of this user guide, which only provides some typical examples. For more information, see
the documentation that came with your third-party image editing software program, or
visit the HP Web site. Go to www.hp.com/support, select your country/region and your
language, and then type HP Photosmart Pro B9100 in the product/name search
box. Press ENTER and then select the HP Photosmart Pro B9100 series printer. In the
Question or keywords search box type color management and then press ENTER.
Click the topic you want to review.
1
2
3
Three-dimensional mathematical models for organizing color.
The RGB color space creates colors by mixing red, green, and blue light. Technologies that rely on light
(monitors, scanners, or digital cameras) use this color space.
The CMYK color space used in the printing industry is based on the light-absorbing qualities of ink printed
on paper. CMYK stands for cyan, magenta, yellow, and black, the colors used in four-color process printing.
HP Photosmart Pro B9100 series User Guide
25
Chapter 3
Choose a color management strategy
Use the HP Photosmart
Pro print plug-in for Adobe
Photoshop®.
Use application-based
color management.
Use printer-based color
management.
●
●
●
●
●
Advanced color
management
Uses the Adobe
Photoshop algorithms
to produce high
resolution prints
Single streamlined
dialog box with the
most commonly used
color management
settings
●
●
Advanced color
management
Uses the Adobe
Photoshop algorithms
to produce high
resolution prints
Several dialog boxes
for all the color
management settings
●
Simple color
management
Uses the printer driver
color management
settings
Tip 1 It is possible to have color management features turned on both in the
printer driver and in a software program such as Adobe® Photoshop.® This double
correction produces unsatisfactory results. Use either printer-based or
application-based color management, but not both at the same time.
Tip 2 Periodically, calibrate the printer color to ensure that the printer provides
consistent and accurate color reproduction on all the supported paper types. See
Align and calibrate the printer.
Use the HP Photosmart Pro print plug-in for Adobe
Photoshop®
The HP Photosmart Pro print plug-in for Adobe Photoshop streamlines the printing
process and simplifies professional color management. The plug-in provides a central
dialog box for color management and other print settings. It combines settings from the
printer driver and the Adobe Photoshop Print with Preview dialog box so you no longer
have to make your way through a confusing maze of dialog boxes each time you print.
The HP Photosmart Pro print plug-in for Adobe Photoshop is installed automatically with
the HP Photosmart printer software if you have Adobe Photoshop 7.0 on the same
computer.
Note Adobe Photoshop is a standalone 3rd party software product, not included
with the printer.
For more information on application-based color management, see Use applicationbased color management.
26
HP Photosmart Pro B9100 series printer
Start the HP Photosmart Pro print plug-in
To start the plug-in
1. Open an image in Adobe Photoshop.
2. Select File, point to Automate, and then click Photosmart Pro print....
The print preview area in the plug-in dialog box displays the current image in a scaled
size in its true aspect ratio. Paper borders, if any, are displayed in their relative size and
location. Use the handles to resize the image. Move the image around or crop it by
dragging.
Change the HP Photosmart Pro print plug-in defaults
To change plug-in defaults
1. Open an image in Adobe Photoshop.
2. Select File, point to Automate, and then click Photosmart Pro print....
3. Change the settings in the HP Photosmart Pro print plug-in.
4. Click Done.
Install the HP Photosmart Pro print plug-in
The HP Photosmart Pro print plug-in for Adobe Photoshop is installed automatically with
the HP Photosmart printer software if you have Adobe Photoshop on the same computer.
If you install Adobe Photoshop after you install the printer software, you can then install
the HP Photosmart Pro print plug-in separately.
To install the HP Photosmart Pro print plug-in (Windows)
1. Insert the HP Photosmart CD in the computer CD-ROM drive.
2. Click Install Photosmart Pro print, and then follow the onscreen instructions.
To install the HP Photosmart Pro print plug-in (Mac)
1. Click the HP Device Manager icon in the Dock. If the HP Device Manager icon is
not in the Dock, choose Applications, Hewlett-Packard, and then HP Device
Manager.
2. Click Maintain Printer.
3. Select the printer from the list, and then click Launch Utility. The HP Printer Utility
appears.
4. Click Photosmart Pro print plug-in for Adobe Photoshop.
5. Click Install Photosmart Pro print.
Use application-based color management
Application-based color management offers more sophisticated control than the printerbased form, but also involves greater complexity and more steps.
Using application-based color management involves:
●
Using device profiles: Application-based color management relies on files called
ICC4 device profiles. An ICC profile describes a device's color space. The software
program component of your color management system uses these profiles to
HP Photosmart Pro B9100 series User Guide
27
Chapter 3
●
convert colors between each device's color space. The HP Photosmart Pro B9100
series software installation installs HP ICC profiles automatically for the printer.
Calibrating the monitor: Monitors exhibit a color degradation over time that can
interfere with producing professional quality printed photography. As a result, the
ICC profile that comes with most new monitors gradually becomes invalid and no
longer accurately reflects the color space available on the device. Calibrating the
monitor at least once a month to produce a custom ICC profile is the best way to
ensure that the color space available on the monitor is accurately defined for your
color management system. You can calibrate a monitor visually using a system or
utility software program, such as Adobe Gamma, but this type of calibration does
not meet the high quality standards expected for professional photography.
Professionals usually invest in a calibration kit consisting of a software program and
a piece of hardware that captures the current state of the RGB environment on the
monitor and saves it as a custom ICC profile. Monitor calibration kits are available
from GretagMacBeth, Monaco Systems, and LaCie, as well as other manufacturers.
To print using application-based color management features, you have to change
settings in the printer driver and in the image editing software program. Here is one
example of a typical print job using application-based color management in Adobe
Photoshop (version 7 or CS). See the documentation that came with your image editing
software program for complete instructions on using the product's color management
features.
To print using application-based color management
1. Open the photo you want to print in Adobe Photoshop.
2. Select File, and click Print with Preview in Adobe Photoshop.
3. Make sure Show More Options is checked in the Print with Preview dialog box,
and then select Color Management from the drop-down list.
4. In the Print Space area of the Print with Preview dialog box, select the appropriate
HP Photosmart Pro B9100 series profile for the paper and ink set you are using.
The HP Photosmart printer software installer installed several profiles for you
automatically.
5. Select Perceptual from the Intent drop-down list. Selecting the Use Black Point
Compensation option is also recommended.
6. Click Page Setup in the Print with Preview dialog box, set up the page for the
current image, and then click OK.
7. Click Print.
Windows users
a.
b.
c.
d.
e.
4
28
Click Properties in the Print dialog box.
Click the Color tab in the Print dialog box.
Select Managed by application from the Color Management area of the
Print dialog box, and then click OK.
Click the Features tab, select an appropriate paper type from the Paper
Type drop-down list, and then click OK.
Click OK.
International Color Consortium. ICC enables profile-based color management solutions. For more
information, see www.color.org.
HP Photosmart Pro B9100 series printer
Mac users
a.
b.
c.
8.
Choose Paper Type/Quality in the Print dialog box.
Choose Application Managed Colors from the Color pop-up menu.
Select an appropriate paper type from the Paper pop-up menu.
Click Print.
Use printer-based color management
The HP Photosmart Pro B9100 series printer offers built-in automatic color management
that is easy to configure. Printer-based color management produces attractive results
and should be adequate for many users.
Choose from the following printer driver color space settings based on the color space
used by your imaging device and your usage of ICC profiles. Change these settings on
the Color tab (Windows) or the Paper Type/Quality pane (Mac). For an example of how
to change these settings, see To print using printer-based color management.
Printer driver color space settings
Setting
When to use it
Colorsmart/sRGB (Default setting)
●
The printer driver is set to Colorsmart/
sRGB by default because most imaging
devices, such as monitors, cameras, and
scanners, use sRGB. In this mode, the
printer converts colors from sRGB to the
printer ink colors.
●
●
When your digital camera, scanner,
or image editing software program is
set to sRGB
For the easiest, most basic form of
color management
When you are not using ICC profiles
Tip Do not use this mode if you
are also using ICC profiles and
your software program to manage
color. This can decrease the color
fidelity since the colors are
converted twice—first by the
software program and then by the
printer.
Adobe RGB or Adobe RGB (1998)
●
You can set some imaging devices to
Adobe RGB, an enhanced version of the
sRGB color space that was developed for ●
●
high-fidelity digital photography. In this
mode, the printer converts colors from
Adobe RGB to the printer ink colors.
HP Photosmart Pro B9100 series User Guide
When your digital camera, scanner,
or image editing software program is
set to Adobe RGB
For high quality digital photography
When you are not using ICC profiles
29
Chapter 3
Printer driver color space settings (continued)
Setting
When to use it
Tip Do not use this mode if you
are also using ICC profiles and
your software program to manage
color. This can decrease the color
fidelity since the colors are
converted twice—first by the
software program and then by the
printer.
Application Managed Colors
●
Application-based color management lets
the image editing software program
convert from the image color space to the
●
printer ink colors. The conversion takes
place in the image editing software
program. In this mode, the printer does not ●
do any color management.
When you want to use the color
management features of an image
editing software program, such as
Adobe Photoshop
For the greatest level of control over
color quality
When you want to use ICC profiles
Using application-based color
management involves changing settings
both in the printer driver and in your
software programs, and requires ICC
profiles for all your devices. For more
information, see Use application-based
color management.
To print using the color management features built into the HP Photosmart Pro B9100
series printer, you have to change settings in the printer driver and in the image editing
software program. Here is one example of a typical print job using printer-based color
management with Adobe Photoshop (version 7 or CS).
To print using printer-based color management
1. Open the file you want to print in Adobe Photoshop.
2. Select File, and then click Print with Preview in Adobe Photoshop. Make sure
Show More Options is selected in the Print with Preview dialog box, and then
select Color Management from the drop-down list.
3. In the Print Space area of the Print with Preview dialog box, select the same RGB
color space setting you intend to use in the printer driver (Windows). In most cases
this is sRGB or Adobe RGB. On a Mac, choose Printer Color Management instead.
4. Click Page Setup in the Print with Preview dialog box, set up the page for the
current image, and then click OK.
5. Click Print.
Windows users
a.
b.
30
Click Properties in the Print dialog box.
Click the Color tab in the Properties dialog box.
HP Photosmart Pro B9100 series printer
c.
d.
Select a color space from the Color Management drop-down list:
– Colorsmart/sRGB (default)
– AdobeRGB
Select the same color space you selected as an RGB working space in the
Adobe Photoshop Color Settings dialog box.
Click the Features tab, select the desired paper type from the Paper Type dropdown list, and then click OK.
Mac users
a.
b.
6.
Choose Paper Type/Quality in the Print dialog box.
Choose a color space from the Color pop-up menu in the Print dialog box:
– Colorsmart/sRGB
– AdobeRGB
Select the same color space you selected as an RGB working space in the
Adobe Photoshop Color Settings dialog box.
Click OK.
HP Photosmart Pro B9100 series User Guide
31
Chapter 3
32
HP Photosmart Pro B9100 series printer
4
Care and maintenance
This section contains the following topics:
●
●
●
●
●
●
●
●
●
Leave the printer on
Replace the ink cartridges
Replace faulty printheads
Clean the printer
Align and calibrate the printer
Print a test page
Print a sample page
Download printer software updates
Uninstall the printer software
Follow the guidelines in this section to extend the life span of the printer and printing
supplies, and to ensure that the photos you print are always of the highest quality.
Leave the printer on
HP recommends that you always leave the printer plugged in and turned on so that it
can periodically perform self-servicing routines. If you leave the printer off for an extended
period of time, you will experience a decline in print quality, automatic maintenance
routines will need to be run, and you may have to replace one or more printheads.
The printer performs a self-servicing routine if the printer is idle for 24 hours or more. The
length of time it takes for the servicing routine to be completed depends on how long the
printer has been idle. As part of the servicing routine, a nozzle health sensor checks the
printhead nozzles for blockages, clears any blockages found, if possible, and substitutes
nozzles as needed. For more information on cleaning the printheads, see Clean the
printheads automatically and Clean the printhead nozzles manually.
Replace the ink cartridges
For information on installing the ink cartridges and printheads the first time after you
purchase the printer, see the Quick Start guide.
For optimal printing results, HP recommends using only HP ink cartridges. Inserting an
incorrect cartridge may invalidate the printer warranty.
HP does not recommend modifying or refilling HP cartridges. Damage that results from
modifying or refilling HP cartridges is not covered by the HP warranty.
For best print quality, HP recommends that you install all retail ink cartridges before the
date stamped on the box.
Do not open the ink cartridge packet until you are ready to install the ink cartridge.
HP Photosmart Pro B9100 series User Guide
33
Chapter 4
Check the ink levels
To check the ink levels from the printer
1. Press Menu on the printer.
2. Press until you see Show ink level percentage on the printer screen.
3. Press OK.
4. Press to see the percentage of ink remaining in each ink cartridge.
Note The ink levels shown are an estimate only. Actual ink volumes may
vary.
To check the ink levels from the computer (Windows)
1. Right-click the HP Digital Imaging Monitor icon on the right side of the Windows
taskbar, and then select Launch/Show HP Solution Center.
2. Click Settings, and then select Status.
3. Click the Estimated Ink Levels icon.
Note The ink levels shown are an estimate only. Actual ink volumes may
vary.
To check the ink levels from the computer (Mac)
1. Click HP Photosmart Studio in the Dock.
2. Click the Devices tab.
3. Choose Maintain Printer from the Settings pop-up menu.
4. Click Launch Utility.
5. Choose the Supplies Status pane.
Note The ink levels shown are an estimate only. Actual ink volumes may
vary.
Replace the ink cartridges
For proper operation, install all of the following eight ink cartridges:
●
●
●
●
●
●
●
●
34
HP 38 Photo Black (PK) Pigment ink cartridge
HP 38 Light Gray (LG) Pigment ink cartridge
HP 38 Matte Black (MK) Pigment ink cartridge
HP 38 Cyan (C) Pigment ink cartridge
HP 38 Magenta (M) Pigment ink cartridge
HP 38 Yellow (Y) Pigment ink cartridge
HP 38 Light Magenta (LM) Pigment ink cartridge
HP 38 Light Cyan (LC) Pigment ink cartridge
HP Photosmart Pro B9100 series printer
If you are replacing ink cartridges, check that you are using the correct cartridges.
To replace the ink cartridges
1. Open the ink cartridge door by pressing the raised bumps at the top of the door until
the door clicks open.
2.
3.
Remove the ink cartridges that need to be replaced. Grasp a cartridge and pull it out
of the stall.
Shake the new ink cartridges vigorously, at least six times, before opening their
packages.
4.
Unwrap the ink cartridges, and then insert each cartridge into its color-coded stall in
the orientation shown. Press firmly on the cartridges to ensure proper contact.
5.
Close the ink cartridge door.
HP Photosmart Pro B9100 series User Guide
35
Chapter 4
Note All eight cartridges and four printheads must be correctly installed for the
printer to work. If this is the first time you are installing the ink cartridges and
printheads, see the Quick Start guide for information on the initial set up of ink
cartridges and printheads. If you need to replace the printheads, see Replace
faulty printheads.
Follow these tips to help maintain HP ink cartridges and ensure consistent print quality:
●
Keep all unused ink cartridges in their original sealed packages until they are
needed. Store ink cartridges at room temperature (15–35 degrees C or 59–95
degrees F).
Note Each ink cartridge has an expiration date. When you receive an ink
expiration message, you can continue printing by pressing OK on the control
panel. HP recommends replacing the expired ink cartridges. HP cannot
guarantee the quality or reliability of expired ink cartridges.
●
Do not remove the plastic tape covering the gold contacts until you are ready to
install the ink cartridge in the printer. If the plastic tape has been removed from the
ink cartridge, do not attempt to reattach it. Reattaching the tape damages the ink
cartridge.
Replace faulty printheads
If a message appears on the printer screen directing you to replace a printhead, try
cleaning the printheads. See Clean the printheads automatically. If you still see the
message on the printer screen after you have cleaned the printheads, call HP support.
If the support staff tell you that the printhead needs to be replaced, purchase a
replacement printhead, and then follow these steps. To purchase replacement
printheads, go to:
●
●
●
●
www.hpshopping.com (U.S.)
www.hpshopping.ca (Canada)
www.hp.com/eur/hpoptions (Europe)
www.hp.com (All other countries/regions)
For proper operation, all of the following four printheads must be installed and in good
condition:
●
●
●
●
36
HP 70 Photo Black/Light Gray printhead
HP 70 Matte Black/Cyan printhead
HP 70 Magenta/Yellow printhead
HP 70 Light Magenta/Light Cyan printhead
HP Photosmart Pro B9100 series printer
To replace printheads
1. Open the top door.
2. Press and hold OK until the printhead assembly moves to the left side of the printer
and stops.
3. Raise the blue printhead assembly cover. Before you begin, notice the metal bar
that holds down the cover. Pull the cover forward by the handle so that it unclips
from the metal bar, then raise it up out of the way.
4.
5.
6.
Remove the faulty printhead. To do this, raise the fold-down blue handle on the
printhead, and use it to pull the printhead straight out of its slot.
Shake the new printhead vigorously, at least six times, before opening the package.
Lift out the printhead. Be careful not to touch the gold-colored contacts on the
printhead. In particular, guard against scratching the contacts with your fingernails.
HP Photosmart Pro B9100 series User Guide
37
Chapter 4
7.
Remove and discard the orange protective covers from the printhead. Do not touch
the gold-colored contacts on the printhead.
8.
9.
Open the pre-moistened swab included inside the printhead package.
Wipe the printhead nozzles with the foam tip of the swab. Wipe along the length of
the nozzles at least 3 times.
10. Insert the new printhead into its color-coded stall in the orientation shown. Press
straight down on the printhead until it is all the way in. The printhead is designed to
insert in only one direction.
38
HP Photosmart Pro B9100 series printer
11. Lower the open printhead assembly cover so that it clips under the metal bar, and
then fold the cover back down to its original position.
12. Close the top door.
The printer automatically performs printhead alignment and color calibration. Make
sure that you have loaded HP Advanced Photo Paper - Glossy in the main tray,
and then click OK to perform the alignment and calibration. For information about
alignment and calibration, see Align and calibrate the printer.
Clean the printer
For best results, keep the outside of the printer clean. If you notice any ink residue on
the outside of the printer, be sure to clean it off using the following steps.
Note Never clean the inside of the printer.
Clean the printer
To clean the outside of the printer
1. Turn off the printer by pressing the On button.
2. Wipe the outside of the printer with a soft cloth that has been lightly moistened with
water. Be sure to wipe away any ink residue that has accumulated on the output tray.
Caution Do not use any type of cleaning solution. Household cleaners and
detergents might damage the printer finish.
3.
Press On to turn on the printer.
HP Photosmart Pro B9100 series User Guide
39
Chapter 4
Do not clean inside the printer
Clean the printheads automatically
If you notice white lines or single-color streaks on the photos you print, the printheads
might need to be cleaned.
To clean the printheads automatically
1. Press Menu on the printer control panel.
2. Select Clean printheads, and then press OK.
3. Following the directions on the printer screen, load paper so the printer can print a
test page after cleaning the printheads. Use Letter or A4-sized plain paper to
conserve photo paper.
4. Press OK to begin cleaning the printheads.
If you still notice white streaks or missing colors on the test page, you might need to clean
the printhead nozzles manually. For more information, see Clean the printhead nozzles
manually.
Note 1 Do not clean the printheads more often than necessary, since the
cleaning uses ink.
Note 2 If a message appears on the printer screen directing you to replace a
printhead, try cleaning the printheads as directed here, first automatically, and
then manually if necessary. If the message still appears on the printer screen after
cleaning, call HP support. If the support staff tell you that the printhead needs to
be replaced, see Replace faulty printheads for more information.
Clean the printhead nozzles manually
If you use the printer in a dusty environment, debris might accumulate on the gold-colored
nozzles and cause printing problems. If you have tried cleaning the printheads
automatically using the Clean printheads procedure from the control panel, and you are
still experiencing image quality problems, you can clean the printhead nozzles manually
using the following procedure.
40
HP Photosmart Pro B9100 series printer
To clean the printhead nozzles
1. Gather the following items to clean the nozzles on the printheads:
– Distilled water (tap water might contain contaminants that can damage the ink
cartridge).
– Cotton swabs or other soft, lint-free material that will not stick to the ink cartridge.
Do not use a paper product, such as coffee filters or paper tissues.
– Sheets of paper or paper towels to rest the printheads on.
2. Open the top door of the printer.
3. Press OK until the printhead assembly moves to the left side of the printer and stops.
4. Raise the printhead assembly cover.
5. Remove a printhead and place it on a piece of paper with the ink nozzle plate facing
up.
Caution 1 Do not touch the ink nozzle plate or gold-colored contacts with
your fingers. Doing so will result in clogs, ink failure, and bad electrical
connections.
Caution 2 Do not leave the printhead outside the printer for more than 30
minutes. Ink nozzles exposed to the air longer than this might dry out and
cause printing problems.
6.
7.
8.
9.
Lightly moisten a cotton swab with distilled water and squeeze any excess water
from the swab by pressing it against a clean plastic or tile surface. Do not use your
fingers to squeeze the excess water from the swab, because the oil from your fingers
could contaminate the swab.
Gently wipe along the length of the nozzle plate on the printhead with the cotton
swab.
1
Ink nozzle plate
2
Do not touch or clean the gold-colored contacts
Repeat steps 6 and 7 until no ink residue or dust appears on a clean swab.
Insert the printhead in the printer, and then close the top door.
The printer automatically performs printhead alignment and color calibration. Make
sure that you have loaded HP Advanced Photo Paper - Glossy in the main tray,
HP Photosmart Pro B9100 series User Guide
41
Chapter 4
and then click OK to perform the alignment and calibration. For information about
alignment and calibration, see Align and calibrate the printer.
Note If a message appears on the printer screen directing you to replace a
printhead, call HP support. If the support staff tell you that the printhead needs to
be replaced, see Replace faulty printheads for more information.
Align and calibrate the printer
The first time you install printheads in the printer or if you replace a faulty printhead, the
printer performs a printer alignment and calibration automatically. However, if colors in
the photos you print are misaligned, or if the alignment page does not print correctly when
you install a new printhead, use the following procedures to align and calibrate the printer
manually.
For consistent and accurate color reproduction on all the supported paper types, be sure
to calibrate the printer color periodically. Before aligning and calibrating the printer, check
that you are using the correct paper. Use HP Advanced Photo Paper - Glossy for
printhead alignment and printer color calibration. Use Letter or A4-sized paper. If you
use a different type of paper, the results may not be accurate.
To align the printheads
1. Load Letter or A4-sized HP Advanced Photo Paper - Glossy in the main tray.
2. Press Menu on the printer control panel.
3. Select Calibrate printer, and then press OK.
4. Select Align printheads, and then press OK.
To calibrate the printer color using closed loop calibration
1. Load Letter or A4-sized HP Advanced Photo Paper - Glossy in the main tray.
2. Press Menu on the printer control panel.
3. Select Calibrate printer, and then press OK.
4. Select Closed loop calibration, and then press OK.
To reset the closed loop calibration
1. Load Letter or A4-sized HP Advanced Photo Paper - Glossy in the main tray.
2. Press Menu on the printer control panel.
3. Select Calibrate printer, and then press OK.
4. Select Reset closed loop calibration, and then press OK.
Print a test page
You can print a test page to check the condition of the ink cartridges. The test page also
contains useful information about the printer, including the printer serial number and
firmware version.
To print a test page
1. Press Menu on the printer control panel.
2. Select Print test page, and then press OK.
42
HP Photosmart Pro B9100 series printer
Note The ink levels shown on the test page are an estimate only. Actual ink
volumes may vary.
Print a sample page
You can print a sample page to verify that the printer can successfully print a photo. If
you are having trouble printing a photo from your software program, use this option as
part of the troubleshooting process to determine whether the problem is with the printer
or software program.
To print a sample page
1. Load paper in the main tray. Use plain paper to conserve photo paper.
2. Press Menu on the printer control panel.
3. Select Print a sample page, and then press OK.
Download printer software updates
Download the latest printer software updates periodically to ensure you have the latest
features and improvements.
Note The printer software update that you download from the HP Web site
updates only the printer driver. It does not update the HP Photosmart Premier
software.
To download the printer software (Windows)
1. Make sure the computer is connected to the Internet.
2. From the Windows Start menu, select Programs, point to HP, and then click
HP Software Update.
3. Click Next. HP Software Update searches the HP Web site for printer software
updates.
– If the computer has the most recent version of the printer driver installed, No
updates are available for your system at this time appears in the
HP Software Update window.
– If the computer does not have the most recent version of the printer driver
installed, a software update appears in the HP Software Update window.
4. If a software update is available, check the box beside the update to select it.
5. Click Next.
6. Follow the onscreen instructions.
Note You can also download printer software updates by going to www.hp.com/
support, selecting your country/region, entering the printer name in the search
box, and clicking Software & Driver Downloads.
To download the printer software (Mac)
1. Make sure the computer is connected to the Internet.
2. On your Mac in the Finder, choose Go, and then click Applications.
HP Photosmart Pro B9100 series User Guide
43
Chapter 4
3.
4.
Choose Hewlett-Packard, point to Photosmart, and then click HP Photosmart
Update.
Follow the onscreen instructions to check for software updates.
If you are behind a firewall, you need to enter the proxy server information in the
updater.
Note You can also download printer software updates by going to www.hp.com/
support, selecting your country/region, entering the printer in the search box, and
clicking on Software & Driver downloads.
Uninstall the printer software
If you need to uninstall the printer software, follow these steps.
Uninstall the printer software (Windows)
1. From the Windows Start menu, click Programs or All Programs, click HP, and then
click HP Photosmart Pro B9100 series.
2. Click Uninstall.
Uninstall the printer software (Mac)
1. Open the HP Device Manager.
2. Click Uninstall in the pop-up menu.
The HP Uninstaller dialog box appears.
3. Click the printer, and then click Uninstall.
4. Click Quit, and then empty the Trash.
5. Disconnect the printer from the computer, and then restart the computer.
44
HP Photosmart Pro B9100 series printer
5
Troubleshooting
The printer is designed to be reliable and easy to use, but if you have any problems, refer
to this section for possible solutions. It contains information about the following topics:
●
●
●
●
Printer software installation problems
Printer hardware problems
Printing problems
Error messages
For additional troubleshooting information, see the electronic Help.
Printer software installation problems
Note Before contacting HP support, read this section for troubleshooting tips or
go to the online support services at www.hp.com/support. The name of
HP support services may vary by country/region.
If the printer software did not install successfully or if the printer and computer are not
communicating properly after software installation, check this section for possible
solutions.
Before proceeding, check all cable connections between the printer and computer, and
ensure that you are using the most recent version of the printer software.
The System Requirements dialog box is displayed during installation
Cause A component of the computer system does not meet minimum system
requirements.
Solution Upgrade the component to the minimum system requirement and then
reinstall the printer software.
The computer could not read the HP Photosmart CD
Solution Make sure the CD is not dirty or scratched. If other CDs work but the
HP Photosmart one does not, you might have a damaged CD. You can request a
new CD from HP support. If other CDs do not work, you might need to service the
CD-ROM drive.
The installation software does not start automatically when the CD is inserted
(Windows only)
Solution From the Windows Start menu, select Run. Click Browse, and then
navigate to the CD drive where you inserted the HP Photosmart CD. Double-click
the setup.exe file.
HP Photosmart Pro B9100 series User Guide
45
Chapter 5
The Found New Hardware Wizard opens but doesn’t recognize the printer
(Windows only)
Cause You might have connected the USB cable before completing the software
installation.
Solution Disconnect the USB cable and restart the software installation. Connect
the USB cable when prompted during software installation.
The computer stops responding during software installation
Cause Virus protection software or another software program is running in the
background and slowing down the installation process.
Solution Wait while the software finishes copying files; this might take several
minutes. If, after several minutes, the computer is still not responding, restart the
computer, pause or disable any active virus protection software, quit all other
software programs, and then reinstall the printer software.
Printer hardware problems
Note 1 Before contacting HP support, read this section for troubleshooting tips
or go to the online support services at www.hp.com/support. The name of
HP support services may vary by country/region.
Note 2 If you want to connect the printer to a computer with a USB cable, HP
recommends using a cable of less than 3 meters (10 feet) in length to minimize
injected noise due to potential high electromagnetic fields.
The On light is flashing blue but the printer is not printing
Solution
The printer is busy processing information; wait for it to finish.
The Attention light is flashing red
Solution Check the printer and computer screens for instructions. For information
on specific error messages see Error messages.
If the Attention light continues to flash red go to www.hp.com/support, or contact
HP support.
The Attention light is solid amber
Solution Turn off the printer, and then unplug its power cord. Wait about 30
seconds, and then plug it in again. Turn on the printer.
If the Attention light remains amber go to www.hp.com/support, or contact
HP support.
46
HP Photosmart Pro B9100 series printer
The Attention light flashed amber briefly after I turned the printer off
Solution This is a normal part of the power-down process; it does not indicate a
problem with the printer.
The printer is plugged in but will not turn on
Solution
● The printer might have drawn too much power. Unplug the printer power cord.
Wait about 30 seconds, and then plug the cord back in. Turn on the printer.
● The printer might be plugged into a power strip that is turned off. Turn on the
power strip, and then turn on the printer.
● The power cord could be defective.
The printer makes noises when I turn it on, or starts making noises after sitting
unused for a while
Solution The printer might make noises after a period of inactivity or when its
power supply has been interrupted and then restored. This is normal operation. The
printer is performing an automatic maintenance procedure to ensure it produces the
best quality output. For more information, see Leave the printer on.
Printing problems
Note Before contacting HP support, read this section for troubleshooting tips or
go to the online support services at www.hp.com/support. The name of
HP support services may vary by country/region.
Tip View the How do I? animations available from the HP Solution Center to
see how to load paper in the main tray or the specialty media tray, how to clear
a paper jam, and how to install and replace ink cartridges and printheads.
Printing is very slow
Cause You might be printing a PDF or a project containing high-resolution
graphics or photos. Large, complex projects containing graphics or photos print
slower than text documents.
Solution Consider using lower resolution graphics in the project, if possible, or
allow for longer print times in your workflow.
Paper does not feed into the printer correctly from the main tray
Solution
● If you are using non-HP brands of glossy media or thick media in the main tray,
and the printer does not feed the paper or feeds multiple sheets through at once,
HP Photosmart Pro B9100 series User Guide
47
Chapter 5
●
●
●
●
●
●
try reducing the number of sheets in the main tray to 20 sheets, or use the
specialty media tray to print on one sheet at a time.
Remove the main tray from the printer and check that the paper stack is lying
flat in the tray, and has not been pushed up over the paper stops. When you
replace the tray, be sure to push the tray into the printer until it is seated
correctly.
There might be too much paper loaded in the tray. Check that the paper is not
stacked above the height of the paper-length guide. If it is, remove some paper
and try printing again.
The paper guides might not be adjusted correctly. Make sure the paper-width
and paper-length guides fit close to the edges of the paper without bending the
paper.
Two or more pieces of paper might be sticking together. Remove the paper from
the main tray, fan the edges of the stack to separate the sheets of paper, and
then reload the paper and try printing again.
If the paper is wrinkled or bent, try using different paper.
The paper might be too thin or too thick. Use HP inkjet paper for best results.
For more information, see Choose the right paper or other media.
Tip For more information on loading paper, see Choose the right paper or
other media or view the How do I? animations available from the HP Solution
Center.
Printed pages are dropping off of the output tray
Solution Always extend the output tray extension and flip up the paper catch when
you print.
The printout is rippled or curled
Solution
● Check that the media type setting in the printer software matches the type of
media loaded in the tray.
● Use the printer software to lower the ink saturation level. See the electronic Help
for more information.
The document printed at an angle or is off-center
Solution The paper might not be loaded correctly. Reload the paper, making sure
it is correctly oriented in the tray and that the paper-width and paper-length guides
fit close to the edges of the paper. For more information on loading paper, see
Choose the right paper or other media or view the How do I? animations available
from the HP Solution Center.
48
HP Photosmart Pro B9100 series printer
Colors are not printing satisfactorily
Solution
● A cartridge is out of ink. Replace it.
● Some of the ink nozzles on the printheads are clogged. Clean the printheads.
See Clean the printheads automatically.
● The color management settings of the printer might not be set properly. For
more information, see Color management.
● Check that the media type setting in the printer software matches the type of
media loaded in the tray.
The paper jammed while printing or no page came out of the printer
Solution
● If the paper jammed while printing, try the following:
– Turn off the printer, and then unplug it from the power source. Remove the
rear door. Gently remove the jammed paper from the printer, and then
replace the rear door. Open the top door and clear the printer of any paper
obstructing the paper path. If needed, gently move the printhead assembly
to one side to remove the paper. Plug the printer back in and turn it on. Try
printing again.
– If you were printing labels, make sure a label did not become unglued from
the label sheet while going through the printer.
– Dry conditions can cause paper to curl, which can cause paper jams, so
store expensive specialty media in a plastic bag rather than in the main tray.
● Try pulling out the main tray and replacing it in the printer, making sure to push
the tray in as far as it will go, until it is fully seated.
● The printer might need attention. Read the printer screen for instructions.
A blank page came out of the printer
Solution
● Check the ink-level percentages on the printer screen. Replace any empty ink
cartridges. For more information, see Replace the ink cartridges.
● You might have begun printing and then cancelled the process. If you cancelled
the process before printing started, the printer might have already loaded paper
in preparation for printing. The next time you print, the printer ejects the blank
page before starting the new printing project.
The printer ejects the paper when preparing to print
Solution Direct sunlight could be interfering with the operation of the automatic
paper sensor. Move the printer out of direct sunlight.
HP Photosmart Pro B9100 series User Guide
49
Chapter 5
Print quality is poor
Solution
● Use photo paper designed for the printer. For best results, use HP Advanced
Photo Paper.
● You might be printing on the wrong side of the paper. Make sure the paper is
loaded in the main tray with the side to be printed facing down or in the
specialty media tray with the side to be printed facing up.
● You might have selected a low-resolution setting on the digital camera. Reduce
the print size of the image and try printing again. For better results in the future,
set the digital camera to a higher photo resolution.
● There might be a problem with a printhead. Try the following:
– Run an automatic cleaning procedure from the printer control panel. For
more information, see Clean the printheads automatically.
– Calibrate the printer from the control panel. For more information, see Align
and calibrate the printer.
– Clean the nozzles on the printheads. For more information, see Clean the
printhead nozzles manually.
● If you are printing from a large file (for example, printing a large image at high
dpi), and your system has insufficient RAM and/or a processor of insufficient
speed, your print quality may be poor. Try the following workarounds, or
increase your system processor speed and physical memory size (RAM).
Please visit www.hp.com/support (search keyword: PHOTOSMART PRO B9180) for
more information on this issue. To optimize print quality for slow computers:
– Close all applications except the application you are printing from. Make
sure there are no processes running in the background.
– Change your color management strategy to “Managed by Application,” or
disable color management. See Color management for more information.
– If you are printing a landscape image, rotate it into portrait orientation and
select portrait orientation in the driver before printing.
A scratch or dent appears along the edge of printed rigid media
Solution When you load rigid media that is 28 cm (11 inches) wide on the specialty
media tray, place the media 15 mm (0.5 inches) to the left of the raised edge of the
tray, instead of aligning it flush with the raised edge. Make sure that the back edge
of the media (the edge nearest to you) is aligned with the dashed white line on the
tray.
Error messages
Error messages that are displayed on the printer screen can be divided into the following
types:
●
●
●
●
50
Paper errors
Printer setup errors
Ink cartridge and printhead errors
Network errors
HP Photosmart Pro B9100 series printer
Paper errors
Before contacting HP support, read this section for troubleshooting tips or go to the online
support services at www.hp.com/support. The name of HP support services may vary
by country/region.
Tip View the How do I? animations available from the HP Solution Center to
see how to load paper in the main tray or the specialty media tray, how to clear
a paper jam, and how to install and replace ink cartridges and printheads.
Error message: Remove media.
Solution When you print on certain types of media using the specialty media tray,
the printer does not fully eject the media from the printer. If the printer prompts you
to Remove media, grasp the media with both hands and gently pull it from the front
of the printer.
Paper jam. Remove media and check flatness. Press OK to continue.
Solution When you print on canvas media using the specialty media tray, the
printer performs a preliminary test to check that the media is flat so that the media
or the printer will not be damaged. If the media is not flat enough, the printer prompts
you to remove the media to check for flatness. Grasp the media with both hands and
gently pull it from the back of the printer through the rear slot. Place the media in a
plastic bag and gently bend it in the opposite direction until it lies flat.
Error message: Paper jam. Clear jam then press OK.
Solution
● Try pulling out the main tray and replacing it in the printer, making sure to push
the tray in as far as it will go, until it is fully seated.
● If the paper jammed while printing, try the following:
– Turn off the printer, and then unplug it from the power source. Remove the
rear door. Gently remove the jammed paper from the printer, and then
replace the rear door. Open the top door and clear the printer of any paper
obstructing the paper path. If needed, gently move the printhead assembly
to one side to remove the paper. Plug the printer back in and turn it on. Try
printing again.
– If you were printing labels, make sure a label did not become unglued from
the label sheet while going through the printer.
– Dry conditions can cause paper to curl, which can cause paper jams, so
store expensive specialty media in a plastic bag rather than in the main tray.
Error message: Out of paper. Load paper then press OK.
Solution Load paper, and then press OK to print again. For paper-loading
instructions, see Load the main tray.
HP Photosmart Pro B9100 series User Guide
51
Chapter 5
Error message: Automatic paper sensor failed.
Solution The automatic paper sensor is obstructed or damaged. Try moving the
printer out of direct sunlight, and then press OK and try printing again. If this does
not work, go to www.hp.com/support or contact HP support. The name of
HP support services may vary by country/region.
Error message: Paper size mismatch.
Cause The size of the paper in the tray does not match the photo size selected in
the printer driver.
Solution Load a paper size that matches the photo size selected, or change the
photo size in the printer driver to match the paper you are using. For paper-loading
instructions, see Load the main tray.
Printer setup errors
Before contacting HP support, read this section for troubleshooting tips or go to the online
support services at www.hp.com/support. The name of HP support services may vary
by country/region.
Tip View the How do I? animations available from the HP Solution Center to
see how to load paper in the main tray or the specialty media tray, how to clear
a paper jam, and how to install and replace ink cartridges and printheads.
Error message: Priming incomplete. Remove printheads. Reinsert setup caps.
Solution The first time you set up the printer, follow the directions in the Quick
Start guide.
After you have installed the ink cartridges, the printer primes the ink cartridges to
start the flow of ink and purge air from the ink line. If you remove the setup caps from
inside the printer before the ink cartridges have been installed or before the ink
cartridges have been primed, the printer screen displays the error Priming
incomplete.
1.
2.
3.
52
Remove the printheads, if installed, reinsert the setup caps, and then close the
top door.
Check that you have installed all the ink cartridges in the correct stalls in the ink
cartridge compartment on the front of the printer. Close the ink cartridge door.
The printer primes the ink cartridges to start the flow of ink and purge air from
the ink line.
Wait until you are prompted on the printer screen to open the top door, and
then remove the setup caps and install the printheads.
HP Photosmart Pro B9100 series printer
Error message: Non-optimal alignment. To realign – select Align printheads. Press
OK to continue.
Solution Printhead alignment was unsuccessful. Select Align printheads, and
then press OK to perform the printhead alignment again. For best results, make sure
you have loaded HP Advanced Photo Paper - Glossy.
Error message: Closed loop calibration unsuccessful. Press OK to continue.
Solution Closed loop calibration was unsuccessful. Press OK. Make sure that you
have loaded HP Advanced Photo Paper - Glossy in the main tray, select Closed
loop calibration, and then press OK to perform the calibration again.
Error message: Extended inactivity detected. Recommend closed loop calibration.
Press OK to continue.
Solution If the printer is turned off for an extended period of time, the printer
prompts you to perform a closed loop calibration. Make sure that you have
loaded HP Advanced Photo Paper - Glossy in the main tray, and then click OK to
perform the calibration and to maintain the best print quality.
Error message: Top door is open.
Solution
Close the top door of the printer.
Ink cartridge and printhead errors
Before contacting HP support, read this section for troubleshooting tips or go to the online
support services at www.hp.com/support. The name of HP support services may vary
by country/region.
Tip View the How do I? animations available from the HP Solution Center to
see how to load paper in the main tray or the specialty media tray, how to clear
a paper jam, and how to install and replace ink cartridges and printheads.
Error message: The ink in the following cartridge(s) is past its expiration date. —
OR— The following ink cartridge(s) appears to be missing or damaged —OR—
Cannot print. Replace the following empty ink cartridge to resume printing.
Solution The specified ink cartridge or printhead might be old or damaged.
Remove the cartridge and then reinstall it. For more information, see Replace the
ink cartridges. If this does not work, replace the cartridge. If the printhead needs to
be replaced, contact HP support for special instructions.
HP Photosmart Pro B9100 series User Guide
53
Chapter 5
Error message: Replace the following ink cartridge(s) soon —OR— The ink in the
following ink cartridge(s) is nearing its expiration date —OR— The original HP ink
in the following ink cartridge(s) has been depleted.
Solution Press OK to continue, or replace the specified cartridge(s). For more
information, see Replace the ink cartridges.
Error message: Replace the following faulty ink cartridge(s).
Solution Replace the failed cartridge(s) with new HP ink cartridges. For more
information, see Replace the ink cartridges.
Error message: The following ink cartridge(s) is not intended for use in this printer.
Solution You have inserted a ink cartridge that does not work with the printer.
Replace the cartridge with one that is compatible with the printer. For more
information, see Replace the ink cartridges.
Error message: Install the following printhead(s).
Solution One of the printheads has not been installed correctly. Remove the
printheads and follow the instructions in the Quick Start guide for installing the ink
cartridges and printheads.
Error message: Replace the following faulty printhead(s). —OR— Replace the
following incompatible printhead(s).
Solution Contact HP support for special instructions on troubleshooting printhead
problems.
Error message: Replace the following incompatible printhead(s).
Solution One or more of the printheads is incompatible. Replace the incompatible
printheads with the correct printheads. For more information, see Replace faulty
printheads.
Network errors
Before contacting HP support, read this section for troubleshooting tips or go to the online
support services at www.hp.com/support. The name of HP support services may vary
by country/region. You can also find help with networking the printer by going to the home
page of the embedded web server in the printer. See To open help for the embedded
web server.
Error message: Network not connected.
Solution The printer cannot find the network. Make sure the ethernet cable is
properly connected to the ethernet port and the network. If your network requires a
54
HP Photosmart Pro B9100 series printer
proxy IP address, access the embedded web server to set the proxy server settings.
See Use the embedded web server.
HP Photosmart Pro B9100 series User Guide
55
Chapter 5
56
HP Photosmart Pro B9100 series printer
6
HP support
●
●
●
Support process
HP support by phone
Additional warranty options
Support process
If you have a problem, follow these steps:
1. Check the documentation that came with the HP Photosmart printer.
2. Visit the HP online support Web site at www.hp.com/support. HP online support is
available to all HP customers. It is the fastest source for up-to-date device
information and expert assistance and includes the following features:
– Fast access to qualified online support specialists
– Software and driver updates for the HP Photosmart printer
– Valuable HP Photosmart printer and troubleshooting information for common
problems
– Proactive device updates, support alerts, and HP newsgrams that are available
when you register the HP Photosmart printer
3. For Europe only: Contact your local point of purchase. If the HP Photosmart printer
has a hardware failure, you will be asked to bring it back to your local point of
purchase. (Service is provided at no charge during the device limited warranty
period. After the warranty period, you will be quoted a service charge.)
4. Call HP support. Support options and availability vary by device, country/region, and
language.
HP support by phone
For a list of support phone numbers, see the phone number list on the inside of the front
cover.
Phone support period
One year of phone support is available in North America, Asia Pacific, and Latin America
(including Mexico). To determine the duration of phone support in Europe, the Middle
East, and Africa, go to www.hp.com/support. Standard phone company charges apply.
Placing a call
Call HP support while you are in front of the computer and the HP Photosmart printer.
Be prepared to provide the following information:
●
●
Device model number (located on the label on the front of the device)
Device serial number (located on the back or bottom of the device)
HP Photosmart Pro B9100 series User Guide
57
Chapter 6
●
●
Messages that appear when the situation occurs
Answers to these questions:
– Has this situation happened before?
– Can you re-create it?
– Did you add any new hardware or software to your computer at about the time
that this situation began?
– Did anything else occur prior to this situation (such as a thunderstorm, device
was moved, etc.)?
After the phone support period
After the phone support period, help is available from HP at an additional cost. Help may
also be available at the HP online support Web site: www.hp.com/support. Contact your
HP dealer or call the support phone number for your country/region to learn more about
support options.
Additional warranty options
Extended service plans are available for the printer at additional costs. Go to
www.hp.com/support, select your country/region and language, then explore the
services and warranty area for information about the extended service plans.
58
HP Photosmart Pro B9100 series printer
A
Networking
The instructions in this section describe how to install the printer in an ethernet (wired) network. A
wired setup allows the printer to communicate with computers through a router, hub, or switch.
Broadband Internet access is required in order to take full advantage of the printer feature set.
Note For USB installation, see the Quick Start guide that came in the box.
Before proceeding with this section, make sure that you have already set up your wired network.
See the documentation that came with your network hardware. Also make sure you have set up the
printer as described in the setup instructions that came in the box.
●
●
●
●
●
●
Networking basics (Windows and Mac)
Connect the printer to the network
Install the printer software on a Windows computer
Install the printer software on a Mac
Use the embedded web server
Print a network settings page
Networking basics (Windows and Mac)
Networking lets networked devices, such as computers and printers, communicate with each other.
A wired or ethernet network is the most common type of network in offices and in homes.
The network adapter in the printer itself supports both 10 Mbps and 100 Mbps ethernet networks.
To connect the printer to a network, you need a CAT-5 ethernet cable equipped with a RJ-45 plug.
This is not the same as a USB cable. You must purchase the ethernet cable separately. It is not
included with the printer.
Caution Although the RJ-45 plug of a CAT-5 cable resembles a common phone plug, it
is not the same. Never use a regular phone wire to connect the printer to an ethernet
network. You can damage the printer and other network devices by doing so.
The following illustration shows an example of the printer networked with several computers through
a network hub, switch, or router. A cable or DSL modem links the hub and all the networked devices
to broadband Internet access.
HP Photosmart Pro B9100 series User Guide
59
Appendix A
1
Cable or DSL modem connecting the networked devices to broadband Internet access
2
A network access point (hub, switch, or router) into which all the devices are connected through ethernet
cables
Networked devices connect to each other through a central device. The most common types include:
●
●
●
Hubs: Simple, inexpensive network devices that let several computers communicate with each
other or share a common printer. Hubs are passive. They only provide a way for communication
to flow between other devices.
Switches: Switches are similar to hubs, but can examine the information sent between devices
and forward the information only to the proper device. Switches can lessen bandwidth usage
on a network and help keep it running more efficiently.
Routers: Routers or gateways connect both devices and networks. A common use is to
connect several home computers on a network to the Internet. Routers often include a built-in
firewall that can help protect a home network from unauthorized access.
Note For specific information about setting up and configuring the hardware on your
network, see the documentation that came with the hardware.
Internet connection
If your network is connected to the Internet through a router or gateway, HP recommends that you
use a router or gateway that supports Dynamic Host Configuration Protocol (DHCP). A gateway
with DHCP support manages a pool of reserved IP addresses that it assigns dynamically as needed.
See the documentation that came with the router or gateway.
Recommended network configurations
The following network configurations support the printer. Determine the type of network
configuration you have, and then see Connect the printer to the network and Install the printer
software on a Windows computer or Install the printer software on a Mac for instructions on
connecting your printer to the network and then installing the software.
Ethernet network without Internet access
The computers and printer communicate with each other, forming a simple network, through a hub.
None of the networked devices has access to the Internet.
60
HP Photosmart Pro B9100 series printer
Ethernet network with Internet access by dial-up modem
The computers and printer communicate with each other, forming a simple network, through a hub.
One of the computers has access to the Internet through a modem and dial-up account. None of
the other networked devices, including the printer, has direct access to the Internet.
Ethernet network with broadband Internet access provided by a router
The printer is connected to a router that acts as a gateway between the user network and the
Internet. This is the ideal network configuration.
Connect the printer to the network
To connect the printer to a wired network, you need the following:
●
●
A network access point such as a hub, router, or switch with an open port
A CAT-5 ethernet cable with RJ-45 plug
Note 1 You should not connect the printer directly to a computer using an ethernet cable.
Peer-to-peer networking is not supported.
Note 2 After you connect the printer to the network as described in this section, you must
install the printer software. See Install the printer software on a Windows computer or Install
the printer software on a Mac.
To connect the printer to the network
1.
2.
If there is a plastic protective cap in the ethernet port on the back of the printer, remove it.
Connect the ethernet cable to the back of the printer.
3.
Connect the ethernet cable to an empty port on the hub, router, or switch.
HP Photosmart Pro B9100 series User Guide
61
Appendix A
After you finish connecting the printer to the network, install the printer software. You cannot print
from a computer until you do the software installation.
●
●
Install the printer software on a Windows computer
Install the printer software on a Mac
Install the printer software on a Windows computer
Note Set up the printer as indicated in the Quick Start guide that came in the box.
Installation takes approximately 20 minutes, but time can vary based on the amount of available
hard drive space and the processor speed of the computer. Make sure you have already connected
the printer to the network with an ethernet cable before you begin the installation.
Note The printer software must be installed as described in this section on every
networked computer from which you want to print to the HP Photosmart Pro B9100 series
printer. After the installation, printing is just like printing through a USB connection.
Tip Do not use the Windows Add Printer control panel utility to install the printer software.
You must use the HP installer to install the printer on a network properly.
To install the printer software
1.
2.
3.
4.
Print a network configuration page. You might need the information included in this report if
the installer cannot detect the printer. See Print a network settings page.
Insert the HP Photosmart printer software CD into the computer CD-ROM drive.
Click Next and follow the instructions provided by the installer to check and prepare the system,
and install drivers, plug-ins, and software. This takes several minutes.
At the Connection Type screen, select Through the network, and then click Next.
The Searching screen displayed as the Setup program searches for the printer on the network.
If the Printer Found screen is displayed, do this:
a.
Verify that the printer description is correct. (Use the configuration page to verify the
printer name and hardware address. See Print a network settings page.)
b. If the printer description is correct, select Yes, install this printer, and then click Next.
If more than one printer is found on the network, select HP Photosmart Pro B9100
series as the device to configure and install, and then click Next. If you have more than
one printer on your network, use the Hardware Address (MAC) item listed in the network
configuration page to identify the specific HP Photosmart Pro B9100 series printer that
you want to install.
If the Check Cable Connection screen is displayed, do this:
a.
b.
c.
d.
62
Follow the onscreen instructions, select Specify a printer by address, and then click
Next.
On the Specify Printer screen, enter the Hardware Address (MAC) number listed in the
network configuration page in the Hardware Address (MAC) box.
Example: 02bad065cb97
MAC stands for Media Access Control, a hardware address that identifies the printer on
the network.
Enter the IP Address listed in the network configuration page in the IP Address box, and
then click Next.
Example: 169.254.203.151
When the Printer Found screen is displayed, select Yes, install this printer, and then
click Next.
HP Photosmart Pro B9100 series printer
e.
f.
5.
In the Confirm Settings screen, click Next.
Follow the onscreen instructions.
When prompted, click Finish to exit the installation.
Install the printer software on a Mac
Note Set up the printer as indicated in the Quick Start guide that came in the box.
Installation time can take 3-4 minutes depending on your operating system, the amount of available
hard drive space, and the processor speed of the Mac. Make sure you have already connected the
printer to the network with an ethernet cable before you begin the installation. If you have already
installed this printer on a USB connection, you do not have to follow these instructions to do a
network installation. Instead, see To change a USB-connected printer to a network connection.
Note 1 The printer software must be installed as described in this section on every
networked computer from which you want to print to the HP Photosmart Pro B9100 series
printer. After the installation, printing is just like printing to a printer connected by a USB
cable.
Note 2 For Mac OS X 10.2.8 systems: Download the Mac OS X 10.2.8 printer driver
from www.hp.com/support, and follow the onscreen installation instructions.
To install the printer software on Mac OS X 1.3, 10.4, or later
1.
2.
3.
4.
5.
Insert the HP Photosmart printer software CD into the Mac CD-ROM drive.
Double-click the CD icon on the desktop.
Double-click the HP Photosmart Installer icon.
Enter the name and password used to administer your Mac, and then click OK.
Select your language, and then select HP Photosmart Pro B9100 series as the device. Follow
the onscreen instructions.
6. When the HP Photosmart Installer window is displayed, choose Easy Install or Custom
Install, and then click Install.
7. Click Continue to run the HP Setup Assistant.
8. When the HP Setup Assistant is displayed, click Next.
9. Highlight the HP Photosmart Pro B9100 series printer, and then click Next. If the printer is
not listed in the window, make sure that the printer is on and the network cable is connected
to the printer.
10. Follow the onscreen instructions to set up your printer using the Printer Setup Utility.
11. Click Next.
12. When the Congratulations page is displayed, click Finish.
To change a USB-connected printer to a network connection
1.
2.
3.
4.
5.
6.
7.
8.
9.
Connect the printer to the network. See Connect the printer to the network.
Print a network configuration page and locate the IP Address entry.
Open a web browser and enter the IP Address to access the embedded web server in the
printer. For more information on the embedded web server, see Use the embedded web server.
Click the Networking tab.
Click mDNS in the Applications area on the left.
Type a unique name (63 characters or less) in the mDNS Service Name box.
Click Apply.
Select the printer in the Print dialog box. If the printer does not appear in the list, select Edit
Printer List to add the printer.
In the Printer List window, click Add.
HP Photosmart Pro B9100 series User Guide
63
Appendix A
10. Select Rendezvous or Bonjour from the pull-down menu.
11. Select the printer from the list, and then click Add.
Use the embedded web server
The embedded web server in the printer provides a simple way to manage the networked printer.
Using any web browser from either a Windows or Mac computer, you can communicate with the
printer over the network to:
●
●
●
●
●
●
Check printer status and estimated ink levels
View network statistics
Adjust the printer network configuration by specifying a proxy server, setting a DNS name, or
manually entering an IP address
Restrict access to configuration pages
Order supplies
Go to the HP Web site for support
To open the embedded web server home page
1. Print a network configuration page. See Print a network settings page.
2. Enter the printer IP address indicated on the network configuration page into the address box
of your browser.
Example IP address: 10.0.0.81
The home page for the embedded web server is displayed.
For information about network terms and the embedded web server that is not covered in this guide,
view the embedded web server help.
To open help for the embedded web server
1.
2.
Go to the embedded web server home page. See To open the embedded web server home
page.
Click Help in the Other Links area of the home page.
Print a network settings page
You can print a network settings page from the printer without even being connected to a computer.
The network settings page provides useful information regarding the printer IP address, network
statistics, and other network settings. You can also display a summary of select network settings
on the printer itself.
To print a network settings page
1.
2.
3.
64
Press Menu on the printer.
Press until Network settings is displayed, and then press OK.
Press until Print network settings page is displayed, and then press OK.
HP Photosmart Pro B9100 series printer
B
Specifications
This section lists the minimum system requirements for installing the HP Photosmart printer
software, and provides selected printer specifications.
System requirements
Component
Windows
Mac
Operating system
Microsoft® Windows 2000
Professional, XP Home,
XP Professional, or
XP Professional x64 Edition
Mac OS X 10.2.8, 10.3, 10.4,
or later
Note The printer
driver for
Mac OS X 10.2.8
systems must be
downloaded from
www.hp.com/support.
Note x64 systems
can be connected
directly to the printer
via USB only;
networking with x64
systems is not
supported.
Processor
RAM
Free disk space
Minimum: Intel® Pentium II
233 MHz (or equivalent), or
higher
Minimum: PowerPC with G3,
G4, G5, or Intel® Core
processor
Recommended: Intel®
Pentium 4 (or equivalent), or
higher
Recommended: PowerPC
with G5 2 GHz or Intel® Core
Duo processor
Minimum: 256 MB
Minimum: 256 MB
Recommended: 1 GB
Recommended: 512 MB
Minimum: 200 MB
Minimum: 500 MB
Recommended: 450 MB
Video display
Minimum: SVGA monitor
(800 x 600, 16-bit color)
Minimum: SVGA monitor
(800 x 600, 16-bit color)
Recommended: SVGA
monitor (1024 x 768, 32-bit
color)
Recommended: SVGA
monitor (1024 x 768, 32-bit
color)
CD-ROM drive
Required
Required
Browser
Microsoft Internet Explorer
5.01 with SP2 or later
—
USB
USB port (Cable not included)
USB port (Cable not included)
Networking
Ethernet port (Cable not
included)
Ethernet port (Cable not
included)
HP Photosmart Pro B9100 series User Guide
65
Appendix B
Printer specifications
Category
Specifications
Connectivity
USB 2.0 High speed
Ethernet 802.3
Dimensions
Weight: 17.1 kg (37.7 lbs)
Height: 235 mm (9.2 inches)
Width: 675 mm (26.6 inches)
Depth: 430 mm (16.9 inches)
Environmental specifications
Recommended during operation: 15–35° C (59–95° F),
20–80% RH
Maximum during operation: 5–40° C (41–104° F), 5–
95% RH
Storage temperature range: -30–65° C (–22–149° F)
Ink cartridges
HP 38 Photo Black (PK) Pigment ink cartridge
HP 38 Light Gray (LG) Pigment ink cartridge
HP 38 Matte Black (MK) Pigment ink cartridge
HP 38 Cyan (C) Pigment ink cartridge
HP 38 Magenta (M) Pigment ink cartridge
HP 38 Yellow (Y) Pigment ink cartridge
HP 38 Light Magenta (LM) Pigment ink cartridge
HP 38 Light Cyan (LC) Pigment ink cartridge
Margins
Printing on rigid media: Top/Bottom 14 mm (0.55 inches);
Left/Right 3 mm (0.12 inches)
Borderless printing on all other media: Top/Bottom/Left/
Right 0.0 mm (0.0 inches)
Media specifications
Maximum length: 483 mm (19 inches)
Maximum width: 330 mm (13 inches)
Maximum weight for main tray: 220 gsm, non-rigid media
Maximum thickness for specialty media tray: 1.5 mm,
one sheet at a time
Media sizes
Supported sizes
7.6 x 12.7 cm to 33 x 48.3 cm (3 x 5 inches to
13 x 19 inches), including:
Metric: 10 x 15 cm (with or without tab), Panorama
10 x 30, 13 x 18 cm, A3, A4, A5, A6, B4, B5, E
Imperial: Index card 3 x 5 inches, Index card 4 x 6 inches,
Index card 5 x 8 inches, 3.5 x 5 inches, 4 x 6 inches (with
or without tab), Panorama 4 x 10 inches, Panorama
4 x 11 inches, Panorama 4 x 12 inches, 5 x 7 inches,
66
HP Photosmart Pro B9100 series printer
(continued)
Category
Specifications
8 x 10 inches, 11 x 14 inches, 11 x 17 inches,
12 x 12 inches, 13 x 19 inches
U.S.: Letter, Legal, Executive, Tabloid
Japan: L, 2L, Hagaki, Ofuku Hagaki
Envelopes: Envelope No. 10, A2 envelope, C6 envelope,
DL envelope
Media types
Paper (photo, plain, inkjet, and specialty media)
Envelopes
Transparencies
Labels
Cards (index, greeting, Hagaki, A6, L-size)
Iron-on transfers
Network support
Microsoft Windows 2000 Professional, XP Home, and
XP Professional
Mac OS X 10.2.8, 10.3, 10.4, or later
Paper trays and supported paper
sizes
Main tray
7.6 x 12.7 cm to 33 x 48.3 cm (3 x 5 inches to
13 x 19 inches)
Specialty media tray
7.6 x 12.7 cm to 33 x 48.3 cm (3 x 5 inches to
13 x 19 inches)
Output tray
All supported sizes
Paper tray capacity
Main tray
200 sheets of plain paper
60 sheets of photo paper
50 envelopes
20–40 cards (depending on thickness)
30 sheets of labels
Specialty media tray
1 sheet of any media up to 1.5 mm thick
Output tray
50 sheets of plain paper
20 sheets of photo paper
10 cards or envelopes
Power consumption
Printing: 65 W peak, 22 W average
Idle: 9.8 W average
Off: 0.4 W average
HP Photosmart Pro B9100 series User Guide
67
Appendix B
(continued)
Category
Specifications
Power cord model number
8121-0740 (North America)
8121-0731 (Europe (except countries/regions listed below),
Korea)
8121-0731 + 8121-0733 (Denmark, Sweden Norway,
Finland)
8121-0731 + 8121-0739 + 8121-0740 (Middle East, Africa
(except south), CIS, Russia)
8121-0837 (Australia)
8121-0737 + 8121-1004 (Israel, South Africa)
8121-0738 (Switzerland)
8121-0739 (United Kingdom, Ireland, Hong Kong,
Singapore)
8121-0742 (China)
8121-0964 (Taiwan)
8121-0790 (Japan)
Printheads
HP 70 Photo Black/Light gray printhead
HP 70 Matte Black/Cyan printhead
HP 70 Magenta/Yellow printhead
HP 70 Light Magenta/Light Cyan printhead
USB support
Microsoft Windows 2000 Professional, XP Home,
XP Professional, and XP Professional x64
Mac OS X 10.2.8, 10.3, 10.4, or later
HP recommends that the USB cable be less than 3 meters
(10 feet) in length
68
HP Photosmart Pro B9100 series printer
C
HP Warranty
HP Photosmart Pro B9100 series User Guide
69
Appendix C
70
HP Photosmart Pro B9100 series printer
Index
A
after the support period 58
aligning printheads. See
calibrating the printer
alignment page 42
attention light 8
B
buttons 8
C
calibrating the printer 42
calling HP support 57
care and maintenance 33
cartridges. See ink cartridges
cleaning
printer 39
printheads automatically
40
printheads manually 40
color management
application-based 27
calibrating a monitor 27
ICC device profiles 27
installing ICC profiles 27
printer-based 29
computer
printing from 11
system requirements 65
control panel 4, 8
D
documentation, printer
3
E
electronic Help 3
error messages 50
ethernet 59
ethernet port 5
H
help. See troubleshooting
help, electronic 3
Hewlett-Packard Company
notices 4
HP Software Update 43
HP Solution Center 3
I
ink cartridge door 4
ink cartridges
checking ink levels
testing 42
L
loading paper
12
M
main tray 4
menu, printer
8
34
N
network settings page 64
networking
connecting printer to
network 61
embedded web server 64
ethernet 59
network settings page 64
software installation (Mac)
63
software installation
(Windows) 62
O
output tray
4
P
paper
buying and choosing 18
jams 49
loading 12
specialty 18
specifications 66
trays 4
phone support 57
phone support period
period for support 57
placing a call 57
power cord connection 5
print cartridges. See ink
cartridges
print driver
recommended settings 11
printer
HP Photosmart Pro B9100 series User Guide
calibrating 42
cleaning 39
documentation 3
error messages 50
maintaining 33
menu 8
parts 4
specifications 66
printer driver
changing settings 21
printer software, updating 43
printheads
cleaning 40
cleaning nozzles 40
inserting 37
printing
changing settings 21
from a computer 11
test page 42
troubleshooting problems
47
Q
quality
printing test page
42
R
rear door 5
rear door releases 5
rear paper slot 5
S
screen, printer 4
software
driver 11
printer driver 11
troubleshooting 45
updating 43
specialty media 18
specialty media tray 4
specifications 65
support process 57
system requirements 65
T
test page
42
71
trays, paper 4
troubleshooting
error messages 50
flashing lights 46
printer hardware
problems 46
printing problems 47
software installation 45
U
USB
specifications 66
USB port 5
72
HP Photosmart Pro B9100 series printer