1
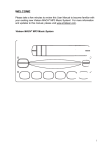
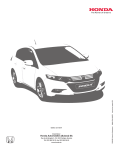
OPERATING INSTRUCTIONS
in-VEHICLE ENTERTAINMENT SYSTEM
D
OA
T /L
EJEC
R
PW
HT
LIG
R
TE
EN
R
KE
EA
SP
NU
ME
RN
TU
RE
E
US
/PA
AY
PL
D
FW
W
RE
XT
NE
OP
ST
EV
PR
AY
PL
DIS
E
GL
AN
D
DV X
AU
DIO
AU MP
CO
P/N: 08A23-9E1-010
Index
Welcome ......................................................... 2
System Overview ........................................... 3
in-VEHICLE ENTERTAINMENT
SYSTEM
Features ....................................................... 6
Play and Format ......................................... 6
Audio System ............................................. 6
DVD Player Controls ................................ 7
Remote Control ......................................... 8
Menu-Bar .................................................. 10
Remote Control Battery
Replacement .......................................... 11
Media Control Panel .............................. 11
Operating Instructions
Flip-Down Screen .................................... 12
Operating Tips ........................................ 12
Features ..................................................... 13
Personal Preferences ............................ 13
Subtitles ................................................. 13
Audio ....................................................... 14
Operation ................................................. 14
Playing a DVD ........................................ 14
Removing Discs ..................................... 15
Moving to Another
Title/Chapter ...................................... 15
Slow Motion .......................................... 15
Still Picture and Frame-by-Frame
Playback ............................................... 15
Search ..................................................... 15
Pause ....................................................... 16
Moving to Another Track .................... 16
Zoom ....................................................... 16
Access Control ...................................... 16
FTS-Video............................................... 17
Storing a FTS-Video Program ............ 17
Storing Chapters/Indexes ................... 17
Erasing a FTS-Video Program ............. 17
Erasing All Selections ........................... 18
Wireless Headphones
Features ..................................................... 19
Explanation of Controls ........................ 19
Auto Off .................................................... 19
Battery Replacement ............................. 20
Operation ................................................ 20
Adjusting Headphones ......................... 20
Auxiliary Input Device Connection
Connecting Auxiliary
Video Equipment .................................. 21
Playing Video Games.............................. 21
Using Auxiliary Video Equipment ........ 21
Care of the DVD Player
Environmental Extremes ........................22
Temperature Extremes ...........................22
Humidity and Moisture
Condensation ........................................ 22
Foreign Substances................................. 23
Cleaning the Display Screen ................ 23
Cleaning the Controls ........................... 23
Troubleshooting .......................................... 24
Safety Information ...................................... 27
FCC Compliance ........................................ 29
1
Welcome
Your in-VEHICLE ENTERTAINMENT SYSTEM is designed to give you and your
family years of enjoyment. You can play your favorite DVDs or plug-and-play a
variety of standard video games. Please review these Operating Instructions to
become familiar with the entertainment system’s features and operation. Pay
particular attention to the safety precautions for use of a DVD player in a vehicle.
For additional information about your in-VEHICLE ENTERTAINMENT SYSTEM,
please contact your dealer.
2
System Overview
Remote Functions
Press to turn the DVD player ON/
OFF
Press to engage/disengage the
vehicle’s audio speakers. Radio
must be set to FM 87.9
Press to play the DVD or to pause
play temporarily
Press to search backward during
play
Press to search forward during play
To prolong system life and optimize radio
performance, turn the DVD player power OFF
when you are not using it.
Operating the system with the engine OFF will run
down the vehicle’s battery.
Wireless Headphones
Headphones require two AAA batteries (not
included). An infrared transmitter transmits the
audio signal to the headphones.
Headphone Receivers
7″ Flip-Down LCD Screen
L
Display
latch
Aspect ratio switch
Push to convert
screen between
normal and
widescreen views
Wireless
headphone infrared
transmitter/receiver
Infrared
sensors
Battery
cover
Dimmer
control
R
Power
Indicator
LED
7" color
liquid crystal
display (LCD)
screen
Power
Button
Volume
Control
Press to return to a previous scene
or track
Press to proceed to the next scene
or track
Press to stop DVD play
Auto Off
This battery power-saving feature
automatically turns off the headphones
if no infrared signal is received
within 3-4 minutes.
Do not cup your hands over the earpiece when
adjusting the volume. This may interfere with the
signal to the headphones.
Press to load or eject the disc
3
System Overview
Remote Control
2
1
3
PWR
NOTE: When using the remote, aim it at the infrared transmitter
above the video display screen. (See Item 5, p. 12)
14. DVD/AUX
4
Press to switch between DVD player and auxiliary
inputs.
EJECT/LOAD
5
LIGHT
21
15. AUDIO/COMP
6
ENTER
NOTE: Functions may operate differently depending on the disc
being played.
20
7
SPEAKER
16. ANGLE
MENU
NOTE: Remote control requires two AA batteries (not included).
8
RETURN
19
1. POWER
Press to turn DVD player ON/OFF.
Press to navigate up through the selected menu.
PREV
16
15
Press to select currently activated menu option.
5. (Right)
Press to navigate right through the selected menu.
6. (Down)
Press to navigate down through the selected menu.
7.
MENU
Press to display the DVD main menu. In menu mode,
press to re-enter play mode at the point where
playback last occurred.
8. RETURN
Press to close menu and resume play.
FWD
STOP
NEXT
10
ANGLE
DISPLAY
AUDIO
COMP
DVD
AUX
11
17. PREV
18. REW
14
13
9. PLAY/PAUSE
In stop mode, press to play a DVD. In play mode,
press to suspend play temporarily.
10. FWD
In play mode, press to search forward. To resume to
normal play mode, press PLAY or FWD.
11. STOP
Press to stop play.
12. NEXT
In play mode, press to forward to the next chapter
or track.
13. DISPLAY
4
In DVD play mode, press to select video camera
angle (available on some DVD disks).
Press PREV to go to the beginning of the current
chapter or track (if pressed after 5 seconds from
beginning of the chapter). If pressed within 5
seconds of beginning of the chapter, play will move
to beginning of the previous chapter or track.
12
17
4. EJECT/LOAD
Press to eject or load DVD.
PLAY/PAUSE
18
2. (Up)
3. ENTER
9
REW
In DVD play mode, press to enable audio
compression. Toggle on and off.
If a disc is in play mode, press to display the menu
bar.
In play mode, press to search backward. To resume
to normal play mode, press PLAY or REW.
19. SPEAKER
Press to toggle the FM Modulator (ON/OFF) to
allow audio to play through vehicle speakers.
20. (Left)
Press to navigate left through the selected menu.
21. LIGHT
Press to light up remote buttons for approximately 8
seconds.
N O T E : Backlighting is set at a nighttime intensity
level. A darkened environment is necessary to verify
this feature.
System Overview
A)
B)
C)
D)
E)
F)
DVD player
Auxiliary input jacks
(cover is non-removable)
7″ Color liquid crystal
display (LCD) flip-down
screen
Infrared wireless
headphones
Remote control
Wireless headphone infrared
transmitter/remote control
receiver
A
B
EJECT/LOAD
PWR
E
LIGHT
F
ENTER
SPEAKER
MENU
D
RETURN
REW
PLAY/PAUSE
PREV
C
STOP
FWD
NEXT
ANGLE
DISPLAY
AUDIO
COMP
DVD
AUX
5
in-VEHICLE
VEHICLE ENTERTAINMENT SYSTEM
in-VEHICLE
VEHICLE
ENTERTAINMENT
SYSTEM
Features
• DVD player.
• High performance 7″ flip-down LCD
screen with dimmer/brightness
control.
• Auxiliary, video and audio jacks for
connecting video games and video
equipment*.
• Infrared remote control for DVD
player.
• Infrared wireless headphones.
• Connects to vehicle’s audio system.
* Auxiliary video or game equipment may
require a 12-volt DC to 120-volt AC
power inverter.
• Aspect Ratio Switch for converting
between normal and widescreen
viewing.
6
Play and Format
The DVD player works only in the
“play” mode. (The DVD player does
not offer a record feature.)
The system plays DVD video and audio
CDs.
Certain DVD discs may require use of
the remote control to navigate the disc
menu to start play.
Audio System
The FM Modulator ON/OFF Speaker
Switch ( ) on the DVD allows rear seat
passengers to listen to audio from the
VEHICLE
in-VEHICLE
ENTERTAINMENT
SYSTEM over the vehicle’s
speakers.
NOTE: The wireless headphones remain
operational regardless of the speaker
switch position.
After pressing the switch, you must
tune the vehicle’s audio sytem to 87.9
Mhz on the FM band to hear the
audio.
in-VEHICLE
VEHICLE ENTERTAINMENT SYSTEM
DVD Player Controls
10
2
4
6
8
11
1
1. POWER
Press to turn the DVD player ON/OFF.
The green power LED will illuminate
when the power is on.
2. STOP/EJECT
Press to stop or eject a DVD.
3. PLAY/PAUSE
In stop mode, press to play a DVD.
In play mode, press to suspend play
temporarily.
3
5
7
4. REV (Reverse)
Press to search backward through
the disc at four times the normal
speed.
5. FF (Fast Forward)
Press to search forward through the
disc at four times the normal speed.
6. SPEAKER
Press to toggle the audio to vehicle
speakers through the FM Modulator
(ON/OFF).
9
7. VIDEO AUXILIARY INPUT JACK
(YELLOW)
8. LEFT AUDIO AUXILIARY INPUT
JACK (WHITE)
9. RIGHT AUDIO AUXILIARY INPUT
JACK (RED)
10. DISC-IN Indicator:
On when disc is present in player.
11. POWER LED Indicator:
On when DVD power is on.
7
in-VEHICLE
VEHICLE ENTERTAINMENT SYSTEM
Remote Control
NOTE: When using the remote, aim it at the
infrared transmitter above the video display
screen. (See Item 5, p. 12)
2
1
3
8. RETURN
Press to close menu and resume play.
9. PLAY/PAUSE
In stop mode, press to play a DVD. In play
mode, press to suspend play temporarily.
4
EJECT/LOAD
PWR
5
LIGHT
21
6
ENTER
NOTE: Functions may operate differently
depending on the disc being played.
20
7
SPEAKER
MENU
NOTE: Remote control requires two AA batteries
(not included).
1. POWER
Press to turn DVD player ON/OFF.
2. (Up)
Press to navigate up through the selected
menu.
3. ENTER
Press to select currently activated menu
option.
4. EJECT/LOAD
Press to eject or load DVD.
5. (Right)
Press to navigate right through the
selected menu.
8
8
RETURN
19
9
REW
PLAY/PAUSE
FWD
10
18
PREV
STOP
NEXT
12
17
16
15
ANGLE
DISPLAY
AUDIO
COMP
DVD
AUX
11
14
13
6. (Down)
Press to navigate down through the
selected menu.
7. MENU
Press to display the DVD main menu. In
menu mode, press to re-enter play mode at
the point where playback last occurred.
10. FWD
In play mode, press to search forward. To
resume to normal play mode, press PLAY or
FWD.
11. STOP
Press to stop play.
12. NEXT
In play mode, press to forward to the next
chapter or track.
13. DISPLAY
If a disc is in play mode, press to display
the menu bar.
14. DVD/AUX
Press to switch between DVD player and
auxiliary inputs.
15. AUDIO/COMP
In DVD play mode, press to enable audio
compression. Toggle on and off.
in-VEHICLE
VEHICLE ENTERTAINMENT SYSTEM
16. ANGLE
In DVD play mode, press to select video
camera angle (available on some DVD
disks).
17. PREV
Press PREV to go to the beginning of the
current chapter or track (if pressed after 5
seconds from beginning of the chapter). If
pressed within 5 seconds of beginning of
the chapter, play will move to beginning of
the previous chapter or track.
18. REW
In play mode, press to search backward. To
resume to normal play mode, press PLAY or
REW.
19. SPEAKER
Press to toggle the FM Modulator (ON/
OFF) to allow audio to play through vehicle
speakers.
20. (Left)
Press to navigate left through the selected
menu.
21. LIGHT
Press to light up remote buttons for
approximately 8 seconds.
NOTE: Backlighting is set at a nighttime
intensity level. A darkened environment is
necessary to verify this feature.
9
in-VEHICLE
VEHICLE ENTERTAINMENT SYSTEM
Menu-Bar
VEHICLE ENTERTAINMENT SYSTEM provides three menu-bar options. Press the DISPLAY key on the remote control
Your Honda in-VEHICLE
once to display menu-bar 1, twice to display menu-bar 2, three times to display menu-bar 3.
NOTE: Depending on the disc type, not all menu items may be available.
1
1
Menu-bar 2 (DVD only)
Menu-bar 1
Personal Preferences
Picture – menu items that can be chosen from
are:
TV Shape – Preset to 16:9 for high
performance 7” LCD.
Black level shift – Select ON for adapting
the color dynamics to obtain richer
contrasts.
Video shift – This setting can personalize
the position of the picture on your TV by
scrolling it to the left or right.
Color settings – Allows user to select from
four preset color settings.
Personal color – Allows user to customize
color.
TV system – Preset to NTSC.
10
Sound – menu items available are:
Digital output – Factory setting is OFF.
Analog output – To select preference for
Stereo, Dolby, Surround, or 3D Sound.
AC3-DYN compression – Raises average
level of DVD audio (AC3 only).
Karaoke Vocal – Factory setting is off.
Enables playback of karaoke disc.
Step – Refer to page 15.
Language – Allows user to select preferred
default language for Audio, Subtitle, and
Menu.
Features – menu items available are:
Access control – Child Lock and Parental
Control are contained in this menu item.
Status window – When set to ON displays
the current status of the player.
PBC (Playback Control) – Can be set to
ON or OFF.
Help text – When set to ON, this will
describe the icons selected.
Subtitle language – Allows user to change subtitle
selection without affecting preference settings.
Audio language – Allows user to change audio
language during playback without affecting preference
settings.
Color – Allows user to select from four preset color
settings or one personal setting.
Sound – Allows user to select Stereo, Dolby,
Surround, or 3D Sound.
Slow motion – Refer to page 15.
Fast motion – Refer to page 15.
Angle – Allows user to select alternate camera
angles depending on the disc.
Zoom – Refer to page 16.
Menu-bar 3
Title – Allows user to skip to a specific title on the
DVD or track on a CD.
Chapter – Allows user to skip to a specific chapter
on DVD.
Time search – Allows user to go to a specific time
on the disc by using the up and down arrows to
increment time. Use left and right arrows to move
from hour, minute, and second fields. Press ENTER
when complete.
Favorite track selection (FTS) – Refer to pages 17
and 18.
in-VEHICLE
VEHICLE ENTERTAINMENT SYSTEM
Remote Battery Replacement
• Use a pen tip to remove the
battery cover.
• Battery replacement is usually
required if the remote only
functions at extremely close
distances to the DVD player or
not at all.
• When replacing the batteries,
use two AA batteries and install
with correct orientation as
indicated on the remote.
Media Control Panel
AUX input jacks
YELLOW:
Video
WHITE:
Left audio
RED:
Right audio
11
Operating Instructions
Flip-Down Screen
5
4
2
3
1
1. Seven-inch (diagonal) color liquid crystal display (LCD) screen.
2. Aspect ratio switch.
Push to convert the screen between normal view and wide screen view.
3. Dimmer control.
Push (+/-) to increase or decrease screen brightness.
4. Display latch.
5. Wireless headphone and remote control infrared transmitter and receiver.
(Aim remote control to this area for proper functionality.)
12
Operating Tips
Operating the system with the engine
OFF will run down the vehicle’s battery.
When the ignition key is turned OFF,
VEHICLE
the in-VEHICLE
ENTERTAINMENT
SYSTEM should also be turned
OFF. When the ignition is turned ON,
the system is off until the DVD
POWER button is pushed to turn it on.
The system defaults to AUX (game)
mode whenever a DVD disc is not
loaded and the DVD power is turned
on.
To prolong system life and optimize
radio performance, turn the DVD
power OFF when you are not using it.
Do not leave DVDs in the player
overnight or for extended periods.
Operating Instructions
To listen through the vehicle’s speaker
system, press the FM Modulator ON/
OFF Speaker Switch ( ) on the DVD
and set the radio to FM 87.9.
When using the remote control, aim it
at the infrared transmitter above the
video display screen.
Features
EJECT/LOAD
PWR
LIGHT
ENTER
SPEAKER
MENU
RETURN
Infrared
Transmitter/Receiver
REW
PLAY/PAUSE
PREV
STOP
FWD
NEXT
ANGLE
DISPLAY
AUDIO
COMP
DVD
AUX
Personal Preferences
1. Press DISPLAY on the remote
control.
2. Select (
) in menu-bar 1. The
Personal Preferences menu appears.
3. Use the 34 56 keys to toggle
through the menus, submenus and
submenu options.
When a menu item is selected, use
the cursor keys (on the remote
control) to operate the item next to
the displayed item.
4. Press ENTER to select.
5. Press DISPLAY 3 times to close
menu and resume play.
Subtitles
1. Press DISPLAY on the remote
control.
2. Select (
) SUBTITLE in
menu-bar 1.
3. Use the 56 keys to toggle
through the menu options of
languages.
4. Press ENTER to close menu and
resume play.
13
Operating Instructions
Audio
1. Press DISPLAY on the remote
control.
2. Select (
) AUDIO in menu bar 1.
3. Use the 56 keys to toggle
through the menu options.
4. Press ENTER to close menu and
resume play.
Operation
EJECT/LOAD
PWR
4.
LIGHT
ENTER
SPEAKER
MENU
5.
RETURN
REW
PLAY/PAUSE
FWD
6.
PREV
STOP
NEXT
ANGLE
DISPLAY
AUDIO
COMP
DVD
AUX
Playing a DVD
1. Turn ignition key ON.
2. Press the POWER button on the
DVD player or remote control.
3. Insert DVD into the DVD player
label side up. If no label, refer to
14
7.
disc package to ensure proper
orientation of disc.
The disc will automatically begin to
play. If video is not shown on the
screen, press the DVD/AUX button
on the remote control to switch
from AUX to DVD player mode.
Set vehicle radio to FM 87.9 or
designated preset frequency.
Press the FM Modulator Speaker
ON/OFF switch ( ) on the DVD
player or remote control to listen to
audio over the vehicle speakers.
Audio is also routed through the
headphones, regardless of the
Speaker ON/OFF switch position.
Press the STOP/EJECT button to
stop play. Press it again to remove
the DVD.
N O T E : If “Child Lock” is set to
ON and the disc inserted is not
authorized, the 4-digit code must
be entered and/or the disc must be
Operating Instructions
authorized (see “Access Control”).
N O T E : Unless otherwise stated,
all operations described are based
on using the remote control.
Removing Discs
1. Press STOP/EJECT on the front of
the player to stop play.
2. Once stopped, press STOP/EJECT
again or press EJECT/LOAD on the
remote to eject the DVD.
Moving to Another Title/Chapter
When the disc has more than one title
or chapter, you can move to another
title/chapter as follows:
1. Press DISPLAY, then
select title or
chapter in menu-bar
3 using the 3 or
4keys.
2. Press 6 or 5 to
select desired title or chapter
number.
LIGHT
ENTER
SPEAKER
MENU
Slow Motion
1. Press DISPLAY on the remote
control.
2. Select
(SLOW MOTION) in
menu-bar 2.
3. Use the 6 keys to enter the SLOW
MOTION menu. Playback will
pause.
4. Use the cursor keys 34 to select
required speed: -1, -1/2, -1/4, or
–1/8 (backward), or 1/8, 1/4,
1/2 or 1 (forward).
5. Select 1 to play the disc at normal
speed again.
6. If
is pressed, the speed will be
set to zero (PAUSE).
7. To exit slow motion mode, press
PLAY and 5.
Still Picture and Frame-by-Frame
Playback
2. Select
(STEP) in menu-bar 2.
3. Use the 6 key to enter the stepby-step menu. Playback will pause.
4. Use the cursor keys 34 to select
the previous or next picture frame.
5. To exit step-by-step playback, press
PLAY or 5.
Search
1. Press DISPLAY on the remote
control.
2. Select
(FAST MOTION) in
menu-bar 2.
3. Use the 6 keys to enter the FAST
MOTION menu.
4. Use the cursor keys 34 to select
the required speed: -32, -8, or –4
(backward) or 4, 8, 32 (forward).
5. To exit FAST MOTION mode, press
PLAY or 5.
1. Press DISPLAY on the remote
control.
15
Operating Instructions
Pause
1. Press during
playback.
2. To return to playback,
press PLAY.
REW
PREV
PLAY/PAUSE
STOP
FWD
NEXT
Moving to Another Track
1. Press PREV to go to
the beginning of the
current chapter or
track (if pressed after
5 seconds from
beginning of the chapter). If
pressed within 5 seconds of
beginning of the chapter, play will
move to beginning of the previous
chapter or track.
REW
PREV
PLAY/PAUSE
STOP
FWD
NEXT
Zoom
The zoom function
allows you to enlarge the
video image and to pan
through the enlarged
image.
16
ANGLE
DISPLAY
AUDIO
COMP
DVD
AUX
1. Press DISPLAY on the remote
control.
2. Select ZOOM
in menu-bar 2.
3. Press 5/6 to activate the ZOOM
function and select the required
zoom factor: 1.33 or 2 or 4.
Playback will pause.
• The selected zoom factor
appears below the ZOOM icon
in menu-bar 2 and “Press OK to
pan” appears below the menubar.
• The picture will change
accordingly.
4. Press ENTER to confirm the
selection. The panning icons
appear on the screen.
5. Use the 34 56 keys to pan
across the screen.
6. When ENTER is pressed only the
zoomed picture will be shown on
the screen.
7. To exit ZOOM mode, press PLAY to
resume playback.
Access Control (Child Lock)
1. When disc playback is stopped,
select ACCESS CONTROL in the
features menu using the 5/6
keys.
2. Use the 34 keys to select the
number’s position and 56 keys to
select number.
3. Press ENTER after selecting each
number.
4. Enter the code a second time.
5. Move to “CHILD LOCK” using the
5/6 keys.
6. Move to LOCK/UNLOCK using the
4 key.
7. Select LOCK using the 5/6 keys.
8. Press OK or 3 to confirm, then
press 3 again to exit the menu.
Now unauthorized discs will not be
played unless the 4-digit code is
entered.
Operating Instructions
9. Select UNLOCK to deactivate the
CHILD LOCK.
N O T E : Confirmation of the
4-digit code is necessary when:
• The code is entered for the very
first time.
• The code is changed.
• The code is cancelled.
FTS (Favorite Track Selection)
The FTS function allows you to store
your favorite titles and chapters for a
particular disc in the player memory.
FTS program can contain 20 items
(titles, chapters etc.).
A programmed FTS will be placed on
top of the list when playback is
activated.
The program can be selected and
played at any time.
Storing a FTS Program
Storing Chapters/Indexes
1. In STOP mode, press menu then
select
in menu-bar 3.
2. Press 6 to open the menu. The
F T S menu appears.
3. Press 4 or 3 to select ON or OFF.
If no program is selected, FTS is
OFF. When titles or chapters are
selected, FTS is automatically
turned ON and user can select
ON/OFF.
1. Press 6 on the selected title
number. The title number will be
marked and the highlight moves to
the first available chapter number
for this title.
2. Use 4 or 3 to select the required
chapter number.
3. Press ENTER to confirm the
selection. The title/chapter
selection will be added to the list of
selections.
4. Press RETURN to exit the F T S
menu.
Storing Titles/Tracks
1. Press 6 to select TITLES
TITLES.
2. Use 4 or 3 to select the required
title.
3. Press ENTER if you wish to store
the entire title. The title number
will be added to the list of
selections.
Erasing a FTS-Video Program
1. In STOP mode, press DISPLAY then
select
in the menu bar.
2. Use 6 to select PROGRAM
PROGRAM.
3. Use4 or 3 to select the required
selection number.
4. Press ENTER to erase the selection.
17
Operating Instructions
5. Press RETURN to exit.
Erasing All Selections:
1. In STOP mode, press MENU then
select
in the menu bar.
2. Use 6 to select CLEAR ALL
ALL.
3. Press ENTER. All selections will now
be erased.
4. Press RETURN to exit. FTS will turn
off.
18
Wireless Headphones
To ensure the best performance from
your wireless headphones, please read
this information carefully.
Features
• Automatic Level Control prevents
input signal overloading
• Uses high-frequency infrared light
to assure a clean signal for clear
reception
• Adjustable headphone band for
proper fit.
• Auto off battery power saving
feature automatically turns off
headphones if no infrared signal is
received within 3-4 minutes.
1
Explanation of Controls
1. Infrared Transmitter
Transmits audio signal to
the headphones.
Headphone Receivers
L
R
2
3
6
5
4
2. Infrared Sensors
Receive audio signal from the
transmitter.
3. Battery Cover
To replace the batteries, use a coin
to turn the screw and remove the
cover.
4. Volume Control
Use to adjust headphone
volume.
5. Power Button
Turns headphone power
ON/OFF.
6. Power Indicator LED
Is on when headphones are ON.
Auto Off
The battery power-saving feature
automatically turns off the
headphones if no infrared signal is
received within 3-4 minutes.
NOTE: Do not cup your hands over the
earpiece when adjusting the volume. This
may interfere with the signal to the
headphones.
19
Wireless Headphones
Battery Replacement
• Use a quarter or similar item to
remove the battery cover.
• Place two alkaline AAA batteries into
the battery compartment of the
headphones, making sure the
batteries are properly installed.
• Install the battery cover, use a coin
to tighten it.
Operation
Please read carefully to prevent damage
to the headphones or your ears.
• Be sure the batteries are properly
installed in the headphones.
20
• Turn the headphone volume nearly
OFF before turning on the power.
Turn on the headphone power
switch, then adjust the headphone
volume to a comfortable level.
Make sure you turn OFF the power
switch before storing the
headphones.
Adjusting Headphones
The headphones may be adjusted to
fit more comfortably. While holding
the top of the headphones, pull down
on each earpiece to make the straps
longer, or push up on each earpiece to
make the straps shorter.
Auxiliary Input Device Connection
Connecting Auxiliary Video
Equipment
VEHICLE
The in-VEHICLE
ENTERTAINMENT
SYSTEM accepts video and audio
RCA type connectors for all standard
video games and video equipment
(such as camcorders) in the auxiliary
input jacks of the media control panel.
Playing Video Games
• Connect the video line to the
YELLOW jack.
• Connect the left and right audio
cables to the WHITE and RED jacks
respectively.
• Turn the video game power ON.
• Press the DVD player power. The
LCD screen will be turned ON.
• View the game on the LCD flip-down
screen. Adjust screen brightness
with the buttons.
Using Auxiliary Video Equipment
• Connect the video line to the
YELLOW jack.
• Connect the left and right audio
wires to the WHITE and RED jacks
respectively.
• Follow the operating instructions for
the video equipment.
NOTE: Auxiliary video equipment can be
powered by the power outlet. It may
require a 12-volt DC to 120-volt AC
power inverter.
NOTE: If a disc is not inserted, system
will default to auxiliary mode.
If a disc is inserted, press DVD AUX to
change modes.
21
Care of the DVD Player
Environmental Extremes
DVD players subjected to harsh
environmental conditions may be
damaged or operate at less than
maximum performance. To prevent
damage or degraded performance of
the DVD player, remote control or
DVD, try to avoid leaving the vehicle:
• in extremely hot or cold
temperatures
• in direct sunlight
• in high humidity
• in a dusty environment
• in locations where strong magnetic
fields are generated
• on a surface that is unstable or
subject to vibrations
• Your cellular phone may cause noise
in the infrared headphones
22
Temperature Extremes
If the vehicle is parked in the sun or in
an extremely cold place for a long
time, wait until the interior
temperature is normal before
operating the system.
Humidity and Moisture
Condensation
Moisture in the air will condense on
the DVD player under extremely humid
conditions or when you move from a
cold place to a warm place. If you
encounter moisture condensation, do
not insert a DVD into the player. If a
DVD is in the player, remove it. Turn
power ON to the DVD player to dry
the moisture before inserting a DVD.
In some cases, this may take an hour
or more.
Cleaning
Foreign Substances
Exercise care to prevent dirt and
foreign objects from entering the DVD
player. Be especially careful not to spill
liquids of any kind onto the DVD
player. If you accidentally spill liquid
onto the system, immediately turn the
system OFF and consult a qualified
service technician.
Cleaning the Display Screen
Clean the display screen with 70%
isopropyl alcohol (rubbing alcohol) or
an ammonia-based glass cleaner. Apply
a small amount of cleaner to a soft
cloth and rub gently until dirt or
fingerprints are removed. To prevent
damage to the electronics, do not
spray the screen directly. Do not apply
excessive pressure while cleaning.
Cleaning the Console
Clean the outside of the console with
a soft cloth dampened with water. Take
care to not get the controls or DVD
player wet.
23
Troubleshooting
Use the following troubleshooting chart to remedy symptoms you may experience. If the problem is not readily
corrected, consult your Honda dealer.
Symptom
No system power. Ignition ON,
power indicator light is OFF.
DVD does not operate.
24
Possible Cause
Power line disconnected, shorted or
damaged. Blown fuse.
Machine or disc has dew or is
damp inside.
Solution
Check vehicle’s 15 amp fuse.
Contact your dealer.
Wait until DVD player or disc
becomes dry. May take several
hours.
Temperature too high.
Wait until vehicle cabin temperature
cools down.
Voltage exceeded 18 v. Overvoltage
protection circuit is operating.
Power off the DVD player and
contact dealer to service.
Function indicators don’t disappear Incorrect display mode.
from screen.
Press the DISPLAY button on the
remote control.
No audio from DVD player or AUX
source on vehicle speakers.
Not in speaker mode.
Press FM modulator
ON/OFF speaker switch.
Radio not tuned to proper
frequency.
Tune radio to 87.9 MHz, or
designated preset frequency.
Troubleshooting
Symptom
Cannot tune radio after listening
to video system speakers.
Possible Cause
Audio output through video system’s
FM modulator instead of
vehicle antenna.
No audio from wireless headphones. Dead batteries in headphones.
Headphone power switch not on.
Volume set too low
on headset.
IR path blocked.
Video Screen displays “Disc Play
Error”
Video Screen displays “Load/Eject
Error”
Solution
Press FM modulator ON/OFF
speaker switch to disengage FM
modulator.
Replace batteries.
Turn on power switch.
Raise volume level
on headset.
Move obstacle from line of sight
between IR headphone and IR
transmitter.
No batteries.
Non-playable disc, excessively
scratched disc, excessive vehicle
vibration.
Put batteries in.
Player will automatically attempt
to find the next readable location
on the disc and resume play if
possible. Check and replace disc
if necessary.
Disc is not properly oriented in the
mechanism or disc is wrong size or
warped.
Remove disc and attempt to
re-insert. Do not force the disc into
the slot. Replace disc if necessary.
25
Troubleshooting
Symptom
Video screen displays “Disc Format
Error”
Possible Cause
Disc is inserted upside down, disc is
unable to be read, or disc format is
incompatible.
Video screen displays “Region Code Non-region 1 disc.
Error”
Video screen displays “Disc Not
No disc in player when eject
Present”
command is received.
No power at power outlet or DVD
Blown fuse.
player
26
Solution
Remove disc and insert right-side
up. Only use discs with compatible
formats (DVD, CD Audio).
Use discs labeled as region 1 or
All Regions.
No action required.
Check vehicle’s 15 amp fuse.
Contact your dealer.
Safety Information
Precautions
This display is intended for rear seat
passenger viewing only – out of the
driver’s view. Installation within the
driver’s view is illegal in most states,
provinces and countries and may lead
to driver distraction.
Do not insert foreign objects into the
DVD player.
WARNING! The front glass on the
liquid crystal display may break when
hit with a hard surface. If the glass
breaks, do not touch the liquid
crystalline material. In case of contact
with skin, wash immediately with soap
and water.
CAUTION: Do not expose the liquid
crystal display to direct sunlight or
intense ultraviolet rays for extensive
time periods. Ultraviolet rays
deteriorate the liquid crystal.
Please be sure to review the owner’s
manuals, consumer information and
precaution booklets for all video
games and video equipment that you
use as auxiliary inputs for your
VEHICLE
in-VEHICLE
ENTERTAINMENT
SYSTEM
SYSTEM.
Do not operate video games and video
equipment if the power cords or cables
are broken, split or damaged.
Avoid touching auxiliary input jacks
with your fingers. Do not blow on
them or allow them to get wet or dirty.
Do not clean any part of the unit with
benzene, paint thinner or any other
solvent.
27
Safety Information
Electrical Cautions and Warnings
CAUTION
Risk of Electrical
Shock
Do not open system.
CAUTION: To reduce the risk of
electrical shock, do not remove
system cover (or back). No userserviceable parts are inside. Refer
servicing to qualified service
personnel.
A lightning flash with
arrowhead symbol within a
triangle is intended to alert
the user to the presence of
uninsulated “dangerous voltage” within
the product’s enclosure. The voltage
may be of sufficient magnitude to
constitute a risk of electric shock.
28
An exclamation point within
triangle is intended to alert
the user to the presence of
important operating and maintenance
(servicing) instructions in the literature
accompanying the appliance.
WARNING! To prevent fire or shock
hazard, do not expose this unit to
rain or moisture.
CAUTION: This DVD player should
be used with 12V DC only. To
prevent electrical shocks and fire
hazards, DO NOT use any other
power source.
Federal Communications Commission (FCC) Compliance
Federal Communications
Commission (FCC) Compliance
Change or modifications not approved
by Honda could void user’s authority
to operate the equipment. This
equipment has been tested and found
to comply with the limits for a Class B
digital device, pursuant to Part 15 of
the FCC Rules. These limits are
designed to provide reasonable
protection against harmful interference
in a residential installation. This
equipment generates, uses and can
radiate radio frequency energy and, if
not installed and used in accordance
with the instructions, may cause
harmful interference to radio
communications.
However, there is no guarantee that
interference will not occur in a
particular installation. If this
equipment does cause harmful
interference to radio or television
reception, which can be determined by
turning the equipment off and
on, the user is encouraged to try to
correct the interference by one or
more of the following measures:
• Reorient or relocate the receiving
antenna.
• Increase the separation between the
equipment and receiver.
29
© American Honda Motor Co., Inc. 2002 All Rights Reserved
REF. NO.: 0823-9E1-0100
VP3BQF-044D34-AANH293L
08A23-9E1-AM00-81
VP3BQF-19A016-AB
Printed in U.S.A.