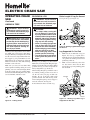
1
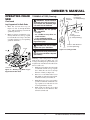
ELECTRIC CHAIN SAW
OWNER’S MANUAL
®
Model: UT13130
IMPORTANT: Read and understand this manual before assembling
or operating this chain saw. Improper use of saw can cause severe
injury. Keep this manual for future reference.
ELECTRIC CHAIN SAW
SAFETY
WARNINGS
Make certain you read and understand all Safety Warnings on
pages 2 and 3. Improper use of
this chain saw can cause severe
injury or death from fire, electrical
shock, body contact with moving
chain, or falling wood.
BEFORE OPERATING SAW
1. Read and understand this owner’s
manual before operating chain saw.
2. Watch what you are doing. Use common sense. Do not operate saw when
you are tired.
3. Use chain saw for cutting wood only.
Do not use chain saw for purpose not
intended. Do not use for cutting plastic,
masonry, etc.
4. Only well-instructed adults should operate chain saw. Never allow children
to operate chain saw.
5. Use only electrical voltage noted on
model plate of chain saw.
6. Use only extension cords marked for
outdoor use. See page 8 for extension
cord requirements.
7. Do not operate chain saw
• while under the influence of alcohol,
medication, or drugs
• in rain or in damp or wet areas
• where highly flammable liquids or
gases are present
• if saw is damaged, adjusted wrong,
or not fully and securely assembled
• if trigger does not turn saw on and off.
Chain must stop moving when you
release trigger. Have faulty switch replaced by authorized service center.
• while in a hurry
• while in tree or on a ladder unless
trained to do so
8. Wear snug-fitting clothes when operating chain saw. Do not wear loose clothing or jewelry. They can get caught in
moving saw chain.
9. Wear the following safety gear when
operating chain saw.
• heavy-duty gloves (wear rubber
gloves when working outdoors)
• steel-toed safety footwear with nonskid soles
• eye protection such as safety glasses,
goggles, or face screen
• safety hard hat
• ear mufflers or ear plugs
• hair covering to contain long hair
• face or dust mask (if working in dusty
areas)
10. Before cutting, always provide the following:
• clear work area
• secure footing
• planned retreat path from falling tree
11. Inspect tree before cutting down. Make
sure there are no dead limbs or branches
that may fall on you.
12. To reduce the risk of electric shock, this
saw has a polarized plug (one blade is
wider than the other). This plug will fit
in a polarized outlet only one way. If the
plug does not fit fully in the outlet of
your extension cord, reverse the plug. If
it still does not fit, a polarized extension
cord will be necessary. Do not change
the plug in any way.
While operating saw
1. Stay alert. Use common sense while
operating chain saw.
2. Keep work area clean. Cluttered areas
invite injuries.
3. Be aware of extension cord while operating chain saw. Be careful not to trip
over cord. Keep cord away from chain
and operator at all times.
4. Keep children, animals, and bystanders
away from chain saw and extension
cord. Only chain saw user should be
in work area.
5. Do not cut down a tree unless you are
trained or have expert help.
6. If two or more persons perform bucking
and felling operations at the same time,
provide plenty of distance between
operations. Provide distance of at least
twice the height of tree being felled.
7. Secure wood you are cutting by using
clamps or chocks.
8. Grip chain saw firmly with both hands.
Never operate chain saw with one hand.
Never use hand guard as handle.
9. Keep finger off trigger until ready to
make cut.
10. Before starting chain saw, make sure
chain is not touching anything.
11. To guard against electrical shock, avoid
For more information, visit www.desatech.com
body contact with grounded objects such
as pipes, fences, and metal posts.
12. Keep all parts of body away from chain
when saw is running.
13. Do not force chain saw while cutting.
Apply light pressure. It will do the job
better and safer at the rate for which it
was intended.
14. Cut small brush and saplings with extreme care. Slender material may catch
in chain and be whipped toward you.
This could also pull you off balance.
15. When cutting limb or tree trunk that is
under tension, use extreme caution. Be
alert for wood springing back. When
wood tension is released, limb could
spring back and strike operator causing
severe injury or death.
16. Carry chain saw from one place to
another
• with saw stopped and unplugged
• by holding front handle (never use
hand guard as handle)
• with finger off trigger
• with guide bar and chain to rear
WARNING: This product
contains chemicals known to
the State of California to cause
cancer or birth defects, or other
reproductive harm.
WARNING: Some dust created
by power sanding, sawing, grinding, drilling, and other construction activities contains chemicals
known (to the state of California)
to cause cancer, birth defects, or
other reproductive harm. Some examples of these chemicals are:
• lead from lead-based paints
• crystalline silica from bricks
and cement and other masonry
products
• arsenic and chromium from
chemically-treated lumber
Your risk from these exposures
varies, depending on how often
you do this type of work. To reduce
your exposure to these chemicals:
work in a well ventilated area, and
work with approved safety equipment, such as those dust masks
that are specially designed to filter
out microscopic particles.
120693
OWNER’S MANUAL
MAINTENANCE AND
STORAGE OF CHAIN SAW
SAFETY
WARNINGS
KICKBACK
WARNING: Kickback may
occur when the nose or tip of
the guide bar touches an object,
or when the wood closes in and
pinches the saw chain in the cut.
Tip contact in some cases may
cause a lightning fast reverse
reaction, kicking the guide bar up
and back towards the operator.
Pinching the saw chain along the
top of the guide bar may push the
guide bar rapidly back towards
the operator. Either of these reactions may cause you to lose
control of the saw which could
result in serious injury to user.
Kickback Safety Devices On
This Saw
This saw has a low-kickback chain and
reduced kickback guide bar. Both items
reduce the chance of kickback. Kickback
can still occur with this saw.
Properly install front hand guard. This item
can reduce injuries from kickback. Follow
assembly instructions on page 6. Do not
remove front hand guard. Do not replace
front hand guard with substitute.
The following steps will reduce the risk of
kickback.
• Use both hands to grip saw while saw
is running. Use firm grip. Thumbs and
fingers must wrap around saw handles.
• Keep all safety items in place on saw.
Make sure they work properly.
• Do not overreach or cut above shoulder
height.
• Keep solid footing and balance at all
times
• Stand slightly to left side of saw. This
keeps your body from being in direct line
with chain.
• Do not let guide bar nose touch anything
when chain is moving (see Figure 1).
120693
Direction
Do Not Let
Guide Bar
Touch Here
90°
Quadrant
Figure 1 - Kickback Hazard Example: Do
Not Let Nose of Guide Bar Touch Object
While Chain is Moving
• Never try cutting through two logs at
same time. Only cut one log at a time.
• Do not bury guide bar nose or try plunge
cut (boring into wood using guide bar
nose).
• Watch for shifting of wood or other forces
that may pinch chain.
• Use extreme caution when reentering a
previous cut.
• Use low-kickback chain and guide bar
supplied with this chain saw. Only replace these parts with chains and guide
bars listed in this manual.
• Never use dull or loose chain. Keep chain
sharp with proper tension.
• Do not hand sharpen chain on automatic
chain sharpening (Fast Sharp) models.
Saw Maintenance and Kickback
Safety
Follow maintenance instructions in this
manual. Proper cleaning of saw and chain
and guide bar maintenance can reduce
chances of kickback. Inspect and maintain
saw after each use. This will increase the
service life of your saw. Note: Even with
proper sharpening, risk of kickback can
increase with each sharpening.
1. Unplug chain saw from power source
• when not in use
• before moving from one place to
another
• before servicing
• before changing accessories or attachments, such as saw chain and
guard
2. Inspect chain saw before and after each
use. Check saw closely if guard or other
part has been damaged. Check for any
damage that may affect operator safety
or operation of saw. Check for alignment or binding of moving parts. Check
for broken or damaged parts. Do not
use chain saw if damage affects safety
or operation. Have damage repaired by
authorized service center.
3. Maintain chain saw with care.
• Never expose saw to rain.
• Keep chain sharp, clean, and lubricated for better and safer performance.
• Follow steps outlined in this manual
to sharpen chain.
• Keep handles dry, clean, and free of
oil and grease.
• Keep all screws and nuts tight.
• Inspect power cord often. If damaged, have repaired by authorized
service center.
• Never carry chain saw by power
cord.
• Never yank power cord to unplug it.
• Keep power cord from heat, oil, and
sharp edges.
• Inspect extension cords often and
replace if damaged.
4. When servicing, use only identical
replacement parts.
5. When not in use, always store chain saw
• in a high or locked place, out of
children’s reach
• in a dry place
• in a carrying case or with scabbard
over guide bar
Keep this manual for reference. It is your
guide to safe and proper operation of this
chain saw.
For more information, visit www.desatech.com
ELECTRIC CHAIN SAW
Chain saw names
and terms
Bucking Process of cutting a felled tree or
log into lengths.
Felling Process of cutting down a tree.
Felling Cut Final cut when felling a tree.
Make this cut on opposite side of tree from
notching cut.
Front Handle Located at front of saw
body.
Front Hand Guard Shield between front
handle and guide bar. Protects left hand
while using saw.
Guide Bar Metal bar that extends from saw
body. The guide bar supports and guides
chain.
Guide Bar Nose Tip or end of guide bar.
Kickback Quick backward and upward
motion of guide bar. Kickback may occur
when tip of guide bar touches an object while
chain is moving. The guide bar will kick up
and back towards operator.
Limbing Process of cutting limb(s) from
a felled tree.
Low-Kickback Chain Chain that reduces
chance of kickback as required by ANS
B175.1.
Spiked Bumper (Spike) Pointed teeth at
Normal Cutting Position Stance used while
making bucking and felling cuts.
front of saw body beside guide bar. Keep
spiked bumper in contact with wood when
felling or bucking. It helps maintain position
of saw while cutting.
Notching Cut Notch cut in tree that directs
Sprocket Toothed wheel that drives
fall of tree.
chain.
Oiler Control System for oiling guide bar
Switch Device that completes or interrupts
and chain.
electrical circuit to motor of saw.
Power Head Chain saw without chain and
Switch Linkage This device connects
switch to trigger. It moves switch when you
squeeze trigger.
guide bar. Also known as saw body.
Pushback (Kickback, Pinch) Rapid push-
back of chain saw. Pushback may occur if
chain along top of guide bar is pinched,
caught, or contacts a foreign object.
Switch Lockout Device that reduces ac-
cidental starting of saw.
Rear Handle Handle located at rear of
Trigger Device that turns saw on and off.
Squeezing trigger turns saw on.
saw body.
Releasing trigger turns saw off.
Reduced Kickback Guide Bar Guide bar
that reduces chance of kickback.
Trimming (Pruning) Process of cutting
limb(s) from a living tree.
Replacement Chain Chain that complies
Undercut An upward cut from underside
of log or limb. This is done while in normal
cutting position and cutting with top of
guide bar.
with ANS B175.1 when used with a specific
saw. It may not meet ANS requirements when
used with other saws.
Saw Chain (Chain) Loop of chain having
cutting teeth for cutting wood. The motor drives chain. The guide bar supports
chain.
For more information, visit www.desatech.com
120693
OWNER’S MANUAL
PRODUCT
IDENTIFICATION
Front Hand
Guard
UNPACKING
1. Remove all items from carton.
2. Check all items for any shipping damage. If you find any damage or if any
parts are missing, promptly inform
dealer where you bought chain saw.
Guide Bar
Nose
Saw
Chain
Rear
Handle
Guide Bar
Sprocket
Cover
Rear Hand
Guard
Scabbard
Power Cord
Oil Level Sight Hole
(located on saw body,
hidden by front handle)
Oil Cap With
Squeeze Bulb
Front Handle
Spike
Motor
Housing
Switch
Lockout
Trigger
Figure 2 - Electric Chain Saw
120693
For more information, visit www.desatech.com
ELECTRIC CHAIN SAW
ASSEMBLY
Note: Some models are pre assembled. Assembly is not needed on these models.
See Saw Chain Tension Adjustment, page 7.
WARNING: Cutting edges on
chain are sharp. Use protective
gloves when handling chain.
8. Place chain around drive sprocket,
then along top groove of guide bar and
around guide bar nose. Note: Make
sure cutting edges of chain are facing
the right direction. Position chain so
cutting edges on top of guide bar face
guide bar nose (see Figure 3).
Tapping
Screw
IMPORTANT: Do not clamp chain
saw in vise during assembly.
The plastic hardware bag should include: • two guide bar bolts
• two guide bar nuts
• one Phillips-head tapping screw
• automatic chain sharpener (Fast Sharp
models only)
1. Lay chain out flat.
2. Install front hand guard onto saw body.
Do this by pressing two mounting standouts on hand guard into hex-shaped
holes in saw body (see Figure 3).
3 Insert tapping screw through hand
guard and into saw handle. Tighten
screw firmly.
4. Turn adjusting screw counterclockwise
(see Figure 4). Continue to turn adjusting screw until adjusting block is to rear
of adjusting plate.
5. Install guide bar onto saw body. Place
rear of guide bar between adjusting
plate and sprocket support.
IMPORTANT: Make sure to insert
adjusting block into oval adjusting hole
on guide bar.
6. Line up holes on sprocket support with
center slot on guide bar and holes in
saw body.
7. Insert guide bar bolts through front
hand guard, saw body, center slot of
guide bar, and sprocket support. Attach
guide bar nuts to guide bar bolts.
IMPORTANT: Tighten guide bar nuts
finger tight only. Make sure adjusting
block is in oval adjusting hole on guide
bar.
CAUTION: Do not place chain
on saw backwards. If chain is
backwards, saw will vibrate badly
and will not cut.
9. Adjust saw chain tension. Follow steps
under Saw Chain Tension Adjustment,
page 7.
Front Hand
Guard
Towards
Guide
Bar Nose
Cutting
Edge
Cutting
Edge
Guide Bar
Bolts
Mounting
Stand-Outs
Saw
Chain
Drive
Sprocket
Guide
Bar
Adjusting
Hole
Guide Bar
Nuts
Figure 3 - Assembling Guide Bar, Chain, and Hand Guard
Adjusting
Block
Adjusting
Plate
Adjusting
Screw
Sprocket
Support
Figure 4 - Part Locations For Assembling Guide Bar
For more information, visit www.desatech.com
120693
OWNER’S MANUAL
SAW CHAIN
TENSION
ADJUSTMENT
WARNING: Unplug chain saw
from power source before adjusting saw chain tension.
4. After chain tension is correct, tighten
guide bar nuts firmly. If not, guide bar
will move and loosen chain tension.
This will increase the risk of kickback.
This can also damage saw. Note: A new
chain will stretch. Check new chain
after first few minutes of operation.
Allow chain to cool down. Readjust
chain tension.
WARNING: Cutting edges on
chain are sharp. Use protective
gloves when handling chain.
FILLING OIL TANK
1. Remove oil cap.
2. Fill oil tank with SAE #30 motor oil.
Note: For temperatures below 30°F, use
SAE #10 oil. For temperatures above
75°F, use SAE #40 oil.
3. Replace oil cap at once. Tighten oil cap
firmly for good seal. This will avoid oil
seepage from tank.
4. Wipe off excess oil.
Note: It is normal for oil to seep when saw
is not in use. Empty oil tank after each use
to prevent seepage.
WARNING: Maintain proper
chain tension always. A loose
chain will increase the risk of
kickback. A loose chain may jump
out of guide bar groove. This
may injure operator and damage
chain. A loose chain will cause
chain, guide bar, and sprocket to
wear rapidly.
Note: For pre-assembled models, the saw
chain tension is properly set at factory. A
new chain will stretch. Check new chain
after first few minutes of operation. Allow Figure 5 - Turning Adjusting Screw
chain to cool down. Follow steps below to
readjust saw chain tension.
Guide Bar Nuts
1. Before adjusting chain, make sure guide
bar nuts are only finger tight (see Figure
3, page 6). Also make sure adjusting block
is in oval adjusting hole on guide bar (see
Figures 3 and 4, page 6).
Guide Bar
2. Turn adjusting screw clockwise until
all slack is out of chain (see Figure 5). Note: There should be no gap between
Guide Bar
side links of chain and bottom of guide
bar (see Figure 6).
Correct
3. Wearing protective gloves, move chain
Tension
Gap
around guide bar. Chain should move
freely. If chain does not move freely,
Incorrect
loosen chain by turning adjusting screw
Tension
counterclockwise.
Figure 6 - Saw Chain Adjustment
120693
For more information, visit www.desatech.com
ELECTRIC CHAIN SAW
OPERATING CHAIN
SAW
Keep cord away from cutting area. Make
sure cord does not catch on branches or logs
during cutting. Inspect cords often. Replace
damaged cords.
WARNING: Read and understand this owner’s manual before
operating this saw. Make certain
you read and understand all
Safety Warnings, pages 2 and 3.
Improper use of this chain saw
can cause severe injury or death
from fire, electrical shock, or body
contact with moving chain, or
falling wood.
The extension cord may come undone from
the power cord during use. To avoid this,
make a knot with the two cords as shown
in Figure 7 below.
Chain Saw
Power Cord
Extension
Cord
Extension Cords
Use proper extension cords with this saw.
Use only extension cords marked for outdoor
use. The cord must be marked with suffix W
or W-A following the cord type designation.
Example: SJTW-A or SJTW.
Use proper sized cord with this saw. Cord
must be heavy enough to carry current
needed. An undersized cord will cause voltage drop at saw. Saw will lose power and
overheat. Follow cord size requirements
listed below.
Cord Length
AWG Cord Size
25 feet
16 AWG
50 feet
16 AWG
100 feet
16 AWG
150 feet
14 AWG
Figure 7 -Tying Extension Cord and Power
Cord in Knot
OILING CHAIN
Always check oil level before using saw. To
oil chain, press squeeze bulb on oil cap. Do
not attempt to operate the oiler while cutting
with the saw. Oil will feed onto guide bar
and chain. Press squeeze bulb on oil cap at
least once before each cut. Check oil level
often by looking at oil sight level hole. Oil
sight level hole is on left side of saw, between
front handle and front hand guard.
Model: UT13130
CUTTING WITH THE CHAIN
SAW
1. Connect saw to extension cord. Connect extension cord to power supply.
2. Make sure section of log to be cut is
not laying on ground. This will keep
chain from touching ground as it cuts
through log. Touching ground with
moving chain will dull chain.
3. Use both hands to grip saw. Always use
left hand to grip front handle and right
hand to grip rear handle. Use firm grip.
Thumbs and fingers must wrap around
saw handles (see Figure 9).
4. Make sure your footing is firm. Keep
feet apart. Divide your weight evenly
on both feet.
5. When ready to make a cut, press in
switch lockout with right thumb and
squeeze trigger (see Figure 9). This
will turn saw on. Releasing trigger will
turn saw off. Make sure saw is running
at full speed before starting a cut.
6. When starting a cut, place moving chain
against wood. Hold saw firmly in place
to avoid possible bouncing or skating
(sideways movement) of saw.
7. Guide saw using light pressure. Do not
force saw. The motor will overload and
can burn out. It will do the job better
and safer at the rate for which it was
intended.
8. Remove saw from a cut with saw running at full speed. Stop saw by releasing
trigger. Make sure chain has stopped
before setting saw down.
9. Practice until you can maintain a steady,
even cutting rate.
Switch
Lockout
Figure 8 - Pressing Squeeze Bulb on Oil
Cap to Oil Chain
Trigger
Figure 9 - Switch Lockout and Trigger
Location
For more information, visit www.desatech.com
120693
OWNER’S MANUAL
operating chain
saw
Direction
of Fall
Retreat
Path
Direction
of Fall
Continued
FELLING A TREE
2
Inches
(Cutting Down a Tree)
45°
•
•
•
•
WARNING:
Avoid kickback. Kickback can
result in severe injury or death.
See Kickback, page 3 to avoid
risk of kickback.
Do not fell a tree without ample
skill or expert help.
Keep children, animals, and
bystanders away from area
when felling a tree.
If two or more persons perform
bucking and felling operations
WARNING:When felling a tree,
be aware of your surroundings.
Do not endanger any person,
strike utility lines, or cause property damage. If tree strikes utility
lines, contact utility company at
once.
Felling is the process of cutting down a tree.
Make sure your footing is firm. Keep feet
apart. Divide your weight evenly on both feet.
Follow directions below to fell a tree.
Before Felling a Tree
1. Before felling, inspect tree. Make sure
there are no dead limbs or branches that
may fall on you. Study natural lean of
tree, location of larger branches, and
wind direction. This will help you judge
which way tree will fall.
2. Clear work area around tree.
3. Plan and clear a retreat path before
felling. Make retreat path opposite to
planned direction of fall of tree and at
45° angle (see Figure 10).
4. Remove dirt, stones, loose bark, nails,
staples, and wire from tree where you
will make felling cuts.
5. Stay on uphill side when felling tree.
Tree could roll or slide downhill after
falling.
Hinge
3rd Cut Felling Cut
2"
Retreat
Path
2nd Cut Upper
Notch Cut
1st Cut Lower
Notch Cut
Tree
Figure 10 - Retreat Path From Tree
Felling Procedure
A) Felling Notch
A properly placed felling notch will determine direction tree will fall. Place felling
notch on side of tree in direction you want
tree to fall (see Figure 11). Follow directions
below to create a felling notch.
1. Make lower notch cut as close to
ground as possible. Hold saw so guide
bar is horizontal. Cut 1/3 the diameter
of tree trunk (see Figure 11). Note: Always make this horizontal lower notch
cut first. If you make this cut second,
tree can pinch chain or guide bar.
2. Start upper notch cut the same distance
above first cut as first cut is deep.
Example: If lower notch cut is eight
inches deep, start upper notch cut eight
inches above it. Cut downward at 45°
angle. The upper notch cut should meet
end of lower notch cut (see Figure 11).
3. Remove tree trunk wedge created by
notching cuts.
Figure 11 - Felling A Tree
3. As felling cut nears hinge, tree should begin to fall. Note: If needed, drive wedges
into felling cut to control direction of
fall. If tree settles back and pinches
chain, drive wedges into felling cut to
remove saw. Only use wedges made of
wood, plastic, or aluminum. Never use
wedge made of steel. This could cause
kickback and damage to chain.
4. When tree begins to fall, quickly
• remove saw from felling cut
• release trigger to turn saw off
• put saw down
• exit area using retreat path
WARNING: Be alert for falling
overhead limbs. Watch your footing while exiting area.
B) Felling Cut
1. Make felling cut two inches higher than
lower notch cut and on opposite side of
tree (see Figure 11). Keep felling cut
parallel to lower notch cut.
2. Cut towards notch.
WARNING: Do not cut all the
way through tree. Leave about
two inches of tree diameter uncut
directly behind felling notch (see
Figure 11).This uncut portion acts
as a hinge. The hinge helps keep
tree from twisting and falling in
wrong direction.
Continued
120693
For more information, visit www.desatech.com
ELECTRIC CHAIN SAW
OPERATING CHAIN
SAW
Continued
LIMBING A TREE
WARNING: Avoid kickback.
Kickback can result in severe injury or death. See Kickback, page
3 to avoid risk of kickback.
WARNING: When cutting limb
that is under tension, use extreme
caution. Be alert for wood springing back. When wood tension is
released, limb could spring back
and strike operator causing severe injury or death.
Limbing is removing branches from a fallen
tree. Make sure your footing is firm. Keep
feet apart. Divide your weight evenly on both
feet. Do not remove larger limbs under tree
that support log off ground. Remove each
limb with one cut (see Figure 12). Clear cut
limbs from work area often. This will help
maintain a safe work area.
Make sure you start your cut where limb
will not pinch saw during cutting. To avoid
pinching, start cut on freely hanging limbs
from above limb. Start cut on limbs under
tension from under limb. If pinch occurs, turn
saw off, lift limb, and remove saw.
BUCKING A LOG
WARNING: Avoid kickback.
Kickback can result in severe injury or death. See Kickback, page
3 to avoid risk of kickback.
WARNING:
• If on slope, make sure log will
not roll down hill. Secure log
by using wooden stakes. Drive
wooden stakes into ground on
downhill side of log. Stand on
uphill side of log while cutting.
Log may roll after cutting.
• Never try cutting through two
logs at same time. This could
increase the risk of kickback.
• While cutting log, never hold log
with your hand, leg, or foot.
• While cutting log, never allow
another person to hold log.
• Turn off and unplug saw before
moving from one place to another.
Bucking a log is cutting a log into sections.
Make sure your footing is firm. Keep feet apart.
Divide your weight evenly on both feet. When
possible, raise log or section off ground. Do
this by using limbs, logs, chocks, etc.
When cutting through log, maintain control
by reducing cutting pressure near end of
cut. Do not relax your grip on chain saw
handles. Do not let moving chain touch
ground. Ground will dull moving chain.
After cutting through log, release trigger to
turn saw off before moving saw.
Entire Length Of Log On Ground
Cut log from top (see Figure 13).
Figure 13 - Bucking Log With Entire Length
On Ground
Log Supported On One End
1. Make first cut on underside of log (see
Figure 14). Use top of guide bar to
make this cut. Cut 1/3 through diameter
of log. This cut will keep section from
splintering when cut.
2. Make second cut directly above first
cut. Cut down to meet first cut. This
cut will keep log from pinching guide
bar and chain.
2nd Cut
Follow directions below to buck a log.
1st Cut
Figure 14 - Bucking Log When Log Is
Supported On One End
Figure 12 - Limbing A Tree
For more information, visit www.desatech.com
10
120693
OWNER’S MANUAL
operating chain
saw
Continued
Log Supported On Both Ends
1. Make first cut from above log (see
Figure 15). Cut 1/3 through diameter
of log. This cut will keep section from
splintering when cut.
2. Make second cut on underside of log,
directly under first cut. Use top of guide
bar to make this cut. Cut up to meet first
cut. This will keep log from pinching
guide bar and chain.
1st Cut
TRIMMING A TREE (Pruning)
WARNING: Avoid kickback.
Kickback can result in severe injury or death. See Kickback, page
3 to avoid risk of kickback.
WARNING: Do not operate
chain saw while
• in a tree
• on a ladder or any other unstable surface
• in any awkward position
You may lose control of saw causing severe injury.
WARNING: Do not cut limbs
higher than your shoulders.
CAUTION: Seek professional
help if facing conditions beyond
your ability.
2nd Cut
Figure 15 - Bucking Log When Log Is
Supported On Both Ends
120693
4th Cut Final Stub
Cut
2nd Cut Pruning Cut
(to avoid pinching)
6"
2" to 4"
1st Cut Pruning Undercut
(to avoid splintering)
3rd Cut - Stub Undercut
(to avoid splintering)
Figure 16 - Cutting A Limb
Trimming a tree is the process of cutting
limbs from a living tree. Make sure your
footing is firm. Keep feet apart. Divide your
weight evenly on both feet. Follow directions
below to trim a tree.
1. Make first cut six inches from tree trunk
on underside of limb. Use top of guide
bar to make this cut. Cut 1/3 through
diameter of limb (see Figure 16).
2. Move two to four inches farther out on
limb. Make second cut from above limb.
Continue cut until you cut limb off.
3. Make third cut as close to tree trunk as
possible on underside of limb stub. Use
top of guide bar to make this cut. Cut 1/3 through diameter of stub.
4. Make fourth cut directly above third
cut. Cut down to meet third cut. This
will remove limb stub.
11
For more information, visit www.desatech.com
ELECTRIC CHAIN SAW
CLEANING AND
MAINTENANCE
NOTICE: Below are instructions
for servicing your chain saw. Any
servicing not mentioned below
should be done by an authorized
service center.
CLEANING SAW BODY
WARNING: Unplug chain saw
from power source before servicing. Severe injury or death could
occur from electrical shock or
body contact with moving chain.
CARE OF GUIDE BAR
Normal Guide Bar Maintenance
Uneven bar wear causes most guide bar
problems. Incorrect sharpening of chain
cutter and depth gauge settings often cause
this. When bar wears unevenly, it widens
guide bar groove (see Figure 17). This
causes chain clatter and rivet popping. Saw
will not cut straight. Replace guide bar if
this occurs.
1. Remove guide bar from chain saw.
2. Remove sawdust from guide bar groove
periodically. Use putty knife or wire.
3. Clean oil slots after each day of use.
4. Remove burrs from sides of guide
bar. Use flat file to make side edges
square.
Inspect guide bar before sharpening chain.
A worn or damaged guide bar is unsafe. A
worn or damaged guide bar will damage
chain. It will also make cutting harder.
Guide Bar
Groove
Replace guide bar when
• bar is bent or cracked
• inside groove of bar is badly worn
Note: When replacing guide bar, see Replacement Parts and Accessories, page 19,
for proper bar.
Burr
WARNING: Cutting edges on
chain are sharp. Use protective
gloves when handling chain.
Guide Bar
WARNING: When cleaning
saw body,
• do not submerge saw in any
liquids
• do not use products that contain ammonia, chlorine, or
abrasives
• do not use chlorinated cleaning
solvents, carbon tetrachloride,
kerosene, or gasoline
Keep saw body clean. Use a soft cloth dampened with a mild soap and water mixture.
Wipe saw body to clean.
Flat File
Guide Bar
Guide Bar
With Uneven
Wear
Normal Guide
Bar
Figure 17 - Guide Bar Cross Section
Showing Uneven Bar Wear
Cleaning Groove With
Putty Knife
Oil Slot
Figure 18 - Guide Bar Maintenance
For more information, visit www.desatech.com
12
120693
OWNER’S MANUAL
cleaning and
maintenance
Continued
SHARPENING SAW CHAIN
WARNING: Unplug chain saw
from power source before servicing. Severe injury or death could
occur from electrical shock or
body contact with moving chain.
WARNING: Cutting edges on
chain are sharp. Use protective
gloves when handling chain.
Use file guide for 30° filing.
1. Adjust chain for proper tension (see Saw
Chain Tension Adjustment, page 7).
2. Clamp guide bar in vise to hold saw
steady. Note: Do not clamp chain.
3. Press 5/32" round file (attached to file
guide) into groove between top plate
and depth gauge on chain. File guide
should rest on both top plate and depth
gauge (see Figures 19 and 20). Note:
File at midpoint of guide bar.
Filing
Direction
30° Guide
Mark
File
Guide
5/32"
Round File
HOLDER
Items Needed to Sharpen Chain
Purchase these items from your local
dealer, hardware store, or chain saw supplies outlet.
• 5/32" round file
• Depth gauge tool
• File guide
• Vise
• Medium sized flat file
4. Hold file guide level. Make sure 30°
mark on file guide is parallel to center of
guide bar (see Figure 19). This will insure that you file cutters at 30° angle.
5. File from inside towards outside of cutter
until sharp. Only file in this one direction
(see Figure 19). Note: Two or three
strokes with file should sharpen cutter.
6. After each cutter is sharpened, move
chain forward to sharpen next cutter.
File all cutters on one side of chain.
7. Move to other side of chain and repeat
process.
FILE
Keep chain sharp. Your saw will cut faster
and more safely. A dull chain will cause
undue sprocket, guide bar, chain, and motor
wear. If you must force chain into wood and
cutting creates only sawdust with few large
chips, chain is dull.
Sharpening Cutters
Note: This illustration shows
file guide placement and
filing direction for sharpening
cutters on left side of chain.
Figure 19 - File and File Guide Placement On Chain
Depth Gauge
(left side of chain)
Groove
Depth Gauge
(right side
of chain)
Left Side of
Chain
Groove
Top Plate
(right side of chain)
Top Plate
(left side of chain)
Right Side of
Chain
Figure 20 - Chain Part Locations
Continued
120693
13
For more information, visit www.desatech.com
ELECTRIC CHAIN SAW
CLEANING AND
MAINTENANCE
Replacing Saw Chain
Continued
Filing Cutter Depth Gauges
The cutter depth gauge clearance is reduced
as cutters are sharpened. After every second or
third sharpening, reset cutter depth gauges.
1. Place depth gauge tool (.025") firmly
across top of two cutters. Make sure
depth gauge enters slot in depth gauge
tool (see Figure 21).
2. Use medium flat file. File depth gauge
level with depth gauge tool.
3. Remove depth gauge tool. With flat file,
round off front corner of cutter depth
gauge (see Figure 22).
Replace chain when cutters are too worn
to sharpen or when chain breaks. Only use
replacement chain noted in this manual.
Always include new drive sprocket when
replacing chain. This will maintain proper
driving of chain. Note: For proper chain and
drive sprocket, see Replacement Parts and
Accessories, page 19.
After several hand filings, have authorized
service center or sharpening service machine
sharpen chain. This will insure even filing.
Flat File
STORAGE
If storing saw for more than 30 days, follow
steps below.
1. Drain oil tank.
2. Remove and clean guide bar and chain.
Clean guide bar and chain by soaking
in petroleum based solvent or mild soap
and water mixture.
3. Dry guide bar and chain.
4. Place chain in container filled with oil.
This will prevent rust.
5. Wipe a thin coating of oil over surface
of guide bar.
6. Wipe off outside of saw body. Do this
with soft cloth dampened with a mild
soap and water mixture.
7. Store chain saw
• in a high or locked place, out of
children’s reach
• in a dry place
• in a carrying case or with scabbard
over guide bar
Depth Gauge
Depth
Gauge
Tool
Depth
Gauge
Slot
Figure 21 - Depth Gauge Tool On Chain
Front Corner
.025"
Figure 22 - Round Off Front Corner Of
Depth Gauge
For more information, visit www.desatech.com
14
120693
OWNER’S MANUAL
TROUBLESHOOTING
Note: For additional help, visit our
technical service web site at www.
desatech.com.
WARNING: Unplug chain saw from power source before servicing.
Severe injury or death could occur from electrical shock or body contact
with moving chain.
OBSERVED FAULT
POSSIBLE CAUSE
REMEDY
Saw runs, but does not cut
Chain assembled backwards on guide bar
See Assembly, page 6
Saw does not cut unless heavily forced.
Cutting produces only sawdust with few
large chips
Chain is dull
See Sharpening Saw Chain, page 13
Saw runs slow. Saw stalls easily
Low power supply voltage
Extension cord wire size too small. See
Extension Cords, page 8
Motor of saw does not run when you squeeze
trigger
1. Switch lockout not pressed in to release
trigger
2. Extension cord connections loose
3. Open line fuse or circuit breaker
4. Bad motor brushes
5. Open wiring circuit on saw
1. Press in switch lockout before squeezing
trigger
2. Check cord connections
3. Check line fuse or circuit breaker
4. See authorized service center
5. See authorized service center
Motor of saw runs, but chain does not move
Gear train failure
See authorized service center
Chain does not get oil
1. Clogged oil slot in guide bar
2. Oil is too thick
1. Remove guide bar and clean oil slot
2. Use correct weight of oil. See Filling Oil
Tank, page 7
Chain comes off guide bar
1. Chain is loose
2. Guide bar and chain not assembled right
1. Tighten chain. See Saw Chain Tension
Adjustment, page 7
2. See Assembly, page 6
Saw smokes
Saw damaged. Do not use saw
See authorized service center
Saw leaks oil
Oil cap is not secure
Tighten oil cap. Note: Empty oil tank when
not in use
120693
15
For more information, visit www.desatech.com
ELECTRIC CHAIN SAW
ILLUSTRATED
PARTS
BREAKDOWN
UT13130
19
13
5
6
18
21
1
2
26
16
21
9
14
10
7
3
4
12
23 15
24
11
17
22
22
20
8
25
22
For more information, visit www.desatech.com
16
E-Ring
Installation
120693
OWNER’S MANUAL
PARTS LIST
UT13130
120693
This list contains replaceable parts used in your chainsaw. When ordering parts, be sure to provide the
correct model and serial numbers (from the model plate), then the part number and description of the
desired part.
KEY
NO.
PART
NO.
DESCRIPTION
1
2
3
4
5
6
7
8
9
10
11
12
13
14
15
16
17
18
19
20
21
22
23
24
25
26
14SB
14SC
107481-01
075676
107319-01
107512-01
099829-01
077399-14
076105
107482-01
059606
107713-01
106809-02
079089-07
NPC-4C
077115
075887
079086-02
097403-01
108120-01
076906
107708-01
077143
077525S
106810-01
079963-04
Guide Bar, 14"
1
Saw Chain
1
Armature Assembly
1
Sprocket Roller Bearing 1
Hex-Head Bolt2
Cap & Bulb Assembly
1
Cord
1
Side Cover, Black 1
Thrust Disk
1
Field & Brush Assembly
1
Drive Gear
1
Internal Gear
1
Front Hand Guard
1
Motor Housing, Black
1
Hex Nut2
Adjusting Plate Assembly
1
Bearing Plate
1
Oil Reservoir
1
Pan-Head Screw
1
E-Ring
1
Flat-Head Tap Screw 2
Pan-Head Tap Screw
10
Sprocket Support
1
Lock-Off Switch 1
Sprocket Cover, Black
1
Scabbard
1
17
QTY.
For more information, visit www.desatech.com
ELECTRIC CHAIN SAW
Parts CentralS
Ray’s Portable Heater Service
3191 Myers Road
Camino, CA 95709-9550
530-644-7716
Tool & Equipment
5 Manila Drive
Hamden, CT 06514-0322
203-248-7553
1-800-397-7553
Grainger Parts Operations
1657 Shermer Road
Northbrook, IL 60062-5362
708-498-5900
1-800-323-0620
www.grainger.com
Portable Heater Parts
342 North County Road 400 East
Valparaiso, IN 46383-9704
219-462-7441
1-800-362-6951
www.portableheaterparts.com
[email protected]
[email protected]
FBD
1349 Adams Street
Bowling Green, KY 42103-3414
270-846-1199
1-800-654-8534
[email protected]
Lyons & Lyons Sales Co. Inc.
Glen Arm Road
Glen Arm, MD 21057-9454
301-665-6500
1-800-333-5966
[email protected]
Master Part Distributors
1251 Mound Avenue NW
Grand Rapids, MI 49504-2672
616-791-0505
1-800-446-1446
www.masterparts.net
Hance Distributors, Inc.
12795 16th Avenue North
Plymouth, MN 55441-4556
763-559-2299
www.hanceco.com
Automotive Equipment Service
3117 Holmes
Kansas City, MO 64109-1716
816-531-9144
1-800-843-3546
www.aes-lawnparts.com
Bowden Electric Motor Service
1681 S. Wesleyan Blvd.
Rocky Mount, NC 27803
252-446-4203
East Coast Energy
10 East Route 36
West Long Branch, NJ 07764-1501
1-800-755-8809
Forrest Lytle and Sons, Inc.
740 West Galbraith Road
Cincinnati, OH 45231-6002
513-521-1464
Bortz Chain Saw Shop
Road #2, Box 64A
Oley, PA 19547-9412
610-987-6452
La Porte’s
2444 N 5th Street
Hartsville, SC 29550-7704
843-332-0191
MTA Distributors
555 Hickory Hills Blvd.
Nashville, TN 37189-9244
615-299-8777
1-800-264-0225
Webbs Appliance Center
1519 Church Street
Nashville, TN 37203-3004
615-329-4079
1-800-899-4079
Industrial Hardware
4109 Bainbridge Blvd.
Chesapeake, VA 23324-1403
757-543-2232
1-800-788-0008
[email protected]
Mills Lawn and Garden
4750-B Baxter Road
Virginia Beach, VA 23462
757-490-7001
www.mills-parts.com
Tuco Industrial Products
5223 180th Street SW
Suite 4A-1
Lynnwood, WA 98037-4506
425-743-9533
1-800-735-1268
www.tucoheat.com
21st Century
2950 Fretz Valley Road
Perkasie, PA 18944-4034
215-795-0400
1-800-325-4828
For more information, visit www.desatech.com
18
120693
OWNER’S MANUAL
TECHNICAL
SERVICE
You may have further questions about assembling, operating, or maintaining this
product. If so, you can visit our Technical
Service web site at www.desatech.com
or contact our Technical Service Department
at 1-800-858-8501 (English Only). You may
also write to:
DESA Power Tools
ATTN: Technical Service Specialty Products
P.O. Box 90004
Bowling Green, KY 42102-9004
When contacting DESA Power Tools, have
ready
• Your Name
• Your Address
• Your Phone Number
• Model Number of Product
• Date of Purchase (Include copy of receipt
for written requests).
Replacement
Parts And
accessories
repair SERVICE
Note: Only use original replacement parts.
This will protect your warranty coverage for
parts replaced under warranty.
WARNING: Use only replacement parts and accessories described in this manual. Use of other
parts or accessories could damage
saw or injure operator.
For original replacement parts and accessories, contact your nearest Authorized
Dealer or Authorized Service Center for this
product. If they can not supply the part or
accessory, contact your nearest Parts Central
listed on page 18. Each Authorized Dealer,
Authorized Service Center, and Parts Central
is independently owned and operated.
See pages 16 and 17 for an Illustrated Parts
List.
If you need additional referral information,
contact our Technical Service Department (see
Technical Service).
Each Authorized Service Center is independently owned and operated.
Warranty Service
If product requires warranty service, return it to
nearest Authorized Service Center. You must
show proof of purchase. If faulty materials or
workmanship caused damage, we will repair or
replace product without charge. Note: Normal
wear, misuse, abuse, neglect, or accidental
damage is not covered under warranty.
Non-Warranty Service
If product requires service, return it to nearest
Authorized Service Center. Repairs will be
billed to you at regular repair list prices.
For additional Service Center or warranty
information, call 1-800-858-8501 or visit
our Technical Service web site at www.
desatech.com.
In Canada call 1-800-561-3372 for parts
information.
120693
UT13130
Part Number
14SB
14SC
107713-01
Description
Guide bar, 14"
Chain, 14"
Drive sprocket
General
Part Number
079963-04
106809-02
077155
Description
Plastic scabbard, 14"
Hand Guard
Adjusting Plate Assy.
19
For more information, visit www.desatech.com
WARRANTY INFORMATION
Homelite brand ELECTRIC CHAIN SAW
LIMITED WARRANTIES
New Products
Standard Warranty
DESA Power Tools warrants this new product and any parts thereof to be free from defects in material and workmanship for a period of one (1)
year from the date of first purchase from an authorized dealer provided the product has been maintained and operated in accordance with DESA
Power Tools’ warnings and instructions.
Factory Reconditioned Products
Limited Warranty
DESA Power Tools warrants factory reconditioned products and any parts thereof to be free from defects in material and workmanship for 90 days
from the date of first purchase from an authorized dealer provided the product has been installed, maintained and operated in accordance with
DESA Power Tools’ warnings and instructions.
Terms Common to All Warranties
The following terms apply to all of the above warranties:
• Always specify model number when contacting the manufacturer. To make a claim under this warranty the bill of sale or other proof of purchase
must be presented.
• This warranty is extended only to the original retail purchaser when purchased from an authorized dealer.
• This warranty covers the cost of part(s) required to restore this product to proper operating condition and an allowance for labor when provided
by a DESA Power Tools Authorized Service Center. Warranty parts must be obtained through authorized dealers of this product and/or DESA
Power Tools who will provide original factory replacement parts. Failure to use original factory replacement parts voids this warranty.
• Travel, handling, transportation, diagnostic, material, labor and incidental costs associated with warranty repairs, unless expressly covered by
this warranty, are not reimbursable under this warranty and are the responsibility of the owner.
• Excluded from this warranty are products or parts that fail or become damaged due to misuse, accidents, lack of proper maintenance, tampering,
or alterations.
• Excluded from this warranty are products purchased for commercial, industrial or rental usage.
• This is DESA Power Tools’ exclusive warranty, and to the full extent allowed by law; this express warranty excludes any and all other warranties,
express or implied, written or verbal and limits the duration of any and all implied warranties, including warranties of merchantability and fitness
for a particular purpose to one (1) year on new products and 90 days on factory reconditioned products from the date of first purchase. DESA
Power Tools makes no other warranties regarding this product.
• DESA Power Tools’ liability is limited to the purchase price of the product, and DESA Power Tools shall not be liable for any other damages
whatsoever under any circumstances including indirect, incidental, or consequential damages.
• Some states do not allow limitations on how long an implied warranty lasts or the exclusion or limitation of incidental or consequential damages,
so the above limitation or exclusion may not apply to you.
• This warranty gives you specific legal rights, and you may also have other rights which vary from state to state.
For information about this warranty contact:
P.O. Box 90004
Bowling Green, KY 42102-9004
www.desatech.com
82 Akron Road
Toronto, Ontario
M8W 1T2
1-800-561-3372
Fax: 1-800-561-8003
Model _ ______________
Date Purchased _ ______________
120693-01
Rev. A
11/06