1
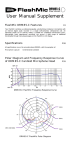
Introduction Thank you for purchasing this HHB FlashMic. This manual provides all the information you should need to use your FlashMic easily and effectively. We recommend you read through the manual carefully before using your FlashMic for the first time, and to keep it in a safe place for future reference. Product Details Owner: Company: Date of Purchase: Serial Number: Safety Information While the HHB FlashMic has been designed to be robust in normal use, always remember that it is both a high-quality professional microphone and a delicate electronic instrument. As such, a degree of care should be exercised in its handling. • Take care not to subject the FlashMic to mechanical impact, e.g. dropping it or knocking it on hard surfaces. • Use care when opening the battery compartment. This operation is designed to be performed by hand; do not use sharp tools of any kind. • Use the connectors and jogswitch control on the base of the FlashMic with care. Ensure that any cables connected are not subject to strain. • Only dispose of used batteries in accordance with local environmental and/or recycling guidelines. • Only clean the FlashMic with a damp cloth. Do not use solvent or abrasive cleaners of any kind. What’s in the box Please check the list below against the contents of the packaging. If any items are missing or damaged, contact the HHB dealer or distributor that you purchased the unit from at once. • DRM85 FlashMic Microphone • Microphone pouch • Mic clip with standard thread (5/8” 27TPI), plus 3/8” adaptor (16TPI BSW) • 1.5m. USB cable, Type A to 5-pin Mini-B • 2 x AA alkaline batteries • CD-ROM with FlashMic Manager software (both Windows™ and Mac™ versions) Contents Introduction 1 Safety Information 2 What’s in the box 2 FlashMic Features 4 FlashMic Description FlashMic Display Window 5 6 Batteries 7 7 8 8 Inserting Batteries Battery Management Battery Status Indicator Using the FlashMic 9 Jogswitch Description 9 Switching The FlashMic On10 Making a Recording11 PreRecord Buffer (Introduction)12 Record Lock12 Monitoring12 Adjusting Record Level13 Replaying Tracks13 Markers14 Deleting a Track14 File Transfer14 Transfer Using FlashMic Manager15 Direct Transfer to a Computer16 FlashMic Menu System17 Using the Menus17 Preset Menu18 Recording Mode Menu19 Recording Level Menu20 Hi-pass Filter Menu21 Battery Type Menu21 Delete Menu22 Clock Set Menu23 FlashMic Manager24 Installing FlashMic Manager on a PC24 Installing FlashMic Manager on a Mac25 Using FlashMic Manager26 Configuration Files and Presets27 Using the Default Configuration28 FlashMic Manager Window - Features29 Preset Information29 Other Features and Functions 31 Connecting the FlashMic 33 Creating a New Configuration File 34 Modifying an Existing Configuration File 34 Creating a Personalised Defaults File 35 Uploading a Configuration File to the FlashMic 35 PreRecord Buffer 36 FlashMic File Names Filename Structure 36 37 Reformatting the Memory 38 Firmware Updates 39 Specifications 40 Polar Diagram and Frequency Response Curve of Microphone Head 41 Notification 42 FlashMic Features Your FlashMic combines a professional-quality, omni-directional condenser microphone with an internal digital audio recorder in a single self-contained, selfpowered unit. An extremely simple set of controls make it suitable for completely non-technical users; alternatively, more experienced recordists can access a wide range of additional functionality through menu-based pages on the FlashMic’s LCD display. Retrieval of recordings is via the FlashMic’s USB port; the stored sound files are transferred to a computer as .wav files in either linear or compressed (MPEG 2 Layer 1) formats. Transfer is either by using the supplied FlashMic Manager software, or by standard drag-and-drop file handling. Think of your FlashMic as the audio equivalent of a digital camera. Just as you use a digital camera to quickly and conveniently record high-quality visual images for subsequent transfer to a computer, so you can use FlashMic to capture sound. Just as pictures can be subsequently edited, stored, e-mailed, deleted, or whatever – so you can now manipulate recorded audio in the same ways. The FlashMic is ideal for use by journalists and reporters for news-gathering and interviews, by business organisations, public institutions – any situation where a quick and convenient method of voice recording is required. Some of the main features of the FlashMic are as follows: • Linear or compressed (using MPEG 1 Layer 2 compression) digital audio recordings as .wav files. • Recording time up to 18hrs (file format and sample rate dependent). • Built-in headphone amplifier for monitoring, with adjustable level. • Uses 2 x AA cells – either alkaline or rechargeable. • Modes of operation to suit both technical and non-technical users. • Adjustable pre-record buffer of up to 10 seconds. • Rapid file transfer via USB to PC or Mac. • 9 internal presets for storing different FlashMic configurations. • Adjustable recording level or fixed AGC mode, with bargraph display. • Remaining Time display. • Replay of last or an earlier recording via monitor output. FlashMic Description 2 1 3 4 10 USB 11 PHONES MENU 8 9 5 6 7 1 Protective basket (windshield) over mic capsule 2 FlashMic body 3 LCD display – see FlashMic Display Window 4 Main operating control section 5 REC button (G) 6 PLAY button (H) 7 MENU/STOP button (M) 8 Multi-function jogswitch control - see Jogswitch Description 9 Record mode LED (REC LED) 10 USB connector (5 pin Mini-B) 11 PHONES: monitor output (3.5mm 3-pole jack socket) FlashMic Display Window 12 17 00:12:12 Rec 13 16 Play 14 15 12 6-character alphanumeric display 13 4-segment battery status indicator 14 REC flag – indicates FlashMic is in record mode. 15 PLAY flag – indicates FlashMic is in replay mode. 16 16-segment bargraph meter – provides an indication of recording level. 17 Display backlight Batteries The FlashMic requires two AA-size batteries. Either 1.5v alkaline or 1.2v NiMH (nickel metal hydride) rechargeable batteries may be used. Batteries of at least 1500mAh capacity are recommended. ! Do not use zinc chloride batteries. Inserting Batteries Hold the FlashMic in one hand and unscrew the rear section (the section with the display and operating controls) with the other. Slide the rear section back as far as it will go. Open the hinged plastic battery compartment cover. Insert the two batteries oriented as shown on the compartment cover. ! The two batteries must point the same way. ! Always change both batteries at the same time, and always use two batteries of the same brand and type. NEVER mix alkaline and rechargeable batteries. Close the cover, push the rear section back over the compartment, and screw up tight. Note: If changing alkaline batteries, dispose of the old ones in a responsible manner – always observe local environmental guidelines. Battery Management Battery life will be maximised if the FlashMic is switched off when not in use, as the power consumed in IDLE mode is virtually the same as in REC mode. The internal clock settings are protected within FlashMic for approximately 1 minute after the batteries are removed. Recorded sound files and configuration settings are not affected by battery removal. Remove any batteries from the FlashMic if it is to be unused for an extended period (more than a month). Battery Status Indicator A 4-segment battery status indicator is provided on the LCD display. The number of segments displayed is proportional to the battery power remaining. The rate of change of the display can be altered (via the menu system or via the FlashMic Manager software) to reflect the different discharge characteristics of alkaline or rechargeable batteries. The display backlight, the record LED on the FlashMic base and the battery indicator will all flash when the remaining battery life approaches zero. Using the FlashMic Jogswitch Description Many of the FlashMic’s operating functions are accessed via the jogswitch on the bottom panel. These include power on/off, navigation through the various internal menus, adjustment of levels, and track selection for replay. Operation of the jogswitch for each specific FlashMic function is described in detail in the section of the manual covering the function. However, because the jogswitch has several physical movements associated with it, an overview is given here. The jogswitch is a small wheel protruding from the base of the FlashMic. It is effectively three momentary-acting pushbuttons in one; it can be pressed inwards (from its rest position), or rotated in either direction. The actions are all springloaded so that the jogswitch always returns to its rest position. Each of the three possible movements can be either ‘long’ or ‘short’, giving a total of six possible actions. The FlashMic’s firmware determines a ‘long’ press to be one of greater than 2 seconds. duration, and as ‘short’ press to be one of less than 2 seconds. The diagram below summarises the possible movements. Elsewhere in this manual, the following notations are used to denote the various types of jogswitch action. It is assumed that the FlashMic is orientated with the LCD display facing the user. NOTATION ACTION SHORT PRESS Press the centre protrusion inwards and release LONG PRESS Press the centre protrusion inwards for a least 2 seconds SHORT DOWN TURN Move the wheel downwards and release LONG DOWN TURN Move the wheel downwards and hold for at least 2 seconds SHORT UP TURN Move the wheel upwards and release LONG UP TURN Move the wheel upwards and hold for at least 2 seconds Switching The FlashMic On The FlashMic is switched on by a SHORT PRESS on the jogswitch, and switched off by a LONG PRESS until the text OFF appears in the display. The FlashMic will turn off when the jogswitch is released. Note that it is not possible to turn the FlashMic off while it is connected to a computer via its USB cable. On switching the FlashMic on, the LCD panel displays in sequence: DRM85 ê Firmware version ê Microphone name ê Active preset. Note that the factory default microphone name is DRM_85 and the factory default preset is PSET_1. After this sequence, the FlashMic is in its standby state – referred to in this manual as IDLE mode - and the displays are as shown below. TRK001 03:14:35 FlashMic IDLE Mode Displays In IDLE mode – i.e. when the FlashMic is powered but not otherwise being operated – the main display alternates between the number of the last recording (TRKnnn - recorded files within the FlashMic are referred to as ‘tracks’) and the remaining recording time. An exception to this is when no recordings have been made since the FlashMic was last reconfigured, when the message NOFILE appears instead of TRKnnn. The FlashMic is fitted with an internal calendar/clock. Before using the FlashMic for the first time it is recommended that this is set correctly. See Clock Set Menu, page 23 for details of how to do this. 10 Making a Recording ! The file format created within the FlashMic includes a record of the date and time at which the recording was made, together with textual information – entered via FlashMic Manager software – to aid later identification of recordings. Nevertheless, it is good recording practice to keep a separate written or electronic recording log during a recording session in the field, as many similar-sounding files may often be created. Keeping such a log is recommended. It will frequently ease the task of identifying your recordings after they have been transferred into a computer for further editing. To initiate a new recording, press the red REC button (G). The REC flag in the display and the REC LED on the FlashMic’s rear panel both illuminate. ! The record LED can be turned off, if for example, the FlashMic is in camera shot. To do this, press and hold the PLAY button while the FlashMic is in REC Mode; the display will show LEDOFF. The LED can be re-enabled by repeating this action while still in REC Mode. Note that the LED will always illuminate initially when REC Mode is selected. The bargraph meter in the display provides an indication of the recording level. The main display indicates the remaining recording time, and counts down. When there are 10mins. of record time remaining, the display backlight, the record LED on the FlashMic base and the REC flag in the display will all flash. The FlashMic will stop recording when there is 1min. of recording time remaining; this is to allow for data error correction. 03:24:04 Rec Recording Display To stop the recording, press the M/STOP button (M). The text SAVING appears in the display, and after a brief pause, the IDLE display resumes, with the track number being indicated. SAVING Saving Recorded Track Factory settings: Settings of recording format, record level, etc., will generally be made via the system of configuration files and presets within the FlashMic Manager software. However, the FlashMic comes with a set of factory parameters enabling it to be used “out of the box”, without any recourse to FlashMic Manager. See Using the Default Configuration, page 28 for a list of these parameter values. 11 PreRecord Buffer (Introduction) In a busy journalistic schedule, it is sometimes difficult - or impossible - to get to the record button quickly enough. The result is a recording that starts a few seconds after the vital bit of information that was needed. The FlashMic incorporates a prerecord buffer of up to 10 seconds (adjustable), which avoids this situation. When the recording is replayed, it will be found that it begins with a few seconds of audio immediately before the REC button was pressed. See PreRecord Buffer, page 36 for more details. Record Lock The FlashMic is equipped with a REC LOCK function to prevent the accidental cancelling of REC mode during a recording. Once in REC mode, press the REC button a second time, holding it down for at least 2 seconds, until the LCD screen displays the text LOCKED. Pressing the M/STOP button will now have no effect (other than to display the text LOCKED). To disable REC LOCK mode, press and hold the REC button until the LOCKED display changes to UNLOCK. Now the recording can be stopped in the normal manner by pressing M/STOP. LOCKED UNLOCK Rec Rec REC LOCKED/UNLOCK Displays Monitoring A pair of headphones may be connected to the FlashMic for monitoring purposes. Headphones of 32 ohms impedance or higher should be used. Connect the headphones via the 3.5mm 3-pole jack marked PHONES on the FlashMic bottom panel. The mono signal from the FlashMic will be heard in both earpieces. Headphone monitoring of live audio is active in both IDLE and REC modes. The monitor output may be used to drive external equipment for monitoring or recording if desired. The monitor level is adjusted with the jogswitch; a SHORT PRESS shows the text PHONnn on the LCD display, where nn = the current level. (The units are arbitrary; 00 = off, 50 = max.) A SHORT UP TURN or DOWN TURN will respectively increase or decrease the monitor level. Note that the monitor level always resets to 28 when the FlashMic is switched on. The level can be adjusted during REC, PLAY or IDLE modes. The LCD display will return automatically to the REC or IDLE displays after a timeout period of approx. 2 seconds. 12 Adjusting Record Level ! Adjustment of Record level is only possible if the FlashMic has been set (via the FlashMic Manager software) to permit configuration changes by the user. See the section on FlashMic Manager for more information. The recording level is adjusted with the jogswitch. A SHORT UP TURN or DOWN TURN while in REC mode displays the text RVOLnn, where nn = the current level. (Unlike monitor level, the units are not arbitrary, being increments of approximately 1dB; 01 = min, 40 = max.) Further SHORT UP or DOWN TURNS will nudge the record level up or down. When the record level is reduced to minimum, the AGC system is selected and the display shows RV AGC. In this mode, FlashMic automatically adjusts recording level according to the sound level. In most situations, this ensures that a recording of usable level will be made, but as with all automatic gain systems, a degree of background noise “pumping” may be audible on the recording. It is also possible to adjust the FlashMic’s recording level from IDLE mode, using the menu system. See FlashMic Menu System, page 18. Note that the record level always resets to the last value used when the FlashMic is switched on, and not to the value set as part of the preset by FlashMic Manager. (See section on FlashMic Manager for more information on presets.) RVOL35 RV AGC Rec Rec Setting Recording Levels Replaying Tracks A recorded track may be replayed for auditioning purposes. To replay the last track recorded, press the PLAY button (H). The PLAY flag on the LCD display illuminates. After a brief pause, the display shows the elapsed time of the track. The recording may be monitored via the PHONES connector. At the end of the track, the FlashMic will resume IDLE mode. Pressing the M/STOP button during replay will also return the FlashMic to IDLE mode. To pause playback during play, press PLAY again. The LCD display will show PAUSE. Play can be resumed by pressing PLAY again, or stop mode can be entered by pressing ‘MENU/STOP. A LONG UP TURN on the jogswitch will “fast-forward” the track (FFW mode), to enable a particular section of the track to be located. Similarly, a LONG DOWN TURN “rewinds” the track (REW mode). The time display continues to show the track time during these ‘fast’ modes. To select and replay a track other than the last recorded, decrement the track number with SHORT DOWN TURNs on the jogswitch. (A LONG DOWN TURN will decrement faster.) UP TURNs will similarly increment the track number. When the required track number is displayed, press the PLAY button to replay the track. It is also possible to select a different track while remaining in PLAY mode; SHORT TURNs of the jogswitch will skip to the next or previous track, depending on the direction of rotation. Be careful not to make LONG TURNs, as the FlashMic will instead enter FFW or REW mode, as described above. TRK005 00:00:01 Play Select Track Display Track Replay Display 13 Markers It is often useful to mark one (or more) points in a recording for ease of reference during later production and editing. You can add markers to FlashMic recordings in REC mode, while the recording is being made. The markers are ‘data flags’, which are embedded in the sound file at the appropriate point. They will appear as onscreen markers when the downloaded sound files are later loaded into a sound editing package. The markers are written to the sound file with both linear and compressed recording formats. FlashMic markers are recognised by a number of professional editing applications, including Cool Edit Pro, Adobe Audition, Sound Forge V4 and above. Note however, that editors can currently only read markers in sound files recorded using the linear recording modes. A marker is added whilst recording by a short press on the REC button. (Note that a long press activates the REC LOCK function in REC mode). The LCD display briefly displays MARKER. As the marker is purely a data flag within the sound file, no further indication of its presence will be apparent until the resulting file is loaded into an editor. Deleting a Track If an erroneous or otherwise unwanted or unusable recording is made, it may be deleted from the FlashMic’s memory to save memory space. Deletion of tracks is performed via the FlashMic menu system. See Delete Menu, page 22 for full details on how to delete a track. File Transfer Typically, you will use your FlashMic ‘in the field’ to capture a number of different recordings. The resulting sound files will need to be downloaded from the FlashMic into a computer at some point for further evaluation, editing, deletion, or other treatment before they can be broadcast or otherwise made useful. In many organisations, the process of file transfer may be performed by someone other than the person who made the recordings. It is possible that a FlashMic may have been used by more than one recordist. Or it may happen that one recordist may use more than one FlashMic during a day of field recording. Thus is it important that any log that has been kept during the recording should be referenced during the transfer process so that files can be correctly identified and attributed. There are two methods for transferring sound files from FlashMic to a computer. • Via the FlashMic Manager software supplied with FlashMic. • Direct transfer. 14 Transfer Using FlashMic Manager This assumes FlashMic Manager has already been installed on a computer. See section Installing FlashMic Manager, page 24 if this is not the case. • First determine the location in the computer’s directory structure where the sound files should be transferred to. This may necessitate creating and naming new folders for the purpose. • Open the FlashMic Manager application. (Note the window which opens is not maximisable.) • Switch the microphone on. • Connect the FlashMic to a spare USB port on the computer, using the cable supplied. • The FlashMic LCD display will show USB, and the large red indicator in the FlashMic Manager window will turn green. There should also be some audible and/or visual confirmation on the computer that the FlashMic has been ‘recognised’. (Exactly what form this confirmation takes may vary slightly from computer to computer. Ignore any window called DRM85 that may open.) • In the area USB Connection, click the button Download Audio Data from DRM… The Transfer Audio Files dialogue box opens. • The sound files in the FlashMic will be listed. Select those to be transferred by highlighting them with a single click. (Normal Windows/MAC conventions re multiple file selection apply.) • Click the Transfer… button. The Browse For Folder dialogue box opens. • Navigate to the folder into which the sound files are to be transferred. Click OK. • The file(s) are transferred. Depending on the number and length of sound recordings, and the spec of the computer, this may take from a few seconds to some minutes, during which time a progress indication is provided. When the files have been transferred successfully, a confirmation box appears. Dismiss this, and the transfer is complete. • Disconnect the FlashMic. After disconnection, the FlashMic can be switched off. 15 Direct Transfer to a Computer As the FlashMic is a generic USB mass storage device, files can be transferred from it to a Mac or PC in the same way as from any other USB mass storage device. ! Do not attempt to format the FlashMic from Mac or PC as the internal file system will be corrupted and any recordings will be lost. Note the example given below applies to a PC running Windows™ XP. Other operating systems differ slightly, if you are unsure about this procedure, please consult your HHB dealer. • Switch the microphone on. • Connect the FlashMic to a spare USB port on the PC, using the cable supplied. The FlashMic’s display will show USB. You can audition the sound files recorded in the FlashMic before transferring them, if wished. To do so: • If a “DRM-85 (d:)” window opens (d = drive letter, will vary with PC) listing options for playing music files, you can select any audio file application offered (such as Windows™ Media Player) to audition the sound files within the FlashMic. The options available will depend on which software applications are installed on the PC. • If the drive folder above does not open, you can still audition the files by opening any audio application available on the PC, and selecting File>Open. Then navigate first to the DRM-85 device, which will be listed among the drives, then to the AUDIO folder within it. The sound files are all in this folder. If you do not wish to audition the files first, or have already done so, perform the transfer as follows: • First determine the location in the PC’s directory structure that the files should be transferred to. This may necessitate creating and naming new folders for the purpose. • Using Windows™ Explorer, navigate to the DRM-85 drive in the ‘Folders’ pane, and open the folder called ‘AUDIO’. The recorded sound files will be listed in the main pane. Do not delete any files in any of the other folders. • Drag-and-drop the required sound files to their new location in the normal way. • Disconnect the FlashMic. After disconnection, the FlashMic can be switched off. 16 FlashMic Menu System The FlashMic’s menu system allows you to adjust internal settings and select various options to suit your specific recording needs. Basic recording, playback and file transfer do not require use of the menu system. Note that some of the menus will only be available to the user if access to them was enabled in the FlashMic Manager software at the time of configuration file definition. These menus are clearly indicated in the descriptions that follow and are marked with an asterisk (*) in the table below. Please see the manual section on FlashMic Manager for more information about configuration files and enabling or disabling user access. Using the Menus The menu system is entered by pressing the M/STOP button while the FlashMic is in IDLE mode. The word MENU appears in the display. Note that pressing M/STOP while the FlashMic is in REC or PLAY modes cancels REC or PLAY. MENU Entering the Menu System This is the ‘header’ of the menu option list. A SHORT DOWN TURN of the jogswitch will now bring up the first of the menus, PRESET. Subsequent SHORT DOWN TURNs bring up the others in turn. When the menu that you want to check or modify is reached, it may be selected by a SHORT PRESS of the jogswitch. The menu options are: MENU DISPLAY USE Preset Menu PRESET Allows selection of a different configuration preset *Recording Mode Menu R MODE Allows selection of audio file format *Recording Level Menu RECLEV Adjustment of recording level *Hi-pass Filter Menu HIPASS Hi-pass filter in/out *Battery Type Menu BATTYP Set for battery type in use Delete Menu DELTRK Deletes selected recording Clock Set Menu TIMDAT Sets internal calendar and clock Pressing M/STOP a second time (from anywhere within the menu structure) will return the FlashMic to IDLE mode. A SHORT PRESS on the jogswitch from within a menu option (i.e., after a menu option has been selected) returns the FlashMic to the opening screen of that menu option. 17 Preset Menu The Preset Menu allows the user to select which preset from the FlashMic’s current configuration file is to be used. The FlashMic’s configuration file can have up to 9 presets. The configuration file is loaded into the FlashMic from a computer, using the supplied FlashMic Manager software. Each preset determines the value of various FlashMic parameters, including recording level and mode, pre-record buffer duration and the file name. (The file name will appear in the header of the audio files.) The parameters are all defined within FlashMic Manager; see Configuration Files and Presets, page 27 for a full description. To enter the Preset Menu, enter MENU mode by pressing the M/STOP button, and then make one SHORT DOWN TURN of the jogswitch. The display will show PRESET. Select this with a SHORT PRESS, and the name of the currently selected preset will be displayed. To select a different preset, make SHORT UP or DOWN TURNs of the jogswitch. The display will show the names of the alternative presets, as they were defined in FlashMic Manager. When the name of the required preset is displayed, a SHORT PRESS on the jogswitch will select it and load it into the FlashMic. PRESET Preset Menu Display Note that not all 9 presets available in a configuration file need to be defined in FlashMic Manager. Those not defined will be displayed as PSET N, where N is a number between 1 and 9, as PSET N is the default preset name used in FlashMic Manager. (However, note that PSET N will still be displayed for a preset that has been defined if the default name is not altered!) If selection of an undefined preset is attempted, the message EMPTY is displayed, indicating that this preset location cannot be used. PSET 1 EMPTY Preset Name Preset Empty Note that when the FlashMic is first used “out of the box”, all nine presets are empty. 18 Recording Mode Menu This menu will not be available if ‘Enable Configuration changes in DRM’ was set to ‘No’ when the configuration file was defined in FlashMic Manager. The Recording Mode menu permits selection of an alternative digital recording format to that determined by the currently selected preset. A total of six recording formats are available within FlashMic; two file formats at each of three sample rates. The formats are: SAMPLE RATE FILE TYPE DISPLAY MAXIMUM RECORDING TIME BWF files (uncompressed) 48kHz LIN48K 3hr BWF files (uncompressed) 44.1kHz LIN44K 3hr 15min BWF files (uncompressed) 32kHz LIN32K 4hr 30min MPEG1 (Layer 2) files 48kHz MP48K 12hr 15min MPEG1 (Layer 2) files 44.1kHz MP44K 14hr 40min MPEG1 (Layer 2) files 32kHz MP32K 18hr 25min The choice of recording mode will usually be determined by the onward programme production chain. To enter the Recording Mode Menu, enter MENU mode by pressing the M/STOP button, and then make SHORT DOWN TURNs of the jogswitch until the display shows R MODE. Select this with a SHORT PRESS, and the display will show the name of the currently selected recording mode, as listed above. To select a different recording mode, make SHORT UP or DOWN TURNs. The display will show the names of the alternative modes. When the required recording mode is displayed, a SHORT PRESS on the jogswitch will select it. R MODE Record Mode Menu Display The recording mode selected will be that used for subsequent recordings until a different recording mode or preset is selected. Note that any recordings already in the FlashMic’s memory will remain at whatever mode was applicable when they were made. 19 Recording Level Menu This menu will not be available if ‘Enable Configuration changes in DRM’ was set to ‘No’ when the configuration file was defined in FlashMic Manager. The audio level used during recording will be that defined within FlashMic Manager for the preset being used. The Recording Level menu permits this level to be altered. To enter the Recording Level Menu, enter MENU mode by pressing the M/STOP button, and then make SHORT DOWN TURNs of the jogswitch until the display shows RECLEV. RECLEV Record Level Menu Display Select this with a SHORT PRESS, and the display shows either RVOLnn - where nn = the current level – or RV AGC if automatic adjustment of recording level was defined for the current preset. The recording level can now be adjusted with SHORT UP or DOWN TURNS. A SHORT PRESS selects the new level. RVOL34 Record Level Setting The units used are in dBs; 01 = min, 40 = max. When the record level is reduced to ‘zero’, the AGC system is selected. In this mode, FlashMic automatically adjusts recording level according to the sound level. In most situations, this ensures that a recording of usable level will be made, but as with all automatic gain systems, a degree of background noise “pumping” may be audible on the recording. RV AGC Record Level Set To AGC It is also possible to adjust the FlashMic’s recording level whilst recording. See Adjusting Record Level on page 13. Note that the record level always resets to the last value used when the FlashMic is switched on, and not to the value set as part of the preset. 20 Hi-pass Filter Menu This menu will not be available if ‘Enable Configuration changes in DRM’ was set to ‘No’ when the configuration file was defined in FlashMic Manager. The FlashMic’s analogue circuitry includes a hi-pass filter, to assist in the rejection of extraneous low-frequency background noises, such as air-conditioning noise or traffic rumble. The filter has a slope of 12dB/oct. and a turnover frequency of 100Hz. The filter is set to be in or out of circuit in the FlashMic Manager software for each preset, and is loaded into the FlashMic with the configuration file. However, the filter may be switched in and out of the recording chain via the menus. To enter the Hi-pass filter Menu, enter MENU mode by pressing the M/STOP button, and then make SHORT DOWN TURNs of the jogswitch until the display shows HIPASS. HIPASS Hi-pass Filter Menu Display Select this with a SHORT PRESS, and the display shows either HP ON or HP OFF. The filter can be switched in or out with SHORT TURNs of the jogswitch. A SHORT PRESS selects the setting. Battery Type Menu This menu will not be available if ‘Enable Configuration changes in DRM’ was set to ‘No’ when the configuration file was defined in FlashMic Manager. The FlashMic may be powered by rechargeable or alkaline batteries. The two types of battery have different discharge characteristics, and for the battery status symbol in the LCD display to reflect the battery’s remaining charge as accurately as possible, it is necessary to set the battery type menu parameter to match the batteries being used. The battery type is set in FlashMic Manager as a ‘global’ setting, which is applicable to all presets in one configuration file, and is not selectable to the different types for different presets. The setting may be overridden via the Battery Type Menu. To enter the Battery Type Menu, enter MENU mode by pressing the M/STOP button, and then make SHORT DOWN TURNs of the jogswitch until the display shows BATTYP. Select this with a SHORT PRESS, and the display shows either ALKLIN (alkaline) or RECBLE (rechargeable). The battery type can be changed with SHORT TURNs of the jogswitch. A SHORT PRESS selects the setting. BATTYP Battery Type Menu Display 21 Delete Menu It is often desirable to delete unwanted recordings (tracks) from the FlashMic’s memory, particularly if they have been made erroneously or are otherwise unusable. The Delete Menu permits the user to do this. Note that any track deleted in this way is deleted permanently and irrecoverably. As tracks are only referred to by their track number on the FlashMic’s LCD display, before deleting a track always ensure you know which one you are trying to delete. The importance of maintaining an accurate recording log is again emphasised. If you have any doubt about the track number, replay it first to ensure you have the correct one. To enter the Delete Menu, enter Menu mode by pressing the M/STOP button, and then make SHORT DOWN TURNs of the jogswitch until the display shows DELTRK. DELTRK Delete Track Menu Select this with a SHORT PRESS, and the display shows the currently selected track number, which will normally be that of the last track recorded. TRK005 Select Track for Deletion If it is required to delete a different track, SHORT TURNs of the jogswitch will alter the track number either up or down. When the number of the correct track is displayed, a SHORT PRESS selects it. The text SURE N is now displayed. If you are sure you have selected the correct track, a SHORT DOWN TURN will change the display to SURE Y. SURE N SURE Y Cancel Track Deletion Confirm Track Deletion Another SHORT PRESS will now delete the track. Note that the track numbers of subsequent recordings are not altered. If the jogswitch is pressed in while SURE N is displayed, nothing is deleted, and the FlashMic returns to the head of the menu option, with DELTRK being displayed. 22 Clock Set Menu The FlashMic contains a real-time calendar/clock, which allows a date and time ‘stamp’ to be embedded in the audio file headers. This is a great aid to later accurate identification of what may be many similar-sounding recordings made in the field. The clock runs continuously whilst batteries are fitted. It continues to run for approx. 1 minute after the batteries are removed, allowing time for a change of batteries. If the batteries are removed for a longer period, or before the FlashMic is used for the first time, the clock will need to be set to the correct date and time of day. Note that the FlashMic is perfectly usable without the clock being set accurately; the only consequence is that the file date/time information will be incorrect (though intervals between file creation times will be accurate). To enter the Clock Set Menu, enter MENU mode by pressing the M/STOP button, and then make SHORT DOWN TURNs of the jogswitch until the display shows TIMDAT. TIMDAT Clock Set Menu Display Select this with a SHORT PRESS, and the display shows Y yyyy, where yyyy is the year. This can be altered up or down with SHORT TURNs of the jogswitch. A SHORT PRESS selects the setting, and the display will now show in turn MON mm, where mm is the number of the month of the year; DAY dd, where dd is the day of the month; HH hh, where hh is the hour of the day (note that FlashMic uses a 24-hr. clock); MM mm for minutes, and SEC ss for seconds. Each of these can be altered in the same way as the year. The full sequence is show below. TIMDAT ê Y 2006 ê MON 04 ê DAY 06 ê HH 23 ê MM 00 ê SS 25 Set Year Set Month Set Day Set Hour Set Minutes Set Seconds After setting all the date and time parameters, the LCD display returns to the opening TIMDAT screen; the menu system can then either be exited by pressing M/ STOP, or another menu option can be selected with the jogswitch. 23 FlashMic Manager FlashMic Manager is the software application supplied with FlashMic. The CD-ROM that came supplied contains both PC and Mac versions. While it is perfectly possible to use FlashMic without using FlashMic Manager, you will not be using it to its full effectiveness, and will not be accessing the full range of features and functions that FlashMic offers. Using FlashMic Manager gives three main advantages: • You will be able to alter the internal configuration of your FlashMic, to determine which file formats and sample rates are used, and to change other FlashMic parameters. • You will be able to change the default filename prefixes to something more meaningful to the particular job, adding, for example, a reporter’s name. • FlashMic Manager provides a very simple method of downloading recorded files to the computer. The installation instructions given assume that the user is familiar with basic Windows™/Mac™ operations for file handling, navigation, etc. If you are unsure how to install the software, please consult your organisation’s IT department, or your HHB dealer. Installing FlashMic Manager on a PC PC REQUIREMENTS FOR FLASHMIC MANAGER Any PC satisfactorily running Windows™ XP or 2000 should support FlashMic Manager software without any difficulty. One spare USB port on the PC is required, for connection of the FlashMic. • Insert the FlashMic CD-ROM into the CD/DVD drive of the PC. The CD shouldautostart, and the following window will appear. See the following Manual Installation instructions if autostart does not run. • Select the destination directory that the FlashMic Manager application will be installed in. Use the Browse button to navigate to a suitable location in the normal Windows manner. C:\Program Files is a suitable location, but any other may be chosen if preferred. • Click Install. 24 Manual Installation instructions. • If, for any reason, the CD does not autostart, open My Computer, and double-click the CD, which will be called FlashMic. • Find the folder titled FMM_Win and copy it to a suitable location on the hard drive. C:\Program Files is a recommended location. • Within this folder is a file named FlashMicManager.exe. Create a shortcut from your desktop to this file. FlashMic Manager can then be launched from this shortcut. Installing FlashMic Manager on a Mac MAC REQUIREMENTS FOR FLASHMIC MANAGER Any Mac running OSX should support FlashMic Manager software without any difficulty. One spare USB port on the Mac is required, for connection of the FlashMic. • Insert the FlashMic CD-ROM into the CD/DVD drive of the Mac. • Copy the folder ‘FMM_MacOSX’ located on the CD to the desired location on the hard disk. The ‘Applications’ path is a recommended location. • To launch the FlashMic Manager, double click the application FlashMicManager.app located within the folder. 25 Using FlashMic Manager The user interface of FlashMic Manager opens as shown below: FlashMic Interface Running on a PC FlashMic Interface Running on a Mac 26 Configuration Files and Presets Before you start exploring the features of FlashMic Manager, it is important to understand some basic terminology and the concepts behind the use of presets. Various parameters of the FlashMic’s operation can be changed with FlashMic Manager. A set of parameters is called a preset, and the FlashMic can hold up to 9 presets at any time. The FlashMic user can select whichever is appropriate for the recording application using the menus. A set of 9 presets is saved as a configuration file within the computer, and you may create and name as many configuration files as you need. Configuration files are saved with a .cfg filename extension. The entire configuration file will then be uploaded into the FlashMic, giving it its 9 presets. The FlashMic parameters which can be defined in a preset by FlashMic Manager are the following: PARAMETER VALUES USER ALTERABLE* Preset Name 6-character text string No Record Mode File type & sample rate Yes Pre-record Buffer 0 to 10 seconds. No Record Level 8 steps from 5dB to 40dB Yes High-pass Filter In/Out Yes Backlight 3 options No Filename 31-character text string No Battery Display Characteristic Alkaline or rechargeable Yes * Parameters marked ‘Yes’ can be subsequently changed within the FlashMic by the user, provided that Configuration Changes were enabled in FlashMic Manager at the time of configuration file creation. 27 Using the Default Configuration The first time FlashMic Manager is run, a file Defaults.cfg will be created. It will be found in the same folder containing the FlashMic Manager executable file (FlashMicManager.exe). This file differs from other *.cfg files in that its purpose is to provide a convenient set of default parameter values to aid the user in setting up his/her own personalised default configuration file. The parameter values provided by this default are: PARAMETER VALUES Record Mode Linear, 48kHz sample rate Pre-record Buffer Off Record Level AGC on High-pass Filter On Backlight Energy saving mode Filename TRACK Battery Display Characteristic Alkaline These are the settings that will be found in the FlashMic when used for the first time “out of the box”. To see these parameters displayed in FlashMic Manager, click File>New (or hit CTRL+N). This will remove the greyed-out fields ready for data entry. Then click Presets>Set Default Values (or hit CTL + D). This loads the parameter values listed above into the data fields for the currently selected Preset number, as shown in the Select Preset box (in this instance, 1). The FlashMic Manager window should now look like this: Note that it is possible to modify Defaults.cfg to suit the requirements of your own organisation (for example to include your company name). See Creating a Personalised Defaults File, page 35. 28 FlashMic Manager Window - Features Preset Information Using the default parameter set loaded previously as an example (PSET_1), examine the various items of information now displayed in the window. Items marked ‡ are those uploaded to the FlashMic as part of the preset. Current Config file: The filename displayed here will be that of the currently loaded configuration file. In this case, ‘New’ is displayed because the file has not yet been saved. Select Preset – drop-down box permitting selection of one of the 9 presets making up the configuration file. Preset Custom Name ‡ – text box for the name of the preset. This will be displayed in the FlashMic during power-up (if the preset was the last used before powerdown). Note that underscore characters are used to insert spaces in the example preset name, PSET_1. SAVE Clicking this button saves the configuration file currently loaded in FlashMic Manager to the same filename it had when it was opened. If the file has been created from new (as in the example case), a standard Save File As window for a new filename will be opened first. The default name offered is Presets.cfg, but the user may substitute any other filename preferred. Clicking the SAVE button is equivalent to selecting File>Save, or using the keyboard shortcut CTRL + S. Preset Configuration Record Mode ‡ – this drop-down box lets you determine the file type and sample rate from 6 options: RECORD MODE FILE TYPE SAMPLE RATE MAXIMUM RECORDING TIME LIN48K BWF files (uncompressed) 48kHz 3hr LIN44K BWF files (uncompressed) 44.1kHz 3hr 15min LIN32K BWF files (uncompressed) 32kHz 4hr 30min MP48K MPEG1 (Layer 2) files 48kHz 12hr 15min MP44K MPEG1 (Layer 2) files 44.1kHz 14hr 40min LIN32K MPEG1 (Layer 2) files 32kHz 18hr 25min 29 Audio Format – confirms selected audio algorithm Sample Rate – confirms selected sample rate Encoded BitRate – confirms effective bitrate of data being written into memory PreRecord Buffer ‡ – drop-down box for setting the duration of the FlashMic’s prerecord buffer in 1 second increments from zero (off) to 10 seconds. (Set to OFF in example) See section on PreRecord Buffer, page 36 for more information. Record Volume/AGC ‡ – If the AGC box is checked (as in this case), the Record Volume drop down box will be greyed-out. With this setting, the AGC circuit is turned on, and no fixed record level is set. If the AGC box is unchecked, the Record Volume drop-down box permits setting of the record level in 5dB increments from 5dB to 40dB. See Adjusting Record Level, page 13 for more information. High Pass Filter ‡ – FlashMic includes a 100Hz 12dB/octave high-pass filter which can be switched in and out. Backlight ‡ – the display panel backlight in FlashMic can be set to be permanently on or off, or to “Energy-Save mode”, where the backlight illuminates for a short period when a button is pressed. The battery life will be noticeably shortened if the backlight is set to “Always On”. BWF/MPEG File Info File Name ‡ - The text in this field (default text ‘TRACK’ in the example) will form part of the header of all sound files recorded in the FlashMic with this preset. This is to assist later identification. Note the file name can be different for each preset in the configuration file. The name can have up to 31 characters. See File Name Structure, page 37 for more information. Note: The data in the next three fields is written into the BEXT data chunk of the .wav file, and can be read by any compatible editing system. Company Name – This field is optional and can be used for reference and housekeeping purposes. Max. length is 31 characters. Reporter Name - This field is optional and can be used for reference and housekeeping purposes. Max. length is 31 characters. Description - This field is optional and can be used for reference and housekeeping purposes. Max. length is 255 characters. 30 Other Features and Functions DRM Configuration Enable Configuration Changes in DRM – Setting this to “No” restricts the range of menu options available in the FlashMic itself. Refer to the table within Using the Menus, page 17 to see which parameters will not be alterable by the user. Setting this option to “Yes” enables the full range of menu options. Battery – this drop-down box is for setting the type of batteries being used. It changes the characteristic of the battery status display on the FlashMic to reflect the different discharge rates of the two types. USB Connection Send this configuration file to DRM Clicking this button initiates the upload of the configuration file currently loaded in FlashMic Manager into the FlashMic. Download Audio Data from DRM Clicking this button initiates the download of the sound files currently in the FlashMic to the computer (see section Transfer Using FlashMic Manager, page 15 for more details). Connection Status The large “LED” indicator at the top right of the window indicates whether a FlashMic is connected to the computer. It is red when a FlashMic is not connected, and turns green when a successful connection is established. Menu Bar Many of the options available in the menu bar are standard to all Windows™ applications and need little explanation: File> New: clears all parameter fields, allows creation of new configuration file. (Keyboard shortcut: CTRL + N) Open: opens “Select file to Open/Load” dialogue box to permit selection of existing configuration file to load. (Keyboard shortcut: CTRL + O) Save: Saves currently-loaded configuration file as existing filename, unless it is a new file being saved for the first time, in which case the “Save File As” dialogue box opens, for file naming. (Keyboard shortcut: CTRL + S) Save As: opens “Save File As” dialogue box to permit file naming before saving. (Keyboard shortcut: none) Exit: closes FlashMic Manager. (Keyboard shortcut: CTRL + E) 31 Settings> Set Date and Time: opens “Set Date and Time” dialogue box, permitting the FlashMic’s internal clock to be reset. This clock is used to time-stamp recorded audio files. (Keyboard shortcut: CTRL + T) Note this menu option is unavailable unless a FlashMic is connected to the computer and turned on. Set Date and Time Window Set DRM Name: opens “Set DRM Name” dialogue box, allowing the name of the FlashMic currently connected to be changed (maximum 6 characters). The factory default name is DRM85. This name forms part of the file header of each recorded sound file, so renaming the FlashMic to a unique name (e.g., that of the user) is of great assistance when multiple FlashMics are employed. (Keyboard shortcut: CTRL + R.) See FlashMic File Names, page 36 for more information. Note this menu option is unavailable unless a FlashMic is connected to the computer and turned on. Set DRM Name Window Presets> Set Default Values: resets all parameter fields of the FlashMic Manager window to the factory default values determined by the file Defaults.cfg, for the currently selected preset (1 – 9). Any existing set of preset values is overwritten, but the configuration file to which they belong is unchanged. The configuration within the FlashMic also remains unchanged until a file upload is performed. This menu option is unavailable unless a configuration file has already been loaded into FlashMic Manager. (Keyboard shortcut: CTRL + D) Clear Preset Values: simply clears all parameter windows; the loaded configuration file and the FlashMic itself are unchanged. (Keyboard shortcut: CTRL + L) Help> Help: opens the Help file. (Keyboard shortcut: F1) About: displays the FlashMic Manager software version number. Status Bar A set of useful additional information is displayed in FlashMic Manager’s status bar: This consists of (left to right across the status bar): FlashMic connection status Name of currently-connected FlashMic Version No. currently-connected FlashMic’s firmware Current Date and Time (as derived from the computer) Status Bar 32 Connecting the FlashMic When connecting the FlashMic to the computer running FlashMic Manager, always ensure the FlashMic is powered and in IDLE mode first. Connect to the computer with the USB cable supplied. When the FlashMic is “recognised”, the FlashMic Manager window will display the parameter values of the currently-selected preset in the FlashMic itself*. The Current Config file: filename will show “File in DRM is ‘xxx.cfg’”, where ‘xxx’ is the name of the configuration currently loaded into the FlashMic, and the Select Preset box will be set to zero. The status bar will confirm that FlashMic Manager is now displaying the FlashMic’s internal settings with the message “Current active preset settings on DRM”. *On connecting the FlashMic, a standard USB connection window (titled ‘DRM’ in this case) may open offering various options; click Cancel to dismiss this window. Note that connecting the FlashMic to the computer will always attempt to ‘force’ FlashMic Manager to display the FlashMic’s internal settings, and that this operation will overwrite any other data. If unsaved preset data is already displayed, a prompt message to Save the current data will be displayed on connecting the FlashMic. Hint: Saving the settings held in the FlashMic to a new configuration file allows you to copy one FlashMic’s settings to other FlashMic’s, or to a different computer. 33 Creating a New Configuration File To create a different preset (or presets), you must first create a new configuration file. • Click File>New (or enter CTL + N). This clears all the data entry fields and enters ‘New’ as the Current Configuration file name. • Enter data for the first preset (Preset 1) in all data entry boxes in the Current Config file, Preset Configuration and DRM Configuration areas ofthe window. Note that all these fields are mandatory. The File Name in the BWF/MPEG File Info area is also mandatory, but Company Name, Reporter Name and Description are optional and may be left empty if wished. Note that only the characters A-Z and 0-9 are allowed in the File Name field. • Click the SAVE button (or click File>Save, or enter CTL + S). The Save File As dialogue box opens. Enter a name for the configuration file in the File name box and click Save. The dialogue box dismisses. In the FlashMic Manager window, note the Current Configuration file name is now the name just entered. • If you want to create further presets within this configuration file, select a new number in the Select Preset drop-down box (it is normal, though not essential, to work in numerical order!), which clears all the data entry boxes. Enter the data for the new presets in turn, as before. Note that two options in the DRM Configuration area of the window - Battery and Enable Configuration changes in DRM – retain the selection that was made when creating the initial preset. This is because these two parameters are ‘global’, and apply to all the presets in the configuration file. • On SAVEing, the configuration file already created will be updated with the additional presets. It is then possible to upload this configuration file. See Uploading a Configuration File to the FlashMic. Modifying an Existing Configuration File You may wish to change an existing configuration file in some way, or possibly use an existing file as a starting point for a different one. Any parameters in one or more presets may be changed. • Click File>Open (or enter CTL + O). The Select file to Open/Load dialogue box opens. • The available configuration files (*.cfg) will be listed. Select the file to be used, and click Open. This dismisses the dialogue box, and FlashMic Manager will now be loaded with the file. The filename appears as the Current Configuration file in the window’s top area. • The data for Preset 1 is displayed. Either modify the parameters for this preset, or select a different preset for modification. • After all necessary changes have been made to the chosen preset, click SAVE if you don’t want to keep the original set of preset parameters (i.e. in the configuration file you opened). The set of presets will be saved as a configuration file with the same name. If you want to create a new configuration file from the altered presets, click File>Save As, and enter a new name in the Save File As dialogue box which opens. Click Save. • If you attempt to open a different preset before saving the changes to the current one a warning will open, prompting you to save the changes first. 34 Creating a Personalised Defaults File You may wish to modify the Defaults.cfg file to include parameter values specific to your operation. In this way, when Presets>Set Default Values is selected, your own personalised settings are loaded into the FlashMic Manager data fields. Refer to Modifying an Existing Configuration File and open Defaults.cfg. Modify the data as desired, then Save to the existing Defaults.cfg file name. ! When modifying Defaults.cfg do not change the Preset Custom Name from PSET_1. Uploading a Configuration File to the FlashMic After modifying or creating a configuration file, you will want to load it into the FlashMic. This can be carried out immediately after editing the configuration file. • Launch FlashMic Manager. • Switch the FlashMic on. • When the FlashMic is in IDLE mode, connect it to the computer with the USB cable supplied. • The LCD display will show USB, and the large red indicator in the FlashMic Manager window will turn green. There should also be some audible and/or visual confirmation on the computer that the FlashMic has been ‘recognised’. (Exactly what form this confirmation takes may vary slightly from computer to computer. Ignore any window called DRM85 that may open.) FlashMic Manager will display the parameter values of the FlashMic’s currently selected preset. • On FlashMic Manager, click File>Open (or enter CTL + O), and select the configuration file that you wish to load into the FlashMic. • Click the button Send this configuration file to DRM. A message window will open after a short delay, confirming that the configuration file has been transferred. • Unplug the USB connector from the FlashMic, which reverts to IDLE mode. Any of the new presets making up the configuration file just loaded may now be used by recalling it using the Preset Menu. See Preset Menu, page 18 for more details. 35 PreRecord Buffer The FlashMic incorporates a pre-record buffer of up to 10 seconds (adjustable). When enabled, audio collected by the microphone is constantly being written into a buffer memory – separate from the main memory – at all times as long as the FlashMic is powered. Thus the last few seconds of audio are always already stored inside the FlashMic. When the REC button is pressed, the contents of the buffer is written into the main memory, while the ‘live’ audio continues to be written into the buffer. When the M/STOP button is pressed, the contents of the buffer continues to be written to the sound file, so nothing is lost. When the recording is replayed, it will be found that it begins with a few seconds of audio immediately before the REC button was pressed. There are no controls on the FlashMic itself for the pre-record buffer; it is enabled and has its duration set from the FlashMic Manager software, as part of a preset configuration. The pre-record buffer can be set from 0 to 10 seconds, in one second increments. Setting Pre-record Buffer Time It should be clear that if all sound files are created with 10 seconds of pre-record buffer enabled, available memory will be used up more rapidly. A degree of experiment may be necessary to find an optimum setting for the length of the pre-record buffer. It is recommended that the buffer is deselected (by setting the duration to ‘OFF’ in FlashMic Manager) for recording situations where it is unlikely to bring any benefit. FlashMic File Names Frequently, the number of sound files to be downloaded from a FlashMic may be quite large. Furthermore, the FlashMic may have been used in several different locations, and/or by different journalists/recordists. Thus it is important to identify sound files at the time of recording so that their identity and origin can be correctly attributed. A written (or electronic) recording log is recommended elsewhere in this manual, and it is good professional practice to maintain such a log. FlashMic Manager additionally provides the user with the scope for considerable extra assistance in file identification in the form of definable file header information. 36 Filename Structure The sound files recorded in FlashMic are .wav files, with filenames made up of three concatenated components separated by underscore characters as follows: MIC NAME_BWF FILE NAME_TRACK NUMBER.wav The three components of the filename are specified in FlashMic Manager as part of a preset definition. After the configuration file containing the preset parameters is uploaded to the FlashMic, some of the textual data that was entered in FlashMic Manager is used to form part of the filename. The three components of the filename are derived as follows: • MIC NAME – this is the name set in FlashMic Manager at Settings>Set DRM Name. This name applies to all presets defined for a particular configuration file. In an organisation using mulitple FlashMics, it allows each to be given an individual name, which might be MIC_nn, for example, or possibly a recordist’s name (if recordists always use the same FlashMic). The maximum length of the Mic Name is 6 characters (alphanumeric only). • BWF FILE NAME – this is the name entered in the File Name field (in the BWF/MPEG File Info area) of FlashMic Manager. This field can be set differently for each preset in a configuration file. This field can be utilised in a variety of ways depending how the FlashMic is to be used; one possibility might be to create presets which differ only in the file name, relating textually to different interviews that the FlashMic is to be used for on a particular day. The maximum length of the File Name is 31 characters (alphanumeric only). • TRACK NUMBER – this part of the filename is generated within the FlashMic itself, and is simply the number of the recording, which automatically increments by one every time a new recording is made. It is displayed as TRKnnn in the FlashMic LCD. The format of the track number is also TRKnnn, where nnn is the track number. Note that the track number does not reset to zero when a different preset is selected in the FlashMic, when a new configuration file is uploaded, nor when the sound files are downloaded. Reformatting the memory (see section Reformatting the Memory for more information) does reset the track number counter. Some examples of sound file filenames are shown below. Filename structure within FlashMic In the example, several files are in the FlashMic’s AUDIO folder. The first of these is named MIC_01_JOHN_TRK001.wav. In this filename, MIC_01 is the FlashMic name that was set in FlashMic Manager for the configuration file loaded into the FlashMic. JOHN – possibly the recordist’s name - is the BWF/MPEG File Name set in FlashMic Manager for one of the presets. We do not know from the .wav filename which preset number this was, but ‘John’ would have had this information, and would have selected this preset. TRK001 is the track number – the first recording of the day, perhaps. 37 Looking at the other filenames in the folder, it can be seen that they all begin with MIC_01, which would be the case if the FlashMic name (DRM Name) was not changed during the course of the recording period, by uploading a new configuration file with a different DRM Name. Some of the files differ in the BWF/MPEG File Name component; this is where the FlashMic was used by – in our example – different recordists, who each selected a different preset. Note finally, that no track number is repeated. Further recording identification can of course be obtained from the date/time file information, which will be accurate as long as the internal clock was set correctly beforehand. How you will use the file naming system will greatly depend on the type of organisation using the FlashMic(s), how many are in use, how many people are using each FlashMic, the kind of recordings being made, etc. In the simplest of single-mic/ single-owner situations, all the default settings can be used with little chance for confusion. Reformatting the Memory The FlashMic’s 1GB flash memory can be reformatted if wished. This is desirable after a firmware update, and is essential if the FlashMic is formatted via USB from a computer. It is also a convenient method of clearing all sound files from the memory. ! IMPORTANT: Reformatting the flash memory will permanently delete any sound files and Preset data still in the FlashMic, so ensure that all your sound files have been downloaded to a computer before proceeding. To reformat the internal memory, proceed as follows: • With the FlashMic turned off, hold down all three side panel buttons - REC (G), PLAY (H) & M/STOP (M) – simultaneously. • With the three buttons depressed, turn the FlashMic on. The LCD display will show FMT N. If you are sure you want to proceed, using the jogwheel make a SHORT DOWN TURN to change the display to FMT Y, then a SHORT PUSH to accept this. • The display will now show FORMAT. Reformatting takes about 35 seconds to complete. The FlashMic then returns to IDLE mode. FORMAT FlashMic LCD Display During Format. 38 Firmware Updates As a responsible manufacturer, HHB adopts a policy of continuous product development. As with all software-based products, it may be desirable from time to time to update the firmware in your FlashMic with a more recent version. You can contact your HHB dealer or distributor, or visit the FlashMic website at http://www.flashmic.info for details of firmware updates. Firmware updates are downloadable from the FlashMic website, or if you prefer, from your local dealer/distributor on a CD-ROM. Alternatively, if you are uncertain about performing a firmware update yourself, take your FlashMic to your HHB dealer, who will be happy to do it for you. It is recommended that the internal memory is reformatted after a firmware update. See Reformatting the Memory for further details. To perform a firmware update, proceed as follows: • First locate the firmware folder and file. Whether you have downloaded the firmware from the FlashMic website or have it on a CD-ROM, it will always be in a folder called FW VER xx-xx-xx, where xx-xx-xx is the firmware version number. This folder will contain a file called DRM85.bin, which is the firmware file itself. Note that the firmware filename does not identify which version it is, therefore it is important to keep it in the folder it ‘arrived in’ for identification. • Ensure that the batteries in your FlashMic are adequately charged, and change them if there is any doubt. NEVER start a firmware update with low batteries, as the FlashMic may be rendered unusable if the batteries run out midway during the update procedure. • Turn the FlashMic on, and connect it to the computer with the USB cable. The LCD display will change to USB, and the computer will signify its recognition of the FlashMic in the usual way. • The FlashMic will be identified in the directory tree as an additional drive (the drive letter will vary from machine to machine). • Drag-and-drop the DRM85.bin file to the FlashMic root (not into any of the three folders AUDIO, CONFIG or FIRMWARE it contains). • When the file transfer is complete, unplug the FlashMic’s USB cable and switch the FlashMic off. • Switch the FlashMic back on again; the LCD display will now show the message UPDATE. The bargraph meter indication will start to move from left to right. When it gets halfway, the FlashMic will turn off. • Switch the FlashMic back on again, and the update will continue automatically. When the bargraph indication is full, the FlashMic will return to IDLE mode. • The new firmware is now installed. It is suggested that the FlashMic memory is now reformatted. See Reformatting the Memory for further details. 39 Specifications Sampling Frequency 48kHz, 44.1kHz and 32kHz. Selection by FlashMic Manager or on DRM85. Bit Resolution (Linear)16 Bit Audio Formats Linear PCM or MPEG 1 Layer 2. Selection by FlashMic Manager software or on DRM85. 6 mode settings. Bit rates (MPEG) 192, 160, 128 kbps Electronics Frequency Response 20 Hz - 20 kHz ± 1dB @ 48 kHz FS Linear PCM THD + N < 0.1% (20 Hz - 20 kHz) @ 48 kHz FS Linear PCM Number of Channels1 (Mono) Microphone Capsule Omni-directional Record Level Automatic or Manual Gain Control High Pass Filter Switchable on/off, 12 dB/octave @ 100Hz Data Storage System Fixed internal memory, capacity 1 GB. Date / Time Internal real-time clock, running as long as power supply is available. Back-up supply for 1 minute to allow battery change. Set/synchronized by host computer application according to host computer clock. Manual setting on DRM85 by menu item. File Format Linear PCM: .wav, Broadcast Wave File (.wav). Or compressed MPEG 1 Layer 2 .wav Date / Time stamp is stored in file header. Filename generated automatically by DRM85, basic text string provided from PC software. File System FAT. Mounts as a removable drive via USB mass storage device protocol. File transfer is possible with the FlashMic Manager software or through Windows Explorer and Mac OS Finder. Headphone Output 3.5mm stereo socket, mono signal to both channels. Manual volume control by rotary switch. Output may be used for analog audio recording. Drive capability for 32 ohm headphone, short circuit protection. Included accessories Stand Clamp, Batteries (x2), USB cable, Pouch, CDROM, Manual. Optional Accessories Windshield (DRMWS), table stand (DRMTS). Weight 366 grams / 13 ounces (excluding batteries). Dimensions Length 244mm / 9.6 inches. Diameter at widest point (mic capsule) 50mm, 2 inches. 40 Polar Diagram and Frequency Response Curve of Microphone Head -20 -30 dBV -40 -50 -60 -70 50 100 100 200 500 1k 1.000 Hz 2k 5k 10k 10.000 20k FlashMic Frequency Response Curve 2kHz 0° 30° 330° 60° 300° 90° 270° 120° 1kHz and below 4kHz 240° 150° 210° 8kHz 16kHz 180° FlashMic Polar Diagram 41 Notification PRODUCT REGISTRATION Please register ownership of your FlashMic now at http://www.flashmic.info. Registration will enable you to receive software updates and other important FlashMic product news. EC DECLARATION OF CONFORMITY This equipment conforms to the requirements of the EMC Directive (89/336/EEC) relating to electromagnetic compatibility by the application of:- EN55013:2001 and EN55020:2002. FCC COMPLIANCE NOTE: This equipment has been tested and found to comply with the limits for a Class B digital device, pursuant to Part 15 of the FCC Rules. These limits are designed to provide reasonable protection against harmful interference in a residential installation. This equipment generates, uses and can radiate radio frequency energy and, if not installed and used in accordance with the instructions, may cause harmful interference to radio communications. However, there is no guarantee that interference will not occur in a particular installation. If this equipment does cause harmful interference to radio or television reception, which can be determined by turning the equipment off and on, the user is encouraged to try to correct the interference by one or more of the following measures: -- Reorient or relocate the receiving antenna. -- Increase the separation between the equipment and receiver. -- Connect the equipment into an outlet on a circuit different from that to which the receiver is connected. -- Consult the dealer or an experienced radio/TV technician for help. WEEE DECLARATION FlashMic was developed and manufactured with high quality materials and components, which can be recycled and/or reused. This symbol indicates that electrical and electronic equipment must be disposed of separately from normal waste at the end of its operational lifetime. Please dispose of this product by taking it to your local collection point or recycling centre for such equipment. This will help to protect the environment in which we all live. LIMITED SOFTWARE WARRANTY POLICY All the software provided with, or purchased especially for, HHB products has been tested for functionality. HHB Communications Ltd will make all reasonable efforts to correct reported software defects for future releases subject to technical and economic practicality. HHB Communications Ltd makes no warranty or representation either express or implied with respect to the system’s performance or fitness for a particular purpose. In no circumstances will HHB Communications Ltd be liable for direct or indirect damages arising from any defect in the software or its documentation. Further, HHB Communications Ltd will not be liable for any loss of or damage to programs, sounds, audio recording, sequences or data stored in or used with HHB products, including the cost of recovery. The disclaimers above are exclusive and take precedence over all others, oral or written, express or implied, to the extent permitted by law in the geographical area of the product’s sale. No employee of HHB Communications Ltd, agent, distributor or employee of an agent or distributor is authorised to offer any variation. TRADEMARKS All trademark, product and company names are the property of their respective owners. http://www.flashmic.info 42