1
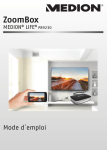
zoombox
™
DVD Entertainment Projector
USER GUIDE
75052
EXT. IN
EXT. IN
VIDEO
DVD
VIDEO
EXT.
VIDEO
IN
DVD
DVD
Thank you for purchasing the ZOOMBOX DVD Player and
Entertainment Projector. Be sure to read and follow all
instructions carefully before using this product.
Take your entertainment to the wall by turning any room in your home
into a personal theater. Play your favorite movies, video games and
music on a wall or ceiling for a larger-than-life-size experience. Zoom in,
kick back, relax and enjoy! Entertainment’s better when it’s BIGGER.™
Batteries not required.
12V AC Adaptor included.
PROJECTOR SPECIFICATIONS
•
•
•
•
•
•
DVD/CD Player
TFT LCD Projector
Resolution 557 x 234
Brightness: 8 ANSI Lumens
35 Watt MR-11 12V Bulb
1000 hour lamp life (average)
1
IMPORTANT SAFETY INSTRUCTIONS
•
Read these instructions.
•
Keep these instructions.
•
Heed all warnings.
•
Follow all instructions.
•
Do not use this apparatus near water.
•
Clean only with a dry cloth.
•
Do not block any ventilation openings. Install in
accordance with the manfacturer’s instructions.
Do not install near any heat sources such as
radiators, heat registers, stoves or other apparatus
(including amplifiers) that produce heat.
Do not defeat the safety purpose of the polarized
or grounding-type plug. A polarized plug has two
blades with one wider than the other. A grounding
type plug has two blades and a third grounding
prong. The wide blade or third grounding prong are
provided for your safety. If the provided plug does
not fit into your outlet, consult an electrician for
replacement of the obsolete outlet
Protect the power cord from being walked on
or pinched particularly at plugs, convenience
receptacles, and the point where they exit from the
apparatus.
Only use attachments/accessories specified by the
manufacturer.
Use only with the stand provided with the
apparatus.
•
•
•
•
•
•
•
•
•
•
•
•
•
•
•
•
•
2
Unplug this apparatus during lightning storms or
when unused for long periods of time.
Refer all servicing to qualified personnel. Servicing
is required when the apparatus has been damaged
in any way, such as power supply cord is damaged,
liquid has been spilled or objects have fallen into
the apparatus, the apparatus has been exposed to
rain or moisture, does not operate normally, or has
been dropped.
If servicing is required, please contact Hasbro
Consumer Affairs at 1-800-844-3733.
Do not look directly into the lens when the lamp
is on.
Keep plastic, paper, and combustible material at
least 0.5 m (2 ft.) away from the projector lens
and vents.
Do not put anything on top of the projector.
Use only enclosed power cord rated for the voltage
and current marked on the product label.
Do not stand the projector on its front surface.
Do not touch the lens with your fingers. See
“Cleaning the projector lens” on page 13.
Do not open the projector except as instructed by
this guide on page 14 and only after allowing the
projector to cool down.
Warnings and power rating information are located
inside DVD compartment and on the bottom panel.
Place the projector on the table top and open
environment when it is operating.
Handle/Adjustable Stand
Manual
Focus Lens
Lens Cap
ANGLE
SUBTITLE
AUDIO
ZOOM
DISPLAY
SETUP MENU
Lamp
Stereo Speakers
Open
Disc Menu = Show DVD
Disc Menu
Previous
(Zoom)
Directional Pad
=
=
=
=
(Setup Menu)
Up/Slow Motion
Down
Left/Rewind
Right/Forward
Shift = Shift functions
ANGLE
Enter =
(Angle)
SUBTITLE
AUDIO
ZOOM
DISPLAY
SETUP MENU
(For more detailed information
please see page 6)
/Play
Pause = Pause/Step Forward
Stop
(Subtitle)
(Audio)
3
Next
(Display)
NOTE: Items in parenthesis
are Shift functions.
AV Plugs
[yellow = video, white = audio left, red = audio right]
Mode Switch
Volume Dial
EXT. IN
VIDEO
Air Vent
DVD
Headphone Jack
LAMP
MAIN
Air Vent
12V DC
Power Jack
Power Cable
End A
End C
End B
On/Off Switch
ATTENTION:
Use the supplied
power adaptor,
type number:
KSS60-12.0-5000
only.
4
Lamp Switch
FUNCTION KEYS DESCRIPTION
Printed
Name
Description
When
Stop
When Play
When
Pause
In Disc/
Setup Menu
1
Å
Up/Slow motion
Ñ ½/¼/⅛/1⁄16
-
-
Up
2
Ç
Down
-
-
-
Down
3
É
Left/Rewind
ÉÉ 2/4/8/16/32x
-
-
Left
4
Ñ
Right/Fast forward
ÑÑ 2/4/8/16/32x
-
-
Right
5
/PLAY
Play/enter
-
Play
Play
Enter
6
II/STEP
Pause/step forward
Pause
-
1 step
-
7
¢
Stop
Stop
-
Stop
-
8
IÉÉ
Previous
Previous
Previous
Previous
-
9
ÑÑI
Next
Next
Next
Next
-
10
DISC MENU
Show DVD disc menu
Disc menu
Disc menu
Disc menu
-
11
SHIFT
Shift functions
-
-
-
-
5
SHIFT-FUNCTIONS
Printed name
DVD
Audio CD
1
Angle
Select viewing angle provided by the
DVD disc
-
2
Subtitle
Select subtitle provided by the DVD disc
-
3
Audio
Select language or audio effect provided Select MONO LEFT, MONO RIGHT,
by the DVD disc
MIX-MONO and STEREO
4
Zoom
Zoom 2x / 3x / 4x
5
Display
-
Title 1
Title 2
Track 1
Track 2
Track 3
Track 4
Track 5
Track 6
Chapter 1 Chapter 2 Chapter 3 Chapter 4 Chapter 1 Chapter 2
Show title # / chapter # / time in different way :
- Title elapsed (e.g. TT 01/04 CH 01/02
0:02:13)
- Title remaining time
- Chapter elapsed
- Chapter remaining time
- Off
6
Setup menu
Enter setup menu
Show track # / time in different way :
- Track elapsed time
- Track remaining time
- Total elapsed time
- Total remaining time
- Off
Enter setup menu
6
SET UP
Rotate the Handle/
Adjustable Stand
until you reach
your desired
position.
EXT.
VIDE
O
To watch your movies or play video games
on the wall, place your ZOOMBOX DVD
Entertainment Projector on a flat, hard,
stable surface. Do not place it on a
carpeted or upholstered surface.
Position approximately 8 feet from the
wall for a 60-inch diagonal picture. For
best results, use in dark room on a light
colored wall.
EXT.
VIDEO
IN
DVD
To watch your movies
or play video games
on the ceiling, place
your ZOOMBOX DVD
Entertainment Projector
vertically on its base
on a flat, hard, stable
surface. Do not place
it on a carpeted or
upholstered surface.
For best results, use in
dark room on a light
colored ceiling.
IN
DVD
7
GETTING STARTED
1. Plug end A of the Power Cable into the Power Jack
on the Projector.
2. Plug end C of the Power Cable into the jack on the
AC Adapter.
3. Make sure the On/Off Switch is in the “Off” position.
4. Plug end B of the Power Cable into a wall outlet.
5. Move the On/Off Switch to the “ON” position.
6. Move the Lamp Switch to the “ON” position. The lamp
will begin warming up. You will see an introductory
screen on your viewing surface.
7. Move the Mode Switch to “DVD” if you will be watching
a DVD or listening to a CD, or “EXTERNAL” if you will be
playing a video game or connecting your ZOOMBOX to
any other external devices such as a video camera, digital
camera, VCR, cable box, plug ‘n play game console, etc.
Your DVD or CD will automatically begin playing
when inserted.
NOTE: At any time you can adjust the focus of your screen by
rotating the Manual Focus Lens clockwise and counterclockwise.
NOTE: Keep the air vents clear of any obstructions.
8
1, 2 & 3
LAMP
MAIN
12V DC
B
A
C
4&5
LAMP
MAIN
12V DC
5
EXT. IN
VIDEO
DVD
SETTINGS
1. Press the Shift button and then “Setup Menu”.
2. The Set Up Menu will be displayed:
NOTE: Setup Menu is only available
in DVD mode.
3. Use the Directional Pad to scroll to the setting you would like to adjust and press ENTER.
4. Use the É and Ñ keys on the Directional Pad to raise or lower the value of the current setting.
Press ENTER when finished to set the value.
5. Press Setup Menu again to exit.
BRIGHTNESS
COLOR
CONTRAST
TINT
Brightens or darkens the picture.
Adjusts the intensity of colors.
Sets the difference between light and dark areas.
Adjusts the shade of the colors.
9
TO PLAY A DVD
TO PLAY A CD
1. Make sure the Mode Switch is set to
“DVD”.
2. Press the OPEN button.
3. Insert a DVD.
4. Gently close the lid of the projector.
You will hear a click.
5. The DVD will start up. Use the
Directional Pad to scroll through the
DVD Menu.
6. Press ENTER to select “Play” from the
DVD Menu.
7. Use the Play, Pause, Next, Previous
and Stop buttons to navigate through
your movie.
8. Rotate the Volume
Dial to the right
or left to increase
or decrease the
volume of your
movie.
NOTE: Move the Lamp Switch to
the “Off” position when playing a
CD. Having the lamp OFF will help
conserve bulb life.
1. Make sure the Mode Switch is set to
“DVD”.
2. Press the OPEN button.
3. Insert a CD.
4. Gently close the lid of the projector.
You will hear a click.
5. Press the Play button to begin listening
to your music.
6. Use the Next and Previous buttons to
navigate through the playlist.
7. Press Stop to stop playing your music
or Pause to pause the current song.
8. Rotate the Volume Dial to the right or
left to increase or decrease the volume
of your music.
10
TO CONNECT A VIDEO GAME CONSOLE
1. Use your gaming console’s AV Cable to connect
your video gaming console to the ZOOMBOX
DVD Entertainment Projector. Make sure you
match the colors of the plugs (White = Audio
Left, Red = Audio Right, Yellow = Video) to the
colors of the ports that are on the ZOOMBOX
DVD Entertainment Projector.
2. Move the Mode Switch to “External.”
3. Your video gaming console’s main screen will
appear. Use your video game controller to navigate through the menu and play
your video game. To access the Setup Menu, set the mode switch to “DVD”.
EXT. IN
VIDEO
DVD
You can also connect a variety of other electronic devices to your ZOOMBOX such as:
video camera, digital camera, VCR, cable box, plug ‘n play gaming console and more!
video camera
digital camera
VCR
11
cable box
plug ‘n play
LISTEN WITH YOUR HEADPHONES
If you prefer to listen privately with
headphones (not included) simply
insert headphone plug into the ⅛”
headphone jack located on the side of
the projector.
EXT. IN
VIDEO
DVD
NOTE: Turn down the volume before
inserting headphones.
CONNECT YOUR POWERED EXTERNAL SPEAKERS
If you want to add more sound to
your entertainment experience,
connect your powered external
speakers (not included) by
inserting a ⅛” speaker plug into
the headphone jack.
EXT. IN
VIDEO
12
DVD
CLEANING THE PROJECTOR LENS
You can clean the front lens of the projector
using the following recommendations. You
cannot clean any of the internal surfaces.
• To minimize the risk of damaging or
scratching the lens surface, blow dust
particles off the lens with clean, dry,
deionized air.
• If this method does not work, use the
following method:
–
–
Wipe the lens in a single direction with a
clean, dry cloth. Do not wipe back and forth
across the lens.
If the cloth is dirty or smears the lens, wash the cloth. If the cloth is still dirty after washing it or the fabric is
damaged, replace it.
• Cleaning requires special consideration:
–
–
–
Do not spray any type of fluid or cleaner directly on the lens surface.
Cleaners might damage the lens.
Do not use fabric softener when washing a cleaning cloth or softener sheets when drying the cloth. Chemicals
on the cloth might damage the surface of the lens.
• Do not store a cleaning cloth in contact with the lens for a long time because doing so
contaminates the lens with dye from the cloth. The cloth can be contaminated if left in the
open air.
13
TO REPLACE LAMP BULB
As the projector operates over time, the brightness of the projector lamp gradually decreases and
the lamp becomes more susceptible to breakage. You can install a new lamp at any time to bring
the projector up to factory-fresh brightness.
The lamp bulb has approximately a 1000-hour life. The lamp operates at a very high temperature,
so wait 30 minutes before removing the lamp bulb. Use a 35 Watt 12V MR-11 lamp bulb, found
where standard light bulbs are sold in home improvement and hardware stores.
1. Turn off
ZOOMBOX
and allow it
to cool for 30
minutes.
2. Unplug the
power cord.
3. Use a Phillips/cross head
screwdriver (not included) to
unscrew the cover and remove.
4. Use a Phillips/cross head
screwdriver (not included) to
unscrew the inside panel. Panel
stays attached.
14
5. Remove existing bulb. Use a soft
cloth to prevent breakage.
6. Plug in replacement bulb.
7. Reattach panel.
8. Reattach cover.
TROUBLESHOOTING GUIDE
START UP PROBLEMS
• If no lights or sounds turn on:
–
–
–
–
–
Be sure that the power cord is securely connected to
the projector and the other end is plugged into an
outlet with power.
Be sure the lens cap is off.
Press the On/Off button again.
Unplug the power cord for 15 seconds, then plug it
in and press the On/Off button again.
Be sure volume is turned up.
• If the image is too small or too large:
–
• If the projector colors seem slightly wrong:
–
–
–
–
When displaying the main menu, adjust the manual
focus.
Ensure the projection surface is between 4 and 8
feet away from the projector.
Check the projection lens to see if it needs cleaning.
Go to the main menu and try adjusting the Color,
Tint, Brightness and Contrast of the picture.
INTERRUPTION PROBLEMS
• If the projector stops responding to all controls:
–
PICTURE PROBLEMS
• If the image is out of focus:
Move the projector closer to or farther from the
viewing surface.
If possible, turn off the projector, then unplug the
power cord and wait at least 15 seconds before
reconnecting power.
• If the lamp shuts off during a show:
–
A minor power surge might cause the lamp to shut
off. This is normal. Wait a few minutes, then power
on the projector.
FCC STATEMENT
This equipment has been tested and found to comply with the limits for a Class B digital device, pursuant to part
15 of the FCC Rules. These limits are designed to provide reasonable protection against harmful interference
in a residential installation. This equipment generates, uses and can radiate radio frequency energy, and, if not
installed and used in accordance with the instructions, may cause harmful interference to radio communications.
However, there is no guarantee that interference will not occur in a particular installation. If this equipment does
cause harmful interference to radio or television reception, which can be determined by turning the equipment off
and on, the user is encouraged to try to correct the interference by one or more of the following measures:
- Reorient or relocate the receiving antenna.
- Increase the separation between the equipment and the receiver.
- Connect the equipment into an outlet on the circuit different from that to which the receiver is connected.
- Consult the dealer or an experienced radio/TV technician for help.
Product and colors may vary.
© 2005 Hasbro. All Rights Reserved.
TM & ® denote U.S. Trademarks.
75052
PN 6515800000