1
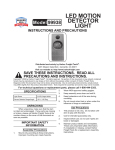
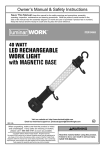
WIRELESS FIVE-LED PUCK LIGHT
94253
ONE PUCK LIGHT
94254
THREE PUCK LIGHTS
ASSEMBLY AND OPERATING INSTRUCTIONS
Due to continuing improvements, actual product may
differ slightly from the product described herein.
3491 Mission Oaks Blvd., Camarillo, CA 93011
Visit our Web site at http://www.harborfreight.com
Copyright © 2006 by Harbor Freight Tools®. All rights reserved. No portion of this
manual or any artwork contained herein may be reproduced in any shape or form
without the express written consent of Harbor Freight Tools.
For technical questions and replacement parts, please call 1-800-444-3353
Specifications
Item
Battery Requirement
Run Time
LEDs
Switch Type
Lens Head
Mounting
Weight
Description
3 – AAA 1-1/2 volt batteries per Puck Light (not
included)
Up to 60 hours using new, high quality batteries
Bright white
Push button in lens: On/Off/Dim
Swivels 360 degrees; pivots 30 degrees left/right
Screw or hook-loop tape mount
0.5 lbs. (each puck)
Save This Manual
You will need the manual for the safety warnings and precautions, assembly instructions,
operating and maintenance procedures, parts list and diagram. Keep your invoice
with this manual. Write the invoice number on the inside of the front cover. Keep the
manual and invoice in a safe and dry place for future reference.
Safety Warnings and Precautions
WARNING: When using this product, basic safety precautions should always be
followed to reduce the risk of personal injury and damage to equipment.
Read all instructions before using this tool!
1.
The Puck Light does not provide enough light to illuminate a pathway for
walking.
2.
Use only the size and battery type specified. Do not mix different types of
batteries together (alkaline and NiCad).
3.
Use care when installing batteries. Placing the batteries in the wrong direction
(polarities reversed) may damage the Puck Light.
4.
When batteries are used up, recycle them properly. Do not throw into the
trash or burn them.
Note: Performance of this product may vary depending on variations in battery power.
Warning: The warnings, cautions, and instructions discussed in this instruction
manual cannot cover all possible conditions and situations that may occur. It
must be understood by the operator that common sense and caution are factors
which cannot be built into this product, but must be supplied by the operator.
Unpacking
When unpacking, check to make sure that the product is complete and undamaged.
If any parts are missing or broken, please call Harbor Freight Tools at the number on
the cover of this manual.
SKU 94253-94254
For technical questions, please call 1-800-444-3353
Page 2
Installation
Mounting with Hook and Loop Tape
1.
Find the Hook and Loop tape (supplied). They come attached to each other.
Pull apart the Hook and Loop sections.
2.
Peel the backing off the Hook pad.
Center on the Battery Cover and press
down to adhere.
3.
Clean the spot where the Light is to be
located of any dirt and grease. Peel the
backing of the Loop pad and press
down and adhere Light to the location.
4.
After the Batteries (not included) are installed, press the Puck Light against
the Loop pad to secure.
Mounting with Screw
1.
Remove the Back Cover by carefully pulling up on Tabs. Remove the bag of
Screws (included) located inside the Puck Light.
2.
Locate the mounting location and make a pencil
mark at the center point.
3.
If mounting to a wall, use appropriate screw lugs
(not included) for the screws provided. If mounting
onto other material, drilling may be required.
Tabs
Caution: Avoid electrical shock. Be certain that you
are not drilling or screwing into any electrical wires
located behind the wall.
4.
Screw in mounting Screw, leaving a 1/16 inch space under the screw head.
5.
Place the Screw into the center hole of the Back Cover, slide the Back Cover
to the smaller portion of the hole, and tighten Screw completely.
6.
After the Batteries (not included) are installed, press the Puck Light onto the
Back Cover to secure. It should snap into place.
Installing Batteries
1.
Remove the Back Cover by carefully pulling up on
the Tabs.
2.
Install three, new AAA 1-1/2 volt batteries into each
Puck Light. Align the + polarity on the Battery with
the + on the battery holder.
3.
Snap in the Back Cover.
SKU 94253-94254
For technical questions, please call 1-800-444-3353
Page 3
Operation
1.
Position the Puck Light by pressing on the
left or right side of the Lens to direct the light
left or right 30 degrees.
2.
Turn the Puck Light base 360 degrees to
direct the light.
3.
Press in on the center of the Lens once to
turn the light on at full brightness.
4.
Press again for lower brightness.
5.
Press a third time to turn the light off.
Troubleshooting
Symptom
No light when
Lens pushed in.
One LED does
not light
Probable Cause
1. Batteries weak or
dead.
2. Installed batteries
incorrectly.
LED burned out.
Possible Solution
1. Replace batteries.
2. Reinstall batteries
paying attention to
polarity (+/-).
Replace Puck Light or
have a qualified
technician repair the
unit.
Maintenance
1.
Remove the batteries before storing the Puck Light.
2.
Immediately remove the batteries when the batteries have run down.
3.
Store the Puck Light in a clean and dry location when not in use.
4.
There are no customer replaceable parts on this unit.
PLEASE READ THE FOLLOWING CAREFULLY
THE MANUFACTURER AND/OR DISTRIBUTOR HAS PROVIDED THE PARTS DIAGRAM
IN THIS MANUAL AS A REFERENCE TOOL ONLY. NEITHER THE MANUFACTURER NOR
DISTRIBUTOR MAKES ANY REPRESENTATION OR WARRANTY OF ANY KIND TO THE
BUYER THAT HE OR SHE IS QUALIFIED TO MAKE ANY REPAIRS TO THE PRODUCT OR
THAT HE OR SHE IS QUALIFIED TO REPLACE ANY PARTS OF THE PRODUCT. IN FACT,
THE MANUFACTURER AND/OR DISTRIBUTOR EXPRESSLY STATES THat ALL REPAIRS
AND PARTS REPLACEMENTS SHOULD BE UNDERTAKEN BY CERTIFIED AND
LICENSED TECHNICIANS AND NOT BY THE BUYER. THE BUYER ASSUMES ALL RISK
AND LIABILITY ARISING OUT OF HIS OR HER REPAIRS TO THE ORIGINAL PRODUCT
OR REPLACEMENT PARTS THERETO, OR ARISING OUT OF HIS OR HER INSTALLATION
OF REPLACEMENT PARTS THERETO.
SKU 94253-94254
For technical questions, please call 1-800-444-3353
Page 4