1
98751
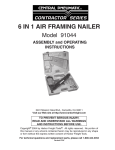
3 IN 1 AIR FRAMING NAILER START-UP GUIDE
WARNING
To prevent serious injury:
1. Even though the Nailer should be empty during the following procedure, ALWAYS point the Nailer at a
piece of scrap wood when testing.
2. Make sure Trigger and Safety Nosepiece move freely, without sticking. Do not use nailer if Trigger or
Safety sticks.
3. Disconnect the Nailer from the air compressor whenever loading or servicing.
4. WEAR ANSI-APPROVED IMPACT SAFETY GOGGLES WHEN RELOADING OR DOING ANY OTHER
MAINTENANCE ON NAILER. Other people in work area must also wear ANSI-approved safety goggles.
5. This guide is not intended to replace the Manual. READ THE MANUAL.
Testing The Safety Mechanism
1. Completely empty the Magazine.
2. The Nailer should not fire if Safety Nosepiece is not depressed against scrap wood.
3. Connect air supply to the Air Coupler. Set the regulator at the recommended 70 to 120 PSI.
4. Test by depressing Safety Nosepiece against a piece of scrap wood without pulling the Trigger.
The Nailer must not fire. If it fires, stop immediately and have the Nailer repaired by a qualified
service technician.
5. Hold tool away or off of scrap wood. The Safety Nosepiece should return to its original position.
Squeeze the Trigger. The Nailer must not fire. If the tool fires, stop immediately and have it repaired
by a qualified service technician.
6. Depress Safety Nosepiece against workpiece and squeeze Trigger. The Nailer must fire only once.
Release the Trigger and squeeze it again. The Nailer must not fire.
With the Trigger held, carefully lift the Nailer and press it against the workpiece again.
The Nailer must not fire. If it fails to perform in the manner explained in bold, have the Nailer
repaired by a qualified service technician.
Loading Nails
1. Slide the Tab back and the Lock will hold it in place.
2. Load a stick of nails (not included) into the top slot,
making sure nail heads are facing up.
Tab
CAUTION
To prevent injury when releasing the Lock, KEEP FINGERS CLEAR OF TAB TRACK.
Tab automatically and forcefully slides forward. PINCH HAZARD.
NOTICE
The Nailer may not work if there are only a few nails left in the tool.
If there are only a few nails remaining, simply load another strip of nails into the Magazine behind the few
remaining nails. The Nailer will be ready for further use.
Page 1
3 STEPS TO SET NAILER ANGLE
Washer
CAUTION
34°
21° 28°
To prevent injury, disconnect the air
supply before making adjustments.
Hex Bolt
Trigger
Hex Bolt
Adjustment
Holes
Pin
Pin
Lock
Bar Guide
Tab
Depth Screw
Bracket
1
Inspect Pin’s location.
When driving 21° angle nails,
the Pin should be in the lower hole
as shown to the right.
Pin
When driving 28° or 34° angle nails,
place the Pin in the upper hole.
If the Pin is in the wrong position, pull
the Pin from its Washer, reposition the
Bar Guide, and reinsert and secure the
Pin and Washer as shown above. Before
using Nailer, be sure Pin is properly secured.
Tab Track
2
28°/ 34°
21°
3
Remove the Adjuster Knob.
Move the Magazine until the
desired hole on the Joint Plate
lines up with the nut on the
Magazine. Replace and tighten
the Adjuster Knob.
Pull back and engage the Tab, exposing
three adjustment holes. Loosen the hex bolt
and slide it into the appropriate hole (21°, 28°,
34°). Retighten the hex bolt securely, making
sure it fits into the appropriate hole properly.
When done, carefully release Lock while
guiding the Tab towards the front with your
hand.
Air Coupler
Magazine
Adjuster
Knob
34°
Joint
Plate
28°
The driving depth of a nail can
be adjusted in two ways.
21°
First, by increasing or decreasing
air pressure (never to exceed the
maximum of 120 PSI).
Adjuster Knob
Second, by loosening the Depth Screw
and adjusting the Bracket as shown below.
Experiment on a scrap piece of material to determine how far to adjust the unit.
Depth Screw
Bracket
Safety Noisepiece
Rubber
Cover
CAUTION
To prevent injury when releasing the Lock,
KEEP FINGERS CLEAR OF TAB TRACK.
Tab automatically slides quickly forward.
PINCH HAZARD.
Joint
Plate
Safety
Put on ANSI-approved goggles and attach air supply to the Air Coupler.
Start your air compressor and set between 70-120 PSI.
To fire, place the Safety Nosepiece of the Nailer on the workpiece. The Nailer
should not fire if the Safety Nosepiece is not depressed. Once depressed, quickly
squeeze the Trigger once.
Do not fire repeatedly; nails could bounce off of one another causing injury.
We recommend practicing with a piece of scrap material.
The Rubber Cover provides a non-marring surface.
If desired, the Rubber Cover may be removed to expose the teeth on Safety
Nosepiece. Doing so provides a nonslip surface and can improve accuracy.
When finished, disconnect the Nailer from the air source.
Page 2