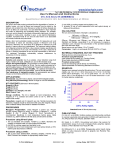
1
Instruction Manual
HI 83900
Suction Lysimeter
www.hannainst.com
1
Dear Customer,
Thank you for choosing a HANNA instruments® product.
Please read this instruction manual carefully before using the equipment. It will provide you with the necessary information for a correct use.
For additional technical information, do not hesitate to e-mail us at
[email protected] or see the back cover for our worldwide contact list.
PRELIMINARY EXAMINATION
TABLE OF CONTENTS
ORDERING INFORMATION
PRELIMINARY EXAMINATION...................................................................... 3
HI 83900-30: Suction lysimeter, 30 cm (0.98’) tube
HI 83900-60: Suction lysimeter, 60 cm (1.97’) tube
HI 83900-90: Suction lysimeter, 90 cm (2.95’) tube
HI 83900-25: Cleaning solution replacement kit, 500 mL bottle
ORDERING INFORMATION ....................................................................... 3
WARRANTY .............................................................................................. 3
Remove the equipment from the packing material and examine it carefully to make
sure that no damage has occurred during shipping. If there is any noticeable damage, immediately notify your dealer.
Each kit includes:
• 1 x sampler tube ending with porous ceramic tip
• 1 x capillary rubber tube with rubber cap and finger clamp
• 1 x cleaning solution starter kit (120 mL bottle)
• 1 x 30 mL syringe
• instruction manual
Note Save all packing materials until you are sure that the equipment functions
correctly. Any damaged or defective items must be returned in their original
packing materials together with the supplied accessories.
GENERAL USE/OPERATING PRINCIPLES ..................................................... 4
FUNCTIONAL DESCRIPTION ...................................................................... 5
OPERATIONAL GUIDE ............................................................................... 6
WARRANTY
Hanna Instruments reserves the right to modify the design,
construction and appearance of its products without advance notice.
This equipment is guaranteed for two years against defects in workmanship
and materials when used for their intended purpose and maintained according to
instructions.
This warranty is limited to repair or replacement free of charge. Damages due to
accident, misuse, tampering or lack of prescribed maintenance are not covered.
If service is required, contact the dealer from whom you purchased the instrument. If
under warranty, report the model number, date of purchase, serial number and the
nature of the failure. If the repair is not covered by the warranty, you will be notified of
the charges incurred.
If the instrument is to be returned to Hanna Instruments, first obtain a Returned
Goods Authorization number from the Customer Service department and then send it
with shipping costs prepaid.
When shipping any instrument, make sure it is properly packaged for complete protection.
2
3
• ACTIVATION ........................................................................................ 6
• INSTALLATION...................................................................................... 7
• SAMPLE EXTRACTION ........................................................................... 8
SUGGESTIONS FOR SAMPLE ANALYSIS....................................................... 9
MAINTENANCE AND STORAGE ............................................................... 10
TROUBLESHOOTING ............................................................................... 11
GENERAL USE / OPERATING PRINCIPLES
FUNCTIONAL DESCRIPTION
The HI 83900 suction lysimeter is built with a porous ceramic cap connected to a
transparent tube for soil solution extraction. A rubber capillary is inserted in the tube
passing through a rubber cap and reaching the ceramic tip.
The lysimeter is an ideal tool for collecting soil solution samples and then perform
quantitative chemical analysis. In this way the operator can easily monitor the level of
fertilization nutrients, such as ammonia, nitrate, phosphorous and potassium.
The ceramic tip of the lysimeter can be used in all types of soil, and it is made of
sinterized material that does not react with nutrient elements. The soil solution, therefore, is not affected by the chemical composition of the ceramic cap, and the test
results are always precise and reliable.
Use our chemical test kits or photometers for accurate analysis (see the HANNA
instruments® general catalog or visit our web site at www.hannainst.com for a
complete list of equipments, reagents and accessories).
The HI 83900 allows to extract a solution from the soil by creating a vacuum (negative pressure or suction) inside the sampler tube, that exceeds the soil water tension.
This will establish an hydraulic gradient for the solution to flow through the porous
ceramic cap and into the lysimeter tube. Typically, a vacuum of about -60 cb (centibar) should be drawn.
For better monitoring the soil solution composition throughout an entire growth period of crops, at least two lysimeters should be installed in the root zone of a representative plant, one at the upper part and the other in the lower part of the root zone.
For better accuracy and repeatability of results, it is recommended to replicate the
above described installation in at least two more locations.
1. Rubber cap
2. Soil solution sampler tube
3. Porous ceramic tip
4. 30 mL syringe (pump)
5. Rubber suction capillary
6. Finger clamp
4
5
OPERATIONAL GUIDE
INSTALLATION
Location
Assemble the unit by inserting the rubber capillary in the
sampler tube and closing with the rubber cap. Check that
the rubber capillary is into the ceramic tip, then remove the
plastic bag from the ceramic part and follow the activation
procedure explained below.
Important: NEVER TOUCH THE CERAMIC SENSITIVE
PART WITH YOUR FINGER BEFORE AND DURING THE
ACTIVATION PROCESS.
• The selected location/plant for installing the
lysimeter should be representative of the entire field.
• For better accuracy and repeatability of results, install at list 3 couples of lysimeters (see
below) per each area to be monitored.
Operation
• Place the lysimeter inside the root zone. It is
suggested to install at least two lysimeters,
one at the upper and the other in the lower
layer of the root zone.
• The recommended distance from the drip
source depends on the soil type:
sandy soil: 5 cm; medium soil: 10 cm; heavy
soil: 15 cm.
ACTIVATION
• Fill approximately 1/3 of the lysimeter tube with the supplied cleaning solution.
• Draw the syringe piston all the way back and attach the
syringe to the rubber capillary.
• Close the tube with the rubber cap, open the finger clamp
and push the syringe piston.
• Pinch the finger clamp and wait until the solution seeps
through the porous ceramic tip. Draw the rest of the solution from the sampler tube and dispose of it.
• The lysimeter is now sterile, free of air bubbles and ready
for insertion into the ground.
• Keep the ceramic tip moist until the lysimeter is inserted
into the soil. Protect it with a plastic bag.
6
• Drill a hole in the ground at the selected
location and insert the HI 83900, while
pushing and rotating it around its axis.
After the proper depth is reached, compress
the surrounding soil, while paying attention
that the soil is tightly in contact with the ceramic tip.
7
SAMPLE EXTRACTION
SUGGESTIONS FOR SAMPLE ANALYSIS
Warning! Never operate the lysimeter in the following conditions:
• immediately after irrigation, otherwise the extracted solution will be the
irrigation water and not the soil solution.
• before the irrigation water reaches the depth of the ceramic tip, because
necessary tension can never be obtained if the sensitive tip is dry.
• Sample extraction needs a vacuum of approximately -60 cb (centibar) to be created inside
the sampler tube. Connect the syringe to the
rubber capillary, open the finger clamp and
draw the syringe piston all the way back (30
mL). Pinch the finger clamp and disconnect
the syringe.
To obtain a vacuum of about -60 cb (centibar), perform these operations once with the
HI 83900-30 model, twice with HI 8390060 and 3 times with HI 83900-90.
• Before drawing out the soil solution, allow a
time interval which depends on the soil type.
Tuff or sandy soil: 30 minutes
Light soil:
1 hour
Medium soil:
2 to 4 hours
Heavy soil:
3 to 12 hours
• To collect the soil solution, connect the syringe to the rubber capillary, open the finger
clamp and the rubber cap, then draw the syringe piston all the way back (30 mL).
• Hold the piston until all the solution is sucked into the syringe, then disconnect the
syringe from the capillary and leave the finger clamp open.
• Transfer the soil solution into the sampling vessel and immediately perform tests.
• Never draw the syringe piston more than specified times, otherwise the
soil moisture tension will be broken. In addition, when a very high vacuum
is created at the soil solution, the test results will be unreliable, due to a
non-aerobic process.
• After drawing out the solution, the lysimeter should not remain at vacuum
conditions until the next time of operation.
8
HANNA instruments® offers a wide variety of instrumentation, chemical test kits and
reagents (ask your dealer for details) to analyze soil solution samples.
Use the HI 83215 (or HI 83225) Grow Master bench photometer for testing the
presence and strength of ammonia, nitrate, phosphorus and potassium on
the spot (low, medium and high ranges). This advanced instrument is very
simple to operate even for non-technical users, and provides lab results.
1. Add the proper reagent (see photometer instruction manual) to the sample solution and shake gently.
2. Fill two measuring cuvets, one with the solution without reagent (blank) and the
other with the reacted sample. Screw the cap onto the cuvets and shake.
3. Wipe the cuvets with a soft tissue to remove any dirt or fingerprint.
4.
5.
Select the desired program and insert
the “blank” cuvet into the photometer
cell. Press “ZERO”.
Now insert the cuvet with the solution
to be analyzed and press “READ”.
For pH/EC/TDS measurements, you can use these portable meters, housed in a
water-resistant casing ideal for field applications:
HI 9811-5 0 to 14 pH, 6000 μS/cm, 3000 ppm, 0 to 70°C
HI 9813-6 0 to 14 pH, 4.00 mS/cm, 1999 ppm, 0 to 60°C, with HANNA F.S.T. system
HI 991300 0 to 14 pH, 3999 μS/cm, 2000 ppm, 0 to 60°C, with advanced features
Chemical Test Kits for Agriculture:
HI 38078 kit for SAR (Sodium Absorption Ratio) test
HI 3896
professional kit for testing traces, low, medium and high ranges of
nitrogen, phosphorus and potassium, and pH from 4 to 9.
9
MAINTENANCE AND STORAGE
TROUBLESHOOTING
The lysimeter should remain installed for all the crop season, and the ceramic cap
must be sterilized against fungi and algae at least every two months, without removing it from the ground.
• Fill the syringe with the supplied cleaning solution (approximately 10 mL).
• With the finger clamp open, inject the solution into the lysimeter tube for about 10
seconds. Draw up the rest of the solution and dispose of it.
If the lysimeter is unable to extract soil solution, first check that:
• The soil is tightly in contact with the porous ceramic cap.
>>> Compress the surrounding soil if necessary.
• The suction capillary reaches the ceramic tip.
>>> Otherwise push it downwards through the rubber cap.
Do not perform soil solution tests immediately after sterilization.
In seasonal cropping and during winter, remove the lysimeter from its installation
before the first frost.
• Immediately after removing the lysimeter, immerse the tip in the cleaning solution
over night.
• Let the solution drain through the porous ceramic cap, gravity flow.
• Air dry the lysimeter and store it.
Warning!
• Do not let the ceramic cap dry while dirty.
• Do not store at temperatures below freezing because some water may
remain trapped inside the porous ceramic.
10
Moreover, the following conditions can cause inability to extract soil solution:
• The water has not reached the ceramic tip. This can occurs when the lysimeter is
positioned at a depth of 40-50 cm.
>>> Delay time of operation.
• Water reaches the depth of the ceramic tip very slowly, also measured in days for
very heavy or compact soils. In this case, the lysimeter should not be installed in
low depths such as 50-60 cm.
>>> Use the lysimeter in depths of only 15-30 cm.
>>> Install the lysimeter in a different location, where the soil is not
too compact.
• Fully developed plants can compete with the lysimeter for water, and may be not
possible to extract the solution. It can also happen that the solution not collected in
time will be extracted back from the lysimeter by the plant.
>>> Operate earlier.
• The water distribution is not uniform.
>>> Check the irrigation water flow.
• The soil is dry, due to an irrigation with insufficient amount of water.
>>> Irrigate again increasing the amount of water.
11
SALES AND TECHNICAL SERVICE CONTACTS
Australia:
Tel. (03) 9769.0666 • Fax (03) 9769.0699
China:
Tel. (10) 88570068 • Fax (10) 88570060
Egypt:
Tel. & Fax (02) 2758.683
Germany:
Tel. (07851) 9129-0 • Fax (07851) 9129-99
Greece:
Tel. (210) 823.5192 • Fax (210) 884.0210
Indonesia:
Tel. (21) 4584.2941 • Fax (21) 4584.2942
Japan:
Tel. (03) 3258.9565 • Fax (03) 3258.9567
Korea:
Tel. (02) 2278.5147 • Fax (02) 2264.1729
Malaysia:
Tel. (603) 5638.9940 • Fax (603) 5638.9829
Singapore:
Tel. 6296.7118 • Fax 6291.6906
South Africa:
Tel. (011) 615.6076 • Fax (011) 615.8582
Taiwan:
Tel. 886.2.2739.3014 • Fax 886.2.2739.2983
Thailand:
Tel. 66.2619.0708 • Fax 66.2619.0061
United Kingdom: Tel. (01525) 850.855 • Fax (01525) 853.668
USA:
Tel. (401) 765.7500 • Fax (401) 765.7575
For e-mail contacts and complete list of Sales and Technical offices, please see
www.hannainst.com
MAN83900
12
09/05