1
Instructions
VPM™
313875J
EN
Hydraulic, Plural-Component, High-Viscosity, Variable-Ratio Proportioner.
For pouring and dispensing sealants and adhesives. For professional use only.
Not approved for use in European explosive atmosphere locations.
Important Safety Instructions
Read all warnings and instructions in this
manual. Save these instructions.
See page 4 for model information, including maximum working pressure and approvals.
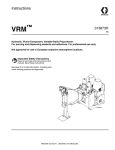
VPM-12
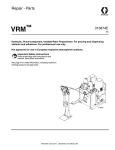
VPM-25
ti17692a
ti17693a
Contents
Related Manuals . . . . . . . . . . . . . . . . . . . . . . . . . . . 3
Models . . . . . . . . . . . . . . . . . . . . . . . . . . . . . . . . . . . 4
Accessories . . . . . . . . . . . . . . . . . . . . . . . . . . . . . . . 4
Warnings . . . . . . . . . . . . . . . . . . . . . . . . . . . . . . . . . 5
Important Two-Component Material Information . 7
Isocyanate Conditions . . . . . . . . . . . . . . . . . . . . . 7
Material Self-ignition . . . . . . . . . . . . . . . . . . . . . . 7
Keep Components A (Red) and B (Blue) Separate 7
Moisture Sensitivity of Isocyanates . . . . . . . . . . . 8
Changing Materials . . . . . . . . . . . . . . . . . . . . . . . 8
A (Red) and B (Blue) Components . . . . . . . . . . . . . 8
Component Identification . . . . . . . . . . . . . . . . . . . 10
VPM-12 . . . . . . . . . . . . . . . . . . . . . . . . . . . . . . 12
Hydraulic Power Pack . . . . . . . . . . . . . . . . . . . . 15
Motor Control Module (MCM) . . . . . . . . . . . . . . 16
Advanced Display Module (ADM) . . . . . . . . . . . 18
Fluid Control Module (FCM) . . . . . . . . . . . . . . . 21
Setup . . . . . . . . . . . . . . . . . . . . . . . . . . . . . . . . . . . . 22
Initial Machine Setup . . . . . . . . . . . . . . . . . . . . . 22
Adjust Motor Control Module Selector Switch . . 27
Startup . . . . . . . . . . . . . . . . . . . . . . . . . . . . . . . . . . 28
Change Drum . . . . . . . . . . . . . . . . . . . . . . . . . . . . . 29
Remove Drum . . . . . . . . . . . . . . . . . . . . . . . . . . 29
Install Drum . . . . . . . . . . . . . . . . . . . . . . . . . . . . 29
Priming . . . . . . . . . . . . . . . . . . . . . . . . . . . . . . . . . . 30
Operation . . . . . . . . . . . . . . . . . . . . . . . . . . . . . . . . 31
ADM Operation Overview . . . . . . . . . . . . . . . . . 31
Machine Operation Overview . . . . . . . . . . . . . . 33
System Setup and Calibration . . . . . . . . . . . . . . 34
Dispensing . . . . . . . . . . . . . . . . . . . . . . . . . . . . 43
Shutdown . . . . . . . . . . . . . . . . . . . . . . . . . . . . . . . . 45
Short-term . . . . . . . . . . . . . . . . . . . . . . . . . . . . . 45
End of Shift . . . . . . . . . . . . . . . . . . . . . . . . . . . . 45
Pressure Relief Procedure . . . . . . . . . . . . . . . . . . 46
Maintenance . . . . . . . . . . . . . . . . . . . . . . . . . . . . . . 47
Install Upgrade Tokens . . . . . . . . . . . . . . . . . . . 48
Advanced Display Module (ADM) . . . . . . . . . . . 49
Motor Control Module (MCM) . . . . . . . . . . . . . . 49
Fluid Control Module (FCM) . . . . . . . . . . . . . . . 49
Troubleshooting . . . . . . . . . . . . . . . . . . . . . . . . . . . 51
Light Tower (Optional) . . . . . . . . . . . . . . . . . . . . 51
Common Problems . . . . . . . . . . . . . . . . . . . . . . 51
ADM Troubleshooting . . . . . . . . . . . . . . . . . . . . 53
Motor Control Module . . . . . . . . . . . . . . . . . . . . 54
Fluid Control Module . . . . . . . . . . . . . . . . . . . . . 56
2
Appendix A - ADM Icons Overview . . . . . . . . . . . 57
Setup Screen Icons . . . . . . . . . . . . . . . . . . . . . . 57
Home Screen Icons . . . . . . . . . . . . . . . . . . . . . 58
Appendix B - ADM Setup Screens Overview . . . . 59
Appendix C - ADM Run Screens Overview . . . . . 65
Optional Screens . . . . . . . . . . . . . . . . . . . . . . . . 68
Appendix D - ADM Event and Error Codes Overview
69
Event Codes . . . . . . . . . . . . . . . . . . . . . . . . . . . 69
Error Codes . . . . . . . . . . . . . . . . . . . . . . . . . . . 70
Appendix E - USB Operation . . . . . . . . . . . . . . . . 80
Overview . . . . . . . . . . . . . . . . . . . . . . . . . . . . . . 80
USB Options . . . . . . . . . . . . . . . . . . . . . . . . . . . 80
Download Log Files . . . . . . . . . . . . . . . . . . . . . . 80
Log Files, Folder Structure . . . . . . . . . . . . . . . . 81
Transfer System Settings . . . . . . . . . . . . . . . . . . 83
Update Custom Language . . . . . . . . . . . . . . . . . 84
Technical Data . . . . . . . . . . . . . . . . . . . . . . . . . . . . 87
Dimensions . . . . . . . . . . . . . . . . . . . . . . . . . . . . 87
Graco Standard Warranty . . . . . . . . . . . . . . . . . . . 88
313875J
Related Manuals
Related Manuals
Manuals are available at www.graco.com.
Component manuals in English:
System Manual
312764
VPM Repair-Parts
Power Distribution Box Manual
3A0239
Power Distribution Boxes Instructions-Parts
Pumpline Manuals
312375
Check-Mate® Displacement
Pumps
3A0021
Vertical Hydraulic Driver
Repair-Parts
Valve Manuals
310550
1/2 in. NPT Fluid Port Ball Seat
Applicator
310551
3/4 in. NPT Fluid Port Ball Seat
Applicator
3A1792
DV Series Dispense Valves
Flow Meter Manual
309834
Helical Gear Fluid Flow Meter
Accessories
3A1937
313875J
Heated Platen Kits
3
Models
Models
Full Load Peak Amps
Per Phase*
System
Description
24F226
VPM-25,
Boom
mounted
dispense
valve
24F874
24F875
24J509
24J510
24J511
*
VPM-12,
Mast
mounted
dispense
valve,
reduced
flow
✔
✔
1
2
No Heated Heated
Heat Platen Platen
Voltage
(phase)
55 A
62 A
62 A
400 (3)
60 A
76 A
86 A
230 (3)
55 A
62 A
62 A
400 (3)
55 A
62 A
62 A
400 (3)
60 A
76 A
86 A
230 (3)
55 A
62 A
62 A
400 (3)
System
Watts
24,000
(No Heat)
Approximat
Max Flow
e Output
Rate◆**
per Cycle Hydraulic
lb/min
(A+B)**
Pressure
(kg/min)
gal. (liter)
Ratio**
55 (25)
27,600
(1 Platen)
31,200
(2 Platens)
Maximum
Fluid
Working
Pressure ‡
psi (MPa,
bar)
0.2 (0.76)
1.87
3000
(21, 207)
26 (12)
Full load amps with all devices operating at maximum capabilities. Fuse requirements at various flow rates and
mix chamber sizes may be less.
** Values are dependent on installed pump size. Values shown are for largest available pump size.
◆ Flow rate is independent of frequency 50/60 Hz.
❖ Flow rate increases with flow meters removed.
‡ The maximum fluid working pressure for the base machine without hoses is 3000 psi (21 MPa, 207 bar). If hoses
rated at less than 3000 psi are installed, the system maximum fluid working pressure becomes the rating of the
hoses. If 2000 psi hoses were purchased and installed by Graco, the working pressure for the machine is already
setup for the lower 2000 psi (14 MPa, 138 bar) working pressure by Graco. If the machine was purchased without
hoses and aftermarket hoses rated at or above 3000 psi are to be installed, see Adjust Motor Control Module
Selector Switch on page 27 for the procedure to setup the machine for higher rated hoses. The change in working pressure is made by changing a rotary switch setting in the Motor Control Module. The minimum pressure rating for hoses is 2000 psi. Do not install hoses with a pressure rating lower than 2000 psi.
Accessories
Heated Platen Kits
Power Distribution Box Conversion Kits
The Heated Platen kits convert the standard platen to a
heated platen to enable dispensing in lower temperature
environments.
These conversion kits convert the voltage and CE
approval of a system.
Part
Description
Part
Description
24E269
400V Non-CE Conversion Kit
24E267
B (Blue) Side Kit
24E272
400V CE Conversion Kit
24E268
A (Red) Side Kit
4
313875J
Warnings
Warnings
The following warnings are for the setup, use, grounding, maintenance, and repair of this equipment. The exclamation point symbol alerts you to a general warning and the hazard symbol refers to procedure-specific risk. Refer back
to these warnings. Additional, product-specific warnings may be found throughout the body of this manual where
applicable.
WARNING
ELECTRIC SHOCK HAZARD
This equipment must be grounded. Improper grounding, setup, or usage of the system can cause electric shock.
•
•
•
Turn off and disconnect power at main switch before disconnecting any cables and before servicing
equipment.
Connect only to grounded power source.
All electrical wiring must be done by a qualified electrician and comply with all local codes and regulations.
TOXIC FLUID OR FUMES HAZARD
Toxic fluids or fumes can cause serious injury or death if splashed in the eyes or on skin, inhaled, or
swallowed.
•
Read MSDSs to know the specific hazards of the fluids you are using.
•
Store hazardous fluid in approved containers, and dispose of it according to applicable guidelines.
•
Always wear chemically impermeable gloves when spraying, dispensing, or cleaning equipment.
PERSONAL PROTECTIVE EQUIPMENT
You must wear appropriate protective equipment when operating, servicing, or when in the operating
area of the equipment to help protect you from serious injury, including eye injury, hearing loss, inhalation of toxic fumes, and burns. This equipment includes but is not limited to:
•
Protective eyewear, and hearing protection.
•
Respirators, protective clothing, and gloves as recommended by the fluid and solvent manufacturer.
SKIN INJECTION HAZARD
High-pressure fluid from dispensing device, hose leaks, or ruptured components will pierce skin. This
may look like just a cut, but it is a serious injury that can result in amputation. Get immediate surgical
treatment.
+
•
Do not point dispensing device at anyone or at any part of the body.
•
Do not put your hand over the fluid outlet.
•
Do not stop or deflect leaks with your hand, body, glove, or rag.
•
313875J
Follow the Pressure Relief Procedure when you stop dispensing and before cleaning, checking,
or servicing equipment.
•
Tighten all fluid connections before operating the equipment.
•
Check hoses and couplings daily. Replace worn or damaged parts immediately.
5
Warnings
WARNING
FIRE AND EXPLOSION HAZARD
Flammable fumes, such as solvent and paint fumes, in work area can ignite or explode. To help prevent
fire and explosion:
•
•
•
•
Use equipment only in well ventilated area.
Eliminate all ignition sources; such as pilot lights, cigarettes, portable electric lamps, and plastic
drop cloths (potential static arc).
Keep work area free of debris, including solvent, rags and gasoline.
Do not plug or unplug power cords, or turn power or light switches on or off when flammable fumes
are present.
•
Ground all equipment in the work area. See Grounding instructions.
•
Use only grounded hoses.
•
Hold gun firmly to side of grounded pail when triggering into pail.
•
•
If there is static sparking or you feel a shock, stop operation immediately. Do not use equipment
until you identify and correct the problem.
Keep a working fire extinguisher in the work area.
EQUIPMENT MISUSE HAZARD
Misuse can cause death or serious injury.
•
Do not operate the unit when fatigued or under the influence of drugs or alcohol.
•
Do not exceed the maximum working pressure or temperature rating of the lowest rated system
component. See Technical Data in all equipment manuals.
•
Use fluids and solvents that are compatible with equipment wetted parts. See Technical Data in all
equipment manuals. Read fluid and solvent manufacturer’s warnings. For complete information
about your material, request MSDS from distributor or retailer.
•
Do not leave the work area while equipment is energized or under pressure. Turn off all equipment
and follow the Pressure Relief Procedure when equipment is not in use.
•
Check equipment daily. Repair or replace worn or damaged parts immediately with genuine manufacturer’s replacement parts only.
•
Do not alter or modify equipment.
•
Use equipment only for its intended purpose. Call your distributor for information.
•
Route hoses and cables away from traffic areas, sharp edges, moving parts, and hot surfaces.
•
Do not kink or over bend hoses or use hoses to pull equipment.
•
Keep children and animals away from work area.
•
Comply with all applicable safety regulations.
MOVING PARTS HAZARD
Moving parts can pinch, cut or amputate fingers and other body parts.
•
Keep clear of moving parts.
•
Do not operate equipment with protective guards or covers removed.
•
6
Pressurized equipment can start without warning. Before checking, moving, or servicing equipment, follow the Pressure Relief Procedure and disconnect all power sources.
313875J
Important Two-Component Material Information
WARNING
BURN HAZARD
Equipment surfaces and fluid that’s heated can become very hot during operation. To avoid severe
burns:
• Do not touch hot fluid or equipment.
SPLATTER HAZARD
Hot or toxic fluid can cause serious injury if splashed in the eyes or on skin. During blow off of platen,
splatter may occur.
• Use minimum air pressure when removing platen from drum.
Important Two-Component Material Information
Isocyanate Conditions
Spraying or dispensing materials containing isocyanates creates potentially harmful mists, vapors, and
atomized particulates.
Read material manufacturer’s warnings and material
MSDS to know specific hazards and precautions
related to isocyanates.
Keep Components A (Red) and
B (Blue) Separate
Cross-contamination can result in cured material in
fluid lines which could cause serious injury or damage equipment. To prevent cross-contamination of
the equipment’s wetted parts, never interchange
component A (Red) and component B (Blue) parts.
Prevent inhalation of isocyanate mists, vapors, and
atomized particulates by providing sufficient ventilation in the work area. If sufficient ventilation is not
available, a supplied-air respirator is required for
everyone in the work area.
To prevent contact with isocyanates, appropriate personal protective equipment, including chemically
impermeable gloves, boots, aprons, and goggles, is
also required for everyone in the work area.
Material Self-ignition
Some materials may become self-igniting if applied
too thickly. Read material manufacturer’s warnings
and material MSDS.
313875J
7
A (Red) and B (Blue) Components
Moisture Sensitivity of
Isocyanates
Isocyanates (ISO) are catalysts used in two component
foam and polyurea coatings. ISO will react with moisture
(such as humidity) to form small, hard, abrasive crystals,
which become suspended in the fluid. Eventually a film
will form on the surface and the ISO will begin to gel,
increasing in viscosity. If used, this partially cured ISO
will reduce performance and the life of all wetted parts.
NOTE: The amount of film formation and rate of crystallization varies depending on the blend of ISO, the
humidity, and the temperature.
To prevent exposing ISO to moisture:
•
•
Always use a sealed container with a desiccant
dryer in the vent, or a nitrogen atmosphere. Never
store ISO in an open container.
Keep the pump wet cups filled with IsoGuard
Select®, part 24F516. The lubricant creates a barrier between the ISO and the atmosphere.
•
Use moisture-proof hoses specifically designed for
ISO, such as those supplied with your system.
•
Never use reclaimed solvents, which may contain
moisture. Always keep solvent containers closed
when not in use.
•
Never use solvent on one side if it has been contaminated from the other side.
•
Always lubricate threaded parts with ISO pump oil
or grease when reassembling.
Changing Materials
•
When changing materials, flush the equipment multiple times to ensure it is thoroughly clean.
•
Check with your material manufacturer for chemical
compatibility.
•
Most materials use ISO on the A (Red) side, but
some use ISO on the B (Blue) side. See the following section.
A (Red) and B (Blue) Components
IMPORTANT!
Material suppliers can vary in how they refer to plural
component materials.
Be aware that when standing in front of the manifold on
proportioner:
•
•
Component A (Red) is on the left side.
Component B (Blue) is on the right side.
For all machines:
•
•
The A (Red) side is intended for ISO, hardeners,
and catalysts.
The B (Blue) side is intended for polyols, resins, and
bases.
NOTE: For machines with material volume ratios other
than 1:1, the higher volume side is typically the B (Blue)
side.
8
313875J
A (Red) and B (Blue) Components
313875J
9
Component Identification
Component Identification
AA
AB
AC
AD
AE
AF
Advanced Display Module (see page 18)
Hydraulic Power Pack
Vertical Hydraulic Driver
RAM Assembly
Ratio Check Dispense Valves/Ports
Power Distribution Box
AG
AH
AJ
AK
AL
Boom Lift Lever
Mixer
Main Power Switch
Air Supply Inlet
Electrical Enclosure
AB
AD
VPM-25 shown
AE
AH
AE
AG
AK
ti17693a
AL
AA
FIG. 1: Component Identification
10
313875J
Component Identification
VPM-25 shown
AD
AC
AF
AJ
ti17702a
AL
FIG. 2: Component Identification
313875J
11
Component Identification
VPM-12
AB
AE
AD
AD
AC
AC
AJ
AH
AF
AK
ti17703a
AL
AL
AA
FIG. 3
12
313875J
Component Identification
RAM Assembly
BA
BB
BC
BD
BE
Vertical Hydraulic Driver
Pump Lower
Platen
Integrated Air Controls
Platen Bleed Port
BF
BG
BH
BJ
BK
Blowoff Air Supply Line Connector
Platen Lift Rod
Pump Bleeder Valve
Pump Wet Cup
Material Line
BA
BK
BJ
BD
BB
BH
BG
BC
BE
BF
ti17705a
313875J
13
Component Identification
Integrated Air Controls
Circuit Breakers
The integrated air controls include:
•
Main air slider valve (CA): turns air on and off to
the ram system. When closed, the valve relieves
pressure downstream.
•
Ram air regulator (CB): controls ram up and down
pressure and blowoff pressure.
•
Ram director valve (CC): controls ram direction.
•
Exhaust port with muffler (CD)
•
Blowoff button (CE): turns air on and off to push
the platen out of an empty drum.
Most circuit breakers are located inside the power distribution box. The main block of circuit breakers in the
power distribution box is shown below, with detailed
information in the following table. See the power distribution box manual for more information.
CB1
CB5
CB6
CB10
CD
CC
24C687_313873-5_1c
CE
CB
Size
230V/
3 phase
400V/
3 phase
Component
CB1
30A
63A
Motor Control Module
CB5
5A
5A
Miscellaneous
CB6
5A
5A
Miscellaneous
CB10
30A
63A
Motor Control Module
Ref.
CA
FIG. 4: Component Identification
14
313875J
Component Identification
Hydraulic Power Pack
F
B
E
C
G
A
D
257442_313873-5_1t
H
257442_313873-5_2t
Shown with shroud removed
FIG. 5
Key:
A
B
C
D
8 Gallon Hydraulic Oil Reservoir (see Technical Data on
page 87 for specifications)
Electric Motor
Dipstick
Hydraulic Housing
313875J
E
F
G
H
Motor Control Module (see page 16)
Fan
Hydraulic Oil Filter
Hydraulic Fluid Drain Port
15
Component Identification
Motor Control Module (MCM)
The MCM is located in the Hydraulic Power Pack.
NOTICE
When installed, the end of the MCM with the power
input connection (12) faces down and the end with the
access cover (A) faces up.
If the Motor Control Module is replaced, the selector switch must be set prior to initial startup of the
Motor Control Module or damage may occur. See
Adjust Motor Control Module Selector Switch
on page 27.
The Motor Control Module uses an 8-position selector
switch to set the system maximum working pressure.
B
A
3
1A
C
1B
r_257396_3b9905_01b
2
6
10
8
9
11
7
12
13
r_257396_3b9905_03b
5
FIG. 6: MCM Component Identification
16
313875J
Component Identification
Ref
Description
A
Access Cover
B
Module Status LEDs
C
Warning Label
A (Red) MCM only:
ADM,
Power Distribution Box
1A, 1B
B (Blue) MCM only:
FCM,
Power Distribution Box
NOTE: 1A and 1B are interchangeable.
2
Three-way Splitter to:
Oil Low Level Sensor,
Dispense Valve Solenoid,
Footswitch
3
Oil Temperature Sensor
5
Electric Motor Temperature Sensor
6
LVDT
7
A (Red) MCM only:
Three-way Splitter to:
Hydraulic Directional Valve,
Oil Overtemperature Switch,
Ratio Check Solenoid Valve
B (Blue) MCM only:
Three-way Splitter to:
Hydraulic Directional Valve,
Oil Overtemperature Switch
(Third connection is not used)
8
Pressure Transducer (for material side
controlled by the MCM)
9
Not used
10
MCM to MCM Analog Connection
11
Motor Position Sensor
12
MCM Power Input Connection
13
Motor Power Connection
313875J
17
Component Identification
Advanced Display Module (ADM)
User Interface
B
C
A
D
E
F
H
G
TI12362a1
FIG. 7: ADM Component Identification - Front
Buttons
Call
out
A
B
C
18
Function
Call
out
Button
Function
ADM
Enable/
Disable
Enable/disable ADM
D
Softkeys
Defined by icon next to softkey
E
Abort
Abort current operation
F
Enter
System
Status
Indicator
LED
Displays system status
Accept change, acknowledge error,
select item, toggle selected item
G
Toggle between Run and Setup
screens
Stop
Stop all system processes
Run/
Setup
Screens
Toggle
H
Arrow
Keys
Navigate within a screen or to a new
screen
Button
313875J
Component Identification
J
S
K
L
M
N
R
P
ti12902a
FIG. 8: ADM Component Identification - Rear
Key:
J
K
L
M
Flat Panel Mount
Model Number Identification Label
USB Interface (see Appendix E - USB Operation
beginning on page 80)
CAN Cable Connection to MCM
N
P
R
S
Module Status LEDs
Accessory Cable Connection
Software Token Access Cover
Battery Access Cover
See ADM Troubleshooting on page 53 for LED status information.
See Maintenance section beginning on page 47 for battery replacement and software update procedures.
313875J
19
Component Identification
ADM Screen Components
See the ADM appendix sections beginning with Appendix A - ADM Icons Overview on page 57 for more information.
Current date and time
Previous screen
Current screen
Next screen
Operating Mode
Faults, Status
Enter/Exit screen
Previous
screen no.
Current
screen no.
Settings Detail
Next
screen no.
FIG. 9: Main Display Components - Typical Setup Screen
Current date and time
Previous screen
Current screen
Operating Mode
Next screen
Faults, Status
Change Operating
Mode
Initiate Dispense
Initiate Ratio
Check Dispense
Dispense Details
FIG. 10: Main Display Components - Home Screen (Shot mode shown)
20
313875J
Component Identification
Fluid Control Module (FCM)
The fluid control module is located inside the electrical
enclosure.
A
C
ti12337a1
D
ti12336a1
B
FIG. 11:
Key:
A
B
C
D
Module Connection Screws
Access Cover
Module Status LEDs
CAN Connectors (one is connected to MCM, other is
unused)
313875J
21
Setup
Setup
Initial Machine Setup
Perform this setup procedure to prepare the machine for
initial operation.
b.
Connect air line on boom to boom director valve
located on boom support.
c.
Install mixer onto boom.
d. Connect electrical cables from base to boom.
The machine is not properly grounded until this setup
procedure is performed. To prevent risk of electric
shock, do not start the machine until this setup procedure is completed.
1. Locate the machine.
NOTICE
To prevent machine damage, do not expose system
to rain.
e. Connect fluid lines from base to boom.
3. VPM-12 systems only: If the mast
was shipped disassembled, install
the mast.
a. Use four bolts and washers to install mast onto
base.
NOTICE
If lifting the machine is required, use a forklift at the
base of the machine. Do not lift the machine by placing forks at the top of the RAM assembly frame.
ti17706a1
a. Locate the machine on a level surface. See
Dimensions on page 87 for space requirements.
b.
Connect air line on mast to mast director valve.
b.
c.
Install mixer onto mast.
Lock the wheels once the machine is in place.
2. VPM-25 systems only: Install the
boom.
d. Connect electrical cables from base to mast.
e. Connect fluid lines from base to mast.
ti17706a
a. Install boom into support.
22
313875J
Setup
4. Fill pump wet cups 2/3 full with
IsoGuard Select fluid.
pointed up and the sensor is on the outlet side
(top, as shown) of the flow meter.
A (Red) Side
B (Blue) Side
ti17707a
5. Back-off air regulators to their full
counterclockwise position and
close all shutoff valves.
6. Install Flow Meters
b.
Hand tighten flow meter fittings to allow proper
positioning of the entire assembly.
c.
Install the output plumbing hand-tight. The outlet plumbing includes the pressure sensor and
pressure gauge.
NOTICE
To prevent damage, be careful when handling the
pressure sensor and pressure gauge assembly
because the pressure sensor cable is attached.
NOTE: This system ships with the flow meters removed.
The illustrations below shows what the flow meters will
look like after they are installed.
B (Blue) Side
A (Red) Side
d. Align the flow meter assembly and fully tighten
all fittings.
B (Blue) Side
A (Red) Side
a. Place the flow meter in position as shown in the
illustration below. The flow direction arrow is
313875J
23
Setup
e. Connect the flow meter cable.
Electrical Cord Requirements
NOTE: Power cord is not supplied. See the following
table.
Table 1: Power Cord Requirements
Cord Requirements
AWG (mm2)
Model
230V, 3 phase
8 (8.4), 3 wire + ground
400V, 3 phase
6 (13.3), 4 wire + ground †
† Residual Current Device (RCD) must be rated at
300 mA if installed.
B (Blue) Side
A (Red) Side
Electrical Cord Wires by Model
7. Connect 1/2 in. NPT female air
supply to air inlet.
NOTICE
To prevent machine damage, supplied air must be
dried and filtered.
230V, 3 phase: L1, L2, L3, GND
400V, 3 phase: L1, L2, L3, N, GND
Electrical Requirements
See Models on page 4 for detailed electrical requirements information.
a. Use 5/32 in. or 4 mm hex allen wrench to connect the power leads to L1, L2, L3, and N as
applicable.
b.
Connect green wire to ground (GND).
N L3 L2 L1
GND
ti17708a
8. Connect electrical cord.
r_24C686_313998_1a
FIG. 12: 400V, 3 phase shown
Installing this equipment requires access to parts
which may cause electric shock or other serious injury
if work is not performed properly. Have a qualified
electrician connect power and ground to main power
switch terminals. All electrical wiring must be done by
a qualified electrician and comply with all local codes
and regulations.
24
313875J
Setup
Power conversion equipment can be sensitive to voltage
fluctuations on incoming power. The Motor Control Module falls under the category of power conversion equipment because energy is stored on a capacitive bus and
then modulated to control a brushless motor. Engineered design takes this into account and withstands a
wide range of conditions, but it is possible for supplied
power to occasionally fall outside the tolerable range in
industrial plants with high-amperage reactive pulsed
loads such as welding equipment. If the tolerable range
is exceeded, an overvoltage condition is flagged and the
system will shut down in an alarm state to protect itself
and alert the user of unstable power. Excessive or
repeated overvoltage may permanently damage hardware.
The MAX-HOLD feature on a multimeter can be used to
determine peak DC voltage on the line. DC is the proper
setting, as opposed to AC, because peak voltage is the
critical parameter that affects the DC voltage level
stored on the capacitive bus in power conversion equipment. Reading should not regularly exceed approximately 400VDC to avoid tripping the 420VDC alarm
level in the Motor Control Module. If power quality is suspect, power conditioning or isolation of the device(s)
causing poor power quality is recommended. Consult a
qualified electrician if there are any concerns about the
available power supply.
Power Line Test Steps with Multimeter
i.
Set multimeter to “DC voltage”.
ii.
Connect multimeter probes to supplied power line.
iii. Press “Min Max” successively to show the peak
positive and negative DC voltages.
iv. Confirm readings do not exceed 400VDC (Motor
Control Module alarm issued at 420VDC).
The chart below shows the permissible magnitude and
duration of temporary over-voltage events:
Maximum Permissible Transient Voltage Surges
* Constructed from ITIC 1996 curve, referenced by IEC 61000-2-4
1400
1200
<--1 MW Max Surge Power
1200Vac, 1697Vdc
1000
Voltage (Volts RMS)
Power Line Voltage Surges
800
600
480Vac, 679Vdc
400
<--150 KW Max Surge Power
336Vac, 475Vdc
<--50 KW Max Surge Power
288Vac, 407Vdc
200
<--No Power Limit
264Vac, 373Vdc
0
0.000001
0.00001
0.0001
0.001
0.01
0.1
1
10
Time (seconds)
9. Ground the system.
This equipment must be grounded.
a. VPM: grounded through power cord. See Connect Electrical Cord, step #8 on page 24.
b.
Dispense Valve: follow your local code.
c.
Fluid supply containers: follow your local code.
d. Dispensing target/container: follow your local
code.
e. To maintain grounding continuity when flushing
or relieving pressure, hold grounded metal pail
firmly to a metal part of dispense valve then initiate a dispense.
10.Check hydraulic fluid levels.
The hydraulic reservoirs are filled at the factory. See
Technical Data on page 87 for hydraulic fluid specifications.
313875J
25
Setup
11.If applicable, attach and adjust
drum low/empty sensor.
NOTE: An optional kit can be purchased to indicate
either when the drum is low or when it is empty.
b.
Navigate to Advanced #2 screen then set units
of measure. See page 63.
c.
Navigate to Advanced #3 screen then
enable/disable system features. See page 64.
d. Navigate to System #1 screen then define control mode, dispense mode, and pump information. See page 61.
A
E
e. Navigate to System #2 screen then define dispense valve details and other system settings.
See page 61.
D
f.
B
ti10916a
a. Position ram at desired level (low or empty).
b.
c.
Attach low/empty sensor bracket (A) to mounting bracket (B).
Attach the actuator (D) to the ram piston rod,
near the top, so it passes in front of the
sensor (E) at the correct level for drum low or
drum empty.
Navigate to System #3 screen then define
labels, pressure imbalance, and flow meter
details. See page 62.
g. Navigate to Shots screen then define shots.
See page 59.
h. Navigate to Sequences screen then define
sequences. See page 60.
i.
If desired, navigate to Maintenance screen
then reset counters. See page 62.
15.Perform System Setup and Calibration procedure on page 34.
12.Install material drums. See Install
Drum procedure, page 29.
13.Perform Startup procedure,
page 28.
14.Perform ADM setup.
NOTE: All ADM setup items are located in the Setup
screens. See Appendix B - ADM Setup Screens Overview beginning on page 59 for more information.
See ADM Operation Overview on page 31 for help with
operating the ADM including how to modify settings.
a. Navigate to Advanced #1 screen then set general system settings. See page 63.
26
313875J
Setup
Adjust Motor Control Module Selector Switch
NOTICE
If the Motor Control Module is replaced, the selector
switch must be set prior to initial startup of the
Motor Control Module or damage may occur.
•
Do not install components rated to less than the
highest pressure in the selected pressure range.
For example, if the 0-2000 psi range is selected do
not install items rated less than 2000 psi. If the
0-3000 psi range is selected do not install items
rated less than 3000 psi. Doing so may lead to
overpressurization and ruptured components.
•
High-pressure fluid from ruptured components will
pierce skin. This may look like just a cut, but it is a
serious injury that can result in amputation. Get
immediate surgical treatment.
The Motor Control Module uses an 8-position selector
switch (S) to set system maximum working pressure.
See FIG. 13.
The system can be configured to run in two pressure
ranges:
•
0-3000 psi (0-20.7 MPa, 0-207 bar): For systems
with all components rated to 3000 psi maximum
working pressure or higher.
•
0-2000 psi (0-13.8 MPa, 0-138 bar): For systems
with one or more component rated less than
3000 psi maximum working pressure. For example,
if the hoses are rated to 2500 psi, then the
0-2000 psi range must be used.
See the following table for MCM selector switch (S) position setting for each maximum working pressure.
To set the Motor Control Module selector switch:
1. Turn machine power off.
2. Remove the access cover (D). See FIG. 13.
3. Set the selector switch (S).
4. Install access cover (D).
Switch Position
MCM
2000 psi MWP
3000 psi MWP
B (Blue)
1
3
A (Red)
2
4
D
The factory setting for the Motor Control Module selector
switch is 2000 psi if the machine is shipped with no
hoses or hoses rated to 2000 psi maximum working
pressure. If the machine is shipped with hoses rated to
3000 psi maximum working pressure or higher then the
factory setting for the selector switch is 3000 psi.
The selector switch position will be properly set at the
factory for new systems. When a motor control module
is replaced, the selector switch must be set to the correct setting by the user prior to initial startup.
S
257396_3B9905_04b
FIG. 13
To change the maximum working pressure rating of the
system in the field, all outlet components including
hoses and dispense valve must be rated at or above the
new system maximum working pressure rating. For
example, if the new system rating will be 3000 psi, all
system components must be rated to at least 3000 psi
maximum working pressure.
313875J
27
Startup
Startup
Moving parts can pinch or amputate fingers. When
the pump is operating and when raising or lowering
the ram, keep fingers and hands away from the pump
intake, platen, and lip of the drum.
1. Perform all required maintenance tasks. See Maintenance on page 47.
2. Check for leaks.
3. Check hydraulic fluid levels.
4. Check pump wet cup fluid levels.
5. Check feed system fluid levels.
6. Turn Main Power Switch to the ON position. The
splash screen will be displayed on the ADM until it is
finished loading.
7. When the ADM is finished loading, press
to
enable the ADM. The System Status Indicator Light
next to
8. Press
will illuminate green.
repeatedly to select a different operating
mode then press
to accept.
NOTE: The Setup screens cannot be accessed when
Disabled mode is the active operating mode. Also, certain machine functions and setup changes are disabled
when Standby mode is selected.
28
313875J
Change Drum
Change Drum
7. Remove bleed stick from platen bleed port (J).
Excessive air pressure in the material drum could
cause the drum to rupture, causing serious injury.
The platen must be free to move out of the drum.
Never use drum blowoff air with a damaged drum.
Remove Drum
1. Open main air slider valve on the integrated air controls and set ram air regulator to 40 psi (0.28 MPa,
2.8 bar).
ti10543a
2. Set ram director valve handle to UP then immediately press and hold the blowoff air button until the
platen is completely out of the drum. Use minimum
amount of air pressure necessary to push the platen
out of the drum.
3. Release the blowoff air button and allow the ram to
rise to its full height.
4. Remove drum.
Install Drum
1. If platen is inside a drum, perform Remove Drum
procedure.
2. If the platen is not at its full height, set ram director
valve handle to UP and allow the ram to rise to its
full height.
D
J
8. If drum has a plastic liner, pull it over edge of drum.
Secure liner with tape wrapped around circumference of drum.
9. Set the director valve to DOWN and lower the ram
until fluid appears at the top of the platen bleed
port (J). Adjust ram air regulator as needed.
Increase air pressure to the ram if the pump does
not prime properly with heavier fluids. Decrease air
pressure if fluid is forced out around the top seal or
platen.
10. Set the director valve to neutral and close the platen
bleed port (J).
11. Perform Priming procedure, see page 30.
3. Inspect platen and, if necessary, remove any
remaining material or material build-up.
4. Lubricate the platen seals with grease or other lubricant compatible with the fluid you will pump.
NOTICE
To avoid damage to the platen seals, do not use a
drum that is dented or damaged.
5. Place full drum on the ram base, slide it back
against the drum stops, and center it under the
platen.
6. Remove the drum cover and smooth the surface of
the fluid with a straightedge.
313875J
29
Priming
Priming
1. Place waste containers below both ratio check dispense valves.
8. Continue dispensing until clean, air-free material is
dispensed from both sides then press
to stop
NOTE: Both ratio check dispense valves will be open
when dispensing in Prime Mode. Only one pump moves
but material may drip from the other ratio check dispense valve when opened.
9. Press
to select the B (Blue) side.
2. Verify RAM director valve is in the DOWN position
and air pressure is applied to the RAM.
10. Press
to begin dispensing B (Blue) material.
dispensing.
11. Continue dispensing until clean, air-free material is
3. Press
press
repeatedly to select Prime Mode then
to accept.
dispensed from both sides then press
to stop
dispensing.
4. Check the dispense settings shown at the bottom of
the screen.
5. If desired, change the dispense settings.
a. Press
to enter editing mode.
b.
Use the left and right arrow keys to select the
item to change.
c.
Use the numeric keypad to type the new value.
d. Press
to accept the new value.
e. Press
to exit editing mode.
6. Press
to select the A (Red) side.
7. Press
to begin dispensing A (Red) material.
30
313875J
Operation
Operation
ADM Operation Overview
NOTE: After startup, press
to enable the ADM.
ADM Navigation Diagram
Run Screens
Home
Errors #1
Events #1
Errors #2
Events #2
Errors #...
Events #...
Maintenance
Optional:
Diagnostic
Maintenance
Supply
Password
Entry
(if enabled)
Setup Screens
Shot #1
Sequences #1
Shot #2
Sequences #2
Shot #...
Sequences #...
313875J
Calibration
System #1
Conditioning #1
Advanced #1
System #2
Conditioning #2
Advanced #2
System #3
Conditioning #3
Advanced #...
31
Operation
Navigation Overview
Change ADM Values
For all ADM screens to be accessible and functional, the
ADM must be enabled and an operating mode other
than Standby or Disabled must be selected.
To edit information in a screen, such as a shot definition
or a system setting like time or date format, follow this
general process:
NOTE: The optional Diagnostic screen can be enabled
from Advanced #3 screen, see page 64.
1. Press
To navigate between screens use the arrow keys on the
ADM keypad. To access the Setup screens,
NOTE: Operator mode flow settings are edited using a
slightly different process. To edit dispensing settings
when in Operator mode, see Dispense in Operator
Mode section on page 44.
press
. If the Setup screens password is turned
on, use the ADM keypad to enter the password then
2. Once in the screen, use the arrow keys to navigate
to the desired item.
press
. For Setup screens information, see Appendix B - ADM Setup Screens Overview on page 59. For
Run screens information, see Appendix C - ADM Run
Screens Overview on page 65.
3. Edit the value:
•
.
If the item has a drop-down list to select
from, press
to display the dropdown list.
Use the up and down arrow keys to highlight the
•
•
desired item then press
to select the item.
If the item is a numeric value, use the numeric
keypad on the ADM to type the new value then
press
to accept the value.
If the item is a select/deselect or enable/disable checkbox option, press
the value.
•
If necessary, press
4. Press
to toggle
to cancel editing.
.
If a screen has been entered by pressing
or if the
system is in editing mode then navigating to a different
screen will be disabled. As applicable, exit the screen
and editing mode to re-enable screen navigation.
32
313875J
Operation
Machine Operation Overview
Ramp Up Feature
Learning Mode
The purpose of the ramp up feature is to enable dispensing at the correct ratio but at a reduced flow rate
when materials are too thick to dispense at the correct
flow rate. As the fluid warms up due to the friction of
moving through the system, the Ramp Up feature will
slowly increase the flow rate until the desired flow rate is
achieved. After a period of idle time the system will cool
down and the fluids will not be as warm while dispensing, which may result in the Ramp Up feature being activated.
When a flow rate or dispense ratio is requested that the
machine has not learned, the system will use the pump
volume of each pump to estimate the pump velocities
needed then Learn mode will be used to adjust them to
the correct flow rates. The system will begin dispensing
at the estimated pump velocity and each stroke performed will be used to gather information and adjust the
velocity. After a number of strokes, the system will have
sufficient data to accurately dispense at the desired setpoint and Learning mode will be exited.
While the system is dispensing, the ramp up feature
monitors the torque supplied to the B (Blue) pump to
verify it does not apply more torque than the pump can
handle. If it does, it will reduce the flow rate in both
pumps to maintain the required dispense ratio. As the
system warms up and material thickness decreases, the
ramp up feature will increase the flow rate until the
desired flow rate is achieved.
When Learn mode is active, a “Learning New Set Point”
advisory is generated and the yellow light on the light
tower is illuminated. After Learn mode is complete, the
advisory is cleared.
NOTE: Because the B (Blue) side is the high volume
side, it is closer to its maximum flow rate capacity than
the A (Red) side pump.
Because a base purge is done before the system is shut
down, the first dispense after the system is turned on is
always initiated at a reduced flow rate. The ramp up feature will then increase the flow rate as described in the
previous paragraph. Also, after ten minutes of idle time
the first dispense will be at a reduced flow rate followed
by the flow rate ramp up.
When the ramp up feature reduces the flow rate, a “System Dispensing Below Requested Set Point” advisory is
generated and the yellow advisory lamp on the light
tower is illuminated. If the system is able to achieve the
desired flow rate the advisory is cleared.
313875J
33
Operation
System Setup and Calibration
7. Navigate to the System 2 screen.
Perform this entire procedure if any of the following conditions are met:
•
•
•
The machine is new
One or both materials in the system have changed
since last performing this procedure
Flow rate, ratio, or ambient temperature has
changed
If the software has been updated, verify all software settings in the first section of this procedure are still correct.
If any incorrect software setting is found, perform this
entire setup and calibration procedure.
Software Settings
1. With the machine on, press
to enable the
ADM. The LED next to the button should be green.
2. Press
press
3. Press
8. Select a base purge flow rate. A value of approximately 200 g/s or 200 cc/s is recommended.
9. If installed, check the “Supply Low Level Sensor”
option.
repeatedly to select Standby mode then
10. Verify the correct Dispense Valve type is selected.
to accept.
11. Navigate to the System 3 screen.
to enter the Setup screens.
4. Navigate to the System 1 screen.
5. Verify the correct pumps and pump sizes are
selected. For the standard VPM system, the B
(Blue) pump should be a Check-Mate 500 and the A
(Red) pump should be a Check-Mate 250.
6. Select volume or weight for the dispense mode.
Weight mode is recommended because it is easier
to calibrate.
34
313875J
Operation
12. Select the flow meter types installed on your system. For VPM-25 systems, select “HG6000” for the
A (Red) side and “SRZ-100” for the B (Blue) side.
For VPM-12 systems, select “HG6000” for both
sides. If no flow meters are installed, select the “Disable” option as indicated below and proceed to
step 14.
16. Press
.
17. Enter the specific gravities for the two materials in
the system.
NOTE: The specific gravities do not need to be exact but
should be close.
13. Set the Ratio “Alarm %” to 0 to turn off ratio alarms
and set the Ratio “Deviation %” to any number
greater than or equal to 5%.
NOTE: The “Alarm %” can be turned back on after this
setup and calibration procedure is completed.
14. Set the “Pressure Imbalance Alarm” to 2000 psi
(137.9 bar, 13.8 MPa).
18. Press
to exit the Setup screens.
Prime the Machine
Refer to Priming section on page 30.
Piston Position Learning
19. Navigate to the Calibration screen.
15. Navigate to the main Calibration screen.
20. Perform Learn Mode.
NOTE: Learn Mode will teach the system the mechanical limits of piston travel. It must be performed whenever
the pump line is rebuilt or if any other maintenance is
performed that may affect the mechanical tolerances in
the pump line. If the machine does not appear to be utilizing the full extent of the pump stroke, or if the machine
appears to be contacting the end of the hydraulic cylinder, perform the Learn Mode procedure.
a. From the Calibration screen, press
to
access the Learn Mode screen.
313875J
35
Operation
b.
c.
Place a waste container below the ratio check
valves. The next steps will cause the machine to
dispense material.
Flow Rate and Ratio Learning
25. At the main Calibration screen, press
all learned data.
Press
then
. The pump will travel to
bottom-most position.
d. After the pump stops moving, press
press
position.
then
. The pump will travel to the top-most
NOTE: During this process, the system learned the
mechanical limits of piston travel. If the pump did not
reach either piston mechanical travel limit for any reason, repeat the procedure.
NOTE: This will not affect the weight calibration that was
just completed.
26. Press
21. Press
22. Press
then press
to exit the Setup screens.
to exit the Setup screens.
27. Press
repeatedly to select Operator mode
to accept.
23. Press
to enter the Setup screens then press
left or right to navigate to the main Calibration
screen.
Flow Meter / No Flow Meter Calibration
24. If flow meters are installed, refer to Flow Meter or
Flow/Ratio Calibration starting on page 39. If flow
meters are not installed, refer to No Flow Meter
Machine Calibration starting on page 40.
36
to erase
press
repeatedly to select Shot mode then
to accept.
28. Select a defined shot that will provide a 10 second
or longer dispense at the flow rate and ratio
intended to be used during normal system operation.
NOTE: If the ambient temperature is significantly below
68°F (20°C) then the flow rate for the machine will need
to be decreased. For most materials at 68°F (20°C) at a
2:1 to 3:1 ratio, a maximum flow rate of 335 g/s or 335
cc/s can be expected. The machine should not be operated much below 120 g/s or 120 cc/s at a 2:1 to 3:1 ratio.
313875J
Operation
29. On the main run screen, verify the ratio check valve
button
is not active.
NOTE: Continue base purge until clean material comes
out of the end of the mixer.
d. When all mixed material is pushed out of the
mixer, press
34. Press
press
35. Press
to stop dispensing.
repeatedly to select Shot Mode then
to accept.
to activate the ratio check valves.
NOTE: Be ready to adjust ratio check valves immediately after performing the following step.
36. With buckets below the ratio check valves,
NOTE: This verifies material dispenses through the
static mixer.
30. Place bucket under the end of the static mixer.
31. Press
to begin dispensing then write down the
A (Red) and B (Blue) dispense pressures shown on
the ADM.
NOTE: During the dispense an off-ratio deviation may
be generated and that is ok.
32. Repeat the previous step until the “System Learning
New Setpoint” advisory turns off and the light tower
yellow lights turns from yellow to green.
33. Base purge the mixer to clear mixer of mixed material:
press
to begin dispensing.
37. While dispensing, adjust the ratio check opening
adjustment screws until both material line pressures
are approximately equal to the pressures recorded
in step 31.
NOTE: If adjusting the ratio check opening screws after
a ratio check dispense, the pressure difference due to
the adjustment will not be shown until the next dispense.
NOTE: After the ratio check dispense pressures are
properly adjusted a ratio check dispense can be performed. The ratio check dispense should be at least 10
seconds.
38. If the pressures are correctly adjusted prior to completing the shot, press
NOTE: A base purge will dispense only the B (Blue)
material to push all mixed material out of the mixer.
Base purge settings are defined on the System #2
screen, see page 61.
to stop dispensing.
39. If the pressures were not correctly adjusted prior to
the shot finishing, go to step 36 to repeat.
Ratio Check
a. Press
repeatedly to select Standby Mode
then press
b.
Press
to accept.
NOTE: In the following steps, the weight of the dispensed materials is used to calibrate the flow meters.
This works regardless of whether the selected dispense
mode is weight or volume.
.
40. With
c.
313875J
Press
to begin dispensing.
active and with pre-weighed buckets
below the ratio check valves, press
dispensing a ratio check dispense.
to begin
37
Operation
41. Weigh the two buckets and use the net weight of
each dispensed material to calculate the actual ratio
of the dispensed material.
42. If the calculated ratio of the weighed materials does
not match the ratios displayed on the ADM, go to
step 1 to re-calibrate the flow meters.
43. If the calculated ratio of the weighed materials
matches the ratio displayed on the ADM, then navigate to the System 3 screen and change the ratio
alarm percentage to the desired percentage.
44. If at any point in the future the ratio, flow rate, or
ambient temperature changes from what was used
while performing this procedure, go to step 1.
NOTE: If the ratio or flow rate is changed to a ratio or
flow rate that has not been calibrated by performing this
procedure, the system will generate a “Learning New
Setpoint” advisory. The system usually produces a good
dispense ratio during the learning process however the
advisory is generated to inform the user of the condition.
The system can store calibration data in its memory for
up to five different flow rates and ratios.
NOTE: If the ambient temperature changes significantly
from the ambient temperature seen while performing
this calibration procedure, the system will need to
“learn” the new temperature and the flow rate may need
to be decreased. If the original flow rate was 325 g/s at
68°F (20°C) and the temperature is now 46°F (8°C), the
user may want to select a flow rate of 150 g/s or
150 cc/s. The machine will not automatically be aware of
the temperature change but it will try to find the correct
dispensing properties to compensate for the new temperature. If the ambient temperature changes significantly, go to step 1. It is important for the system to learn
the new temperature because typical paste materials
increase viscosity significantly as the temperature
decreases below 68°F (20°C).
38
313875J
Operation
Flow Meter or Flow/Ratio Calibration
1. At the main Calibration screen, press
to erase
any previously learned flow meter calibration data.
NOTE: At this point, the “Learning New Set Point” advisory will be generated.
2. Select
screen.
8. Weigh both buckets and enter the net weight of
each material dispensed in the last two fields provided on the screen.
NOTE: After the weights are entered the K-factor will be
shown to the right of the weights. The previous K-factor
is shown to the left of the weight entry fields.
9. Repeat steps 5-8 until the new K-factor shown is
within 1% of the previous K-factor.
to enter the flow meter calibration
NOTE: If the new K-factor is not within 1% of the previous K-factor the machine may need further priming to
remove any trapped air in the material lines.
NOTE: The ratio of the weights entered may not match
the requested ratio. This is ok for now.
10. Select
to exit the flow meter calibration screen.
3. On the flow meter calibration screen, enter the flow
rate and ratio that will be used during normal operation.
NOTE: It is recommended to use approximately 200 g/s
or 200 cc/s and a ratio of approximately 2.0:1.
4. If either K-Factor value is 0, enter 3000 if an
HG6000 flow meter is installed in that side and 700
if the SRZ-100 flow meter is installed in that side.
NOTE: In the following steps, the weight of the dispensed materials is used to calibrate the flow meters.
This works regardless of whether the selected dispense
mode is weight or volume.
5. Weigh two buckets and record the weight of each
then place below the ratio check valves.
6. With two buckets in place to catch material dispensed from the ratio check valves, press
begin dispensing.
to
7. After dispensing for at least 10 seconds, press
to stop dispensing.
NOTE: If available, a footswitch can also be used.
313875J
39
Operation
No Flow Meter Machine Calibration
It is highly recommended that the user operate the
machine in weight mode when flow meters are not
installed or have been disabled.
3. Press
to exit the setup screen and verify the
ratio check option is not selected.
NOTE: In weight mode, the ratio displayed is a weight
ratio and should not be considered as volumetric ratio.
1. Press
to enter the Setup screens then press
left or right to navigate to Advanced #3 screen. Turn
off the “Enable Ratio Check Weight Mode Entry”
option.
4. Place a waste container under the mixer.
Press
to begin dispensing and record the average A (Red) and B (Blue) pressures shown on the
ADM.
NOTE: The dispense can be aborted early after recording by pressing
.
5. Select Standby mode and perform a base purge.
2. Press
and navigate to the shot definition
screen. Define a shot which is 10 times larger than
the desired flow rate selected. This will set approximately a 10 second dispense time.
Example: If the dispense rate is 300 grams/second,
set the amount to 3000 grams.
NOTE: A base purge will dispense only the B (Blue)
material to push all mixed material out of the mixer.
Base purge settings are defined on the System #2
screen, see page 61.
a. Press
.
b.
Press
to begin dispensing.
c.
When all mixed material is pushed out of the
mixer, press
to stop dispensing.
NOTE: Approximately 1 to 2 liters of base material will
need to be dispensed.
6. Select Shot mode and select the ratio check option
by pressing
40
.
313875J
Operation
7. Place waste containers below the ratio check nozzles and start a ratio check dispense. Adjust the
ratio check opening screws until the pressures displayed are near the values previously recorded
when dispensing through the mixer (step 4).
NOTE: After entering the net weight of B (Blue) material,
the ADM will inform the user how close the respective
flow of the pump was to the desire rate.
8. Press
to enter the Setup screens then press
left or right to navigate to Advanced #3 screen. Turn
on the “Enable Ratio Check Weight Mode Entry”
option.
11. Press
to accept the information.
NOTE: The ADM will respond by generating a “System
Learning Setpoint” advisory and the corresponding advisory light will be illuminated on the machine light tower
(if installed).
9. Press
to exit the setup screen and verify the
ratio check option is selected.
10. With new waste containers below the ratio check
nozzles, start the dispense by pressing the footswitch or
. At the end of the dispense, enter the
A (Red) and B (Blue) material weights into the
prompt boxes. Enter the weight of each bucket for
both materials.
12. Press
to accept the advisory. Repeat steps 10
through 11 until the percentages approach zero and
the advisory is removed.
NOTE: The machine will be calibrated for the flow and
ratio selected once the advisory is removed.
13. If the user needs to operate at a second flow or
ratio, repeat the calibration process for the second
desired flow or ratio.
NOTE: The machine will store the necessary control
data for both calibration points.
313875J
41
Operation
NOTE: It is recommended that the user calibrate the
machine at the extreme rates where it will be used.
Example: If the machine is to be used at mixed flows
between 300 & 500 grams/second (at 3:1 ratio), calibrate the machine at the two 300 and 500 grams/ second extremes, then stop the calibration process. The
machine will be very close to all requested flows and
ratios in between.
14. Turn off the “Enable Ratio Check Weight Mode
Entry” option in the Advanced #3 screen. The user
can verify the machine calibration by performing a
ratio check dispense and weighing the A (Red) and
B (Blue) materials.
42
313875J
Operation
Dispensing
Dispense in Sequence Mode
Dispense in Shot Mode
Sequences can be defined on the Sequences screen.
Sequences are defined on the Sequences screen, see
page 60.
To dispense in Shot mode, at least one shot number
must be defined. Shots are defined on the Shots
screen, see page 59.
1. Navigate to the Home screen.
2. Press
1. Navigate to the Home screen.
repeatedly to select Sequence Mode
then press
2. Press
press
repeatedly to select Shot Mode then
3. If desired, changed the selected sequence.
to accept.
a. Press
3. If desired, change the selected shot.
a. Press
to accept.
.
b.
Use numeric keypad to type the desired shot
number.
c.
Press
to accept. The shot number definition details will be shown on the bottom of the
screen.
once.
b.
Press the right arrow key on the ADM keypad
once.
c.
Use the up and down arrow keys to select a
sequence.
d. Press
to accept.
4. If desired, press
NOTE: Only defined shot numbers can be entered. If an
undefined shot number is entered, it will be ignored.
shot position in the sequence. Repeat as desired.
To go to the first defined position in the sequence,
press
4. Press
to skip to the next defined
.
to begin dispensing the active shot. To
abort the shot at any time, press
or
. The
shot will continue until the predefined amount has
been dispensed.
5. Check the ADM for errors and pop-up notifications
that could indicate a faulty dispense. Press
acknowledge any displayed errors.
to
5. Press
to begin dispensing the active shot.
NOTE: To abort the shot at any time, press
or
. If the shot is not aborted, material will continue to
dispense until the predefined amount has been dispensed. The next position in the Sequence will automatically be selected upon completion of the shot.
6. Check the ADM for errors and pop-up notifications
that could indicate a faulty dispense. Press
acknowledge any displayed errors.
313875J
to
43
Operation
Dispense in Operator Mode
Operator Mode begins dispensing when
and stops when it is pressed again.
7. Check the ADM for errors and pop-up notifications
is pressed
that could indicate a faulty dispense. Press
acknowledge any displayed errors.
to
NOTE: If a footswitch is used, press and hold to dispense. Release to stop dispensing.
1. Navigate to the Home screen.
2. Press
then press
repeatedly to select Operator Mode
to accept.
3. Check the dispense settings shown at the bottom of
the screen.
4. If desired, change the dispense settings.
a. Press
to enter editing mode.
b.
Use the left and right arrow keys to select the
item to change.
c.
Use the numeric keypad to type the new value.
d. Press
to accept the new value.
e. Press
to exit editing mode.
5. Press
to begin dispensing.
6. Press
to stop dispensing.
44
313875J
Shutdown
Shutdown
Short-term
7. Place container under the mixer and allow mixer to
drain completely.
1. Place container under mixer.
NOTICE
2. If using a moisture-sensitive material, park pumps.
a. Navigate to the Home screen.
b.
Press
repeatedly to select Standby Mode
then press
c.
to accept.
Press
to park pump. Material will dispense. when the pumps are in the parked position, they will stop moving.
Preventing material from draining from the mixer
may cause material in the mixer to harden and damage the dispense block.
8. Turn Main Power Switch to the OFF position.
9. Close air inlet ball valve.
End of Shift
1. Perform Short-term Shutdown procedure.
2. Remove, disassemble, and flush mixer.
3. Allow material to drain completely from the mixer
prior to base purge.
4. Perform base purge.
NOTE: A base purge will dispense only the B (Blue)
material to push all mixed material out of the mixer.
Base purge settings are defined on the System #2
screen, see page 61.
a. Press
.
b.
Press
to begin dispensing.
c.
When all mixed material is pushed out of the
mixer, press
to stop dispensing.
NOTE: The user can disable changing the flow, ratio, or
both on the Advanced #3 setup screen.
NOTE: Approximately 1 to 2 liters of base material will
need to be dispensed.
5. Press
to park pumps again.
6. Press
.
313875J
45
Pressure Relief Procedure
Pressure Relief
Procedure
1. Perform Shutdown procedure.
2. Set the ram director valve to neutral position.
3. Place a waste container below each ratio check
valve.
In the following step, any pressure in the lines will be
instantly relieved which may lead to material spraying
out of the valve and splashing in the bucket. Use
appropriate protective wear to prevent contact with
materials.
4. Press the red override button on top of the pneumatic valve nearest the mixer. This will open the
ratio check valves and relieve any residual pressure
in the fluid lines.
ti17709a
46
313875J
Maintenance
Maintenance
Change Hydraulic Oil and Filter
Check all sub-component manuals for maintenance
schedule and procedures.
Change break-in oil in a new unit after the first 250
hours of operation or within 3 months, whichever comes
first. After initial break-in, see the following table for recommended oil and filter change schedule.
Table 2: Frequency of Oil Changes
Task
Schedule
Replace hydraulic oil and filter
See table
Inspect fluid lines for leaks and
signs of wear
Daily
Check wet cup fluid level, add
IsoGuard Select fluid as necessary
Weekly
Check hydraulic fluid level
Weekly
Verify vent holes on bottom of
hydraulic power pack shroud are
clear and unobstructed
Weekly
(more often in
dusty environments)
Check all fittings and connections, tighten as necessary
As necessary
Use compressed air to remove
dust buildup on control boards,
fan, motor (under shield), hydraulic oil coolers, and component
heat sink fins
Ambient
Temperature
Recommended
Frequency
0 to 90°F
(-17 to 32°C)
1000 hours or 12 months,
whichever comes first
90°F and above
(32°C and above)
500 hours or 6 months,
whichever comes first
Check Hydraulic Fluid Level
Check hydraulic fluid level on dipstick (A). Fluid level
must be between indent marks (B) on dipstick. Refill as
required with approved hydraulic fluid; see Technical
Data on page 87. If fluid is dark in color, change fluid
and filter.
Monthly
A
S
B
ti7861a1
257442_313873-5_2t
313875J
47
Maintenance
Install Upgrade Tokens
NOTE: The Motor Control Module, Fluid Control Module, and Temperature Control Module connection to the
system is temporarily disabled during the installation of
upgrade tokens.
To install software upgrades:
1. Use correct software token stated in the table. See
Graco Control Architecture™ Module Programming
manual for instructions.
r_257396_3b9905_04b
ti12334a1
NOTE: Upgrade all modules in the system to the
software version on the token, even if you are
replacing only one or two modules. Different software versions may not be compatible.
All data in the module (System Settings, USB Logs,
Recipes, Maintenance Counters) may be reset to
factory default settings. Download all settings and
user preferences to a USB before the upgrade, for
ease of restoring them following the upgrade.
ti12354a1
FIG. 14: Remove Access Cover
See manuals for locations of specific GCA components.
The software version history for each system can be
viewed in the technical support section at
www.graco.com.
Token
Application
16G365 VPM:
- Advanced Display Module
- Motor Control Module
- High Power Temperature Control Module
- Communication Gateway Module
16G407 Ratio Monitoring (Flow Meters):
- Fluid Control Module
48
313875J
Maintenance
Advanced Display Module (ADM)
Motor Control Module (MCM)
Replace Battery
Keep heat sink fins clean at all times. Clean them using
compressed air.
A lithium battery maintains the ADM clock when power
is not connected.
NOTE: Do not use conductive cleaning solvents on the
module.
To replace the battery:
1. Disconnect power to the ADM.
2. Remove rear access panel.
Heat
Sink Fins
r_257396_3b9905_02b
FIG. 15: Clean Heat Sink Fins
Install Upgrade Token
See Install Upgrade Tokens on page 48.
ti12903a
Fluid Control Module (FCM)
3. Remove the old battery and replace with a new
CR2032 battery.
Install Upgrade and Key Tokens
4. Replace rear access panel.
See Install Upgrade Tokens on page 48.
Install Upgrade Token
See Install Upgrade Tokens on page 48.
Cleaning
Use any alcohol-based household cleaner, such as
glass cleaner, to clean the ADM. Spray on the rag then
wipe ADM. Do not directly spray the ADM.
313875J
49
Maintenance
50
313875J
Troubleshooting
Troubleshooting
Light Tower (Optional)
For information about ADM error and event codes see
Appendix D - ADM Event and Error Codes Overview,
page 69.
Before performing any troubleshooting procedure:
Signal
Description
Green on only
System is powered up and there are
no error conditions present
Yellow on
An advisory exists
Red flashing
A deviation exists
Red on
The system is shut down due to an
alarm occurring.
1. Perform Pressure Relief Procedure on page 46.
2. Turn Main Power Switch to the OFF position.
3. Allow equipment to cool.
Try the recommended solutions in the order given for
each problem to avoid unnecessary repairs. Also, determine that all circuit breakers, switches, and controls are
properly set and wiring is correct before assuming there
is a problem.
Errors include advisories, deviations, or alarms, so
green will only be on when none of these occur. A yellow
light can be on at the same time as red (flashing or solid
on) when an advisory exists at the same time as a deviation or alarm.
Common Problems
Problem
General
Display Module completely
dark
No or incorrect amount of
material dispensed from
either side
Significant material leaking
from pump seal
Material dispensed not correct weight
Cause
Solution
No power
Thrown circuit breaker
Loose connection
Bad display module
Tank empty
Air in material
Verify main power switch is ON
Check machine breakers and reset
Tighten 5-pin cable on Advanced Display Module
Replace Advanced Display Module
Install new drum of fluid
Prime the machine
Pump shaft worn and/or shaft seal
worn
Specific gravity of one or more of the
two materials has changed since calibration
Check valve malfunction
Piston worn or broken
Remove pump shaft assembly and reinstall, see
pump manual for instructions and rebuild kit
Perform calibration procedure
Proportioning System
Proportioning pump does not Pump piston or intake valve leaking
hold pressure when stalled
313875J
Remove check valve; clean or replace as necessary
Replace piston
1.
Observe gauges to determine which pump is losing pressure.
2.
Determine in which direction the pump has
stalled by observing which directional valve indicator light is on.
3.
Repair the valve.
51
Troubleshooting
Problem
Material imbalance
Erratic pump movement
Pump output low
52
Cause
Solution
Inadequate flow from pump; cavitation Increase fluid supply to proportioning pump
Worn pump inlet valve ball/seat or gasket, repair as
necessary
Pump cavitation
Feed pump pressure is too low, adjust pressure to
within required range
Obstructed fluid hose or mixer; fluid
Open, clear; use hose with larger ID
hose ID too small
Worn piston valve or intake valve in
See pump manual for appropriate repair procedure
displacement pump
Inadequate feed pump pressure
Check feed pump pressure and adjust to within
required range
313875J
Troubleshooting
ADM Troubleshooting
B
C
J
S
K
A
D
L
E
F
N
H
R
ti12902a
M
P
G
ti12362a1
FIG. 16: ADM Component Identification - Rear
ADM System Status LEDs (B) Conditions
Module Status
LED Signal
Description
Green on
Run mode, System on
Green flashing
Setup mode, System on
Yellow on
Run Mode, System off
ADM Module Status LEDs (N) Conditions
Module Status
LED Signal
Description
Green on
System is powered up
Yellow on
Communication in progress
Red solid
ADM hardware failure
Red flashing
Uploading software
USB Module Status LEDs (L) Conditions
Module Status
LED Signal
Description
Green flashing
System is powered up
Yellow on
Downloading information to USB
Green/Yellow
Flashing
ADM is busy, USB cannot transfer
information when in this mode
313875J
53
Troubleshooting
Motor Control Module
Diagnostic Information
Table 3: LED Status Signal
Module Status LED Signal
Description
Green on
System is powered up
Yellow on
Internal communication in progress
Red solid
MCM hardware failure. Replace MCM
Red flashing fast
Uploading software
Red flashing slow
Token error, remove token and upload
software token again
LED
Signals
r_257396_3b9905_07b
FIG. 17: LED Signals
54
313875J
Troubleshooting
Acceptable Size and Duration of Power Line Voltage Fluctuations
The Motor Control Module is designed to withstand voltage fluctuations from the incoming power supply. If the
incoming power supply goes outside of the tolerable
range, an over-voltage condition is flagged and the system shuts down in an alarm state. Excessive or
repeated over-voltage may permanently damage hardware. The chart below shows the permissible magnitude
and duration of temporary over-voltage events. Consult
a qualified electrician if there are any concerns about
the available power supply.
Maximum Permissible Transient Voltage Surges
* Constructed from ITIC 1996 curve, referenced by IEC 61000-2-4
1400
1200
<--1 MW Max Surge Power
1200Vac, 1697Vdc
Voltage (Volts RMS)
1000
800
600
480Vac, 679Vdc
400
<--150 KW Max Surge Power
336Vac, 475Vdc
<--50 KW Max Surge Power
288Vac, 407Vdc
200
<--No Power Limit
264Vac, 373Vdc
0
0.000001
0.00001
0.0001
0.001
0.01
0.1
1
10
Time (seconds)
313875J
55
Troubleshooting
Fluid Control Module
Diagnostic Information
Module Status LED Signal
Green on
Diagnosis
System is powered up
Yellow
Internal communication in progress
Red solid
FCM hardware failure. Replace FCM.
Red flashing fast
Uploading software
Red flashing slow
Token error. Remove token and
upload software token again.
Module Status LEDs
ti12337a1
FIG. 18:
56
313875J
Appendix A - ADM Icons Overview
Appendix A - ADM Icons Overview
Setup Screen Icons
Icon
Icon
Description
Description
Learn Top-Most Piston Position
Enter Screen
Go to Next Calibration Screen
Exit Screen
Begin Weight Calibration Shot
Erase Selected Item
Dispense Valve Details
Erase All Items Shown
Shot Number
Change Multiple Values
(see Using the
button on
Flow
page 59)
Ratio Calculator
(see Using the
Sequence
Weight
button on
page 59)
Volume
Return to Previous/Main Screen
Duration
Ratio
Calibrate Piston Position
Calculated Ratio
On Main Calibration screen:
Calibrate Weight Dispense
Tank/Tank Heater
On Flow Meter Calibration screen:
Use Dispensed Material Weight to
Calibrate Flow Meters
Primary Heater
Use Dispensed Material Volume to
Calibrate Flow Meters
Heated Hose
Calibrate Flow Meters
Chiller
Learn Bottom-Most Piston Position
313875J
57
Appendix A - ADM Icons Overview
Home Screen Icons
Icon
Description
Icon
Description
Prime A (Red) Side
Select Operating Mode
Prime B (Blue) Side
Initiate Dispense
Enter Screen
Dispense Disabled
Exit Screen
Ratio Check
Erase Selected Item
Park Piston
Erase All Items Shown
Park Piston Disabled
Weight
Close Dispense Valve
Volume
Perform Base Purge
Duration
Selected Shot Number
Piston Cycles
No Shot Number Selected
Selected Sequence and Sequence
Position
No Sequence Selected
Skip to Next Shot in Sequence
Abort Sequence
Edit Operator Mode Flow Properties
58
313875J
Appendix B - ADM Setup Screens Overview
Appendix B - ADM Setup Screens Overview
Setup Screens Navigation Diagram
Shot #1
Sequences #1
Shot #2
Sequences #2
Shot #...
Sequences #...
Calibration
System #1
Conditioning #1
Advanced #1
System #2
Conditioning #2
Advanced #2
System #3
Conditioning #3
Advanced #...
Shots
Supply
Maintenance
4. Type the new value then press enter. All values
below the selected shot will change to the new
value.
5. Repeat the previous two steps as desired.
6. Press
to deactivate.
Using the
button
The
button can be used to calculate an x:1 ratio
from a non x:1 ratio. For example, if the desired ratio is
This screen allows the user to edit shot definitions. The
contents of this screen change based on the Dispense
Mode. Shots may be defined by flow rate and by
time (duration), volume, or weight depending on the Dispense Mode selection. See System #1 on page 61 for
Dispense Mode options.
Using the
The
5:2, the
1. From the Shots screen, press
2. Navigate to the
3. Press
button
button can be used to change multiple shot
definitions at once.
column.
.
column and in the shot definition.
.
5. Press
2. Press
.
4. Enter the non x:1 ratio in the
column. The calculated x:1 ratio will automatically be displayed in
the
1. From the Shots screen, press
button can be used to convert 5:2 to 2.5:1.
.
.
3. Navigate to a shot definition value.
313875J
59
Appendix B - ADM Setup Screens Overview
Sequences
Calibration - Learn Mode
This screen allows the user to edit sequence definitions.
The contents of this screen change based on the Dispense mode.
This screen is for learning the mechanical limits for piston travel.
Calibration - Weight
Dispense detail is shown as volume, time, or weight
depending on which Dispense Mode is selected. See
System #1 on page 61 for Dispense Mode options.
NOTE: 5 sequences with 20 positions each are available across 10 pages.
Calibration - Main
This screen is for calibrating weight.
Calibration - Flow Meters
This screen shows calibration data for the system and
provides access to the individual calibration screens.
See System Setup and Calibration on page 34 for
how to use the calibration screens.
The date next to each key represents the last time that
function was performed.
The “Cal. Min” and “Cal. Max” values are the system
recognized extreme ends of piston travel.
60
This screen is for calibrating the flow meters.
313875J
Appendix B - ADM Setup Screens Overview
System #1
System #2
This screen allows the user to set mechanical system
settings and the Dispense Mode setting.
This screen allows the user to set the Gel Timer properties and set which items are installed on the machine.
Dispense mode can be set to volume or weight. Dispense mode controls how dispense quantities are measured. Dispensing must be calibrated, see System
Setup and Calibration on page 34 for more information.
Pump sizes and inlet pressures must be entered on this
screen. The inlet pressure is the minimum allowable
fluid inlet pressure. If the inlet pressure is below this
value, dispensing is disabled. If pump sizes and inlet
pressures are not entered properly, system performance
will be affected.
The maximum working pressure for the machine is displayed on this screen. The maximum working pressure
is dependent on the installed hoses and is set to the
lowest rated system component. If 2000 psi hoses are
installed and the maximum working pressure displayed
is not 2000 psi, see Adjust Motor Control Module
Selector Switch on page 27 for instructions to set the
maximum working pressure for hoses.
313875J
NOTICE
The correct dispense valve option must be selected.
Selecting an incorrect dispense valve option will
lead to erratic machine performance.
When enabling the Gel Timer, the user must select one
of the 100 available shot definitions to use as the Gel
Shot. This shot will be dispensed when the Idle Period
expires. The Idle Period will begin after a dispense is
completed. Any dispense operation in the middle of the
timer countdown will reset the Idle Period counter. The
system will generate an audible alarm that will begin the
user-entered number of seconds before the Idle Period
expires.
The hydraulic level sensor and hydraulic RTD for the
pump line must be enabled when installed in the system. If the sensors are not marked as enabled, they will
be ignored.
61
Appendix B - ADM Setup Screens Overview
System #3
Maintenance
This screen allows the user to edit the labels for the A
(Red) and B (Blue) sides of the machine. The labels set
for the A (Red) and B (Blue) sides of the machine are
displayed throughout the screens. Labels are limited to
five characters.
This screen shows shot number and sequence position
counters. Use the Counters dropdown menu to select
which set of counters to view.
Supply
The pressure imbalance alarm can also be set. This is
the difference between the A (Red) and B (Blue) side
material pressures before an alarm occurs.
The flowmeter types are defined on this screen. The
available flow meter types are Disabled, HG6000, or
SRZ-100. The ratio deviation value is the allowable percentage before the machine displays a pop-up notification. The ratio alarm value is the allowable percentage
difference before the machine will stop a dispense.
Keyboard Screen
Do not use the check-boxes on this screen. If a low level
sensor is used, check the box for the Supply Low Level
Sensor option on the System #2 screen, see page 61.
This screen is used to edit the A (Red) and B (Blue)
labels on the ADM. Use arrow keys to select the desired
letter and press
exit the keyboard.
62
to accept the letter. Press
to
313875J
Appendix B - ADM Setup Screens Overview
Conditioning #1
Advanced #1
NOTE: Platen heaters are available as an option on the
VPM system.
This screen allows the user to set the language, date
format, current date, time, setup screens password,
screen saver delay, and turn on or off silent mode.
Conditioning #2
Advanced #2
NOTE: Platen heaters are available as an option on the
VPM system.
This screen allows the user to set the units of measure.
Conditioning #3
NOTE: The VPM does not use Night mode conditioning.
Do not enable night mode.
313875J
63
Appendix B - ADM Setup Screens Overview
Advanced #3
This screen allows the user to control the availability of
some key system features.
•
•
•
•
•
•
•
•
64
Disable Dispensing From Display: Check this box
to disable dispensing from the ADM. A footswitch,
dispense valve trigger, or other external signal will
be the only way to initiate a dispense.
Disable Modifying Temp Setpoint: Check this box
to disable modifying temperature setpoints from the
Run screens. This is only applicable if temperature
control items are installed and enabled.
Disable Operator Mode Flow Adjustments: When
checked, the user will not be able to change the flow
on operator mode Home Run screen.
Disable Operator Mode Ratio Adjustments:
When checked, the user will not be able to change
the ratio on operator mode Home Run screen.
Temperature Alarm Disables Dispense: When
checked, any active alarm from any temperature
zone will disable dispensing.
Complete Dispense with Setpoint Error: When
this box is checked, the shot will continue dispensing even if the system never reaches the desired
setpoint.
Enable Shot Aborted Notification: When this box
is checked, a pop-up notification will be displayed
when a shot is aborted.
Enable Ratio Check Weight Mode Entry: This
option is for machines without flow meters. When
this box is checked, after any ratio check shot a
popup window will appear asking the user to enter
the dispensed weights. Press the Cancel button to
abort the entry or press the Enter button to record
the new values.
Advanced #4
This screen is for enabling the optional Diagnostic
screen and for enabling USB log downloading and USB
errors. For more information about USB operation, see
Appendix E - USB Operation on page 80. For more
information about the optional screens, see Diagnostic
Screen screen on page 68.
Advanced #5
Numbers shown are for reference only and may
be different on your system.
This screen displays software information.
313875J
Appendix C - ADM Run Screens Overview
Appendix C - ADM Run Screens Overview
Run Screens Navigation Diagram
Home
Errors #1
Events #1
Errors #2
Events #2
Errors #...
Events #...
Home Screens
Maintenance
Optional:
Diagnostic
Disabled
The Home screen is the first screen that displays when
the machine is started and when switching from the
Setup screens to the Run screens. The Home screen
shows the current fluid pressure at the pump outlets.
The operating mode can be selected from the Home
screen. The available operating modes are Operator,
Sequence, Shot, Standby, Night, and Disabled.
System Off
In Disabled mode, machine operation is disabled and
the setup screens cannot be accessed.
Standby
This operating mode is only used at initial startup and
when
is pressed.
In Standby mode, the user can park the pumps, perform
a base purge, and close the dispense valve. See Shutdown on page 45 for base purge and parking the
pumps procedure.
313875J
65
Appendix C - ADM Run Screens Overview
Shot
Operator
This mode allows the user to dispense using one of the
defined shots. See Shots screen on page 59. Shot definition including flow, ratio, progress, and size is shown at
the bottom of the screen. The user can also dispense a
ratio check shot.
This mode allows users to dispense without using pre-
Sequence
Prime
This mode allows the user to dispense using one of the
defined sequences. See Sequences on page 60. The
shot definition for the shot used in the current sequence
position is shown at the bottom of the screen. Shot definition information shown includes flow, ratio, progress,
and size.
This mode allows users to prime each pump individually.
66
defined shot numbers or sequences. Use
to set
flow rate and ratio. The user can also dispense a ratio
check shot.
313875J
Appendix C - ADM Run Screens Overview
Errors Screen
Maintenance
The Errors screens display the 50 most recent system
errors. Each error entry includes a description and error
code along with a date and time stamp. There are 5
pages displaying 10 errors each.
This screen displays historical information for each
pump including material usage and pump cycles. The
See the Troubleshooting section beginning on page 51
for a detailed description of all system errors.
material usage units are shown next to the
,
, or
icons and depend on the selected Dispense mode.
The batch counters are resettable but the total counters
are not.
Events Screen
The Events screens display the 200 most recent events.
Each event includes a description and event code along
with a date and time stamp. There are 20 pages displaying 10 events each.
See the Troubleshooting section beginning on page 51
for a detailed description of all system events.
313875J
67
Appendix C - ADM Run Screens Overview
Optional Screens
Diagnostic Screen
The optional Diagnostic screen can be enabled in the
Advanced #4 screen, see page 64.
The Diagnostic screen shows status information for various system components.
Status Screen
The status screen provides all of the operational functionality of the Home screen except for operating mode
selection. Refer to the Home screen and operating
mode descriptions for information on this functionality.
In addition to the functionality provided by the Home
screen, the Status screen also provides material conditioning information and control.
68
313875J
Appendix D - ADM Event and Error Codes Overview
Appendix D - ADM Event and Error Codes Overview
Event Codes
Event Code and
String
EAA0-R: Base Purge
EAD0-R: Pump(s)
Parked
EA10-R: Red Pump
Prime
EA20-R: Blue Pump
Prime
EA00-R: Disp.
Occurred (Shot #)
EAR0-R: Night Mode
Recirc On
EB00-R: Stop Button
Pressed
EBR0-R: Night Mode
Recirc Off
EBR1-R: Setup values changed
ECA1-R: Red Material SG Modified
ECB2-R: Blue Material SG Modified
ECH0-R: Learn Mode
Executed
EH00-R: Gel Timer
Dispense
EL00-R: System Powered On
EM00-R: System
Powered Off
ENC1-R: Cal. Point 1
Weight Entered
ENC2-R: Cal. Point 2
Weight Entered
ENC4-R: Cal. Point 1
Weight Erased
ENC5-R: Cal. Point 2
Weight Erased
END0-R: Ratio Check
Dispense
ENN0-R: Automatic
Cal. Performed
313875J
Triggers
Base purge performed
One or both pumps were parked
The red pump has been primed
The blue pump has been primed
A dispense has occurred of the given
shot number.
While in night mode the system has
automatically entered a low recirculation mode and attempted to turn on all
enabled conditioning zones.
The Red stop button was pressed on
the Advanced Display Module.
While in night mode the system has
automatically stopped the low recirculation mode and turned off all conditioning zones.
One or more of the setup values has
changed.
The Red materials specific gravity was
modified.
The Blue materials specific gravity was
modified.
A learn mode calibration was successfully completed.
The gel timer expired and the system
automatically took the gel shot.
The System was powered on.
Event Code and
String
EQU1-R: Settings
Downloaded
Triggers
The system settings were successfully
transferred from the ADM to a USB
drive.
EQU2-R: Settings
The system settings file was successUploaded
fully transferred from the USB drive to
the ADM.
EQU3-R: Language The custom language file was sucDownloaded
cessfully transferred from the ADM to a
USB drive.
EQU4-R: Language The custom language file was sucUploaded
cessfully transferred from the USB
drive to the ADM.
EQU5-R: Logs Down- The Error/Event and Shot data logs
loaded
were successfully transferred from the
ADM to a USB drive.
ER01-R: Shot Count A counter from the shot counters mainReset
tenance page was erased
ER02-R: Seq. PosiA counter from the sequence counters
tion Count Reset
maintenance page was erased
ERA1-R: Red Mate- The resettable totalizer for the Red
rial Volume Reset
material volume was reset to zero.
ERA2-R: Red Mate- The resettable totalizer for the Red
rial Weight Reset
material weight was reset to zero.
ERA3-R: Red Cycle The resettable cycle counter for the
Count Reset
Red pump was reset to zero.
ERB1-R: Blue Mate- The resettable totalizer for the Blue
rial Volume Reset
material volume was reset to zero.
ERB2-R: Blue Mate- The resettable totalizer for the Blue
rial Weight Reset
material weight was reset to zero.
ERB3-R: Blue Cycle The resettable cycle counter for the
Count Reset
Blue pump was reset to zero.
The System was powered off.
A value for the first point in the three
point calibration was entered.
A value for the second point in the
three point calibration was entered.
The running average for point one of
the three point calibration was erased.
The running average for point two of
the three point calibration was erased.
A ratio check shot was dispensed from
the ratio check calibration screen.
The system was successfully characterized with the Automatic calibration.
69
Appendix D - ADM Event and Error Codes Overview
Error Codes
Error
Code
Error Name
0500
Invalid
Weight Cal.
Data
05A1
Invalid Auto
Cal. Data
Error
Error Description
Type
Cause
The three point calibration data
is invalid, system will operate
in weight mode but will attempt
to volumetrically calculate
Deviation Invalid data
weight. This will lead to
consistent shots which will be
offset for the desired dispense
amount.
The system will ignore the
calibration data gathered and
Deviation Invalid data
will use information gathered
during dispenses
Red Blanket
Overcurrent
Blue Blanket
A4B5
Overcurrent
Red Inline
A4A3
Overcurrent
Blue Inline
A4B1
Overcurrent An over current was detected
on the output
Red Hose
A4A2
Overcurrent
Blue Hose
A4B4
Overcurrent
Red Chiller
A4A7
Overcurrent
Blue Chiller
A4B8
Overcurrent
High current has been
Motor Over detected on a phase and has
A4H1
been shutdown to prevent
Current
damage
Motor Over Too much current is being
A4M1
Current
drawn from the wall
A4A6
A4N1
A7A6
A7B5
A7A3
A7B1
A7A2
A7B4
A7A7
A7B8
70
Motor Over
Current
A hardware current fault has
occurred causing a system
shutdown
Red Blanket
Control Fault
Blue Blanket
Control Fault
Red Inline
Control Fault
Blue Inline
Control Fault Unexpected current to
heater/chiller
Red Hose
Control Fault
Blue Hose
Control Fault
Red Chiller
Control Fault
Blue Chiller
Control Fault
Solution
Re-calibrate the machine
If any messages appeared indicating why the
calibration failed attempt to fix the problem then
re-run the calibration
Alarm
Alarm
Alarm
Bad heaters
Measure resistance of heater
Alarm
Alarm
Alarm
Alarm
Alarm
Alarm
Alarm
Alarm
High voltage
Shorted Temperature
Control Module
Bad internal wiring of the
motor
Short circuit of motor
wiring
Low voltage from the wall
during load
Short circuit of motor
wiring
Measure voltage across the disconnect switch.
Voltage should measure between 190 and 264 Vac.
If temperature rises for a zone that has been disabled,
replace Temperature Control Module
Replace motor
Check wiring to the motor to ensure no bare wires are
touching and that no wires are shorted to ground
Make sure the supply line is properly sized for the
load and is above the minimum voltage requirements
Check wiring to the motor to ensure no bare wires are
touching and that no wires are shorted to ground
Unplug the directional valve (so pressure will not
build) and try to move the motor again. If this
Motor rotor has become succeeds then the power pack may need to be
replaced. If the motor is still unable to move, the
locked
bearings or hydraulic pump have likely failed in the
motor and will need to be replaced.
Alarm
Alarm
Alarm
Alarm
Alarm
Shorted Temperature
Control Module
If temperature rises for a zone that has been disabled,
replace Temperature Control Module
Alarm
Alarm
Alarm
313875J
Appendix D - ADM Event and Error Codes Overview
Error
Code
A8A6
A8B5
A8A3
A8B1
A8A2
A8B4
A8B7
A8B8
A9C1
B9C0
CAC1
CAC3
CAC4
CAC5
CAC6
CAC7
CAA6
CAB5
CAA3
CAB1
CAA2
CAB4
CAA7
CAB8
D1A1
Error Name Error Description
No Red
Blanket
Current
No Blue
Blanket
Current
No Red Inline
Current
No Blue Inline
Current
No current to the conditioning
No Red Hose
zone
Current
No Blue Hose
Current
No Red
Chiller
Current
No Blue
Chiller
Current
Motor Over
Current
Small Shot
Request
Cause
Solution
Tripped circuit breaker
Visually check circuit breaker for a tripped condition
Alarm
Low power
Measure voltage across input terminals on power line
filter. Voltage should measure between 190 and 264
Vac
Alarm
Cable unplugged/loose
power
Check for loose or disconnected wires or plugs
Alarm
Bad heater(s)
Measure resistance of heater(s)
Alarm
Alarm
Alarm
Alarm
Alarm
Check for MCM software update, load latest MCM
software, if problem persists contact Graco
On the ADM go into the Setup screens to the System
Pumps are defined with
The requested dispense
screens then make sure that the pump sizes are
the wrong size
amount is below the minimum
defined correctly
amount of the system (25% of Deviation
Requested shot is below
the combined pump volumes is
If the user has to be able to take the shot the system
the capabilities of the
the minimum)
must be fitted with smaller pumps
current pump setup
A software error has occurred
Alarm
commanding too much current
Comm. Error
Motor
Comm. Error
Red Tank
Comm. Error
Blue Tank
Comm. Error
Mix Head
Comm. Error
Mix Head 2
Comm. Error
Ratio Monitor
Comm. Error
Red Blanket
Communication error
Comm. Error
Blue Blanket
Comm. Error
Red Inline
Comm. Error
Blue Inline
Comm. Error
Red Hose
Comm. Error
Blue Hose
Comm. Error
Red Chiller
Comm. Error
Blue Chiller
Setpoint Not The set point was not reached
Reached
and the pump was shutdown
313875J
Error
Type
Bad Motor Control
Module code
Alarm
Alarm
Alarm
Alarm
Alarm
Alarm
Loose/broken connection Check connection
Alarm
Alarm
Alarm
Alarm
Alarm
Alarm
Module not programmed Program the module
Alarm
Module missing power
Check power supply connection
Alarm
Module bad
Replace module
Deviation
Material restriction too
high for requested flow
Reduce flow request
71
Appendix D - ADM Event and Error Codes Overview
Error
Code
D2A1
D3A1
Error Name
Error Description
Error
Type
Cause
Pump cannot reach the
requested pressure
Setpoint Not
The set point was not reached Deviation
Reached
Pump cannot reach the
requested flow
System underwent a
change that caused a
large drop in restriction
Setpoint
The set point was exceeded
Deviation
(such as new orifices)
Exceeded
Solution
Increase restriction in the system
Decrease restriction in the system
Erase learned System Data, found in the setup
screens under calibration
Make sure the material lines are open and have
proper feed pressure
Recalibrate the machine Rerun the learn mode calibration
Check to ensure the pressure transducer is properly
Loose/bad connection
installed and all wires are properly connected
No material in pumps
This calibration lets the MCM
know where the ends of the
pump are. If the data gathered
Invalid Learn
during this process is outside Deviation
D5A1
Mode Data
of normal parameters the
Bad linear position
machine will operate with a
sensor
greatly reduced stroke.
Loose/bad connection to
linear position sensor
Bad linear position
The linear position sensor is
sensor
returning data that should not
Position
Alarm
D6A1
Sensor Fault be possible during normal
Linear position sensor
operation
may be loose where
attached to pump
housing
Insufficient material
Red Pump
Deviation
DDA1
being supplied or
Cavitation
insufficient material
Cavitation was detected on the
Deviation
pressure on feed system
given pump
Blue Pump
DDB2
Cavitation
Debris or packout in the
incoming fluid filter
Orifices blocked
Hose blocked
Pump Not
The pump failed to reach the
Deviation
DFA1
Parked
park position
Dispense valve failed to
open
The type or size of the Red or
Pumps Not
Properly setup the
Blue material pumps have not Alarm
DSC0
Defined
system
been defined
Failure of the dispense
When the pump tried to stall to
valve
pressure the pump traveled
Pump Failed
more than it should in normal Deviation
F7D1
Material leak
to Stall
operation (only applies to
dead-headed system)
Out of material
Red Low
Deviation Tanks low on material
L111
Material Level
L122
L311
L322
L6A1
L6B2
72
Blue Low
Material Level
Low material level in tanks
Red High
Material Level
High material level in tanks
Blue High
Material Level
Red Auto
Refill Timeout The tank stand has been filing
for a time greater than
Blue Auto
expected
Refill Timeout
Verify pump moves to limits, if problem persists
replace linear position sensor
Check to ensure the linear position sensor is properly
installed and all wires are properly connected
Replace linear position sensor
Re-tighten the sensor and re-calibrate the machine
Verify that incoming ball valves are open
Verify that feed pumps are supplying material
Inspect filter for debris of filler packout and clean or
replace as necessary
Clear blockage
Clear or replace hose as necessary
Check to make sure the dispense valve is properly
configured and connected to the MCM
On the ADM go into the setup screens -> System->
then make sure that the pump type and size are set
(not --)
Ensure the valve has a proper air supply and seals
properly. If not, service the valve as necessary.
Visually inspect the machine and hoses for sign of
leakage. NOTE: This error will display after 2 full
piston strokes so the leak will be substantial.
Fill tanks
Fill tanks with material
If the tanks appear to have plenty of material check to
Deviation Loose/broken connection make sure the level sensor is connected to the proper
port and that the cord is not damaged
Bad level sensor
Replace level sensor
Defective fill valve
If the tanks appear to have plenty of material check to
make sure the level sensor is connected to the proper
port and that the cord is not damaged
Deviation
Deviation
No material is actually
being fed
Loose level sensor
Deviation connection
Bad level sensor
Deviation
Make sure the feed pumps are operating properly
Check for loose or disconnected wires or plugs
Replace level sensor
313875J
Appendix D - ADM Event and Error Codes Overview
Error
Code
Error Name
MBH1 Low Oil Level
MBN1
Low Motor
Performance
N4A1
Pump Failed
to Move
P400
Thermal
Pressure
Rise
P4A1
Red Pressure
Shutdown
P4B2
Blue
Pressure
Shutdown
313875J
Error Description
Error
Type
Cause
Low oil level
Solution
Check oil level and if low add more hydraulic fluid
Check to ensure the hydraulic oil level sensor is
Loose/bad connection
properly connected to the MCM and that the wire has
not been damaged
The volume of oil in the tank is
Bad level sensor
Replace sensor
below the minimum level
Alarm
Inspect hydraulic driver end seals and early leak
needed for the system to
Leak in hydraulic driver detection tubing. Replace seals as necessary and
properly operate
replace lost oil.
Inspect the hydraulic reservoir fittings and filter for
Leak in the hydraulic
leaks. Repair or replace as necessary and replace
reservoir, heat
lost oil.
exchanger
If error persists and performance can no longer
The motor magnetism has
Prolonged exposure to
satisfy the user requirements the motor will need to
decreased to the point where Advisory
heat or high voltage
be replaced
performance is greatly reduced
Visually check to ensure the pump is moving, if not
Motor failure
ensure the motor is wired properly
If motor is moving but pump is not and pressure is not
Hydraulic power pack
building they hydraulic power pack may need
failure
servicing
Check to ensure the linear position sensor is properly
Loose/bad connection to
connected to the MCM and the wiring has not be
the linear position sensor
damaged
Failure of the linear
Replace the linear position sensor
The MCM attempted to move
position sensor
the pump but no movement
Deviation
Motor no longer coupled Reset coupler per specifications and retighten set
was detected
to hydraulic pump
screws
Supply tube from
hydraulic pump to
Retighten or replace supply tube
manifold is loose or
broken
Broken motor shaft
Replace motor
Verify that no outside forces are stopping the pump
Over-pressure valve
from moving, then inspect over-pressure valve for
dumping to tank
damage or debris
Pressure has risen to an
unsafe level due to thermal
Open the dispense valve manually or open the valves
Deviation High pressure
expansion of materials. All
to bleed pressure
conditioning zones have
automatically been turned off.
Dispense valve failed to Check to make sure the dispense valve is properly
Alarm
open
configured and connected to the MCM
Bad dispense valve
Replace dispense valve
Restriction in the
Check to ensure there is no blockage
material lines
The material pump pressure
exceeded the maximum
Make sure the requested pressure is within the max
Invalid maximum
operating pressure as defined
operating pressure, which can be found on the setup
pressure defined
Alarm
in the setup screens
screen System 1
Orifices blocked
Clear blockage
Hose blocked
Clear blockage or replace hose as necessary
Dispense valve failed to Check to make sure the dispense valve is properly
open
configured and connected to the MCM
73
Appendix D - ADM Event and Error Codes Overview
Error
Code
P4D0
P6A1
P6B2
T1A6
T1B5
T1A3
T1B1
T1A2
T1B4
T1A7
T1B8
T3H1
Error Name
Error Description
Pressure
Imbalance
The pressure difference
between the Red and Blue
material is greater than the
defined amount
Red Pressure
Sensor Fault
Blue
Pressure
Sensor Fault
Red Tank
Low Fluid
Temp.
Blue Tank
Low Fluid
Temp.
Red Inline
Low Fluid
Temp.
Blue Inline
Low Fluid
Temp.
Red Hose
Low Fluid
Temp.
Blue Hose
Low Fluid
Temp.
Red Chiller
Low Fluid
Temp.
Blue Chiller
Low Fluid
Temp.
Oil Temp.
Cutback
The pressure sensor is
providing invalid/no pressure
readings
Error
Type
Alarm
Alarm
Alarm
Cause
Solution
Ensure the material flow is equally restricted on both
Dispense line is clogged
material lines
On the ADM go into the setup screens -> System->
and ensure the pressure imbalance value is the
Pressure imbalance is
maximum acceptable to prevent unnecessary alarms
defined too low
which will abort dispenses
Orifice blocks closed off Verify that one or both of the orifice blocks dispense
too much on one or both when adjusted to the fully open position then adjust
accordingly
sides
Relieve system pressure then remove the orifice from
Debris in the orifice block
the orifice block and inspect for debris in the cavity
Relieve system pressure and remove the orifice from
Material fillers may have
the orifice block and inspect for pack out. Clean or
packed out in an orifice
replace as necessary.
Out of material
Fill tanks with material
Feed system defective Replace defective item
Check to ensure the pressure transducer is properly
Loose/bad connection
installed and all wires are properly connected
Bad sensor
Replace pressure transducer
No material in pump
Fill tanks
Tripped circuit breaker
Visually check circuit breaker for a tripped condition
Alarm
Low power
Measure voltage across input terminals on power line
filter. Voltage should measure between 190 and 264
Vac
Alarm
Cable unplugged/loose
power
Check for loose or disconnected wires or plugs
Alarm
Bad heater(s)
Measure resistance of heater(s)
No power to fan
Debris in fan or fan grill
Check cord to make sure fan has power
Clear debris from fan/fan grill
Alarm
Alarm
Alarm
Alarm
Fluid temperature is below the
defined low alarm limit
Alarm
The hydraulic oil temperature
is approaching a level where
damage is possible so the
Motor Control Module is
limiting the output to a safe
level
Deviation
Try to stop fan by lightly pressing on the center with a
Low air volume from fan pencil eraser. If the fan slows down easily it will need
to be replaced
No power to fan
Debris in fan or fan grill
T3N1
74
Check cord to make sure fan has power
clear debris from fan/fan grill
Try to stop fan by lightly pressing on the center with a
Motor temperature is
Low air volume from fan pencil eraser. If the fan slows down easily it will need
approaching a level where
to be replaced
Motor Temp.
Advisory
damage is possible so the
Cutback
Ambient
environmental
motor control module is limiting
Move machine to an area below 120°F
conditions are too hot
the output to a safe level
Motor/pump coupler may
Reset coupler per specifications and retighten set
be rubbing on hydraulic
screws
pump
313875J
Appendix D - ADM Event and Error Codes Overview
Error
Code
T4B5
T4A3
T4B1
T4A2
T4B4
T4A7
T4B8
T4C1
Error Name
Blue Tank
High Fluid
Temp.
Red Inline
High Fluid
Temp.
Blue Inline
High Fluid
Temp.
Red Hose
High Fluid
Temp.
Blue Hose
High Fluid
Temp.
Red Chiller
High Fluid
Temp.
Blue Chiller
High Fluid
Temp.
Error Description
Error
Type
Cause
Solution
Defective RTD
Replace RTD
Alarm
Defective High Power
Temperature Control
Module
Replace High Power Temperature Control Module
Alarm
Loose connections
Tighten connections
Alarm
Alarm
Alarm
Fluid temperature is above the
Alarm
defined high alarm limit
Alarm
The temperature the MCM has
reached a level where product
Motor Control
Alarm
life will be decreased
High Temp.
drastically and has been
shutdown for protection
The hydraulic oil is at a
temperature where
performance is impacted
significantly and has resulted
in a system shutdown
T4H1
Oil Temp.
Shutdown
T4N1
Motor temperature is too high
Motor Temp. and system has been
Alarm
shutdown to prevent possible
Shutdown
damage
T6A6
T6B5
T6A3
T6B1
T6A2
T6B4
T6A7
T6B8
Red Tank
RTD Fault
Blue Tank
RTD Fault
Red Inline
RTD Fault
Blue Inline
RTD Fault
Red Hose
FTS Fault
Blue Hose
FTS Fault
Red Chiller
RTD Fault
Blue Chiller
RTD Fault
313875J
Alarm
No power to fan
Check cord to make sure fan has power
Debris in fan or heatsink Clear debris from fan or heatsink
Try to stop fan by lightly pressing on the center with a
Low air volume from fan pencil eraser. If the fan slows down easily it will need
to be replaced
Motor may be damaged Replace motor
Debris is packed in the
Clear debris from MCM heat sink fins
MCM’s heat sink fins
No Power to Fan
Check cord to make sure fan has power
Debris in fan or fan grill Clear debris from fan/fan grill
Try to stop fan by lightly pressing on the center with a
Low air volume from fan pencil eraser. If the fan slows down easily it will need
to be replaced
No power to fan
Check cord to make sure fan has power
Debris in fan or fan grill Clear debris from fan/fan grill
Try to stop fan by lightly pressing on the center with a
Low air volume from fan pencil eraser. If the fan slows down easily it will need
to be replaced
Ambient environmental
Move machine to an area below 120°F
conditions are too hot
Motor may be damaged Motor may need to be replaced
Alarm
Alarm
Alarm
RTD 1 is giving no or invalid
data
Alarm
Loose or bad connection Check RTD wiring
Alarm
Alarm
Alarm
Alarm
Bad RTD
Replace RTD
75
Appendix D - ADM Event and Error Codes Overview
Error
Code
T6C6
T6C5
T6C7
T6C8
T8A6
T8B5
T8A3
T8B1
T8A2
T8B4
T8A7
T8B8
T9A6
T9B5
Error Name Error Description
Red Blanket
RTD Fault
Blue Blanket
RTD Fault
RTD 2 is giving no or invalid
data
Red Chiller
RTD Fault
Blue Chiller
RTD Fault
No Heat Red
Tank
No Heat Blue
Tank
No Heat Red
Inline
No temperature rise
No Heat Blue
Inline
No Heat Red
Hose
No Heat Blue
Hose
No Cooling
Red Chiller
No Cooling
Blue Chiller
Red Inline
Temp. Cutoff
T9B1
Blue Inline
Temp. Cutoff
76
Cause
Solution
Alarm
Alarm
Loose or bad connection Check RTD wiring
Alarm
Alarm
Bad RTD
Replace RTD
Tripped circuit breaker
Visually check circuit breaker for a tripped condition
Alarm
Low Power
Measure voltage across input terminals on power line
filter. Voltage should measure between 190 and 264
Vac
Alarm
Cable unplugged/loose
power
Check for loose or disconnected wires or plugs
Alarm
Bad heater(s)
Measure resistance of heater(s)
Alarm
Tripped circuit breaker
Visually check circuit breaker for a tripped condition
Alarm
Alarm
Alarm
Disconnect the valve and measure the voltage across
the wires when the chiller is running to ensure 24V is
being delivered to the valve. If so, the cooling valve
will likely need replacing.
Chilled water supply off Turn on chilled water supply
Loose or bad connection Check RTD wiring
Defective cooling valve
No temperature decline
Alarm
Red Blanket
Temp. Cutoff
Blue Blanket
Temp. Cutoff
T9A3
Error
Type
Alarm
Defective RTD
Replace RTD
Alarm
Defective High Power
Temperature Control
Module
Replace High Power Temperature Control Module
Alarm
Loose connections
Tighten connections
Alarm
Heater overtemperature cutoff
313875J
Appendix D - ADM Event and Error Codes Overview
Error
Code
T9C6
T9C5
T9C3
T9C1
T9C2
T9C4
T9C7
T9C8
V1H1
V4A6
V4B5
V4A3
V4B1
V4A2
V4B4
V4A7
V4B8
V4H0
Error
Error Name Error Description
Type
Red Blanket
Ctrl
Alarm
Shutdown
Blue Blanket
Ctrl
Alarm
Shutdown
Red Inline
Ctrl
Alarm
Shutdown
Blue Inline
Ctrl
Alarm
Shutdown
PCB over temperature
Red Hose Ctrl
Alarm
Shutdown
Blue Hose
Ctrl
Alarm
Shutdown
Red Chiller
Ctrl
Alarm
Shutdown
Blue Chiller
Ctrl
Alarm
Shutdown
The voltage to the MCM has
Motor Control
dropped to a level where
Alarm
Undervoltage
performance is greatly affected
Red Blanket
Alarm
Overvoltage
Blue Blanket
Alarm
Overvoltage
Red Inline
Alarm
Overvoltage
Blue Inline
Alarm
Overvoltage
High line voltage
Red Hose
Alarm
Overvoltage
Blue Hose
Alarm
Overvoltage
Red Chiller
Alarm
Overvoltage
Blue Chiller
Alarm
Overvoltage
The voltage to the MCM has
Motor Control reached an unsafe level and
Alarm
Overvoltage has been shutdown in an
attempt to prevent damage
W0U0
USB Update The ADM tried to upload a
Failed
system settings file but failed
WBH1
Motor
An error has been detected on
Alarm
Encoder Fault the motor position sensor
313875J
Alarm
Cause
Solution
Overheated
Temperature Control
Module
Turn conditioning zone off. Wait a few minutes. If the
condition does not clear or regenerates consistently,
replace heater module
Tripped circuit breaker
Supply lines providing
low voltage
Visually check circuit breaker for a tripped condition
Check incoming voltage to ensure it is above the
minimum operating voltage
Incoming line voltage is
too high
Measure voltage across disconnect switch. Voltage
should measure between 190 and 264 Vac.
Supply lines providing
high voltage
Check incoming voltage to ensure it is below the
maximum operating voltage
System Settings file is
corrupt
System Settings file is
intended for another
system
Failing sensors
Replace the system settings file with a backup or new
file
Ensure that the first line in the settings.txt file contains
the text GMS. If not replace the file with the proper
system update file.
If error persists the motor will need to be replaced
Ensure the d-sub connector to the motor is connected
and the wiring is intact
Loose connection
77
Appendix D - ADM Event and Error Codes Overview
Error
Code
Error Name
Error Description
Error
Type
Cause
No power to directional
valve
Bad directional valve
connection
WKH1
WM06
WM05
WM03
WM01
WM02
WM04
WM07
WM08
WMA6
WMB5
WMC6
WMC5
WMC3
WMC1
WMC2
WMC4
WMC7
WMC8
WMH1
78
High Motor
Speed
Red Tank
Con. Fault
Blue Tank
Con. Fault
Red Inline
Con. Fault
Blue Inline
Con. Fault
Red Hose
Con. Fault
Blue Hose
Con. Fault
Red Chiller
Con. Fault
Blue Chiller
Con. Fault
Red Blanket
High Temp.
Make sure the directional valve has power
Make sure the cord to the directional valve is
connected to the correct port and the cord is not
damaged
The directional valve will need to be replaced
Directional valve failure
Hydraulic power pack
failure
Defective encoder
Motor no longer coupled
to hydraulic pump
Supply tube from
hydraulic pump to
manifold is loose or
broken
Broken motor shaft
Replace motor
Broken contactor
Replace contactor
Alarm
Defective RTD
Replace RTD
Alarm
Defective High Power
Temperature Control
Module
Loose connections
The motor has reached a
speed that should not be
Alarm
reached in normal operation
and was shutdown to prevent
possible damage
The hydraulic power pack will need repair
Replace encoder
Reset coupler per specifications and retighten set
screws
Retighten or replace supply tube
Alarm
Alarm
Alarm
Alarm
High current to relay 1
Alarm
Alarm
Alarm
Alarm
Tank blanket is above the
Blue Blanket defined high alarm limit
High Temp.
Red Tank
Con. Fault
Blue Tank
Con. Fault
Red Inline
Con. Fault
Blue Inline
Con. Fault
Red Hose
Con. Fault
Blue Hose
Con. Fault
Red Chiller
Con. Fault
Blue Chiller
Con. Fault
Motor
Controller
Fault
Solution
Replace High Power Temperature Control Module
Tighten connections
Alarm
Alarm
Alarm
Alarm
Unexpected current to relay 1
Shorted module
Alarm
If temperature is being affected by a zone that has
been disabled, replace heat module
Alarm
Alarm
Alarm
A general fault has occurred
within the MCM
Deviation Internal hardware failure
Cycle power, if the error persists the MCM will need to
be replaced
313875J
Appendix D - ADM Event and Error Codes Overview
Error
Code
Error Name
Invalid
WSC0 Setpoint
Request
Invalid Gel
WSD0 Timer
Definition
313875J
Error Description
Error
Type
Cause
Solution
On the ADM go into the setup screens -> System->
System incorrectly setup and ensure that all pages have properly defined
The requested controlling
values
value (pressure or flow) is
Deviation
outside the limits of the system
Redefine shot with control parameters within the limits
Shot incorrectly defined
of the system
Gel timer shot is below
the minimum dispense
Select a different shot or modify existing shot data
amount or set for a
invalid pressure/flow
The shot that was entered for
the gel timer is not a valid shot.
The MCM has
Deviation
This must be fixed before the
determined that the gel If you are certain that the shot is within parameters,
gel timer will function properly
timer shot will not be able try running the Learn Mode routine found in the setup
screen Calibration. If the error persists, a gel shot with
to be executed based
reduced control parameters is required.
parameters entered in
the ADM
79
Appendix E - USB Operation
Appendix E - USB Operation
NOTICE
Low-quality USB stick drives may lead to burning
out the USB port on the ADM. Use only high-quality
USB stick-drives.
Overview
There are 3 main uses for the USB.
•
•
•
Ability to download a log of up to the past 50,000
errors, events, or jobs that can contain over 150,000
snapshots of critical dipsense information.
Download, modify, and upload custom language
files
Download and upload system configurations
• This data includes most user-selectable and
user-configurable settings.
• This data does not include pump counters, error
and event logs, shot and sequence counters
USB Options
The only options for USB on the ADM are in Advanced
#4, see page 64.
The second option is the Erase icon which will reset the
last download date to a time where all logs can be
downloaded. This will allow the user to download all
USB log entries, which may take over 2 hours if the log
files are full. The ADM does not monitor the USB logs to
alert the user when data may be overwritten. In order to
minimize download times and the risk of losing data it is
recommended that the user download the logs every 2
weeks or more often if the machine is used during more
than one full shift a day.
Download Log Files
If the “Enable Downloading of USB Logs” option is
checked, a USB stick-drive can be used to download the
log files.
To download the log files, insert a high-quality USB
stick-drive into the USB port in the bottom of the ADM.
The ADM will automatically begin downloading the log
files as well as the custom language file (DISPTEXT.TXT) and the system settings file (SETTINGS.TXT). The status of the download will be shown
in the Status bar. If an error occurs during download,
remove the USB stick-drive then re-insert.
The first option is a checkbox that enables or disables
the downloading of the Error Event and Shot Data log
files. The Shot Data log runs during all operating modes.
80
313875J
Appendix E - USB Operation
Log Files, Folder Structure
FIG. 19: DOWNLOAD, DATAxxxx Folders
Each time a stick-drive is inserted into the ADM USB port, a new folder named DATAxxxx is created. The number at
the end of the folder name is incremented each time a stick-drive is inserted and data is transferred through the USB.
In each DATAxxxx folder there are three log files. They are formatted as .csv (comma separated value) files and can
be opened by most text editors or data processing programs such as Excel.
Example 1-ERROR File
The 1-ERROR file is the Errors and Events log file.
313875J
81
Appendix E - USB Operation
Example 2-JOB File
The 2-JOB file is the Shot Data log file.
Example 3-SYSTEM File
The 3-SYSTEM file is the Software Version log file.
82
313875J
Appendix E - USB Operation
Transfer System Settings
Use the following process to transfer system settings
from one machine to another.
1. Insert a high-quality USB stick-drive into the ADM
USB port on the system with the settings to be
transferred. Once the download is complete the
SETTINGS.TXT file will be located in the “DOWNLOAD” folder.
NOTE: Before the update begins the ADM automatically
shuts down the system, aborting any in-progress dispensing. When the software is updating a pop-up box
will appear to inform the user of the update and the system will lock. Once the update is complete the ADM will
tell the user to cycle power to apply the updates.
6. When the software is done updating, remove the
USB stick-drive.
NOTICE
The user should never attempt to modify the SETTINGS.TXT file in any way. Graco is not responsible
for damages caused by an improperly modified
setup file.
2. Plug the USB stick-drive into a computer.
3. Navigate to the DOWNLOAD folder.
4. Copy the SETTINGS.TXT file from the DOWNLOAD
folder into the UPLOAD folder.
5. Remove the USB stick-drive from the computer and
install it into the ADM USB port for the second
machine. The software will automatically begin
updating.
313875J
7. Turn the Main Power Switch to the OFF position
then back to the ON position.
8. Plug the USB stick-drive into a computer.
9. Navigate to the UPLOAD folder and remove the
SETTINGS.TXT file.
NOTE: Immediately after uploading the settings, remove
the SETTINGS.TXT file from the UPLOAD folder to prevent accidental loss of data the next time the USB
stick-drive is inserted into the ADM USB port. If there is
a SETTINGS.TXT file in the UPLOAD folder when the
USB stick-drive is inserted into the ADM USB port the
software will automatically begin updating.
83
Appendix E - USB Operation
Update Custom Language
Use the following process to customize the text on the
ADM. The language file DISPTEXT.TXT can be modified in Excel but must be saved as a Unicode Text file
with the extension .TXT in order for it to properly import.
1. Insert a high-quality USB stick-drive into the ADM
USB port on the system with the settings to be
transferred. Once the download is complete the
DISPTEXT.TXT file will be located in the “DOWNLOAD” folder.
NOTE: Immediately following uploading the language
file, remove the DISPTEXT.TXT file from the UPLOAD
folder to prevent accidental loss of data the next time the
USB stick-drive is inserted into the ADM USB port. If
there is a DISPTEXT.TXT file in the UPLOAD folder
when the USB stick-drive is inserted into the ADM USB
the software will automatically begin updating.
2. Plug the USB stick-drive into a computer.
3. Navigate to the DOWNLOAD folder.
4. Copy the DISPTEXT.TXT file from the DOWNLOAD
folder to your computer.
5. Use any data processing software such as Excel to
edit the DISPTEXT.TXT file.
a. In the first column, locate the string to change.
b.
In the second column of the same row, enter the
new string.
c.
Save the file as a Unicode Text file. The name
must remain “DISPTEXT.TXT”.
6. Copy the edited DISPTEXT.TXT file into the
UPLOAD folder.
7. Remove the USB stick-drive from the computer and
insert it into the ADM USB port. The software will
automatically begin updating.
NOTE: Before the update begins the ADM automatically
shuts down the system, aborting any in-progress dispensing. When the software is updating a pop-up box
will appear to inform the user of the update and the system will lock. Once the update is complete the ADM will
tell the user to cycle power to apply the updates.
8. When the software is done updating, remove the
USB stick-drive.
9. Turn the Main Power Switch to the OFF position
then back to the ON position.
10. Plug the USB stick-drive into a computer.
11. Navigate to the UPLOAD folder and remove the
DISPTEXT.TXT file.
84
313875J
Appendix E - USB Operation
Example SETTINGS.TXT File
Example DISPTEXT.TXT File
NOTICE
The user should never attempt to modify the SETTINGS.TXT file in any way. Graco is not responsible
for damages caused by an improperly modified
setup file.
313875J
85
Appendix E - USB Operation
86
313875J
Technical Data
Technical Data
Air Inlet Pressure . . . . . . . . . . . . . . . . . . . . . . . . . . . . . .
85-100 psi (0.59-0.69 MPa, 5.9-6.9 bar)
Wetted Parts . . . . . . . . . . . . . . . . . . . . . . . . . . . . . . . . .
Stainless steel, UHMW, carbon steel
Fluid Viscosity Range . . . . . . . . . . . . . . . . . . . . . . . . . .
Paste
Fluid Flow Range. . . . . . . . . . . . . . . . . . . . . . . . . . . . . .
VPM-25: 12-25 kg/min (26-55 lb/min)
VPM-12: 10-12 kg/min (22-26 lb/min)
Hydraulic Reservoir Capacity . . . . . . . . . . . . . . . . . . . .
8 gal. (30 liters) each
Recommended Hydraulic Fluid . . . . . . . . . . . . . . . . . . .
Citgo A/W Hydraulic Oil, ISO Grade 46
Dimensions
The dimensions of the machine vary by machine layout.
Ref
VPM-25
VPM-12
A (Height)
Ram in the lowered position:
9 ft 3 in.
(2.82 m)
Ram in the raised position:
11 ft 4 in.
(3.45 m)
Ram in the lowered position:
9 ft 3 in.
(2.82 m)
Ram in the raised position:
11 ft 4 in.
(3.45 m)
B (Width)
7 ft 8 in.
(2.34 m)
7 ft 8 in.
(2.34 m)
C (Depth)
15 ft 10 in.
(4.83 m)
6 ft 1 in.
(1.86 m)
B
VPM-25 Shown
ti17693a
A
C
313875J
87
Graco Standard Warranty
Graco warrants all equipment referenced in this document which is manufactured by Graco and bearing its name to be free from defects in
material and workmanship on the date of sale to the original purchaser for use. With the exception of any special, extended, or limited warranty
published by Graco, Graco will, for a period of twelve months from the date of sale, repair or replace any part of the equipment determined by
Graco to be defective. This warranty applies only when the equipment is installed, operated and maintained in accordance with Graco’s written
recommendations.
This warranty does not cover, and Graco shall not be liable for general wear and tear, or any malfunction, damage or wear caused by faulty
installation, misapplication, abrasion, corrosion, inadequate or improper maintenance, negligence, accident, tampering, or substitution of
non-Graco component parts. Nor shall Graco be liable for malfunction, damage or wear caused by the incompatibility of Graco equipment with
structures, accessories, equipment or materials not supplied by Graco, or the improper design, manufacture, installation, operation or
maintenance of structures, accessories, equipment or materials not supplied by Graco.
This warranty is conditioned upon the prepaid return of the equipment claimed to be defective to an authorized Graco distributor for verification of
the claimed defect. If the claimed defect is verified, Graco will repair or replace free of charge any defective parts. The equipment will be returned
to the original purchaser transportation prepaid. If inspection of the equipment does not disclose any defect in material or workmanship, repairs will
be made at a reasonable charge, which charges may include the costs of parts, labor, and transportation.
THIS WARRANTY IS EXCLUSIVE, AND IS IN LIEU OF ANY OTHER WARRANTIES, EXPRESS OR IMPLIED, INCLUDING BUT NOT LIMITED
TO WARRANTY OF MERCHANTABILITY OR WARRANTY OF FITNESS FOR A PARTICULAR PURPOSE.
Graco’s sole obligation and buyer’s sole remedy for any breach of warranty shall be as set forth above. The buyer agrees that no other remedy
(including, but not limited to, incidental or consequential damages for lost profits, lost sales, injury to person or property, or any other incidental or
consequential loss) shall be available. Any action for breach of warranty must be brought within two (2) years of the date of sale.
GRACO MAKES NO WARRANTY, AND DISCLAIMS ALL IMPLIED WARRANTIES OF MERCHANTABILITY AND FITNESS FOR A
PARTICULAR PURPOSE, IN CONNECTION WITH ACCESSORIES, EQUIPMENT, MATERIALS OR COMPONENTS SOLD BUT NOT
MANUFACTURED BY GRACO. These items sold, but not manufactured by Graco (such as electric motors, switches, hose, etc.), are subject to
the warranty, if any, of their manufacturer. Graco will provide purchaser with reasonable assistance in making any claim for breach of these
warranties.
In no event will Graco be liable for indirect, incidental, special or consequential damages resulting from Graco supplying equipment hereunder, or
the furnishing, performance, or use of any products or other goods sold hereto, whether due to a breach of contract, breach of warranty, the
negligence of Graco, or otherwise.
FOR GRACO CANADA CUSTOMERS
The Parties acknowledge that they have required that the present document, as well as all documents, notices and legal proceedings entered into,
given or instituted pursuant hereto or relating directly or indirectly hereto, be drawn up in English. Les parties reconnaissent avoir convenu que la
rédaction du présente document sera en Anglais, ainsi que tous documents, avis et procédures judiciaires exécutés, donnés ou intentés, à la suite
de ou en rapport, directement ou indirectement, avec les procédures concernées.
Graco Information
For the latest information about Graco products, visit www.graco.com.
TO PLACE AN ORDER, contact your Graco distributor or call to identify the nearest distributor.
Phone: 612-623-6921 or Toll Free: 1-800-328-0211 Fax: 612-378-3505
All written and visual data contained in this document reflects the latest product information available at the time of publication.
Graco reserves the right to make changes at any time without notice.
For patent information, see www.graco.com/patents.
Original instructions. This manual contains English. MM 313875
Graco Headquarters: Minneapolis
International Offices: Belgium, China, Japan, Korea
GRACO INC. AND SUBSIDIARIES • P.O. BOX 1441 • MINNEAPOLIS MN 55440-1441 • USA
Copyright 2010, Graco Inc. All Graco manufacturing locations are registered to ISO 9001.
www.graco.com
Revised November 2012