1
Operation
®
ProMix
2KS
312779E
EN
Plural Component Proportioner
Automatic system for proportional mixing of plural component coatings, with Wall Mount
Fluid Station or RoboMix Fluid Station. For professional use only.
Approved for use in explosive atmospheres (except the EasyKey).
Important Safety Instructions
Read all warnings and instructions in this
manual. Save these instructions.
See pages 4-7 for model information, including maximum working pressure. Equipment approval labels are
on page 3. Some components shown are not included
with all systems.
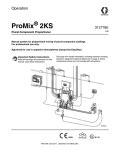
Automatic System with RoboMix Fluid Station
Automatic System with Wall Mount Fluid Station
TI12552a
TI12553a
0359
#
53
II 2 G
Contents
Related Manuals . . . . . . . . . . . . . . . . . . . . . . . . . . . . . . . . . 3
Equipment Approvals . . . . . . . . . . . . . . . . . . . . . . . . . . . . 3
System Configuration and Part Numbers . . . . . . . . . . . . 4
Wall Mount Fluid Station Configurator Key . . . . . . . . . . 4
Standard Features . . . . . . . . . . . . . . . . . . . . . . . . . . . . 5
RoboMix Fluid Station Configurator Key . . . . . . . . . . . . 6
Standard Features . . . . . . . . . . . . . . . . . . . . . . . . . . . . 7
Accessories . . . . . . . . . . . . . . . . . . . . . . . . . . . . . . . . . . . . 8
Warnings . . . . . . . . . . . . . . . . . . . . . . . . . . . . . . . . . . . . . . . 9
Important Two-Component Material Information . . . . . 11
Isocyanate Conditions . . . . . . . . . . . . . . . . . . . . . . . . 11
Material Self-ignition . . . . . . . . . . . . . . . . . . . . . . . . . . 11
Keep Components A and B Separate . . . . . . . . . . . . . 11
Moisture Sensitivity of Isocyanates . . . . . . . . . . . . . . . 11
Changing Materials . . . . . . . . . . . . . . . . . . . . . . . . . . . 11
Glossary of Terms . . . . . . . . . . . . . . . . . . . . . . . . . . . . . . 12
Overview . . . . . . . . . . . . . . . . . . . . . . . . . . . . . . . . . . . . . . 14
Usage . . . . . . . . . . . . . . . . . . . . . . . . . . . . . . . . . . . . . 14
Component Identification and Definition . . . . . . . . . . . 14
Wall Mount System Components . . . . . . . . . . . . . . . . 16
RoboMix System Components . . . . . . . . . . . . . . . . . . 18
EasyKey Display and Keyboard . . . . . . . . . . . . . . . . . . . 20
Display . . . . . . . . . . . . . . . . . . . . . . . . . . . . . . . . . . . . 20
Keypad . . . . . . . . . . . . . . . . . . . . . . . . . . . . . . . . . . . . 20
AC Power Switch . . . . . . . . . . . . . . . . . . . . . . . . . . . . 21
I/S Power . . . . . . . . . . . . . . . . . . . . . . . . . . . . . . . . . . 21
Potlife Exceeded Audible Alarm . . . . . . . . . . . . . . . . . 21
Graco Web Interface Port . . . . . . . . . . . . . . . . . . . . . . 21
Ethernet Connection . . . . . . . . . . . . . . . . . . . . . . . . . . 21
Run Mode Screens . . . . . . . . . . . . . . . . . . . . . . . . . . . . . . 22
Splash Screen . . . . . . . . . . . . . . . . . . . . . . . . . . . . . . 22
Status Screen . . . . . . . . . . . . . . . . . . . . . . . . . . . . . . . 24
Manual Override Screen . . . . . . . . . . . . . . . . . . . . . . . 25
Totals Screen . . . . . . . . . . . . . . . . . . . . . . . . . . . . . . . 26
Reset Total Screen . . . . . . . . . . . . . . . . . . . . . . . . . . . 26
Reset Solvent Screen . . . . . . . . . . . . . . . . . . . . . . . . . 26
Alarms Screen . . . . . . . . . . . . . . . . . . . . . . . . . . . . . . 27
Level Control Screen . . . . . . . . . . . . . . . . . . . . . . . . . 27
Setup Mode . . . . . . . . . . . . . . . . . . . . . . . . . . . . . . . . . . . . 28
Password Screen . . . . . . . . . . . . . . . . . . . . . . . . . . . . 29
Set Up Home Screen . . . . . . . . . . . . . . . . . . . . . . . . . 29
System Configuration Screens . . . . . . . . . . . . . . . . . . 31
Option Screens . . . . . . . . . . . . . . . . . . . . . . . . . . . . . . 36
Advanced Setup Screens . . . . . . . . . . . . . . . . . . . . . . 38
Recipe Setup Screens . . . . . . . . . . . . . . . . . . . . . . . . 43
Recipe 0 Screens . . . . . . . . . . . . . . . . . . . . . . . . . . . . 47
Calibration Screen . . . . . . . . . . . . . . . . . . . . . . . . . . . 49
ProMix 2KS Integration Specifics . . . . . . . . . . . . . . . . . . 51
Discrete I/O vs Network Communications . . . . . . . . . 51
Discrete I/O . . . . . . . . . . . . . . . . . . . . . . . . . . . . . . . . . 51
Automation Flow Charts . . . . . . . . . . . . . . . . . . . . . . . 55
2
Integrated Flow Control . . . . . . . . . . . . . . . . . . . . . . . . . 67
Flow Control Description . . . . . . . . . . . . . . . . . . . . . . 67
Flow Control Components . . . . . . . . . . . . . . . . . . . . . 67
Fluid and Air Pressure Requirements . . . . . . . . . . . . . 68
Flow Control Operation . . . . . . . . . . . . . . . . . . . . . . . . 68
Flow Control Operating Process Example . . . . . . . . . 70
Flow Control Setup . . . . . . . . . . . . . . . . . . . . . . . . . . . 72
Flow Control Startup . . . . . . . . . . . . . . . . . . . . . . . . . . 72
Flow Control Calibration . . . . . . . . . . . . . . . . . . . . . . . 74
Pressure Flow Control Mode . . . . . . . . . . . . . . . . . . . 77
Flow Control Troubleshooting . . . . . . . . . . . . . . . . . . . 78
System Operation . . . . . . . . . . . . . . . . . . . . . . . . . . . . . . 80
Operation Modes . . . . . . . . . . . . . . . . . . . . . . . . . . . . 80
Sequential Dosing . . . . . . . . . . . . . . . . . . . . . . . . . . . 80
Dynamic Dosing . . . . . . . . . . . . . . . . . . . . . . . . . . . . . 80
Recipe (Color) Change . . . . . . . . . . . . . . . . . . . . . . . . 80
Solvent Push . . . . . . . . . . . . . . . . . . . . . . . . . . . . . . . 80
Typical PLC Interaction with ProMix 2KS . . . . . . . . . . 81
General Operating Cycle, Sequential Dosing . . . . . . . 83
General Operating Cycle, Dynamic Dosing . . . . . . . . 85
Mix Manifold Valve Settings . . . . . . . . . . . . . . . . . . . . 88
Start Up . . . . . . . . . . . . . . . . . . . . . . . . . . . . . . . . . . . 89
Shutdown . . . . . . . . . . . . . . . . . . . . . . . . . . . . . . . . . . 91
Pressure Relief Procedure . . . . . . . . . . . . . . . . . . . . . 91
Purging . . . . . . . . . . . . . . . . . . . . . . . . . . . . . . . . . . . . 95
Solvent Push Feature . . . . . . . . . . . . . . . . . . . . . . . . . 99
Meter Calibration . . . . . . . . . . . . . . . . . . . . . . . . . . . . . . 100
Color Change . . . . . . . . . . . . . . . . . . . . . . . . . . . . . . . . . 102
Color Change Procedures . . . . . . . . . . . . . . . . . . . . 102
Color Change Sequences . . . . . . . . . . . . . . . . . . . . 102
Alarms and Warnings . . . . . . . . . . . . . . . . . . . . . . . . . . 115
System Alarms . . . . . . . . . . . . . . . . . . . . . . . . . . . . . 115
System Warnings . . . . . . . . . . . . . . . . . . . . . . . . . . . 115
Alarm Troubleshooting . . . . . . . . . . . . . . . . . . . . . . . . . 116
Schematic Diagrams . . . . . . . . . . . . . . . . . . . . . . . . . . . 127
System Pneumatic Schematic . . . . . . . . . . . . . . . . . 127
System Electrical Schematic . . . . . . . . . . . . . . . . . . 128
EasyKey Electrical Schematic . . . . . . . . . . . . . . . . . 130
Meter Performance Data (G3000 on A and B) . . . . . . . 131
Meter Performance Data (G3000 on A, Coriolis on B) 132
Technical Data . . . . . . . . . . . . . . . . . . . . . . . . . . . . . . . . 133
Graco Standard Warranty . . . . . . . . . . . . . . . . . . . . . . . 134
Graco Information . . . . . . . . . . . . . . . . . . . . . . . . . . . . . 134
312779E
Related Manuals
Related Manuals
Equipment Approvals
Component Manuals in English
Equipment approvals appear on the following labels
which are attached to the Fluid Station and EasyKey™.
See FIG. 1 on page 4 and FIG. 2 on page 6 for label locations.
Manual
Description
312778
ProMix 2KS Automatic System
Installation
ProMix 2KS Automatic System
Repair-Parts
Fluid Mix Manifold
Dispense Valve
Color Change Valve Stacks
Color Change Module Kit
Gun Flush Box Kits
Gun Air Shutoff Kit
Dump Valve and Third Purge Valve Kits
Network Communication Kits
G3000/G3000HR/G250/G250HR Flow
Meter
Coriolis Flow Meter
Gun Flush Box Integration Kit
Floor Stand Kit
Beacon Kit
Basic Web Interface/Advanced Web
Interface
15V825 Discrete I/O Board Kit
312780
312781
312782
312783
312787
312784
310745
312786
312785
308778
313599
313212
313290
313542
313386
406800
EasyKey and Fluid Station Label
ATEX Certificate is listed here
!"#$"%#$!
(
78
3
4
$#$+" ,+-!
!./%0!$#-( ++
1
213/%14
56'(#&'(
!"#$#%%
&'
(
(
)*
+ )
,-
(
+./+01%
2*3
3:
3(
(
988
$$!% +1
&&88
&'()'*
Fluid Station Label
ProMix® 2KS
PART NO.
C
SERIES
FLUID PANEL
MAX AIR WPR
SERIAL MFG. YR.
Intrinsically safe equipment
for Class I, Div 1, Group D, T3
US Ta = -20°C to 50°C
Install per 289833
.7
7
MPa
bar
100
PSI
GRACO INC.
P.O. Box 1441
Minneapolis, MN
55440 U.S.A.
FM08ATEX0073
II 2 G
Ex ia IIA T3
Artwork No. 293538
TI13581a
ATEX Certificate is listed here
EasyKey Label
PART NO. SERIES NO. MFG. YR.
VOLTS
85-250 ~
AMPS 2 AMPS MAX
GRACO INC.
C
P.O. Box 1441
Minneapolis, MN
55440 U.S.A.
50/60 Hz
Intrinsically safe connections
for Class I, Div 1, Group D
US Ta = -20°C to 50°C
Install per 289833
II (2) G
[Ex ia] IIA
FM08ATEX0072
Artwork No. 293467
POWER REQUIREMENTS
ProMix® 2KS
Um: 250 V
TI13582a
ATEX Certificate is listed here
312779E
3
System Configuration and Part Numbers
System Configuration and Part Numbers
Wall Mount Fluid Station Configurator Key
The configured part number for your equipment is printed on the equipment identification labels. See FIG. 1
for location of the identification labels. The part number includes one digit from each of the following six
categories, depending on the configuration of your system.
Automatic
System
Control and Display
A and B Meter
A
D = EasyKey with LCD Display 0 = No Meters
1 = G3000 (A and B)
2 = G3000HR (A and B)
3 = 1/8 in. Coriolis (A) and
G3000 (B)
4 = G3000 (A) and 1/8 in.
Coriolis (B)
Color Valves
Catalyst Valves
Flow
Control
0 = No Valves
(single color)
1 = Two Valves
(low pressure)
0 = No Valves
N = No
(single catalyst)
Y = Yes
1 = Two Valves
(low pressure)
2 = Four Valves
(low pressure)
2 = Four Valves
(low pressure)
3 = Seven Valves
(low pressure)
5 = 1/8 in. Coriolis (A) and
G3000HR (B)
4 = Twelve Valves
(low pressure)
6 = G3000HR (A) and 1/8 in.
Coriolis (B)
7 = 1/8 in. Coriolis (A and B)
!"#$"%#$!
(
Label Location
on Fluid Station
78
3
4
TI12423a
Maximum Fluid
Working Pressure
is listed here
$#$+" ,+-!
!./%0!$#-( ++
1
213/%14
56'(#&'(
!"#$#%%
&'
(
(
)*
+ )
,-
(
+./+01%
2*3
Configured Part Number
3:
TI12418a
Label Location
on EasyKey
&'()'*
3(
(
988
$$!% +1
&&88
FIG. 1: Identification Label, Wall Mount Fluid Station Systems
4
312779E
System Configuration and Part Numbers
Hazardous Location Approval
Models using a G3000, G3000HR, or intrinsically safe Coriolis meter for both A and B meters are approved for
installation in a Hazardous Location - Class I, Div I, Group D, T3 or Zone I Group IIA T3.
Maximum Working Pressure
Maximum working pressure rating is dependent on the fluid component options selected. The pressure rating is
based on the rating of the lowest rated fluid component. Refer to the component pressure ratings below.
Example: Model AD110Y has a maximum working pressure of 190 psi (1.31 MPa, 13.1 bar).
Check the identification label on the EasyKey or fluid station for the system maximum working pressure.
See FIG. 1.
ProMix Fluid Components Maximum Working Pressure
Base System (no meters [option 0], no color/catalyst change [option 0],
and no flow control [option N]) . . . . . . . . . . . . . . . . . . . . . . . . . . . . . . . . . . . . . . . 4000 psi (27.58 MPa, 275.8 bar)
Meter Option 1 and 2 (G3000 or G3000HR) . . . . . . . . . . . . . . . . . . . . . . . . . . . . 4000 psi (27.58 MPa, 275.8 bar)
Meter Option 3, 4, 5, 6, and 7 (one or two Coriolis Meters) . . . . . . . . . . . . . . . . . 2300 psi (15.86 MPa, 158.6 bar)
Color Change Option 1, 2, 3 and 4 and
Catalyst Change Option 1 and 2 (low pressure valves) . . . . . . . . . . . . . . . . . . . . . . . 300 psi (2.07 MPa, 20.6 bar)
Flow Control Option Y (Yes) . . . . . . . . . . . . . . . . . . . . . . . . . . . . . . . . . . . . . . . . . . . . .190 psi (1.31 MPa 13.1 bar)
Flow Meter Fluid Flow Rate Range
G3000. . . . . . . . . . . . . . . . . . . . . . . . . . . . . . . . . . . . . . . . . . . . . . . . . . . . . . . 75-3800 cc/min. (0.02-1.0 gal./min.)
G3000HR . . . . . . . . . . . . . . . . . . . . . . . . . . . . . . . . . . . . . . . . . . . . . . . . . . . 38-1900 cc/min. (0.01-0.50 gal./min.)
Coriolis Meter . . . . . . . . . . . . . . . . . . . . . . . . . . . . . . . . . . . . . . . . . . . . . . 20-3800 cc/min. (0.005-1.00 gal./min.)
S3000 Solvent Meter (accessory) . . . . . . . . . . . . . . . . . . . . . . . . . . . . . . . . 38-1900 cc/min. (0.01-0.50 gal./min.)
Standard Features
Feature
EasyKey with LCD
Fiber Optic and Power Cables, 50 ft (15.25 m)
Wall Mount Fluid Station, 50 cc Integrator and Static Mixer
Discrete I/O Board
A Side Dump Valve, if color valve(s) selected
B Side Dump Valve, if catalyst valve(s) selected
Flow Control with 15 ft (4.57 m) Cable (if selected)
Basic Web Interface
312779E
5
System Configuration and Part Numbers
RoboMix Fluid Station Configurator Key
The configured part number for your equipment is printed on the equipment identification labels. See FIG. 2
for location of the identification labels. The part number includes one digit from each of the following six
categories, depending on the configuration of your system.
RoboMix
System
Control and Display
A and B Meter
Color Valves
Catalyst Valves
Flow
Control
R
D = EasyKey with LCD Display
0 = No Meters
0 = No Valves
(single color)
0 = No Valves
(single catalyst)
N = No
1 = G250 (A and B)
1 = Two Valves
2 = G250HR (A and B)
(low pressure)
1 = Two Valves
(low pressure)
2 = Four Valves
(low pressure)
2 = Four Valves
(low pressure)
Y = Yes
3 = Seven Valves
(low pressure)
4 = Twelve Valves
(low pressure)
!"#$"%#$!
Label Location on
RoboMix Fluid Station
(
78
3
4
$#$+" ,+-!
!./%0!$#-( ++
1
213/%14
56'(#&'(
TI12512b
Maximum Fluid
Working Pressure
is listed here
!"#$#%%
&'
(
(
)*
+ )
,-
(
+./+01%
2*3
3:
TI12418a
Label Location
on EasyKey
&'()'*
Configured Part Number
3(
(
988
$$!% +1
&&88
FIG. 2: Identification Label, RoboMix Fluid Station Systems
6
312779E
System Configuration and Part Numbers
Hazardous Location Approval
Models using a G250 or G250HR for both A and B meters are approved for installation in a Hazardous Location Class I, Div I, Group D, T3 or Zone I Group IIA T3.
Maximum Working Pressure
Maximum working pressure rating for RoboMix Systems is 190 psi (1.31 MPa, 13.1 bar).
Check the identification label on the EasyKey or RoboMix fluid station for the system maximum working
pressure. See FIG. 2.
ProMix RoboMix Systems Maximum Working Pressure
RoboMix Fluid Station Options (all) . . . . . . . . . . . . . . . . . . . . . . . . . . . . . . . . . . . . . . 190 psi (1.31 MPa, 13.1 bar)
Flow Meter Fluid Flow Rate Range
G250 Meter. . . . . . . . . . . . . . . . . . . . . . . . . . . . . . . . . . . . . . . . . . . . . . . . . . . 75-3800 cc/min. (0.02-1.0 gal./min.)
G250HR Meter . . . . . . . . . . . . . . . . . . . . . . . . . . . . . . . . . . . . . . . . . . . . . . . 38-1900 cc/min. (0.01-0.50 gal./min.)
Standard Features
Feature
EasyKey with LCD
RS 485 Network Cable, 50 ft (15.25 m)
Fiber Optic and Power Cables, 50 ft (15.25 m)
Remote Fluid Station, 25 cc Integrator
Discrete I/O Board
A Side Dump Valve, if color valve(s) selected
B Side Dump Valve, if catalyst valve(s) selected
Flow Control with 15 ft (4.57 m) Cable (if selected)
Basic Web Interface
312779E
7
Accessories
Accessories
Accessory
15V354 Third Purge Valve Kit
15V202 Third Purge Valve Kit
15V536 Solvent Flow Switch Kit
15V213 Power Cable, 100 ft (30.5 m)
15G710 Fiber Optic Cable, 100 ft (30.5 m)
15G614 Flow Control Extension Cable, 40 ft (12.2 m)
15U955 Injection Kit for Dynamic Dosing
15V034 10 cc Integrator Kit
15V033 25 cc Integrator Kit
15V021 50 cc Integrator Kit
24B618 100 cc Integrator Kit
15W034 Strobe Light Alarm Indicator Kit
15V331 Gateway Ethernet Communication Kit
15V963 Gateway DeviceNet Communication Kit
15V964 Gateway Profibus Communication Kit
15V337 Advanced Web Interface
280555 S3000 Solvent Flow Meter Kit
8
312779E
Warnings
Warnings
The following warnings are for the setup, use, grounding, maintenance, and repair of this equipment. The exclamation point symbol alerts you to a general warning and the hazard symbols refer to procedure-specific risks. When
these symbols appear in the body of this manual, refer back to these Warnings. Product-specific hazard symbols and
warnings not covered in this section may appear throughout the body of this manual where applicable.
WARNING
FIRE AND EXPLOSION HAZARD
Flammable fumes, such as solvent and paint fumes, in work area can ignite or explode. To help prevent
fire and explosion:
• Use equipment only in well ventilated area.
• Eliminate all ignition sources; such as pilot lights, cigarettes, portable electric lamps, and plastic drop
cloths (potential static arc).
• Keep work area free of debris, including solvent, rags and gasoline.
• Do not plug or unplug power cords, or turn power or light switches on or off when flammable fumes
are present.
• Ground all equipment in the work area. See Grounding instructions in your system installation manual.
• Use only grounded hoses.
• Hold gun firmly to side of grounded pail when triggering into pail.
• If there is static sparking or you feel a shock, stop operation immediately. Do not use equipment
until you identify and correct the problem.
• Keep a working fire extinguisher in the work area.
ELECTRIC SHOCK HAZARD
This equipment must be grounded. Improper grounding, setup, or usage of the system can cause
electric shock.
• Turn off and disconnect power at main switch before disconnecting any cables and before servicing
equipment.
• Connect only to grounded power source.
• All electrical wiring must be done by a qualified electrician and comply with all local codes and
regulations.
INTRINSIC SAFETY
Intrinsically safe equipment that is installed improperly or connected to non-intrinsically safe equipment
will create a hazardous condition and can cause fire, explosion, or electric shock. Follow local
regulations and the following safety requirements.
312779E
•
Only models with a G3000, G250, G3000HR, G250HR, or intrinsically safe Coriolis meter are
approved for installation in a Hazardous Location - Class I, Div I, Group D, T3 or Zone I Group IIA
T3.
•
Do not install equipment approved only for a non-hazardous location in a hazardous area. See the
ID label for the intrinsic safety rating of your model.
•
Do not substitute or modify system components as this may impair intrinsic safety.
9
Warnings
WARNING
SKIN INJECTION HAZARD
High-pressure fluid from gun, hose leaks, or ruptured components will pierce skin. This may look like just
a cut, but it is a serious injury that can result in amputation. Get immediate surgical treatment.
• Tighten all fluid connections before operating the equipment.
• Do not point gun at anyone or at any part of the body.
• Do not put your hand over the spray tip.
• Do not stop or deflect leaks with your hand, body, glove, or rag.
• Follow Pressure Relief Procedure in this manual, when you stop spraying and before cleaning,
checking, or servicing equipment.
EQUIPMENT MISUSE HAZARD
Misuse can cause death or serious injury.
• Do not operate the unit when fatigued or under the influence of drugs or alcohol.
• Do not exceed the maximum working pressure or temperature rating of the lowest rated system
component. See Technical Data in all equipment manuals.
• Use fluids and solvents that are compatible with equipment wetted parts. See Technical Data in all
equipment manuals. Read fluid and solvent manufacturer’s warnings. For complete information
about your material, request MSDS forms from distributor or retailer.
• Check equipment daily. Repair or replace worn or damaged parts immediately with genuine manufacturer’s replacement parts only.
• Do not alter or modify equipment.
• Use equipment only for its intended purpose. Call your distributor for information.
• Route hoses and cables away from traffic areas, sharp edges, moving parts, and hot surfaces.
• Do not kink or over bend hoses or use hoses to pull equipment.
• Keep children and animals away from work area.
• Comply with all applicable safety regulations.
TOXIC FLUID OR FUMES HAZARD
Toxic fluids or fumes can cause serious injury or death if splashed in the eyes or on skin, inhaled, or
swallowed.
• Read MSDS’s to know the specific hazards of the fluids you are using.
• Store hazardous fluid in approved containers, and dispose of it according to applicable guidelines.
• Always wear chemically impermeable gloves when spraying or cleaning equipment.
PERSONAL PROTECTIVE EQUIPMENT
You must wear appropriate protective equipment when operating, servicing, or when in the operating
area of the equipment to help protect you from serious injury, including eye injury, inhalation of toxic
fumes, burns, and hearing loss. This equipment includes but is not limited to:
• Protective eyewear
• Clothing and respirator as recommended by the fluid and solvent manufacturer
• Gloves
• Hearing protection
10
312779E
Important Two-Component Material Information
Important Two-Component Material Information
Isocyanate Conditions
Spraying or dispensing materials containing isocyanates creates potentially harmful mists, vapors, and
atomized particulates.
Read material manufacturer’s warnings and material MSDS to know specific hazards and precautions
related to isocyanates.
Prevent inhalation of isocyanate mists, vapors, and
atomized particulates by providing sufficient ventilation in the work area. If sufficient ventilation is not
available, a supplied-air respirator is required for
everyone in the work area.
To prevent contact with isocyanates, appropriate
personal protective equipment, including chemically
impermeable gloves, boots, aprons, and goggles, is
also required for everyone in the work area.
Material Self-ignition
Some materials may become self-igniting if applied
too thickly. Read material manufacturer’s warnings
and material MSDS.
Keep Components A and B
Separate
Moisture Sensitivity of
Isocyanates
Isocyanates (ISO) are catalysts used in two component
coatings. ISO will react with moisture (such as humidity)
to form small, hard, abrasive crystals, which become
suspended in the fluid. Eventually a film will form on the
surface and the ISO will begin to gel, increasing in viscosity. If used, this partially cured ISO will reduce performance and the life of all wetted parts.
NOTE: The amount of film formation and rate of crystallization varies depending on the blend of ISO, the
humidity, and the temperature.
To prevent exposing ISO to moisture:
•
Always use a sealed container with a desiccant
dryer in the vent, or a nitrogen atmosphere. Never
store ISO in an open container.
•
Use moisture-proof hoses specifically designed for
ISO, such as those supplied with your system.
•
Never use reclaimed solvents, which may contain
moisture. Always keep solvent containers closed
when not in use.
•
Never use solvent on one side if it has been contaminated from the other side.
•
Always lubricate threaded parts with ISO pump oil
or grease when reassembling.
Changing Materials
•
When changing materials, flush the equipment multiple times to ensure it is thoroughly clean.
•
Always clean the fluid inlet strainers after flushing.
•
Check with your material manufacturer for chemical
compatibility.
•
Most materials use ISO on the A side, but some use
ISO on the B side.
Cross-contamination can result in cured material in
fluid lines which could cause serious injury or damage equipment. To prevent cross-contamination of
the equipment’s wetted parts, never interchange
component A (isocyanate) and component B (resin)
parts.
312779E
11
Glossary of Terms
Glossary of Terms
Air Chop - the process of mixing air and solvent
together during the flush cycle to help clean the lines
and reduce solvent usage.
Air Chop Time- duration of each activation of the air
purge valve during a chop sequence. User settable from
0.0-99.9 seconds.
Analog - relating to, or being a device in which data are
represented by continuously variable, measurable,
physical quantities, such as length, width, voltage, or
pressure.
Ethernet - a method for directly connecting a computer
to a network or equipment in the same physical location.
Fiber Optic Communication - the use of light to transmit communication signals.
Final Purge Source- source of the media used in the
final purge cycle. User settable to air purge valve, solvent purge valve, or 3rd purge valve.
Final Purge Time- duration of the final purge cycle.
User settable from 0-999 seconds.
Chop Time- refers to the total length of the chop
sequence during a purge. User settable from 0-999 seconds.
First Purge Source- source of the media used in the
first purge cycle. User settable to air purge valve, solvent purge valve, or 3rd purge valve
Closed Loop Flow Control - refers to the process
when the flow rate is adjusted automatically to maintain
a constant flow.
First Purge Time- duration of the first purge cycle. User
settable from 0-999 seconds.
Color/Catalyst Dump - refers to the time required to
flush the lines from the color or catalyst change module
to the mix manifold during a color or catalyst change.
Color/Catalyst Fill - refers to the time required to fill the
lines from the color or catalyst change module to the mix
manifold.
Coriolis Meter - a non-intrusive flow meter often used in
low flow applications or with light viscosity, shear sensitive, or acid catalyzed materials. This meter uses vibration to measure flow.
Digital Input and Output - a description of data which
is transmitted as a sequence of discrete symbols, most
commonly this means binary data represented using
electronic or electromagnetic signals.
Discrete I/O - refers to data that constitutes a separate
entity and has direct communication to another control.
Dose Size - the amount of resin (A) and catalyst (B) that
is dispensed into an integrator.
Dose Time Alarm - the amount of time that is allowed
for a dose to occur before an alarm occurs.
Flow Control Resolution - a settable value that allows
the flow control system to maximize its performance.
The value is based on maximum desired flow rates.
Flow Rate Analog Signal - the type of communication
signal that can be used on the ProControl module.
Flow Rate Tolerance - the settable percent of acceptable variance that the system will allow before a flow
rate warning occurs.
Flow Set Point - a predefined flow rate target.
Flush Volume Check - system monitors flush volume.
E-11 Alarm occurs if minimum volume is not achieved.
Minimum flush volume is user settable (0-999 cc).
Grand Total - a non-resettable value that shows the
total amount of material dispensed through the system.
Gun Trigger Input Signal - used to manage ratio
assurance dose times and flow control processes.
Intrinsically Safe (IS) - refers to the ability to locate certain components in a hazardous location.
Idle - if the gun is not triggered for 2 minutes the system
enters Idle mode. Trigger the gun to resume operation.
Dynamic Dosing - Component A dispenses constantly.
Component B dispenses intermittently in the necessary
volume to attain the mix ratio.
12
312779E
Glossary of Terms
Job Total - a resettable value that shows the amount of
material dispensed through the system for one job. A job
is complete when a color change or complete system
flush occurs.
K-factor - a value that refers to the amount of material
that passes through a meter. The assigned value refers
to an amount of material per pulse.
Ki - refers to the degree fluid flow over shoots its set
point.
Kp - refers to the speed in which the fluid flow reaches
its set point.
Manual Mode - when the proportioning or flow control
system is controlling the inputs without any input from
an outside control.
Minimum Material Fill Volume - system monitors
material fill volume. E-21 Alarm occurs if minimum volume is not achieved. Minimum material fill volume is
user settable (0-9999 cc).
Mix - when cross-linking of the resin (A) and catalyst (B)
occurs.
Mix Input Signal- refers to system mode status where
system begins a dose sequence each time the mix signal is made “High”.
Mixed Material Fill Time - the amount of time that is
required to load mixed material from the dose valves to
the applicator/gun.
Purge - when all mixed material is flushed from the system.
Purge Time - the amount of time required to flush all
mixed material from the system.
Purge Volume Alarm - E-11 Alarm occurs if minimum
flush volume is not achieved.
Ratio Tolerance - the settable percent of acceptable
variance that the system will allow before a ratio alarm
occurs.
Sequential Color Change - the process when a color
change is initiated and the system automatically flushes
the old color and loads a new color.
Sequential Dosing - Components A and B dispense
sequentially in the necessary volumes to attain the mix
ratio.
Solvent/3rd Purge Valve Chop Time- duration of each
activation of the solvent or 3rd purge valve during a
chop sequence. User settable from 0.0-99.9 seconds.
Solvent Fill - the time required to fill the mixed material
line with solvent.
Solvent Push - enables the user to save some mixed
material by pushing it out to the gun with solvent.
Requires an accessory solvent meter.
Standby - refers to the status of the system.
Modbus/TCP - a type of communication protocol used
to communicate Digital I/O signals over an ethernet.
Third Purge Valve - refers to the use of three purge
valves used to flush some waterborne materials. The
valves are used to flush with water, air and solvent.
Network Station - a means to identify a particular individual proportioning or flow control system.
V/P - refers to the voltage to air pressure device in the
flow control module.
Overdose Alarm - when either the resin (A) or catalyst
(B) component dispenses too much material and the
system cannot compensate for the additional material.
Potlife Time - the amount of time before a material
becomes unsprayable.
Potlife Volume - the amount of material that is required
to move through the mix manifold, hose and applicator
before the potlife timer is reset.
312779E
13
Overview
Overview
Usage
The Graco ProMix 2KS is an electronic two-component paint proportioner. It can blend most two-component solvent
and waterborne epoxy, polyurethane, and acid-catalyzed paints. It is not for use with “quick-setting” paints (those
with a potlife of less than 15 minutes).
• Color change options are available for low pressure
• Can proportion at ratios from 0.1:1 to 50:1 in 0.1
(300 psi [2.1 MPa, 21 bar]) air spray and high presincrements.
sure (3000 psi [21 MPa, 210 bar]) systems with up
• Has user selectable ratio assurance and can mainto 30 color change valves and up to 4 catalyst
tain up to +/-1% accuracy, depending on materials
change valves.
and operating conditions.
• Models are available to operate air spray or
NOTE: Optional accessories are available for in
air-assisted systems with a capacity of up to 3800
field installation to achieve 30 colors.
cc/min.
Component Identification and Definition
SeeTable 1, and FIG. 3 for the wall mount system components and FIG. 5 for the RoboMix system components.
Table 1: Component Descriptions
Component
Description
EasyKey (EK)
Used to set up, display, operate, and monitor the system. The EasyKey accepts 85-250
VAC, 50/60 Hz line power and converts that power to acceptable low voltage and optical
signals used by other system components.
Wall Mount Fluid
Station (ST, used on
ADxxxx and AExxxx
Models only)
Includes air control solenoids, flow switches, and mountings for the fluid flow meters, and
the fluid manifold assembly. Its control board manages all proportioning functions.
RoboMix Fluid
Station (RS, used
on RDxxxx and
RExxxx Models
only)
Includes air control solenoids, flow switches, fluid flow meters, and the fluid manifold
assembly to control and monitor fluid dispensing. Its control board manages all proportioning functions.
Fluid Manifold (FM)
•
•
•
•
•
14
Pneumatically Operated Dose Valves for component A and B
Purge Valves for solvent and air purge
Sampling Valves for calibrating the flow meters and performing ratio checks (Wall
Mount Panel only)
Shutoff Valves for component A and B to close their fluid passages to the mix manifold, to allow for accurate calibration and ratio checks (Wall Mount Panel only)
Mix Manifold, which includes the fluid integrator and static mixer.
➜ Fluid Integrator is the chamber where component A and B align at the
selected ratio and begin to mix.
➜ Static Mixer has 24 elements to uniformly blend the materials downstream
of the fluid integrator.
312779E
Overview
Table 1: Component Descriptions
Component
Flow Meters (MA,
MB, MS)
Description
The following optional flow meters are available from Graco:
•
G3000 is a general purpose gear meter typically used in flow ranges of 75-3800
cc/min. (0.02–1.0 gal/min.), pressures up to 4000 psi (28 MPa, 276 bar), and viscosities of 20–3000 centipoise. The K-factor is approximately 0.119 cc/pulse.
•
G3000HR is a high resolution version of the G3000 meter. It is typically used in flow
ranges of 38–1900 cc/min. (0.01–0.5 gal/min.), pressures up to 4000 psi (28 MPa,
276 bar). and viscosities of 20–3000 centipoise. The K-factor is approximately 0.061
cc/pulse.
•
G250 is a general purpose gear meter, used in RoboMix systems. It is typically used
in flow ranges of 75-3800 cc/min. (0.02–1.0 gal/min.), pressures up to 300 psi (2.1
MPa, 21 bar), and viscosities of 20–3000 centipoise. The K-factor is approximately
0.119 cc/pulse.
•
G250HR is a high resolution version of the G250 meter, used in RoboMix systems. It
is typically used in flow ranges of 38–1900 cc/min. (0.01–0.5 gal/min.), pressures up
to 300 psi (2.1 MPa, 21 bar). and viscosities of 20–3000 centipoise. The K-factor is
approximately 0.061 cc/pulse.
•
S3000 is a gear meter used for solvents in flow ranges of 38-1900 cc/min. (0.01–0.50
gal/min.), pressures up to 3000 psi (21 MPa, 210 bar), and viscosities of 20–50 centipoise. The K-factor is approximately 0.021 cc/pulse. Required to use the Solvent
Push feature.
•
Coriolis is a specialty meter capable of a wide range of flow rates and viscosities.
This meter is available with 1/8 in. or 3/8 in. diameter fluid passages. For detailed
information on the Coriolis meter, see manual 313599.
The K-factor is user-settable; at lower flow rates use a lower K-factor.
➜ 1/8 in. fluid passages: set K-factor to .020 or .061.
➜ 3/8 in. fluid passages: set K-factor to .061 or 0.119.
Color Change
Valves (ACV) and
Color Change
Module (CCM)
An optional component. It is available as a color change valve stack for either low or high
pressure with up to 30 color change valves. Each stack includes one additional valve for
solvent to clean the fluid line between color changes.
Catalyst Change
Valves (BCV)
An optional component. It is available as a catalyst change valve stack for either low or
high pressure with up to 4 catalyst change valves. Each stack includes one additional
valve for solvent to clean the fluid line between catalyst changes.
Dual Fiber Optic
Cable (FO)
Used to communicate between the EasyKey and Wall Mount Fluid Station or RoboMix.
Fluid Station Power
Supply Cable (PS)
Used to provide power to the Wall Mount Fluid Station or RoboMix.
Flow Control
Regulator
Assembly (FC)
Includes an air operated fluid pressure regulator, fluid pressure sensor, voltage to air
pressure transducer and circuit board. The function of this unit is to receive the flow analog signal and drive (manage) the desired flow rate.
312779E
15
Overview
Wall Mount System Components
EK
ACV
CCM
PS*
BCV
MS
FO*
FC
ST
MA
FM
MB
*
See the ProMix 2KS
Repair-Parts manual for
optional cable lengths.
TI12553a
FIG. 3. Wall Mount System, shown with G3000 Meters, Color/Catalyst Change, Accessory Solvent Meter, and
Flow Control
16
312779E
Overview
DVA
FI
DVB
MB
MS
MA
RVB
AT
APV
RVA
SVA
SM
SVB
SPV
TI12556b
FIG. 4. Wall Mount Fluid Station
Key:
MA
DVA
RVA
SVA
MB
DVB
RVB
SVB
MS
SPV
APV
SM
FI
AT
Component A Meter
Component A Dose Valve
Component A Sampling Valve
Component A Shutoff Valve
Component B Meter
Component B Dose Valve
Component B Sampling Valve
Component B Shutoff Valve
Solvent Meter (accessory)
Solvent Purge Valve
Air Purge Valve
Static Mixer
Fluid Integrator
Air Purge Valve Air Supply Tube
312779E
17
Overview
RoboMix System Components
EK
ACV
CCM
BCV
Air Controls
Purge Air
PS*
RoboMix
Control Air
FO*
FC
RS
*
See the ProMix 2KS
Repair-Parts manual for
optional cable lengths.
TI12552a
FIG. 5. RoboMix System shown with Color/Catalyst Change and Flow Control
18
312779E
Overview
Air Logic In
Cable Path
B Supply (1/4 npt)
A Supply (1/4 npt)
Ground Screw
Air Purge
Solvent Supply
(1/4 npt)
TI12511b
A Dump Out
B Dump Out
Cover is removed for clarity
MB
DVB
MA
TI12579b
DVA
FIG. 6: Details of RoboMix Fluid Station
312779E
19
EasyKey Display and Keyboard
EasyKey Display and Keyboard
Keypad
LCD Display
TI11630A
Navigation Keys
Alarm Reset Key
FIG. 7. EasyKey Display and Keypad
Display
Shows graphical and text information related to setup
and spray operations. Back light will turn off after 10
minutes without any key press. Press any key to turn
back on.
Keypad
Used to input numerical data, enter setup screens, scroll
through screens, and select setup values.
In addition to the numbered keys on the EasyKey keypad, which are used to enter values in setup, there are
keys to navigate within a screen and between screens,
and to save entered values. See Table 2.
Table 2: EasyKey Keypad Functions (see FIG. 7)
Key
Function
Setup: press to enter or exit Setup mode.
Enter: if cursor is in menu box, press Enter
key to view menu. Press Enter to save a
value either keyed in from the numerical
keypad or selected from a menu.
Up Arrow: move to previous field or menu
item, or to previous screen within a group.
Down Arrow: move to next field or menu
item, or to next screen within a group.
Left Arrow: move to previous screen group.
Right Arrow: move to next screen group.
Alarm Reset: resets alarms.
20
312779E
EasyKey Display and Keyboard
Fiber Optic Strain
Relief Port
Audible Alarm
AC Power
Switch
Main Power
Access Port
Ground Screw
I/S Power
Graco Web
Interface
Discrete I/O Cable
Connector Ports
TI12638a
TI12657a
FIG. 8. EasyKey Connections and AC Power Switch
AC Power Switch
Graco Web Interface Port
Turns system AC power on or off.
Used to communicate with the ProMix from a PC to:
I/S Power
Power circuit to Fluid Station.
Potlife Exceeded Audible Alarm
Alerts the user when a Potlife Exceeded alarm occurs.
Clear by pressing the Alarm Reset
key.
➜ Upgrade software
➜ View software version
➜ Download
• Job and alarm logs
• Material usage report
• Setup values (can also upload)
➜ Clear job, alarm, and material usage reports
➜ Upload a custom language to view on
screen
➜ Restore factory defaults
➜ Restore setup password
See manual 313386 for more information.
NOTE: If using the Graco Gateway in your system, disconnect its cable from the EasyKey before updating the
ProMix 2KS software.
Ethernet Connection
You can access data on an office or industrial network
through the internet with the proper configuration. See
manual 313386 for more information.
312779E
21
Run Mode Screens
Run Mode Screens
NOTE: See FIG. 11 for a map of the Run screens.
Detailed screen descriptions follow.
.
Splash Screen
At power up, the Graco logo and software revision will
display for approximately 5 seconds, followed by the
Status Screen (see page 24).
FIG. 9. Splash Screen
The Splash screen will also momentarily display “Establishing Communication.” If this display remains for more
than one minute, check that the fluid station circuit board
is powered up (LED is on) and that the fiber optic cable
is properly connected (see Installation manual).
NOTE: If the software version of the fluid plate does not
match the version of the EasyKey, the EasyKey will
update the fluid plate, and the fluid plate programming
screen will appear until the update is completed.
FIG. 10. Fluid Plate Programming Screen
22
312779E
Run Mode Screens
Press the Setup
key to
enter Setup mode.
TI12802a
FIG. 11. Run Screens Map
312779E
23
Run Mode Screens
Status Screen
6 Target Flow Rate and Current Flow Rate: in
cc/min.
•
Use the Up
or Down
Run screens.
•
Press the Setup
keys to scroll through the
7 Animation: when the gun is triggered, the gun
appears to spray and the component A or B hose
lights up, showing which component dose valve is
open.
key to enter the Setup screens
from the Status screen.
•
8 Current Date and Time
The other keys have no function in this Status
screen.
1
11
8
2
3
9
10
7
4
9
6
Screen Number and Scroll Arrows: displays the
current screen number and the total number of
screens in a group. The Up and Down arrows on the
right edge of the screen indicate the scroll feature.
The total number of screens in some groups may
vary depending on system configuration selections.
10 Current Flow Control Data: fluid output pressure
and voltage of analog signal used for driving the
fluid regulator V/P.
11 Lock Symbol: indicates that Setup screens are
5
password protected. See page 29.
FIG. 12. Status Screen
Key to FIG. 12:
1 Active Recipe: shows the active recipe.
NOTE: At power up the system defaults to Recipe
61, which is not a valid recipe number.
2 Target Ratio: for the active recipe. The ratio can be
from 0.0:1–50.0:1, in 0.1 increments.
3 Actual Ratio: in hundredths, calculated after each
dose of A and B.
4 Potlife Timer: shows remaining potlife time in min-
utes. Two times are shown if there are two guns
(manual or semi-automatic mode only).
5 Status Bar: shows current alarm or operation mode
(standby, mix, purge, recipe change, or the current
alarm).
NOTE: If the auto key board is removed from the
EasyKey display board, the Status Bar will read
“Auto key not found.” This indicates that the automatic mode is not operable.
24
312779E
Run Mode Screens
Manual Override Screen
Flow Rate Range
This screen displays the flow rate range selected on
Advanced Setup Screen 5 (see page 41).
Flow Set Point
The Flow Set Point is user settable. If Flow Control
Override is set to “Off” or “Pressure” in Advanced
Setup Screen 1 on page 39, the Flow Set Point will display as cc/min. Enter the desired flow set point within
the range.
FIG. 13. Manual Override Screen
If Flow Control Override is set to “% Open,” the Flow Set
Point will display as % Open. This percentage relates to
the flow control V/P ratio which translates to a fluid flow
rate. Set the initial percentage at 35% and increase as
necessary to reach the desired flow rate.
This screen will appear if Manual Override is set to “On”
in Advanced Setup Screen 1 (page 39). It shows the
active recipe, new/go to recipe, and manual override
mode.
Flow Control Calibration
If Flow Control is set to “On” in Configure Screen 5 on
page 34, this screen will also display Flow Rate Range,
Flow Set Point, Flow Control Calibration (Start/Abort),
and Global Flow Control Data Copy (Start/Abort).
Manual Override Menu
This field allows you to set the operating mode from the
EasyKey. Press the Enter
key to view the menu,
then select the desired operating mode (Standby, Mix,
Purge, or Recipe Change). See FIG. 14.
This field allows you to calibrate flow control for each
recipe. The system must be in Mix mode and receiving a
Gun Trigger signal. Press the Enter
key to view the
menu, then select Start or Abort. See FIG. 15.
The flow rate will drop to 0, then incrementally increase
until it reaches the maximum flow rate. To view the
progress, go to the Status Screen, page 24. The system will populate the data for the current recipe. To copy
this data to all recipes, see Global Flow Control Data
Copy, page 26.
FIG. 15. Flow Control Calibration
FIG. 14. Manual Override Menu
312779E
25
Run Mode Screens
Global Flow Control Data Copy
Reset Total Screen
This field allows you to copy flow control data from the
active recipe to all recipes. Press the Enter
key to
view the menu, then select Start or Abort. See FIG. 16.
FIG. 18. Reset Total Screen
FIG. 16. Global FC Data Copy
Totals Screen
If job is reset, job number will increment by one for
default.
Reset Solvent Screen
FIG. 17. Totals Screen
FIG. 19. Reset Solvent Total Screen
This screen shows the job totals, grand totals, and job
number. Use the tabs to reset job totals (Job Complete),
reset solvent totals (Rst Solvent), or go to Level Control
Screen, page 27.
The screen will ask if you want to reset solvent total.
Select Yes or No.
Solvent Totals and the Rst Solvent tab only appear if
“Meter” is selected under Solvent Monitor in Configure
Screen 5 on page 34.
NOTE: Grand totals are not resettable.
26
312779E
Run Mode Screens
Alarms Screen
See FIG. 22. If the tank volume reaches the low-level
threshold, the EasyKey screen will display the Tank
Level Low alarm and prompt the user to do one of the
following:
1. Refill tank volume to clear the alarm.
2. Resume mixing by selecting “Spray 25% of Remainder.” If this selection is chosen, a second alarm will
occur after 25% of the remaining volume is mixed.
Refill tank volume to clear the alarm.
FIG. 20. Alarms Screen
Two screens show the last 10 alarms. Use the Up
Down
or
keys to scroll between the two screens.
See Table 16 on page 115 for a list of alarm codes.
Level Control Screen
FIG. 22. Tank Level Low Screen (Tank A Shown)
FIG. 21. Level Control Screen
This screen shows the current volume for each fluid.
Adjust the current volumes on this screen, or use the tab
to go to Usage (Totals Screen, page 26). The Alarm
Level values may be adjusted using the advanced web
interface.
312779E
27
Setup Mode
Setup Mode
Press the Setup
key to enter Setup mode.
NOTE: See FIG. 23 for a map of the Setup screens.
Detailed screen descriptions follow.
Press the Setup
key to
enter Setup mode.
This screen appears only if a
password is activated.
To access Advanced Setup Screens,
page 38 and Recipe Setup Screens, page
To access System Configuration
Screens, page 31.
Press the Setup
key to exit
Setup mode and return to the Status
screen.
This screen appears momentarily
if a password is activated.
TI12803a
FIG. 23. Setup Screens Map
28
312779E
Setup Mode
Password Screen
Set Up Home Screen
If a password has been activated (see Configure
Screen 1, page 32), the Password screen will appear.
You must enter the password to access the Set Up
Home Screen. Entering the wrong password returns the
display to the Status Screen.
NOTE: If you forget the password, you can reset the
password (to 0), using the ProMix Web Interface (see
manual 313386).
FIG. 26. Set Up Home Screen
This screen displays when you enter Setup mode. From
it you can go to Recipe and Advanced Setup Screens
(pages 38-46) or System Configuration Screens
(pages 31-37). Press the Enter
selected screen set.
FIG. 24. Password Screen
NOTE: If a password is activated, Setup Locked displays momentarily after exiting Setup mode and returning to the Status Screen. A lock
key to go to the
The screen also displays software versions and internet
addresses of various components. The values shown in
FIG. 26 are only examples and may vary on your screen.
See Table 3 for further information.
symbol appears
on the Status Screen.
FIG. 25. Setup Locked Screen
312779E
29
Setup Mode
Table 3: Component Software Versions
Component
Display (may vary
from examples
shown)
Description
EK (EasyKey)
2.00.012
EasyKey software version.
FP (Fluid Plate)
2.00.012
Fluid Plate software version.
BC (Booth Control)
-.-
Booth Control not installed, not detected, or not operational.
1.XX
Booth Control software version 1.00 or 1.01.
2.XX
Booth Control software version 2.XX.
-.-
Color Change Module 1/2 not installed, not detected,
or not operational.
1.XX
Color Change Module software version 1.00 or 1.01.
2.XX
Color Change Module software version 2.XX.
2K-Manual
No AutoKey installed or detected. System operates in
2K Manual Mode only
2K-Auto
2K AutoKey detected. System can operate in 2K Manual, Semi-automatic, or Automatic Mode.
3K-Auto
3K AutoKey detected. System can operate in 3K Manual, Semi-automatic, or Automatic Mode.
XP (XPORT)
V6.6.0.2
Example of XPORT network module software version.
Other versions are acceptable.
MC (Micro Controller)
1042.0198
Example of fluid plate micro controller version. Other
versions are acceptable.
IP (Internet Address)
192.168.178.5
Example of the address EasyKey is set to for basic
and advanced web interface reporting.
MAC (MAC address)
00204AAD1810
Example of internet MAC address. Each EasyKey will
have a different value in this format.
C1/C2 (Color Change
Modules 1 and 2)
AK (Autokey)
30
312779E
Setup Mode
System Configuration Screens
NOTE: See FIG. 27 for a map of the System Configuration Screens. Detailed screen descriptions follow.
NOTE: Each screen displays the current screen number
and the total number of screens in the group.
TI12804a
FIG. 27. System Configuration and Option Screens Map
312779E
31
Setup Mode
Configure Screen 1
Configure Screen 2
FIG. 28. Configure Screen 1
FIG. 29. Configure Screen 2
Language
Month
Defines the language of the screen text. Select English
(default), Spanish, French, German, Italian, Dutch, Japanese (Kanji), Korean, and Chinese (Simplified).
Enter current month.
Password
Day
Enter current day.
The password is only used to enter Setup mode. The
default is 0, which means no password is required to
enter Setup. If a password is desired, enter a number
from 1 to 9999.
Year
NOTE: Be sure to write down the password and keep it
in a secure location.
Enter current time in hours (24 hour clock) and minutes.
Seconds are not adjustable.
Display Units
Date Format
Select the desired display units:
Select mm/dd/yy or dd/mm/yy.
•
•
Enter current year (four digits).
Time
cc/liter (default)
cc/gallon
Buzzer - All Alarms
As shipped, the alarm buzzer will sound only for the Potlife Alarm (E-2).
Off is default. Set to “On” to have the buzzer sound for
all alarms.
Screen Timeout
Select the desired screen timeout in minutes (0-99). 5 is
the default.
32
312779E
Setup Mode
Configure Screen 3
FIG. 30. Configure Screen 3
Run Mode
Select the Run mode application from the pulldown
menu: Automatic (default), Semi-Automatic (uses a
manual spray gun), or Manual.
NOTE: ProControl 1KS is also available as a selection.
For further information, see ProControl 1KS operation
manual 3A1080.
Dump Valve A
This field only appears if the system includes an optional
dump valve A. If dump valve A is included, set to On.
Configure Screen 4
FIG. 31. Configure Screen 4
Dose Size
Select the total dose size (cc) from the pulldown menu:
100, 50, 25, 10, or select DD to turn on dynamic dosing.
See page 85.
Example:
For a total dose size of 50 cc and a ratio of 4.0:1, the
component A dose size is 40 cc and component B dose
size is 10 cc.
NOTE: Increase the dose size in applications with
higher flow rates or wider ratios. Decrease the dose size
for a better mix under low flow conditions.
Dump Valve B
This field only appears if the catalyst change option is
detected from the cc board, meaning that dump valve B
is present. On is the only setting.
3rd Flush Valve
Off is default. If optional 3rd flush valve is used, set to
On.
312779E
33
Setup Mode
DD Setup Mode
Configure Screen 5
See FIG. 32 and FIG. 33. Selecting “DD” makes the
Dynamic Dosing Setup mode field appear. Select On to
enable DD setup mode, or Off to disable. See page 86
for further information.
FIG. 34. Configure Screen 5
Flow Control
FIG. 32. Configure Screen 4, dynamic dosing
selected
This field only appears if Run Mode is set to “Automatic”
in Configure Screen 3, page 33. Select On or Off.
If set to “On,” Advanced Setup Screen 5, page 41 is
added.
Special Outputs
Select special outputs (0-4). Each output has two different start times and durations.
Solvent Monitor
Select solvent monitor (Off, Flow Switch, or Meter).
Web Browser IP
FIG. 33. Configure Screen 4, dynamic dosing setup
mode enabled
The default web browser IP address prefix is
192.168.178.__ Assign a unique number for each
EasyKey in your system (1-99) and enter it here.
Dose Time Alarm
Enter the dose time (1 to 99 seconds). This is the
amount of time allowed for a dose to occur before a
dose time alarm occurs.
Number of Guns
This field only appears if Run Mode is set to “Manual” or
Semi-Automatic” in Configure Screen 3, page 33.
Enter the number of spray guns (1 or 2).
NOTE: Only 1 gun is used in automatic mode.
Gun Flush Box (manual or semi-automatic mode)
This field only appears if Run Mode is set to “Manual” or
Semi-Automatic” in Configure Screen 3, page 33.
Enter the number of gun flush boxes (Off, 1, or 2).
34
312779E
Setup Mode
Configure Screen 6
FIG. 35. Configure Screen 6 (Automatic mode shown)
Flow Control
This field only appears if Run Mode is set to “Automatic”
in Configure Screen 3, page 33 and Flow Control is set
to “On” in Configure Screen 5, page 34. Select “Discrete” or “Network.”
Proportioning
Select “Discrete” or “Network.”
Gun 1 Trigger
Select “Discrete” or “Network” if Run Mode is set to
“Automatic” in Configure Screen 3, page 33. “AFS” is
added as a selection if Run Mode is set to “Semi-automatic” in Configure Screen 3, page 33.
Gun 2 Trigger
Displays AFS if Number of Guns is set to “2” in Configure Screen 4, page 33.
Control Network ID
Used for the Graco Gateway network system. See
Graco Gateway manual 312785 for further information
312779E
35
Setup Mode
Option Screens
Verification Screen
NOTE: See FIG. 27 on page 31 for a map of the Option
Screens. Detailed screen descriptions follow.
NOTE: Each screen displays the current screen number
and the total number of screens in the group.
Option Screen 1
FIG. 37. Verification Screen
Verification
This screen appears if Flush and Fill Input or K-factor
Input are changed from “Recipe” to “Global” in Option
Screen 1.
FIG. 36. Option Screen 1
Flush Volume Check
This field only appears if Solvent Monitor is set to
“Meter” in Configure Screen 5, page 34.
If set to “On”, Minimum Flush Volume will appear in
Recipe Setup Screen 2, page 44.
Flush and Fill Input
If set to “Global”, Color/Catalyst Purge and Color/Catalyst Fill are added to Advanced Setup Screen 1, page
39. Advanced Setup Screen 2 and 3 are added. See
pages 40-42.
If set to “Recipe”, Color/Catalyst Purge and Color/Catalyst Fill are added to Recipe Setup Screen 2, page 44.
Recipe Setup Screen 3, 4, and 7 are added. See
pages 45-46.
K-factor Input
If set to “Global,” Advanced Setup Screen 4, page 41
is added.
If set to “Recipe,” Recipe Setup Screen 5, page 46, is
added.
Minimum Material Fill Volume
Enter 0-9999 cc.
36
312779E
Setup Mode
Option Screen 2
FIG. 38. Option Screen 2
External Color Change
If set to “Off”, Color/Catalyst Purge Time and Color/Catalyst Fill Time appear in Advanced Setup Screen 1,
page 39 or Recipe Setup Screen 2, page 44 (depending on whether Flush and Fill Inputs are set to “Global”
or “Recipe”).
If set to “On”, these fields are removed from the
screens.
Auto Dump
If the auto dump feature is being used, set to “On”. Once
the auto dump is enabled, the gun flush box is enabled
and the potlife alarm is active for 2 minutes, the system
will automatically flush out the old material.
Flow Rate Monitor
This field only appears if Flow Control is set to “Off” in
Configure Screen 5, page 34.
If set to “On,” Recipe Setup Screen 6 on page 46 is
added, enabling setting of high and low flow limits.
If set to “Off,” flow rate monitoring is disabled and Recipe Setup Screen 6 on page 46 will not appear.
Solvent Push Enable
To enable the Solvent Push feature, select “Solvent” or
“3rd Valve” (available if 3rd Flush Valve in Configure
Screen 3, page 33, is set to “On”).
To disable the Solvent Push feature, set to “Off.”
312779E
37
Setup Mode
Advanced Setup Screens
NOTE: See FIG. 39 for a map of the Advanced Setup Screens. Detailed screen descriptions follow.
Advanced Setup screens 2, 3,
4, and 8 appear depending on
selections made in Option
screens 1 and 2. Screen 5
appears if Flow Control is set
to “On” in Configure screen 5.
TI12805a
FIG. 39. Advanced Setup Screens Map
38
312779E
Setup Mode
NOTE: Each screen displays the current screen number
and the total number of screens in the group. The total
number of screens in a group and the fields displayed
on each screen may vary depending on selections
made in the System Configuration Screens and
Option Screens.
Manual Override
Advanced Setup Screen 1
Gun 1/Gun2 Potlife Volume
This field only appears if Run Mode is set to “Automatic”
or “Semi-automatic” in Configure Screen 3, page 33.
Set to “On” to override all outside control. If selected, the
Manual Override Screen (page 25) will be added, and
the Flow Control Override field appears (see above).
Enter the potlife volume (1 to 1999 cc) for each gun.
This is the amount of material required to move through
the mix manifold, hose and applicator/gun before the
potlife timer is reset.
Use the following information to determine approximate
pot life volume (PLV) in cc:
FIG. 40. Advanced Setup Screen 1
Flow Control Override
This field only appears if Flow Control is set to “On” in
Configure Screen 5 on page 34, and Manual Override
is set to “On” (see below). The selections made will
affect the display in Manual Override Screen on page
25. Choose the desired selection as defined below:
Selection
Description
Off
% Open
Normal operation
Flow control regulator is opened to a
desired percentage.
Flow control regulator is opened to a
calibrated pressure.
Pressure
Hose ID (inches)
Volume (cc/foot)*
3/16
1/4
3/8
5.43
9.648
21.71
Integrator manifold and mixer volume = 75 cc
Spray Gun Volume = 20 cc
(Hose Volume* x Feet of Hose) + 75 + 20 = PLV
Color/Catalyst Purge
This field only appears if the system includes a color
change module and Flush and Fill Input is set to
“Global” in Option Screen 1, page 36. Enter the purge
time (0 to 99 seconds). It refers to the amount of time
required to flush the lines from the color or catalyst module to the dose valve or dump valve.
Color/Catalyst Fill
This field only appears if the system includes a color
change module and Flush and Fill Input is set to
“Global” in Option Screen 1, page 36. Enter the fill time
(0 to 99 seconds). It refers to the time required to fill the
lines from the color or catalyst module to the dose valve
or dump valve.
FIG. 41. Flow Control Override Menu
312779E
39
Setup Mode
Advanced Setup Screen 2
Advanced Setup Screen 3
FIG. 42. Advanced Setup Screen 2
FIG. 43. Advanced Setup Screen 3
This screen appears only if Flush and Fill Input is set to
“Global” in Option Screen 1, page 36.
This screen appears only if Flush and Fill Input is set to
“Global” in Option Screen 1, page 36.
First Purge Source
Select “Air,” “Solvent,” or “3rd Flush Valve” (available
only if 3rd Flush Valve is set to “On” in Configure
Screen 3 on page 33).
If Number of Guns is set to “2” in Configure Screen 4,
page 33, a Gun 2 column will appear in this screen.
Chop Type
Enter the first purge time (0 to 999 seconds).
Select “Air/Solvent” or “Air/3rd Flush Valve” (available
only if 3rd Flush Valve is set to “On” in Configure
Screen 3 on page 33). This refers to the process of mixing air and solvent (or air and 3rd flush fluid) together
during the flush cycle, to help clean the lines and reduce
solvent usage.
Final Purge Source
Select “Air,” “Solvent,” or “3rd Flush Valve” (available
only if 3rd Flush Valve is set to “On” in Configure
Screen 3 on page 33).
Air Chop Time
First Purge Time
Total Chop Time
Enter the total chop time (0 to 999 seconds).
Final Purge Time
Enter the final purge time (0 to 999 seconds).
Mixed Material Fill Time
Enter the mixed material fill time (0 to 999 seconds). It
refers to the amount of time that is required to load
mixed material from the dose valves to the applicator/gun.
Enter the air chop time (0.0 to 99.9 seconds).
Solvent Chop Time/3rd Flush Valve Chop Time
Enter the solvent or 3rd flush valve chop time (0.0 to
99.9 seconds).
40
312779E
Setup Mode
Advanced Setup Screen 4
Advanced Setup Screen 5
FIG. 44. Advanced Setup Screen 4
FIG. 45. Advanced Setup Screen 5 (Automatic Mode
with Flow Control Only)
This screen appears only if K-factor Input is set to
“Global” in Option Screen 1, page 36.
This screen appears only if Flow Control is set to “On” in
Configure Screen 5, page 34.
K-factor A Meter
Flow Rate Range
Enter the k-factor (cc/pulse) for flow meter A. This is the
amount of material that passes through the flow meter
per pulse (electrical pulse signal).
Enter the flow rate range (0-300, 0-600, or 0-1200). This
determines the flow control PID loop resolution.
K-factor B Meter
Enter the k-factor (cc/pulse) for flow meter B.
K-factor Solvent Meter
This field only appears if Solvent Monitor in Configure
Screen 5, page 34, is set to “Meter.” Enter the k-factor
(cc/pulse) for the solvent flow meter.
Flow Rate Tolerance
Enter the flow rate tolerance (1 to 99%). This is the percentage of variance that the system will allow before a
flow rate warning/alarm occurs.
Flow Rate Ki
Enter the flow rate Ki (flow control PID loop integral
value). This refers to the degree that fluid flow overshoots its set point.
Flow Rate Kp
Enter the flow rate Kp (flow control PID loop gain value).
This refers to the speed at which the fluid flow reaches
its set point.
Flow Rate Alarm Time
Enter the flow rate alarm time (1 to 99 seconds).
312779E
41
Setup Mode
Advanced Setup Screen 6
FIG. 46. Advanced Setup Screen 6
This screen shows the status of recipe analog inputs
and digital outputs. If box is shaded the input recipe is
active.
Advanced Setup Screen 7
Advanced Setup Screen 8
FIG. 48. Advanced Setup Screen 8
This screen appears only if Flush and Fill Input is set to
“Global” in Option Screen 1, page 36 and Special Outputs is set to 1, 2, 3, or 4 in Configure Screen 5, page
34. The I/O board has four programmable outputs.
FIG. 47. Advanced Setup Screen 7
This screen shows the status of digital inputs and digital
outputs. If box is shaded the input is active. If not, input
is off. See pages 52-54 for details on the inputs and outputs.
42
312779E
Setup Mode
Recipe Setup Screens
NOTE: See FIG. 49 for a map of the Recipe screens. Detailed screen descriptions follow.
Recipe 0 Screens
Recipe screens 3, 4, 5, 6,
and 7 appear depending on
selections made in Option
screens 1 and 2
TI12806a
FIG. 49: Recipe Screens Map
312779E
43
Setup Mode
NOTE: Each screen displays the current screen number
and the total number of screens in the group. The total
number of screens in a group and the fields displayed
on each screen may vary depending on selections
made in the System Configuration Screens and
Option Screens.
Recipe Setup Screen 2
Recipe Setup Screen 1
FIG. 51. Recipe Setup Screen 2
FIG. 50. Recipe Setup Screen 1
Ratio
Enter the mix ratio of component A over component B
(0.0:1 to 50:1).
Ratio Tolerance
Enter the ratio tolerance (1 to 99%). This refers to the
percent of acceptable variance that the system will allow
before a ratio alarm occurs.
Component A (Color) Valve (if present)
This field only appears if the system includes a color
change module. Enter the color valve number (1 to 30).
Component B (Catalyst) Valve (if present)
This field only appears if the system includes a color
change module. Enter the catalyst valve number (1 to
4).
44
Minimum Flush Volume
This field only appears if Flush Volume Check is set to
“On” in Option Screen 1 on page 36. Enter the minimum flush volume (0 to 999 cc). Entering 0 disables this
function.
Potlife Time
Enter the potlife time (0 to 999 minutes). Entering 0 disables this function.
Color/Catalyst Purge
This field only appears if the system includes a color
change module and Flush and Fill Input is set to “Recipe” in Option Screen 1, page 36. Enter the purge time
(0 to 99 seconds). It refers to the amount of time
required to flush the lines from the color or catalyst module to the dose valve or dump valve.
Color/Catalyst Fill
This field only appears if the system includes a color
change module and Flush and Fill Input is set to “Recipe” in Option Screen 1, page 36. Enter the fill time (0
to 99 seconds). It refers to the time required to fill the
lines from the color or catalyst module to the dose valve
or dump valve.
312779E
Setup Mode
Recipe Setup Screen 3
Recipe Setup Screen 4
FIG. 52. Recipe Setup Screen 3
FIG. 53. Recipe Setup Screen 4
This screen appears only if Flush and Fill Input is set to
“Recipe” in Option Screen 1, page 36.
This screen appears only if Flush and Fill Input is set to
“Recipe” in Option Screen 1, page 36.
First Purge Source
If Number of Guns is set to “2” in Configure Screen 4,
page 33, a Gun 2 column will appear in this screen.
Select “Air,” “Solvent,” or “3rd Flush Valve” (available
only if 3rd Flush Valve is set to “On” in Configure
Screen 3 on page 33).
First Purge Time
Enter the first purge time (0 to 999 seconds).
Chop Type
Select “Air/Solvent” or “Air/3rd Flush Valve” (available
only if 3rd Flush Valve is set to “On” in Configure
Screen 3 on page 33). This refers to the process of mixing air and solvent (or air and 3rd flush fluid) together
during the flush cycle, to help clean the lines and reduce
solvent usage.
Final Purge Source
Select “Air,” “Solvent,” or “3rd Flush Valve” (available
only if 3rd Flush Valve is set to “On” in Configure
Screen 3 on page 33).
Total Chop Time
Enter the total chop time (0 to 999 seconds).
Final Purge Time
Enter the final purge time (0 to 999 seconds).
Mixed Material Fill Time
Enter the mixed material fill time (0 to 999 seconds). It
refers to the amount of time that is required to load
mixed material from the dose valves to the applicator/gun.
Air Chop Time
Enter the air chop time (0.0 to 99.9 seconds).
Solvent Chop Time/3rd Flush Valve Chop Time
Enter the solvent or 3rd flush valve chop time (0.0 to
99.9 seconds).
312779E
45
Setup Mode
Recipe Setup Screen 5
FIG. 54. Recipe Setup Screen 5
This screen appears only if K-factor Input is set to “Recipe” in Option Screen 1, page 36.
K-factor A Meter
Enter the k-factor (cc/pulse) for flow meter A. This is the
amount of material that passes through the flow meter
per pulse (electrical pulse signal).
K-factor B Meter
Enter the k-factor (cc/pulse) for flow meter B.
Recipe Setup Screen 6
FIG. 55. Recipe Setup Screen 6
This screen appears only if Flow Rate Monitor is set to
“On” in Option Screen 2 on page 37.
Flow Rate Monitor
Select the desired flow rate monitoring (Off, Warning, or
Alarm).
Low Flow Limit
Enter the low flow rate limit (1 to 3999 cc/min).
High Flow Limit
K-factor Solvent Meter
Enter the high flow rate limit (1 to 3999 cc/min).
This field only appears if Solvent Monitor is set to
“Meter” in Configure Screen 5, page 34. Enter the
k-factor (cc/pulse) for the solvent flow meter.
Recipe Setup Screen 7
FIG. 56. Recipe Screen 7
This screen appears only if Flush and Fill Input is set to
“Recipe” in Option Screen 1, page 36 and Special Outputs is set to 1, 2, 3, or 4 in Configure Screen 5, page
34. The I/O board has four programmable outputs.
46
312779E
Setup Mode
Recipe 0 Screens
NOTE: See FIG. 49 on page 43 for a map of the Recipe
0 screens. Detailed screen descriptions follow.
Recipe 0 is typically used:
• in multiple color systems to purge out material lines
without loading a new color
• at the end of a shift to prevent hardening of catalyzed material.
NOTE: Each screen displays the current screen number
and the total number of screens in the group. The total
number of screens in a group and the fields displayed
on each screen may vary depending on selections
made in the System Configuration Screens and
Option Screens.
Final Purge Source
Select “Air,” “Solvent,” or “3rd Flush Valve” (available
only if 3rd Flush Valve is set to “On” in Configure
Screen 3 on page 33).
Air Chop Time
Enter the air chop time (0.0 to 99.9 seconds).
Solvent Chop Time/3rd Flush Valve Chop Time
Enter the solvent or 3rd flush valve chop time (0.0 to
99.9 seconds).
Recipe 0 Screen 2
Recipe 0 Screen 1
FIG. 58. Recipe 0 Screen 2
FIG. 57. Recipe 0 Screen 1
First Purge Source
Select “Air,” “Solvent,” or “3rd Flush Valve” (available
only if 3rd Flush Valve is set to “On” in Configure
Screen 3 on page 33).
Chop Type
Select “Air/Solvent” or “Air/3rd Flush Valve” (available
only if 3rd Flush Valve is set to “On” in Configure
Screen 3 on page 33). This refers to the process of mixing air and solvent (or air and 3rd flush fluid) together
during the flush cycle, to help clean the lines and reduce
solvent usage.
If Number of Guns is set to “2” in Configure Screen 4,
page 33, a Gun 2 column will appear in this screen.
Color/Catalyst Purge Time
This field only appears if the system includes a color
change module. Enter the purge time (0 to 999 seconds).
First Purge Time
Enter the first purge time (0 to 999 seconds).
Total Chop Time
Enter the total chop time (0 to 999 seconds).
Final Purge Time
Enter the final purge time (0 to 999 seconds).
312779E
47
Setup Mode
Recipe 0 Screen 3
Recipe 0 Screen 4
FIG. 60. Recipe 0 Screen 4
FIG. 59. Recipe 0 Screen 3
This screen only appears if Solvent Monitor is set to
“Meter” in Configure Screen 5, page 34 and Flush Volume Check is set to “On” in Option Screen 1, page 36
or 3rd Flush Valve is set to “On” in Configure Screen 3
on page 33.
This screen appears only if Flush and Fill Input is set to
“Recipe” in Option Screen 1, page 36 and Special Outputs is set to 1, 2, 3, or 4 in Configure Screen 5, page
34. The I/O board has four programmable outputs.
Minimum Flush Volume
This field only appears if Flush Volume Check is set to
“On” in Option Screen 1 on page 36. Enter the minimum flush volume (0 to 999 cc).
Exiting Fill Source
This field only appears if 3rd Flush Valve is set to “On” in
Configure Screen 3 on page 33. Select “Off,” “Air,”
“Solvent,” or “3rd Valve.”
Exiting Fill Time
This field only appears if Exiting Fill Source is set to
“Air,” “Solvent,” or “3rd Valve.” Enter the time in seconds.
48
312779E
Setup Mode
Calibration Screen
FIG. 61. Calibration Screen
Use this screen to calibrate a meter. Set to “Meter A,”
“Meter B,” or “Solvent Meter” (available if Solvent Monitor in Configure Screen 5, page 34, is set to “Meter”).
•
Start - start calibration
•
Abort - stop calibration
•
Purge - purge sampling valves after calibration
See Meter Calibration, page 100, for when and how to
calibrate meter.
312779E
49
Setup Mode
50
312779E
ProMix 2KS Integration Specifics
ProMix 2KS Integration Specifics
Discrete I/O vs Network
Communications
The ProMix 2KS Automatic system does not use a
Booth Control. Instead, it uses Discrete I/O or Network
Communications to drive the system. Each method can
be used exclusively, or both at the same time.
In Automatic mode, the following fields can be set to
“Discrete” or “Network” (see Configure Screen 6 on
page 35):
•
•
•
Flow Control
Proportioning
Gun 1 Trigger
NOTE: In Semi-automatic mode, only the Proportioning
field is available,
NOTE: The Manual Override function enables you to
operate the system before the automation (PLC) is
available. Manual Override still requires some communication through Discrete I/O or Network Communications. Although Manual Override is not intended to be
the main mode of control, it can be used if proper Gun
Trigger Input is provided.
Discrete I/O
Discrete I/O requires a 24 Vdc power supply which must
be supplied on site. The ProMix 2KS does not supply
power for Discrete I/O.
See Table 4 on page 54, FIG. 70 on page 63, and Table
8 on page 64 for inputs and outputs. Understanding
these inputs and outputs is necessary to properly integrate the ProMix 2KS to the automation.
Input and output connections are made at the Discrete
I/O terminal strips (FIG. 63) and the discrete I/O board
(FIG. 64) inside the EasyKey. Also see the System
Electrical Schematic on page 128.
Review the Color Change Charts (FIG. 109-FIG. 126). A
full understanding of the color change sequence is necessary to properly drive the inputs and monitor the outputs.
See Advanced Setup Screen 7, page 42. This screen
shows the actual status of all inputs and outputs. It is
important to ensure that each input from local automation (PLC) is received by the EasyKey and to verify that
the ProMix 2KS is sending outputs to the automation.
The following paragraphs describe each discrete I/O
function in detail.
Display Board
Barrier Board
Terminal Strips
(see FIG. 63)
Discrete I/O Board (see FIG. 64)
TI12496a
FIG. 62: EasyKey Control Boards
312779E
51
ProMix 2KS Integration Specifics
Digital Inputs
See Automation Flow Charts, pages 55-59.
Mix Start: This is a maintained input. When High, the
ProMix 2KS will attempt to enter Mix mode. This Mix
Start input should not be attempted unless the
Mix_Ready output is recognized. This ensures that
there are no alarms and that the Mix Start input is appropriate.
This input stays High at all times when mixing on
demand is required. When Low, the intent is to stop mixing material and perform a purge or recipe change.
Do not toggle this input to set the unit to Standby mode
during short work stoppages. The ProMix 2KS will automatically go into Idle mode after 2 minutes of inactivity.
When a Gun Trigger input is seen, the ProMix 2KS will
automatically leave Idle mode and resume mixing material where it left off.
Purge Start: This is a maintained input. When recognized by the ProMix 2KS, the Purge Sequence will start,
using the Purge Time from the active recipe. This will
also include the Solvent Fill Time. Proper monitoring of
the Purge/Color Change Output is required to ensure
this function has begun. Once this output is removed,
the system will immediately go to Standby mode.
Color Change Start: This is a momentary input, 100
msec minimum. When recognized by the ProMix 2KS,
the Color Change sequence will begin, starting at the
Color/Catalyst Dump.
NOTE: If the new recipe has the same color as the
active recipe, then the Color/Catalyst Dump and
Color/Catalyst Fill times are skipped and the Color
Change Sequence starts with the Purge. Also, the recipe bit configuration for the Color Change must be
loaded at least 100 msec before the Color Change Start
input is turned on. The recipe bit configuration must
remain on while the Color Change Start input is
removed. Graco recommends the recipe bits stay active
and do not change until a new color is required. The
PLC should monitor the Purge/Color Change Output as
well as the Fill Active Output to ensure the process happens as required. A complete color change without
errors (resulting in a Mix Ready Output state) is a completed color change.
Gun Trigger: When High, this input signals the ProMix
2KS that the gun is actually triggered. It should be sent
every time the gun is triggered. This input provides timing for alarm functions and also drives the flow control
functions. Without it, no flow control functions will start.
Job Complete: This is a momentary input, 100 msec
minimum. When recognized by the ProMix 2KS, the Job
totals are cleared and a time/date stamp is added for
retrieval.
Remote Stop: Use this input when external equipment
is used to stop the system. Clear any alarms before
using this input. For more information about when this
input is needed, contact your Graco distributor.
Alarm Reset: This is a momentary input, 100 msec
minimum. When recognized by the ProMix 2KS it clears
any active alarms and allows the automation to take the
next step.
Common: This is not an input, but the ProMix 2KS
expects to have the COM side of the 24 Vdc supply connected as shown in Table 8. This ensures proper operation of each input and output.
I/O Terminal Strip Detail
Pin 1
RS485 Integration A
RS485 Integration B
RS485 Integration Ground
RS485 Network A
RS485 Network B
RS485 Network Ground
Pin 1
Flow Control Calibrate
Gun Trigger
Digital Common
Remote Stop
INPUTS
Alarm Reset
General Alarm
Digital Common
Potlife Alarm
OUTPUTS
Flow Rate Analog In
Flow Rate Analog Common
TI12958a
FIG. 63: EasyKey Terminal Strips
NOTE: This also applies if using the Modbus Registers
(see the Modbus Map table in manual 312785).
52
312779E
Digital Output
Common/Power
Special Output #1
Special Output #2
Special Output #3
Digital Output
Common/Power
Special Output #4
ProMix 2KS Integration Specifics
JLS
Digital Output Common/Power
Flow Rate Alarm Output
Flow Control Calibrate Active
Fill Active
Mix Ready Output
Mix Active Output
Purge/Recipe Change Active Output
Digital Output Common/Power
Recipe Change Input
Recipe Bit 5 Input
Recipe Bit 4 Input
Recipe Bit 3 Input
Recipe Bit 2 Input
Recipe Bit 1 Input
Recipe Bit 0 Input
Digital Input Common
Spare
External Color Change Ready
Job Complete Input
Purge Input
Mix Input
Digital Input Common
FIG. 64: 255766 Discrete I/O Board
312779E
53
ProMix 2KS Integration Specifics
Digital Outputs
Analog Inputs
See Automation Flow Charts, pages 55-59.
Purge_CC_Active: This output will remain High during
the manual Purge or Color Change purge sequence.
See the Color Change Charts (FIG. 109-FIG. 126) for further information.
Flow Command: This is the positive side of the 0 – 10
Vdc signal. (See Common under Digital Inputs, page
52.) This input corresponds to the Flow Range setting in
Advanced Setup Screen 5, page 41. For example, if
the setting is 0 – 300 cc/min, the 0 Vdc analog input is 0
cc/min, therefore the 10 Vdc analog input is 300 cc/min.
Fill_Active: This output will remain High while the ProMix 2KS is in the Mixed Material Fill at the end of a typical color change sequence.
Table 4: Sourcing/Sinking Inputs and Outputs
Mix_Active: This output will remain High while the ProMix 2KS is in Mix mode. There may be alarm outputs
while this output is High; these are typically High/Low
Flow Warnings. Always monitor this output and the
alarm outputs to provide feedback of the actual status of
the ProMix 2KS. (See the Modbus charts in the Graco
Gateway manual 312785.)
Mix_Ready: This output will remain High while there are
no alarms and the ProMix 2KS is ready to go to Mix
mode.
General Alarm: This output will remain High when any
alarm is active. See Table 16 on page 115 for a complete list of alarms.
Inputs (Automation Sourcing)
1
Flow Control Calibration
Black
+
2
Gun Trigger
White
+
3
Digital In Common
Red
-
4
Remote Stop
Green
+
5
Alarm Reset
Brown
+
Outputs (Automation Sourcing)
6
Alarm Output
Blue
+
7
Digital Out Common
Orange
-
8
Pot Life
Yellow
+
Outputs (Automation Sinking)
NOTE: It is important to monitor this output along with
Mix_Active to understand the alarm’s true meaning.
6
Alarm Output
Blue
-
7
+24 Volts
Orange
+
Alarm_Potlife: This output will remain High along with
the Alarm output when the potlife time has been
reached for the active recipe. The Mix_Active output will
drop Low, even if the Mix_Start input is High. This output will remain High until the potlife volume is dispensed
or the ProMix 2KS completes a Purge or a Color
Change. The Alarm Reset input will not stop this output
but will silence the audible alarm on the EasyKey.
8
Pot Life
Yellow
-
NOTE: The Alarm Reset
Automation
9
Flow Rate Analog In
Purple
+
10
Flow Rate Analog Common
Gray
-
key will also reset the
audible alarm.
To dispense the potlife volume, the ProMix 2KS
Mix_Start input must be turned Off then back to High to
spray material. At this point, Mix_Active, Alarm, and
Alarm_Potlife outputs will be High until the potlife volume is sprayed.
Digital Out Supply: This is the supply for the digital outputs. It is the same supply for the digital inputs. (See
Common under Digital Inputs, page 52.)
54
312779E
ProMix 2KS Integration Specifics
Automation Flow Charts
Start Mix Mode Process
See FIG. 65, Table 5, and Table 6.
Start Mix
Mode Process
NO
YES
Is Mix Ready
bit = 1?
Must be Alarm Condition or Active Recipe
61. See Alarm Processing on page 59,
or Startup from Recipe 61 (see NOTE
Set Mix bit = 1
NO
NOTE: At power up the system
defaults to Recipe 61, which is
not a valid recipe number. Initiate
a color change to Recipe 0 or a
valid recipe number (1-60).
Is Mix Active
bit = 1?
YES
ProMix 2KS in Mix
Mode (Complete)
Mix Active = 1 while
the ProMix 2KS is in
Mix mode
FIG. 65. Start Mix Mode Process Flow Chart
312779E
55
ProMix 2KS Integration Specifics
Mixing Mode Process
See FIG. 66, Table 5, and Table 6.
Mixing Mode
Process
Mixing Mode is desired.
PLC is polling to ensure
Mixing Mode is maintained.
NO
Is Mix Active
bit = 1?
YES
Mixing Process active
Check Alarm
Condition: is Alarm_
General bit = 1?
NO
Go to Start Mix Mode
Process, page 55
YES
Go to Alarm Processing, page 59
FIG. 66. Mixing Mode Process Flow Chart
56
312779E
ProMix 2KS Integration Specifics
Purge Mode Process
See FIG. 67, Table 5, and Table 6.
Start
NO
Is Mix Ready
bit = 1?
Must be Alarm
Condition or Active
Recipe 61. See
Alarm Processing
on page 59, or
Startup from Recipe
61 (see NOTE below).
Set Purge bit = 1?
NO
NO
(Wait for Mix Ready)
Is Mix Ready
bit = 1?
NOTE: At power up the system
defaults to Recipe 61, which is
not a valid recipe number. Initiate
a color change to Recipe 0 or a
valid recipe number (1-60).
YES
YES
Is Purge_CC_Active
bit = 1?
YES
ProMix 2KS in
Purge_CC Mode
(Process Started)
ProMix 2KS Purge
Process (Complete)
FIG. 67. Purge Mode Process Flow Chart
312779E
57
ProMix 2KS Integration Specifics
Color Change Mode Process
See FIG. 68, Table 5, and Table 6.
Color Change
Process
(basic)
Do nothing.
Spraying at
desired recipe.
YES
Is Active Recipe =
to desired recipe?
(Register 40005).
NO
Load ccNewRecipe
(Register 40046) with
recipe number to Color
Change to (0 through
60 is valid).
Ensure ColorChange bit is seen
by ProMix 2KS
Is
Purge_CC_Active
bit = 1?
NO
YES
Set ColorChange (CC)
bit = 1.
Clear ColorChange (CC)
bit (momentary input).
CC process started.
(Wait for Mix Ready)
NO
Is Mix Ready
bit = 1?
NO
Check Alarm
Condition: is Alarm_
General bit = 1?
YES
YES
ProMix 2KS Color
Change Process
(Complete)
Process Alarm. See
Alarm Processing,
page 59.
FIG. 68. Color Change Mode Process Flow Chart
58
312779E
ProMix 2KS Integration Specifics
Alarm Processing
See FIG. 69, Table 5, Table 6, and Table 7.
Alarm Processing
An Alarm Condition
has been found
previously.
Alarm_General = 1.
Check if Potlife
Alarm: is Alarm_
Potlife bit = 1?
NO
Two options:
Determine the exact alarm
from Table 7 on page 62
and solve what caused the
alarm, as required.
• Purge or Color Change to remove
mixed material in the line.
• Place in Mix mode and spray the
Potlife Volume set in the ProMix
2KS.
NOTE: The Reset key only silences
the alarm. To clear the alarm you must
use one of these two options.
Reset the alarm.
Reset_Alarm = 1.
NO
Is Mix Ready
bit = 1?
YES
YES
Go to next process,
as desired.
FIG. 69. Alarm Processing Flow Chart
312779E
59
ProMix 2KS Integration Specifics
Table 5: ProMix 2KS Digital Inputs (Modbus Register 40040)
Bit
Digital Input Binary
Name
Details
0:5
0 0 0 0 0 0 0 0 0 0 X X X X X X Recipe
Binary bits for viewing discrete inputs only.
6
0 0 0 0 0 0 0 0 0 1 0 0 0 0 0 0 Color Change
(CC)
Set bit to “1” to initiate Color Change (momentary)
7
0 0 0 0 0 0 0 0 1 0 0 0 0 0 0 0 Mix
Set bit initiate Mix mode (maintain)
8
0 0 0 0 0 0 0 1 0 0 0 0 0 0 0 0 Purge
Set bit to “1” to initiate Purge sequence (maintained)
9
0 0 0 0 0 0 1 0 0 0 0 0 0 0 0 0 Job_Complete Set bit to “1” to initiate Job Complete input (momentary)
10
0 0 0 0 0 1 0 0 0 0 0 0 0 0 0 0 External CC
Ready
11
0 0 0 0 1 0 0 0 0 0 0 0 0 0 0 0 Not Used
12
0 0 0 1 0 0 0 0 0 0 0 0 0 0 0 0 FC _Calibrate
Set bit to “1” to initiate a Flow Control Calibrate input
(momentary)
13
0 0 1 0 0 0 0 0 0 0 0 0 0 0 0 0 Gun_Trigger
Set bit to “1” to indicate the gun is actually triggered
(maintain while gun is triggered, remove when gun is
closed)
14
0 1 0 0 0 0 0 0 0 0 0 0 0 0 0 0 Reset_Alarm
Set bit to “1” to clear an active Alarm (momentary)
15
1 0 0 0 0 0 0 0 0 0 0 0 0 0 0 0 Remote Stop
Set bit to remotely stop unit (momentary)
Set bit to “1” to initiate External Color Change
(momentary)
NOTE: Shaded cells relate to the flow charts on pages 55-59.
60
312779E
ProMix 2KS Integration Specifics
Table 6: ProMix 2KS Digital Outputs (Modbus Register 40041)
Bit
Digital Input Binary
Name
Details
0
0 0 0 0 0 0 0 0 0 0 0 0 0 0 0 1 Purge_CC_Active
“1” indicates Purge or Color Change is in progress
1
0 0 0 0 0 0 0 0 0 0 0 0 0 0 1 0 Mix_Active
“1” indicates Mix is in progress
2
0 0 0 0 0 0 0 0 0 0 0 0 0 1 0 0 Mix_Ready
“1” indicates No Alarms and OK to Mix
3
0 0 0 0 0 0 0 0 0 0 0 0 1 0 0 0 CC_Fill_Active
“1” indicates the Fill portion of a Color Change is
in progress
4
0 0 0 0 0 0 0 0 0 0 0 1 0 0 0 0 FCalActive
“1” indicates the Flow Control Calibrate routine is
in progress
5
0 0 0 0 0 0 0 0 0 0 1 0 0 0 0 0 Flow_Rate_Alarm
“1” indicates the Flow Rate Alarm/Warning is
active
6
0 0 0 0 0 0 0 0 0 1 0 0 0 0 0 0 Special_1
“1” indicates the Special_1 output is on (monitor
only)
7
0 0 0 0 0 0 0 0 1 0 0 0 0 0 0 0 Special_2
“1” indicates the Special_2 output is on (monitor
only)
8
0 0 0 0 0 0 0 1 0 0 0 0 0 0 0 0 Special_3
“1” indicates the Special_3 output is on (monitor
only)
9
0 0 0 0 0 0 1 0 0 0 0 0 0 0 0 0 Special_4
“1” indicates the Special_4 output is on (monitor
only)
10
0 0 0 0 0 1 0 0 0 0 0 0 0 0 0 0 Not Used
11
0 0 0 0 1 0 0 0 0 0 0 0 0 0 0 0 Not Used
12
0 0 0 1 0 0 0 0 0 0 0 0 0 0 0 0 Alarm_General
“1” indicates a General Alarm is in process. (If
Mix_Active is still High, then a Warning only.) See
the Modbus charts in the Graco Gateway manual
312785 for details on type.
13
0 0 1 0 0 0 0 0 0 0 0 0 0 0 0 0 Alarm_Potlife
“1” indicates a Potlife Alarm is in process.
NOTE: Shaded cells relate to the flow charts on pages 55-59.
312779E
61
ProMix 2KS Integration Specifics
Table 7: ProMix 2KS Active Alarms (Modbus Register 40010)
62
Bit
Digital Input Binary
Name
Details
Low Byte: 0
0000 0000 0000 0000
No Bits Set
No Active Alarms
Low Byte: 0
0000 0000 0000 0001
Comm_Error
Low Byte: 0
0000 0000 0000 0010
Potlife_Alarm
Low Byte: 0
0000 0000 0000 0100
Ratio_High_Alarm
Low Byte: 0
0000 0000 0000 1000
Ratio_Low_Alarm
Low Byte: 0
0000 0000 0001 0000
Overdose_A_Alarm
Low Byte: 0
0000 0000 0010 0000
Overdose_B_Alarm
Low Byte: 0
0000 0000 0100 0000
Dose_Time_A_Alarm
Low Byte: 0
0000 0000 1000 0000
Dose_Time_B_Alarm
Low Byte: 0
0000 0001 0000 0000
Mix_In_Setup_Alarm
Low Byte: 0
0000 0010 0000 0000
Remote_Stop_Alarm
Low Byte: 0
0000 0100 0000 0000
Purge_Volume_Alarm
Low Byte: 0
0000 1000 0000 0000
CAN_Comm_Error_Alarm
Low Byte: 0
0001 0000 0000 0000
High_Flow_Alarm
Low Byte: 0
0010 0000 0000 0000
Low_Flow_Alarm
Low Byte: 0
0100 0000 0000 0000
System_Idle_Alarm
Low Byte: 0
1000 0000 0000 0000
Setup_Change_Alarm
High Byte: 0
0000 0000 0000 0001
Power_On_Alarm
High Byte: 0
0000 0000 0000 0010
Defaults_Loaded_Alarm
High Byte: 0
0000 0000 0000 0100
IO_Alarm
High Byte: 0
0000 0000 0000 1000
Purge_Initiate_Error
High Byte: 0
0000 0000 0001 0000
Material_Fill_Alarm
High Byte: 0
0000 0000 0010 0000
Tank_A_Low_Alarm
High Byte: 0
0000 0000 0100 0000
Tank_B_Low_Alarm
High Byte: 0
0000 0000 1000 0000
Tank_S_Low_Alarm
High Byte: 0
0000 0001 0000 0000
Auto_Dump_Complete
High Byte: 0
0000 0010 0000 0000
Color/Catalyst_Purge_Alarm
High Byte: 0
0000 0100 0000 0000
Color/Catalyst_Fill_Alarm
High Byte: 0
0000 1000 0000 0000
Num_Alarm_Desc
High Byte: 0
0001 0000 0000 0000
Spare3_Alarm
High Byte: 0
0010 0000 0000 0000
Spare2_Alarm
High Byte: 0
0100 0000 0000 0000
Spare1_Alarm
High Byte: 0
1000 0000 0000 0000
Potlife_Buzzer
312779E
ProMix 2KS Integration Specifics
ProMix 2KS EasyKey
Digital Input
PLC Output
(Sourcing)
Input
Common
Output
Input
24
Vdc
Common
PLC Input
(Sinking)
ProMix 2KS EasyKey
Digital Output
24
Vdc
Output
Common
Input
Output
Common
ProMix 2KS EasyKey
Digital Output
PLC Input
(Sourcing)
Output
Common
Output
Input
24
Vdc
Common
FIG. 70. Automation 24 Vdc Sourcing Input Diagram
312779E
63
ProMix 2KS Integration Specifics
Table 8: Discrete I/O Terminal Connections
Terminal
Terminal Location
Name
Details (also see pages 60 and 61)
Digital Inputs
1
J2, Remote I/O Board
Mix
Set Bit to Initiate Mix Mode (maintain)
2
J2, Remote I/O Board
Purge
Set Bit to “1” to initiate Purge Sequence
(maintained)
3
J2, Remote I/O Board
Job_Complete
Set Bit to “1” to initiate Job Complete Input
(momentary)
4
J2, Remote I/O Board
External CC Ready
Set Bit to “1” to initiate External Color
Change (maintained)
5
J2, Remote I/O Board
Spare
6*
J2, Remote I/O Board
Digital Input Common
1*
J3, Remote I/O Board
Digital Input Common
2
J3, Remote I/O Board
Recipe Bit 0
Set Binary Bits for Recipe to Change To (hold
until changing again)
3
J3, Remote I/O Board
Recipe Bit 1
Set Binary Bits for Recipe to Change To (hold
until changing again)
4
J3, Remote I/O Board
Recipe Bit 2
Set Binary Bits for Recipe to Change To (hold
until changing again)
5
J3, Remote I/O Board
Recipe Bit 3
Set Binary Bits for Recipe to Change To (hold
until changing again)
6
J3, Remote I/O Board
Recipe Bit 4
Set Binary Bits for Recipe to Change To (hold
until changing again)
7
J3, Remote I/O Board
Recipe Bit 5
Set Binary Bits for Recipe to Change To (hold
until changing again)
8
J3, Remote I/O Board
Color Change (CC)
Set Bit to “1” to initiate Color Change
(momentary)
1
10 Pin Terminal Block
Flow Control Calibrate
Set Bit to “1” to initiate Flow Control Calibrate
(momentary)
2
10 Pin Terminal Block
Gun Trigger
Set Bit to “1” to indicate Gun is Triggered
(fluid flow expected)
3†
10 Pin Terminal Block
Digital Input Common
4
10 Pin Terminal Block
Remote Stop
Set Bit to “1” to initiate a Remote Stop
(momentary)
5
10 Pin Terminal Block
Reset_Alarm
Set Bit to “1” to Clear an Active Alarm
(momentary)
*
Digital inputs tied together on the I/O board (see FIG. 64).
† Digital inputs tied together on the EasyKey Display Board.
Multiple connection points for convenience.
64
312779E
ProMix 2KS Integration Specifics
Table 8: Discrete I/O Terminal Connections
Terminal
Terminal Location
Name
Details (also see pages 60 and 61)
Digital Outputs
1★
J4, Remote I/O Board
Digital Output Common/Power
2
J4, Remote I/O Board
Purge_CC Active
“1” Indicates Purge or Color Change is in
progress
3
J4, Remote I/O Board
Mix_Active
“1” Indicates Mix is in progress
4
J4, Remote I/O Board
Mix_Ready
“1” Indicates No Alarms and OK to Mix
5
J4, Remote I/O Board
CC_Fill_Active
“1” Indicates the Fill Portion of a Color
Change is in progress
6
J4, Remote I/O Board
FCalActive
“1” Indicates the Flow Control Calibrate routine is in progress
7
J4, Remote I/O Board
Flow_Rate
“1” Indicates the Flow Rate Alarm/Warning is
active
8★
J4, Remote I/O Board
Digital Output Common/Power
1★
J5, Remote I/O Board
Digital Output Common/Power
2
J5, Remote I/O Board
Special_1
“1” Indicates the Special_1 Output is on
3
J5, Remote I/O Board
Special_2
“1” Indicates the Special_2 Output is on
4
J5, Remote I/O Board
Special_3
“1” Indicates the Special_3 Output is on
5
J5, Remote I/O Board
Special_4
“1” Indicates the Special_4 Output is on
6★
J5, Remote I/O Board
Digital Output Common/Power
6
10 Pin Terminal Block
General Alarm Output
7◆
10 Pin Terminal Block
Digital Output Common/Power
8
10 Pin Terminal Block
Potlife Alarm
“1” Indicates the Potlife Alarm Output is on
9
10 Pin Terminal Block
Flow Rate Analog In (0-10
VDC)
0 - 10VDC input for Flow Setpoint relative to
flow range set in 2KS Flow Range Screen
10
10 Pin Terminal Block
Flow Rate Common to Pin 9
Common side of Flow Setpoint from Terminal
9
“1” Indicates the General Alarm Output is on
Communications
1
6 Pin Terminal Block
RS485 Integration A
2
6 Pin Terminal Block
RS485 Integration B
3
6 Pin Terminal Block
RS485 Integration
Shield/Ground
4
6 Pin Terminal Block
RS485 Network A
5
6 Pin Terminal Block
RS485 Network B
6
6 Pin Terminal Block
RS485 Network Shield/Ground
Communication to External PLC/Controller
Communication to Multiple EasyKeys only
★ Digital outputs tied together on the I/O board (see FIG. 64).
◆ Digital outputs tied together on the EasyKey Display Board.
Multiple connection points for convenience.
312779E
65
ProMix 2KS Integration Specifics
Table 9: ProMix 2KS Recipe Bits
Recipe Bits
5
0
0
0
0
0
0
0
0
0
0
0
0
0
0
0
0
0
0
0
0
0
0
0
0
0
0
0
0
0
0
0
0
1
66
4
0
0
0
0
0
0
0
0
0
0
0
0
0
0
0
0
1
1
1
1
1
1
1
1
1
1
1
1
1
1
1
1
0
3
0
0
0
0
0
0
0
0
1
1
1
1
1
1
1
1
0
0
0
0
0
0
0
0
1
1
1
1
1
1
1
1
0
2
0
0
0
0
1
1
1
1
0
0
0
0
1
1
1
1
0
0
0
0
1
1
1
1
0
0
0
0
1
1
1
1
0
Number
1
0
0
1
1
0
0
1
1
0
0
1
1
0
0
1
1
0
0
1
1
0
0
1
1
0
0
1
1
0
0
1
1
0
0
0
1
0
1
0
1
0
1
0
1
0
1
0
1
0
1
0
1
0
1
0
1
0
1
0
1
0
1
0
1
0
1
0
0
1
2
3
4
5
6
7
8
9
10
11
12
13
14
15
16
17
18
19
20
21
22
23
24
25
26
27
28
29
30
31
32
Recipe Bits
5
1
1
1
1
1
1
1
1
1
1
1
1
1
1
1
1
1
1
1
1
1
1
1
1
1
1
1
1
4
0
0
0
0
0
0
0
0
0
0
0
0
0
0
0
1
1
1
1
1
1
1
1
1
1
1
1
1
3
0
0
0
0
0
0
0
1
1
1
1
1
1
1
1
0
0
0
0
0
0
0
0
1
1
1
1
1
2
0
0
0
1
1
1
1
0
0
0
0
1
1
1
1
0
0
0
0
1
1
1
1
0
0
0
0
1
1
0
1
1
0
0
1
1
0
0
1
1
0
0
1
1
0
0
1
1
0
0
1
1
0
0
1
1
0
Number
0
1
0
1
0
1
0
1
0
1
0
1
0
1
0
1
0
1
0
1
0
1
0
1
0
1
0
1
0
33
34
35
36
37
38
39
40
41
42
43
44
45
46
47
48
49
50
51
52
53
54
55
56
57
58
59
60
312779E
Integrated Flow Control
Integrated Flow Control
Flow Control Description
Flow control is an optional feature which incorporates an
intrinsically safe regulator control module with the ProMix 2KS automatic system. Flow control precisely regulates the flow of material to a manual or automatic air
spray gun, to help ensure adequate coverage and avoid
sags or runs in the finish coat.
NOTE: Flow control cannot be selected with dynamic
dosing. It is not for use with air-assisted or airless spray
guns.
Air-operated
Fluid Regulator
Fluid Pressure
Gauge Port
Fluid Pressure
Sensor
1/8 npt(f)
Fluid Inlet
1/8 npt(f)
Fluid Outlet
Power and
Signal
Cable Input
Flow control uses the existing flow meters in a wall
mounted fluid station or a RoboMix fluid station. There is
no flow meter in the mixed material line.
Flow Control Components
Air Inlet Fitting,
1/4 in. (6 mm) OD
Tube
Circuit Board
V/P (Voltage/Air
Pressure) Valve
249849 Flow Control Module
See FIG. 71. The 249849 Flow Control Module includes
an air-operated fluid pressure regulator, fluid pressure
sensor, voltage to air pressure valve, and circuit board.
See manual 3A2097. The function of this unit is to
receive the flow analog signal and drive (manage) the
desired flow rate.
24H989 Flow Control Module
See FIG. 72. The 24H989 Flow Control Module is for use
with a user-supplied, remotely mounted, air-operated
fluid pressure regulator. The module includes a remote
fluid pressure sensor and connecting cable, voltage to
air pressure valve, and circuit board. See manual
3A2097. The function of this unit is to receive the flow
analog signal and drive (manage) the desired flow rate.
NOTE: For best results, place the supplied pressure
sensor as close to the remote fluid regulator as possible.
TI17116a
FIG. 71. Cutaway of 249849 Flow Control Module
Air Outlet Fitting,
1/4 in. (6 mm) OD Tube
Remote Fluid
Pressure
Sensor
Air Pressure
Gauge
(not included)
Power and
Signal
Cable Input
Circuit Board
(hidden)
V/P (Voltage/Air
Pressure) Valve
Air Inlet Fitting,
1/4 in. (6 mm) OD
Tube
TI18956a
FIG. 72. Cutaway of 24H989 Flow Control Module
312779E
67
Integrated Flow Control
Fluid and Air Pressure
Requirements
The fluid input pressure to the fluid regulator must be
high enough to provide a 15-20 psi (0.1-0.14 MPa,
1.0-1.4 bar) pressure differential across the regulator at
the highest flow setting. For example, if the maximum
flow rate set point is 280 cc/min and 35 psi outlet pressure is required to achieve that flow, the input pressure
must be 50-55 psi.
Required air pressure to the flow control module is
70-100 psi (0.35-0.7 MPa, 3.5-7.0 bar).
NOTE:
•
For flow control modules 249849 and 24H989 used
with a 1:1 fluid regulator, the fluid outlet pressure
from the regulator must be between 12-75 psi
(.08-0.5 MPa, 0.84-5.2 bar) for all flow set points.
Flow rate set points with pressures outside this
range are not achievable. There must be at least 12
psi (.08 MPa, 0.84 bar) fluid pressure at the lowest
flow rate.
•
If flow control module 24H989 is used with a fluid
regulator at a ratio greater than 1:1, the relationship
of air pressure to fluid outlet pressure is very important. The lowest recommended air pressure from
the V/P is 10-12 psi (.07-.08 MPa, 0.70-0.84 bar).
Back pressure will be required to ensure minimal
fluid pressure at the lowest flow rate setpoint.
Flow Control Operation
See FIG. 73 for module 249849 and FIG. 74 for module
24H989. The Flow Control System includes two information loops:
•
The pressure loop monitors fluid pressure with the
pressure sensor in the module. This allows the system to react very quickly to set point changes. The
gun must be triggered during the pressure loop.
•
The flow loop monitors fluid flow through flow
meter pulses, ensuring accuracy. The gun must be
triggered during the flow loop.
The Flow Control System creates a data table that targets a desired flow rate based on the fluid pressure. It
then monitors the flow loop to maintain the flow rate.
The turn down ratio of the typical fluid regulator is
approximately 3:1 or 4:1, depending on material type
and viscosity. For example, if the lowest flow rate
required is 100 cc/min, the top flow rate achievable may
be 300-400 cc/min.
NOTE: The top flow rate is not the maximum flow rate
range selected.
68
312779E
Integrated Flow Control
Flow Input:
Feedback from
Meters A and B
Air-operated
Fluid Regulator
Mixed Material Line
Fluid Pressure Sensor
Meter B
Fluid Control
Board
Meter A
Air Signal to
Regulator
Analog Signal to V/P
Air Line
V/P (Voltage/Air
Pressure) Valve
Pressure Input: Feedback from Fluid Pressure Sensor
TI17118a
FIG. 73. ProMix 2KS Flow Control Schematic Diagram (249849 Module)
Flow Input: Feedback from
Meters A and B
Mixed Material Line
Air-operated Remote
Fluid Regulator
Meter B
Fluid
Control
Board
Fluid Pressure
Sensor
Air Signal to
Regulator
Meter A
Pressure Input:
Feedback from
Fluid Pressure
Sensor
Analog Signal to V/P
Air Line
V/P (Voltage/Air
Pressure) Valve
TI18958a
FIG. 74. ProMix 2KS Flow Control Schematic Diagram (24H989 Module)
312779E
69
Integrated Flow Control
Flow Control Operating Process Example
Operating Ranges
Step 2: Pressure Loop
Flow Control operating ranges correlate the desired flow
rate to the incoming flow set point signal (see below).
The operating ranges are:
NOTE: The gun must be triggered during the pressure
loop.
•
•
•
•
0-300 cc/min
0-600 cc/min
0-1200 cc/min
0-100% (% open in manual override mode)
In this example, the range is set to 0-300 cc/min and
the target flow rate is 150 cc/min.
Step 1: Flow Set Point Input Signal
Discrete Input
A discrete signal is 0-10Vdc, which corresponds linearly
to the set operating range. For example, if the set range
is 0-300 cc/min and the desired flow rate is 150 cc/min,
the ProMix 2KS receives a flow rate setpoint (5Vdc signal) from the PLC or robot.
See FIG. 75 for module 249849 and FIG. 76 for module
24H989. The ProMix 2KS drives the system to the necessary pressure to meet the desired flow rate (150
cc/min). The pressure sensor in the module verifies the
actual pressure and returns the reading back to the ProMix 2KS.
Step 3: Flow Loop
NOTE: The gun must be triggered during the flow loop.
The flow meters verify that the target flow rate is
achieved and feeds this information back to the ProMix
2KS. The ProMix 2KS adjusts the voltage to the V/P to
maintain the actual flow.
Step 2 and Step 3 repeat continuously to maintain pressure and flow.
Network Communication Input
A network communication signal is either the desired
flow rate (150 cc/min in this example) or the % open.
70
312779E
Integrated Flow Control
Step 3: Flow Input
Fluid Pressure
Sensor
Step 1:
ProMix 2KS receives
a flow rate setpoint
from PLC/robot
Analog Signal to V/P
Air Line
V/P (Voltage/Air
Pressure) Valve
Step 2: Pressure Input
TI17118a
FIG. 75. ProMix 2KS Flow Control Pressure Loop and Flow Loop (249849 Module)
Step 3: Flow Input
Step 1:
ProMix 2KS
receives a
flow rate
setpoint from
PLC/robot
Fluid Pressure
Sensor
Air Line to
Remote
Fluid
Regulator
Analog Signal to V/P
Step 2: Pressure Input
Air Line
V/P (Voltage/Air
Pressure) Valve
TI18958a
FIG. 76. ProMix 2KS Flow Control Pressure Loop and Flow Loop (24H989 Module)
312779E
71
Integrated Flow Control
Flow Control Setup
Flow Control Startup
1. Install the intrinsically safe flow regulator (FC) as
explained in the ProMix 2KS Installation Manual.
1. Set Flow Control to “On” in Configure Screen 5.
2. Ensure that the analog signal is 0-10 Vdc, or is
properly provided through network communication.
3. Calibrate the system’s flow meters; see page 100.
This ensures that the K-factors are tuned to the
range of materials being used.
4. Verify that the I/O inputs are working properly. If
using discrete I/O, check by viewing Advanced
Setup Screen 6 and Advanced Setup Screen 7,
page 42. If using network communication, ensure
the commands are being sent by viewing the Status
Screen, page 24, and Advanced Setup Screen 6
and Advanced Setup Screen 7, page 42, for
inputs.
FIG. 77. Configure Screen 5
2. In Advanced Setup Screen 1, turn Manual Override On. The Flow Control Override field will appear.
NOTE: See the Graco Gateway manual for Flow Control
Modbus addresses.
5. See Flow Control Startup.
FIG. 78. Advanced Setup Screen 1
72
312779E
Integrated Flow Control
3. Set Flow Control Override to % Open. See FIG. 79
and Table 10. On the Manual Override Screen, the
Flow Set Point field will display as a percentage
open (see FIG. 80).
4. On the Manual Override Screen, drive the regulator to a percentage open that starts fluid flow. Fluid
pressure should be above 12 psi (.08 MPa, 0.84
bar) [see the Status Screen]. Observe the fluid flow
rate at this pressure. This is the achievable low end
flow rate for the system’s given restriction. If a lower
flow rate is required, increase the restriction
between the flow control regulator and the spray
gun.
NOTE: If the lowest flow rate achieved is well below 12
psi (.08 MPa, 0.84 bar), add restriction to achieve fluid
pressure closer to 12 psi. Pressures below 12 psi can
be inconsistent.
FIG. 79. Flow Control Override Menu
Table 10: Flow Control Override Selections
Selection
Description
Off
% Open
Normal operation
Flow control regulator is opened to a
desired percentage.
Flow control regulator is opened to a
calibrated pressure.
Pressure
5. Drive the regulator to 100% open. This is the maximum achievable flow rate based on the low flow
requirement and the flow control module’s functional
range.
6. When an acceptable operating range is achieved,
turn Flow Control Override Off.
NOTE: Set the Flow Control Override to “Pressure” to
use the Pressure Flow Control Mode (see page 77).
FIG. 81. Advanced Setup Screen 1
7. Run Flow Control Calibration, page 74.
FIG. 80. Flow Set Point as a Percentage
312779E
73
Integrated Flow Control
Flow Control Calibration
Flow Control Calibration is an automatic routine that
establishes a pressure vs flow profile between low and
high operating points. See FIG. 86. The profile may be
unique to each recipe or may be globally copied to all
recipes.
3. Go to Advanced Setup Screen 1 (see FIG. 83).
Turn Manual Override On.
.
NOTE: Calibration cannot be done in recipe 0 or 61.
1. Load a color.
2. Go to Advanced Setup Screen 5 (see FIG. 82).
Select the flow rate range that best covers the largest flow target for your application (for example,
0-1200).
FIG. 83. Advanced Setup Screen 1
4. Go to the Manual Override Screen (see FIG. 84).
Set Manual Override to Mix, and set Flow Ctrl Calibration to Start.
FIG. 82. Advanced Setup Screen 5 (Automatic Mode
with Flow Control Only)
FIG. 84. Manual Override Screen
74
312779E
Integrated Flow Control
5. Return to the Status Screen (see FIG. 85). The status bar at the bottom of the screen will indicate that
Mix Calibration is in progress.
8. When calibration is complete, the Status Screen
will change from Mix Calibration to Mix. The unit
should have built a complete table for the flow rate
range selected in step 2.
NOTE: If the voltage reached 3.3 V (flow control wide
open) but the unit did not reach the top of the selected
flow rate range, the delivery system is not providing
enough volume. Do one of the following:
7
Mix Calibration
•
If the volume is acceptable, change the flow rate
range accordingly.
•
If the volume is not acceptable, increase the delivery pressure. Increasing the pressure may affect
your low flow rate setting.
9. De-trigger the gun.
FIG. 85. Status Screen
10. Set Manual Override to Standby.
6. Trigger the gun and make sure the gun trigger input
is high.
7. On the Status Screen (see FIG. 85), the voltage will
start at 0 and increase incrementally to 3.3 V. The
flow rate will also begin to increase during calibration, but this may not show for the first few voltage
increases.
11. To copy the data table to all recipes, see Global FC
Data Copy, page 76. This loads a starting point for
each recipe, and continuous learning will create a
unique data table when the recipe is run.
NOTE: If you want to do a flow calibration for each recipe, do not do a Global FC Data Copy.
Regulator Outlet Pressure, psi (MPa, bar)
30
(0.21, 2.1)
25
(0.17, 1.7)
20
(0.14, 1.4)
15
(0.10, 1.0)
10
(.07, 0.7)
5
(.035, 0.35)
0
0
50
100
150
200
250
300
350
Flow (cc/min)
FIG. 86. Typical Flow Calibration (0-300 cc/min range)
312779E
75
Integrated Flow Control
Global FC Data Copy
Setting Ki and Kp
Set Global FC Data Copy to Start on the Manual Override Screen (see FIG. 87). Global copy provides a starting point for all recipes, enabling Continuous Learning
(see page 76) to take over.
FIG. 89 shows the definition and relationship between Ki
and Kp.
Global copy works very well with multiple colors when
the viscosities are similar. It may only require a calibration and global copy each time a regulator is serviced or
if restriction downstream of the regulator is changed.
•
•
The default value for Ki is 40.
The default value for Kp is 400.
For most applications, Ki and Kp do not need to change.
Do not change these vallues unless you are sure it is
required.
Before adjusting these values, ensure that the input fluid
pressure to the regulator is pulsation free, and the outlet
pressure is higher than 12 psi (.08 MPa, 0.84 bar) for
each flow rate set point.
Applications with viscosities less than 20 cps or greater
than 300 cps may require that the Ki and Kp be
adjusted. Do this by making small variable changes to
the values in Advanced Setup Screen 5. See FIG. 88.
FIG. 87. Manual Override Screen
Continuous Learning
The flow profile will automatically adjust as necessary to
drive to the required flow set point, reflecting changes in
material viscosity or system dynamics (such as restrictions downstream from the regulator).
When changing recipes, the profile is saved to the current active recipe. A Job Complete input will also save
the profile to the active recipe.
76
FIG. 88. Advanced Setup Screen 5 (Automatic Mode
with Flow Control Only)
312779E
Integrated Flow Control
Pressure Flow Control Mode
When the Flow Control Override is set to “Pressure”, the
system will only drive to the pressure associated with
the flow rate request of the saved calibration table. It will
not close the loop with the flow meters.
This mode may be used with a ProMix 2KS connected
both to a robot with flow control and to a manual gun.
Because there are two flow paths, the meters cannot be
used to close the flow loop. Therefore the robot can run
a calibration by itself. When calibration is complete, set
to “Pressure.” The robot will run in open loop mode, and
the manual gun can spray at the same time.
Kp refers to the speed at which fluid flow reaches its set point.
Kp
Target Flow Rate
Ki
Ki refers to the degree fluid flow over shoots its set point.
TI17119a
NOTE: Ki and Kp are dependent on each other. If one changes the other must change.
FIG. 89. Kp/Ki Graph
312779E
77
Integrated Flow Control
Flow Control Troubleshooting
Problem: Flow Command does not produce fluid output.
Test the system as follows, to determine if the problem
is mechanical or electrical.
1. Install a 0-100 psi (0-0.7 MPa, 0-7.0 bar), 1/8 npt(m)
air pressure gauge (not supplied) as follows.
a. For module 249849: Remove the plug from the
1/8 npt(f) air gauge port and install the gauge.
See FIG. 71 on page 67.
b. For module 24H989: Install a 1/8 npt(m) x 1/8
npt (fbe) tee in the air outlet port. Install the
gauge in one branch of the tee and the air outlet
fitting in the other. See FIG. 72 on page 67.
2. Set the system to Manual Override, % Open mode;
see steps 2-5 under Flow Control Startup on
pages 72-73.
3. Set the % Open value to 50. See FIG. 90.
Set % Open
value to 50
50
FIG. 90. Set % Open to 50 Percent
4. Ensure that the gun is triggered. Increase the %
Open value on the EasyKey, then decrease. The
gauge reading should also increase then decrease.
78
312779E
Integrated Flow Control
Result of the Test
Gauge reading increases and
decreases as % Open value is
changed and fluid flow does not
change or is not present.
Gauge reading does not increase
and decrease as % Open value is
changed.
Cause
Solution
The problem is mechanical:
1. Clear any clogs.
•
restriction/plugged hose
2. Remove restrictions.
•
plugged gun tip
3. Clean and/or repair fluid regulator.
•
fluid regulator failure
The problem is electrical:
•
Fuse F2 is blown
•
disconnected wires or cables
•
pressure control failure
•
V/P valve failure
•
flow control board failure
1. Measure the voltage to the regulator at one of two places:
•
At J5 on the fluid control
board, measure across the
white (pin 1) and black (pin 6)
wire connections. The voltage should be in the range of
0-3.3 Vdc for 0%-100% Open
command (approximately
1.65 Vdc for 50% Open).
•
At J2 on the flow control
board of the module, measure across the red (pin 1)
and black (pin 2) wire connections. The voltage should
be in the range of 0-21 Vdc
for 0%-100% Open command (approximately 12 Vdc
for 50% Open).
2. If voltage is not present, check if
fuse F2 on the fluid control board
is blown.
3. If voltage is present, ensure the
cable is properly connected to
the module circuit board.
4. If cable is properly connected,
replace pressure control, VP
valve, and flow control board
sequentially to isolate failure. See
manual 3A2097.
312779E
79
System Operation
System Operation
Operation Modes
Mix
System mixes and dispenses material (apply Mix input).
Standby
Stops the system (remove Mix input).
Purge
Purges the system, using air and solvent (apply Purge
input).
Sequential Dosing
Components A and B dispense sequentially in the necessary volumes to attain the mix ratio.
Dynamic Dosing
In typical operation (ratios 1:1 and above), component A
dispenses constantly. Component B dispenses intermittently in the necessary volume to attain the mix ratio.
Recipe (Color) Change
The process when the system automatically flushes out
the old color and loads a new color. See pages 102-113.
Solvent Push
The Solvent Push feature enables the user to save
some mixed material by pushing it out to the gun with
solvent. The feature requires an accessory solvent
meter. See page 99 for complete information.
80
312779E
System Operation
Typical PLC Interaction with
ProMix 2KS
This section describes a typical interaction when a local
PLC is directly connected to the Discrete I/O connections of the ProMix 2KS.
See ProMix 2KS Integration Specifics on page 51 for
a detailed explanation of inputs and outputs.
NOTE: Communications fields of Configure Screen 6
must be set to DISCRETE (see page 35).
During the short On state, the recipe will be read from
this binary sequence and the status bar of the EasyKey
will display COLOR CHANGE XX. The
Purge_CC_Active output will be High for the duration of
the color change purge process. During the Mixed Material Load portion at the end of the Color Change
sequence, the Fill_Active output will be on, indicating
that portion of the color change. These will not be on at
the same time. Once the Mix_Ready output goes High
with no alarms, then the PLC has assurance that the
requested color change has taken place with the
requested recipe being the current active recipe. If any
error occurs during the process, the requested recipe
will not be loaded, and the old recipe will remain active.
Start Mixing
To start the mix process, the PLC will monitor and
ensure the Mix_Ready output is High. This provides
assurance it is ready to mix. PLC will drive High the
Mix_Start input, keep it High and monitor the Mix_Active
output to ensure the ProMix 2KS followed through on
the request.
Stop Mixing
To stop mixing (to perform a purge or color change),
remove the Mix_Start input (the status bar on the
EasyKey will show STANDBY). Monitor the Mix_Ready
output to ensure the Mix_Active output goes Low.
Color Change
To perform a color change, ensure there are no alarms
(except the Potlife Alarm). If alarms are present, the
Alarm_Reset input should be sent momentarily to clear
the alarm (>100 msec).
NOTE: Alarm_Reset will not reset a Potlife alarm. Only
dispensing the Potlife Volume or a complete
Purge/Color Change will reset a Potlife alarm.
The Alarm Reset Input will silence the audible alarm.
Turn the Color_Change_Start input on momentarily
(>100 msec) while the proper sequence of recipe bits
are set.
NOTE: The Recipe Bits must be presented at least 100
msec before the Color Change Start input is turned on
and remain until a new recipe is required.
NOTE: It is not possible to read the active recipe
through Discrete I/O alone. Only by monitoring networked registers through the Gateway is it possible to
view the active recipe. Proper management of the alarm
status outputs during the color change process will
ensure the active recipe is what is expected.
Purge
To start a Purge (no color change), drive the
Purge_Start input High (maintained) while ensuring
Mix_Ready output is High (ensuring no active alarms).
An exception is Potlife alarm (see Color Change above
if alarms are present.) The Purge_CC_Active output is
High for the entire Purge process. Ensure there are no
alarms during this process. Fill_Active is High when Mix
is on. When complete, Mix _Ready output will be High,
indicating a completed purge.
NOTE: No change is made to the active recipe.
Gun Trigger Input
This input is sent and expected every time the gun is
actually triggered, and this input is turned off when the
gun is not triggered. Never tie this input with any other
signal. Without this input, some critical mixing alarms
are eliminated.
IMPORTANT: This input must be provided through Discrete I/O for integrated flow control applications, to
ensure fast coordination with the flow control process.
Applications without flow control can use Gun Trigger
input through Network Communications or Discrete I/O.
NOTE: The Gun Trigger input has the same effect as
the air flow switch used on manual ProMix 2KS systems.
312779E
81
System Operation
Alarm Monitoring/Reset (Discrete I/O)
Anytime an alarm occurs, the Alarm Reset input will
reset the alarms and allow for processing of the next
step by automation, except for the following conditions:
•
key. Only a Purge/Color Change or spraying the
Potlife volume will reset a Potlife alarm. (See
Alarm_Potlife output information on page 54.)
•
ProMix 2KS has four specials that can each be turned
off and on twice throughout a color change sequence.
See Advanced Setup Screen 8 on page 42 or Recipe
Setup Screen 7 on page 46.
Potlife Alarms cannot be reset by the Alarm Reset
input or through the EasyKey Alarm Reset
•
For Applications with Dump Valves (for quick
purges/color changes at or near the gun):
When Flow Control is turned on (see Configure
Screen 5 on page 34), the Flow_Rate_Alarm output
will be High when the instantaneous flow rate is
above or below the Flow Rate tolerance setting.
(High Flow or Low Flow will be the condition, indicating in the status bar of the EasyKey.) This output
will be High along with the Mix_Active output. The
PLC should monitor the amount of time this condition exists and take action at a predetermined time.
With Flow Control there will be times (for example
during flow rate changes) where the general alarm
as described here will be High (typically momentarily). The PLC must read this Alarm output (i.e.
general alarm), see if Mix_Active is still High, and if
so, start a timer. A typical example would be to
ensure all parts are sprayed within a specific flow
rate range. A maximum predetermined time would
be set to allow a Low or High flow condition to exist
continuously.
Shutdown or go to Standby after the flow rate alarm
time expires.
For example, a dump valve at a gun on a robot could be
opened at the appropriate times to facilitate fast color
changes. Another output could be used to automatically
drive an air-operated fluid regulator High during the
Purge or Color Change process.
NOTE: With integrated Flow Control, the flow control
regulator automatically is driven High. See Advanced
Setup Screen 5 on page 41 for specifics on setting up
these values. Each of the specials can be monitored,
but can only be controlled through the times entered
within the setup screens of the EasyKey or by managing
the proper registers on the network.
The following ProMix 2KS inputs should never be on
(High) at the same time:
•
Mix_Start
•
Purge_Start
•
Color_Change_Start
The Recipe Bits (0-6) are always on at the same time.
The only time these bits are recognized is when the
Color_Change_Start input is High. The Recipe Bits
should be loaded and stay loaded for the current recipe. Do not change the Recipe Bits until a color change
is required again. Inconsistent results are possible if this
is not followed.
Job_Complete Input
Every time a momentary Job_Complete input is seen by
the ProMix 2KS, a job log will be recorded, logging the A
and B meter volumes (cc) with a time and date stamp.
The volumes will then be reset to 0. (Volume totals are
accumulated since the last reset.)
NOTE: A Color Change accomplishes the same Job
Complete Reset functions. The Job_Complete input is
commonly used to record material usage for a specific
set of parts. These volumes are sprayed material volumes.
82
312779E
System Operation
General Operating Cycle,
Sequential Dosing
d. Dose Valve B (DVB) opens, and fluid flows into
the integrator and is aligned proportionately with
component A.
1. The system enters and loads the desired color.
e. Flow Meter B (MB) monitors the fluid volume
dispensed and sends electrical pulses to the
ProMix 2KS controller.
2. The system enters Mix mode to begin operation.
3. The ProMix 2KS controller sends signals to activate
the solenoid valves. The solenoid valves activate
Dose Valves A and B. Fluid flow begins when the
Gun Trigger input is seen.
4. Components A and B are introduced into the fluid
integrator (FI) one at a time as follows.
a. Dose Valve A (DVA) opens, and fluid flows into
the integrator.
b. Flow Meter A (MA) monitors the fluid volume
dispensed and sends electrical pulses to the
ProMix 2KS controller. The controller monitors
these pulses and signals.
c.
When the target volume dispenses, Dose Valve
A closes.
NOTE: The dispense volume of component A and B
is based on the mix ratio and dose size set by the
user and calculated by the ProMix 2KS controller.
f.
When the target volume is dispensed, Dose
Valve B closes.
5. The components are pre-mixed in the integrator,
then uniformly blended in the static mixer (SM).
NOTE: To control output from the static mixer to the
gun, install an optional fluid pressure regulator.
6. Components A and B are alternately fed into the
integrator as long as the Gun Trigger input is seen.
7. If the Gun Trigger input is not seen for two minutes,
the system switches to Idle mode, which closes off
the mix manifold dose valves.
8. When the Gun Trigger input is seen again, the ProMix 2KS continues the process where it left off.
NOTE: Operation can be stopped at any time by
going to Standby mode (remove Mix input).
Table 11: Sequential Dosing Operation
Ratio = 2.0:1
Dose 1
Dose 2
Dose 3
A=2
B=1
312779E
83
System Operation
DVA
DVB
FI
MB
MS
MA
RVB
AT
APV
RVA
TI12556b
SVA
SM
SVB
SPV
Key:
MA
DVA
RVA
SVA
MB
DVB
RVB
Component A Meter
Component A Dose Valve
Component A Sampling Valve
Component A Shutoff Valve
Component B Meter
Component B Dose Valve
Component B Sampling Valve
SVB
MS
SPV
APV
SM
FI
AT
Component B Shutoff Valve
Solvent Meter (accessory)
Solvent Purge Valve
Air Purge Valve
Static Mixer
Fluid Integrator
Air Purge Valve Air Supply Tube
FIG. 91. Wall Mount Fluid Station, Sequential Dosing
84
312779E
System Operation
General Operating Cycle, Dynamic Dosing
Overview
Dynamic Dosing System Parameters
Dynamic Dosing provides on-demand proportioning,
eliminating the need for an integrator and therefore minimizing undesired material contact. This feature is especially useful with shear-sensitive and waterborne
materials.
The following parameters affect dynamic dosing performance:
A restrictor injects component B into a continuous
stream of component A. The software controls the duration and frequency of each injection. See FIG. 92 for a
schematic diagram of the process.
•
Component A Flow: Ensure that the supply pump is
sized to provide sufficient and uninterrupted flow.
Note that component A provides majority of system
flow at higher mix ratios.
•
Component B Flow: Ensure that the supply pump is
sized to provide sufficient and uninterrupted flow.
•
Component A Pressure: Ensure precise pressure
regulation. It is recommended that the component A
pressure be 5-15% lower than the component B
pressure.
•
Component B Pressure: Ensure precise pressure
regulation. It is recommended that the component B
pressure be 5-15% higher than the component A
pressure.
NOTE: When using dynamic dosing it is very important
to maintain a constant, well-regulated fluid supply. To
obtain proper pressure control and minimize pump pulsation, install a fluid regulator on the A and B supply
lines upstream of the meters. In systems with color
change, install the regulator downstream of the
color/catalyst valve stack.
Component A (continuous flow)
Proportioned Material
To Static
Mixer
Component B (pulsed injection)
FIG. 92. Schematic Diagram of Dynamic Dosing Operation
312779E
85
System Operation
Select a Component B Restrictor Size
Install the 15U955 Injection Kit in the fluid manifold as
explained in the ProMix 2KS Installation manual. Use
the charts provided in that manual to select an appropriate restrictor size based on the desired flow and mix
ratio.
NOTE: Do not use the material mixed when in DD setup
mode, as it may not be on ratio due to the disabled
alarms.
Turn On Dynamic Dosing
1. On the EasyKey press the Setup
3. Selecting “DD” in System Configure Screen 4
makes the DD Setup mode available. See FIG. 95.
To enable DD setup mode, select On in the DD
Setup mode drop down menu. This disables Off
Ratio alarms E-3 and E-4, allowing uninterrupted
setup and tuning.
key to access
the Set Up Home screen. Select “System Configuration” to access the configuration screens. FIG. 93.
FIG. 93. Set Up Home Screen
NOTE: If DD setup mode is not turned Off at the end of
setup, it will automatically turn off 3 minutes after initiation of a Mix command.
FIG. 95. Configure Screen 4, dynamic dosing setup
mode enabled
2. Navigate to System Configure Screen 4. Select
“DD” option from the “Dose Size” drop down menu.
FIG. 94.
FIG. 94. Configure Screen 4, dynamic dosing
selected
86
312779E
System Operation
Balancing A/B Pressure
If component B pressure is too high, it will push the component A stream aside during B injection. The valve will
not open long enough, causing a High Ratio alarm.
If component B pressure is too low, it will not be injected
in sufficient volume. The valve will stay open too long,
causing a Low Ratio alarm.
Selecting the correct component B restrictor size and
balancing the A/B pressures will keep the system in the
proper pressure range, resulting in a consistent mix
ratio.
FIG. 97 shows the A to B pressure balance, read at the
proportioner inlet. It is recommended that the component B pressure be 5-15% higher than the component A
pressure to keep the system in the control range, hold
the proper mix ratio, and obtain properly mixed material.
If pressures are not balanced (“B Pressure Too High” or
“B Pressure Too Low”), it may not be possible to hold
the desired mix ratio. The system will generate an off
ratio alarm and stop operation.
NOTE: In multi-flow rate systems, it is recommended
that you set up the system to run properly at the highest
flow rate, to ensure adequate fluid supply across the
flow rate range.
In dynamic dosing, component A dose valve is constantly on. Component B dose valve will cycle on and
off; one cycle every 0.5 – 1.0 seconds indicates proper
balance.
Monitor system performance by watching the EasyKey
display for warning messages which provide information
on system performance, and adjust pressures accordingly. See Table 12 on page 88.
nge
Ra
l
o
ntr
Co
B Pressure
Too Low
B Pressure
Too High
A Pressure
B Pressure
FIG. 97. A/B Control Range with Properly Sized
Restrictor
nge
l Ra )
o
r
t
l
Con o smal
(to
B Pressure
Too Low
B Pressure
Too High
A Pressure
B Pressure
NOTE: If the restrictor is too small, it may be
necessary to supply more differential pressure
than is available in your system.
FIG. 98. A/B Control Range with Too Large a
Restrictor
FIG. 96. B Pressure Too Low, displayed on EasyKey
312779E
87
System Operation
Table 12: Dynamic Dosing Troubleshooting Guide
(for complete system troubleshooting, see Table 17 beginning on page 116)
Warning/Alarm Message
Solution
B Pressure Too Low (see FIG. 96)
•
•
•
Increase B pressure.
Clean restrictor or use a larger size.
Verify B valve is opening properly.
B Pressure Too High
•
•
Increase A pressure or decrease B pressure.
Use a smaller restrictor.
Off Ratio Low
•
•
Increase A pressure or decrease B pressure.
Use a smaller restrictor.
Off Ratio High
•
•
•
Increase B pressure.
Clean restrictor or use a larger size.
Verify B valve is opening properly.
Mix Manifold Valve Settings
To open dose or purge valves, turn hex nut (E) counterclockwise. To close, turn clockwise. See Table 13 and
FIG. 99.
E
TI11581a
FIG. 99. Valve Adjustment
Table 13: Mix Manifold Valve Settings
88
Valve
Setting
Function
Dose (see
FIG. 99)
Hex nut (E) 1-1/4 turns out
from fully closed
Limits maximum fluid flow rate into integrator
and minimizes valve response time.
Purge (see
FIG. 99)
Hex nut (E) 1-1/4 turns out
from fully closed
Limits maximum fluid flow rate into integrator
and minimizes valve response time.
Shutoff (SVA
and SVB,
see FIG. 91)
Fully open during Run/Mix
operation
Closes component A and B ports to integrator
during ratio check or meter calibration. Open
ports during Run/Mix operation.
Sampling
(RVA and
RVB, see
FIG. 91)
Fully closed during Run/Mix
operation
Open to dispense component A and B while
calibrating meters. Do not open sampling
valves unless fluid shutoff valves are closed.
312779E
System Operation
Start Up
1. Go through the Pre-Operation Checklist in Table 14.
Table 14: Pre-Operation Checklist
✓
Checklist
System grounded
Verify all grounding connections were made. See
the Installation manual.
➜ Graco logo, software revision, and “Establishing
Communication” will display, followed by Status
screen. See page 22.
➜ At power up the system defaults to Recipe 61,
which is not a valid recipe number. Initiate a
color change to Recipe 0 or a valid recipe number (1-60).
➜ In bottom left corner, the system status displays, which can be Standby, Mix, Purge, or an
alarm notification.
All connections tight and correct
Verify all electrical, fluid, air, and system connections are tight and installed according to the
Installation manual.
Check air purge valve tubing
Check the air purge valve supply tube daily for
any visible solvent accumulation. Notify your
supervisor if solvent is present.
Fluid supply containers filled
Check component A and B and solvent supply
containers.
Mix manifold valves set
FIG. 101. Status Screen
Check that mix manifold valves are set correctly.
Start with the settings recommended in Mix Manifold Valve Settings, page 88, then adjust as
needed.
3. Verify that the EasyKey is working. The active recipe number and Standby mode should be displayed.
Fluid supply valves open and pressure set
Component A and B fluid supply pressures should
be equal unless one component is more viscous
and requires a higher pressure setting.
Solenoid pressure set
75-100 psi inlet air supply (0.5-0.7 MPa, 5.2-7 bar)
2. Turn the AC Power Switch ON (I = ON, 0 = OFF).
I = ON
4. If this is the first time starting up the system, purge it
as instructed in Purging Fluid Supply System,
page 96. The equipment was tested with lightweight
oil, which should be flushed out to avoid contaminating your material.
5. Make sure that the EasyKey is in Standby (remove
Mix input).
6. Adjust component A and B fluid supplies
as needed for your application. Use lowest pressure possible.
7. Do not exceed the maximum rated working pressure shown on the system identification
label or the lowest rated component in the system.
8. Open the fluid supply valves to the
system.
TI12656a
9. Adjust the air pressure. Most applications require about 80 psi (552
kPa, 5.5 bar) air pressure to operate properly. Do
not use less than 75 psi (517 kPa, 5.2 bar).
FIG. 100. Power Switch
312779E
89
System Operation
10. Purge air from the fluid lines.
a. Shut off air to the gun by closing the air regulator or shutoff
valve for the gun atomizing air.
b. Trigger the gun (manual or automatic) into
a grounded metal pail.
c.
Manual
gun shown
If the fluid flow rate is too low: increase air pressure to component A and B fluid supplies or
increase the regulated fluid pressure.
If the fluid flow rate is too high: reduce the air
pressure, close the fluid manifold dose valves further, or adjust the fluid pressure regulator.
Go to Mix mode.
d. If the flow meters over-run because of air in the
system, an alarm will occur and operation stops.
Press the Alarm Reset
Watch the fluid flow rate displayed on the Status
screen while the gun is fully open. Verify that the
flow rate of components A and B are within 10% of
each other.
key to clear
alarm.
e. Go to Mix mode.
11. Adjust the flow rate.
The fluid flow rate shown on the EasyKey Status
screen is for either component A or B, depending on
which dose valve is open. The fluid supply lines on
the screen highlight to show which dose valve is
open.
NOTE: Pressure adjustments of each component will
vary with fluid viscosity. Start with the same fluid pressure for component A and B, then adjust as needed.
NOTE: Do not use the first 4-5 oz. (120-150 cc) of material as it may not be thoroughly mixed due to alarms
while priming the system.
12. Turn on atomizing air to the gun. Check the spray
pattern as instructed in your spray gun manual.
NOTE: Do not allow a fluid supply tank to run empty. It
is possible for air flow in the supply line to turn gear
meters in the same manner as fluid. This can lead to the
proportioning of fluid and air that meets the ratio and tolerance settings of the equipment. This can further result
in spraying uncatalyzed or poorly catalyzed material.
FIG. 102. Status Screen Flow Rate Display
90
312779E
System Operation
Shutdown
Pressure Relief Procedure
Overnight Shutdown
NOTE: The following procedures relieve all fluid and air
pressure in the ProMix 2KS system. Use the procedure
appropriate for your system configuration.
1. Leave the power on.
2. Run Recipe 0 to purge solvent through meters and
gun.
Service Shutdown
1. Follow Pressure Relief Procedure on page 91.
2. Close main air shutoff valve on air supply line and
on ProMix 2KS.
3. Shut off ProMix 2KS power (0 position). FIG. 103.
4. If servicing EasyKey, also shut off power at main circuit breaker.
Relieve pressure when you stop spraying, before
changing spray tips, and before cleaning, checking, or
servicing equipment.
Single Color Systems
1. While in Mix mode (gun triggered), shut off the A
and B fluid supply pumps/pressure pots. Close all
fluid shutoff valves at the pump outlets.
2. With the gun triggered, push the manual override on
the A and B dose valve solenoids to relieve pressure. See FIG. 104.
0 = OFF
NOTE: If a Dose Time alarm (E-7, E-8) occurs,
clear the alarm.
3. Do a complete system purge, following the instructions under Purging Using Recipe 0, page 96.
TI12657a
FIG. 103. Power Switch
4. Shut off the fluid supply to the solvent purge valve
(SPV) and the air supply to the air purge valve
(APV), FIG. 106.
5. With the gun triggered, push the manual override on
the A and B purge valve solenoids to relieve air and
solvent pressure. See FIG. 104. Verify that solvent
pressure is reduced to 0.
NOTE: If a Purge Volume alarm (E-11) occurs, clear
the alarm.
312779E
91
System Operation
Systems with Color Change and without
Dump Valves
Systems with Color/Catalyst Change and
Dump Valves
NOTE: This procedure relieves pressure through the
sampling valve.
NOTE: This procedure relieves pressure through the
dump valves.
1. Complete all steps under Single Color Systems,
page 91.
1. Complete all steps under Single Color Systems,
page 91.
2. Close the A side shutoff valve (SVA), FIG. 106.
Open the A side sampling valve (RVA).
2. Shut off all color and catalyst supplies to the valve
stacks.
3. Direct the A side sampling tube into a waste container.
3. Press and hold the dump valve A solenoid override,
FIG. 104.
4. See FIG. 105. Open the color change module. Using
the solenoid identification labels as a guide, press
and hold the override button on each color solenoid
until flow from the sampling valve stops.
4. See FIG. 105. Open the color change module. Using
the solenoid identification labels as a guide, press
and hold the override button on each color solenoid
until flow from dump valve A stops.
5. Press and hold the solvent solenoid override until
clean solvent comes from the sampling valve, then
release.
5. Press and hold the dump valve B solenoid override,
FIG. 104.
6. Shutoff the solvent supply to the color change stack
solvent valve.
7. Press and hold the solvent solenoid override until
solvent flow from the sampling valve stops.
8. Open the A side shutoff valve (SVA), FIG. 106.
Close the A side sampling valve (RVA).
6. See FIG. 105. Using the solenoid identification
labels as a guide, press and hold the override button on each catalyst solenoid until flow from dump
valve B stops.
7. Press and hold the dump valve A solenoid override,
FIG. 104.
8. Press and hold the A side (color) solvent solenoid
override until clean solvent comes from the dump
valve, then release.
9. Press and hold the dump valve B solenoid override,
FIG. 104.
10. Press and hold the B side (catalyst) solvent solenoid
override until clean solvent comes from the dump
valve, then release.
11. Shutoff the solvent supply to the color/catalyst
change stack solvent valves.
12. Press and hold the A and B solvent solenoid overrides and dump valve overrides until solvent flow
from the dump valves stops.
92
312779E
System Operation
Dose Valve B
Override Button
RoboMix Fluid Station
Dose Valve A
Override Button
TI12655a
Wall Mount Fluid Station
F2
F1
J1
Power
Fiber
Optic
CAN
J13
CAN
J12
1
J14
1
J15
GFB 2
GFB 1
Dump B
J9
Dump A
1
Purge B
Dose A
Dose B
Purge A
Valve Overrides
3rd Purge
J3
1
J8
Dump Valve A
Dump Valve B
GFB 1
Optional Solenoid
Locations
GFB 2
3rd Purge Valve
Solenoid
Dose Valve A
Solenoid
Dose Valve B
Solenoid
Purge Valve A
Solenoid
Purge Valve B
Solenoid
TI12652b
FIG. 104. Fluid Solenoids
312779E
93
System Operation
Color
Solenoid
Identification
Label
Catalyst
Color
Solenoid
Identification
Label
TI12826a
Solvent Solenoid
Overrides
FIG. 105: Color Change Solenoids
DVA
FI
Key:
DVB
MB
MS
MA
RVB
AT
TI12556b
APV
RVA
SVA
SM
SVB
SPV
MA Component A Meter
DVA Component A
Dose Valve
RVA Component A
Sampling Valve
SVA Component A
Shutoff Valve
MB Component B Meter
DVB Component B
Dose Valve
RVB Component B
Sampling Valve
SVB Component B
Shutoff Valve
MS Solvent Meter
(accessory)
SPV Solvent Purge Valve
APV Air Purge Valve
SM Static Mixer
FI
Fluid Integrator
AT
Air Purge Valve Air
Supply Tube
FIG. 106. Wall Mount Fluid Station
94
312779E
System Operation
Purging
Read Warnings, page 9. Follow the Grounding
instructions in your system Installation manual.
To avoid splashing fluid in the eyes, wear eye protection.
There are 4 purging procedures in this manual:
•
•
•
•
2. Set the solvent supply pressure regulator at a pressure high enough to completely purge the system in
a reasonable amount of time but low enough to
avoid splashing or an injection injury. Generally, a
setting of 100 psi (0.7 MPa, 7 bar) is sufficient.
3. If using a gun flush box, place the gun into the box
and close the lid. Go to Purge mode. The purge
sequence automatically starts.
If the gun flush box is not used, trigger the gun (manual or automatic)
into a grounded metal pail until the
purge sequence is complete.
Purging Mixed Material (below)
Purging Using Recipe 0 (page 96)
Purging Fluid Supply System (page 96)
Purging Sampling Valves and Tubes (page 98)
4. If the system is not completely clean, repeat step 3.
Use the criteria listed in each procedure to determine
which procedure to use.
NOTE: If necessary, adjust purge sequence so only
one cycle is required.
When done purging, the EasyKey automatically
switches to Standby mode.
Purging Mixed Material
There are times when you only want to purge the fluid
manifold, such as:
•
•
•
•
end of potlife
breaks in spraying that exceed the potlife
overnight shutdown
before servicing the fluid manifold assembly, hose
or gun.
Solvent purges the component B (catalyst, right) side of
the mix manifold and the inner tube of the integrator. Air
purges the component A (resin, left) side and the outer
tube of the integrator.
Trigger the gun to relieve pressure. Engage trigger
lock.
5. If spray tip was removed, reinstall it.
6. Adjust the solvent supply regulator back to its normal operating pressure.
1. Go to Standby mode (remove Mix input).
Trigger the gun to relieve pressure.
If you are using a high pressure gun, engage the trigger lock. Remove spray tip and clean tip separately.
If using an electrostatic gun shut off the electrostatics
before flushing the gun.
312779E
95
System Operation
Purging Using Recipe 0
Purging Fluid Supply System
Recipe 0 is typically used:
• in multiple color systems to purge out material lines
without loading a new color
• at the end of a shift to prevent hardening of catalyzed material.
Follow this procedure before:
• the first time material is loaded into equipment*
• servicing
• shutting down equipment for an extended period of
time
• putting equipment into storage
To setup Recipe 0, go to Advanced Setup. Select the
Recipe tab and change the Recipe to 0. The Recipe 0
Setup Screen appears. Set the chop times from 0-999
seconds in increments of 1 second.
1. Go to Standby mode (remove Mix input).
*
Some steps are not necessary for initial flushing, as no material has been loaded into the
system yet.
1. Go to Standby mode (remove Mix input).
Trigger the gun to relieve pressure.
Trigger the gun to relieve pressure.
If you are using a high pressure gun, engage the trigger lock. Remove spray tip and clean tip separately.
If you are using a high pressure gun, engage the trigger lock. Remove spray tip and clean tip separately.
If using an electrostatic gun shut off the electrostatics
before flushing the gun.
If using an electrostatic gun, shut off the electrostatics
before flushing the gun.
2. Attach solvent supply lines as follows:
2. If using a gun flush box, place the gun into the box
and close the lid.
3. Select Recipe 0 and press Enter
5. The color change LED blinks while Recipe 0 runs
and turns solid after purge sequence is complete.
6. If the system is not completely clean, you can
96
Single color/single catalyst systems: disconnect the component A and B fluid supplies at
the flow meter inlets, and connect regulated solvent supply lines.
•
Multiple color/single catalyst systems: disconnect only the component B fluid supply at
the flow meter inlet and connect a regulated solvent supply line.
•
Multiple color/multiple catalyst systems:
connect the solvent supply lines to the designated solvent valve on the color and catalyst
valve stacks. Do not connect a solvent supply to
either flow meter.
.
4. If a gun flush box is not used, trigger
the gun (manual or automatic) into a
grounded metal pail until the purge
sequence is complete.
repeat Recipe 0 by pressing Enter
•
.
312779E
System Operation
3. Adjust the solvent fluid supply pressure. Use the
lowest possible pressure to avoid splashing.
4. Remove the Fluid Station cover to access the solenoid valves. See FIG. 104 on page 93.
5. Purge as follows:
•
Single color/single catalyst systems: Purge
component A side. Press the manual override
on the Dose Valve A solenoid valve and trigger
the gun into a grounded metal pail.
Purge component B side. Press the manual
override on the Dose Valve B solenoid valve
and trigger the gun into a grounded metal pail
until clean solvent flows from the gun.
Repeat to thoroughly clean the fluid integrator.
•
Multiple color/single catalyst systems:
Select Recipe 0 and press Enter
to purge
the component A side. The color change LED
blinks while Recipe 0 runs and turns solid after
purge sequence is complete.
Purge component B side. Press the manual
override on the Dose Valve B solenoid valve
and trigger the gun into a grounded metal pail
until clean solvent flows from the gun.
Repeat to thoroughly clean the fluid integrator.
•
Multiple color/multiple catalyst systems:
Select Recipe 0 and press Enter
to purge
the component A side and the component B
side. The color change LED blinks while Recipe
0 runs and turns solid after purge sequence is
complete.
Repeat to thoroughly clean the fluid integrator.
6. Reinstall the Fluid Station cover.
7. Shut off the solvent fluid supply.
8. Disconnect the solvent supply lines and reconnect
the component A and B fluid supplies.
9. See page 89 for Start Up procedure.
312779E
97
System Operation
Purging Sampling Valves and Tubes
Follow this procedure after meter calibration.
1. Go to Standby mode (remove Mix input).
2. See FIG. 106, page 94. Close both fluid shutoff
valves and sampling valves.
3. Route the sampling tubes into a grounded waste
container.
4. On a single color system, attach a solvent supply
line to Flow Meter A inlet.
5. On the EasyKey, press Setup
key and access
the Advanced Setup screens.
6. Press the Right Arrow
key to select the Calibra-
tion screen. Press the Down Arrow
key and
select Purge from the menu. Press the Enter
key.
7. To avoid splashing, slowly open the sampling
valves and dispense solvent until the valves and
tubes are clean.
NOTE: When performing a calibration purge, the
solvent valve(s) close automatically after 2 minutes
or when Abort is selected on the screen.
8. Close sampling valves.
NOTE: Select Abort on Calibration screen to cancel
current calibration and close dose or purge valves.
9. Fully open both fluid shutoff valves.
10. On a single color system, reconnect component A
fluid supply line to flow meter A.
NOTE: After calibration it is necessary to clean out contaminated mix material. Do a manual purge and resume
the recipe just tested, or do Recipe 0 then go on to the
next recipe.
Dose A, solvent purge valve (B side), and color
change solvent valves (if used) will open.
FIG. 107. Calibration Screen
98
312779E
System Operation
Solvent Push Feature
The Solvent Push feature enables the user to save
some mixed material by pushing it out to the gun with
solvent. The quantity saved is 50% of the potlife volume
entered in Advanced Setup Screen 1 on page 39. If
there are 2 guns, the smaller potlife volume is used.
4. The system will dispense solvent to push the mixed
material out to the gun. The Booth Control display
alternately shows dashes and the percent remaining
(0-99%) of the 50% of the potlife volume.
NOTE: To manually interrupt Solvent Push, press the
Solvent Push requires an accessory solvent meter (MS).
Order Graco Part No. 280555 S3000 Solvent Meter Kit.
See manual 308778.
1. See FIG. 108. Install the solvent meter (MS) on the
side of the fluid station, as explained in the ProMix
2KS Installation Manual.
2. To enable Solvent Push, select “Solvent” or “3rd
Valve,” as desired. See Option Screen 2, page 37.
NOTE: If you are using a 3rd purge valve instead of the
solvent purge valve to run the Solvent Push feature,
connect the solvent supply line from the solvent meter to
the inlet of the 3rd purge valve.
3. Press and hold the Mix
key for 5 seconds
to turn on Solvent Push. The green Mix LED will
light and the Recipe LED will blink. The system will
close the Dose Valves (DVA, DVB) and open the
Solvent Purge Valve (SPV).
Key:
DVA
DVB
MS
SPV
APV
SMC
SS
Standby
key. The Solvent Purge Valve (SPV) or
3rd purge valve will close. To re-enter Solvent Push,
press the Mix
key.
5. When the total solvent dispensed exceeds 50% of
the potlife volume, the system will go into Standby
mode.
6. Perform a manual purge or recipe change to purge
the remaining mixed material. This will clear the system out of Solvent Push, allowing you to resume
Mix mode.
NOTE: Once the system senses that solvent exceeds
50% of potlife volume, attempts to re-enter Solvent
Push will cause an Overdose_A/B Alarm (E-5, E-6).
DVA is closed
DVB is closed
Component A Dose Valve
Component B Dose Valve
Solvent Meter (required)
Solvent Purge Valve
Air Purge Valve
Solvent Meter Cable
Solvent Supply Line
MS
SMC
TI12556b
SS
SPV is open
FIG. 108. Solvent Push Setup
312779E
99
Meter Calibration
Meter Calibration
4. Place the beakers (minimum size - 250 cc) in holders. Put the sampling tubes into the beakers. (Wall
Mount Fluid Station only.)
To avoid splashing fluid in the eyes, wear eye protection. The fluid shutoff valves and ratio check valves are
retained by mechanical stops that prevent accidental
removal of the valve stem while the manifold is pressurized. If you cannot turn the valve stems manually,
relieve the system pressure, then disassemble and
clean the valve to remove the resistance.
NOTE: If tubes need replacing, use 5/32 in. or 4 mm
OD tubing.
5. On the EasyKey, press the Setup
key to access
setup screens.
6. Select Recipe & Advanced Setup and press the
Enter
key to select.
Calibrate the meter:
•
The first time the system is operated.
•
Whenever new materials are used in the system,
especially if the materials have viscosities that differ
significantly.
•
At least once per month as part of regular maintenance.
•
Whenever a flow meter is serviced or replaced.
NOTE:
• K-factors on the Calibration Screen are
updated automatically after the calibration procedure is completed.
•
K-factor values on the screen are viewable only.
If needed, you can manually edit the K-factors
in Advanced Setup Screen 4 (see page 41) or
Recipe Setup Screen 5 (page 46).
•
All values on this screen are in cc, independent
of the units set in Configure Screen 1.
•
The controller will use the active recipe
K-factors for meter calibration. The active recipe
must be recipe 1 to recipe 60. Recipes 0 and 61
do not have K-factor values.
7. Press the Right Arrow
key to select the Cali-
bration Screen. Press the Enter
key to select
either Dose Valve A or B. Press the Down Arrow
key and select Start from the menu. Start only one
at a time.
1. Before calibrating meter A or B, prime the system
with material. For a color/catalyst change system,
make sure the color/catalyst valve is open.
2. Shut off all spray or dispense devices connected to
the ProMix.
3. Close both fluid shutoff valves and sampling valves.
(Wall Mount Fluid Station only.)
100
312779E
Meter Calibration
8. Dispense component A or B into beaker.
12. After the volume for A, B, or Solvent is entered, the
ProMix 2KS controller calculates the new flow meter
K-factor and shows it on the Calibration Screen.
a. To avoid splashing, slowly open sampling
valves.
b. For more accurate calibration, adjust the valve
to dispense at a flow rate similar to your production spray flow rate.
c.
Dispense a minimum of 250 cc; make sure
enough material is dispensed to accurately read
the volume with your beaker. The A and B volumes do not have to be equal or at any particular ratio.
NOTE: K-factor values on the screen are viewable
only. If needed, you can manually edit the K-factors
in Advanced Setup Screen 4 (page 41) or Recipe
Setup Screen 5 (page 46).
13. Always purge sampling valves after calibrating
meters. Use one of the following methods.
•
Follow the Purging Sampling Valves and
Tubes procedure, page 98.
•
Place the sampling valve fluid tubes into a compatible cleaning fluid (TSL or solvent) or cap
them.
NOTE: If fluid hardens in sampling tubes, replace
them with 5/32 in. or 4 mm OD tubing.
d. Close sampling valve tightly.
9. The volume that the ProMix measured displays on
the EasyKey.
14. Make sure both sampling valves are closed and
both fluid shutoff valves are fully open.
10. Compare the amounts on the EasyKey to the
amount in the beakers.
15. Before you begin production, clear the system of
solvent and prime it with material.
NOTE: For maximum accuracy, use a gravimetric
(mass) method to determine the actual volumes dispensed.
11. If the screen and actual volumes are different, enter
the actual dispensed volume in cc for A, B, or Solvent Volume field, and press the Enter
a. Go to Mix mode.
b. Trigger the gun into a grounded metal pail until
mixed material flows from the gun nozzle.
c.
To begin operation, see Start Up, page 89.
key.
If the value was substantially different, repeat the
calibration process.
NOTE: If the screen and actual volume is the same
or if for any reason you want to cancel the calibration procedure, scroll to Abort on the Calibration
Screen menu and press the Enter
312779E
key.
101
Color Change
Color Change
Color Change Procedures
Multiple Color Systems
1. Shut off air to the gun.
2. Place the gun in the gun flush box if used, and close
the lid.
3. Go to Standby mode (remove Mix input).
4. Select the new recipe. Begin the color change
sequence.
5. If a gun flush box is not used, trigger
the gun (manual or automatic) into a
grounded metal pail until the color
change sequence is complete.
Color Change Sequences
FIG. 109 through FIG. 126 illustrate various color change
sequences. See Table 15 to determine which figure to
reference, based on the recipe change and system configuration. The time sequences are detailed in the following paragraphs.
NOTE: For software version 2.04.xxx and older, the system uses the color/catalyst purge and fill times from the
new recipe.
NOTE: See Setup Mode on page 28 to select purge
sources and set desired purge, chop, and fill times.
NOTES:
•
NOTE: The color change timer does not start until a
Gun Trigger input is seen and fluid flow is detected.
If no flow is detected within 2 minutes, the color
change operation aborts. The system enters
The system uses old recipe data for the purge cycle.
However, it opens the new color/catalyst valve
based on the new recipe data.
•
The system uses the new recipe data for the fill
cycle.
Standby
mode (remove Mix input) at the previ-
•
For the one gun flush box (GFB) option, the spray
gun must be inserted in the GFB during the entire
color change cycle (purge and fill). The GFB trigger
output will be on during the recipe change cycle.
6. When you are ready to spray, remove the gun from
the gun flush box if used, and close its door (manual
and semi-automatic systems only).
•
For the two gun flush box (GFB) option, both spray
guns must be inserted in the GFBs during the entire
color change cycle (purge and fill). The system will
turn each GFB trigger output on and off based on
the preset time for each gun.
•
For Special Outputs options, the system will turn
each output on and off based on the preset times.
Each Special Output has two different start times
and durations.
•
For systems without dump valves, the First Purge
begins after the Color/Catalyst Change steps are
completed.
•
Dump Valve B is required for a Catalyst Change
system.
•
When going from Recipe X to Recipe 0, only the
purge cycle data from Recipe 0 is used.
•
When going from Recipe 0 to Recipe X, only the fill
cycle data from Recipe X is used.
ous color.
NOTE: The gun flush box door must be closed for
the atomizing air valve to open.
7. Enter Mix
mode to start spraying.
Single Color Systems
1. Follow procedure for Purging Fluid Supply System, page 96.
2. Load the new color. See Start Up, page 89.
3. Enter Mix
102
mode to start spraying.
312779E
Color Change
Color Purge/Dump
Step P0-P1
•
This sequence flushes out the color with solvent,
from the color valve to the Dump A valve.
•
The color change solvent valve and the Dump A
valve open during the Purge Time.
•
The color change solvent valve closes when the
Purge Time expires.
Color Fill
Step P1-P2
•
This sequence fills the line with the new color all the
way to the Dump A valve.
•
The new color valve and the Dump A valve open
during the Fill Time.
•
The new color valve and the Dump A valve close
when the Fill Time expires.
Catalyst Purge/Dump
Step P2-P3
•
This sequence flushes out the catalyst with solvent,
from the catalyst valve to the Dump B valve.
•
The catalyst change solvent valve and the Dump B
valve open during the Purge Time.
•
The catalyst change solvent valve closes when the
Purge Time expires.
Catalyst Fill
Step P3-P4
•
This sequence fills the line with the new catalyst all
the way to the Dump B valve.
•
The new catalyst valve and the Dump B valve open
during the Fill Time.
•
The new catalyst valve and the Dump B valve close
when the Fill Time expires.
First Purge
Step M0-M1
Select the First Purge Source (air, solvent, or 3rd valve)
and First Purge Time. For most applications, air is
selected.
The system purges the old material from the dose
valves to the gun, using only the selected purge media
(usually air). The selected purge valve opens during the
First Purge Time and closes when the time expires.
Chop Cycle
Step M1-M2
Select the Chop Type (air/solvent or air/3rd valve) and
Chop Times.
The air purge valve opens only during the air chop
cycle, and the solvent (or 3rd valve) opens only during
the solvent chop cycle. The number of chop cycles is
determined by dividing the Total Chop Time by the sum
of the Air and Solvent Chop Times.
Final Purge
Step M2-M3
Select the Final Purge Source (air, solvent, or 3rd valve)
and Final Purge Time. For most applications, solvent is
selected.
The system fills the line with solvent from the dose
valves to the gun, using only the selected purge media
(usually solvent). The selected purge valve opens during the Final Purge Time and closes when the time
expires.
Fill
Step M3-M4
This sequence fills the line from the dose valves to the
gun, and is also referred to as the mixed material fill.
The system begins mixing components A and B until the
Fill Time expires.
Purge Active
Step M0-M3
The system turns on the Purge/Recipe Change Purge
Active output during steps M0-M3.
Fill Active
Step M3-M4
The system turns on the Recipe Change Fill Active output during step M3-M4.
312779E
103
Color Change
Table 15: Color Change Chart Reference
Number of
Gun Flush
Boxes
Refer to Fig.
Starting
Recipe
Ending
Recipe
Color
Change
Catalyst
Change
Dump
Valves
3rd Purge
Valve
X
X
Yes
Yes
Yes
Yes
0
FIG. 110
X
X
Yes
Yes
Yes
No
0
FIG. 109
X
X
Yes
No
No
No
0
FIG. 112
X
X
Yes
No
Yes
No
0, 1, or 2
FIG. 111
X
X
No
Yes
Yes
No
0, 1, or 2
FIG. 113
X
X
No
No
No
No
0, 1, or 2
FIG. 123
X
X
Yes
Yes
Yes
No
1
FIG. 115
X
X
Yes
No
No
No
1
FIG. 117
X
X
Yes
Yes
Yes
No
2
FIG. 114
X
X
Yes
No
No
No
2
FIG. 116
X
0
Yes
Yes
Yes
No
0, 1, or 2
FIG. 118*
X
0
Yes
No
Yes
No
0, 1, or 2
FIG. 118*
X
0
Yes
No
No
No
0, 1, or 2
FIG. 120**
X
0
No
Yes
Yes
No
0, 1, or 2
FIG. 118*
X
0
No
No
No
No
0, 1, or 2
FIG. 120**
0 or 61
X
Yes
Yes
Yes
No
0, 1, or 2
FIG. 119*
0 or 61
X
Yes
No
Yes
No
0, 1, or 2
FIG. 119*
0 or 61
X
Yes
No
No
No
0, 1, or 2
FIG. 121**
0 or 61
X
No
Yes
Yes
No
0, 1, or 2
FIG. 119*
0 or 61
X
No
No
No
No
0, 1, or 2
FIG. 121**
0
0
Yes
Yes
Yes
No
0, 1, or 2
FIG. 118*
0
0
Yes
No
Yes
No
0, 1, or 2
FIG. 118*
0
0
Yes
No
No
No
0, 1, or 2
FIG. 120**
0
0
No
Yes
Yes
No
0, 1, or 2
FIG. 118*
0
0
No
No
No
No
0, 1, or 2
FIG. 120**
61
0
Yes or No
Yes or No
Yes or No
No
0, 1, or 2
FIG. 118*
0
X
Yes
Yes
Yes
Yes
0, 1, or 2
FIG. 125
0
X
Yes
No
Yes
Yes
0, 1, or 2
FIG. 125
0
X
Yes
No
No
Yes
0, 1, or 2
FIG. 126
0
X
No
Yes
Yes
Yes
0, 1, or 2
FIG. 125
0
X
No
No
No
Yes
0, 1, or 2
FIG. 126
NOTES:
*
FIG. 118 and FIG. 119 show both color and catalyst change. If the color or catalyst is not changing, disregard that
portion of the chart.
** FIG. 120 and FIG. 121 show color change. If the color is not changing, disregard that portion of the chart.
FIG. 122 (page 111) shows a recipe change with Special Outputs.
FIG. 124 (page 112) shows an External Color Change.
104
312779E
Color Change
ProMix 2KS Recipe Change
Chart 1: A1 to A2, B1 to B2 with Dump Valves
Valve
Time-Sequence
A
Dump A
Dump B
B
Color Change Solvent
Catalyst Change Solvent
Color Change A
Catalyst Change B
A
B
A
B
P0
P1
P2
P3
P4
Color Purge Time P0->P1
Color Fill Time P1->P2
Catalyst Purge Time P2->P3
Catalyst Fill Time P3->P4
CC Purge/Fill Timers are independent
of Mixed Material Purge Timers. This
line defines when the Mixed Fill Time
begins. The longer of the two timers
defines when the Mixed Fill Time
begins.
Air Chop Time
Solvent Chop Time
3rd Flush Chop Time
First Purge (one of these)
Air Purge
Solvent Purge
3rd Flush Valve
Final Purge (one of these)
Dispense A
Dispense B
A
A
B
B
Gun Trigger(s) by Operator
M0
M1
M2
M3
M4
First Purge Time M0->M1
Chop Time (air/solvent or air/3rd flush) M1->M2
Final Purge Time M2->M3
Mixed Fill Time M3->M4
Notes:
Purge from old recipe
Fill from new recipe
Load tables from new recipe
FIG. 109: Color Change Chart 1
ProMix 2KS Recipe Change
Chart 2: A1 to A2, B1 to B2 with Dump Valves and 3rd Flush Valve
Valve
Time-Sequence
A
Dump A
Dump B
B
Color Change Solvent
Catalyst Change Solvent
Color Change A
Catalyst Change B
A
A
B
B
P0
P1
P2
P3
P4
Color Purge Time P0->P1
Color Fill Time P1->P2
Catalyst Purge Time P2->P3
Catalyst Fill Time P3->P4
CC Purge/Fill Timers are independent
of Mixed Material Purge Timers. This
line defines when the Mixed Fill Time
begins. The longer of the two timers
defines when the Mixed Fill Time
begins.
Air Chop Time
Solvent Chop Time
3rd Flush Chop Time
First Purge (one of these)
Air Purge
Solvent Purge
3rd Flush Valve
Final Purge (one of these)
*Two Second Solvent Purge
Dispense A
Dispense B
A
A
B
B
Gun Trigger(s) by Operator
M0
M1
M2
M3
M4
M5
*Two Second Initial Purge Time M0->M1
First Purge Time M1->M2
Chop Time (air/solvent or air/3rd flush) M2->M3
Final Purge Time M3->M4
Mixed Fill Time M4->M5
Notes:
Purge from old recipe
Fill from new recipe
*Applies to ALL charts when 3rd Flush Valve is ON
Load tables from new recipe
FIG. 110: Color Change Chart 2
312779E
105
Color Change
ProMix 2KS Recipe Change
Chart 3: A1 to A2, same B with Dump Valves
Valve
Time-Sequence
A
Dump A
Dump B
Color Change Solvent
Catalyst Change Solvent
Color Change A
Catalyst Change B
A
P0
A
B
P1
P2
P3
P4
Color Purge Time P0->P1
Color Fill Time P1->P2
CC Purge/Fill Timers are independent
of Mixed Material Purge Timers. This
line defines when the Mixed Fill Time
begins. The longer of the two timers
defines when the Mixed Fill Time
begins.
Air Chop Time
Solvent Chop Time
3rd Flush Chop Time
First Purge (one of these)
Air Purge
Solvent Purge
3rd Flush Valve
Final Purge (one of these)
Dispense A
Dispense B
A
A
B
B
Gun Trigger(s) by Operator
M0
M1
M2
M3
M4
First Purge Time M0->M1
Chop Time (air/solvent or air/3rd flush) M1->M2
Final Purge Time M2->M3
Mixed Fill Time M3->M4
Notes:
Purge from old recipe
Fill from new recipe
Load tables from new recipe
FIG. 111: Color Change Chart 3
ProMix 2KS Recipe Change
Chart 4: A1-A2, same B without Dump Valves
Valve
Time-Sequence
Dump A
Dump B
Color Change Solvent
Catalyst Change Solvent
Color Change A
Catalyst Change B
A
A
B
Air Chop Time
Solvent Chop Time
3rd Flush Chop Time
First Purge (one of these)
Air Purge
Solvent Purge
3rd Flush Valve
Final Purge (one of these)
Dispense A
Dispense B
A
A
A
B
B
Gun Trigger(s) by Operator
0
1
2
3
4
5
6
Color Purge Time 0->1
Color Fill Time 1->2
First Purge Time 2->3
Chop Time (air/solvent or air/3rd flush) 3->4
Final Purge Time 4->5
Mixed Fill Time 5->6
Notes:
Purge from old recipe
Fill from new recipe
Load tables from new recipe
FIG. 112: Color Change Chart 4
106
312779E
Color Change
ProMix 2KS Recipe Change
Chart 5: B1 to B2, same A with Dump Valves
Valve
Time-Sequence
Dump A
Dump B
B
Color Change Solvent
Catalyst Change Solvent
Color Change A
Catalyst Change B
A
B
B
P0
P1
P2
P3
P4
Catalyst Purge Time P0->P1
Catalyst Fill Time P1->P2
CC Purge/Fill Timers are independent
of Mixed Material Purge Timers. This
line defines when the Mixed Fill Time
begins. The longer of the two timers
defines when the Mixed Fill Time
begins.
Air Chop Time
Solvent Chop Time
3rd Flush Chop Time
First Purge (one of these)
Air Purge
Solvent Purge
3rd Flush Valve
Final Purge (one of these)
Dispense A
Dispense B
A
A
B
B
Gun Trigger(s) by Operator
M0
M1
M2
M3
M4
First Purge Time M0->M1
Chop Time (air/solvent or air/3rd flush) M1->M2
Final Purge Time M2->M3
Mixed Fill Time M3->M4
Notes:
Purge from old recipe
Fill from new recipe
Load tables from new recipe
FIG. 113: Color Change Chart 5
ProMix 2KS Recipe Change
Chart 6: A1 to A2, B1 to B2 with Dump Valves, 2 GFBs
Valve
Time-Sequence
A
Dump A
Dump B
B
Color Change Solvent
Catalyst Change Solvent
Color Change A
Catalyst Change B
A
A
B
B
P0
P1
P2
P3
P4
Color Purge Time P0->P1
Color Fill Time P1->P2
Catalyst Purge Time P2->P3
Catalyst Fill Time P3->P4
CC Purge/Fill Timers are independent
of System Purge Timers. This line
defines when the System Fill Time
begins. The longer of the two timers
defines when the System Fill Time
begins.
Air Chop Time
Solvent Chop Time
3rd Flush Chop Time
First Purge (one of these)
Air Purge
Solvent Purge
3rd Flush Valve
Final Purge (one of these)
Dispense A
Dispense B
A
A
B
B
Gun Flush Box Output #1
Gun Flush Box Output #2
M0
M1
M2
M3
M4
First Purge Time M0->M1
Chop Time (air/solvent or air/3rd flush) M1->M2
Final Purge Time M2->M3
Mixed Fill Time M3->M4
Notes:
Purge from old recipe
Fill from new recipe
Load tables from new recipe
FIG. 114: Color Change Chart 6
312779E
107
Color Change
ProMix 2KS Recipe Change
Chart 7: A1 to A2, B1 to B2 with Dump Valves, 1 GFB
Valve
Time-Sequence
A
Dump A
Dump B
B
Color Change Solvent
Catalyst Change Solvent
Color Change A
Catalyst Change B
A
A
B
B
P0
P1
P2
P3
P4
Color Purge Time P0->P1
Color Fill Time P1->P2
Catalyst Purge Time P2->P3
Catalyst Fill Time P3->P4
CC Purge/Fill Timers are independent
of Mixed Material Purge Timers. This
line defines when the Mixed Fill Time
begins. The longer of the two timers
defines when the Mixed Fill Time
begins.
Air Chop Time
Solvent Chop Time
3rd Flush Chop Time
First Purge (one of these)
Air Purge
Solvent Purge
3rd Flush Valve
Final Purge (one of these)
Dispense A
Dispense B
A
A
B
B
Gun Flush Box Output #1
Gun Flush Box Output #2
M0
M1
M2
M3
M4
First Purge Time M0->M1
Chop Time (air/solvent or air/3rd flush) M1->M2
Final Purge Time M2->M3
Mixed Fill Time M3->M4
Notes:
Purge from old recipe
Fill from new recipe
Load tables from new recipe
FIG. 115: Color Change Chart 7
ProMix 2KS Recipe Change
Chart 8: A1-A2, same B without Dump Valves, 2 GFBs
Valve
Time-Sequence
Dump A
Dump B
Color Change Solvent
Catalyst Change Solvent
Color Change A
Catalyst Change B
A
A
B
Air Chop Time
Solvent Chop Time
3rd Flush Chop Time
First Purge (one of these)
Air Purge
Solvent Purge
3rd Flush Valve
Final Purge (one of these)
Dispense A
Dispense B
A
A
A
B
B
Gun Flush Box Output #1
Gun Flush Box Output #2
0
1
2
3
4
5
6
Color Purge Time 0->1
Color Fill Time 1->2
First Purge Time 2->3
Chop Time (air/solvent or air/3rd flush) 3->4
Final Purge Time 4->5
Mixed Fill Time 5->6
Notes:
Purge from old recipe
Fill from new recipe
Load tables from new recipe
FIG. 116: Color Change Chart 8
108
312779E
Color Change
ProMix 2KS Recipe Change
Chart 9: A1-A2, same B without Dump Valves, 1 GFB
Valve
Time-Sequence
Dump A
Dump B
Color Change Solvent
Catalyst Change Solvent
Color Change A
Catalyst Change B
A
A
B
Air Chop Time
Solvent Chop Time
3rd Flush Chop Time
First Purge (one of these)
Air Purge
Solvent Purge
3rd Flush Valve
Final Purge (one of these)
Dispense A
Dispense B
A
A
A
B
B
Gun Flush Box Output #1
Gun Flush Box Output #2
0
1
2
3
4
5
6
Color Purge Time 0->1
Color Fill Time 1->2
First Purge Time 2->3
Chop Time (air/solvent or air/3rd flush) 3->4
Final Purge Time 4->5
Mixed Fill Time 5->6
Notes:
Purge from old recipe
Fill from new recipe
Load tables from new recipe
FIG. 117: Color Change Chart 9
ProMix 2KS Recipe Change
Chart 10: Recipe X, 0, OR 61 to Recipe 0 with Dump Valves
Valve
Time-Sequence
A
Dump A
Dump B
B
Color Change Solvent
Catalyst Change Solvent
Color Change A
Catalyst Change B
P0
P1
P2
Color Purge Time P0->P1
Catalyst Purge Time P1->P2
Color/Catalyst Purge Timers are
independent of Mixed Material Purge
Timers.
Air Chop Time
Solvent Chop Time
3rd Flush Chop Time
First Purge (one of these)
Air Purge
Solvent Purge
3rd Flush Purge
Final Purge (one of these)
Dispense A
Dispense B
Gun Trigger(s) by Operator
M0
M1
M2
M3
First Purge Time M0->M1
Chop Time (air/solvent or air/3rd flush) M1->M2
Final Purge Time M2->M3
Notes:
All timing from Recipe 0
FIG. 118: Color Change Chart 10
312779E
109
Color Change
ProMix 2KS Recipe Change
Chart 11: Recipe 0 OR 61 to Recipe X with Dump Valves
Valve
Time-Sequence
Dump A
Dump B
A
B
Color Change Solvent
Catalyst Change Solvent
Color Change A
Catalyst Change B
A
A
B
B
Air Purge
Solvent Purge
3rd Flush Purge
Dispense A
Dispense B
A
A
B
B
Gun Trigger(s) by Operator
0
1
2
3
Color Fill Time 0->1
Catalyst Fill Time 1->2
Mixed Fill Time 2->3
Notes:
Purge from old recipe
Fill from new recipe
Load tables from new recipe
FIG. 119: Color Change Chart 11
ProMix 2KS Recipe Change
Chart 12: Recipe X, 0, OR 61 to Recipe 0 without Dump Valves
Valve
Time-Sequence
Dump A
Dump B
Color Change Solvent
Catalyst Change Solvent
Color Change A
Catalyst Change B
Air Chop Time
Solvent Chop Time
3rd Flush Chop Time
First Purge (one of these)
Air Purge
Solvent Purge
3rd Flush Valve
Final Purge (one of these)
Dispense A
Dispense B
A
Gun Trigger(s) by Operator
0
1
2
3
4
Color Purge Time 0->1
First Purge Time 1->2
Chop Time (air/solvent or air/3rd flush) 2->3
Final Purge Time 3->4
Notes:
All timing from Recipe 0
FIG. 120: Color Change Chart 12
110
312779E
Color Change
ProMix 2KS Recipe Change
Chart 13: Recipe 0 OR 61 to Recipe X without Dump Valves
Valve
Time-Sequence
Dump A
Dump B
Color Change Solvent
Catalyst Change Solvent
Color Change A
Catalyst Change B
A
A
Air Purge
Solvent Purge
3rd Flush Purge
Dispense A
Dispense B
A
A
A
B
B
Gun Trigger(s) by Operator
0
1
2
Color Fill Time 0->1
Mixed Fill Time 1->2
Notes:
Purge from old recipe
Fill from new recipe
Load tables from new recipe
FIG. 121: Color Change Chart 13
ProMix 2KS Recipe Change
Chart 14: A1 to A2, B1 to B2 with All
Valve
Time-Sequence
Dump A
Dump B
A
B
Color Change Solvent
Catalyst Change Solvent
Color Change A
Catalyst Change B
A
B
A
B
P0
P1
P2
P3
P4
CC Purge/Fill Timers are independent
of Mixed Material Purge Timers. This
line defines when the Mixed Fill Time
begins. The longer of the two timers
defines when the Mixed Fill Time
begins.
Color Purge Time P0->P1
Color Fill Time P1->P2
Catalyst Purge Time P2->P3
Catalyst Fill Time P3->P4
Air Chop Time
Solvent Chop Time
3rd Flush Chop Time
First Purge (one of these)
Air Purge
Solvent Purge
3rd Flush Valve
Final Purge (one of these)
Dispense A
Dispense B
A
A
B
B
Gun Trigger(s) by Operator
M0
M1
M2
M3
M4
First Purge Time M0->M1
Chop Time (air/solvent or air/3rd flush) M1->M2
Final Purge Time M2->M3
Mixed Fill Time M3->M4
Notes:
Purge from old recipe
Fill from new recipe
Load tables from new recipe
1st On/Start
1st On Length/Duration
2nd On/Start
2nd On Length
Special Output #1
Special Output #2
Special Output #3
Special Output #4
Recipe Change Purge Active Output
Recipe Change Fill Active Output
FIG. 122: Color Change Chart 14
312779E
111
Color Change
ProMix 2KS Recipe Change
Chart 15: Same A, Same B
Valve
Time-Sequence
Dump A
Dump B
Color Change Solvent
Catalyst Change Solvent
Color Change A
Catalyst Change B
A
B
Air Chop Time
Solvent Chop Time
3rd Flush Chop Time
First Purge (one of these)
Air Purge
Solvent Purge
3rd Flush Purge
Final Purge (one of these)
Dispense A
Dispense B
A
A
B
B
Gun Trigger(s) by Operator
0
1
2
3
4
First Purge Time 0->1
Chop Time (air/solvent or air/3rd flush) 1->2
Final Purge Time 2->3
Mixed Fill Time 3->4
Notes:
Purge from old recipe
Fill from new recipe
Load tables from new recipe
FIG. 123: Color Change Chart 15
ProMix 2KS Recipe Change
Chart 16: External Color Change Option
Valve
Time-Sequence
Dump A
Dump B
Color Change Solvent
Catalyst Change Solvent
Color Change A
Catalyst Change B
Air Chop Time
Solvent Chop Time
3rd Flush Chop Time
First Purge (one of these)
Air Purge
Solvent Purge
3rd Flush Purge
Final Purge (one of these)
Dispense A
Dispense B
A
A
B
B
Gun Trigger(s) by Operator
0
1
2
3
4
5
First Purge Time 0->1
Chop Time (air/solvent or air/3rd flush) 1->2
Final Purge Time 2->3
Wait for External Color Change Ready signal
(before advance to step 4) 3->4
Mixed Fill Time 4->5
Notes:
Purge from old recipe
Fill from new recipe
Load tables from new recipe
Recipe Change Purge Active Output
Recipe Change Fill Active Output
FIG. 124: Color Change Chart 16
112
312779E
Color Change
ProMix 2KS Recipe Change
Chart 17: Recipe 0 OR 61 to Recipe X with Dump Valves and 3rd Flush Valve
Valve
Time-Sequence
Dump A
Dump B
A
B
Color Change Solvent
Catalyst Change Solvent
Color Change A
Catalyst Change B
A
A
B
B
Mixed Fill Time does not
begin until the Exiting Fill
Time and Color/Catalyst Fill
Time is complete.
Air Purge
Solvent Purge
3rd Flush Purge
*Exiting Fill
Dispense A
Dispense B
A
A
B
B
Gun Trigger(s) by Operator
0
1
2
3
*Exiting Fill Time 0->2
Color Fill Time 0->1
Catalyst Fill Time 1->2
Mixed Fill Time 2->3
Notes:
Mixed Material Purge Timers from old recipe
CC Purge/Fill Timers and Mixed Fill Time from new recipe
*Exiting Fill Source and Length are Programmable
Load tables from new recipe
FIG. 125: Color Change Chart 17
ProMix 2KS Recipe Change
Chart 18: Recipe 0 OR 61 to Recipe X without Dump Valves and 3rd Flush Valve
Valve
Time-Sequence
Dump A
Dump B
A
Color Change Solvent
Catalyst Change Solvent
Color Change A
Catalyst Change B
A
A
A
A
Air Purge
Solvent Purge
3rd Flush Purge
*Exiting Fill
Dispense A
Dispense B
A
B
B
Gun Trigger(s) by Operator
0
1
2
3
*Exiting Fill Time 0->1
Color Fill Time 1->2
Mixed Fill Time 2->3
Notes:
Mixed Material Purge Timers from old recipe
CC Purge/Fill Timers and Mixed Fill Time from new recipe
*Exiting Fill Source and Length are Programmable
Load tables from new recipe
FIG. 126: Color Change Chart 18
312779E
113
Color Change
114
312779E
Alarms and Warnings
Alarms and Warnings
Table 16: System Alarm/Warning Codes
Code Description
Details
E-1
Communication Error Alarm
Page 116
E-2
Potlife Alarm
Page 116
System Alarms
E-3
Ratio High Alarm
Page 117
E-4
Ratio Low Alarm
Page 118
System alarms alert you of a problem and help prevent
off-ratio spraying. If an alarm occurs, operation stops
and the following occurs:
E-5
Overdose A/B Dose Too Short
Alarm
Page 119
E-6
Overdose B/A Dose Too Short
Alarm
Page 119
E-7
Dose Time A Alarm
Page 120
E-8
Dose Time B Alarm
Page 120
E-9
Mix in Setup Alarm
Page 121
E-10
Remote Stop Alarm
Page 121
E-11
Purge Volume Alarm
Page 121
E-12
CAN Network Communication Error Page 122
Alarm
E-13
High Flow Alarm
Page 122
E-14
Low Flow Alarm
Page 122
E-15
System Idle Warning
Page 123
E-16
Setup Change Warning
Page 123
E-17
Power On Warning
Page 123
E-18
Defaults Loaded Warning
Page 123
E-19
I/O Alarm
Page 124
E-20
Purge Initiate Alarm
Page 125
E-21
Material Fill Alarm
Page 125
E-22
Tank A Low Alarm
Page 125
E-23
Tank B Low Alarm
Page 125
E-24
Tank S Low Alarm
Page 125
E-25
Auto Dump Complete Alarm
Page 126
E-26
Color/Catalyst Purge Alarm
Page 126
E-27
Color/Catalyst Fill Alarm
Page 126
NOTE: Do not use the fluid in the line that was dispensed off ratio as it may not cure properly.
•
•
Buzzer sounds (for E-2 only; see page 32 to set for
all alarms).
Status bar on the EasyKey shows the alarm E-Code
with a description (see Table 16).
System Warnings
Table 16 lists the System Warning Codes. Warnings do
not stop operation or sound an alarm. They are saved in
the date/time stamped log, which can be viewed on a
PC, using the ProMix 2KS Web Interface (see manual
313386).
To Reset Alarm and Restart
NOTE: When an alarm occurs be sure to determine the
E-Code before resetting it. See Table 16. If you forget
which E-Code occurred, use the Alarms Screen (page
27) to view the last 10 alarms, with date and time
stamps.
To reset alarms, see Table 17. Many alarms can be
cleared by simply pressing the Alarm Reset
312779E
key.
115
Alarm Troubleshooting
Alarm Troubleshooting
Table 17. Alarm Troubleshooting
E-1: COMM ERROR
Cause
No power to the EasyKey.
Solution
Connect power to EasyKey.
No power to Fluid Station. The intrinsically safe power
Verify that the cable is correctly connected. See Installacable between the EasyKey and Fluid Station is not con- tion manual.
nected.
No power to Fluid Station. The fluid control board fuse is Verify condition of fuse and replace if necessary. See
blown.
Repair-Parts manual.
The fiber optic cable between the EasyKey and Fluid
Station is not connected.
Verify that the cable is correctly connected. See Installation manual.
The fiber optic cable is cut or bent.
Verify that the cable has not been cut or bent at a radius
smaller than 1.6 in. (40 mm).
Dirty fiber optic cable ends.
Disconnect fiber optic cable ends and clean with a
lint-free cloth.
A communication cable or connector failed.
Replace cable.
E-2: POTLIFE ALARM
Cause
Solution
The potlife time has been exceeded for the mixed material.
Press the Alarm Reset
NOTICE
To prevent mixed material from curing in the equipment, do not shut off power. Follow one of the solutions at right.
116
key to stop the audible
alarm. Purge the system with solvent, fresh mixed material, or a new color:
•
Solvent Purge - See Purging Mixed Material on
page 95. The system purges until the preset purge
time is complete.
•
New Mixed Material Purge - Go to Mix mode and
spray the required volume to restart the timer.
•
Color Change - Perform a color change, see page
102.
312779E
Alarm Troubleshooting
Table 17. Alarm Troubleshooting
E-3: RATIO HIGH ALARM
Sequential Dosing System
The mix ratio is higher than the set tolerance on the previous dose cycle.
Dynamic Dosing System
The mix ratio is higher than the set tolerance for an A to B component volume comparison.
Cause
There is too little restriction in the system.
Solution
•
Check that the system is fully loaded with material.
•
Check that the supply pump’s cycle rate is set properly.
•
Check that the spray tip/nozzle is properly sized for
the flow and application, and that it is not worn.
•
Check that the fluid regulator is set properly.
If the alarm occurs during start up, after purging, the flow Restrict gun needle travel to slow down the initial fluid
rate was probably too high.
delivery rate until fluid hoses are loaded with material.
If the alarm occurred after you were spraying for some
time, the pressures from the fluid supplies could be
unbalanced.
Adjust component A and B fluid supply regulator pressures until they are about equal. If the pressures are
already about equal, verify that component A and B dose
valves are operating properly.
Slow actuation of the component A or B valves. This can Manually operate the Dispense A and B solenoid valves
be caused by:
as instructed in the ProMix 2KS Repair-Parts manual to
check operation.
•
Air pressure to the valve actuators is too low.
•
Increase air pressure. Air pressure must be 75-120
psi (0.52-0.84 MPa, 5.2-8.4 bar); 120 psi is recommended.
•
Something is restricting the solenoid or tubing and
interrupting valve actuation air.
•
There may be dirt or moisture in the air supply. Filter
appropriately.
•
A dose valve is turned in too far.
•
Refer to Table 13: Mix Manifold Valve Settings,
page 89, for adjustment guidelines.
•
Fluid pressure is high and air pressure is low.
•
Adjust air and fluid pressure. See recommended air
pressure above.
312779E
117
Alarm Troubleshooting
Table 17. Alarm Troubleshooting
E-4: RATIO LOW ALARM
Sequential Dosing System
The mix ratio is lower than the set tolerance on the previous dose cycle.
Dynamic Dosing System
The mix ratio is lower than the set tolerance for an A to B component volume comparison.
Cause
There is too much restriction in the system.
Solution
•
Check that the system is fully loaded with material.
•
Check that the supply pump’s cycle rate is set properly.
•
Check that the spray tip/nozzle is properly sized for
the flow and application, and that it is not clogged.
•
Check that the fluid regulator is set properly.
If the alarm occurs during start up, after purging, the flow Restrict gun needle travel to slow down the initial fluid
rate was probably too high.
delivery rate until fluid hoses are loaded with material.
If the alarm occurred after you were spraying for some
time, the pressures from the fluid supplies could be
unbalanced.
Adjust component A and B fluid supply regulator pressures until they are about equal. If the pressures are
already about equal, verify that component A and B dose
valves are operating properly.
Slow actuation of the component A or B valves. This can Manually operate the Dispense A and B solenoid valves
be caused by:
as instructed in the ProMix 2KS Repair-Parts manual to
check operation.
•
Air pressure to the valve actuators is too low.
•
Increase air pressure. Air pressure must be 75-120
psi (0.52-0.84 MPa, 5.2-8.4 bar); 120 psi is recommended.
•
Something is restricting the solenoid or tubing and
interrupting valve actuation air.
•
There may be dirt or moisture in the air supply. Filter
appropriately.
•
A dose valve is turned in too far.
•
Refer to Table 13: Mix Manifold Valve Settings,
page 89, for adjustment guidelines.
•
Fluid pressure is high and air pressure is low.
•
Adjust air and fluid pressure. See recommended air
pressure above.
118
312779E
Alarm Troubleshooting
Table 17. Alarm Troubleshooting
E-5: OVERDOSE A/B DOSE TOO SHORT ALARM and
E-6: OVERDOSE B/A DOSE TOO SHORT ALARM
E-5: the A dose overshoots and, when combined with B, is too large for the mix chamber capacity.
E-6: the B dose overshoots and forces an A side dose that, when combined with B, is too large for the mix chamber
capacity.
Cause
Solution
Valve seal or needle/seat are leaking. Check FIG. 17
Repair the valve (see valve manual 312782).
Totals Screen on page 26. If A and B are dosing simultaneously (sequential dosing only), there is a leak.
Sampling valve is leaking.
Tighten or replace valve.
Flow meter fluctuations caused by pressure pulsations.
Check for pressure pulsations:
1. Close all the manifold valves.
2. Turn on the circulating pumps and all the booth
equipment (such as fans and conveyors).
3. Check if the ProMix 2KS is reading any fluid flow.
4. If the ProMix 2KS shows there is fluid flow and there
are no leaks from the gun or any other seals or fittings, the flow meters are probably being affected by
pressure pulsations.
5. Close the fluid shutoff valve between the fluid supply
system and the flow meter. The flow indication
should stop.
6. If necessary, install pressure regulators or a surge
tank on the fluid inlets to the ProMix 2KS to reduce
the fluid supply pressure. Contact your Graco distributor for information.
Slow actuation of component A or B valves.
See E-3: RATIO HIGH ALARM and E-4: RATIO LOW
ALARM, pages 117-118.
Running a high mix ratio and a high flow rate.
It may be necessary to restrict the flow rate through the
component B dose valve by adjusting its hex nut (E). See
page 88.
312779E
119
Alarm Troubleshooting
Table 17. Alarm Troubleshooting
E-7: DOSE TIME A ALARM and E-8: DOSE TIME B ALARM
E-7: gun trigger input is active (AFS or Integration) and no A meter pulses are detected during the dose time
selected.
E-8: gun trigger input is active (AFS or Integration) and no B meter pulses are detected during the dose time
selected.
Cause
Solution
System is in Mix mode and gun is only partially triggered, Fully trigger the gun.
allowing air but no fluid to pass through gun.
Fluid flow rate is too low.
Increase flow rate.
Dose time setting is too short for the current flow rate.
Increase the dose time setting.
Flow meter or cable failed or flow meter clogged.
To check meter sensor operation, remove meter cap to
expose sensor. Pass a ferrous metal tool in front of the
sensor.
TI12792a
If there is a meter or cable failure, you will see a large difference between the amount of fluid dispensed and the
flow meter volume displayed by the EasyKey. Clean or
repair meter as necessary. Also see meter manual
308778.
Follow Meter Calibration procedure, page 100.
Slow actuation of component A or B valves.
See E-3: RATIO HIGH ALARM and E-4: RATIO LOW
ALARM, pages 117-118.
The supply pump is not turned on.
Turn on the supply pump.
System is in Mix mode with 0 volume entered for Min
Material Fill Volume (see Option Screen 1, page 36),
and Fuse F1 is blown.
Verify condition of fuse and replace if necessary. See
Repair-Parts manual.
120
312779E
Alarm Troubleshooting
Table 17. Alarm Troubleshooting
E-9: MIX IN SETUP ALARM
Cause
Attempt to operate system while in Setup mode.
Solution
System must be in Standby to change current recipe,
and cannot be operated.
E-10: REMOTE STOP ALARM
Cause
Solution
Automation has requested that the system abort all oper- Abort operations. Troubleshoot automation system.
ations.
E-11: PURGE VOLUME ALARM
Cause
Solution
ProMix 2KS solvent flow switch is not activated while
purging.
Verify that the gun is not shut off and that the solvent flow
switch is activated while purge is taking place.
Minimum flush volume is not achieved.
Increase solvent supply or decrease minimum volume
setting.
No meter pulses during Color/Catalyst Dump.
Color change solvent supply not set up or functional.
Check Color Change setup.
312779E
121
Alarm Troubleshooting
Table 17. Alarm Troubleshooting
E-12: CAN COMM ERROR ALARM
Cause
Communication between the Color Change Module and
the Fluid Station is interrupted.
Communication between the Color Change Module and
the Fluid Station is interrupted. The fluid control board
fuse is blown.
Solution
•
Verify that all cables are connected securely and that
the Color Change power LED turns on. If the power
LED does not turn on, the problem is probably
caused by a bad connection. The nut on the connector must make at least 5 complete turns to ensure a
good connection. If the power LED still does not
light, the cable or board is bad.
•
Check the color change board DIP switch settings.
See the Installation manual.
•
Check the fluid plate board DIP switch setting. An
incorrect setting will not cause E-12 alarms, but a
correct setting will help prevent E-12 caused by electrical noise. See the Installation manual.
•
Check EasyKey software version (displayed at power
up for all versions and when the lock key is pressed
for version 2.02.000 and above). If older than
1.06.002, upgrade. Be sure to save settings through
BWI or AWI before upgrading, as they will be erased.
•
The sticker on the color change board shows the
software part number and version, for example
15T270
1.01. If the version is older than 1.01,
replace the board.
•
If all software versions and DIP switch settings are
correct and you still have E-12 alarms, then the system has a bad connection, bad cable, or bad circuit
board. Use a multimeter on the CAN connectors to
test whether there is a good connection between
systems. If there is, you have a bad circuit board. If
there is not, you have a bad connector, connection,
or cable.
Verify condition of fuse and replace if necessary. See
Repair-Parts manual.
E-13: HIGH FLOW ALARM or E-14: LOW FLOW ALARM (may also be set as Warnings)
Cause
Fluid system is producing too much or too little flow.
122
Solution
Troubleshoot fluid system for restrictions, leaks,
exhausted fluid supply, incorrect settings, etc. Increase
or decrease flow rate, as required.
312779E
Alarm Troubleshooting
Table 17. Alarm Troubleshooting
E-15: SYSTEM IDLE WARNING
Cause
Solution
Mix input is high, but the gun has not been triggered for 2 If not painting, clear alarm and resume operation.
minutes.
If painting, shut down and inspect fluid meter.
E-16: SETUP CHANGE WARNING
Cause
The system setup parameters have been changed.
Solution
No action required. See Event Log available through
advanced web interface.
E-17: POWER ON WARNING
Cause
Solution
The power to the system has been cycled.
No action required. See Event Log available through
advanced web interface.
Voltage becoming too low due to weak power supply.
Replace power supply. See Repair-Parts manual.
Power wires are disconnected or making intermittent
contact.
Check that all wires are securely connected. Ensure that
wires are not stretched too tightly.
Reset button has been pushed (S1 on EasyKey display
board, S3 on Autokey).
No action required. See Event Log available through
advanced web interface.
Software update is initiated on EasyKey.
No action required. See Event Log available through
advanced web interface.
E-18: DEFAULTS LOADED WARNING
Cause
The factory defaults have been installed on the system.
312779E
Solution
No action required. See Event Log available through
advanced web interface.
123
Alarm Troubleshooting
Table 17. Alarm Troubleshooting
E-19: I/O ALARM
Cause
Solution
The Mix and Purge digital inputs are on at the same time. Ensure that only one input is on at a time. At least 1 sec
delay is required when switching from Mix to Purge or
vice versa.
NOTE: The I/O alarm incorporates several sub-alarms relating to internal data issues, as detailed below. These
alarms are only seen in the Alarm log or through BWI or AWI, and may not apply to all software versions.
FP Reboot (Fluid Plate Reboot): Occurs if the system
detects a fluid plate control board reboot or power cycle
not triggered from the EasyKey. The system reverts to
Recipe 61, and mixed material may be in the lines.
Flush the system or perform a color change. If possible,
identify the origin of the reboot or power cycle.
Autokey Lost: Occurs if the Autokey is lost or changed
after having been detected. (A short term loss of the
Autokey will not be registered.) Some system functions
may become unavailable. For example, an automatic
system will not respond to PLC or robot control.
Reinstall the Autokey, or verify that the Autokey is set
properly.
Verify that the source data is from a valid recipe (1-60).
Illegal Source: Occurs if a recipe outside of the range
1-60 is detected as the source data for global recipe data
copies. This is possible if an invalid configuration file is
sent to the EasyKey.
Verify that the Autokey is set properly or that the configu2K/3K Error: Occurs if the recipe data is incompatible
with the current Autokey setting (2K or 3K). This is possi- ration file is valid.
ble if the Autokey is changed or an invalid configuration
file is sent to the EasyKey.
Init Error: Occurs if the recipe data codes specifying the Verify that the configuration file is valid.
type of machine they were made on are not what is
expected. For example, a 3KS machine receives a configuration file originally made on a 2KS machine.
Config Error: Occurs if a configuration file sent to the
EasyKey specifies a different hardware setup than what
exists. For example, the configuration file specifies 2
color change boards but only 1 is present.
Verify that the configuration file specifications and the
hardware conform.
Range Error: Occurs if a valve used in a recipe is not
present in the current hardware setup. For example, a
recipe calls for valve 30 but the system has only 12
valves.
Verify that the recipe specifications and the hardware
conform.
LC Error (Level Control Error): Occurs if level control Verify that the Autokey is set properly.
data is received by the EasyKey, and the current Autokey
setting (2K or 3K) has changed since the level control
data was originally initialized.
LC Range Error (Level Control Range Error): Occurs Set level control data correctly.
if level control data includes a valve range exceeding the
capability of the machine.
MB Overflow (Modbus Overflow): Occurs if the Modbus connection to a PLC experiences data overflow.
124
Verify the Modbus protocol to the EasyKey.
312779E
Alarm Troubleshooting
Table 17. Alarm Troubleshooting
E-20: PURGE INITIATE ALARM
Cause
Solution
System detects atomizing air to the gun when purge is
selected.
Shut off gun air.
For systems with a gun flush box, gun is not in the box
when purge is selected.
Place gun in gun flush box. Verify that gun flush box is
operating properly.
For systems with auto dump on, gun is not in the box
when auto dump is initiated.
Place gun in gun flush box. Verify that gun flush box is
operating properly.
For systems with a gun flush box, Fuse F2 is blown.
Verify condition of fuse and replace if necessary. See
Repair-Parts manual.
E-21: MATERIAL FILL ALARM
Cause
For systems with minimum mixed material fill volume
entered, the system detects that fill volume is not
achieved during mixed material fill time.
Solution
Check for restrictions or leaks in the fluid supply system.
Check if the fill volume is properly configured:
•
•
For systems without color change and with minimum
mixed material fill volume entered, Fuse F1 is blown.
Adjust fill volume.
Adjust fill time.
Verify condition of fuse and replace if necessary. See
Repair-Parts manual.
E-22: TANK A LOW ALARM, E-23: TANK B LOW ALARM, or E-24: TANK S LOW ALARM
Cause
The tank volume reaches the low-level threshold.
Solution
The EasyKey screen will display the alarm and prompt
the user to do one of the following:
•
•
312779E
Refill tank volume to clear the alarm.
Resume mixing by selecting “Spray 25% of remaining volume.” If this selection is chosen, a second
alarm will occur after 25% of the remaining volume is
mixed. Refill tank volume to clear the alarm.
125
Alarm Troubleshooting
Table 17. Alarm Troubleshooting
E-25: AUTO DUMP COMPLETE ALARM
Cause
Solution
A potlife alarm is active for more than 2 minutes, the gun Be sure to spray all mixed material before potlife expires.
flush box is enabled and gun is in the gun flush box, and
an auto dump flush sequence is complete.
E-26: COLOR/CATALYST PURGE ALARM
Cause
Solution
System detects no meter pulses, or a disruption in meter Check that meter cable is connected.
pulses lasting longer than 1 second throughout the
Color/Catalyst purge time duration.
Clean or repair meter.
E-27: COLOR/CATALYST FILL ALARM
Cause
Solution
System detects no meter pulses, or system must detect
at least 10cc of material from each side throughout the
Color/Catalyst fill time duration.
Check that meter cable is connected.
Gun, dump valve, or correct color/catalyst valve not
open.
Open the valve.
Exhausted fluid supply.
Check fluid level and refill if necessary.
Switch settings (S3-S6) on color change board do not
match hardware configuration.
Verify that color change board switches are set correctly.
See installation manual.
Fuse F1, F2, or both are blown.
Verify condition of fuses and replace if necessary. See
Repair-Parts manual.
126
Clean or repair meter.
312779E
Schematic Diagrams
Schematic Diagrams
System Pneumatic Schematic
COLOR
CHANGE
CONTROL
A B
E
BE
OS
CL 2 TU
5/3 N
E
OP
DOSE A
VALVE
12 VDC
4-WAY SOLENOID
A B
E
BE
OS
CL 2 TU
5/3 N
E
OP
A B
E
BE
OS
CL 2 TU
5/3 N
E
OP
DOSE B
VALVE
12 VDC
05
AIR INPUT
4-WAY SOLENOID
CONTROL AIR
3/8 AIR FILTER
MANUAL DRAIN
5 MICRON
WALL MOUNT ONLY
4-WAY SOLENOID
A B
12 VDC
A B
AIR EXHAUST MUFFLER
PURGE AIR
PURGE A
VALVE
E
BE
OS
CL 2 TU
5/3 N
E
OP
PURGE B
VALVE
E
BE
OS
CL 2 TU
5/3 N
E
OP
PURGE C
VALVE
(OPTIONAL)
E
DUMP A
VALVE
(OPTIONAL)
E
DUMP B
VALVE
(OPTIONAL)
12 VDC
3-WAY SOLENOID
A
UB
2T
5/3 N
E
OP
A
UB
2T
5/3 N
E
OP
AIR INPUT
12 VDC
3-WAY SOLENOID
3-WAY SOLENOID
E
GFB 1
VALVE
(OPTIONAL)
E
GFB 2
VALVE
(OPTIONAL)
A
UB
2T
5/3 N
E
OP
A
UB
2T
5/3 N
E
OP
12 VDC
3-WAY SOLENOID
COLOR 13
COLOR 14
COLOR 15
COLOR 16
COLOR 17
COLOR 18
COLOR 19
COLOR 20
COLOR 21
COLOR 22
COLOR 23
COLOR 24
COLOR 25
COLOR 26
COLOR 27
COLOR 28
COLOR 29
COLOR 30
MAC
36 SERIES SOLENOID VALVES
12 VDC
312779E
COLOR 1
COLOR 2
COLOR 3
COLOR 4
COLOR 5
COLOR 6
COLOR 7
COLOR 8
COLOR SOLVENT
COLOR 9
COLOR 10
COLOR 11
COLOR 12
CATALYST 1
CATALYST 2
CATALYST 3
CATALYST 4
CATALYST SOLVENT
12 VDC
4-WAY SOLENOID
MANIFOLD
1/4 TUBE
12 VDC
4-WAY SOLENOID
TO MANIFOLD
MANIFOLD
FLUSH AIR TO FLUID INLET
1/4 TUBE
AIR EXHAUST MUFFLER
COLOR
VALVE
STACKS
127
Schematic Diagrams
System Electrical Schematic
NOTE: The electrical schematic illustrates all possible wiring expansions in a ProMix 2KS system. Some components shown are not included with all systems.
Non-Hazardous Area
NON-HAZARDOUS AREA
OPERATOR INTERFACE
DC OK
+24 VDC
COMMON
COMMON
+
+
-
1
2
POWER
SUPPLY
L1
N
L1 85-250 VAC
N
LINE
FILTER
L1
N
GND
1
2
3
POWER HARNESS
BARRIER
BOARD
J1
1
2
3
4
5
J5
1
2
3
J4
1
2
3
UNUSED
UNUSED
UNUSED
UNUSED
UNUSED
L1
N
GND
GND LUG
GND N L1
85-250
VAC
1 POWER
2 ROCKER
1A SWITCH
1B
2A
2B
OPEN
OPEN
HARNESS
L1 TERMINAL
N
BLOCK
GND
+12VDC I/S (RED)
COM (BLACK)
SHIELD
CABLE
+24VDC
OPEN
COMMON
(50' STD.)/
(100' OPTION)
ALARM
MEMBRANE
SWITCH
WITH
RIBBON
CABLE
J4
1
2
3
4
5
6
7
8
9
10
11
DISPLAY
BOARD
J9
J6
RJ45
1
2
3
4
+
-
+
-
RJ45
3'
POWER DIST.
TERMINAL
BLOCKS
J2
+
-
+
-
+
-
+
RJ45
1
2
3
4
J5 5
6
7
8
9
10
J2
J3
REMOTE
I/O
INTEGRATION
BOARD
SHIELD
DISPLAY
1
2
3
4
5
6
7
8
9
10
11
12
13
14
15
16
17
18
19
20
-
RJ45
FLOW CONTROL CAL. (BLK)
GUN TRIGGER (WHT)
DIGITAL IN COMMON (RED)
REMOTE STOP (GRN)
ALARM RESET (BRN)
ALARM OUTPUT (BLU)
DIGITAL OUTPUT COMMON (ORG)
POT LIFE (YEL)
FLOW RATE ANALOG IN (PUR)
FLOW RATE ANALOG COMMON (GRAY)
J4
1
2
3
4
5
6
7
8
9
10
1
2
3
4
5
6
1
2
3
4
5
6
7
8
MIX INPUT
PURGE INPUT
JOB COMPLETE INPUT
EXTERNAL CLR CHG READY
RESET ALARM INPUT
DIGITAL INPUT COMMON
DIGITAL INPUT COMMON
RECIPE BIT 0 INPUT
RECIPE BIT 1 INPUT
RECIPE BIT 2 INPUT
RECIPE BIT 3 INPUT
RECIPE BIT 4 INPUT
RECIPE BIT 5 INPUT
RECIPE CHANGE INPUT
1
2
3
4
5
6
7
8
DIGITAL OUTPUT COMMON/POWER
PURGE/RECIPE CHG ACTIVE OUTPUT
MIX ACTIVE OUTPUT
MIX READY OUTPUT
FILL ACTIVE
FLOW CAL. ACTIVE
FLOW RATE ALARM OUTPUT
DIGITAL OUTPUT COMMON/POWER
1
2
3
DIGITAL OUTPUT COMMON/POWER
SPECIAL OUTPUT #1
SPECIAL OUTPUT #2
SPECIAL OUTPUT #3
SPECIAL OUTPUT #4
DIGITAL OUTPUT COMMON/POWER
J5 4
5
6
I/O HARNESSES
J10
1
2
3
4
5
6
RS485 INTEGRATION A (WHT/BLU)
RS485 INTEGRATION B (BLU/WHT)
RS485 INTEGRATION GROUND (SHIELD)
RS485 NETWORK A (WHT/ORG)
RS485 NETWORK B (ORG/WHT)
RS485 NETWORK GROUND (SHIELD)
1
2
3
4
5
6
(+24) YEL
(COM) GRAY
ORG
BRN
RED
TERMINAL
BLOCKS
BEACON
CABLE
J7
J8
P1
RJ45
FO IN (BLK)
FO OUT (BLU)
RJ45
3'
RJ45
BULKHEAD
RJ45
RJ45
3'
(25'-200' OPTIONS)
128
WEB SERVER
MODULE
312779E
Schematic Diagrams
System Electrical Schematic
NOTE: The electrical schematic illustrates all possible wiring expansions in a ProMix 2KS system. Some components shown are not included with all systems.
Hazardous Area
HAZARDOUS AREA
FLUID PANEL CONTROL BOX
FLUID
PANEL
CONTROL
BOARD
J10
1 +12VDC I/S
2 COM
3 SHIELD
3X CABLE
J3
1
2
3
4
5
6
J12
1
2
3
4
5
6
J13
J5
MH2
J11
PWR (RED)
COM (BLACK)
SIG (WHITE)
SHIELD/GRN
PWR (RED)
COM (BLACK)
SIG (WHITE)
SHIELD/GRN
PWR (RED)
COM (BLACK)
SIG (WHITE)
SHIELD/GRN
UNUSED
UNUSED
UNUSED
UNUSED
UNUSED
UNUSED
1
2
3
4
5
6
FLOW METER A
FLOW METER SOLVENT
V/P ANALOG OUT (WHT)
PRESS. (GRN)
+12 V (RED)
GND (BLK)
CHASSIS (BARE)
GROUND
TERMINAL
(10')/
(40')
3
2
5
4
1
6' STD.
(3'-100' OPTIONS)
GRD (BLK)
+12VDC (RED)
SHIELD (BARE)
CAN H (WHT)
CAN L (BLU)
3
2
5
4
1
CLR 8
MANIFOLD
CLR 7
3
2
5
4
1
GRD (BLK)
+12VDC (RED)
SHIELD (BARE)
CAN H (WHT)
CAN L (BLU)
CLR 6
BOOTH
CONTROL
BOARD
CLR 5
CLR 4
CLR 3
J14
J9
312779E
FO OUT
(BLU)
J4
FO IN
(BLK)
J6
J1
BLACK
RED
BLACK
RED
BLACK
RED
BLACK
RED
BLACK
RED
BLACK
RED
6
5
4
3
2
1
6
5
4
3
2
1
BLACK
RED
BLACK
RED
BLACK
RED
BLACK
RED
BLACK
RED
BLACK
RED
1
2
3
4
5
6
7
8
9
10
SIG
COM
SIG
COM
SIG
COM
SIG
COM
SIG
COM
MANIFOLD
CLR 1
DUMP B
GFB #1
GFB #2
DUMP A
MANIFOLD
NOT USED
SOL CLR
PURGE A
NOT USED
NOT USED
DOSE B
DOSE A
AIR FLOW SWITCH 1
AIR FLOW SWITCH 2
1
2
3
4
5
J2
J4
SIG (RED)
COM (BLK)
TECNO
V/P
+ PRESSURE (GRN)
COM (RED)
EX+ (WHT)
- PRESSURE (BLK)
SHIELD (BARE)
FLUID
PRESS.
SENS.
1 4 5 2 3
COLOR
BOARD 1
(COLORS
1 THRU 12,
CATALYST
1 THRU 4)
1
2
3
4
5
6
J8
J9
+12VDC
COM
+12VDC
COM
+12VDC
COM
1
2
3
4
5
6
J15
J16
+12VDC
COM
+12VDC
COM
+12VDC
COM
1
2
3
4
5
6
J7/J11
J14
J10
MANIFOLD
6
5
4
3
2
1
COM
+12VDC
COM
+12VDC
COM
+12VDC
6
5
4
3
2
1
COM
+12VDC
COM
+12VDC
COM
+12VDC
CLR 12
6
5
4
3
2
1
COM
+12VDC
COM
+12VDC
COM
+12VDC
CAT 2
CLR 9
CLR 10
CLR 11
CAT 4
CAT 3
CAT 1
SOL CAT
1 4 5 2 3
6' STD.
J7/J11
PURGE C
PURGE B
1
2
+12VDC
COM
+12VDC
COM
+12VDC
COM
12 VDC
3-WAY SOLENOID
6
5
4
3
2
1
6
5
4
3
2
1
12 VDC
4-WAY SOLENOID
J15
1 FLOW
2 CONTROL
3 BOARD
4
5
J7/J11
CLR 2
J8
J1
1
2
3
4
5
6
50' STD.
J7
I.S. METERS
FLOW METER B
CLR 21
CLR 20
CLR 19
CLR 18
CLR 17
CLR 16
CLR 15
CLR 14
CLR 13
MANIFOLD
+12VDC
COM
+12VDC
COM
+12VDC
COM
1
2
3
4
5
6
+12VDC
COM
+12VDC
COM
+12VDC
COM
1
2
3
4
5
6
+12VDC
COM
+12VDC
COM
+12VDC
COM
1
2
3
4
5
6
1 4 5 2 3
COLOR
BOARD 2
(COLORS
13 THRU 30)
J8
J15
J14
J9
J16
J10
MANIFOLD
6
5
4
3
2
1
COM
+12VDC
COM
+12VDC
COM
+12VDC
6
5
4
3
2
1
COM
+12VDC
COM
+12VDC
COM
+12VDC
CLR 25
6
5
4
3
2
1
COM
+12VDC
COM
+12VDC
COM
+12VDC
CLR 28
CLR 22
CLR 23
CLR 24
CLR 26
CLR 27
CLR 29
CLR 30
SOLVENT FLOW SWITCH
GFB 1 PRESSURE SWITCH
GFB 2 PRESSURE SWITCH
129
130
DISPLAY BOARD
P1
BARRIER BOARD
J9
1
2
3
4
RJ45
DISPLAY BOARD
RJ45
J5
J1
J4
24 VDC+
IN
RED 18 AWG
BLACK 18 AWG
RED/BLACK/WHITE 22 AWG
J5-1
J5-2
J5-3
SHIELD/GRND
COMMON (BLACK)
+12 VDC I/S (WHITE)
UNUSED
UNUSED
J1-2
J1-1
UNUSED
UNUSED
J1-4
J1-3
UNUSED
RED 18 AWG
BLACK 18 AWG
J1-5
J4-1
J4-2
J4-3
GREEN/BLACK/WHITE 22 AWG
IS POWER
12 VDC
+
+
+
+
-
RED 18 AWG
BLACK 18 AWG
DC OK
+
-
-
24 VDC+
HIGH
VOLTAGE
IN
POWER SUPPLY
24 VDC+
OUTPUT
GND LUG
COMMON
RJ45
BROWN 16 AWG
RED 16 AWG
RJ45 BULKHEAD
N
N
L
L
2
1
POWER
ROCKER SWITCH
2A
1A
+
-
BROWN 16 AWG
RED 16 AWG
ALARM
LINE FILTER
N
L1
N
L1
GND
N
L1
GND
TERMINAL BLOCKS
BROWN 16 AWG
RED 16 AWG
GRN/YEL 16 AWG
Schematic Diagrams
EasyKey Electrical Schematic
312779E
312779E
1:1
2:1
3:1
4:1
5:1
6:1
7:1
8:1
25cc Dose
50cc Dose
Ratio
9:1 10:1 11:1 12:1 13:1 14:1 15:1 16:1 17:1 18:1 19:1 20:1 21:1 22:1 23:1 24:1 25:1 26:1 27:1 28:1 29:1 30:1
10cc Dose
Fluid: Hydraulic Oil
Viscosity: 65.7 centipoise
Ratio Tolerance: 5%
Valve Setting: 1.25 Turns Open (standard setting)
A and B Feed Pressure: 300 psig
Test Conditions
0
500
1000
1500
2000
2500
3000
3500
3800
NOTE: Maximum system flow is 3800 cc/min.
Meter Performance Data (G3000 on A and B)
Meter Performance Data (G3000 on A and B)
131
Flow Rate (cc/min)
132
1:1
2:1
3:1
4:1
5:1
6:1
7:1
8:1
10cc Dose
25cc Dose
25cc Dose
50cc Dose
Ratio
9:1 10:1 11:1 12:1 13:1 14:1 15:1 16:1 17:1 18:1 19:1 20:1 21:1 22:1 23:1 24:1 25:1 26:1 27:1 28:1 29:1 30:1
50cc Dose
Fluid: Hydraulic Oil
Viscosity: 65.7 centipoise
Ratio Tolerance: 5%
Valve Setting: 1.25 Turns Open (standard setting)
A and B Feed Pressure: 300 psig
Test Conditions
0
500
1000
1500
2000
2500
3000
3500
3800
NOTE: Maximum system flow is 3800 cc/min.
Meter Performance Data (G3000 on A, Coriolis on B)
Meter Performance Data (G3000 on A, Coriolis on B)
312779E
Flow Rate (cc/min)
Technical Data
Technical Data
Maximum fluid working pressure . . . . . . . . . . . . . . . Base system: 4000 psi (27.58 MPa, 275.8 bar)
Low pressure color change: 300 psi (2.07 MPa, 20.6 bar)
Coriolis meter: 2300 psi (15.86 MPa, 158.6 bar)
RoboMix system: 190 psi (1.31 MPa, 13.1 bar)
Flow control: 190 psi (1.31 MPa, 13.1 bar)
Maximum working air pressure . . . . . . . . . . . . . . . . 100 psi (0.7 MPa, 7 bar)
Air supply . . . . . . . . . . . . . . . . . . . . . . . . . . . . . . . . . 75 - 100 psi (0.5 - 0.7 MPa, 5.2 - 7 bar)
Air filter inlet size . . . . . . . . . . . . . . . . . . . . . . . . . . . 3/8 npt(f)
Air filtration for air logic and purge air
(Graco-supplied). . . . . . . . . . . . . . . . . . . . . . . . . . . . 5 micron (minimum) filtration required; clean and dry air
Air filtration for atomizing air (user-supplied) . . . . . . 30 micron (minimum) filtration required; clean and dry air
Mixing ratio range . . . . . . . . . . . . . . . . . . . . . . . . . . . 0.1:1- 50:1*
On-ratio accuracy . . . . . . . . . . . . . . . . . . . . . . . . . . . up to + 1%, user selectable
Fluids handled . . . . . . . . . . . . . . . . . . . . . . . . . . . . . one or two component:
• solvent and waterborne paints
• polyurethanes
• epoxies
• acid catalyzed varnishes
• moisture sensitive isocyanates
Viscosity range of fluid . . . . . . . . . . . . . . . . . . . . . . . 20- 5000 cps*
Fluid filtration (user-supplied) . . . . . . . . . . . . . . . . . . 100 mesh minimum
Fluid flow rate range*
G3000, G250 Meter . . . . . . . . . . . . . . . . . . . . . . 75 - 3800 cc/min. (0.02-1.00 gal./min.)
G3000HR, G250HR Meter. . . . . . . . . . . . . . . . . 38 - 1900 cc/min. (0.01-0.50 gal./min.)
Coriolis Meter. . . . . . . . . . . . . . . . . . . . . . . . . . . 20 - 3800 cc/min. (0.005-1.00 gal./min.)
S3000 Solvent Meter (accessory) . . . . . . . . . . . 38 - 1900 cc/min. (0.01-0.50 gal./min.)
Fluid inlet sizes
Flow Meter . . . . . . . . . . . . . . . . . . . . . . . . . . . . . 1/4 npt(f)
Dose Valve/Color Valve Adapters . . . . . . . . . . . 1/4 npt(f)
Fluid outlet size (static mixer) . . . . . . . . . . . . . . . . . . 1/4 npt(f)
External Power Supply Requirements . . . . . . . . . . . 85 - 250 Vac, 50/60 Hz, 2 amps maximum draw
15 amp maximum circuit breaker required
8 to 14 AWG power supply wire gauge
Operating temperature range . . . . . . . . . . . . . . . . . . 41- 122° F (5-50° C)
Environmental Conditions Rating . . . . . . . . . . . . . . . indoor use, pollution degree (2), installation category II
Noise Level
Sound pressure level . . . . . . . . . . . . . . . . . . . . . below 70 dBA
Sound power level . . . . . . . . . . . . . . . . . . . . . . . below 85 dBA
Wetted parts . . . . . . . . . . . . . . . . . . . . . . . . . . . . . . . 303, 304 SST, Tungsten carbide (with nickel binder),
perfluoroelastomer; PTFE
*
Dependent on programmed K-factor and application. The maximum allowable flow meter pulse frequency is 425
Hz (pulses/sec). For more detailed information on viscosities, flow rates, or mixing ratios, consult your Graco distributor.
See individual component manuals for additional technical data.
312779E
133
Graco Standard Warranty
Graco warrants all equipment referenced in this document which is manufactured by Graco and bearing its name to be free from defects in
material and workmanship on the date of sale to the original purchaser for use. With the exception of any special, extended, or limited warranty
published by Graco, Graco will, for a period of twelve months from the date of sale, repair or replace any part of the equipment determined by
Graco to be defective. This warranty applies only when the equipment is installed, operated and maintained in accordance with Graco’s written
recommendations.
This warranty does not cover, and Graco shall not be liable for general wear and tear, or any malfunction, damage or wear caused by faulty
installation, misapplication, abrasion, corrosion, inadequate or improper maintenance, negligence, accident, tampering, or substitution of
non-Graco component parts. Nor shall Graco be liable for malfunction, damage or wear caused by the incompatibility of Graco equipment with
structures, accessories, equipment or materials not supplied by Graco, or the improper design, manufacture, installation, operation or
maintenance of structures, accessories, equipment or materials not supplied by Graco.
This warranty is conditioned upon the prepaid return of the equipment claimed to be defective to an authorized Graco distributor for verification of
the claimed defect. If the claimed defect is verified, Graco will repair or replace free of charge any defective parts. The equipment will be returned
to the original purchaser transportation prepaid. If inspection of the equipment does not disclose any defect in material or workmanship, repairs
will be made at a reasonable charge, which charges may include the costs of parts, labor, and transportation.
THIS WARRANTY IS EXCLUSIVE, AND IS IN LIEU OF ANY OTHER WARRANTIES, EXPRESS OR IMPLIED, INCLUDING BUT NOT
LIMITED TO WARRANTY OF MERCHANTABILITY OR WARRANTY OF FITNESS FOR A PARTICULAR PURPOSE.
Graco’s sole obligation and buyer’s sole remedy for any breach of warranty shall be as set forth above. The buyer agrees that no other remedy
(including, but not limited to, incidental or consequential damages for lost profits, lost sales, injury to person or property, or any other incidental or
consequential loss) shall be available. Any action for breach of warranty must be brought within two (2) years of the date of sale.
GRACO MAKES NO WARRANTY, AND DISCLAIMS ALL IMPLIED WARRANTIES OF MERCHANTABILITY AND FITNESS FOR A
PARTICULAR PURPOSE, IN CONNECTION WITH ACCESSORIES, EQUIPMENT, MATERIALS OR COMPONENTS SOLD BUT NOT
MANUFACTURED BY GRACO. These items sold, but not manufactured by Graco (such as electric motors, switches, hose, etc.), are subject to
the warranty, if any, of their manufacturer. Graco will provide purchaser with reasonable assistance in making any claim for breach of these
warranties.
In no event will Graco be liable for indirect, incidental, special or consequential damages resulting from Graco supplying equipment hereunder, or
the furnishing, performance, or use of any products or other goods sold hereto, whether due to a breach of contract, breach of warranty, the
negligence of Graco, or otherwise.
FOR GRACO CANADA CUSTOMERS
The Parties acknowledge that they have required that the present document, as well as all documents, notices and legal proceedings entered into,
given or instituted pursuant hereto or relating directly or indirectly hereto, be drawn up in English. Les parties reconnaissent avoir convenu que la
rédaction du présente document sera en Anglais, ainsi que tous documents, avis et procédures judiciaires exécutés, donnés ou intentés, à la suite
de ou en rapport, directement ou indirectement, avec les procédures concernées.
Graco Information
For the latest information about Graco products, visit www.graco.com.
For patent information, see www.graco.com/patents.
TO PLACE AN ORDER, contact your Graco distributor or call to identify the nearest distributor.
Phone: 612-623-6921 or Toll Free: 1-800-328-0211 Fax: 612-378-3505
All written and visual data contained in this document reflects the latest product information available at the time of publication.
Graco reserves the right to make changes at any time without notice.
Original instructions. This manual contains English. MM 312779
Graco Headquarters: Minneapolis
International Offices: Belgium, China, Japan, Korea
GRACO INC. AND SUBSIDIARIES • P.O. BOX 1441 • MINNEAPOLIS MN 55440-1441 • USA
Copyright 2009, Graco Inc. All Graco manufacturing locations are registered to ISO 9001.
www.graco.com
Revision E, February 2014