1
Instructions - Parts List
™
SaniForce
Diaphragm Pumps
311879Y
EN
1040, 1590, and 2150 Models
For use in sanitary applications. For professional use only.
Important Safety Instructions
Read all warnings and instructions in this
manual. Save these instructions.
Refer to the appropriate Pump Matrix on page 26, 34,
or 42 to determine the model number of your pump.
See page 3 for approval information.
120 psi (0.8 MPa, 8 bar) Maximum Fluid Working Pressure
120 psi (0.8 MPa, 8 bar) Maximum Air Input Pressure
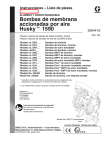
TI8924a
1040 Models
1590 Models
TI8926a
2150 Models
TI8928a
Contents
Models . . . . . . . . . . . . . . . . . . . . . . . . . . . . . . . . . . . 3
Warnings . . . . . . . . . . . . . . . . . . . . . . . . . . . . . . . . . 5
Installation . . . . . . . . . . . . . . . . . . . . . . . . . . . . . . . . 7
Operation . . . . . . . . . . . . . . . . . . . . . . . . . . . . . . . . 12
Maintenance . . . . . . . . . . . . . . . . . . . . . . . . . . . . . . 13
Troubleshooting . . . . . . . . . . . . . . . . . . . . . . . . . . . 14
Service . . . . . . . . . . . . . . . . . . . . . . . . . . . . . . . . . . 16
Pump and Repair Kit Matrix - 1040 Models . . . . . 26
Available 1040 Configurations . . . . . . . . . . . . . . 27
Parts - 1040 Models . . . . . . . . . . . . . . . . . . . . . . . . 28
Dimensional Drawing - 1040 Models . . . . . . . . . . 31
Technical Data - 1040 Models . . . . . . . . . . . . . . . . 32
Performance Chart - 1040 Models . . . . . . . . . . . . 33
Pump and Repair Kit Matrix - 1590 Models . . . . . 34
Available 1590 Configurations . . . . . . . . . . . . . . 35
Parts - 1590 Models . . . . . . . . . . . . . . . . . . . . . . . . 36
Dimensional Drawing - 1590 Models . . . . . . . . . . 39
Technical Data - 1590 Models . . . . . . . . . . . . . . . . 40
Performance Chart - 1590 Models . . . . . . . . . . . . 41
Pump and Repair Kit Matrix - 2150 Models . . . . . 42
Available 2150 Configurations . . . . . . . . . . . . . . 43
Options for Ram Mounting . . . . . . . . . . . . . . . . 43
Parts - 2150 Models . . . . . . . . . . . . . . . . . . . . . . . . 44
Parts - 2150 Models for Ram Mounting . . . . . . . . 48
Dimensional Drawing - 2150 Models . . . . . . . . . . 50
Technical Data - 2150 Models . . . . . . . . . . . . . . . . 51
Performance Chart - 2150 Models . . . . . . . . . . . . 52
Graco Warranties . . . . . . . . . . . . . . . . . . . . . . . . . . 54
Graco Information . . . . . . . . . . . . . . . . . . . . . . . . . 54
2
311879Y
Models
Models
Model
Connections
FD1___
Flange
FD7___
DIN
*FA1___
Flange
*FA7___
DIN
FD2___
Flange
FD8___
DIN
*FA2___
Flange
*FA8___
DIN
FD3___
Flange
FD9___
DIN
*FA3___
Flange
*FA9___
DIN
24G743
Flange
24G744
Flange
*FA1111
Flange
*FA7111
DIN
FD1111
Flange
FD7111
DIN
FD1211
Flange
*FA2111
Flange
*FA8111
DIN
FD2111
Flange
FD8111
DIN
FD2211
Flange
*FA3111
Flange
*FA9111
DIN
FD3111
Flange
FD9111
DIN
FD3211
Flange
Description
Approvals
1040 AODD Pump
II 2 G
1590 AODD Pump
2150 AODD Pump
2150 AODD Pump
for Ram Mounting
1040 AODD Pump
1590 AODD Pump
II 2 G
2150 AODD Pump
* FA pumps have painted aluminum center sections that may exhibit signs of corrosion depending on cleaning solutions used.
311879Y
3
Models
Material Certification
Reference: SaniForce Product Family
Issue Date: November 1, 2011
All fluid contact materials in the SaniForce product family are FDA-Compliant and meet the United States
Code of Federal Regulations (CFR) Title 21, Section 177 or are of a corrosion resistant grade Stainless
Steel. This includes the below product groups:
1.
2.
3.
4.
5.
6.
SaniForce 515, 1040, 1590, 2150 Air-Operated Double Diaphragm Pumps
SaniForce 1590, 3150 HS Air-0perated Double Diaphragm Pumps
SaniForce 1590, 3150 HS 3-A Certified Air-Operated Double Diaphragm Pumps
SaniForce 5:1, 6:1 and 12:1 Air-Operated Piston Pumps
SaniForce Diaphragm Pump and Piston Pump Drum Unloaders
SaniForce Diaphragm Pump and Piston Pump Bin Evacuation Systems
Bradley A. Byron
Quality Manager
Graco Inc.
4
311879Y
Warnings
Warnings
The following warnings are for the setup, use, grounding, maintenance, and repair of this equipment. The exclamation point symbol alerts you to a general warning and the hazard symbol refers to procedure-specific risk. When
these symbols appear in the body of this manual, refer back to these Warnings. Additional, product-specific warnings
may be found throughout the body of this manual where applicable.
WARNING
FIRE AND EXPLOSION HAZARD
Flammable fumes, such as solvent and paint fumes, in work area can ignite or explode. To help prevent
fire and explosion:
• Use equipment only in well ventilated area.
• Eliminate all ignition sources; such as pilot lights, cigarettes, portable electric lamps, and plastic
drop cloths (potential static arc).
• Keep work area free of debris, including solvent, rags and gasoline.
• Do not plug or unplug power cords, or turn power or light switches on or off when flammable fumes
are present.
• Ground all equipment in the work area. See Grounding instructions.
• Use only grounded hoses.
• Hold gun firmly to side of grounded pail when triggering into pail.
• If there is static sparking or you feel a shock, stop operation immediately. Do not use equipment
until you identify and correct the problem.
• Keep a working fire extinguisher in the work area.
PRESSURIZED EQUIPMENT HAZARD
Fluid from the gun/dispense valve, leaks, or ruptured components can splash in the eyes or on skin and
cause serious injury.
• Follow the Pressure Relief Procedure when you stop spraying and before cleaning, checking, or
servicing equipment.
• Tighten all fluid connections before operating the equipment.
• Check hoses, tubes, and couplings daily. Replace worn or damaged parts immediately.
311879Y
5
Warnings
WARNING
EQUIPMENT MISUSE HAZARD
Misuse can cause death or serious injury.
• Do not operate the unit when fatigued or under the influence of drugs or alcohol.
• Do not exceed the maximum working pressure or temperature rating of the lowest rated system
component. See Technical Data in all equipment manuals.
• Use fluids and solvents that are compatible with equipment wetted parts. See Technical Data in all
equipment manuals. Read fluid and solvent manufacturer’s warnings. For complete information
about your material, request MSDS from distributor or retailer.
• Do not leave the work area while equipment is energized or under pressure. Turn off all equipment
and follow the Pressure Relief Procedure when equipment is not in use.
• Check equipment daily. Repair or replace worn or damaged parts immediately with genuine
manufacturer’s replacement parts only.
• Do not alter or modify equipment.
• Use equipment only for its intended purpose. Call your distributor for information.
• Route hoses and cables away from traffic areas, sharp edges, moving parts, and hot surfaces.
• Do not kink or over bend hoses or use hoses to pull equipment.
• Keep children and animals away from work area.
• Comply with all applicable safety regulations.
TOXIC FLUID OR FUMES HAZARD
Toxic fluids or fumes can cause serious injury or death if splashed in the eyes or on skin, inhaled, or
swallowed.
• Read MSDSs to know the specific hazards of the fluids you are using.
• Route exhaust away from work area. If diaphragm ruptures, fluid may be exhausted into the air.
• Store hazardous fluid in approved containers, and dispose of it according to applicable guidelines.
BURN HAZARD
Equipment surfaces and fluid that’s heated can become very hot during operation. To avoid severe
burns:
• Do not touch hot fluid or equipment.
PERSONAL PROTECTIVE EQUIPMENT
You must wear appropriate protective equipment when operating, servicing, or when in the operating
area of the equipment to help protect you from serious injury, including eye injury, hearing loss,
inhalation of toxic fumes, and burns. This equipment includes but is not limited to:
• Protective eyewear, and hearing protection.
• Respirators, protective clothing, and gloves as recommended by the fluid and solvent manufacturer.
6
311879Y
Installation
Installation
General Information
•
FA pumps have painted aluminum center sections
that may exhibit signs of corrosion depending on
cleaning solutions used.
•
The typical installations shown in Figs. 2-4 are only
guides for selecting and installing system components. Contact your Graco distributor for assistance
in planning a system to suit your needs.
•
Always use genuine Graco parts and accessories.
•
Reference numbers and letters in parentheses refer
to the callouts in the figures and the parts lists on
pages 28-30, 36-38, and 44-46.
Grounding
The equipment must be grounded. Grounding reduces
the risk of static and electric shock by providing an
escape wire for the electrical current due to static build
up or in the event of a short circuit.
•
Pump: Connect a ground wire and clamp as shown
in Fig. 1. Loosen the grounding screw (W). Insert
one end of a 12 ga (1.5 mm²) minimum ground wire
(Y) behind the grounding screw and tighten the
screw securely. Connect the clamp end of the
ground wire to a true earth ground. Order Part No.
238909 Ground Wire and Clamp.
Y
The pump is very heavy (see Technical Data on pages
32, 40, and 51 for specific weights). If the pump must
be moved, follow the pressure relief procedure on
page 12 and have two people to lift the pump by grasping the outlet manifold securely or use appropriate lifting equipment.
W
To reduce the risk of serious injury due to burns, insulate and/or label the pump before pumping hot fluids.
Tightening Clamps Before First Use
FIG. 1
•
Fluid hoses: Use only grounded hoses with a maximum of 500 ft. (150 m) combined hose length to
ensure grounding continuity.
•
Air compressor: Follow the manufacturer’s recommendations.
•
All solvent pails used when flushing: Follow the local
code. Use only metal pails, which are conductive.
Do not place the pail on a non-conductive surface,
such as paper or cardboard, which interrupts the
grounding continuity.
•
Fluid supply container: Follow the local code.
After you unpack the pump, and before you use it for the
first time, check all clamps and tighten as necessary.
311879Y
"
7
Installation
Mountings
NOTICE
The pump exhaust air may contain contaminants. Ventilate to a remote area if the contaminants could affect
your fluid supply. See Air Exhaust Ventilation on page
11.
•
Be sure the mounting surface can support the
weight of the pump, hoses, and accessories, as well
as the stress caused during operation.
•
For all mountings, be sure the pump is bolted
directly to the mounting surface.
•
For ease of operation and service, mount the pump
so the air valve cover (2), air inlet, and fluid inlet and
outlet ports are easily accessible.
Air Line
A bleed-type master air valve (B) is required in the system to relieve air trapped between this valve and the
pump. Trapped air can cause the pump to cycle unexpectedly, which could result in serious injury, including
splashing in the eyes or on the skin, injury from moving
parts, or contamination from hazardous fluids. See
FIG. 2.
1. Install the air line accessories as shown in FIG. 2.
Mount these accessories on the wall or on a
bracket. Be sure the air line supplying the accessories is grounded.
In the step below, do not connect the quick-disconnect
coupler (D) on the air hose to the mating fitting on the
pump until you are ready to operate the pump. Connecting the coupler too early can result in unintentional
operation of the pump, leading to serious injury from
moving parts, splashing fluid in the eyes or on the skin,
and contact with hazardous fluids.
2. Install a grounded, flexible air hose (A) between the
accessories and the 1/2 npt(f) pump air inlet (N).
See Fig. 5. Use a minimum 3/8 in. (9.5 mm) ID air
hose. Screw an air line quick disconnect coupler (D)
onto the end of the air hose (A), and screw the mating fitting into the pump air inlet snugly.
Fluid Suction Line
1. Use flexible, grounded fluid hoses.
2. For best sealing results, use a standard tri-clamp or
DIN style sanitary gasket of a flexible material such
as EPDM, Buna-N, fluoroelastomer, or silicon.
3. If the fluid inlet pressure to the pump is more than
25% of the outlet working pressure, the ball check
valves will not close fast enough, resulting in inefficient pump operation.
4. At inlet fluid pressures greater than 15 psi (0.1 MPa,
1 bar), diaphragm life will be shortened.
5. See the Technical Data on pages 32, 40, and 51 for
maximum suction lift (wet and dry).
a. Install an air regulator (C) and gauge to control
the fluid pressure. The fluid outlet pressure will
be the same as the setting of the air regulator.
8
b.
Locate one bleed-type master air valve (B)
close to the pump and use it to relieve trapped
air. See the WARNING above. Locate the other
master air valve (E) upstream from all air line
accessories and use it to isolate them during
cleaning and repair.
c.
The air line filter (F) removes harmful dirt and
moisture from the compressed air supply.
311879Y
Installation
Fluid Outlet Line
1. Use flexible grounded fluid hoses (L).
A fluid drain valve (J) is required to relieve pressure in
the hose if it is plugged. The drain valve reduces the
risk of serious injury, including splashing in the eyes or
on the skin, or contamination from hazardous fluids
when relieving pressure. Install the valve close to the
pump fluid outlet. See FIG. 2.
E
2. For best sealing results, use a standard tri-clamp or
DIN style sanitary gasket of a flexible material such
as EPDM, Buna-N, fluoroelastomer, or silicon
3. Install a fluid drain valve (J) near the fluid outlet. See
the WARNING above, and FIG. 2.
4. Install a shutoff valve (K) in the fluid outlet line.
B
C
A
F
Key:
A
B
C
D
E
F
G
J
K
L
Y
Air supply line
Bleed-type master air valve
(required for pump)
Air regulator
Air line quick disconnect
Master air valve (for accessories)
Air line filter
Flexible fluid suction line
Fluid drain valve (required)
Fluid shutoff valve
Flexible fluid line
Ground wire (required; see page
7 for installation instructions)
K
L
D
J
Y
G
TI8930a
FIG. 2 Typical Floor-Mount Installation
311879Y
9
Installation
Changing the Orientation of the Fluid Inlet
and Outlet Ports
The pump is shipped with the ports facing the same
direction. To reverse the orientation of the ports:
1. Remove the clamps holding the inlet and/or outlet
manifold to the covers.
2. Reverse the manifold and reattach. Install and
tighten clamps snugly.
Key:
N
P
1/2 npt(f) air inlet port
Muffler (air exhaust
port is 3/4 npt(f)
R Fluid inlet port
S Fluid outlet port
113 Manifold clamps
3 Air valve screws
1
1 3
113
S
Torque to
28-30 in-lb
(3.2-3.7 N•m)
N
P
106
R
TI8926a
FIG. 3
10
311879Y
Installation
Air Exhaust Ventilation
To provide a remote exhaust:
Be sure the system is properly ventilated for your type
of installation. When pumping flammable or hazardous
fluids, you must vent the exhaust to a safe place, away
from people, animals, food handling areas, and all
sources of ignition.
Diaphragm failure will cause the fluid being pumped to
exhaust with the air. Place an appropriate container at
the end of the air exhaust line to catch the fluid. See
FIG. 4.
1. Remove the muffler (P) from the pump air exhaust
port.
2. Install a grounded air exhaust hose (T) and connect
the muffler (P) to the other end of the hose. The
minimum size for the air exhaust hose is 3/4 in. (19
mm) ID. If a hose longer than 15 ft (4.57 m) is
required, use a larger diameter hose. Avoid sharp
bends or kinks in the hose.
3. Place a container (U) at the end of the air exhaust
line to catch fluid in case a diaphragm ruptures. See
FIG. 4.
The air exhaust port is 3/4 npt(f). Do not restrict the air
exhaust port. Excessive exhaust restriction can cause
erratic pump operation.
Key:
A
B
C
D
E
F
P
T
U
Air supply line
Bleed-type master air valve
(required for pump)
Air regulator
Air line quick disconnect
Master air valve (for accessories)
Air line filter
Muffler
Grounded air exhaust hose
Container for remote air exhaust
E
C
F
B
A
T
U
D
P
TI8931a
FIG. 4 Venting Exhaust Air
311879Y
11
Operation
Operation
Pressure Relief Procedure
Starting and Adjusting the Pump
1. Be sure the pump is properly grounded. Refer to
Grounding on page 4.
The equipment stays pressurized until pressure is
manually relieved. To reduce the risk of serious injury
from pressurized fluid or splashing fluid, follow this
procedure whenever you stop pumping and before
cleaning, checking, or servicing equipment.
2. Check connections to be sure they are tight. Tighten
fluid inlet and outlet connections securely.
3. Place the suction tube (if used) in fluid to be
pumped.
2. Open the dispensing valve, if used.
NOTE: If fluid inlet pressure to the pump is more than
25% of outlet working pressure, the ball check valves
will not close fast enough, resulting in inefficient pump
operation.
3. Open the fluid drain valve to relieve fluid pressure,
having a container ready to catch the drainage.
4. Place the end of fluid hose (L) into an appropriate
container.
Sanitize the Pump Before First Use
5. Close the fluid drain valve (J).
It is the user’s responsibility to properly sanitize the
pump before first use. It is up to the user whether this
will include disassembling and cleaning individual parts
or simply flushing pump with a sanitizing solution. As
necessary, follow the steps under Starting and Adjusting the Pump below, under the Service section on
page 16, or under Flushing on page 13.
6. Back out the air regulator (C) knob, and open all
bleed-type master air valves (B, E).
1. Shut off the air to the pump.
Never move or lift a pump under pressure. If dropped,
the fluid section may rupture. Always follow the Pressure Relief Procedure before lifting the pump.
7. If the fluid hose has a dispensing device, hold it
open while continuing with the following step.
8. Slowly increase air pressure with the air regulator
(C) until the pump starts to cycle. Allow the pump to
cycle slowly until all air is pushed out of the lines
and the pump is primed.
Pump Shutdown
At the end of the work shift, relieve pressure.
12
311879Y
Maintenance
Maintenance
Lubrication
Tightening Connections
The air valve is designed to operate unlubricated, however if lubrication is desired, every 500 hours of operation (or monthly) remove the hose from the pump air
inlet and add two drops of machine oil to the air inlet.
Before each use, check all hoses for wear or damage,
and replace as necessary. Check to be sure all connections are tight and leak-free.
Preventive Maintenance Schedule
NOTICE
Do not over-lubricate the pump. Oil is exhausted
through the muffler and could contaminate your fluid
supply or other equipment. Excessive lubrication can
also cause the pump to malfunction.
Establish a preventive maintenance schedule, based on
the pump’s service history. This is especially important
for prevention of spills or leakage due to diaphragm failure.
Flushing
Insert suction tube into cleaning solution. Open air regulator to supply low pressure air to the pump. Run the
pump long enough to thoroughly clean the pump and
hoses. Close the air regulator. Remove the suction tube
from the cleaning solution and drain pump. Place suction tube in the fluid to be pumped.
Flush the pump often enough to prevent the fluid you
are pumping from drying or freezing in the pump and
damaging it. Flushing schedule will be based on what
the pump is being used for. Use a compatible cleaning
solution and always cycle the pump during the entire
flushing process.
Always flush the pump and relieve the pressure before
storing it for any length of time.
311879Y
13
Troubleshooting
Troubleshooting
To reduce the risk of serious injury, whenever you are
instructed to relieve pressure, always follow the Pressure Relief Procedure on page 12.
•
Relieve the pressure before checking or servicing
the equipment.
•
Check all possible problems and causes before disassembling the pump.
PROBLEM
CAUSE
SOLUTION
Pump cycles at stall or fails to hold
pressure at stall.
Worn check valve balls (301), seats
(201) or o-rings (202).
Replace. See 18.
Pump will not cycle, or cycles once
and stops.
Air valve is stuck or dirty.
Disassemble and clean air valve. See
page 16. Use filtered air.
Check valve ball (301) severely
worn and wedged in seat (201) or
manifold (102 or 103).
Replace ball and seat. See page 18.
Check valve ball (301) is wedged
Install Pressure Relief Valve
into seat (201), due to overpressur- (see page 10).
ization.
Pump operates erratically.
Air bubbles in fluid.
Dispensing valve clogged.
Relieve pressure and clear valve.
Clogged suction line.
Inspect; clear.
Sticky or leaking balls (301).
Clean or replace. See page 18.
Diaphragm ruptured.
Replace. See pages 19-21.
Restricted exhaust.
Remove restriction.
Suction line is loose.
Tighten.
Diaphragm ruptured.
Replace. See pages 19-21.
Loose inlet manifold (102), damTighten manifold clamps (113), or
aged seal between manifold and
replace seats (201) or o-rings (202).
seat (201), damaged o-rings (202). See page 18.
Chattering - noisy operation.
14
Loose diaphragm shaft bolt (107).
Tighten or replace (pages 19-21).
Damaged o-ring (108).
Replace. See pages 19-21.
Check valve balls do not seat prop- Reduce size/diameter of inlet line relative to outline line. Outlet line size
erly/cleanly due to imbalance
should not exceed pump size.
between fluid inlet and outlet line
sizing. Noise is accentuated with
light viscosity fluids.
311879Y
Troubleshooting
PROBLEM
CAUSE
SOLUTION
Leak in inlet or outlet sanitary fitting.
Loose sanitary clamp.
Tighten clamp.
Damaged or worn gasket.
Replace gasket.
Misalignment of inlet/outlet hose or
pipe.
Use flexible hoses at pump inlet and
outlet.
Gasket does not seal.
Use a standard sanitary gasket of flexible material such as EPDM, Buna-N,
fluoroelastomer, or silicon.
Diaphragm ruptured.
Replace. See pages 19-21.
Loose diaphragm shaft bolt (107).
Tighten or replace. See pages 19-21.
Damaged o-ring (108).
Replace. See pages 19-21.
Worn air valve block (7), o-ring (6),
plate (8), pilot block (18), u-cups
(10), or pilot pin o-rings (17).
Repair or replace. See page 16.
Worn shaft seals (402).
Replace. See pages 19-21.
Air valve cover (2) or air valve cover
screws (3) are loose.
Tighten screws. See page 16.
Air valve gasket (4) or air cover
gasket (22) is damaged.
Inspect; replace. See pages 16, 22-23.
Air cover screws (25) are loose.
Tighten screws. See pages 22-23.
Fluid in exhaust air.
Pump exhausts excessive air at
stall.
Pump leaks air externally.
Pump leaks fluid externally from
ball check valves.
311879Y
Loose manifolds (102, 103), damTighten manifold clamps (113), or
aged seal between manifold and
replace seats (201) or o-rings (202).
seat (201), damaged o-rings (202). See page 18.
15
Service
Service
Repairing the Air Valve
Reassembly
Tool Required
1. If you replaced the bearings (12, 15), reinstall as
explained on page 24. Reassemble the fluid section.
•
•
•
•
•
Torque wrench
Torx (T20) screwdriver or 7 mm (9/32 in.) socket
wrench
Needle-nose pliers
O-ring pick
Lithium base grease
NOTE: Air Valve Repair Kits are available. Order Kit
255061 for models with stainless steel center housing.
Order Kit 236273 for models with aluminum center
housing. Parts included in Kit 255061 are marked with †,
and parts included in Kit 236273 are marked with ◆.
Use all the parts in the kit for the best results.
Disassembly
2. On models with aluminum center housing, install the
valve plate seal (55◆) into the groove at the bottom
of the valve cavity. The rounded side of the seal
must face down into the groove. See FIG. 8.
3. Install the valve plate (8†) in the cavity, seal down.
Install the three screws (3), using a Torx (T20)
screwdriver or 7 mm (9/32 in.) socket wrench.
Tighten until the screws bottom out on the housing.
See FIG. 8.
4. Install an o-ring (17†◆) on each pilot pin (16).
Grease the pins and o-rings. Insert the pins into the
bearings (15), narrow end first. See FIG. 7.
5. Install a u-cup packing (10†◆) on each actuator piston (11), so the lips of the packings face the narrow
end of the pistons. See FIG. 7.
1. Relieve the pressure.
2. With a Torx (T20) screwdriver or 7 mm (9/32 in.)
socket wrench, remove the six screws (3), air valve
cover (2), and gasket (4). See FIG. 5.
3. Move the valve carriage (5) to the center position
and pull it out of the cavity. Remove the valve block
(7) and o-ring (6) from the carriage. Using a needle-nose pliers, pull the pilot block (18) straight up
and out of the cavity. See FIG. 6.
6. Lubricate the u-cup packings (10†◆) and actuator
pistons (11). Insert the actuator pistons in the bearings (12), wide end first. Leave the narrow end of
the pistons exposed. See FIG. 7.
7. Grease the lower face of the pilot block (18†◆) and
install so its tabs snap into the grooves on the ends
of the pilot pins (16). See FIG. 6.
8. Grease the o-ring (6†◆) and install it in the valve
block (7†◆). Push the block onto the valve carriage
(5). Grease the lower face of the valve block. See
FIG. 6.
4. Pull the two actuator pistons (11) out of the bearings
(12). Remove the u-cup packings (10) from the pistons. Pull the pilot pins (16) out of the bearings (15).
Remove the o-rings (17) from the pilot pins. See
FIG. 7.
9. Install the valve carriage (5) so its tabs slip into the
grooves on the narrow end of the actuator pistons
(11). See FIG. 6.
5. Inspect the valve plate (8) in place. If damaged, use
a Torx (T20) screwdriver or 7 mm (9/32 in.) socket
wrench to remove the three screws (3). Remove the
valve plate (8). See FIG. 8.
10. Align the valve gasket (4†◆) and cover (2) with the
six holes in the center housing (1). Secure with six
screws (3), using a Torx (T20) screwdriver or 7 mm
(9/32 in.) socket wrench. Torque to 52-60 in-lb
(5.6-6.8 N•m). See FIG. 5.
6. Inspect the bearings (12, 15) in place. See FIG. 7.
The bearings are tapered and, if damaged, must be
removed from the outside. This requires disassembly of the fluid section. See page 24.
7. Clean all parts and inspect for wear or damage.
Replace as needed. Reassemble.
16
311879Y
Service
2 Torque to 52-60 in-lb
(5.6-6.8 N•m)
1 Insert narrow end first
3 2
2 Grease
2
3 Install with lips facing narrow end of piston (11)
4 Insert wide end first
4†◆
10†◆ 2 3
11 4
12
TI9086A
2 17†◆
FIG. 7
FIG. 5
Detail
1 See detail at right.
16 1
1 Tighten screws until they bottom out on the housing.
5
2 Grease.
3 Grease lower face.
TI9089A
15
2
2
◆†6
Rounded side of seal must face down. (Seal is used
only on models with aluminum center housing).
31
3
◆†7
8†
TI9088A
18†◆ 3
5 1
55◆ 2
TI9087A
TI9090A
FIG. 8
FIG. 6
311879Y
17
Service
Ball Check Valve Repair
1 Arrow (A) must point toward outlet manifold (103)
Tools Required
•
O-ring pick
2 Radiused seating surface must face the ball (301).
Large chamfer on O.D. must face o-ring.
Disassembly
NOTE:
• A Fluid Section Repair Kit is available. Refer to the
Repair Kit Matrix parts section for the appropriate
pump size so that the correct kit for your pump is
ordered. Parts included in the kit are marked with an
asterisk, for example (202*). Use all the parts in the
kit for the best results.
•
103
113
To ensure proper seating of the balls (301), always
inspect the seats (201) when replacing the balls.
Replace seats as necessary if seating surface
shows evidence of wear. Also, replace the o-rings
(202) as necessary. PTFE o-rings should be
replaced every time manifolds are removed.
301*
201 2
202*
101
A 1
1. Relieve the pressure. Disconnect all hoses.
2. Remove the pump from its mounting.
3. Remove the clamps (106) holding the outlet manifold (103) to the fluid covers (101). See FIG. 9.
4. Remove the o-rings (202), seats (201), and balls
(301) from the manifold (103).
301*
5. Turn the pump over and remove the inlet manifold
(102). Remove the o-rings (202), seats (201), and
balls (301) from the fluid covers (101).
201 2
202*
Reassembly
1. Clean all parts and inspect for wear or damage.
Replace parts as needed.
113
2. Reassemble in the reverse order, following all notes
in FIG. 9. Be sure the ball checks and manifolds are
assembled exactly as shown. The arrows (A) on the
fluid covers (101) must point toward the outlet manifold (103).
102
TI8932a
FIG. 9
18
311879Y
Service
Standard Diaphragm Repair
NOTE: If your pump uses overmolded diaphragms, see
page 22.
Tools Required
•
•
•
•
•
1. Relieve the pressure.
Torque wrench
15 mm socket wrench
19 mm open end wrench
O-ring pick
Lithium-base grease
2. Remove the manifolds and disassemble the ball
check valves as explained on page 18.
3. Remove the clamps (106) holding the fluid covers
(101) to the air covers (23). Pull the fluid covers
(101) off the pump. See FIG. 10.
Disassembly
NOTE: A Fluid Section Repair Kit is available. Refer to
page 27, 35, or 43 to order the correct kit for your pump.
Parts included in the kit are marked with an asterisk, for
example (401*). Use all the parts in the kit for the best
results.
106
1
Arrow (A) must point toward air valve.
1
B
23
106
101
A
1
TI9091A
FIG. 10
311879Y
19
Service
4. Loosen but do not remove the diaphragm shaft bolts
(107), using a 15 mm socket wrench on both bolts.
See FIG. 11.
d. On PTFE models only, install the backer (401*)
on the bolt. Make certain the side marked AIR
SIDE faces the center housing (1).
5. Unscrew one bolt from the diaphragm shaft (24) and
remove the o-ring (108), fluid side diaphragm plate
(105), diaphragm (403), backer (401) used only on
PTFE models, and air side diaphragm plate (104).
See FIG. 11.
e. Install the air side diaphragm plate (104) so the
rounded side faces the diaphragm (401). This
plate is stamped with its part number.
6. Pull the other diaphragm assembly and the diaphragm shaft (24) out of the center housing (1).
Hold the shaft flats with a 19 mm open end wrench,
and remove the bolt (107) from the shaft. Disassemble the remaining diaphragm assembly.
7. Inspect the diaphragm shaft (24) for wear or
scratches. If it is damaged, inspect the bearings (19)
in place. If the bearings are damaged, refer to page
24.
8. Reach into the center housing (1) with an o-ring pick
and hook the u-cup packings (402), then pull them
out of the housing. This can be done with the bearings (19) in place.
9. Clean all parts and inspect for wear or damage.
Replace parts as needed.
Reassembly
f.
Apply medium-strength (blue) Loctite® or equivalent to the bolt (107) threads. Screw the bolt
into the shaft (24) hand tight.
3. Grease the length and ends of the diaphragm shaft
(24), and slide it through the housing (1).
4. Assemble the other diaphragm assembly to the
shaft as explained in step 2.
5. Hold one shaft bolt (107) with a wrench and torque
the other bolt to 60-70 ft-lb (81-95 N•m) at 100 rpm
maximum.
6. Align the fluid covers (101) and the center housing
(1) so the arrows (A) on the covers face the same
direction as the air valve (B). Secure covers with the
clamps. See FIG. 10.
7. Reassemble the ball check valves and manifolds as
explained on page 18.
1. Install the shaft u-cup packings (402*) so the lips
face out of the housing (1). Lubricate the packings.
See FIG. 11.
2. Install the diaphragm assembly on one end of the
shaft (24) as follows:
a. Install the o-ring (108*) on the shaft bolt (107).
b.
Install the fluid side diaphragm plate (105) on
the bolt so the rounded side faces the diaphragm (401).
NOTE: The fluid side diaphragm plate (105) is stainless
steel. This plate is not stamped with its part number. Be
sure to install this plate on the fluid side of the diaphragm.
c.
20
Install the diaphragm (403*). Make certain the
side marked AIR SIDE faces the center
housing (1).
311879Y
Service
19
402* 1
105 2
Cutaway view, with
diaphragms in place
107 5
403* 3 6
1
24 104
4
2
401*
TI8935a
3
24 4
104 2
401* 3 6
403* 3
105 2
108* 107
5
TI8934a
1
24 4
1
Lips face out of housing (1).
2
Rounded side faces diaphragm (401).
3
Air side must face center housing (1).
4
Grease.
5
Apply medium strength (blue) Loctite® or
equivalent. Torque to 60-70 ft-lb (81-95 N•m)
at 100 rpm maximum.
6
Backer used on pumps with PTFE
diaphragms only.
TI8933a
FIG. 11
311879Y
21
Service
Overmolded Diaphragm Repair
NOTE: If your pump uses standard diaphragms, see
page 19.
Tools Required
•
•
•
•
Torque wrench
19 mm open end wrench
O-ring pick
Lithium-base grease
8. Reach into the center housing (1) with an o-ring pick
and hook the u-cup packings (402), then pull them
out of the housing. This can be done with the bearings (19) in place.
9. Clean all parts and inspect for wear or damage.
Replace parts as needed.
Disassembly
NOTE: A Fluid Section Repair Kit is available. Refer to
page 27, 35, or 43 to order the correct kit for your pump.
Parts included in the kit are marked with an asterisk, for
example (401*). Use all the parts in the kit for the best
results.
1. Relieve the pressure.
24
403*
106
1
2. Remove the manifolds and disassemble the ball
check valves as explained on page 18.
3. Remove the clamps (106) holding the fluid covers
(101) to the air covers (23). Pull the fluid covers
(101) off the pump. See FIG. 12.
104
23
101
ti10630a
FIG. 12
4. Once the fluid covers are removed, the diaphragm
on the side of the pump which was last pressurized
with air will be separated from the center section/air
cover. This allows you to grip the diaphragms.
5. Diaphragms are assembled handtight. To loosen,
grip both diaphragms securely around the outer
edge and rotate counterclockwise. One diaphragm
assembly will come free and the other will remain
attached to the shaft. Remove the freed diaphragm
(403) and air side plate (104).
6. Pull the opposite diaphragm assembly and shaft
(24) out of the center housing (1). Hold the shaft
flats with a 19 mm open end wrench and remove the
diaphragm and air side plate from the shaft.
7. Inspect the diaphragm shaft (24) for wear or
scratches. If it is damaged, inspect the bearings (19)
in place. If the bearings are damaged, refer to page
24.
22
311879Y
Service
Reassembly
B
To reduce the risk of serious injury, including
amputation, do not put your fingers or hand between
the air cover and the d4iaphragm.
24
104
403* 5
106
1. Install the shaft u-cup packings (402*) so the lips
face out of the housing (1). Lubricate the packings.
See FIG. 13.
2. Assemble the air side plate (104) onto the diaphragm (403). The wide, radiused side of the plate
must face the diaphragm. Apply medium-strength
(blue) Loctite® or equivalent to the threads of the
diaphragm assembly. Screw the assembly into the
shaft (24) hand tight.
3. Grease the length and ends of the diaphragm shaft
(24). Insert the shaft/diaphragm assembly into one
side of the pump. Assemble the fluid cover (101)
and clamp (106) so the arrow (A) on the cover faces
the same direction as the air valve (B). Securely
tighten the clamp.
1
23
101
A
ti10631a
5
Apply medium strength (blue) Loctite® or
equivalent to bolt (not shown).
FIG. 13
4. Assemble the other diaphragm assembly to the
shaft as explained in step 2. This diaphragm will be
lifted off the air cover at this point.
5. Supply the pump with low pressure air (less than 7
psi [.05 MPa, 0.5 bar]). The diaphragm will very
slowly pull onto the air cover (23). Find the pressure
that keeps the diaphragm close enough to clamp,
but does not let it contact the pilot pin.
NOTICE
Do not deform the diaphragm manually. The diaphragm
needs uniform pressure to deform properly for maximum life.
6. Assemble the fluid cover (101) and clamp (106) so
the arrow (A) on the cover faces the same direction
as the air valve (B). Securely tighten the clamp.
NOTE: If the diaphragm contacts the pilot pin and is
forced away from the air cover, try Step 5 again. If necessary, return to Step 3.
7. Reassemble the ball check valves and manifolds as
explained on page 18.
311879Y
23
Service
Bearing and Air Gasket Removal
Tools Required
•
•
•
•
•
Torque wrench
10 mm socket wrench
Bearing puller
O-ring pick
Press, or block and mallet
Disassembly
NOTE: Do not remove undamaged bearings.
1. Relieve the pressure.
2. Remove the manifolds and disassemble the ball
check valves as explained on page 18.
bearing so it is flush with the surface of the center
housing.
3. Reassemble the air valve as explained on page 16.
4. Align the new air cover gasket (22) so the pilot pin
(16) protruding from the center housing (1) fits
through the proper hole (H) in the gasket.
5. Align the air cover (23) so the pilot pin (16) fits in the
middle hole (M) of the three small holes near the
center of the cover. Install the screws (25), handtight. Apply medium-strength (blue) Loctite® or
equivalent to the threads of the screws (25). See
FIG. 14. Using a 10 mm socket wrench, torque the
screws oppositely and evenly to 130-150 in-lb
(15-17 N•m).
6. Install the diaphragm assemblies and fluid covers as
explained on page 19.
7. Reassemble the ball check valves and manifolds as
explained on page 18.
3. Remove the fluid covers and diaphragm assemblies
as explained on page 19.
NOTE: If you are removing only the diaphragm shaft
bearing (19), skip step 4.
4. Disassemble the air valve as explained on page 16.
5. Using a 10 mm socket wrench, remove the screws
(25) holding the air covers (23) to the center housing
(1). See FIG. 14.
6. Remove the air cover gaskets (22). Always replace
the gaskets with new ones.
7. Use a bearing puller to remove the diaphragm shaft
bearings (19), air valve bearings (12) or pilot pin
bearings (15). Do not remove undamaged bearings.
8. If you removed the diaphragm shaft bearings (19)
reach into the center housing (1) with an o-ring pick
and hook the u-cup packings (402), then pull them
out of the housing. Inspect the packings. See FIG.
11.
Reassembly
1. If removed, install the shaft u-cup packings (402*)
so the lips face out of the housing (1). See FIG. 11.
2. The bearings (12, 15, and 19) are tapered and can
only be installed one way. Insert the bearings into
the center housing (1), tapered end first. Using a
press or a block and rubber mallet, press-fit the
24
311879Y
Service
1 Insert bearings tapered end first
2
Press-fit bearings flush with surface of center housing (1)
3 Apply medium strength (blue) Loctite® or equivalent.
12 1 2
Torque to 130-150 in-lb (15-17 N•m)
Detail of air valve bearings
TI9093A
1
15
16
1 2
19 1 2
22
M
23
H
25 3
TI9092a
FIG. 14
311879Y
25
Pump and Repair Kit Matrix - 1040 Models
Pump and Repair Kit Matrix - 1040 Models
SaniForce 1040 FDA-Compliant Sanitary Pumps
Your Model No. is marked on the pump’s serial plate.
The first three digits are always either FD1, FD7, FA1, or
FA7, designating 1040 FDA-compliant sanitary pumps.
The only difference between the FD and FA pumps is
the air motor housing material: stainless for FD pumps
and aluminum for FA pumps. The third digit defines the
connection style, while the final three digits define the
materials of construction of the wetted section parts. For
example, a 1040 FDA pump with a stainless steel air
motor, flange manifold connections, PTFE o-rings, stainless steel seats, PTFE balls, and PTFE diaphragms is
Model FD1111. To order replacement parts, refer to
the part lists on page 29.
SaniForce Diaphragm Pump
(Stainless Steel Fluid Sections)
Balls
Diaphragms
1 316 SST with
1
PTFE
1
PTFE
2
Santoprene®
2
Santoprene®
3
Polychloroprene
with SST core
3
PTFE
Overmolded
1 Flange
FA
All 1040 FDA-Compliant sanitary
pumps with aluminum air motor.
7 DIN
26
The digits in the matrix do not correspond to the reference numbers in the parts drawings and parts lists.
Seats and O-rings
All 1040 FDA-Compliant sanitary
pumps with stainless steel air
motor.
FDA-Compliant sanitary pumps.
To repair the air valve, order Kit 255061 for models with
stainless steel center housin or Kit 236273 for models
with aluminum center housing. See page 29. Parts
included in Kit 255061 are marked with †, and parts
included in Kit 236273 are marked with ◆.
Connections
FD
FK1 All Repair Kits for 1040
Repair kits are numbered in the same manner. The first
three digits are always FK1. Parts included in the kit are
marked with an asterisk in the parts list, for example
(201*). For example, if your pump has stainless steel
seats, PTFE o-rings, PTFE balls, and PTFE diaphragms, order Repair Kit FK1111.
PTFE o-rings
2 316 SST with
EPDM o-rings
Flange or DIN
311879Y
Pump and Repair Kit Matrix - 1040 Models
Available 1040 Configurations
Description
Pump
Model
Repair
Kit
FD1111
FK1111
FD7111
Connecti
Air Motor
ons
Seats
O-rings
Balls
Diaphragms
Flange
316 SST
PTFE
PTFE
PTFE
FK1111
DIN
316 SST
PTFE
PTFE
PTFE
FD1113
FK1113
Flange
316 SST
PTFE
PTFE
PTFE Overmolded
FD7113
FK1113
DIN
316 SST
PTFE
PTFE
PTFE Overmolded
FD1122
FK1122
Flange
316 SST
PTFE
Santoprene
Santoprene
FD7122
FK1122
DIN
316 SST
PTFE
Santoprene
Santoprene
FD1132
FK1132
Flange
316 SST
PTFE
Polychloroprene with
stainless steel core
Santoprene
316 SST
PTFE
Polychloroprene with
stainless steel core
PTFE Overmolded
316
Stainless
Steel
FD1133
FK1133
Flange
FD1211
FK1211
Flange
316 SST
EPDM
PTFE
PTFE
FD1213
FK1213
Flange
316 SST
EPDM
PTFE
PTFE Overmolded
FD1222
FK1222
Flange
316 SST
EPDM
Santoprene
Santoprene
FD7222
FK1222
DIN
316 SST
EPDM
Santoprene
Santoprene
FD1232
FK1232
Flange
316 SST
EPDM
Polychloroprene with
stainless steel core
Santoprene
FD7232
FK1232
DIN
316 SST
EPDM
Polychloroprene with
stainless steel core
Santoprene
FA1111
FK1111
Flange
316 SST
PTFE
PTFE
PTFE
FD7111
FK1111
DIN
316 SST
PTFE
PTFE
PTFE
FA1113
FK1113
Flange
316 SST
PTFE
PTFE
PTFE Overmolded
FA1122
FK1122
Flange
316 SST
PTFE
Santoprene
Santoprene
FA7122
FK1122
DIN
316 SST
PTFE
Santoprene
Santoprene
FA1132
FK1132
Flange
316 SST
PTFE
Polychloroprene with
stainless steel core
Santoprene
FA1133
FK1133
Flange
316 SST
PTFE
Polychloroprene with
stainless steel core
PTFE Overmolded
FA1222
FK1222
Flange
316 SST
EPDM
Santoprene
Santoprene
FA1231
FK1231
Flange
316 SST
EPDM
Polychloroprene with
Stainless Steel Core
PTFE
FA1232
FK1232
Flange
316 SST
EPDM
Polychloroprene with
Stainless Steel Core
Santoprene
FA1233
FK1233
Flange
316 SST
EPDM
Polychloroprene with
Stainless Steel Core
PTFE Overmolded
FA7222
FK1222
DIN
316 SST
EPDM
Santoprene
Santoprene
311879Y
A380
aluminum
27
Parts - 1040 Models
Parts - 1040 Models
Detail of Overmolded Diaphragm
Tri-Clamp Model
Shown
403*
104
3
110▲
103
2
◆†4
◆†10
11
5
113
105
108*
6†◆
7†◆
◆†17
201
202*
8†
16
◆†18
301*
106
107
3
104
55◆ 1
16
401* 1
17†◆
12
403*
10†◆
101
11
22
23
25
15
402*
20
1
24
19
301*
111
201
1
Not used on all models.
202*
*
These parts are included in the Pump Repair Kit which may be purchased
separately. Refer to Available 1040 Configurations on page 26 to determine
the correct kit for your pump.
† These parts are included in Air Valve Repair Kit 255061 (for models with
stainless steel center housing), which may be purchased separately.
113
◆ These parts are included in Air Valve Repair Kit 236273 (for models with
aluminum center housing), which may be purchased separately.
▲ Replacement Danger and Warning labels, tags, and cards are available at
no cost.
28
102
TI10634a
311879Y
Parts - 1040 Models
Parts, 1040 Models, continued
Air Motor (Digit 2 of 6 in Pump Model
Number)
Fluid Section
Ref.
Part No.
Description
Qty
101
277262
COVER, fluid; SST
2
MANIFOLD, inlet; SST
1
Digit
Ref.
Part No. Description
Qty
D
1
15K009
HOUSING, center; SST
1
2
15K696
COVER, air valve; SST
1
8†
15H178
PLATE, air valve; SST
1
1
188838
HOUSING, center, aluminum 1
2
188854
COVER, air valve; aluminum 1
8
188615
PLATE, air valve, aluminum
1
277266
Flange
55◆
188617
SEAL, valve plate
1
24U149
DIN
A
Air Motor Common Parts
Ref.
Part No.
Description
Qty
3
116344
SCREW, mach, hex flange hd;
M5 x 0.8; 12 mm (0.47 in.)
9
4†◆
188618
GASKET, cover
1
5
188855
CARRIAGE; aluminum
1
6†◆
108730
O-RING; nitrile
1
7†◆
188616
BLOCK, air valve; acetal
1
10†◆ 112181
PACKING, u-cup; nitrile
2
11
188612
PISTON, actuator; acetal
2
12
188613
BEARING, piston; acetal
2
15
188611
BEARING, pin; acetal
2
16
188610
PIN, pilot; SST
2
17†◆ 157628
O-RING; buna-N
2
18†◆ 188614
BLOCK, pilot; acetal
1
19
188609
BEARING, shaft; acetal
2
20
116344
SCREW, grounding
1
22
188603
GASKET, air cover; foam
2
23
15G667
COVER, air, SST
2
24
188608
SHAFT, diaphragm; SST
1
25
112178
SCREW; M8 x 1.25; 25 mm
(1 in.); stainless steel
12
† These parts are included in Air Valve Repair Kit 255061
(for models with stainless steel center housing), which may
be purchased separately.
◆ These parts are included in Air Valve Repair Kit 236273
(for models with aluminum center housing), which may be
purchased separately.
311879Y
102
277265
Flange
24U148
DIN
103
MANIFOLD, outlet; SST
1
106
15G698
CLAMP, diaphragm
2
110▲
188621
LABEL, warning
1
111
15G332
MUFFLER
1
113
620223
CLAMPS, sanitary
4
▲Replacement Danger and Warning labels, tags, and cards
are available at no cost.
Seat (Digit 4 of 6 in Pump Model Number)
Digit
Ref.
Part No.
Description
Qty
1
201
15H824
SEAT; 316 SST
4
2
202*
15J280
O-RING; PTFE
4
201
15H824
SEAT; 316 SST
4
202*
15H827
O-RING; EPDM
4
Ball (Digit 5 of 6 in Pump Model Number)
Digit
Ref.
Part No.
Description
Qty
1
301*
112088
BALL; PTFE
4
2
301*
112092
BALL; Santoprene®
4
3
301*
15H832
BALL; polychloroprene/SST core
4
* These parts are included in the Pump Repair Kit which
may be purchased separately. Refer to Available 1040 Configurations on page 26 to determine the correct kit for your
pump.
Continued on next page.
29
Parts - 1040 Models
Diaphragm (Digit 6 of 6 in Pump Model Number)
Digit
Ref.
1
401*
2
30
Part No. Description
Qty
DIAPHRAGM; backer; EPDM 2
402*
112181
PACKING; u-cup; nitrile
2
403*
188605
DIAPHRAGM; PTFE
2
104
188607
PLATE, air side; aluminum
105
15C039 PLATE, fluid side; SST
2
107
189044
BOLT; M12 x 1.75;
35 mm (1.38 in.); SST
2
108*
104319
O-RING; PTFE
2
402*
112181
PACKING; u-cup; nitrile
2
403*
188857
DIAPHRAGM; Santoprene
2
104
188607
PLATE, air side; aluminum
105
15C039 PLATE, fluid side; SST
2
107
189044
BOLT; M12 x 1.75;
35 mm (1.38 in.); SST
2
108*
104319
O-RING; PTFE
2
3
289224 Kit, overmolded diaphragm, PTFE; includes
403 and 104
402*
112181
PACKING; u-cup; nitrile
2
403*
253626
DIAPHRAGM; Overmolded;
PTFE; includes two diaphragms and two packings
(402)
1
104
15H809 PLATE, air side; aluminum
2
2
* These parts are included in the Pump Repair Kit which
may be purchased separately. Refer to Available 1040 Configurations on page 26 to determine the correct kit for your
pump.
2
311879Y
Dimensional Drawing - 1040 Models
Dimensional Drawing - 1040 Models
IN
MM
IN /UTLET
3ANITARY &LANGE
IN
MM
Tri-clamp model
!IR )NLET
NPTF
IN
MM
IN
MM
Pump Mounting
Hole Pattern
IN
MM
IN
MM
IN
MM
!IR %XHAUST
MUFFLER INCLUDED
NPTF
IN
MM
IN )NLET
3ANITARY &LANGE
&OUR IN
MM
DIAMETER HOLES
IN
MM
TI9094A
/VERALL 7IDTH IN MM
40 mm DIN
11851 Outlet
16.6 in.
(422 mm)
8.8 in.
(224 mm)
DIN model
Air Inlet
1/2 npt(f)
13.2 in.
(335 mm)
16.2 in.
(411 mm)
10.2 in.
( 259 mm)
2.0 in.
(51 mm)
Air Exhaust
(muffler included)
3/4 npt(f)
7.4 in.
(188 mm)
Overall Width = 8.2 in. (208 mm)
311879Y
40 mm DIN
11851 Inlet
TI22573a
31
Technical Data - 1040 Models
Technical Data - 1040 Models
Maximum fluid working pressure . . . . . . . . . . . . . . . . . . .
Air pressure operating range . . . . . . . . . . . . . . . . . . . . . .
Maximum air consumption . . . . . . . . . . . . . . . . . . . . . . . .
Air consumption at 70 psi/20 gpm . . . . . . . . . . . . . . . . . .
Maximum free-flow delivery . . . . . . . . . . . . . . . . . . . . . . .
Maximum pump speed . . . . . . . . . . . . . . . . . . . . . . . . . . .
* Gallons (Liters) per cycle . . . . . . . . . . . . . . . . . . . . . . . .
120 psi (0.8 MPa, 8 bar)
20-120 psi (0.14-0.8 MPa, 1.4-8 bar)
50 scfm
Maximum suction lift . . . . . . . . . . . . . . . . . . . . . . . . . . . . .
Maximum size pumpable solids . . . . . . . . . . . . . . . . . . . .
** Maximum Noise Level at 100 psi, full flow . . . . . . . . . .
** Sound Power Level . . . . . . . . . . . . . . . . . . . . . . . . . . . .
** Noise Level at 70 psi and 50 cpm. . . . . . . . . . . . . . . . .
29 ft (8.83 m) wet, 16 ft (4.87 m) dry
1/8 in. (3.2 mm)
92 dBa
100 dBa
73 dBa
18 scfm (see chart)
41 gpm (159 l/min)
256 cpm
0.16 (0.57)
PTFE 220°F (104.4°C)
Maximum fluid operating temperature is based on the folSantoprene® 180°F (82.2°C)
lowing maximum diaphragm, ball, and seat temperature
EPDM 275°F (135°C)
ratings. . . . . . . . . . . . . . . . . . . . . . . . . . . . . . . . . . . . . . . .
Polychloroprene 200°F (93°C)
Stainless steel 250°F (121.1°C)
Air inlet size . . . . . . . . . . . . . . . . . . . . . . . . . . . . . . . . . . . 0.5 in. npt(f)
Fluid inlet size. . . . . . . . . . . . . . . . . . . . . . . . . . . . . . . . . . 1.5 in. sanitary flange or 40 mm DIN 11851
Fluid outlet size. . . . . . . . . . . . . . . . . . . . . . . . . . . . . . . . . 1.5 in. sanitary flange or 40 mm DIN 11851
Wetted parts
***All fluid contact materials are FDA-compliant and meet the United States Code of Federal Regulations (CFR)
Title 21, Section 177.
Wetted materials on all models . . . . . . . . . . . . . . . . . 316 SST
Wetted material depen
EPDM, Polychloroprene, PTFE, Santoprene®
g on model . . . . . . . . . . . . . . . . . . . . . . . . . . . . . . . . .
CAUTION:
Santoprene® may be used only with non-fatty, non-oily foods or alcohols up to 15%.
300 series stainless steel, aluminum (A380), polyester
Non-wetted external parts . . . . . . . . . . . . . . . . . . . . . . . .
(labels), LDPE foam (gasket)
Weight
FD1 Models . . . . . . . . . . . . . . . . . . . . . . . . . . . . . . . . 55 lb. (24.9 kg)
FA1 Models . . . . . . . . . . . . . . . . . . . . . . . . . . . . . . . . 49 lb. (22.2 kg)
Santoprene® is a registered trademark of the Monsanto Co.
Loctite® is a registered trademark of the Loctite Corporation.
*
Displacement per cycle may vary based on suction condition, discharge head, air pressure, and fluid type.
**
Noise levels measured with the pump mounted to a solid surface. Sound power measured per
ISO Standard 9614-1.
***
The pump user must verify that the construction materials meet their specific application requirements.
32
311879Y
Performance Chart - 1040 Models
Performance Chart - 1040 Models
Test Conditions: Pump tested in water with inlet submerged
Fluid Pressure Curves
To find Fluid Outlet Pressure
(psi/MPa/bar) at a specific fluid flow (gpm/lpm) and
operating air pressure (psi/MPa/bar):
1. Locate fluid flow rate along bottom of chart.
2. Follow vertical line up to intersection with selected
operating air pressure curve.
3. Follow left to scale to read fluid outlet pressure.
120
(0.84, 8.4)
100
(0.7, 7)
psi (MPa, bar)
at 120 psi (0.7 MPa, 7 bar) operating air pressure
at 100 psi (0.7 MPa, 7 bar) operating air pressure
at 70 psi (0.48 MPa, 4.8 bar) operating air pressure
at 40 psi (0.28 MPa, 2.8 bar) operating air pressure
Fluid Outlet Pressure
A
B
C
D
80
(0.55, 5.5)
60
(0.41, 4.1)
40
(0.28, 2.8)
20
(0.14, 1.4)
0
5
(19)
10
(38)
15
(57)
20
(76)
25
(95)
30
(114)
35
(133)
Fluid Flow
40
(152)
TI8736A
gpm (lpm)
TI8742A
Air Consumption Curves
To find Pump Air Consumption
(scfm or m3/min) at a specific fluid flow (gpm/lpm) and
operating air pressure (psi/MPa/bar):
1. Locate fluid flow rate along bottom of chart.
2. Read vertical line up to intersection with selected
operating air pressure curve.
3. Follow left to scale to read air consumption.
60
(1.7)
scfm (m3/min)
at 120 psi (0.7 MPa, 7 bar) operating air pressure
at 100 psi (0.7 MPa, 7 bar) operating air pressure
at 70 psi (0.48 MPa, 4.8 bar) operating air pressure
at 40 psi (0.28 MPa, 2.8 bar) operating air pressure
Air Consumption
A
B
C
D
40
(1.13)
20
(0.57)
0
5
(19)
10
(38)
15
(57)
20
(76)
25
(95)
30
(114)
35
(133)
40
(152)
Fluid Flow
gpm (lpm)
TI8737A
TI8742A
311879Y
33
Pump and Repair Kit Matrix - 1590 Models
Pump and Repair Kit Matrix - 1590 Models
SaniForce 1590 FDA-Compliant Sanitary Pumps
Your Model No. is marked on the pump’s serial plate.
The first three digits are always either FD2, FD8, FA2, or
FA8, designating 1590 FDA-compliant sanitary pumps.
The only difference between the FD and FA pumps is
the air motor housing material: stainless for FD pumps
and aluminum for FA pumps. The third digit defines the
connection style, while the final three digits define the
materials of construction of the wetted section parts. For
example, a 1590 FDA pump with a stainless steel air
motor, flange manifold connections, PTFE o-rings, stainless steel seats, PTFE balls, and PTFE diaphragms is
Model FD2111. To order replacement parts, refer to
the part lists on pages 37.
SaniForce Diaphragm Pump
(Stainless Steel Fluid Sections)
Connections
FD
All 1590 FDA-Compliant sanitary
2 Flange
pumps with stainless steel air motor.
FA
All 1590 FDA-Compliant sanitary
pumps with aluminum air motor.
8 DIN
FK2 All Repair Kits for 1590 FDA-Compli- Flange or DIN
ant sanitary pumps.
34
Repair kits are numbered in the same manner. The first
three digits are always FK2. Parts included in the kit are
marked with an asterisk in the parts list, for example
(201*). For example, if your pump has stainless steel
seats, PTFE o-rings, PTFE balls, and PTFE diaphragms, order Repair Kit FK2111.
To repair the air valve, order Kit 255061 for models with
stainless steel center housing or Kit 236273 for models
with aluminum center housing. See page 37. Parts
included in Kit 255061 are marked with †, and parts
included in Kit 236273 are marked with ◆.
The digits in the matrix do not correspond to the reference numbers in the parts drawings and parts lists.
Seats and O-rings
Balls
Diaphragms
1 316 SST with
1
PTFE
1
PTFE
2
Santoprene®
2
Santoprene®
3
Polychloroprene
with SST core
3
PTFE
Overmolded
PTFE o-rings
2 316 SST with
EPDM o-rings
311879Y
Pump and Repair Kit Matrix - 1590 Models
Available 1590 Configurations
Description
Pump
Model
Repair
Kit
Connection
FD2111
FK2111
FD8111
Air Motor
Seats
O-rings
Balls
Diaphragms
Flange
316 SST
PTFE
PTFE
PTFE
FK2111
DIN
316 SST
PTFE
PTFE
PTFE
FD2113
FK2113
Flange
316 SST
PTFE
PTFE
PTFE Overmolded
FD2122
FK2122
Flange
316 SST
PTFE
Santoprene
Santoprene
FD2132
FK2132
Flange
316 SST
PTFE
Polychloroprene with
stainless steel core
Santoprene
316 SST
PTFE
Polychloroprene with
stainless steel core
PTFE Overmolded
316
Stainless
Steel
FD2133
FK2133
Flange
FD2211
FK2211
Flange
316 SST
EPDM
PTFE
PTFE
FD2213
FK2213
Flange
316 SST
EPDM
PTFE
PTFE Overmolded
FD2222
FK2222
Flange
316 SST
EPDM
Santoprene
Santoprene
FD8222
FK2222
DIN
316 SST
EPDM
Santoprene
Santoprene
FD2232
FK2232
Flange
316 SST
EPDM
Polychloroprene with
stainless steel core
Santoprene
FA2111
FK2111
Flange
316 SST
PTFE
PTFE
PTFE
FA8111
FK2111
DIN
316 SST
PTFE
PTFE
PTFE
FA2113
FK2113
Flange
316 SST
PTFE
PTFE
PTFE Overmolded
FA2122
FK2122
Flange
316 SST
PTFE
Santoprene
Santoprene
FA2132
FK2132
Flange
316 SST
PTFE
Polychloroprene with
stainless steel core
Santoprene
316 SST
EPDM
PTFE
PTFE Overmolded
A380
Aluminum
FA2213
FK2213
Flange
FA2222
FK2222
Flange
316 SST
EPDM
Santoprene
Santoprene
FA2231
FK2231
Flange
316 SST
EPDM
Polychloroprene with
Stainless Steel Core
PTFE
FA2232
FK2232
Flange
316 SST
EPDM
Polychloroprene with
Stainless Steel Core
Santoprene
FA2233
FK2233
Flange
316 SST
EPDM
Polychloroprene with
Stainless Steel Core
PTFE Overmolded
311879Y
35
Parts - 1590 Models
Parts - 1590 Models
Tri-Clamp Model
Shown
Detail of Overmolded Diaphragm
110▲
403*
103
104
3
2
113
◆†4
*301
104
◆†10
403*
5
106
105
11
*202
108*
◆†17
107
6†◆
7†◆
8†
55◆ 1
16
17†◆
16
◆†18
3
12
10†◆
201
401* 1
11
22
23
25
101
24
*301
402*
1
15
19
201
20
111
1
*202
13
113
Not used on all models.
*
These parts are included in the Pump Repair Kit which may be purchased
separately. Refer to Available 1590 Configurations on page 35 to determine
the correct kit for your pump.
† These parts are included in Air Valve Repair Kit 255061 (for models with
stainless steel center housing), which may be purchased separately.
◆ These parts are included in Air Valve Repair Kit 236273 (for models with
aluminum center housing), which may be purchased separately.
▲ Replacement Danger and Warning labels, tags, and cards are available at
no cost.
36
102
TI8927b
311879Y
Parts - 1590 Models
Parts, 1590 Models, continued
Air Motor (Digit 2 of 6 in Pump Model
Number)
Ref.
Part No.
Description
Qty
Qty
101
277263
COVER, fluid; SST
2
HOUSING, center; SST
1
102
MANIFOLD, inlet; SST
1
COVER, air valve; SST
1
1
Digit
Ref.
Part No. Description
D
1
15K009
2
15K696
A
Fluid Section
277267
Flange
24U150
DIN
8†
15H178
PLATE, air valve; SST
1
188838
HOUSING, center, aluminum 1
2
188854
COVER, air valve; aluminum 1
277268
Flange
8
188615
PLATE, air valve, aluminum
1
24U151
DIN
55◆
188617
SEAL, valve plate
1
103
Air Motor Common Parts
Qty
MANIFOLD, outlet; SST
1
106
15G699
CLAMP, diaphragm
2
110▲
188621
LABEL, warning
1
111
15G332
MUFFLER
1
113
15D475
CLAMP, sanitary
4
Ref.
Part No.
Description
3
116344
SCREW, mach, hex flange hd;
M5 x 0.8; 12 mm (0.47 in.)
9
4†◆
188618
GASKET, cover;
1
5
188855
CARRIAGE; aluminum
1
6†◆
108730
O-RING; nitrile
1
7†◆
188616
BLOCK, air valve; acetal
1
Digit
Ref.
Part No.
Description
10†◆
112181
PACKING, u-cup; nitrile
2
1
201
15H825
SEAT; 316 sst
4
202*
15H830
O-RING; PTFE
4
201
15H825
SEAT; 316 sst
4
202*
15H828
O-RING; EPDM
4
11
188612
PISTON, actuator; acetal
2
12
188613
BEARING, piston; acetal
2
13
▲ Replacement Danger and Warning labels, tags and
cards are available at no cost.
Seat (Digit 4 of 6 in Pump Model Number)
2
2
Qty
103778
PLUG, pipe
15
188611
BEARING, pin; acetal
2
16
188610
PIN, pilot; SST
2
17†◆
157628
O-RING; buna-N
2
Digit
Ref.
Part No.
Description
Qty
18†◆
188614
BLOCK, pilot; acetal
1
1
301*
112419
BALL; PTFE
4
19
188609
BEARING, shaft; acetal
2
2
301*
112421
BALL; Santoprene®
4
20
116344
SCREW, grounding
1
3
301*
15H833
188603
GASKET, air cover; foam
2
BALL; polychloroprene/SST core
4
22
23
15G668
COVER, air; SST
2
24
189245
SHAFT, diaphragm; SST
1
25
112178
SCREW; M8 x 1.25; 25 mm
(1 in.); stainless steel
12
† These parts are included in Air Valve Repair Kit 255061
Ball (Digit 5 of 6 in Pump Model Number)
*
These parts are included in the Pump Repair Kit which
may be purchased separately. Refer to Available 1590 Configurations on page 35 to determine the correct kit for your
pump.
Continued on next page.
(for models with stainless steel center housing), which may
be purchased separately.
◆ These parts are included in Air Valve Repair Kit 236273
(for models with aluminum center housing), which may be
purchased separately.
311879Y
37
Parts - 1590 Models
Diaphragm (Digit 6 of 6 in Pump Model Number)
Digit
Ref.
1
401*
2
38
Part No.
Description
Qty
DIAPHRAGM; backer; EPDM 2
402*
112181
PACKING; u-cup; nitrile
2
403*
15K312
DIAPHRAGM; PTFE
2
104
15K448
PLATE, air side; aluminum
2
105
189309
PLATE, fluid side; SST
2
107
189410
BOLT; M12 x 1.75;
35 mm (1.38 in.); SST
2
108*
104319
O-RING; PTFE
2
402*
112181
PACKING; u-cup; nitrile
2
403*
189426
DIAPHRAGM; Santoprene®
2
104
15K448
PLATE, air side; aluminum
2
105
189309
PLATE, fluid side; SST
2
107
189410
BOLT; M12 x 1.75;
35 mm (1.38 in.); SST
2
108*
104319
O-RING; PTFE
2
3
289225 Kit, overmolded diaphragm, PTFE; includes
403 and 104
402*
112181
PACKING; u-cup; nitrile
2
403*
253627
DIAPHRAGM; Overmolded;
PTFE; includes two diaphragms and two packings
(402)
1
104
15H810
PLATE, air side; aluminum
2
*
These parts are included in the Pump Repair Kit which
may be purchased separately. Refer to Available 1590 Configurations on page 35 to determine the correct kit for your
pump.
311879Y
Dimensional Drawing - 1590 Models
Dimensional Drawing - 1590 Models
IN
MM
IN /UTLET
3ANITARY &LANGE
IN
MM
Tri-clamp model
!IR )NLET
NPTF
IN
MM
IN
MM
Pump Mounting
Hole Pattern
IN
MM
IN
MM
&OUR IN
MM
DIAMETER HOLES
IN
MM
!IR %XHAUST
MUFFLER INCLUDED
NPTF
IN )NLET
3ANITARY &LANGE
IN
MM
IN
MM
TI9095a
/VERALL 7IDTH IN MM
19.3 in.
(490 mm)
50 mm DIN
11851 Outlet
9.6 in.
(244 mm)
DIN model
Air Inlet
1/2 npt(f)
16.9 in.
(429 mm)
20.4 in.
(518 mm)
12.6 in.
(320 mm)
2.4 in.
(61 mm)
TI22574a
Air Exhaust
(muffler included)
3/4 npt(f)
7.8 in.
(198 mm)
50 mm DIN
11851 Inlet
Overall Width = 10.1 in. (257 mm)
311879Y
39
Technical Data - 1590 Models
Technical Data - 1590 Models
Maximum fluid working pressure . . . . . . . . . . . . . . . . . . .
Air pressure operating range . . . . . . . . . . . . . . . . . . . . . .
Maximum air consumption . . . . . . . . . . . . . . . . . . . . . . . .
Air consumption at 70 psi/50 gpm . . . . . . . . . . . . . . . . . .
Maximum free-flow delivery . . . . . . . . . . . . . . . . . . . . . . .
Maximum pump speed . . . . . . . . . . . . . . . . . . . . . . . . . . .
* Gallons (Liters) per cycle . . . . . . . . . . . . . . . . . . . . . . . .
120 psi (0.8 MPa, 8 bar)
20-120 psi (0.14-0.8 MPa, 1.4-8 bar)
130 scfm
Maximum suction lift . . . . . . . . . . . . . . . . . . . . . . . . . . . . .
Maximum size pumpable solids . . . . . . . . . . . . . . . . . . . .
** Maximum Noise Level at 100 psi, full flow . . . . . . . . . .
** Sound Power Level . . . . . . . . . . . . . . . . . . . . . . . . . . . .
** Noise Level at 70 psi and 50 cpm . . . . . . . . . . . . . . . . .
29 ft (8.83 m) wet, 14 ft (4.26 m) dry
3/16 in. (4.8 mm)
88 dBa
95 dBa
79 dBa
42 scfm (see chart)
100 gpm (379 l/min)
200 cpm
0.5 (1.9)
PTFE 220°F (104.4°C)
Maximum fluid operating temperature is based on the fol- Santoprene® 180°F (82.2°C)
lowing maximum diaphragm, ball, and seat temperature Polychloroprene 200°F (93°C)
ratings. . . . . . . . . . . . . . . . . . . . . . . . . . . . . . . . . . . . . . . . EPDM 275°F (135°C)
Stainless steel 250°F (121.1°C)
Air inlet size . . . . . . . . . . . . . . . . . . . . . . . . . . . . . . . . . . . 0.5 in. npt(f)
Fluid inlet size . . . . . . . . . . . . . . . . . . . . . . . . . . . . . . . . . . 2.0 in. Sanitary flange or 50 mm DIN 11851
Fluid outlet size . . . . . . . . . . . . . . . . . . . . . . . . . . . . . . . . . 2.0 in. Sanitary flange or 50 mm DIN 11851
Wetted parts
***All fluid contact materials are FDA-compliant and meet the United States Code of Federal Regulations (CFR)
Title 21, Section 177.
Wetted materials on all models . . . . . . . . . . . . . . . . . 316 SST
Wetted material depending on model. . . . . . . . . . . . . EPDM, Polychloroprene, PTFE, Santoprene®
CAUTION:
Santoprene® may be used only with non-fatty, non-oily foods or alcohols up to 15%.
300 series stainless steel, aluminum (A380), polyester
Non-wetted external parts. . . . . . . . . . . . . . . . . . . . . . . . .
(labels), LDPE foam (gasket)
Weight
FD2 Models . . . . . . . . . . . . . . . . . . . . . . . . . . . . . . . . 89 lb (40.3 kg)
FA2 Models . . . . . . . . . . . . . . . . . . . . . . . . . . . . . . . . 83 lb. (37.6 kg)
Santoprene® is a registered trademark of the Monsanto Co.
Loctite® is a registered trademark of the Loctite Corporation.
40
*
Displacement per cycle may vary based on suction condition, discharge head, air pressure, and fluid type.
**
Noise levels measured with the pump mounted to a solid surface. Sound power measured per
ISO Standard 9614-1.
***
The pump user must verify that the construction materials meet their specific application requirements.
311879Y
Performance Chart - 1590 Models
Performance Chart - 1590 Models
Test Conditions: Pump tested in water with inlet submerged
Fluid Pressure Curves
To find Fluid Outlet Pressure
(psi/MPa/bar) at a specific fluid flow (gpm/lpm) and
operating air pressure (psi/MPa/bar):
1. Locate fluid flow rate along bottom of chart.
2. Follow vertical line up to intersection with selected
operating air pressure curve.
3. Follow left to scale to read fluid outlet pressure.
140
(0.96, 9.6)
120
(0.84, 8.4)
psi (MPa, bar)
at 120 psi (0.7 MPa, 7 bar) operating air pressure
at 100 psi (0.7 MPa, 7 bar) operating air pressure
at 70 psi (0.48 MPa, 4.8 bar) operating air pressure
at 40 psi (0.28 MPa, 2.8 bar) operating air pressure
Fluid Outlet Pressure
A
B
C
D
100
(0.7, 7)
80
(0.55, 5.5)
60
(0.41, 4.1)
40
(0.28, 2.8)
20
(0.14, 1.4)
0
20
(75)
40
(151)
60
(227)
80
(302)
120
(454)
100
(378)
Fluid Flow
TI8738A
gpm (lpm)
TI8742A
Air Consumption Curves
1. Locate fluid flow rate along bottom of chart.
2. Read vertical line up to intersection with selected
operating air pressure.
3. Follow left to scale to read air consumption.
120
(3.4)
scfm (m3/min)
To find Pump Air Pressure
(scfm or m3/min) at a specific fluid flow (gpm/lpm)
and operating air pressure (psi/MPa/bar):
140
(3.96)
Air Consumption
A at 120 psi (0.7 MPa, 7 bar) operating air pressure
B at 100 psi (0.7 MPa, 7 bar) operating air pressure
C at 70 psi (0.48 MPa, 4.8 bar) operating air pressure
D at 40 psi (0.28 MPa, 2.8 bar) operating air pressure
100
(2.83)
80
(2.27)
60
(1.7)
40
(1.13)
20
(0.57)
0
20
(75)
40
(151)
60
(227)
Fluid Flow
gpm (lpm)
80
(302)
120
(454)
100
(378)
TI8739A
TI8742A
311879Y
41
Pump and Repair Kit Matrix - 2150 Models
Pump and Repair Kit Matrix - 2150 Models
SaniForce 2150 FDA-Compliant Sanitary Pumps
Your Model No. is marked on the pump’s serial plate.
The first three digits are always either FD3, FD9, FA3, or
FA9, designating 2150 FDA-compliant sanitary pumps.
The only difference between the FD and FA pumps is
the air motor housing material: stainless for FD pumps
and aluminum for FA pumps. The third digit defines the
connection style, while the final three digits define the
materials of construction of the wetted section parts. For
example, a 2150 FDA pump with a stainless steel air
motor, flange manifold connections, PTFE o-rings,
stainless steel seats, PTFE balls, and PTFE diaphragms
is Model FD3111.To order replacement parts, refer to
the part lists on page 45.
Repair kits are numbered in the same manner. The first
three digits are always FK3. Parts included in the kit are
marked with an asterisk in the parts list, for example
(201*). For example, if your pump has stainless steel
seats, PTFE o-rings, PTFE balls, and PTFE
diaphragms, order Repair Kit FK3111.
To repair the air valve, order Kit 255061 for models with
stainless steel center housing or Kit 236273 for models
with aluminum center housing. See page 45. Parts
included in Kit 255061 are marked with †, and parts
included in Kit 236273 are marked with ◆.
The digits in the matrix do not correspond to the
reference numbers in the parts drawings and parts lists.
SaniForce Diaphragm Pump
(Stainless Steel Fluid Sections)
Connections
FD
All 2150 FDA-Compliant sanitary
3 Flange
pumps with stainless steel air motor.
FA
All 2150 FDA-Compliant sanitary
pumps with aluminum air motor.
9 DIN
FK3 All Repair Kits for 2150 FDA-Compli- Flange or DIN
ant sanitary pumps.
42
Seats and O-rings
Balls
Diaphragms
1 316 SST with
1
PTFE
1
PTFE
2
Santoprene®
2
Santoprene®
3
Polychloroprene
with SST core
3
PTFE
Overmolded
PTFE o-rings
2 316 SST with
EPDM o-rings
311879Y
Pump and Repair Kit Matrix - 2150 Models
Available 2150 Configurations
Description
Pump
Model
Repair
Kit
Connections Air Motor
Seats
O-rings
Balls
Diaphragms
FD3111
FK3111
Flange
316 SST
PTFE
PTFE
PTFE
FD9111
FK3111
DIN
316 SST
PTFE
PTFE
PTFE
FD3113
FK3113
Flange
316 SST
PTFE
PTFE
PTFE Overmolded
FD3122
FK3122
Flange
316 SST
PTFE
Santoprene
FD3132
FK3132
Flange
316 SST
PTFE
316 SST
PTFE
Santoprene
Polychloroprene with
stainless steel core
Polychloroprene with
stainless steel core
PTFE Overmolded
316
Stainless
Steel
Santoprene
FD3133
FK3133
Flange
FD3211
FK3211
Flange
316 SST
EPDM
PTFE
PTFE
FD3213
FK3213
Flange
316 SST
EPDM
PTFE
PTFE Overmolded
FD3222
FK3222
Flange
316 SST
EPDM
Santoprene
Santoprene
FD9222
FK3222
DIN
316 SST
EPDM
Santoprene
FD3232
FK3232
Flange
316 SST
EPDM
Santoprene
Polychloroprene with
stainless steel core
Santoprene
FA3111
FK3111
Flange
316 SST
PTFE
PTFE
PTFE
FA9111
FK3111
DIN
316 SST
PTFE
PTFE
PTFE
FA3113
FK3113
Flange
316 SST
PTFE
PTFE
PTFE Overmolded
FA3122
FK3122
Flange
316 SST
PTFE
Santoprene
FA3132
FK3132
Flange
316 SST
PTFE
Santoprene
Polychloroprene with
stainless steel core
FA3222
FK3222
Flange
316 SST
EPDM
FA3231
FK3231
Flange
316 SST
EPDM
FA3232
FK3232
Flange
316 SST
EPDM
FA3233
FK3233
Flange
316 SST
EPDM
A380
Aluminum
Santoprene
Polychloroprene with
Stainless Steel Core
Polychloroprene with
Stainless Steel Core
Polychloroprene with
Stainless Steel Core
Santoprene
Santoprene
PTFE
Santoprene
PTFE Overmolded
Options for Ram Mounting
Pump Model
Repair Kit
Seats
O-rings
Balls
Diaphragms
24G743
FK3113
316 sst
PTFE
PTFE Overmolded
24G744
FK3132
316 sst
PTFE
PTFE, white
Polychloroprene with
stainless steel core
311879Y
Santoprene
43
Parts - 2150 Models
Parts - 2150 Models
See page 47 for 2150 models designed for ram mounting.
Detail of Overmolded Diaphragm
Tri-Clamp Model
Shown
403*
110▲
104
103
3
2
◆†4
◆†10
113
5
11
104
6†◆
◆†17
*301
105
7†◆
106
16
◆†18
8†
*202
107
55◆ 1
3
201
108*
17†◆
16
12
10†◆
11
401* 1
403*
23
25
15
24
101
1
402*
19
*301
20
22
111
13
1 Not used on all models.
*
These parts are included in the Pump Repair Kit which may be purchased separately. Refer to Available 2150 Configurations on page 43 to
determine the correct kit for your pump.
201
*202
113
† These parts are included in Air Valve Repair Kit 255061 (for models with
stainless steel center housing), which may be purchased separately.
◆ These parts are included in Air Valve Repair Kit 236273 (for models with
aluminum center housing), which may be purchased separately.
▲ Replacement Danger and Warning labels, tags and cards are available at
no cost.
102
TI8929b
44
311879Y
Parts - 2150 Models
Parts, 2150 Models, continued
Air Motor (Digit 2 of 6 in Pump Model
Number)
Ref.
Part No.
Description
Qty
Qty
101
277264
COVER, fluid; SST
2
HOUSING, center; SST
1
102
MANIFOLD, inlet; SST
1
COVER, air valve; SST
1
1
Digit
Ref.
Part No. Description
D
1
15K009
2
15K696
A
Fluid Section
277269
Flange
24U152
DIN
8†
15H178
PLATE, air valve; SST
1
188838
HOUSING, center, aluminum 1
2
188854
COVER, air valve; aluminum 1
277270
Flange
8
188615
PLATE, air valve, aluminum
1
24U153
DIN
55◆
188617
SEAL, valve plate
1
103
Air Motor Common Parts
Qty
MANIFOLD, outlet; SST
1
106
15H513
CLAMP, sanitary, diaphragm
2
110▲
188621
LABEL, warning
1
111
15G332
MUFFLER
1
113
510490
CLAMP, sanitary
4
Ref.
Part No.
Description
3
116344
SCREW, mach, hex flange hd;
M5 x 0.8; 12 mm (0.47 in.)
4†◆
188618
GASKET, cover
1
5
188855
CARRIAGE; aluminum
1
6†◆
108730
O-RING; nitrile
1
Digit
Ref.
Part No.
Description
Qty
7†◆
188616
BLOCK, air valve; acetal
1
1
201
15H826
SEAT; 316 SST
4
10†◆
112181
PACKING, u-cup; nitrile
4
202*
15H831
O-RING; PTFE
4
11
188612
PISTON, actuator; acetal
2
201
15H826
SEAT; 316 SST
4
12
188613
BEARING, piston; acetal
2
202*
15H829
O-RING; EPDM
4
13
103778
PLUG, pipe
2
15
188611
BEARING, pin; acetal
2
16
188610
PIN, pilot; SST
2
Digit
Ref.
Part No.
Description
Qty
17†◆
157628
O-RING; buna-N
2
1
301*
112359
BALL; PTFE
4
10
▲Replacement Danger and Warning labels, tags and cards
are available at no cost.
Seat (Digit 4 of 6 in Pump Model Number)
2
Ball (Digit 5 of 6 in Pump Model Number)
18†◆
188614
BLOCK, pilot; acetal
1
2
301*
112361
BALL; Santoprene®
4
19
188609
BEARING, shaft; acetal
2
3
301*
15H834
4
20
116344
SCREW, grounding
1
BALL; polychloroprene/SST core
22
188603
GASKET, air cover; foam
2
23
15H859
COVER, air; SST
2
24
189304
SHAFT, diaphragm; SST
1
25
112178
SCREW; M8 x 1.25; 25 mm
(1 in.); stainless steel
12
*
These parts are included in the Pump Repair Kit which
may be purchased separately. Refer to Available 2150 Configurations on page 43 to determine the correct kit for your
pump.
Continued on next page.
† These parts are included in Air Valve Repair Kit 255061
(for models with stainless steel center housing), which may
be purchased separately.
◆ These parts are included in Air Valve Repair Kit 236273
(for models with aluminum center housing), which may be
purchased separately.
311879Y
45
Parts - 2150 Models
Diaphragm (Digit 6 of 6 in Pump Model Number
Digit
Ref.
1
401*
Part No.
2
PACKING; u-cup; nitrile
2
403* 15K313
DIAPHRAGM; PTFE
2
104
189298
PLATE, air side; aluminum
2
105
189299
PLATE, fluid side; SST
2
107
189410
BOLT; M12 x 1.75;
55 mm (2.16 in.); SST
2
O-RING; PTFE
2
402* 112181
PACKING; u-cup; nitrile
2
403* 189296
DIAPHRAGM; Santoprene®
2
104
189298
PLATE, air side; aluminum
2
105
189299
PLATE, fluid side; SST
2
107
189410
BOLT; M12 x 1.75;
55 mm (2.16 in.); SST
2
O-RING; PTFE
2
108* 104319
3
Qty
DIAPHRAGM; backer; EPDM
402* 112181
108* 104319
2
Description
289226 Kit, overmolded diaphragm, PTFE; includes
403 and 104
402* 112181
PACKING; u-cup; nitrile
2
403* 253628
DIAPHRAGM; Overmolded;
PTFE; includes two diaphragms and two packings
(402)
1
104
PLATE, air side; aluminum
2
15H811
*
These parts are included in the Pump Repair Kit which
may be purchased separately. Refer to Available 2150 Configurations on page 43 to determine the correct kit for your
pump.
46
311879Y
Parts - 2150 Models
311879Y
47
Parts - 2150 Models for Ram Mounting
Parts - 2150 Models for Ram Mounting
Models 24G743 and 24G744
103
Detail of Overmolded Diaphragm
403*
110▲
104
3
2
†4
†10
113
5
11
*301
6†
†17
105
106
16
†18
201
108*
*202
7†
8†
3
107
104
16 17†
12
403*
10†
11
23
25
15
1
10*
24
101
19
*301
20
111
22
13
* These parts are included in the Pump Repair Kit which may be purchased separately. Refer to Options for Ram Mounting on page 43 to
determine the correct kit for your pump.
201
*202
113
† These parts are included in Air Valve Repair Kit 255061 which may be
purchased separately.
▲ Replacement Danger and Warning labels, tags and cards are available
at no cost.
114
TI8929b
48
311879Y
Parts - 2150 Models for Ram Mounting
2150 Models 24G743 and 24G744 (for Ram Mounting)
Qty
114
24G855
ADAPTER, for ram plate
2
HOUSING, center; SST
1
201
15H826
SEAT; 316 SST
4
15K696
COVER, air valve; SST
1
202*
15H831
O-RING; PTFE
8
3
116344
SCREW, mach, hex flange hd;
M5 x 0.8; 12 mm (0.47 in.)
9
301*
112359
BALL; PTFE, for Model 24G743
4
15H834
188618
GASKET, cover
1
BALL; polychloroprene/SST
core, for Model 24G744
4
4†
5
188855
CARRIAGE; aluminum
1
253628
1
6†
108730
O-RING; nitrile
1
7†
188616
BLOCK, air valve; acetal
1
DIAPHRAGM; Overmolded;
PTFE; includes two diaphragms and two packings (10),
for Model 24G743
8†
15H178
PLATE, air valve; SST
1
189296
DIAPHRAGM; Santoprene®, for
Model 24G744
2
10†
112181
PACKING, u-cup; nitrile
4
11
188612
PISTON, actuator; acetal
2
12
188613
BEARING, piston; acetal
2
13‡
103778
PLUG, pipe
2
15
188611
BEARING, pin; acetal
2
*
These parts are included in the Pump Repair Kit which
may be purchased separately. Order Kit FK3113 for Model
24G743. Order Kit FK3132 for Model 24G744.
16
188610
PIN, pilot; SST
2
▲
17†
157628
O-RING; buna-N
2
18†
188614
BLOCK, pilot; acetal
1
19
188609
BEARING, shaft; acetal
2
20
116344
SCREW, grounding
1
22
188603
GASKET, air cover; foam
2
23
15H859
COVER, air; SST
2
24
189304
SHAFT, diaphragm; SST
1
25
112178
SCREW; M8 x 1.25; 25 mm
(1 in.); stainless steel
101
277264
COVER, fluid; SST
2
103
16F257
MANIFOLD, outlet; SST
1
104
15H811
PLATE, air side; aluminum, for
Model 24G743
2
189298
PLATE, air side, aluminum, for
Model 24G744
2
105
189299
PLATE, fluid side; SST, for
Model 24G744
2
106
15H513
CLAMP, sanitary, diaphragm
2
107
189410
BOLT; M12 x 1.75; 55 mm (2.16
in.); SST, for Model 24G744
2
108*
104319
O-RING; PTFE
2
110▲
188621
LABEL, warning
1
113
510490
CLAMP, sanitary
4
Ref.
Part No.
Description
1
15K009
2
311879Y
403*
† These parts are included in Air Valve Repair Kit 255061
which may be purchased separately.
Replacement Danger and Warning labels, tags and cards
are available at no cost.
12
49
Dimensional Drawing - 2150 Models
Dimensional Drawing - 2150 Models
IN
MM
IN /UTLET
3ANITARY &LANGE
IN
MM
Tri-clamp model
!IR )NLET
NPTF
IN
MM
Pump Mounting
Hole Pattern
IN
MM
IN
MM
&OUR IN
MM
DIAMETER HOLES
IN
MM
IN
MM
!IR %XHAUST
MUFFLER INCLUDED
NPTF
IN
MM
IN )NLET
3ANITARY &LANGE
/VERALL 7IDTH IN MM
IN
MM
TI9096a
22.1 in.
(561 mm)
11.0 in.
(278 mm)
65 mm DIN
11851 Outlet
DIN model
Air Inlet
1/2 npt(f)
21.99 in.
(556 mm)
26.0 in.
(660 mm)
15.8 in.
(401 mm)
TI22575a
Air Exhaust
(muffler included)
3/4 npt(f)
8.2 in.
(208 mm)
2.4 in.
(61 mm)
65 mm DIN
11851 Inlet
Overall Width = 10.1 in. (257 mm)
50
311879Y
Technical Data - 2150 Models
Technical Data - 2150 Models
Maximum fluid working pressure . . . . . . . . . . . . . . . . . . .
Air pressure operating range . . . . . . . . . . . . . . . . . . . . . .
Maximum air consumption . . . . . . . . . . . . . . . . . . . . . . . .
Air consumption at 70 psi/80 gpm . . . . . . . . . . . . . . . . . .
Maximum free-flow delivery . . . . . . . . . . . . . . . . . . . . . . .
Maximum pump speed . . . . . . . . . . . . . . . . . . . . . . . . . . .
* Gallons (Liters) per cycle . . . . . . . . . . . . . . . . . . . . . . . .
120 psi (0.8 MPa, 8 bar)
20-120 psi (0.14-0.8 MPa, 1.4-8 bar)
175 scfm
Maximum suction lift . . . . . . . . . . . . . . . . . . . . . . . . . . . . .
Maximum size pumpable solids . . . . . . . . . . . . . . . . . . . .
** Maximum Noise Level at 100 psi, full flow . . . . . . . . . .
** Sound Power Level . . . . . . . . . . . . . . . . . . . . . . . . . . . .
** Noise Level at 70 psi and 50 cpm . . . . . . . . . . . . . . . . .
29 ft (8.83 m) wet, 16 ft (4.87 m) dry
1/4 in. (6.3 mm)
95 dBa
102 dBa
84 dBa
70 scfm (see chart)
160 gpm (568 lpm)
165 cpm
0.97 (3.67)
PTFE 220°F (104.4°C)
Maximum fluid operating temperature is based on the fol- Santoprene® 180°F (82.2°C)
lowing maximum diaphragm, ball, and seat temperature Polychloroprene 200°F (93°C)
ratings. . . . . . . . . . . . . . . . . . . . . . . . . . . . . . . . . . . . . . . . EPDM 275°F (135°C)
Stainless steel 250°F (121.1°C)
Air inlet size . . . . . . . . . . . . . . . . . . . . . . . . . . . . . . . . . . . 0.5 in. npt(f)
Fluid inlet size . . . . . . . . . . . . . . . . . . . . . . . . . . . . . . . . . . 2.5 in. sanitary flange or 65 mm DIN 11851
Fluid outlet size . . . . . . . . . . . . . . . . . . . . . . . . . . . . . . . . . 2.5 in. sanitary flange or 65 mm DIN 11851
Wetted parts
***All fluid contact materials are FDA-compliant and meet the United States Code of Federal Regulations (CFR)
Title 21, Section 177.
Wetted materials on all models. . . . . . . . . . . . . . . . . . . . . 316 SST
Wetted material depending on model . . . . . . . . . . . . . . . . EPDM, Polychloroprene, PTFE, Santoprene®
CAUTION:
Santoprene® may be used only with non-fatty, non-oily foods or alcohols up to 15%.
300 series stainless steel, aluminum (A380), polyester
Non-wetted external parts. . . . . . . . . . . . . . . . . . . . . . . . .
(labels), LDPE foam (gasket)
Weight
FD3 Models . . . . . . . . . . . . . . . . . . . . . . . . . . . . . . . . 147 lb. (66.7 kg)
FA3 Models . . . . . . . . . . . . . . . . . . . . . . . . . . . . . . . . 141 lb. (64.0 kg)
Santoprene® is a registered trademark of the Monsanto Co.
Loctite® is a registered trademark of the Loctite Corporation.
*
Displacement per cycle may vary based on suction condition, discharge head, air pressure, and fluid type.
**
Noise levels measured with the pump mounted to a solid surface. Sound power measured per
ISO Standard 9614-1.
***
The pump user must verify that the construction materials meet their specific application requirements.
311879Y
51
Performance Chart - 2150 Models
Performance Chart - 2150 Models
Test Conditions: Pump tested in water with inlet submerged
Fluid Pressure Curves
To find Fluid Outlet Pressure
(psi/MPa/bar) at a specific fluid flow (gpm/lpm) and
operating air pressure (psi/MPa/bar):
1. Locate fluid flow rate along bottom of chart.
2. Follow vertical line up to intersection with selected
operating air pressure curve.
3. Follow left to scale to read fluid outlet pressure.
120
(0.84, 8.4)
100
(0.7, 7)
psi (MPa, bar)
at 120 psi (0.7 MPa, 7 bar) operating air pressure
at 100 psi (0.7 MPa, 7 bar) operating air pressure
at 70 psi (0.48 MPa, 4.8 bar) operating air pressure
at 40 psi (0.28 MPa, 2.8 bar) operating air pressure
Fluid Outlet Pressure
A
B
C
D
80
(0.55, 5.5)
60
(0.41, 4.1)
40
(0.28, 2.8)
20
(0.14, 1.4)
0
20
(75)
40
(151)
60
(227)
80
(302)
100
(378)
120
(454)
Fluid Flow
140
(530)
160
(605)
TI8740A
gpm (lpm)
TI8742A
at 120 psi (0.7 MPa, 7 bar) operating air pressure
at 100 psi (0.7 MPa, 7 bar) operating air pressure
at 70 psi (0.48 MPa, 4.8 bar) operating air pressure
at 40 psi (0.28 MPa, 2.8 bar) operating air pressure
To find Pump Air Consumption
(scfm or m3/min) at a specific fluid flow (gpm/lpm) and
operating air pressure (psi/MPa/bar):
1. Locate fluid flow rate along bottom of chart.
2. Read vertical line up to intersection with selected
operating air pressure curve.
3. Follow left to scale to read air consumption.
scfm (m3/min)
A
B
C
D
Air Consumption
Air Consumption Curves
180
(5.1)
160
(4.53)
140
(3.96)
120
(3.4)
100
(2.83)
80
(2.27)
60
(1.7)
40
(1.13)
20
(0.57)
0
20
(75)
40
(151)
60
(227)
80
(302)
100
(378)
Fluid Flow
gpm (lpm)
120
(454)
140
(530)
160 180
(605) (681)
TI8741A
TI8742A
52
311879Y
Performance Chart - 2150 Models
311879Y
53
Graco Warranties
Graco Standard Pump Warranty
Graco warrants all equipment manufactured by Graco and bearing its name to be free from defects in material and workmanship on the date of
sale to the original purchaser for use. With the exception of any special, extended, or limited warranty published by Graco, Graco will, for a period
of five years from the date of sale, repair or replace any part of the equipment determined by Graco to be defective. This warranty applies only
when the equipment is installed, operated and maintained in accordance with Graco’s written recommendations.
This warranty does not cover, and Graco shall not be liable for general wear and tear, or any malfunction, damage or wear caused by faulty
installation, misapplication, abrasion, corrosion, inadequate or improper maintenance, negligence, accident, tampering, or substitution of
non-Graco component parts. Nor shall Graco be liable for malfunction, damage or wear caused by the incompatibility of Graco equipment with
structures, accessories, equipment or materials not supplied by Graco, or the improper design, manufacture, installation, operation or
maintenance of structures, accessories, equipment or materials not supplied by Graco.
This warranty is conditioned upon the prepaid return of the equipment claimed to be defective to an authorized Graco distributor for verification of
the claimed defect. If the claimed defect is verified, Graco will repair or replace free of charge any defective parts. The equipment will be returned
to the original purchaser transportation prepaid. If inspection of the equipment does not disclose any defect in material or workmanship, repairs will
be made at a reasonable charge, which charges may include the costs of parts, labor, and transportation.
THIS WARRANTY IS EXCLUSIVE, AND IS IN LIEU OF ANY OTHER WARRANTIES, EXPRESS OR IMPLIED, INCLUDING BUT NOT LIMITED
TO WARRANTY OF MERCHANTABILITY OR WARRANTY OF FITNESS FOR A PARTICULAR PURPOSE.
Graco’s sole obligation and the buyer’s sole remedy for any breach of warranty shall be as set forth above. The buyer agrees that no other remedy
(including, but not limited to, incidental or consequential damages for lost profits, lost sales, injury to person or property, or any other incidental or
consequential loss) shall be available. Any action for breach of warranty must be brought within six years of the date of sale.
Graco makes no warranty, and disclaims all implied warranties of merchantability and fitness for a particular purpose in connection with
accessories, equipment, materials or components sold but not manufactured by Graco. These items sold, but not manufactured by Graco (such as
electric motors, switches, hose, etc.), are subject to the warranty, if any, of their manufacturer. Graco will provide purchaser with reasonable
assistance in making any claim for breach of these warranties.
In no event will Graco be liable for indirect, incidental, special or consequential damages resulting from Graco supplying equipment hereunder, or
the furnishing, performance, or use of any products or other goods sold hereto, whether due to a breach of contract, breach of warranty, the
negligence of Graco, or otherwise.
FOR GRACO CANADA CUSTOMERS
The parties acknowledge that they have required that the present document, as well as all documents, notices and legal proceedings entered into,
given or instituted pursuant hereto or relating directly or indirectly hereto, be drawn up in English. Les parties reconnaissent avoir convenu que la
rédaction du présente document sera en Anglais, ainsi que tous documents, avis et procédures judiciaires exécutés, donnés ou intentés, à la suite
de ou en rapport, directement ou indirectement, avec les procédures concernées.
Extended Product Warranty
Graco warrants all 205, 307, 515, 716, 1040, 1590, 2150, 3150, and 3275 air valve center sections to be free from defects in material and
workmanship for a period of fifteen years from date installed in service by the original purchaser. Normal wear of items such as packings or seals
are not considered to be defects in material and workmanship.
Five years
Six to Fifteen years
Graco will provide parts and labor.
Graco will replace defective parts only.
Graco Information
For the latest information about Graco products, visit www.graco.com.
For patent information, see www.graco.com/patents.
TO PLACE AN ORDER, contact your Graco distributor or call to identify the nearest distributor.
Phone: 612-623-6921 or Toll Free: 1-800-328-0211 Fax: 612-378-3505
All written and visual data contained in this document reflects the latest product information available at the time of publication.
Graco reserves the right to make changes at any time without notice.
Original Instructions. This manual contains English. MM 311879
Graco Headquarters: Minneapolis
International Offices: Belgium, China, Japan, Korea
GRACO INC. AND SUBSIDIARIES • P.O. BOX 1441 • MINNEAPOLIS MN 55440-1441 • USA
Copyright 2006, Graco Inc. All Graco manufacturing locations are registered to ISO 9001.
www.graco.com
Revision Y - July 2014