1
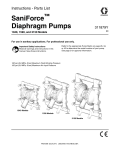
Instructions/Parts
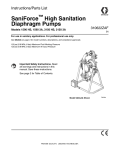
SaniForce™
Ram Packages
3A0591U
EN
For use in sanitary applications to transfer medium to high viscosity fluids.
For professional use only.
Not for use in European Explosive Atmosphere locations.
See pages 3- 4 for model information, including maximum fluid working pressure.
Important Safety Instructions
Read all warnings and instructions in this
manual. Save these instructions.
TI15713a
Contents
Models . . . . . . . . . . . . . . . . . . . . . . . . . . . . . . . . . . . 3
Piston Pumps . . . . . . . . . . . . . . . . . . . . . . . . . . . 3
Air-Operated Diaphragm Pumps . . . . . . . . . . . . . 4
Inflatable Seal . . . . . . . . . . . . . . . . . . . . . . . . . . . 4
Warnings . . . . . . . . . . . . . . . . . . . . . . . . . . . . . . . . . 6
Installation . . . . . . . . . . . . . . . . . . . . . . . . . . . . . . . . 8
Grounding . . . . . . . . . . . . . . . . . . . . . . . . . . . . . . 8
Location . . . . . . . . . . . . . . . . . . . . . . . . . . . . . . . 8
Setup . . . . . . . . . . . . . . . . . . . . . . . . . . . . . . . . . . 9
Operation . . . . . . . . . . . . . . . . . . . . . . . . . . . . . . . . 14
Pressure Relief Procedure . . . . . . . . . . . . . . . . 14
Flush Before First Use . . . . . . . . . . . . . . . . . . . 14
Setting Inflatable Seal Pressure . . . . . . . . . . . . 14
Starting and Adjusting the Ram . . . . . . . . . . . . 15
Starting and Adjusting the Pump . . . . . . . . . . . 16
Changing Drums . . . . . . . . . . . . . . . . . . . . . . . . 17
Shutdown . . . . . . . . . . . . . . . . . . . . . . . . . . . . . 17
Cleaning Procedure . . . . . . . . . . . . . . . . . . . . . 18
2
Troubleshooting . . . . . . . . . . . . . . . . . . . . . . . . . . . 19
Repair . . . . . . . . . . . . . . . . . . . . . . . . . . . . . . . . . . . 20
Disconnect Diaphragm Pump . . . . . . . . . . . . . . 20
Disconnect Piston Pump . . . . . . . . . . . . . . . . . . 20
Service Ram Pistons . . . . . . . . . . . . . . . . . . . . . 21
Notes . . . . . . . . . . . . . . . . . . . . . . . . . . . . . . . . . 23
Parts . . . . . . . . . . . . . . . . . . . . . . . . . . . . . . . . . . . . 24
Piston Pump Ram Packages . . . . . . . . . . . . . . . 24
Diaphragm Pump Ram Packages . . . . . . . . . . . 26
Ram Kits . . . . . . . . . . . . . . . . . . . . . . . . . . . . . . 28
Air Controls Kits . . . . . . . . . . . . . . . . . . . . . . . . . 32
Notes . . . . . . . . . . . . . . . . . . . . . . . . . . . . . . . . . 34
Dimensions . . . . . . . . . . . . . . . . . . . . . . . . . . . . . . . 35
Technical Data . . . . . . . . . . . . . . . . . . . . . . . . . . . . 36
Package Weights . . . . . . . . . . . . . . . . . . . . . . . . 37
Graco Standard Warranty . . . . . . . . . . . . . . . . . . . 38
3A0591U
Models
Models
Piston Pumps
Maximum Package Air Inlet Pressure: 100 psi (0.7 MPa, 6.9 bar)
Frame
Controls
Model, Series SS* CS* SS* CS* Pump Description
24D708, B
✔
✔ Priming Piston, Drum
24D712, B
✔
✔ Priming Piston, Drum
24D714, B
✔
✔
Priming Piston, Drum
24D720, B
✔
✔ Double Ball, Drum
24D724, B
✔
✔ Double Ball, Drum
24D726, B
✔
✔
Double Ball, Drum
24V839†, A
✔
✔
Priming Piston, Drum
24D776, B
✔
✔ Priming Piston, Stubby
24D780, B
✔
✔ Priming Piston, Stubby
24D782, B
✔
✔
Priming Piston, Stubby
24D788, B
✔
✔ Double Ball, Drum
24D792, B
✔
✔ Double Ball Drum
24D794, B
✔
✔
Double Ball, Drum
24D647, B
✔
✔ Priming Piston, Stubby
24D651, B
✔
✔ Priming Piston, Stubby
24D653, B
✔
✔
Priming Piston, Stubby
24F188**, B
✔
✔ Priming Piston, Stubby
24F189**, B
✔
✔ Priming Piston, Stubby
24F190**, B
✔
✔
Priming Piston, Stubby
✔
✔ Priming Piston, Stubby
24P811†, B
24U568†**, B
✔
✔
Ratio
5:1
5:1
5:1
5:1
5:1
5:1
5:1
6:1
6:1
6:1
6:1
6:1
6:1
12:1
12:1
12:1
12:1
12:1
12:1
12:1
Priming Piston, Stubby 12:1
Maximum Ram Air
Inlet Pressure,
psi (MPa, bar)
100 (0.7, 6.9)
100 (0.7, 6.9)
100 (0.7, 6.9)
100 (0.7, 6.9)
100 (0.7, 6.9)
100 (0.7, 6.9)
100 (0.7, 6.9)
100 (0.7, 6.9)
100 (0.7, 6.9)
100 (0.7, 6.9)
100 (0.7, 6.9)
100 (0.7, 6.9)
100 (0.7, 6.9)
100 (0.7, 6.9)
100 (0.7, 6.9)
100 (0.7, 6.9)
100 (0.7, 6.9)
100 (0.7, 6.9)
100 (0.7, 6.9)
100 (0.7, 6.9)
Maximum Pump
Air Inlet Pressure,
psi (MPa, bar)
80 (0.6, 5.5)
80 (0.6, 5.5)
80 (0.6, 5.5)
80 (0.6, 5.5)
80 (0.6, 5.5)
80 (0.6, 5.5)
80 (0.6, 5.5)
100 (0.7, 6.9)
100 (0.7, 6.9)
100 (0.7, 6.9)
100 (0.7, 6.9)
100 (0.7, 6.9)
100 (0.7, 6.9)
100 (0.7, 6.9)
100 (0.7, 6.9)
100 (0.7, 6.9)
100 (0.7, 6.9)
100 (0.7, 6.9)
100 (0.7, 6.9)
100 (0.7, 6.9)
Maximum Fluid
Working Pressure,
psi (MPa, bar)
410 (2.8, 28.3)
410 (2.8, 28.3)
410 (2.8, 28.3)
410 (2.8, 28.3)
410 (2.8, 28.3)
410 (2.8, 28.3)
410 (2.8, 28.3)
650 (4.5, 44.8)
650 (4.5, 44.8)
650 (4.5, 44.8)
650 (4.5, 44.8)
650 (4.5, 44.8)
650 (4.5, 44.8)
1450 (10, 100.0)
1450 (10, 100.0)
1450 (10, 100.0)
1450 (10, 100.0)
1450 (10, 100.0)
1450 (10, 100.0)
1450 (10, 100.0)
100 (0.7, 6.9)
100 (0.7, 6.9)
1450 (10, 100.0)
* SS = Stainless Steel; CS = Carbon Steel
** This model has an additional seal for viscous, sticky materials.
† This model has a conical platen.
3A0591U
3
Models
Air-Operated Diaphragm Pumps
Maximum Package Air Inlet Pressure: 120 psi (0.8 MPa, 8 bar)
Frame
Controls
Model,
Series
SS* CS* SS* CS*
24G542, B ✔
✔
✔
24F191, B
24G543, B
✔
24F192, B
✔
✔
✔
✔
24F193, B
24F194, B
✔
24D922, B
✔
✔
✔
✔
✔
24D926, B
24D928, B
✔
24J364, B
✔
✔
✔
✔
✔
24J365, B
24J366, B
✔
✔
✔
✔
✔
24D932, B
✔
24D936, B
✔
24D940, B
✔
✔
24D944, B
✔
✔
✔
24D948, B
24D952, B
✔
✔
✔
✔
Maximum
Maximum
Ram Air Inlet Pump Air Inlet
Pressure,
Pressure,
Pump Description
Ratio psi (MPa, bar) psi (MPa, bar)
SaniForce 2150, Air-Operated Double 1:1
100 (0.7, 6.9) 120 (0.8, 8.2)
Diaphragm, Ball Check, PTFE
SaniForce 2150, Air-Operated Double 1:1
100 (0.7, 6.9) 120 (0.8, 8.2)
Diaphragm, Ball Check, PTFE
SaniForce 2150, Air-Operated Double 1:1
100 (0.7, 6.9) 120 (0.8, 8.2)
Diaphragm, Ball Check, PTFE
SaniForce 2150, Air-Operated Double 1:1
100 (0.7, 6.9) 120 (0.8, 8.2)
Diaphragm, Ball Check, Santoprene
SaniForce 2150, Air-Operated Double 1:1
100 (0.7, 6.9) 120 (0.8, 8.2)
Diaphragm, Ball Check, Santoprene
SaniForce 2150, Air-Operated Double 1:1
100 (0.7, 6.9) 120 (0.8, 8.2)
Diaphragm, Ball Check, Santoprene
SaniForce 3150, Air-Operated Double 1:1
100 (0.7, 6.9) 120 (0.8, 8.2)
Diaphragm, Ball Check, EPDM
SaniForce 3150, Air-Operated Double 1:1
100 (0.7, 6.9) 120 (0.8, 8.2)
Diaphragm, Ball Check, EPDM
SaniForce 3150, Air-Operated Double 1:1
100 (0.7, 6.9) 120 (0.8, 8.2)
Diaphragm, Ball Check, EPDM
SaniForce 3150, Air-Operated Double 1:1
100 (0.7, 6.9) 120 (0.8, 8.2)
Diaphragm, Ball Check, PTFE
SaniForce 3150, Air-Operated Double 1:1
100 (0.7, 6.9) 120 (0.8, 8.2)
Diaphragm, Ball Check, PTFE
SaniForce 3150, Air-Operated Double 1:1
100 (0.7, 6.9) 120 (0.8, 8.2)
Diaphragm, Ball Check, PTFE
SaniForce 3150, Air-Operated Double 1:1
100 (0.7, 6.9) 120 (0.8, 8.2)
Diaphragm, Ball Check, Santoprene
SaniForce 3150, Air-Operated Double 1:1
100 (0.7, 6.9) 120 (0.8, 8.2)
Diaphragm, Ball Check, Santoprene
SaniForce 3150, Air-Operated Double 1:1
100 (0.7, 6.9) 120 (0.8, 8.2)
Diaphragm, Ball Check, Santoprene
SaniForce 3150, Air-Operated Double 1:1
100 (0.7, 6.9) 120 (0.8, 8.2)
Diaphragm, Flapper Check,
Santoprene
SaniForce 3150, Air-Operated Double 1:1
100 (0.7, 6.9) 120 (0.8, 8.2)
Diaphragm, Flapper Check,
Santoprene
SaniForce 3150, Air-Operated Double 1:1
100 (0.7, 6.9) 120 (0.8, 8.2)
Diaphragm, Flapper Check,
Santoprene
Maximum
Fluid Working
Pressure,
psi (MPa, bar)
120 (0.8, 8.2)
120 (0.8, 8.2)
120 (0.8, 8.2)
120 (0.8, 8.2)
120 (0.8, 8.2)
120 (0.8, 8.2)
120 (0.8, 8.2)
120 (0.8, 8.2)
120 (0.8, 8.2)
120 (0.8, 8.2)
120 (0.8, 8.2)
120 (0.8, 8.2)
120 (0.8, 8.2)
120 (0.8, 8.2)
120 (0.8, 8.2)
120 (0.8, 8.2)
120 (0.8, 8.2)
120 (0.8, 8.2)
* SS = Stainless Steel; CS = Carbon Steel
Inflatable Seal
Part, Series Description
16G242, C
4
Inflatable Seal
Normal Air Operating
Pressure
10-25 psi
(0.07- 0.17 MPa, 0.69-1.7 bar)
Maximum Air Operating
Pressure
25 psi
(0.17 MPa, 1.7 bar)
3A0591U
Models
Material Certification
Reference: SaniForce Product Family
Issue Date: November 1, 2011
All fluid contact materials in the SaniForce product family are FDA-Compliant and meet the United States
Code of Federal Regulations (CFR) Title 21, Section 177 or are of a corrosion resistant grade Stainless
Steel. This includes the below product groups:
1.
2.
3.
4.
5.
6.
SaniForce 515, 1040, 1590, 2150 Air-Operated Double Diaphragm Pumps
SaniForce 1590, 3150 HS Air-0perated Double Diaphragm Pumps
SaniForce 1590, 3150 HS 3-A Certified Air-Operated Double Diaphragm Pumps
SaniForce 5:1, 6:1 and 12:1 Air-Operated Piston Pumps
SaniForce Diaphragm Pump and Piston Pump Drum Unloaders
SaniForce Diaphragm Pump and Piston Pump Bin Evacuation Systems
Bradley A. Byron
Quality Manager
Graco Inc.
3A0591U
5
Warnings
Warnings
The following warnings are for the setup, use, grounding, maintenance, and repair of this equipment. The exclamation point symbol alerts you to a general warning and the hazard symbols refer to procedure-specific risks. When
these symbols appear in the body of this manual, refer back to these Warnings. Product-specific hazard symbols and
warnings not covered in this section may appear throughout the body of this manual where applicable.
WARNING
WARNING
SKIN INJECTION HAZARD
High-pressure fluid from dispensing device, hose leaks, or ruptured components will pierce skin. This may
look like just a cut, but it is a serious injury that can result in amputation. Get immediate surgical
treatment.
+
• Do not point dispensing device at anyone or at any part of the body.
• Do not put your hand over the fluid outlet.
• Do not stop or deflect leaks with your hand, body, glove, or rag.
• Follow the Pressure Relief Procedure when you stop dispensing and before cleaning, checking, or
servicing equipment.
• Tighten all fluid connections before operating the equipment.
• Check hoses and couplings daily. Replace worn or damaged parts immediately.
MOVING PARTS HAZARD
Moving parts can pinch, cut or amputate fingers and other body parts.
• Keep clear of moving parts.
• Do not operate equipment with protective guards or covers removed.
• Pressurized equipment can start without warning. Before checking, moving, or servicing equipment,
follow the Pressure Relief Procedure and disconnect all power sources.
FIRE AND EXPLOSION HAZARD
Flammable fumes, such as solvent and paint fumes, in work area can ignite or explode. To help prevent
fire and explosion:
• Use equipment only in well ventilated area.
• Eliminate all ignition sources; such as pilot lights, cigarettes, portable electric lamps, and plastic drop
cloths (potential static arc).
• Keep work area free of debris, including solvent, rags and gasoline.
• Do not plug or unplug power cords, or turn power or light switches on or off when flammable fumes are
present.
• Ground all equipment in the work area. See Grounding instructions.
• Use only grounded hoses.
• Hold gun firmly to side of grounded pail when triggering into pail.
• If there is static sparking or you feel a shock, stop operation immediately. Do not use equipment until
you identify and correct the problem.
• Keep a working fire extinguisher in the work area.
6
3A0591U
Warnings
WARNING
WARNING
EQUIPMENT MISUSE HAZARD
Misuse can cause death or serious injury.
• Do not operate the unit when fatigued or under the influence of drugs or alcohol.
• Do not exceed the maximum working pressure or temperature rating of the lowest rated system
component. See Technical Data in all equipment manuals.
• Use fluids and solvents that are compatible with equipment wetted parts. See Technical Data in all
equipment manuals. Read fluid and solvent manufacturer’s warnings. For complete information about
your material, request MSDS from distributor or retailer.
• Do not leave the work area while equipment is energized or under pressure. Turn off all equipment and
follow the Pressure Relief Procedure when equipment is not in use.
• Check equipment daily. Repair or replace worn or damaged parts immediately with genuine
manufacturer’s replacement parts only.
• Do not alter or modify equipment.
• Use equipment only for its intended purpose. Call your distributor for information.
• Route hoses and cables away from traffic areas, sharp edges, moving parts, and hot surfaces.
• Do not kink or over bend hoses or use hoses to pull equipment.
• Keep children and animals away from work area.
• Comply with all applicable safety regulations.
SPLATTER HAZARD
Hot or toxic fluid can cause serious injury if splashed in the eyes or on skin. During blow off of platen,
splatter may occur.
• Use minimum air pressure when removing platen from drum.
TOXIC FLUID OR FUMES HAZARD
Toxic fluids or fumes can cause serious injury or death if splashed in the eyes or on skin, inhaled, or
swallowed.
• Read MSDSs to know the specific hazards of the fluids you are using.
• Route exhaust away from work area. If diaphragm ruptures, fluid may be exhausted into the air.
• Store hazardous fluid in approved containers, and dispose of it according to applicable guidelines.
BURN HAZARD
Equipment surfaces and fluid that’s heated can become very hot during operation. To avoid severe burns:
• Do not touch hot fluid or equipment.
PERSONAL PROTECTIVE EQUIPMENT
You must wear appropriate protective equipment when operating, servicing, or when in the operating area
of the equipment to help protect you from serious injury, including eye injury, hearing loss, inhalation of
toxic fumes, and burns. This equipment includes but is not limited to:
• Protective eyewear, and hearing protection.
• Respirators, protective clothing, and gloves as recommended by the fluid and solvent manufacturer.
3A0591U
7
Installation
Installation
Grounding
Location
Position the ram so the air controls are easily accessible. Ensure that there is sufficient overhead clearance
when the ram is fully raised. See Repair, page 20.
The equipment must be grounded. Grounding
reduces the risk of static and electric shock by
providing an escape wire for the electrical current
due to static build up or in the event of a short circuit.
Pump: Connect a ground wire (Graco PN 238909) to
the ground screw on the bottom cover of the air motor,
under the shield. Connect the other end of the ground
wire to a true earth ground.
Air and fluid hoses: use only electrically conductive
hoses with a maximum of 500 ft. (150 m) combined
hose length to ensure grounding continuity. Check electrical resistance of hoses. If total resistance to ground
exceeds 25 megohms, replace hose immediately.
Position the ram in an area with adequate access for
servicing and cleaning the equipment and adjacent
areas to maintain the required level of hygiene. Locate
equipment away from sources of air currents, dust, or
liquids derived from leakage, condensation, or aerosols.
Using the holes in the ram base as a guide, drill holes
for 1/2 in. (13 mm) anchors.
Check that the ram base is level in all directions. If necessary, level the base using metal shims. Secure the
base to the floor using 1/2 in. (13 mm) anchors that are
long enough to prevent the ram from tipping.
Air compressors: follow manufacturer’s recommendations.
Dispense valve: ground through connection to a properly grounded fluid hose and pump.
Material supply container: follow local code.
Container(s) that receive material: follow local code.
Solvent pails used when flushing: follow local code.
Use only conductive metal pails, placed on a grounded
surface. Do not place the pail on a nonconductive surface, such as paper or cardboard, which interrupts
grounding continuity.
To maintain grounding continuity when flushing or
relieving pressure: hold metal part of the dispense
valve firmly to the side of a grounded metal pail, then
trigger the valve.
8
3A0591U
Installation
Setup
NOTE: Reference numbers and letters in parentheses in
the text refer to the callouts in the figures and the parts
drawings.
Accessories are available from Graco. Make certain all
accessories are sized and pressure-rated to meet your
system requirements
FIG. 1 and FIG. 2 are guides for selecting and installing
system components and accessories. Contact your
Graco distributor for assistance in designing a system to
suit your particular needs.
•
Inflatable Seal (C): Adjust inflation level so the seal
fits snug against the drum. A properly inflated seal
wipes the sides of the drum and prevents material
from passing the plate, to minimize waste.
•
Main air bleed valve (D): Required in your system
to shut off the air supply to the pump and ram.
When closed, the valve bleeds off all air in the ram
and pump.
Air and Fluid Accessories
The following accessories are recommended for your
system, and are available from your Graco distributor.
Make certain all accessories are sized and pressure-rated to meet your system requirements
•
•
•
•
Fluid Drain Valve (M): Required in your system to
relieve fluid pressure between the pump and the dispense device.
Fluid Outlet Elbow (P): Recommended for ram
packages with piston pumps. Connects the fluid outlet hose to the pump fluid outlet.
Air Line Filter (K): Removes harmful dirt and moisture from the compressed air supply.
Second bleed-type air valve (L): isolates air line
accessories and supply system for servicing. Locate
upstream from all other air line accessories.
3A0591U
9
Installation
L
K
N
J
M
A
B
H
P
D
F
E
G
C
TI16245
Key:
Ram Package Components (Supplied)
A
B
C
D
E
F
G
H
Pump
Ram
Inflatable Seal
Main Air Bleed Valve (required for pump and ram)
Air Assist Air Supply
Inflatable Seal Air Supply (partially visible)
Ram Director Air Supply
Enclosed Air Controls (see FIG. 3; exposed air controls
also available.)
Accessories (Not Supplied)
J
K
L
M
N
P
Air Supply Hose (use 1/2 in. air hose, minimum)
Air Line Filter
Second Bleed-Type Air Valve
Fluid Outlet Hose
Fluid Drain Valve (required for pump)
Fluid Outlet Elbow
FIG. 1: Typical Installation, Piston Pump
10
3A0591U
Installation
L
N
K
M
J
B
H
F
A
D
G
E
C
TI16247a
FIG. 2. Typical Installation, Diaphragm Pump
Ram Package Components (Supplied)
Accessories (Not Supplied)
A
B
C
D
E
F
G
H
J
K
L
M
N
Pump
Ram
Inflatable Seal
Main Air Bleed Valve (required for pump and ram)
Air Assist Air Supply
Inflatable Seal Air Supply (partially visible)
Ram Director Air Supply
Enclosed Air Controls (see FIG. 3; exposed air controls
also available.)
3A0591U
Air Supply Hose (use 1/2 in. air hose, minimum)
Air Line Filter
Second Bleed-Type Air Valve
Fluid Outlet Hose
Fluid Drain Valve (required for pump)
11
Installation
Enclosed Air Control Module
(Side View)
Enclosed Air Control Module
(Bottom View)
BH
Ram Up Air Supply
Main Air Inlet and
Main Air Valve (BA)
Seal Air Supply
Exhaust Port
(BD)
BJ
Pump Air
Supply
BE
BF
BB
TI15716a
BC
Air Assist Air Supply
Ram Down Air Supply
BG
BA
Exposed Air Control Module
(Rear View)
TI15717b
Exposed Air Control Module
(Front View)
Pump Air Supply
BD
BF
Ram Down
Air Supply
BE
BG (out
of view)
Ram Up
Air Supply
BH
BC
BK
BB
Air Assist
Air Supply
BJ
BK
BA
Seal Air
Supply
Main Air Inlet
(on bottom)
BL
BK
TI15726a
TI15715a
FIG. 3: Air Control Modules
12
3A0591U
Installation
Integrated Air Controls
See FIG. 3. Air inlet size is 1/2 npt(f) on the Enclosed Air
Controls and 3/4 npt(f) on the Exposed Air Controls. The
integrated air controls include:
•
•
•
Inflatable seal air regulator (BH): controls air
pressure to the inflatable seal.
•
Main air valve (BA): turns air on and off to the system. When closed, the valve relieves pressure
downstream.
Inflatable seal switch (BJ): controls the inflation
and deflation of the ram plate seal.
•
Air relief valve (BK): automatically relieves excessive pressure.
Ram air regulator (BB): controls ram up and down
pressure.
•
Seal bleed off valve (BL): bleeds air from inflatable
seal as needed for drum tapering. For Exposed Air
Control Modules, See FIG. 3. For Enclosed Air Control Modules, the valve is located inside the box. See
FIG. 4, page 16.
•
Muffler with needle valve (BN): Allows adjustment
of travel rate when lowering the ram plate. Located
inside the box on the Enclosed Air Control Module.
Not needed with the Exposed Air Control Module
because ram rate can be adjusted with the director
valve.
•
Ram director switch/valve (BC): controls ram
direction.
•
Exhaust port with muffler (BD)
•
Air motor regulator (BE): Controls air pressure to
motor.
•
Air motor switch/slider valve (BF): turns air on
and off to the air motor. When closed, the valve
relieves air trapped between it and the air motor.
•
Air assist valve (BG): turns air on and off to push
the ram plate out of an empty drum. Uses line air.
3A0591U
13
Operation
Operation
Pressure Relief Procedure
Trapped air can cause the pump to cycle
unexpectedly, which could result in serious injury
from injection, splashing or moving parts. Relieve
pressure when you stop pumping and before
cleaning, checking, or servicing equipment.
NOTE: Do not close the main air valve until Step 6. The
Enclosed Air Controls will not operate when the main air
supply is in the Off position.
1. Enclosed Air Controls: See FIG. 3. Turn the air
motor switch (BF) to off.
Exposed Air Controls: See FIG. 3. Close the air
motor slider valve (BF).
2. Back the ram director air regulator down to zero. Set
the ram director switch/valve (BC) to DOWN. The
ram will slowly drop.
3. Jog the director valve up and down to bleed air from
ram cylinders.
Setting Inflatable Seal Pressure
1. Set an empty drum on the ram base. Set the director valve (BC) to DOWN. Lower the seal into the
drum to the point of the drum’s largest inside diameter.
2. Set the inflatable seal switch (BJ) to On. Adjust the
seal air regulator until the seal just touches the
inside of the drum.
3. Leave regulator set at this setting for this style of
drum.
4. Set the inflatable seal switch to Off to deflate seal
before raising the ram. Set the director valve (BC) to
UP and let the ram rise to its full height.
5. Remove the empty drum.
NOTE: Use the lowest seal pressure possible to achieve
desired results. Excessive seal pressure may cause the
seal to roll off of the follower plate. To prevent overpressurization, a relief valve limits seal pressure to 30 psi
(2.1 bar, 0.21 MPa).
4. Turn the inflatable seal switch (BJ) to off.
5. Open the fluid ball valve and/or dispensing valve to
relieve fluid pressure.
6. Close the main air valve (BA).
Flush Before First Use
The sanitary pump was assembled using sanitary lubricant on moving parts and was tested in water. Flush the
pump thoroughly with an appropriate cleaning solution
or disassemble and sanitize the parts before using the
pump. See your separate pump manual for complete
flushing and cleaning procedures for a sanitary pump.
Check national, state, and local codes for specific
limitations.
14
3A0591U
Operation
Starting and Adjusting the Ram
• Do not inflate the seal when not installed on the
follower plate. Wear safety glasses when
operating the seal. Seal burst could result in
injury.
• Keep hands and fingers away from the ram plate,
pump fluid inlet, and lip of the fluid container
when raising or lowering the ram to reduce risk of
serious injury from moving parts.
1. Close all air regulators and air valves.
2. Turn on the main air supply.
3. Open the main air valve (BA), and set the ram director air regulator (BB) to 2.8 bar, 0.26 MPa (40 psi).
Set the director valve (BC) to UP and let the ram
rise to its full height.
4. Lubricate inflatable seal (C) with sanitary lubricant.
5. Set a full drum of fluid on the ram base, slide it back
against the tube stop, and center it under the follower plate.
8. Set the director valve to DOWN. Set ram air regulator at about 40 psi (0.28 MPa, 2.8 bar). Lower the
ram until the ram plate is about to enter the drum,
and set the valve to neutral. Reposition the drum as
necessary so the inflatable seal does not hit the
drum lip.
NOTE: Enclosed Controls: To increase or decrease
the speed of downward travel on the ram plate, adjust
the valve on the muffler (BN) inside the control box. See
FIG. 4, page 16.
Exposed Controls: To increase or decrease the speed
of downward travel on the ram plate, adjust the director
valve (BC).
9. Set the director valve to DOWN, and continue to
lower the ram until the ram plate contacts the fluid.
10. Set seal air pressure regulator to pressure determined in Setting Inflatable Seal Pressure, page
14. Set the inflatable seal switch to On to inflate
seal.
NOTE: If fluid leaks past the seal, increase the air pressure to the seal gradually until leaking stops. To prevent
overpressurization, a relief valve limits seal pressure to
30 psi (2.1 bar, 0.21 MPa).
6. Remove the drum cover, and smooth the surface of
the fluid with a straightedge.
7. Secure the bag liner to the drum with tape or a
strap, to prevent it from sliding into the drum.
NOTICE
Do not use drums that have side bungs or large dents
with this ram. Rough bung openings or large dents will
damage the inflatable seal or stop the ram plate, resulting in a runaway pump.
3A0591U
15
Operation
Starting and Adjusting the Pump
NOTES ON ADJUSTING PRESSURE:
Different combinations of seal and ram pressure may be
necessary for proper seal and pump operation.
•
If the pump does not prime properly with heavier fluids, increase air pressure to the ram.
•
If fluid is forced out around the inflatable seal,
decrease pressure to the ram.
•
For diaphragm pump models, adjust DOWN pressure to the minimum level, to ensure that the pump
inlet balls seat properly.
See FIG. 3, page 12.
1. Be sure the pump air regulator (BE) is closed. Set
the ram air regulator (BB) to about 3.5 bar, 0.35
MPa (50 psi). Set the director valve (BC) to DOWN.
2. Start the pump as explained in the separate pump
instruction manual.
3. Keep the director valve (BC) set to DOWN while the
pump is operating.
NOTE: If seal pressure builds when the seal enters a
tapered portion of the drum, the relieve valve will activate. Turn the seal bleed-off valve (BL) counterclockwise
to open it.
BN
BL
BC
TI16465a
BL
TI15715a
FIG. 4. Seal Bleed Valve and Muffler with Valve
16
3A0591U
Operation
Changing Drums
Shutdown
1. Set the director valve (BC) to neutral.
2. Follow Pressure Relief Procedure, page 14.
Moving parts can pinch, cut, or amputate fingers and
other body parts. Keep your hands and fingers away
from the priming piston, ram plate, and lip of drum during operation and whenever the pump or ram is
charged with air.
3. Follow the pump shutdown instructions in your separate pump manual.
1. Stop the pump. Close the air motor valve (BF).
2. Set the inflatable seal valve (BJ) to deflate.
3. Set the director valve (BC) to UP to raise the ram
plate.
4. Raise the ram plate until it is completely out of drum.
5. If needed, use air assist (BG) to help lift the ram
plate.
Excessive air pressure in the material drum could
cause the drum to rupture, causing serious injury and
equipment damage. The platen must be free to move
out of the drum.
• Never use drum blowoff air assist with a damaged
drum.
• Always deflate the seal prior to lifting ram plate or
engaging air assist.
6. Remove the empty drum.
7. Inspect the ram plate and, if necessary, remove any
remaining material or buildup.
8. Place a full drum on ram base.
9. Lower the ram, and adjust the position of the drum
relative to the ram plate, as explained under Setting
Inflatable Seal Pressure on page 14.
3A0591U
17
Operation
Cleaning Procedure
8. Pull the inflatable seal down to remove. Clean and
sanitize the seal.
NOTE: Discoloration of the inflatable seal is normal.
Replace the inflatable seal if the surface is compromised
due to excessive wear, tears, cuts, or gouges.
NOTE: The following instructions are a basic procedure
for cleaning a sanitary ram.
9. Set the director valve to DOWN. Lower the ram
plate.
•
10. Follow the Pressure Relief Procedure, page 14.
•
•
Be sure to follow your national and state sanitary
standard codes and local regulations.
Use appropriate cleaning and disinfecting agents, at
intervals appropriate for product processed.
Follow cleaning product manufacturer’s instructions.
1. Remove the pump from the fluid container. Operate
it to pump out as much fluid as possible.
2. Flush the system thoroughly with an appropriate
cleaning solution.
3. Set the inflatable seal valve (BJ) to deflate.
4. Set the director valve (BC) to UP to raise the ram
plate.
5. If needed, use air assist (BG) to help lift the ram
plate.
6. Raise the ram plate until it is completely out of the
drum. Remove the empty drum.
11. Disconnect all remaining air and fluid hoses, and
remove air inlet and exhaust fittings.
12. Remove and clean the pump.
NOTE: The pump must be disassembled to thoroughly
clean it. See your separate pump manual for complete
flushing and cleaning procedures for a sanitary pump.
Any damaged rubber parts must be replaced as they
could harbor microorganisms that can contaminate the
fluid.
13. Remove, clean, and sanitize the clamps (12, 13),
ram plate (5) and seal (8).
14. Remove the air motor cover. Open the control box
door. Wipe out any residual cleaning fluid or moisture.
15. Clean external surfaces of all parts before
reassembly.
7. Disconnect inflatable seal supply air.
18
3A0591U
Troubleshooting
Troubleshooting
1. Follow Pressure Relief Procedure, page 14.
2. Check all possible remedies in the Troubleshooting
Chart before disassembling the pump.
Problem
Ram will not raise or lower.
Cause
Solution
Closed air valve or clogged air line.
Open, clear.
Not enough ram air pressure.
Increase.
Worn or damaged piston.
Replace.
Hand valve closed or clogged.
Open, clear.
Air pressure is too high.
Decrease.
Travel rate is not properly adjusted.
Exposed Air Controls - open the
director valve less for slower travel,
more for faster travel.
Enclosed Air Controls - open the
needle valve on the muffler more for
slower downward travel, less for
faster downward travel.
Air leaks around cylinder rod.
Worn rod seal.
Replace.
Fluid squeezes past ram plate wipers.
Ram air pressure too high.
Decrease ram pressure.
Worn or damaged wipers.
Replace.
Inflatable seal pressure too low.
Increase seal pressure
Closed air valve or clogged air line.
Open, clear.
Not enough air pressure.
Increase.
Worn or damaged piston.
Replace. See pump manual.
Hand valve closed or clogged.
Open, clear.
Hand valve is dirty, worn, or damaged.
Clean, service.
Closed air valve or clogged air line.
Open, clear.
Not enough air pressure.
Increase.
Valve passage clogged.
Clean.
Ram raises and lowers too fast.
Pump will not prime properly or
pumps air.
Air assist valve will not hold drum
down or push plate up.
Seal pressure builds when drum
Seal bleed-off valve (BL) is closed
tapers, activating the automatic pressure relief.
3A0591U
Open. See Integrated Air Controls,
page 13.
19
Repair
Repair
Disconnect Diaphragm Pump
Disconnect Piston Pump
1. Follow Pressure Relief Procedure, page 14.
1. Follow Pressure Relief Procedure, page 14.
2. Disconnect inflatable seal supply air and air assist
supply air.
2. Disconnect inflatable seal supply air and air assist
supply air.
3. Remove two clamps (13) holding the pump to the
ram plate. Remove gaskets (8).
3. Remove two clamps (12) holding the tie rods (2) to
the ram plate. Remove gaskets (7).
4. Lift pump carefully up and away from ram plate.
4. Remove nut (4) and washer (3) holding the air motor
connecting rod (10) to the tie beam (114).
5. Remove two clamps (12) holding the tie rods (2) to
the ram plate. Remove gaskets (7).
6. Open main air valve (BA). Set the director valve
(BC) to UP to raise the ram. Set the director valve to
neutral. Close main air valve (BA).
7. Pull the inflatable seal down to remove.
5. Open main air valve (BA). Set the director valve
(BC) to UP to raise the ram. Set the director valve to
neutral. Close main air valve (BA).
6. To remove the pump from the ram plate, remove
clamp (13) and gasket (8). Carefully lift the pump up
and away from the plate, using two people if
needed.
2
13
13
2
8
8
7
12
12
ti16471a
FIG. 5. Disconnect Diaphragm Pump
NOTE: See your diaphragm pump manual for cleaning,
repair, and parts information.
ti16470a
FIG. 6. Remove piston pump
NOTE: See your piston pump manual and air motor
manual for cleaning, repair, and parts information.
20
3A0591U
Repair
Service Ram Pistons
124
Always service both cylinders at the same time. When
you service the piston rod always install new o-rings in
the piston rod seal and ram piston.
•
•
Order Piston Repair Kit 24G853 for a stainless steel
ram. Parts are marked with a † in the illustrations
and parts list.
Order Piston Repair Kit 24G854 for a carbon steel
ram. Parts are marked with an * in the illustrations
and parts list.
123
120
121†
115*†
122†
105*†
113
103
106*†
Disassemble Piston and Seal
111†
112*†
1. Follow Pressure Relief Procedure, page 14.
2. Follow Disconnect Diaphragm Pump, page 20, or
Disconnect Piston Pump, page 20.
104*†
3. Remove nuts (117) and lock washers (116) holding
the tie bar (114) to the piston rods (102). Also
remove nuts (4) and washers (3) holding the tie bar
to the tie rods (2).
4. Stainless Steel Rams: Remove four screws (124)
and washers (123), then remove the piston cap
(120). Remove outer o-ring (121) and inner o-ring
(122) from piston cap.
102
TI16472a
FIG. 7. Piston Rod Seal
5. Remove retaining ring (115).
6. Carefully pull the piston rod out of the top of the cylinder.
NOTICE
Do not tilt the piston rod when removing it from the
base or when installing it. Such movement can damage
the piston or the inside surface of the base cylinder.
7. Slide the piston seal housing (103) and spring (104)
up off of the piston rod (102). Remove outer o-ring
(105) and inner o-ring (106) from the piston seal
housing (103).
8. Remove retaining ring (112) and bearing (111) from
the piston seal housing (103).
3A0591U
21
Repair
9. Carefully lay piston (107) and rod (102) down so rod
will not be bent. Remove nut (108), washer (109),
and piston (107). Remove outer o-ring (105) and
inner o-ring (110).
10. Inspect parts for wear or damage. Replace as necessary.
careful not to push the piston seal housing down
into cylinder.
9. Install retaining ring (115).
10. Stainless Steel Rams: Lubricate and install inner
o-ring (122) into piston cap (120). Install outer o-ring
(121) onto piston cap. Then install piston cap (120)
onto the cylinder with screws (124) and washers
(123).
11. Reattach the tie bar (114), washers (116, 3), and
nuts (117, 4).
102
105*†
107
110*†
109*†
108*†
TI10521a
FIG. 8. Ram Piston.
Reassemble Piston and Seal
1. Install new o-rings (105 and 110) and lubricate piston (107) and o-rings.
2. Apply medium strength thread sealant. Install piston
(107), washer (109), and nut (108) on piston rod
(102).
3. Carefully insert piston into cylinder and push piston
rod straight down into cylinder.
4. Lubricate o-ring (106) and bearing (111). Install
o-ring (106), bearing (111), and retaining ring (112)
into piston seal housing (103).
5. Install new o-ring (105) on piston seal housing
(103).
6. Carbon Steel Rams: Install new pin (113) if necessary, or be sure it is in place.
7. Lubricate o-ring (105) and piston seal housing
(103).
8. Slide spring (104) and piston seal housing (103) on
the rod (102). Carbon Steel Rams: orient the pin to
the slot in the cylinder. Stainless Steel Rams: be
22
3A0591U
Repair
Notes
3A0591U
23
Parts
Parts
Piston Pump Ram Packages
10
44
3
2
4
4
34
3
1a
16
11
14
21
11
17
18
15
14
9
19
12
18
15
20
7
13
8
5
28, 29
6
24
ti16246a
3A0591U
Parts
Table 1. Common Parts, All Piston Pump
Ram Packages (5:1, 6:1, and 12:1)
Ref.
28
Part
-----
Ref.
1
29
-----
34
-----
1a
2
3
4
5
6
7
8
9
10
11
12
13
14
15
16
17
18
19
20
21
23
24
Part Description
See RAM, kit, includes Parts 1a, 14,
Table 2
15, and 18; see pages 28-31
----- FRAME, ram, assembly, includes
piston assembly
16G477 TIE ROD
512743 WASHER, flat 18-8 sst 7/8 in.
510221 NUT, hex st sst 7/8-9
PLATE, sanitary ram
16G240 Standard design, used on most
models
16K938 Conical design, used on model
24P811 and 24U568
17B191 Conical design, used on model
24V839
16G242 SEAL, inflatable, 18.0 id; includes
Refs. 28 and 29.
16D169 GASKET, sanitary 1.5
16D246 GASKET, 6" sanitary
See PUMP
Table 2
See ROD, air motor connecting
Table 2
101818 CLAMP, exhaust hose;
see page 31
118598 CLAMP, sanitary, 1.5 in
16D245 CLAMP, 6" sanitary
CONTROLS, air; see page 33
16G393
Enclosed, stainless steel
16G396
Exposed, carbon steel
----- SCREW, shdc,ss,.500x1.00
----- HOSE, exhaust; see page 31
512914 MUFFLER, polyethylene, see
page 31
----- WASHER, back-up piston sst
101682 SCREW, cap, sch
100016 WASHER, lock
16A942 FITTING, exhaust hose
16G391 HOSE, drain, 2 ft, includes Part
24, shipped loose, not shown
----- CLAMP, hose, included with Part
23, not shown
Qty
1
1
2
4
4
1
36
120306
103347
44
16V033
125▲ 15J074
126▲ 280574
1
2
1
1
Description
FITTING, 1/4 ptc to 1/4 ptc, FDA,
included with Ref. 6; see page
31
FITTING, 1/4 ptcm to 1/4 barb,
FDA, included with Ref. 6; see
page 31
FITTING, 1/2 npt x 1/2 ptc, FDA;
see page 31
VALVE, safety; shown on
page 32
80 psi, Models with 5:1 pumps
100 psi, Models with 6:1 or 12:1
pumps
SPACER, sleeve; used on model
24P811 and 24U568
LABEL, warning, ram, not shown
LABEL, warning, pump, not
shown
Qty
1
1
1
1
1
1
1
----- Not available separately.
▲Replacement Danger and Warning labels, tags, and
cards are available at no cost.
1
2
Table 2. Parts that Vary by Model
16C303
2
1
1
1
1
1
1
2
2
1
1
1
Model
24D708
24D712
24D714
24D720
24D724
24D726
24D776
24D780
24D782
24D788
24D792
24D794
24D647
24D651
24D653
24F188
24F189
24F190
24P811
24U568
Ram Kit
(1)
24G861
24G860
24G859
24G861
24G860
24G859
24G861
24G860
24G859
24G861
24G860
24G859
24G861
24G860
24G859
24G861
24G860
24G859
24G861
24G861
Pump (9)*
24G741
24G741
24G741
24G742
24G742
24G742
24G739
24G739
24G739
24G740
24G740
24G740
24F625
24F625
24F625
24F626
24F626
24F626
24F625
24F626
Rod
(10)
16E169
16E169
16E169
16C303
16C303
16C303
16E168
16E168
16E168
16E169
16E169
16E169
16C303
16C303
16C303
16C303
16C303
16C303
16C303
16C303
Sleeve
(44)
16V033
16V033
* See your pump manual for parts information.
3A0591U
25
Parts
Diaphragm Pump Ram Packages
4
3
2
38
1a
2
14
11
15
34
17
9
16
7
11
19
21
20
14
12
13
8
18
39
7
12
5
28, 29
ti16246a
6
26
3A0591U
Parts
Table 1. Common Parts, All Diaphragm
Pump Ram Packages (2150 and 3150)
Table 2. Parts that Vary by Model
Ref.
1
Model
24G542
24F191
24G543
24F192
24F193
24F194
24D922
24D926
24D928
24D932
24D936
24D940
24D944
24D948
24D952
24J364
24J365
24J366
Part
Description
See
RAM, kit, includes Parts 1a, 14,
Table 2
15, and 18; see pages 28-31
1a
----FRAME, ram, assembly,
includes piston assembly
2
16G477 TIE ROD
3
512743 WASHER, flat 18-8 sst 7/8 in.
4
510221 NUT, hex st sst 7/8-9
5
16G241 PLATE, ram
6
16G242 SEAL, inflatable, FDA, neoprene, 18 in. (46 cm)
7
16D169 GASKET, sanitary 1.5 in.
8
15D346 GASKET, sanitary
9
See
PUMP
Table 2
11
101818 CLAMP, exhaust hose;
see page 31
12
118598 CLAMP, 1.5 in
13
510490 CLAMP, 4 in.
14
CONTROLS, air; see page 33
16G393
Enclosed, stainless steel
16G396
Exposed, carbon steel
15
----SCREW, 1/2-13 unc, sst
16
----HOSE, exhaust; see page 31
17
512914 MUFFLER, polyethylene, see
page 31
18
----WASHER, sst
19
101682 SCREW, cap, 1/4-20, carbon
steel
20
100016 WASHER, lock
21
16A942 FITTING, exhaust hose
28
----FITTING, 1/4 ptc to 1/4 ptc, FDA;
see page 31
29
----FITTING, 1/4 ptcm to 1/4 barb,
FDA; see page 31
34
----FITTING, 1/2 npt x 1/2 ptc, FDA;
see page 31
36
114003 VALVE, safety, 130 psi, shown
on page 32
38
16D049 PLUG, Models 24D651 and
24F189 only
39
16C946 FITTING, air
125▲ 15J074 LABEL, warning, ram, not shown
127▲ 188621 LABEL, warning, pump, not
shown
128▲ 198382 LABEL, warning, pump, not
shown
Qty.
1
1
2
2
2
1
1
2
2
1
2
2
2
1
Ram Kit
(1)
24G861
24G860
24G859
24G861
24G860
24G859
24G861
24G860
24G859
24G860
24G859
24G861
24G861
24G860
24G859
24G861
24G860
24G859
Pump
(9)*
24G743
24G743
24G743
24G744
24G744
24G744
24C124
24C124
24C124
24J388
24J388
24J388
248274
248274
248274
24J389
24J389
24J389
* See your pump manual for parts information.
1
1
1
1
2
2
1
1
1
1
1
2
1
1
1
1
----- Not available separately.
▲Replacement Danger and Warning labels, tags, and
cards are available at no cost.
3A0591U
27
Parts
Ram Kits
Kits 24G859 and 24G861, Stainless Steel Frame
124
123
120
122†
121†
115*†
105*†
106*†
114
117
116
103
111†
112*†
104*†
102
118
101
105*†
107
107
110*†
109*†
108*†
ti16273b
28
3A0591U
Parts
Kits 24G859 and 24G861, Stainless Steel Frame
Ref.
14
15
18
101
102*
103
104†
105†
106†
107
108†
109†
110†
111†
112†
114
115†
116
117
118
120
121†
122†
123
124
125▲
Part
16G393
16G396
------------16G478
16E383
160138
160258
156698
16E384
101535
101533
156401
----15F453
16G480
----512743
510221
24G857
16E648
----111098
104123
102023
15J074
Description
CONTROLS, air; see page 33
Enclosed, stainless steel
Exposed, carbon steel
SCREW, 1/2-13 unc, sst
WASHER, sst
RAM, frame
ROD, piston, nickel-plated
BEARING
SPRING, compression
O-RING
O-RING
PISTON
NUT
WASHER
O-RING
BEARING
RING, retaining
BAR, tie
RING, retaining, 3.06 dia
WASHER, flat 18-8 sst 7/8 in.
NUT, hex st sst 7/8-9
FITTING, 1/8 npt to 3/8 ptc
CAP, piston
O-RING
PACKING, o-ring, cylinder
WASHER, lock, spring
SCREW, cap, hex hd
LABEL, warning, not shown
Qty.
1
1
1
1
2
1
1
2
1
1
1
1
1
1
1
1
2
2
2
2
2
2
2
8
8
1
▲ Replacement Danger and Warning labels, tags, and
cards are available at no cost.
† Parts included in stainless steel Piston Repair Kit
24G853.
*
316 stainless steel Ram Piston Rod Kit 24W822 is
available.
3A0591U
29
Parts
Ram Kit 24G860, Carbon Steel Frame
114
115*†
106*†
105*†
113
117
116
103
111†
126
112*†
104*†
102
118
101
105*†
107
110*†
109*†
107
108*†
ti16273c
30
3A0591U
Parts
Ram Kit 24G860, Carbon Steel Frame
Ref.
14
Part
16G393
16G396
15
----18
----101
----102
16G478
103
15M295
104* 160138
105* 160258
106* 156698
107
183943
108* 101535
109* 101533
110* 156401
111* ----112* 15F453
113
15U979
114
16G479
115*
----116
512743
117
510221
119
24G856
125▲ 15J074
126
189559
Description
CONTROLS, air; see page 33
Enclosed, stainless steel
Exposed, carbon steel
SCREW, 1/2-13 unc, sst
WASHER, sst
RAM, frame
ROD, piston
BEARING
SPRING, compression
O-RING
O-RING
PISTON
NUT
WASHER
O-RING
BEARING
RING, retaining
PIN, spring
BAR, tie
RING, retaining, 3.06 dia
WASHER, flat 18-8 sst 7/8 in.
NUT, hex st sst 7/8-9
FITTING, Connector tube
LABEL, warning
CAP, end
Qty.
1
1
1
1
2
1
1
2
1
1
1
1
1
1
1
1
1
2
2
2
2
4
2
▲ Replacement Danger and Warning labels, tags, and
cards are available at no cost.
*
Parts included in carbon steel Piston Repair Kit
24G854.
3A0591U
Muffler Kit 16G390
Ref.
17
Part
Description
512914 MUFFLER, polyethylene
Qty.
2
Exhaust Assembly Kit 16G389
Ref.
17
16
11
Part
512914
----101818
Description
MUFFLER, polyethylene
HOSE, exhaust, 6 ft.
CLAMP, hose
Qty.
1
1
2
PTC Fittings Kit 16G392
Ref.
28
29
34
Description
FITTING, 1/4 ptc to 1/4 ptc, FDA
FITTING, 1/4 ptcm to 1/4 barb, FDA
FITTING, 1/2 npt x 1/2 ptc, FDA
Qty.
1
1
1
Conversion Kit 24H370
Order this kit to convert a ram with a 12:1 piston pump
to a ram with a 3150 diaphragm pump.
Ref.
5
6
8
9
13
21
28
29
34
39
40
Description
PLATE, ram
SEAL, inflatable, FDA, neoprene, 18 in.
(46 cm)
GASKET, sanitary
PUMP, 3150, Model 24C124
CLAMP, 4 in.
FITTING, exhaust hose
FITTING, 1/4 ptc to 1/4 ptc, FDA
FITTING, 1/4 ptcm to 1/4 barb, FDA
FITTING, 1/2 npt x 1/2 ptc, FDA
FITTING, air
CONNECTOR, union, 1/2 to 1/2 PTC
Qty.
1
1
1
1
2
1
1
1
1
1
1
31
Parts
Air Controls Kits
Kit 16G396 Air Controls
208
Carbon Steel, Exposed
201b
207
201h
Ref.
201
Part
-----
201a
201b
201c
201d
201e
201f
201g
201h
201j
201k
201m
----121108
121107
121110
----121106
121109
121112
517449
100721
120602
202
16E534
203
204
205
206
207
208
209
----100016
101682
16A943
100896
114111
C36260
201d
209
36 1
203
201e
201d
201a
206
202
205
204
201g
201j
201c
209
201d
201b
201f
ti16249a
1 The safety valve is part of the ram package. See
Description
Qty.
CONTROL, air,
1
includes
201a-201m
MANIFOLD
1
VALVE, shutoff
2
VALVE, control
1
O-RING
3
REGULATOR
1
REGULATOR
1
VALVE, blow-off
1
SCREW, cap
6
MUFFLER, 1/4 npt
1
PLUG, pipe
1
FITTING, cartridge,
3
not shown
CONTROL, air assist
1
option
BRACKET, air control
1
WASHER, lock
4
SCREW, cap, sch
4
ELBOW, plug-in
2
BUSHING, pipe
1
CONNECTOR, male
1
GAUGE, pressure, air
2
Table 1 on page 25 (piston pump packages) or
page 27 (diaphragm pump packages).
32
3A0591U
Parts
Kit 16G393 Air Controls
Stainless Steel, Enclosed
Ref. Part
301
----301a
301b
301c
301d
16T411
16T409
16T410
16V725
301e 16V728
301f 16V727
301g 16V728
301h 16V726
301j 16V729
301k 16V730
302
303
304
305
306
307
16F486
16F485
102235
104123
102025
16N855
302
Description
Qty.
CONTROL, air; includes
1
301a-301k
REGULATOR, seal
1
REGULATOR, pump
1
REGULATOR, ram
1
GAUGE, pressure,
1
inflatable seal
SWITCH, pressure,
1
inflatable seal
GAUGE, pressure,
1
air motor
SWITCH, pressure,
1
air motor
GAUGE, pressure,
1
ram direction
SWITCH, pressure,
1
ram direction
SWITCH, push button,
1
air assist ram plate
BRACKET, control module
1
BRACKET, control module
1
SCREW, cap, hex hd
4
WASHER, lock, spring
4
NUT, full, hex, regular
4
LABEL, overlay
1
304
305
306
301
301a
301b
301d
301e
301f
301g
301h
301j
303
307
301k
301c
ti16250a
Part No. 16G393 Pneumatic Control Panel, Pneumatic Diagram
Air in
BV
301c
301b
301g
301a
301e
301h
301f
301d
301j
vent 4
1
5
2
PR1
V1
NV
3
V2
NVM
PR1
301k
F1
Air
Assist
3A0591U
F2 F2
Ram Ram
Up Down
F3
Pump 1
M1
F1
Seal
33
Parts
Notes
34
3A0591U
Dimensions
Dimensions
49 in. (124.5 cm)
9 ft (2.75 m)
when fully raised.
5 ft. 8 in. (1.73 m)
when fully lowered.
Four 0.562 in. (14 mm)
mounting holes.
38 in. (96.5 cm)
42 in. (106.7 cm)
21 in. (53.4 cm)
25 in. (63.5 cm)
TI15713a
3A0591U
35
Technical Data
Technical Data
Maximum Fluid Working Pressure
5:1 Ratio Piston Pumps . . . . . . . . . . . . . . . . . . . . . .
410 (2.8 MPa, 28.3 bar)
6:1 Ratio Piston Pumps . . . . . . . . . . . . . . . . . . . . . .
650 (4.5 MPa, 44.8 bar)
12:1 Ratio Piston Pumps . . . . . . . . . . . . . . . . . . . . .
1450 (10 MPa, 100.0 bar)
Diaphragm Pumps . . . . . . . . . . . . . . . . . . . . . . . . . .
120 (0.8 MPa, 8.2 bar)
Maximum Package Air Inlet Pressure
Piston Pump Ram Packages . . . . . . . . . . . . . . . . . .
100 psi (0.7 MPa, 6.9 bar)
Diaphragm Pump Ram Packages . . . . . . . . . . . . . .
120 psi (0.8 MPa, 8 bar)
Maximum Ram Air Inlet Pressure . . . . . . . . . . . . . . . . .
100 psi (0.7 MPa, 6.9 bar)
Maximum Pump Air Inlet Pressure
6:1 and 12:1 Ratio Piston Pumps. . . . . . . . . . . . . . .
100 psi (0.7 MPa, 6.9 bar)
5:1 Ratio Piston Pumps . . . . . . . . . . . . . . . . . . . . . .
80 psi (0.6 MPa, 5.5 bar)
Diaphragm Pumps. . . . . . . . . . . . . . . . . . . . . . . . . . . . .
120 psi (0.8 MPa, 8 bar)
Air Inlet Size
Enclosed Controls . . . . . . . . . . . . . . . . . . . . . . . . . .
1/2 npt(f)
Exposed Controls . . . . . . . . . . . . . . . . . . . . . . . . . . .
3/4 npt(f)
Maximum Ram Package Operating Temperature
5:1 Ratio Piston Pump Ram Packages . . . . . . . . . .
All Other Ram Packages . . . . . . . . . . . . . . . . . . . . .
140°F (60°C)
150°F (66°C)
Maximum Drum ID . . . . . . . . . . . . . . . . . . . . . . . . . . . .
24 in. (61 cm)
Minimum Drum ID
Straight-Sided Drum. . . . . . . . . . . . . . . . . . . . . . . . .
19.4 in. (49 cm)
Tapered Drum . . . . . . . . . . . . . . . . . . . . . . . . . . . . .
19.0 in. (48 cm)
Maximum Drum Height . . . . . . . . . . . . . . . . . . . . . . . . .
40.75 in. (104 cm)
Sound Data . . . . . . . . . . . . . . . . . . . . . . . . . . . . . . . . . .
See your pump manual.
Wetted Parts
36
Inflatable Seal. . . . . . . . . . . . . . . . . . . . . . . . . . . . . .
Neoprene
Ram (plate, fittings, gaskets) . . . . . . . . . . . . . . . . . .
300-Series Stainless steel, Buna-N, and Polypropylene
5:1 Ratio Piston Pumps (see pump manual) . . . . . .
Stainless steel, Buna-N, FKM, PTFE and UHMWPE.
Priming piston pumps also have Polychloroprene and
Nylon. Model 24F197 also has Silicone.
6:1 Ratio Piston Pumps (see pump manual) . . . . . .
Stainless steel, Buna-N, Polychloroprene, Nitrile, Nylon,
and UHMWPE. Certain models have PTFE packings.
12:1 Ratio Piston Pumps (see pump manual) . . . . .
Stainless steel, Acetal, Nitrile, PTFE, UHMWPE
Diaphragm Pumps (see pump manual) . . . . . . . . . .
316 Stainless steel, Santoprene®, Buna-N, Fluoroelastomer, EPDM, Weighted CR, Weighted Polychloroprene,
and PTFE
3A0591U
Technical Data
Package Weights
Piston Pump
Ram Packages
Diaphragm Pump
Ram Packages
Weight
Model
24D708
24D712
24D714
24D720
24D724
24D726
24D776
24D780
24D782
24D788
24D792
24D794
24D647
24D651
24D653
24F188
24F189
24F190
24P811
24U568
3A0591U
lb
413
433
428
417
437
432
353
372
367
356
375
370
440
459
454
440
459
454
460
460
kg
187
196
194
189
198
196
160
169
166
161
170
168
200
208
206
200
208
206
209
209
Weight
Model
24G542
24F191
24G543
24F192
24F193
24F194
24D922
24D926
24D928
24D932
24D936
24D940
24D944
24D948
24D952
24J364
24J365
24J366
lb
450
464
464
450
464
464
428
443
443
443
442
428
428
443
442
428
443
443
kg
204
210
210
204
210
210
194
201
201
201
200
194
194
201
200
194
201
201
37
Graco Standard Warranty
Graco warrants all equipment referenced in this document which is manufactured by Graco and bearing its name to be free from defects in
material and workmanship on the date of sale to the original purchaser for use. With the exception of any special, extended, or limited warranty
published by Graco, Graco will, for a period of twelve months from the date of sale, repair or replace any part of the equipment determined by
Graco to be defective. This warranty applies only when the equipment is installed, operated and maintained in accordance with Graco’s written
recommendations.
This warranty does not cover, and Graco shall not be liable for general wear and tear, or any malfunction, damage or wear caused by faulty
installation, misapplication, abrasion, corrosion, inadequate or improper maintenance, negligence, accident, tampering, or substitution of
non-Graco component parts. Nor shall Graco be liable for malfunction, damage or wear caused by the incompatibility of Graco equipment with
structures, accessories, equipment or materials not supplied by Graco, or the improper design, manufacture, installation, operation or
maintenance of structures, accessories, equipment or materials not supplied by Graco.
This warranty is conditioned upon the prepaid return of the equipment claimed to be defective to an authorized Graco distributor for verification of
the claimed defect. If the claimed defect is verified, Graco will repair or replace free of charge any defective parts. The equipment will be returned
to the original purchaser transportation prepaid. If inspection of the equipment does not disclose any defect in material or workmanship, repairs will
be made at a reasonable charge, which charges may include the costs of parts, labor, and transportation.
THIS WARRANTY IS EXCLUSIVE, AND IS IN LIEU OF ANY OTHER WARRANTIES, EXPRESS OR IMPLIED, INCLUDING BUT NOT LIMITED
TO WARRANTY OF MERCHANTABILITY OR WARRANTY OF FITNESS FOR A PARTICULAR PURPOSE.
Graco’s sole obligation and buyer’s sole remedy for any breach of warranty shall be as set forth above. The buyer agrees that no other remedy
(including, but not limited to, incidental or consequential damages for lost profits, lost sales, injury to person or property, or any other incidental or
consequential loss) shall be available. Any action for breach of warranty must be brought within two (2) years of the date of sale.
GRACO MAKES NO WARRANTY, AND DISCLAIMS ALL IMPLIED WARRANTIES OF MERCHANTABILITY AND FITNESS FOR A
PARTICULAR PURPOSE, IN CONNECTION WITH ACCESSORIES, EQUIPMENT, MATERIALS OR COMPONENTS SOLD BUT NOT
MANUFACTURED BY GRACO. These items sold, but not manufactured by Graco (such as electric motors, switches, hose, etc.), are subject to
the warranty, if any, of their manufacturer. Graco will provide purchaser with reasonable assistance in making any claim for breach of these
warranties.
In no event will Graco be liable for indirect, incidental, special or consequential damages resulting from Graco supplying equipment hereunder, or
the furnishing, performance, or use of any products or other goods sold hereto, whether due to a breach of contract, breach of warranty, the
negligence of Graco, or otherwise.
FOR GRACO CANADA CUSTOMERS
The Parties acknowledge that they have required that the present document, as well as all documents, notices and legal proceedings entered into,
given or instituted pursuant hereto or relating directly or indirectly hereto, be drawn up in English. Les parties reconnaissent avoir convenu que la
rédaction du présente document sera en Anglais, ainsi que tous documents, avis et procédures judiciaires exécutés, donnés ou intentés, à la suite
de ou en rapport, directement ou indirectement, avec les procédures concernées.
Graco Information
For the latest information about Graco products, visit www.graco.com.
For patent information, see www.graco.com/patents.
TO PLACE AN ORDER, contact your Graco distributor or call to identify the nearest distributor.
Phone: 612-623-6921 or Toll Free: 1-800-328-0211 Fax: 612-378-3505
All written and visual data contained in this document reflects the latest product information available at the time of publication.
Graco reserves the right to make changes at any time without notice.
Original instructions. This manual contains English. MM 3A0591
Graco Headquarters: Minneapolis
International Offices: Belgium, China, Japan, Korea
GRACO INC. AND SUBSIDIARIES • P.O. BOX 1441 • MINNEAPOLIS MN 55440-1441 • USA
Copyright 2010, Graco Inc. All Graco manufacturing locations are registered to ISO 9001.
www.graco.com
Revision U, September 2014