1
Instructions
Topper Units
306556S
EN
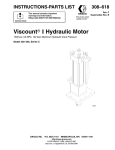
Grease dispense unit with pneumatic pump elevator for easy drum replacement. For
professional use only.
Model 226013
Model 244637
50:1 Ratio Fire-Ball® Pump
5000 psi (34.5 MPa, 345 bar) Maximum Working Pressure
100 PSI (0.68 MPa, 6.89 bar) Maximum Air Pressure
75:1 Ratio President® Pump
4000 psi (27.6 MPa, 276 bar) Maximum Working
Pressure
80 PSI (0.55 MPa, 5.5 bar) Maximum Air Pressure
Model 226018
Model 204490, Elevator and Inductor
50:1 Ratio President® Pump
4000 psi (27.6 MPa, 276 bar) Maximum Working
Pressure
80 PSI (0.55 MPa, 5.5 bar) Maximum Air Pressure
without pump or hose kit
Important Safety Instructions
Read all warnings and instructions in this
manual. Save these instructions.
Contents
Warnings . . . . . . . . . . . . . . . . . . . . . . . . . . . . . . . . . 3
Installation . . . . . . . . . . . . . . . . . . . . . . . . . . . . . . . . 5
Grounding . . . . . . . . . . . . . . . . . . . . . . . . . . . . . . 5
Pressure Relief Procedure . . . . . . . . . . . . . . . . . 5
Typical Installation . . . . . . . . . . . . . . . . . . . . . . . . 6
Operation . . . . . . . . . . . . . . . . . . . . . . . . . . . . . . . . 10
Installing a Drum . . . . . . . . . . . . . . . . . . . . . . . . 10
Removing a Drum . . . . . . . . . . . . . . . . . . . . . . . 11
Maintenance . . . . . . . . . . . . . . . . . . . . . . . . . . . . . . 12
Removing the Pump . . . . . . . . . . . . . . . . . . . . . 12
Reinstalling the Pump . . . . . . . . . . . . . . . . . . . . 12
Troubleshooting . . . . . . . . . . . . . . . . . . . . . . . . . . . 13
Parts . . . . . . . . . . . . . . . . . . . . . . . . . . . . . . . . . . . . 14
Technical Data . . . . . . . . . . . . . . . . . . . . . . . . . . . . 19
Graco Standard Warranty . . . . . . . . . . . . . . . . . . . 20
2
306556S
Warnings
Warnings
The following warnings are for the setup, use, grounding, maintenance, and repair of this equipment. The exclamation point symbol alerts you to a general warning and the hazard symbols refer to procedure-specific risks. When
these symbols appear in the body of this manual or on warning labels, refer back to these Warnings. Product-specific
hazard symbols and warnings not covered in this section may appear throughout the body of this manual where
applicable.
WARNING
FIRE AND EXPLOSION HAZARD
When flammable fluids are present in the work area, such as gasoline and windshield wiper fluid, be
aware that flammable fumes can ignite or explode. To help prevent fire and explosion:
• Use equipment only in well ventilated area.
• Eliminate all ignition sources, such as cigarettes and portable electric lamps.
• Keep work area free of debris, including rags and spilled or open containers of solvent and gasoline.
• Do not plug or unplug power cords or turn lights on or off when flammable fumes are present.
• Ground all equipment in the work area.
• Use only grounded hoses.
• If there is static sparking or you feel a shock, stop operation immediately. Do not use equipment
until you identify and correct the problem.
• Keep a working fire extinguisher in the work area.
EQUIPMENT MISUSE HAZARD
Misuse can cause death or serious injury.
• Do not operate the unit when fatigued or under the influence of drugs or alcohol.
• Do not exceed the maximum working pressure or temperature rating of the lowest rated system
component. See Technical Data in all equipment manuals.
• Use fluids and solvents that are compatible with equipment wetted parts. See Technical Data in all
equipment manuals. Read fluid and solvent manufacturer’s warnings. For complete information
about your material, request MSDS forms from distributor or retailer.
• Check equipment daily. Repair or replace worn or damaged parts immediately with genuine manufacturer’s replacement parts only.
• Do not alter or modify equipment.
• Use equipment only for its intended purpose. Call your distributor for information.
• Route hoses and cables away from traffic areas, sharp edges, moving parts, and hot surfaces.
• Do not kink or over bend hoses or use hoses to pull equipment.
• Keep children and animals away from work area.
• Comply with all applicable safety regulations.
SKIN INJECTION HAZARD
High-pressure fluid from dispense valve, hose leaks, or ruptured components will pierce skin. This may
look like just a cut, but it is a serious injury that can result in amputation. Get immediate surgical
treatment.
• Do not point dispense valve at anyone or at any part of the body.
• Do not put your hand over the end of the dispense nozzle.
• Do not stop or deflect leaks with your hand, body, glove, or rag.
• Follow Pressure Relief Procedure in this manual, when you stop spraying and before cleaning,
checking, or servicing equipment.
306556S
3
Warnings
WARNING
TOXIC FLUID HAZARD
Hazardous fluid or toxic fumes can cause serious injury or death if splashed in the eyes or on the skin,
inhaled, or swallowed.
• Know the specific hazards of the fluid you are using.
• Store hazardous fluid in an approved container. Dispose of hazardous fluid according to all local,
state, and national guidelines.
• Always wear protective eye wear, gloves, clothing, and respirator as recommended by the fluid and
solvent manufacturer.
MOVING PARTS HAZARD
Moving parts can pinch or amputate fingers and other body parts.
• Keep clear of moving parts.
• Do not operate equipment with protective guards or covers removed.
• Pressurized equipment can start without warning. Before checking, moving, or servicing equipment,
follow the Pressure Relief Procedure in this manual. Disconnect power or air supply.
PERSONAL PROTECTIVE EQUIPMENT
You must wear appropriate protective equipment when operating, servicing, or when in the operating
area of the equipment to help protect you from serious injury, including eye injury, hearing loss,
inhalation of toxic fumes, and burns. This equipment includes but is not limited to:
• Protective eyewear, and hearing protection.
• Respirators, protective clothing, and gloves as recommended by the fluid and solvent manufacturer.
4
306556S
Installation
Installation
Grounding
3. Connect the other end of the ground wire to a true
earth ground. (Fig 1).
The equipment must be grounded to reduce the risk
of static sparking and electric shock. Electric or static
sparking can cause fumes to ignite or explode.
Improper grounding can cause electric shock.
Grounding provides an escape wire for the electric
current.
•
Pump: Use a ground wire and clamp as shown in
Fig 1.
•
Air and fluid hoses: Use only electrically conductive
hoses.
•
Air Compressor: Follow manufacturer’s recommendations.
•
Spray fun and dispensing valve: Ground through
connection to a properly grounded fluid hose and
pump.
•
Fluid supply container: Follow your local code.
•
Truck bed or platform: Follow your local code.
•
Solvent pails used when flushing: Follow your local
code. Use only metal pails, which are conductive,
placed on a grounded surface. Do not place the pail
on a nonconductive surface, such as paper or cardboard, which interrupts the grounding continuity.
•
To maintain grounding continuity when flushing or
relieving pressure: Hold a metal part of the dispensing valve firmly to the side of a grounded metal pail,
then trigger the valve.
Grounding the Pump
1. Remove the ground screw (Z) and insert through
the eye of the ring terminal at the end of ground wire
(Y).
2. Fasten the ground screw back into the pump and
tighten securely.
306556S
Z
Y
FIG. 1
Pressure Relief Procedure
Follow the Pressure Relief Procedure whenever
you see this symbol.
This equipment stays pressurized until pressure is
manually relieved. To help prevent serious injury from
pressurized fluid, such as skin injection, splashing
fluid and moving parts, follow the Pressure Relief
Procedure when you stop spraying and before
cleaning, checking, or servicing the equipment.
1. Close the pump’s air regulator.
2. Close the supply pump’s bleed-type master air valve
(required in this system).
3. Hold a metal part of the dispensing valve firmly to a
grounded metal waste container and open the dispensing valve until pressure is fully relieved.
If you suspect that the dispensing valve, extension, or
grease fitting coupler is clogged, or that pressure has
not been fully relieved after following the steps above,
VERY SLOWLY loosen the coupler or hose end coupling and relieve pressure gradually, then loosen completely and clear the clog.
5
Installation
Typical Installation
3” (76 mm)
1” (25 mm)
6” (152.4 mm)
supply lines
(from ceiling)
supply lines
(through wall)
bleed-type
master air valve
high pressure
fluid shutoff valve
5’ (1524 mm)
mounting
holes
clearance
for plumbing
FIG. 2
The Typical Installation (shown in fig 2) is only a guide
for selecting and installing this system. It is not an actual
system design. Contact your local Graco representative
for assistance in designing a system to suit your particular needs.
Positioning the Elevator
4. Place the inductor plate (2, 18, or 22) on the mounting base (102).
A
1. Position the elevator where the ceiling is at least 8 ft
(2.6 m) high. The elevator is 90 in (2.4 m) when fully
raised.
2. Provide adequate space in front of the elevator for
changing drums and in back and on the side for
plumbing.
102
Mounting the Elevator
1. Secure the elevator base (A) to the mounting base
(102) using screws (104), lockwashers (103), and
nuts (105). (Fig 3)
2. Bolt the mounting base (102) to the floor for stability.
3. Verify the elevator is level. Loosen on or two screws
(104) on the elevator base and place shims under
the base, if necessary.
6
103
104
105
FIG. 3
5. Loosen the screws (68) of both support brackets
(83). Slide the support (64) down far enough to
allow installation of the pump in the inductor plate.
Tighten the bracket screws lightly.
306556S
Installation
Mounting the Pump
5. Tighten the lock nut (11 or 24) securely. Continue
with Step 4 below.
Models 226013, 226018, 244637
DETAIL
1. Mount the pump support bracket (86). (FIG. 4)
8 or 23
pump riser
tube
11 or 24
2 or 22
pump intake
slots
86
0.12” (3.2 mm)
FIG. 5
NOTE: The full length of the pump intake slots must be
just below the bottom of the inductor cone.
Model 204490
FIG. 4
2. Remove inductor plate nut (11 or 24), locking ring (8
or 23) and o-ring (9). (FIG. 5)
Refer to FIG. 6 for Steps 1-3 below.
1. Lubricate the o-ring (20) in the inductor plate (18)
with light, waterproof grease. (FIG. 6)
3. In order, slide inductor plate nut (11 or 24), locking
ring (8 or 23) and o-ring (9) on pump riser tube.
(FIG. 5)
2. Mount the pump on the pump support (64) so the
fluid outlet faces front.
4. Adjust the inductor plate on the pump so that the
pump intake is 0.12 in. (3.2 mm) above the mounting base.
3. Guide the pump intake valve as far as possible into
the inductor plate, then tighten the set screws (19).
Continue with Step 4 below.
20
18
19
FIG. 6
306556S
7
Installation
All Models
Refer to FIG. 7 for the following Steps.
4. Connect one end of the 36 in. (914 mm) hose into
the adapter and the other hose end into the
snap-over valve’s (27) union (82). (FIG. 8)
4. Loosen the pump support clamps again and raise
the support (64) until it meets the pump base.
5. Secure the President or Fire-Ball pump to the pump
support mounting plates from the underside with the
screws (68).
6. Tighten screws (68) on lower pump bracket (83).
7. Slide the upper support bracket (83) up or down (the
tubing of the pump support (64) will flex slightly)
until the pump is in a true vertical position.
The bleed-type master air valve is required in your
system to relieve air trapped between this valve and
the pump after the air is shut off. Trapped air can
cause the pump to cycle unexpectedly and cause
serious injury, including splashing in the yes or on the
skin. Position the valve close to the pump.
89
8. Tighten the screws (68) on the upper bracket.
85
68
64
83
27
FIG. 7
Installing the Hoses and Valves
E
NOTE: Use thread sealant on all male threads except at
the swivel unions.
1. Remove the plug from the top of the elevator cap
and screw it into the air inlet (E) in the elevator base.
(FIG. 8)
1. Screw the restrictor valve assembly (42) into the
elevator cap.
2. Screw the 1/4 x 1/8 npt adapter (85) into the restrictor valve. (FIG. 8)
FIG. 8
5. Route the hose inside the arms of the pump support
(64). (FIG. 7)
6. Screw the hex nipple (115 or 99) from the outlet
hose kit (91 or 97) to the pump outlet. (See Parts
Drawing on Page 16.)
7. Connect the kit’s swivel union (96) to the adapter
with the opening in the valve (94) facing down. (See
Parts Drawing on Page 18.)
3. Install the 1/4 x 3/8 npt adapter (89). (FIG. 8)
8
306556S
Installation
8. Install a bleed-type master air valve on the pump’s
air supply line.
9. Install a fluid shutoff valve on the fluid supply line to
shut off fluid to the pump.
10. Finish assembling the hoses and fittings as shown
on Parts Drawing Page 16.
306556S
9
Operation
Operation
NOTICE
Always close the ball valve (65) as soon as the
inductor plate reaches the bottom of the drum, indicating the drum is empty. Allowing the pump to run
without fluid will cause damage to the pump.
Installing a Drum
NOTE: To adjust the elevator speed, turn the restrictor
valve screw (46) clockwise to decrease the speed or
counter clockwise to increase the speed.
6. Center an opened 400 lb (181.4 kg) drum under the
inductor plate so the drum bottom touches the elevator base (A).
7. Make the top of the fluid concave by scooping fluid
from the center to the sides of the container.
8. Loosen the setscrews (73), holding pump mounting
plates to the mounting bracket (C). Align the pump
and inductor plate with the drum.
Refer to FIG. 9 for the following instructions.
1. Relieve the pressure, see Pressure Relief Procedure, page 5.
NOTE: Keep your fingers and hands away from the
sides of the drum or inductor plate to avoid pinching
them when raising and lowering the pump.
2. Close the ball valve (65). The handle will be at a 90°
angle to the valve body.
9. Push in the snap-over valve (27) to lower the pump
while guiding the inductor plate into the drum.
3. Open the bleed-type master air valve (F).
10. Press down the pump and rock it back and forth to
seat the inductor plate. This helps eliminate air
trapped beneath the plate. Continue this action until
fluid appears at the vent opening (D).
4. Open the inductor plate vent by turning the knob
(10) counter clockwise.
5. Pull open the snap-over valve (27) to raise the elevator.
F
46
11. Be sure that the pump is aligned vertically and
tighten the set screws (73).
12. Close the inductor plate vent by turning the knob
(10) clockwise.
13. For Models 226013, 226018, and 244637 only:
73
a. Open the bleeder valve (94) at the pump outlet
by turning the thumbscrew counter clockwise.
b.
Open the ball valve (65) until all air trapped in
the pump and under the plate are pumped
through the valve.
c.
Close the ball valve and the bleeder valve.
65
C
27
47
A
94
10
D
FIG. 9
10
d. Regulate the pump speed with the ball valve
handle.
14. All Models: Always use the lowest possible pump
pressure necessary for good delivery. Higher pressures cause premature pump wear and usually do
not produce better results.
306556S
Operation
Removing a Drum
1. Relive pressure, see Pressure Relief Procedure,
page 5.
2. Press in and hold the air-assist valve (47) until the
inductor plate rises above the drum. Release the
valve. (FIG. 9)
3. Open the snap-over valve (27) and raise the elevator to full height. (FIG. 9)
NOTE: If you lose air pressure when reaching the drum
chime, continue holding the air-assist valve and slowly
pull out the snap-over valve until the chime is passed.
Then, immediately close the snap-over valve to prevent
raising the drum off the floor.
306556S
11
Maintenance
Maintenance
Refer to FIG. 10 for reference numbers.
NOTE: To avoid contaminating the fluid in the supply
container, keep the pump intake and the inductor plate
clean during the servicing operations. Place the parts on
clean paper or rags.
Removing the Pump
27
1. Relieve Pressure, see Pressure Relief Procedure,
page 5.
41
2. Remove the drum. Disconnect the air-assist hose
(41).
11 or 24
For Model 204490: Loosen the inductor plate set
screws (19).
For Models 226013, 226018, and 244637: Unscrew
the locking nut (11 or 24), taking note of the number
of turns needed.
3. Push the snap-over valve (27) to lower the pump.
4. Relieve pressure in the pump and disconnect the
hoses.
FIG. 10
5. Disconnect the pump from the mounting bracket
and remove it.
Reinstalling the Pump
1. Connect the pump to the mounting bracket.
2. Attached hoses to pump.
3. Pull the snap-over valve (27) to raise the pump.
4. Attach drum. See Installing a Drum, page 10.
NOTE: When attaching the pump to the inductor plate,
turn the locking nut (11 or 24) the same number of turns
noted in Removing the Pump, Step 2, or until you feel it
settle in.
12
306556S
Troubleshooting
Troubleshooting
Problem
Cause
1. Open inductor plate vent
Solution
1. Close the inductor plate.
Low flow or air sucked into pump or 2. Loose inductor plate sleeve lock- 2. Tighten the locking nuts.
ing nut
under inductor plate.
3. Replace seals; See Parts Drawing Page 16.
3. Worn inductor seals
Failure of snap-valve or air-assist
valve
306556S
Worn o-rings or seals
Remove valve, place in vise, disassemble and replace parts as
needed.
13
Parts
Parts
Model 204490
Elevator and Inductor Plate Assembly
Includes items 17, 25, 90, and 101
Model 244637
Pump, Elevator, and Inductor Plate Assembly
Includes items 21, 25, 90, 97, 101, and 107
Ref Parts
No. No.
Description
Qty.
17 204405 INDUCTOR PLATE ASSEMBLY
1
See parts on page 14
25 204461 WISHBONE SUPPORT ASSEMBLY
1
See parts on page 16
90 204385 PNEUMATIC ELEVATOR
1
See manual 306287 for parts
101 205339 ELEVATOR BASE
1
See parts below
Ref
No. Part No. Description
Qty.
21 205669 INDUCTOR PLATE ASSEMBLY
1
See Parts on Page 14
25 204461 WISHBONE SUPPORT ASSEMBLY
1
See parts on page 16
90 204385 PNEUMATIC ELEVATOR
1
See manual 306287 for parts
97 205102 HOSE KIT
1
See parts on page 18
101 205339 ELEVATOR BASE
1
See parts below
107 239730 75:1 RATIO PRESIDENT PUMP
1
See manual 308777 for parts
Model 226013
Pump, Elevator, and Inductor Plate Assembly
Includes items 1, 25, 89, 90, 91 and 101
Ref
No. Part No. Description
Qty.
1
204353 INDUCTOR PLATE ASSEMBLY
1
See parts on page 14
25 204461 WISHBONE SUPPORT ASSEMBLY
1
See parts on page 16
89 239888 50:1 RATIO FIRE-BALL PUMP
1
See manual 308883 for parts
90 204385 PNEUMATIC ELEVATOR
1
See manual 306287 for parts
91 204467 HOSE KIT
1
See parts on page 18
101 205339 ELEVATOR BASE
1
See parts below
Ref No. 101: Part No. 205339
Elevator Base Assembly
Includes items 102 - 105
Ref
No.
102
103
104
105
Part No.
205340
100018
100096
100321
Description
BASE, elevator
LOCKWASHERS, spring, 1/2”
SCREW, hex hd cap, 1/2-13 x 2”
NUT, 1/2-13
Qty.
1
4
4
4
90
89, 106, or 107
Model 226018
Pump, Elevator, and Inductor Plate Assembly
Includes items 21, 25, 90, 97, 101, and 106
Ref
No. Part No. Description
Qty.
21 205699 INDUCTOR PLATE ASSEMBLY
1
See part on page 14
25 204461 WISHBONE SUPPORT ASSEMBLY 1
See parts on page 16
90 204385 PNEUMATIC ELEVATOR
1
See manual 306287 for parts
97 205102 HOSE KIT
1
See parts on page 18
101 205339 ELEVATOR BASE
1
See parts below
106 205395 50:1 RATIO PRESIDENT PUMP
1
See manual 306674 for parts
14
91 or 97
102
103
104
105
1, 17, or 21
306556S
Parts
Ref No. 1: Part No. 204353
Inductor Plate Assembly: 400 lb Drum size
Fits 50:1 Fire-Ball In-Line Pump; Includes items 2-16
Ref No.Part No.
2
204502
3
100015
4
100021
5
104663
6
100799
7
100859
8
9
10
11
12
13
14
15
16
101644
158776
160865
161107
161162
161287
161288
164432
164497
Description
Qty.
PLATE, inductor, bare
1
NUT, hex, mscr, 1/4-20 UNC-2a
1
CAPSCREW, hex hd, 1/4-20 UNC-2a x 1”
1
PLUG, pipe, 3/4 npt (f)
1
SCREW, mach, rd hd, 1/4-20 x 1/2”
18
SCREW, headless, full dog point, No.
1
10-24 x 1/4”
SLEEVE, coupling
1
O-RING
1
KNOB, vent
1
NUT, locking
1
SEAL, rubber
1
WIPER, inductor plate
1
SEGMENT, full barrel
6
CAP, vent
1
ROD, vent release
1
10
12
13
14
15
16
18
19
160865
161162
161287
161288
164432
164497
204507
100556
20
160721
Description
Qty.
NUT, hex, mscr, 1/4-20 UNC-2a
1
CAPSCREW, hex hd, 1/4-20 UNC-2a x 1”
1
PLUG, pipe, 3/4 npt (f)
1
SCREW, mach, rd hd, 1/4-20 x 1/2”
18
SCREW, headless, full dog point, No.
1
10-24 x 1/4”
KNOB, vent
1
SEAL, rubber
1
WIPER, inductor plate
1
SEGMENT, full barrel
6
CAP, vent
1
ROD, vent release
1
PLATE, inductor, bare
1
SETSCREW, sq hd cup point, 5/16-18 x
2
3/8”
O-RING, nitrile rubber
1
10
12
13
14
15
16
22
23
24
160865
161162
161287
161288
164432
164497
205698
196219
164962
306556S
Description
Qty.
NUT, hex, mscr, 1/4-20 UNC-2a
1
CAPSCREW, hex hd, 1/4-20 UNC-2a x 1”
1
PLUG, pipe, 3/4 npt (f)
1
SCREW, mach, rd hd, 1/4-20 x 1/2”
18
SCREW, headless, full dog point, No.
1
10-24 x 1/4”
KNOB, vent
1
SEAL, rubber
1
WIPER, inductor plate
1
SEGMENT, full barrel
6
CAP, vent
1
ROD, vent release
1
PLATE, inductor, bare
1
RING, locking
1
NUT, collet
1
11
8
15
7
Tapered
shoulder
faces up
9
5
12
13
Ref No. 1
2
4
10
3
6
14
16
15
7
20
5
12
19
13
18
Ref No. 21: Part No. 205699
Inductor Plate Assembly: 400 lb Drum size
Fits 50:1 President In-Line Pumps
Includes items 3 - 7, 10, 12 - 16, and 22 - 24
Ref No.Part No.
3
100015
4
100021
5
104663
6
100799
7
100859
14
16
Ref No. 17: Part No. 204405
Inductor Plate Assembly: 400 lb Drum size
Fits Monarch and President In-Line Pumps
Includes items 3 - 7, 10, 12 - 16, 18 - 20
Ref No.Part No.
3
100015
4
100021
5
104663
6
100799
7
100859
6
4
10
3
10
3
Ref No. 17
6
4
14
24
16
15
23
9
7
12
Large taper
faces up
5
13
22
Ref No. 21
15
Parts
aa
Ref. No. 42
Restrictor Valve Assembly
Includes items 43 to 46
Ref. No. 27
Snap-Over Valve Assembly
Includes items 28 to 40
29 36
43
35
46
28
34
40
44
45
33
37
38
30
32
39
1/8 npt
31
0729
85
0730
42
89
62
69
68
70
83
64
83
86
61
73
79
90
65
63
82
84
27
41
0732B
88
66 74
77
87
47
62
60
Ref. No. 47
Air Assist Valve Assembly
Includes items 48 to 60
50 56
3/8 npt
52
58
51 49
78
57
53
59
55
1/4 npt
48
54
0731
16
306556S
Parts
Ref No. 25: Part No. 204461
Wishbone Support Assembly
Ref
No.
27
28
29
30
31
32
33
34
35
36
37
38
39
40
41
42
43
44
45
46
47
48
49
50
51
52
53
54
55
56
57
58
59
60
Part No. Description
Qty.
202295 SNAP-OVER VALVE ASSEMBLY
Includes items 28 - 40
100272 LOCKWASHER, int. shkprf, No. 6
1
104560 SCREW, oval hd, 6-32 3/8”
1
154519 KNOB
1
154526 WASHER
1
154570 WASHEr
1
154594 O-RING, buna-N
1
155500 O-RING, nitrile rubber
1
155811 SEAL, valve, nitrile rubber
1
155921 SEAL, valve, nitrile rubber
1
157160 HOUSING, valve
1
157161 GUIDE, valve
1
161129 STEM, valve, large
1
161132 STEM, valve, small
1
205418 HOSE, air, cpld 1/2 npt(m) 1/2” (13mm)
1
ID, 6’ (1.8 m) long
203743 RESTRICTOR VALVE ASSEMBLY
1
Includes items 43 - 46
101448 NUT, jam, 3/8-24
1
157628 O-RING, nitrile rubber
1
160162 HOUSING, valve
1
160163 NEEDLE VALVE
1
203842 AIR ASSIST VALVE ASSEMBLY
1
Includes items 48 - 60
100063 PIN, cotter, 1/6” dia x 1/2”
1
100068 LOCKWASHERS, spring, No. 6
1
100072 NUT, hex, No. 6-32
1
150902 SPRING, compression
1
153348 GASKET, copper
1
154519 KNOB
1
154594 O-RING, buna-N
1
155500 O-RING, nitrile rubber
1
155811 SEAL, valve, nitrile rubber
1
157161 GUIDE, valve
1
160401 STEM, valve
1
160402 HOUSING, valve
1
160404 STUD, valve
1
Ref
No.
61
62
63
64
65
66
68
69
70
71
72
73
74
76
77
78
79
80
81
82
83
84
85
86
87
88
89
90
Part No. Description
Qty.
204560 HOSE, air, cpld 3/8 npt (m) 3/8”
1
(9.6mm) ID, 18” (457 mm) long
204561 HOSE, air, cpld 3/8 npt (m) 3/8”
2
(9.6mm) ID, 36” (914 mm) long
205610 SUPPORT, pump, lower
1
205611 SUPPORT, pump, upper
1
208393 BALL VALVE
1
100016 LOCKWASHER, spring, 1/4”
4
100057 CAPSCREW, hex hd, 5/16-18 x 3/4”
11
100181 NUT, square, 6/16-18
4
100214 LOCKWASHERS, 5/16”
4
100333 CAPSCREW, hex hd, 1/4-20 x 1/2”
4
100469 CAPSCREW, hex hd, 3/8-16 x 3/4”
4
100421 SETSCREW, socket hd, cup point,
4
5/16” x 3/8”
100377 SCREW, hex socket hd, 1/4-20 x 5/8”
2
150718 CLAMP, drum
4
151243 ADAPTER, 1/8 npt(m)
1
155541 UNION, 90° street, 1/4 npt (m x f)
1
swivel
155677 UNION, 90° adapter, 3/8 npt (f)
1
155699 ELBOW, street, 3/8 npt (m x f)
1
156580 ADAPTER, 3/8 npt(f) x 1/8 npt(m)
1
156823 UNION, 1/4 npt(m x f) swivel
1
158271 BRACKET, elevator riser tube, 1/8 npt
2
158962 ELBOW, 90° street, 1/4 npt(f) x 1/8 npt
1
(m)
159840 ADAPTER, pump mounting, 1/4 npt(f) x
1
1/8 npt(m)
189211 BRACKET, pump mounting
2
161466 MANIFOLD, air
1
162505 UNION, swivel, 3/8 npt(m) x 1/2
1
npsm(f) swivel
150287 ADAPTER, 1/4 npt(m) x 3/8 npt(f)
1
158256 UNION, swivel, 1/2 npt(m) x 3/8
1
npsm(f) swivel (used with model
226018 President pump only)
MOUNTING and CONNECTING PARTS
0734
0733
1/8 npt
3/8 npt
REF. NO.
81
80
76
68
71
72
QTY.
1
1
4
11
4
4
306556S
17
Parts
Ref No. 91: Part No. 204467
Fire-Ball Delivery Hose Kit
Includes items 92 - 94, 96, and 115
Ref No. 97: Part No. 205102
President Delivery Hose Kit
Includes items 94, 96, 98, 99, and 110
Ref
No.
92
93
Ref
No.
94
96
98
94
96
115
Part No. Description
Qty.
100206 BUSHING, 1/2 npt(m) x 1/4 npt(f)
1
109150 HOSE, fluid, cpld 1/4 npt(m)), 1/4”
1
(6.4mm) ID, 6’ (1.83 m) long
205528 VALVE, bleeder
1
160878 UNION, 90°, 1/4 npt(f) swivel
1
156971 NIPPLE, 1/4 x 1/4 npt(m)
1
94
93
1/2 npt
99
110
Part No.
205528
160878
109163
Description
VALVE, bleeder
UNION, 90°, 1/4 npt(f) swivel
HOSe, cpld 3/8 npt(m), 3/8”
(9.6mm) ID, 6’ (1.83 m) long
156849 NIPPLE, hex, 3/8 npt(m)
100081 BUSHING, pipe, 1/2 npt(m) x 3/8
npt(f)
98
94
92
1
1
1/2 npt
99
115
1/4 npt 96
Qty.
1
1
1
3/8 npt
96
110
Dimensions
90” (2.3 m) Maximum Height
56” (1.4 m) Minimum Height
30” (762 mm)
24” (610 mm)
18
306556S
Technical Data
Technical Data
See the pump instruction manual for Technical Data including Wetted Parts, Port Sizes, and so on.
.
Topper Units
US
Maximum fluid working pressure
50:1 Ratio Fire-Ball Pump
50:1 Ratio President Pump
75:1 Ratio President Pump
Maximum air pressure
50:1 Ratio Fire-Ball Pump
50:1 Ratio President Pump
75:1 Ratio President Pump
5000 psi
4000 psi
4000 psi
100 psi
80 psi
Metric
34.5 MPa, 345 bar
28 MPa, 280 bar
28 MPa, 280 bar
0.7 MPa, 7bar
0.6 MPa, 6 bar
0.6 MPa, 6 bar
80 psi
Weight
Model 226013
122 lb
55 kg
50:1 Ratio Fire-Ball Pump
Model 226018
136 lb
61 kg
50:1 Ratio President Pump
Model 244637
136 lb
61 kg
75:1 Ratio President Pump
Model 204490
90 lb
41 kg
Elevator and Inductor
Maximum sound pressure tested at 100 psi (0.7 MPa, 7 bar) at 40 cycles per minute
Model 226013
77.8 dB(A)
50:1 Ratio Fire-Ball Pump
Maximum sound pressure tested at 100 psi (0.7 MPa, 7 bar) at 15 cycles per minute
Model 226018
80.9 dB(A)
50:1 Ratio President Pump
Model 244637
80.9 dB(A)
75:1 Ratio President Pump
Maximum sound power lever tested in accordance with ISO 9614-2
Model 226013
85.6 dB(A)
50:1 Ratio Fire-Ball Pump
Maximum sound power lever tested in accordance with ISO 9614-2
Model 226018
94.6 dB(A)
50:1 Ratio President Pump
Model 244637
94.6 dB(A)
75:1 Ratio President Pump
306556S
19
Graco Standard Warranty
Graco warrants all equipment referenced in this document which is manufactured by Graco and bearing its name to be free from defects in
material and workmanship on the date of sale to the original purchaser for use. With the exception of any special, extended, or limited warranty
published by Graco, Graco will, for a period of twelve months from the date of sale, repair or replace any part of the equipment determined by
Graco to be defective. This warranty applies only when the equipment is installed, operated and maintained in accordance with Graco’s written
recommendations.
This warranty does not cover, and Graco shall not be liable for general wear and tear, or any malfunction, damage or wear caused by faulty
installation, misapplication, abrasion, corrosion, inadequate or improper maintenance, negligence, accident, tampering, or substitution of
non-Graco component parts. Nor shall Graco be liable for malfunction, damage or wear caused by the incompatibility of Graco equipment with
structures, accessories, equipment or materials not supplied by Graco, or the improper design, manufacture, installation, operation or
maintenance of structures, accessories, equipment or materials not supplied by Graco.
This warranty is conditioned upon the prepaid return of the equipment claimed to be defective to an authorized Graco distributor for verification of
the claimed defect. If the claimed defect is verified, Graco will repair or replace free of charge any defective parts. The equipment will be returned
to the original purchaser transportation prepaid. If inspection of the equipment does not disclose any defect in material or workmanship, repairs will
be made at a reasonable charge, which charges may include the costs of parts, labor, and transportation.
THIS WARRANTY IS EXCLUSIVE, AND IS IN LIEU OF ANY OTHER WARRANTIES, EXPRESS OR IMPLIED, INCLUDING BUT NOT LIMITED
TO WARRANTY OF MERCHANTABILITY OR WARRANTY OF FITNESS FOR A PARTICULAR PURPOSE.
Graco’s sole obligation and buyer’s sole remedy for any breach of warranty shall be as set forth above. The buyer agrees that no other remedy
(including, but not limited to, incidental or consequential damages for lost profits, lost sales, injury to person or property, or any other incidental or
consequential loss) shall be available. Any action for breach of warranty must be brought within two (2) years of the date of sale.
GRACO MAKES NO WARRANTY, AND DISCLAIMS ALL IMPLIED WARRANTIES OF MERCHANTABILITY AND FITNESS FOR A
PARTICULAR PURPOSE, IN CONNECTION WITH ACCESSORIES, EQUIPMENT, MATERIALS OR COMPONENTS SOLD BUT NOT
MANUFACTURED BY GRACO. These items sold, but not manufactured by Graco (such as electric motors, switches, hose, etc.), are subject to
the warranty, if any, of their manufacturer. Graco will provide purchaser with reasonable assistance in making any claim for breach of these
warranties.
In no event will Graco be liable for indirect, incidental, special or consequential damages resulting from Graco supplying equipment hereunder, or
the furnishing, performance, or use of any products or other goods sold hereto, whether due to a breach of contract, breach of warranty, the
negligence of Graco, or otherwise.
FOR GRACO CANADA CUSTOMERS
The Parties acknowledge that they have required that the present document, as well as all documents, notices and legal proceedings entered into,
given or instituted pursuant hereto or relating directly or indirectly hereto, be drawn up in English. Les parties reconnaissent avoir convenu que la
rédaction du présente document sera en Anglais, ainsi que tous documents, avis et procédures judiciaires exécutés, donnés ou intentés, à la suite
de ou en rapport, directement ou indirectement, avec les procédures concernées.
Graco Information
For the latest information about Graco products, visit www.graco.com.
TO PLACE AN ORDER, contact your Graco distributor or call to identify the nearest distributor.
Phone: 612-623-6928 or Toll Free: 1-800-533-9655, Fax: 612-378-3590
All written and visual data contained in this document reflects the latest product information available at the time of publication.
Graco reserves the right to make changes at any time without notice.
For patent information, see www.graco.com/patents.
Original instructions. This manual contains English. MM 306556
Graco Headquarters: Minneapolis
International Offices: Belgium, China, Japan, Korea
GRACO INC. AND SUBSIDIARIES • P.O. BOX 1441 • MINNEAPOLIS MN 55440-1441 • USA
Copyright 1956, Graco Inc. All Graco manufacturing locations are registered to ISO 9001.
www.graco.com
Revised November 2012