1
Instructions – Parts List
50:1 FIRE–BALLR, 120–LB DRUM SIZE
Topper Units
306523K
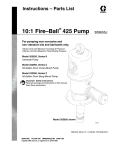
Grease dispense unit with pneumatic pump elevator for easy drum replacement.
Model No. 222073
Important Safety instructions
Read all warnings and instructions in this manual.
Save these instructions.
06381B
GRACO INC.ąP.O. BOX 1441ąMINNEAPOLIS, MNą55440-1441
Copyright 1996, Graco Inc. is registered to I.S. EN ISO 9001
Table of Contents
Warnings . . . . . . . . . . . . . . . . . . . . . . . . . . . . . . . . . . . . . .
Installation . . . . . . . . . . . . . . . . . . . . . . . . . . . . . . . . . . . . .
Operation . . . . . . . . . . . . . . . . . . . . . . . . . . . . . . . . . . . . .
Parts Drawing . . . . . . . . . . . . . . . . . . . . . . . . . . . . . . . . . .
Parts List . . . . . . . . . . . . . . . . . . . . . . . . . . . . . . . . . . . . . .
2
3
4
6
7
Sound Data . . . . . . . . . . . . . . . . . . . . . . . . . . . . . . . . . . . .
Manual Change Summary . . . . . . . . . . . . . . . . . . . . . . .
Graco Standard Warranty . . . . . . . . . . . . . . . . . . . . . . .
Graco Phone Number . . . . . . . . . . . . . . . . . . . . . . . . . . .
Symbols
Warning Symbol
Caution Symbol
CAUTION
WARNING
This symbol alerts you to the possibility of serious
injury or death if you do not follow the instructions.
This symbol alerts you to the possibility of damage to
or destruction of equipment if you do not follow the
instructions.
WARNING
EQUIPMENT MISUSE HAZARD
Equipment misuse can cause the equipment to rupture or malfunction and result in serious injury.
D This equipment is for professional use only.
D Read all instruction manuals, tags, and labels before operating the equipment.
D Use the equipment only for its intended purpose. If you are not sure, call your Graco distributor.
D Do not alter or modify this equipment.
D Check equipment daily. Repair or replace worn or damaged parts immediately.
D Handle hoses carefully. Do not pull on hoses to move equipment.
D Route hoses away from traffic areas, sharp edges, moving parts, and hot surfaces. Do not expose
Graco hoses to temperatures above 66_C (150_F) or below –40_C (–40_F).
D Do not move or lift pressurized equipment.
D Comply with all applicable local, state, and national fire, electrical, and safety regulations.
2
306523
7
8
8
8
Installation
Note: Choose a location with sufficient overhead
clearance, and adequate clearance for plumbing when
unit is being raised or lowered.
Assemble the Pump to the Elevator
(See Fig. 2)
1. Remove the elevator clamp (34) from the elevator
bracket (33).
Note: Numbers and letters in parenthesis refer to
callouts in the Figures and Parts Drawing.
2. Center the pump and inductor plate (8) on the
base (H), straddling the elevator tube (F).
Assemble the Elevator to the Base
(See Fig. 1)
3. Tighten the screws (19) securing the clamp (34) to
the bracket (33). See the Parts Drawing on
page 6.
Note: All necessary nuts, screws, and washers are
provided with Base Assy. 204740.
4. Place the unit in the desired location, and use
metal shims to to level the base, if necessary.
1. Set three flat washers (B) in place over the mounting holes in the base.
5. Anchor the unit to the floor using the mounting
holes (G) in the base. See Fig 1.
Connect the Hoses
1. Connect the 1/4 npt(m) end of the fluid hose (27)
between the outlet of the pump and the permanent
supply line.
2. Position the elevator on the washers (B).
3. Place three flat washers (B) over the holes in the
elevator base casting.
4. Fasten securely with three screws (A),
lockwashers (C) and nuts (D).
2. Connect the 3/8 npt(m) end of the air hose (5) to
the permanent supply.
27
34
37
5
33
A
B
F
G
E
8
C
H
D
Fig. 1
06384
06381B
Fig. 2
306523
3
Operation
WARNING
To reduce the risk of serious injury, always disconnect air and relieve pressure in lines before attempting any service.
1. Open the vent inductor plate (8) by turning the
knob (37) counterclockwise. See Fig. 2.
Changing the Drums
1. Disconnect the air line coupler (4) from the
pump.
2. Open the inductor plate vent, and connect the
coupler to the elevator to raise the unit.
Note: For steps 2–8, see the parts drawing on
page 6.
Note: If the empty drum rises with the unit, pull the
front of the drum down and forward to break it loose
from the inductor plate.
2. With the air supply turned on, connect the airline
coupler (4) to the fitting on top of the elevator
tube. Elevator speed may be regulated by turning
the adjusting screw clockwise to decrease, and
counterclockwise to increase elevator speed.
3. Remove the empty drum from the base, and install
a full drum as explained at left.
3. Center an opened drum of material under the
inductor plate (8) so that the drum bottom touches
the elevator base casting. The top surface of the
material should be made concave by scooping
material from the center to the sides of the container.
4. Disconnect the air line coupler (4) and guide the
inductor plate (8) into the drum. Press down on the
pump and rock or jiggle it back and forth to seat
the inductor plate and get rid of any trapped air,
and continue action until material appears at the
vent opening. Slide the plastic cover (9) down onto
the drum.
Removing the Pump for Service
Unscrew the locking nut (40) (taking note of the
number of turns). Disconnect hoses and pump from
the mounting and remove.
When attaching the pump, turn the locking
nut (40) the same number of turns as when disassembling, or a slight distance further. Check for 1/8”
(3 mm) clearance. See Fig. 3.
Note: For pump and elevator operation,
troubleshooting, and service instructions, see the
separate manuals.
5. Close the inductor plate vent, and open the bleeder valve (25*) by turning the thumbscrew counterclockwise.
23
6. Start the pump by connecting the air line
coupler (4) to the pump inlet fitting.
40
7. Let the pump run until material appears at the
bleeder valve.
8. Disconnect the air line coupler (4) and close the
bleeder valve. The unit is now ready for operation.
Note: When supplied with sufficient air pressure, the
pump is remotely controlled at the dispensing valve.
The pump starts and stops as the dispensing valve is
opened or closed.
8
Note: For overnight or holiday shutdown, disconnect
the air line coupler (4) and relieve the pressure in the
lines.
1/8” (3 mm)
06383
Fig. 3
4
306523
Notes
306523
5
Parts
27
Model 222073, Topper Unit
6
41
4
42
5
25*
30
38
32
19
1
16
37
19
34
33
18
21
17
3e
21
9
40
23
39
*31
22
8
12
36*
15
11
*29
13
14
06382B
6
306523
7
Parts List
Model 222073, Topper Unit
Ref.
No.
1
2
Part No.
204121
222074
4
114558
5
203320
6
239887
7
8
9
10
204194
204195
204739
204740
11
12
100004
13
14
15
16
17
100133
100307
100731
100015
100016
Description
Qty.
ELEVATOR, 120 lb
see manual 306522 for parts
SUPPORT, pump
includes items 4,5,7–42
COUPLER, female, air line,
quick disconnect
. HOSE, air; cpld 3/8 npt (mbe)
3/8” ID; 6’ (1.8 m) long
50:1 FIREBALL PUMP
see manual 308883 for parts
VENT JACK SCREW and LEG
PLATE, inductor
COVER, drum; plastic
BASE, mounting
includes items 11–15
. BASE, bare
. SCREW, hex hd cap;
3/8–16 x 1–1/4
. LOCKWASHER, spring; 3/8”
. NUT, hex; 3/8–16
. WASHER, steel; 3/8”
NUT, hex; 1/4–20
LOCKWASHER, spring; 1/4”
1
1
1
1
1
1
1
1
1
1
3
3
3
6
1
2
Ref.
No.
Part No.
Description
18
100021
19
100022
21
22
23
24
25*
27*
100677
101537
101644
102472
205528
109150
29*
30
155463
155494
31*
32
33
34
35
36*
37
38
158776
156971
160853
160854
160858
160861
160865
160878
39
40
41
42
161028
161107
169971
150287
SCREW, hex hd cap;
1/4–20 x 1”
SCREW, hex hd cap;
1/4–20 x 3/4”
NUT, sq hd mach; 1/4–20
PIN, roll; 1/8” dia; 1/2” long
SLEEVE, coupling
RIVET, blind: 1/8” dia
VALVE, bleeder
HOSE, fluid; cpld 1/4 npt(mbe)
1/4” ID; 6’ (1.9 m) long
O-RING, nitrile rubber
UNION 90_, swivel;
3/8 npt(m) x 3/8 npt (f)
O-RING, nitrile rubber
ADAPTER; 1/4 npt(m)
BRACKET, elevator
CLAMP, elevator bracket
PLATE, instruction
WIPER, drum
HANDLE, vent
UNION 90_, swivel; 1/4 npt(f);
1/8 npt hole tapped in body
ROD, vent jack screw
NUT, sleeve locking
FITTING, air line; 3/8 npt(m)
COUPLING,
1/4 npt(m) x (3/8 npt(f)
Qty.
1
6
6
1
1
4
1
1
1
1
1
1
1
1
1
1
1
1
1
1
1
1
* Recommended “tool box” spare parts. Keep these spare
parts on hand to reduce down time
Sound Data
See the pump instruction manual for technical data including wetted parts, port sizes, maximum air consumption,
maximum delivery, and so on. Sound data for the air motors of the pumps on these units is follows:
Tested at 100 psi (0.7 MPa, 7 bar) at 40 cycles per minute
Sound Pressure Level, measured at 1 meter from unit
77.9 dB(A)
Sound Power Level, tested in accordance with ISO 9614–2
85.6 dB(A)
306523
7
Graco Standard Warranty
Graco warrants all equipment manufactured by Graco and bearing its name to be free from defects in material and workmanship on the
date of sale to the original purchaser for use. With the exception of any special, extended, or limited warranty published by Graco,
Graco will, for a period of twelve months from the date of sale, repair or replace any part of the equipment determined by Graco to be
defective. This warranty applies only when the equipment is installed, operated and maintained in accordance with Graco’s written
recommendations.
This warranty does not cover, and Graco shall not be liable for general wear and tear, or any malfunction, damage or wear caused by
faulty installation, misapplication, abrasion, corrosion, inadequate or improper maintenance, negligence, accident, tampering, or substitution of non–Graco component parts. Nor shall Graco be liable for malfunction, damage or wear caused by the incompatibility of
Graco equipment with structures, accessories, equipment or materials not supplied by Graco, or the improper design, manufacture,
installation, operation or maintenance of structures, accessories, equipment or materials not supplied by Graco.
This warranty is conditioned upon the prepaid return of the equipment claimed to be defective to an authorized Graco distributor for
verification of the claimed defect. If the claimed defect is verified, Graco will repair or replace free of charge any defective parts. The
equipment will be returned to the original purchaser transportation prepaid. If inspection of the equipment does not disclose any defect
in material or workmanship, repairs will be made at a reasonable charge, which charges may include the costs of parts, labor, and
transportation.
THIS WARRANTY IS EXCLUSIVE, AND IS IN LIEU OF ANY OTHER WARRANTIES, EXPRESS OR IMPLIED, INCLUDING BUT
NOT LIMITED TO WARRANTY OF MERCHANTABILITY OR WARRANTY OF FITNESS FOR A PARTICULAR PURPOSE.
Graco’s sole obligation and buyer’s sole remedy for any breach of warranty shall be as set forth above. The buyer agrees that no other
remedy (including, but not limited to, incidental or consequential damages for lost profits, lost sales, injury to person or property, or any
other incidental or consequential loss) shall be available. Any action for breach of warranty must be brought within two (2) years of the
date of sale.
Graco makes no warranty, and disclaims all implied warranties of merchantability and fitness for a particular purpose in connection
with accessories, equipment, materials or components sold but not manufactured by Graco. These items sold, but not manufactured
by Graco (such as electric motors, switches, hose, etc.), are subject to the warranty, if any, of their manufacturer. Graco will provide
purchaser with reasonable assistance in making any claim for breach of these warranties.
In no event will Graco be liable for indirect, incidental, special or consequential damages resulting from Graco supplying equipment
hereunder, or the furnishing, performance, or use of any products or other goods sold hereto, whether due to a breach of contract,
breach of warranty, the negligence of Graco, or otherwise.
FOR GRACO CANADA CUSTOMERS
The parties acknowledge that they have required that the present document, as well as all documents, notices and legal proceedings
entered into, given or instituted pursuant hereto or relating directly or indirectly hereto, be drawn up in English. Les parties reconnaissent avoir convenu que la rédaction du présente document sera en Anglais, ainsi que tous documents, avis et procédures judiciaires
exécutés, donnés ou intentés à la suite de ou en rapport, directement ou indirectement, avec les procedures concernées.
Graco Phone Numbers
TO PLACE AN ORDER, contact your Graco distributor, or call one of the following numbers
to identify the distributor closest to you:
1–800–533–9655 Toll Free
612–623–6928
612–378–3590 Fax
All written and visual data contained in this document reflects the latest product information available at the time of publication.
Graco reserves the right to make changes at any time without notice.
This manual contains English. MM 306523
Graco Headquarters: Minneapolis
International Offices: Belgium, Korea, China, Japan
GRACO INC.ąP.O. BOX 1441ąMINNEAPOLIS, MNą55440-1441
306523K
10/1995 Rev. 11/2006
8
306523