1
Instructions/Parts List
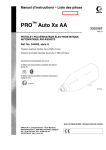
Manual Electrostatic Air-Assisted
PRO™ Xs4 AA
Spray Gun
309295L
ENG
For use in Class I, Div. I hazardous locations using Group D spray materials.
#
53
For use in Group II, Zone 1 areas using Group IIA spray materials.
II 2 G EEx 0.24MJ
Smart Model
For Professional Use ONLY.
100 psi (0.7 MPa, 7 bar) Maximum Air Inlet Pressure
3000 psi (21 MPa, 210 bar) Maximum Working Fluid Pressure
Important Safety Instructions
Read all warnings and instructions in this manual.
Save these instructions.
See for page 2 Table of Contents and page 3 for List
of Models.
U.S. Patent 7,226,004
ti1509a
Standard Model
ti1332b
Table of Contents
List of Models . . . . . . . . . . . . . . . . . . . . . . . . . . . . . 3
Warnings . . . . . . . . . . . . . . . . . . . . . . . . . . . . . . . . . 4
Warning Symbol . . . . . . . . . . . . . . . . . . . . . . . . . 4
Caution Symbol . . . . . . . . . . . . . . . . . . . . . . . . . . 4
Warning . . . . . . . . . . . . . . . . . . . . . . . . . . . . . . . . . . 4
Introduction . . . . . . . . . . . . . . . . . . . . . . . . . . . . . . . 6
How the Electrostatic AA Spray Gun Works . . . . 6
Gun Overview . . . . . . . . . . . . . . . . . . . . . . . . . . . 7
Installation . . . . . . . . . . . . . . . . . . . . . . . . . . . . . . . . 8
Install the System . . . . . . . . . . . . . . . . . . . . . . . . 8
Warning Sign . . . . . . . . . . . . . . . . . . . . . . . . . . . . 8
Ventilate the Spray Booth . . . . . . . . . . . . . . . . . . 8
Connect the Air Line . . . . . . . . . . . . . . . . . . . . . 10
Connect the Exhaust Tube . . . . . . . . . . . . . . . . 10
Connect the Fluid Line . . . . . . . . . . . . . . . . . . . 11
Filter the Fluid . . . . . . . . . . . . . . . . . . . . . . . . . . 11
Select a Spray Tip . . . . . . . . . . . . . . . . . . . . . . . 11
Grounding . . . . . . . . . . . . . . . . . . . . . . . . . . . . . 12
Check Electrical Grounding . . . . . . . . . . . . . . . . 13
Check Fluid Resistivity . . . . . . . . . . . . . . . . . . . 14
Check Fluid Viscosity . . . . . . . . . . . . . . . . . . . . 14
Operation . . . . . . . . . . . . . . . . . . . . . . . . . . . . . . . . 15
Low Voltage Adjustment (Smart Guns Only) . . 15
Maintenance . . . . . . . . . . . . . . . . . . . . . . . . . . . . . . 16
Flush the Spray Gun . . . . . . . . . . . . . . . . . . . . . 16
Electrical Tests . . . . . . . . . . . . . . . . . . . . . . . . . . . 18
Test Gun Resistance . . . . . . . . . . . . . . . . . . . . . 18
Test Power Supply Resistance . . . . . . . . . . . . . 19
Test Barrel Resistance . . . . . . . . . . . . . . . . . . . 20
2
Troubleshooting . . . . . . . . . . . . . . . . . . . . . . . . . . . 21
Spray Pattern Troubleshooting . . . . . . . . . . . . . 21
Gun Operation Troubleshooting . . . . . . . . . . . . . 22
Electrical Troubleshooting . . . . . . . . . . . . . . . . . 23
Repair . . . . . . . . . . . . . . . . . . . . . . . . . . . . . . . . . . . 24
Pressure Relief Procedure . . . . . . . . . . . . . . . . 24
Prepare the Gun for Service . . . . . . . . . . . . . . . 25
Tools Needed . . . . . . . . . . . . . . . . . . . . . . . . . . . 25
Tip Guard, Air Cap, Spray Tip, or Seat Housing
Replacement . . . . . . . . . . . . . . . . . . . . . . . . 26
Electrode Replacement . . . . . . . . . . . . . . . . . . . 28
Fluid Tube Replacement . . . . . . . . . . . . . . . . . . 29
Fluid Filter Removal . . . . . . . . . . . . . . . . . . . . . . 29
Fluid Needle Replacement . . . . . . . . . . . . . . . . 30
Barrel Removal . . . . . . . . . . . . . . . . . . . . . . . . . 31
Barrel Installation . . . . . . . . . . . . . . . . . . . . . . . . 31
Power Supply Removal and Replacement . . . . 32
Turbine Alternator Removal and Replacement . 33
Atomizing Air Adjustment Valve Repair . . . . . . . 34
Air Valve Repair . . . . . . . . . . . . . . . . . . . . . . . . . 35
ES ON/OFF Valve Repair . . . . . . . . . . . . . . . . . 36
Parts . . . . . . . . . . . . . . . . . . . . . . . . . . . . . . . . . . . . 37
Accessories . . . . . . . . . . . . . . . . . . . . . . . . . . . . . . 44
Air Line Accessories . . . . . . . . . . . . . . . . . . . . . 44
Fluid Line Accessories . . . . . . . . . . . . . . . . . . . 44
Gun Accessories . . . . . . . . . . . . . . . . . . . . . . . . 44
Miscellaneous Accessories . . . . . . . . . . . . . . . . 45
Spray Tip Selection Chart . . . . . . . . . . . . . . . . . . . 46
Technical Data . . . . . . . . . . . . . . . . . . . . . . . . . . . . 47
Graco Standard Warranty . . . . . . . . . . . . . . . . . . . 48
Graco Information . . . . . . . . . . . . . . . . . . . . . . . . . 48
309295L
List of Models
List of Models
Model
244572, Series C
PRO Xs4 AA
Manual Air-Assisted Spray Gun
309296/3W9296/
3Z9296
244573, Series C
PRO Xs4 AA
Manual Air-Assisted Spray Gun with smart display
309296/3W9296/
3Z9296
309295L
Description
Operation
Manual
Part No.
3
Warnings
Warnings
Warning Symbol
Caution Symbol
WARNING
CAUTION
This symbol alerts you to the possibility of serious injury
or death if you do not follow the instructions.
This symbol alerts you to the possibility of damage to or
destruction of equipment if you do not follow the instructions.
WARNING
Fire, Explosion, and Electric Shock Hazard
Flammable fumes, such as solvent and paint fumes, in work area can ignite or explode. To help
prevent fire and explosion:
• Electrostatic equipment must be used only by trained, qualified personnel who understand the
requirements of this manual.
• Ground equipment, personnel, object being sprayed, and conductive objects in work area. See
Grounding instructions.
• Only use grounded Graco conductive air supply hoses.
• Check gun and hose resistance and electrical grounding daily.
• Interlock the gun air supply to prevent operation unless ventilating fans are on.
• Use and clean equipment only in well ventilated area.
• Use cleaning solvents with highest possible flash point when flushing or cleaning equipment.
• Always turn the electrostatics off when flushing, cleaning or servicing equipment.
• If there is static sparking or you feel a shock, stop operation immediately. Do not use equipment until you identify and correct the problem.
• Eliminate all ignition sources; such as pilot lights, cigarettes, portable electric lamps, and plastic drop cloths (potential static arc).
• Do not plug or unplug power cords or turn lights on or off when flammable fumes are present.
• Keep work area free of debris, including solvent, rags and gasoline.
• Keep a working fire extinguisher in the work area.
Skin Injection Hazard
Spray from the gun, hose leaks, or ruptured components can inject fluid into your body and cause
an extremely serious injury, including the need for amputation. Splashing fluid in the eyes or on the
skin can also cause serious injury.
•
•
•
•
•
•
•
4
Fluid injected into the skin might look like just a cut, but is a serious injury. Get immediate
surgical treatment.
Do not point the gun at anyone or at any part of the body. Do not put your hand or fingers over
the spray tip. Do not stop or deflect fluid leaks with your hand, body, glove, or rag.
Never spray without the tip guard in place.
Lock the trigger safety when you stop spraying.
Follow the Pressure Relief Procedure, page 24, when you stop spraying and before cleaning,
checking, or repairing equipment.
Check the hoses and couplings daily. Replace worn, damaged, or loose parts immediately.
Permanently coupled hoses cannot be repaired; replace the entire hose.
Tighten all fluid connections before each use.
309295L
Warning
WARNING
Toxic Fluid Hazard
Hazardous fluids or toxic fumes can cause a serious injury or death if splashed in the eyes or on
the skin, swallowed, or inhaled.
•
•
•
Know the specific hazards of the fluid you are using. Read the fluid manufacturer’s warnings.
Store hazardous fluid in an approved container. Dispose of the hazardous fluid according to all
local, state, and national guidelines.
Wear appropriate protective clothing, gloves, eyewear, and respirator.
Equipment Misuse Hazard
Equipment misuse can cause the equipment to rupture, malfunction, or start unexpectedly and
result in a serious injury.
•
•
•
•
•
•
•
•
•
•
309295L
This equipment is for professional use only.
Read all manuals, tags, and labels before operating the equipment.
Use the equipment only for its intended purpose. If you are uncertain, call your Graco
distributor.
Do not alter or modify equipment. Use only genuine Graco parts and accessories.
Check the equipment daily. Repair or replace worn or damaged parts immediately.
Do not exceed the maximum working pressure of the lowest rated system component.
Maximum working fluid pressure of this equipment is 3000 psi (21 MPa, 210 bar).
Use fluids and solvents that are compatible with the equipment wetted parts. See the
Technical Data section of all equipment manuals. Read the fluid and solvent manufacturer’s
warnings.
Route the hoses away from traffic areas, sharp edges, moving parts, and hot surfaces. Do not
expose Graco hoses to temperatures above 180°F (82°C) or below -40°F (-40°C).
Wear hearing protection when operating this equipment.
Comply with all applicable local, state, and national fire, electrical, and other safety
regulations.
5
Introduction
Introduction
How the Electrostatic AA
Spray Gun Works
WARNING
Skin Injection Hazard
Remember, this is not an air spray gun.
For your safety, read and follow all Warnings in this manual.
The air-assisted spray gun combines airless and air
spraying concepts. The spray tip shapes the fluid into a
fan pattern, as does a conventional airless spray tip. Air
from the air cap further atomizes the fluid and completes
the atomization of the fluid tails to produce a uniform
pattern.
As the gun is triggered, part of the regulated air operates the turbine and the rest of the air atomizes the fluid
being sprayed. The turbine generates power, which is
converted by the power cartridge to supply high voltage
current to the gun’s electrode.
The regulated air that is directed to the air cap can be
further controlled using the gun’s atomizing air adjustment valve. This valve can be used to restrict air flow to
the air cap while maintaining sufficient air flow to the turbine.The atomizing air adjustment valve does not control
pattern width. To change pattern width, a new tip size
must be used.
The high working fluid pressure of this gun provides the
power needed to atomize higher solids materials.
The gun’s internal power supply provides high voltage
current. The fluid is electrostatically charged as it
passes the electrode. The charged fluid is attracted to
the grounded workpiece, wrapping around and evenly
coating all surfaces.
NOTE: For airless atomization, if desired, turn the gun’s
atomizing air adjustment valve completely off. Closing
this valve does not affect turbine operation.
6
309295L
Introduction
Gun Overview
•
ES ON/OFF valve. Turns electrostatics ON (I) or
OFF (0).
The electrostatic gun includes the following controls.
See FIG. 1.
•
ES INDICATOR (standard gun only). Green when
ES is ON (I).
•
Air cap/tip guard and spray tip. Never spray without the tip guard. See page 46 for spray tip sizes.
•
Voltage/current DISPLAY (smart models only).
Shows voltage (V) and current (A). Green=spray,
yellow/red=see Troubleshooting, page 23.
•
Trigger safety lock. Prevents the gun from spraying.
•
ES HI/LO switch (smart models only). Sets voltage to HI or LO (factory settings).
Atomizing AIR adjustment valve. Adjusts atomizing air.
•
LO voltage adjustment (smart models only).
Remove plug to adjust to four settings.
•
TRIGGER SAFETY LOCK
TIP GUARD
AIR CAP
SPRAY TIP
ti1509a
DISPLAY
ES INDICATOR
LO
ES HI/LO
0
KV
100%
μα
ES ON/OFF
(I = ON,
0 = OFF)
HI
LO
I
ES
O
AIR
ES ON/OFF
(I = ON,
0 = OFF)
ES
I
ES
O
AIR
ti1366a
ti1333a
Standard Gun
Smart Gun
Fig. 1. Gun Overview
309295L
7
Installation
Installation
Install the System
WARNING
Fire, Explosion, and Electric Shock
Hazard
Installing and servicing this equipment
requires access to parts which may cause
electric shock or other serious injury if work
is not performed properly.
• Do not install or service this equipment
unless you are trained and qualified.
• Be sure your installation complies with
National, State and Local codes for the
installation of electrical apparatus in a
Class I, Div. I, Group D or a Group II,
Category 2G Hazardous Location.
• Comply with all applicable local, state,
and national fire, electrical, and other
safety regulations.
FIG. 2. shows a typical electrostatic air-assisted spray
system. It is not an actual system design. For assistance
in designing a system to suit your particular needs, contact your Graco distributor.
8
Warning Sign
Mount warning signs in the spray area where they can
easily be seen and read by all operators. An English
Warning Sign is provided with the gun.
Ventilate the Spray Booth
WARNING
Flammable or Toxic Vapor Hazard
Provide fresh air ventilation to avoid the
buildup of flammable or toxic vapors when
spraying, flushing, or cleaning the gun. Do
not operate the gun unless ventilation fans
are operating.
Electrically interlock the gun air supply with the ventilators to prevent gun operation without ventilating fans
operating. Check and follow all National, State, and
Local codes regarding air exhaust velocity requirements.
NOTE: High velocity air exhaust will decrease the operating efficiency of the electrostatic system. Air exhaust
velocity of 100 ft/min (31 linear meters/minute) should
be sufficient.
309295L
Installation
D
C*
A
B*
C
D
The air supply to the gun must be electrically
interlocked with the ventilators to prevent the power
supply from operating without ventilating fans on.
O
S
Q*
P
H
J*
V
L
M
W
T
*R
G
*E
N
F
X
K
U*
ti1514b
Non-Hazardous Area
Hazardous Area
Fig. 2. Typical Installation
Key
A
Main Air Supply Line
B*
Ventilation Fan Interlock Solenoid Valve
C*
Main Air Supply Shutoff Valve (bleed-type)
D
Air Line Filter/Water Separator
E*
Pump Air Supply Shutoff Valve (bleed-type)
F
Air Line Lubricator
G
Air Pressure Regulator
H
Pump
J*
Pump Ground Wire
K
Fluid Filter
L
Fluid Supply Line Shutoff Valve
M
Fluid Pressure Regulator
N
Grounded Fluid Supply Line, with spring guards
309295L
O
Gun Air Regulator
P
Gun Air Supply Line Shutoff Valve
Q*
Air Hose Ground Wire
R*
Graco Grounded Air Hose
S
Electrostatic Air-Assisted Spray Gun
T
Fluid Pressure Gauge
U*
Fluid Drain Valve
V
Gun Air Inlet
W
Gun Fluid Inlet
X
Pump Runaway Valve
*
Required for safe operation. Must be purchased
separately. NOTE: Solenoid valve (B) is not
offered as a Graco accessory.
9
Installation
Connect the Air Line
3. Install a bleed-type air regulator (G, O) on the pump
and gun air supply lines to control air pressure to the
pump and gun.
WARNING
Electric Shock Hazard
To reduce the risk of electric shock or other
serious injury, the air supply hose must be
electrically connected to a true earth
ground. Use only Graco Grounded Air
Supply Hose.
1. Connect the Graco Grounded Air Supply Hose (R)
between the air supply line and the gun's air inlet
(V). The gun air inlet fitting has a left-hand thread.
Connect the air supply hose ground wire (Q) to a
true earth ground.
2. Install an air line filter/water separator (D) on the air
line to ensure a dry, clean air supply to the gun. Dirt
and moisture can ruin the appearance of your finished workpiece and can cause the gun to malfunction.
WARNING
Skin Injection Hazard
To reduce the risk of serious injury due to
component rupture, including fluid injection,
pump pressure must be limited by the pump
air regulator. Do not rely on the gun fluid
regulator to limit the fluid pressure to the
gun.
WARNING
Skin Injection Hazard
The bleed-type air valve (E) is required in
your system to relieve air trapped between
the valve and the pump after the air regulator is shut off. Trapped air can cause the
pump to cycle unexpectedly, which can result in serious injury, including fluid injection and splashing fluid
in the eyes or on the skin.
4. Install a bleed-type air valve (E) on the pump air line
to shut off air to the pump. Install an additional
bleed-type air valve (C) on the main air line (A) to
isolate the accessories for servicing.
5. Install an air shutoff valve ( P) on each gun air supply line to shut off air to the gun(s).
Connect the Exhaust Tube
Press the exhaust tube (38) onto the barbed adapter on
the bottom of the gun handle. Secure the tube with the
clamp (39).
The fluid supply pump must be prevented from producing a fluid pressure greater than the 3000 psi (21
MPa, 210 bar) Maximum Working Fluid Pressure of
the gun. For example, the air supply pressure to a
30:1 ratio pump must not exceed 100 psi (0.7 MPa, 7
bar).
10
309295L
Installation
Connect the Fluid Line
Filter the Fluid
1. Before connecting the fluid line (N), blow it out with
air and flush it with solvent. Use solvent which is
compatible with the fluid to be sprayed.
Install a fluid filter (K) at the pump outlet to remove particles and sediment which could clog the spray tip.
2. Install a fluid regulator (M) on the fluid line to control
fluid pressure to the gun.
The gun includes an inline fluid filter (1) for additional filtration.
Select a Spray Tip
WARNING
Skin Injection Hazard
The fluid drain valve (U) is required in your
system to assist in relieving fluid pressure in
the displacement pump, hose and gun. Triggering the gun to relieve pressure may not
be sufficient. Install a drain valve close to the pump's
fluid outlet. The drain valve reduces the risk of serious injury, including fluid injection and splashing in
the eyes or on the skin.
3. Install a drain valve (U) near the pump outlet.
4. Connect the fluid line to the 1/4 npsm gun fluid inlet
(W).
WARNING
Skin Injection Hazard
To reduce the risk of a fluid injection injury,
always follow the Pressure Relief Procedure, page 24, before removing or installing
the spray tip, air cap, or tip guard.
The fluid output and pattern width depend on the size of
the spray tip, the fluid viscosity, and the fluid pressure.
Use the Spray Tip Selection Chart, page 46, as a
guide for selecting the appropriate spray tip for your
application.
Refer to the gun operation manual to install the spray tip.
5. Before running any paint through the spray gun,
flush it out with a compatible solvent.
309295L
11
Installation
Grounding
•
All persons entering the spray area: shoes must
have conductive soles, such as leather, or personal
grounding straps must be worn. Do not wear shoes
with non-conductive soles such as rubber or plastic.
If gloves are necessary, wear the conductive gloves
that are supplied with the gun. If non-Graco gloves
are worn, cut off fingers or palm area of glove, to
ensure your hand contacts the grounded gun handle.
•
Object being sprayed: keep the workpiece hangers
clean and grounded at all times. Resistance must
not exceed 1 megohm.
•
The floor of the spray area: must be electrically conductive and grounded. Do not cover the floor with
cardboard or any non-conductive material which
would interrupt grounding continuity.
•
Flammable liquids in the spray area: must be kept in
approved, grounded containers. Do not use plastic
containers. Do not store more than the quantity
needed for one shift.
•
All electrically conductive objects or devices in the
spray area: including fluid containers and wash
cans, must be properly grounded.
WARNING
Fire, Explosion, and Electric Shock
Hazard
When operating the electrostatic gun, any
ungrounded objects in the spray area (people, containers, tools, etc.) can become
electrically charged. Improper grounding
can result in static sparking, which can
cause a fire, explosion, or electric shock.
Follow the grounding instructions below.
The following are minimum grounding requirements for
a basic electrostatic system. Your system may include
other equipment or objects which must be grounded.
Check your local electrical code for detailed grounding
instructions. Your system must be connected to a true
earth ground.
•
Pump: ground the pump by connecting a ground
wire and clamp as described in your separate pump
instruction manual.
•
Electrostatic Air-Assisted Spray Gun: ground the
gun by connecting the Graco Grounded Air Hose
and connecting the air hose ground wire to a true
earth ground. See Check Electrical Grounding,
page 13.
ti1259a
•
•
12
Air compressors: ground the equipment according
to the manufacturer's recommendations.
All air and fluid lines must be properly grounded.
Use only grounded hoses with a maximum of 100
feet (30.5 m) combined hose length to ensure
grounding continuity.
309295L
Installation
Check Electrical Grounding
3. Turn off the air and fluid supply to the gun. The fluid
hose must not have any fluid in it.
4. Make sure the grounded air hose (R) is connected
and the hose ground wire is connected to a true
earth ground.
WARNING
Fire, Explosion, and Electric Shock
Hazard
ti1259a
Megohmmeter Part No. 241079 (AA-see
FIG. 3.) is not approved for use in a hazardous area. To reduce the risk of sparking, do
not use the megohmmeter to check electrical grounding unless:
• The gun has been removed from the
hazardous area;
• Or all spraying devices in the hazardous
area are turned off, ventilation fans in the
hazardous area are operating, and there
are no flammable vapors in the area
(such as open solvent containers or
fumes from spraying).
5. Measure the resistance between the gun handle
(BB) and a true earth ground (CC). Use an applied
voltage of 500 minimum to 1000 volts maximum.
The resistance should not exceed 1 megohm. See
FIG. 3.
6. If the resistance is greater than 1 megohm, check
the tightness of the ground connections and be sure
the air hose ground wire is connected to a true earth
ground. If the resistance is still too high, replace the
air hose.
BB
Failure to follow this warning could cause
fire, explosion, and electric shock and result
in serious injury and property damage.
AA
1. Have a qualified electrician check the electrical
grounding continuity of the spray gun and air hose.
CC
2. Turn the ES ON/OFF valve OFF.
I
ES
O
ti1340a
ti1337a
Fig. 3. Check Gun Grounding
309295L
13
Installation
Check Fluid Resistivity
Check Fluid Viscosity
To check fluid viscosity you will need:
WARNING
Fire, Explosion, and Electric Shock
Hazard
Check the fluid resistivity in a non-hazardous area only. Resistance Meter 722886
and Probe 722860 are not approved for use
in a hazardous area.
Failure to follow this warning could cause
fire, explosion, electric shock and result in
serious injury and property damage.
Graco Part No. 722886 Resistance Meter and 722860
Probe are available as accessories to check that the
resistivity of the fluid being sprayed meets the requirements of an electrostatic air-assisted spray system.
•
a viscosity cup
•
a stopwatch.
1. Completely submerge the viscosity cup in the fluid.
Lift the cup out quickly, starting the stopwatch as
soon as the cup is completely removed.
2. Watch the stream of fluid coming from the bottom of
the cup. As soon as there is a break in the stream,
shut off the stopwatch.
3. Record the fluid type, elapsed time, and size of the
viscosity cup.
4. If the viscosity is too high or too low, contact the
material supplier and adjust as necessary.
Follow the instructions included with the meter and
probe. Readings of 25 megohms-cm and above provide
the best electrostatic results.
14
309295L
Operation
Operation
Refer to the gun operation manual (supplied)
for Setup, Shutdown, and Daily Care
procedures.
INSTRUCTIONS
Low Voltage Adjustment
(Smart Guns Only)
Table 1: Low Voltage Adjustment
The ES HI/LO switch enables you to switch between full
voltage and a lower voltage output. The lower voltage is
factory set, but can be adjusted.
1
2
kV
ON
ON
70
ON
OFF
60
OFF
ON
50
OFF
OFF
40
1. Set the ES HI/LO switch to LO.
2. Remove the LOW VOLTAGE adjustment plug (53).
Set the desired voltage, using a small screwdriver to
slide switches 1 and 2 ON or OFF, according to
Table 1 . Also see FIG. 4.
OFF
ON
2
0
KV
1
100%
μα
53
ti1529a
Fig. 4. Low Voltage Adjustment Switches
309295L
15
Maintenance
Maintenance
Refer to the gun operation manual (supplied)
for Daily Care and Cleaning procedures.
INSTRUCTIONS
Flush the Spray Gun
1. Turn the ES ON/OFF valve OFF.
I
ES
O
Flush the gun before changing colors, at the end of the
day, before storing, and before repairing the gun.
ti1337a
WARNING
Fire, Explosion, and Electric Shock
Hazard
To reduce the risk of fire, explosion, or electric shock, turn the ES ON/OFF valve OFF
before flushing the gun.
WARNING
Skin Injection Hazard
To reduce the risk of a fluid injection injury,
always follow the Pressure Relief Procedure, page 24, whenever you are instructed
to relieve the pressure.
2. Relieve the pressure.
ti1341a
CAUTION
Flush the gun with a non-conductive, compatible solvent. Conductive solvents can cause the gun to malfunction.
3. Remove and clean the air cap and the spray tip.
ti1334b
Do not use methylene chloride as a flushing or cleaning solvent with this gun as it will damage nylon components.
16
Continued on page 17.
309295L
Maintenance
4. Change the fluid source to solvent, or disconnect
the fluid line and connect a solvent supply line to the
gun.
6. Relieve the pressure. Lock the trigger.
ti1465a
7. Shut off or disconnect the solvent line.
8. Hang the gun from its hook, with the nozzle pointing
down.
ti1287a
5. Point the gun into a grounded metal pail. Flush until
clean solvent flows from the gun.
ti1349a
ti1465a
309295L
9. When ready to spray again, reconnect the fluid supply line. Follow the Setup procedure in the Gun
Operation Manual.
17
Electrical Tests
Electrical Tests
Electrical components inside the gun affect performance
and safety. The following procedures test the condition
of the power supply (18) and barrel (16), and electrical
continuity between components.
CAUTION
The barrel resistor cartridge is part of the barrel and
is not replaceable. To avoid destroying the gun barrel,
do not attempt to remove the barrel resistor.
Test Gun Resistance
1. Flush and dry the fluid passage.
2. Measure resistance between the electrode needle
tip (9b) and the air swivel (35); it should be 156-180
megohms. See FIG. 5. If outside this range, go to
the next test. If in range, refer to Electrical Troubleshootingon page 23 for other possible causes of
poor performance.
AA
Use megohmmeter Part No. 241079 (AA) with an
applied voltage of 500 V. Connect the leads as shown.
WARNING
Fire, Explosion, and Electric Shock
Hazard
Megohmmeter Part No. 241079 (AA-see
FIG. 5.) is not approved for use in a hazardous area. To reduce the risk of sparking, do
not use the megohmmeter to check electrical grounding unless:
9b
35
TI1469A
• The gun has been removed from the
hazardous area;
• Or all spraying devices in the hazardous
area are turned off, ventilation fans in the
hazardous area are operating, and there
are no flammable vapors in the area
(such as open solvent containers or
fumes from spraying).
Fig. 5. Test Gun Resistance
Failure to follow this warning could cause
fire, explosion, and electric shock and result
in serious injury and property damage.
18
309295L
Electrical Tests
Test Power Supply
Resistance
6. Be sure the spring (18b) is in place before reinstalling the power supply.
1. Remove the power supply (18), page 32.
2. Remove the turbine alternator (19) from the power
supply, page 33.
3. Measure resistance from the power supply's ground
strips (EE) to the spring (18b). See FIG. 6.
4. The resistance should be 135-150 megohms. If outside this range, replace the power supply. If in
range, proceed to the next test.
18b
5. If you still have problems, refer to Electrical Troubleshooting on page 23 for other possible causes
of poor performance, or contact your Graco distributor.
EE
ti1599a
Fig. 6. Test Power Supply Resistance
309295L
19
Electrical Tests
Test Barrel Resistance
5. If the resistance is still outside the range, replace
the barrel.
1. Insert a conductive rod (B) into the gun barrel
(removed for the power supply test) and against the
metal contact (C) in the front of the barrel.
2. Measure the resistance between the conductive rod
(B) and the barrel contact ring (16a). See FIG. 7.
The resistance should be 19-29 megohms. If the
resistance is incorrect, make sure the metal contact
(C) in the barrel and the barrel contact ring (16a) are
clean and undamaged.
3. If the resistance is still outside the range, remove
the barrel contact ring (16a) and measure the resistance between the conductive rod (B) and the wire
lead at the bottom of the contact ring groove.
4. If the resistance is in range, replace the contact ring
(16a) with a new one. Press the contact ring firmly
into the groove on the front of the barrel.
16a
C
B
ti1515b
Fig. 7. Test Barrel Resistance
WARNING
Fire, Explosion, and Electric Shock
Hazard
The barrel contact ring (16a) is a conductive
contact ring, not a sealing o-ring. To reduce
the risk of sparking or electric shock, do not
remove the barrel contact ring (16a) except
to replace it and never operate the gun without the contact ring in place. Do not replace
the contact ring with anything but a genuine
Graco part.
20
309295L
Troubleshooting
Troubleshooting
WARNING
WARNING
Electric Shock Hazard
Skin Injection Hazard
Installing and servicing this equipment
requires access to parts which may cause
an electric shock or other serious injury if
the work is not performed properly. Do not install or
service this equipment unless you are trained and
qualified.
To reduce the risk of a fluid injection injury,
always follow the Pressure Relief Procedure on page 24 whenever you are
instructed to relieve the pressure.
NOTE: Check all possible remedies in the Troubleshooting Chart before disassembling the gun.
Spray Pattern Troubleshooting
NOTE: Some spray pattern problems are caused by the improper balance between air and fluid.
Problem
Cause
Solution
Fluttering or spitting spray.
No fluid.
Air in fluid supply.
Refill supply.
Check fluid source. Refill.
Irregular pattern.
Fluid buildup; partially plugged tip.
Worn/damaged tip or air cap holes.
Clean. See gun operation manual.
Clean or replace.
Pattern pushed to one side; air cap
gets dirty.
Tails in pattern.
Air cap holes plugged.
Clean. See gun operation manual.
Air pressure too low.
Fluid pressure too low.
Open atomizing air adjustment valve.
Increase.
Air pressure too high.
Fluid pressure too low.
Decrease.
Increase.
Fluid buildup on air cap/tip guard.
309295L
21
Troubleshooting
Gun Operation Troubleshooting
Problem
Excessive spray fog.
“Orange Peel” finish.
Fluid leaks from the fluid packing
area
Air leaks from the front of the gun
Fluid leakage from the front of the
gun
Gun does not spray
Dirty air cap
22
Cause
Solution
Atomizing air pressure too high.
Close atomizing air valve some, or
decrease air pressure as low as possible; minimum 40 psi (0.28 MPa, 2.8
bar) needed at gun for full voltage.
Fluid too thin.
Increase viscosity.
Atomizing air pressure too low.
Open atomizing air valve more or
increase gun air inlet pressure; use
lowest air pressure necessary.
Spray tip is too large.
Use smaller tip. See page 46.
Poorly mixed or filtered fluid.
Remix or refilter fluid.
Fluid too thick.
Reduce viscosity.
Worn fluid needle packings or shaft. Replace fluid needle assembly (26);
see page 30.
Air valve (21) is not seating properly. Clean and service air valve; see
page 35.
Worn or damaged fluid needle ball.
Replace fluid needle (26); see page
30.
Worn fluid seat housing (2).
Replace seat housing; see page 26.
Loose spray tip (3).
Tighten retaining ring (27); see page
26.
Damaged tip seal (3a).
Replace; see page 26.
Low fluid supply.
Add fluid if necessary.
Damaged spray tip (3).
Replace; see page 26.
Dirty or clogged spray tip (3).
Clean; see gun operation manual.
Damaged fluid needle (26).
Replace; see page 30.
Damaged or plugged air cap (9).
Clean air cap; see gun operation
manual.
309295L
Troubleshooting
Electrical Troubleshooting
Problem
Poor wrap.
ES indicator or voltage/current display is not lit.
Cause
ES ON/OFF valve OFF (0).*
Gun air pressure too low.
Turn ON (I).
Check air pressure to gun; minimum
40 psi (0.28 MPa, 2.8 bar) needed at
gun for full voltage.
Atomizing air pressure too high.
Decrease.
Fluid velocity too high.
Decrease fluid pressure or replace
worn tip.
Incorrect distance from gun to part.
Should be 8-12 in. (200-300 mm).
Poorly grounded parts.
Resistance must be 1 megohm or
less. Clean workpiece hangers.
Faulty gun resistance.
See “Test Gun Resistance” on page
18.
Low fluid resistivity.
Check fluid resistivity. See page 14.
Fluid leaks from the fluid needle (26) Clean the needle cavity. Replace the
packings and causes a short.
fluid needle. See page 30.
Faulty turbine alternator (19).
Be sure the plug is in place on the
back of the turbine alternator housing. Remove and test the turbine
alternator. See page 33.
The KV HI-LO lever is on LO.
Check the lever position; replace if
needed.
ES ON/OFF valve OFF (0).*
Turn ON (I).
No power.
Voltage/current display stays red
(smart guns only).
Gun too close to part.
Check fluid resistivity.
Operator gets mild shock.
Solution
Dirty gun.
Operator not grounded or is near
ungrounded object.
Gun not grounded.
Operator gets shock from workpiece. Workpiece not grounded.
Repair/replace alternator turbine;
replace power supply. See page 32.
Should be 8-12 in. (200-300 mm).
See “Check Fluid Resistivity” on
page 14.
Clean. See Operation Manual.
See “Grounding” on page 12.
See “Check Electrical Grounding” on
page 13 and “Test Gun Resistance”
on page 18.
Resistance must be 1 megohm or
less. Clean workpiece hangers.
* ES indicator light is off when the gun is triggered.
309295L
23
Repair
Repair
Pressure Relief Procedure
4. Unlock the trigger.
WARNING
ti1406a
5. Trigger the gun into a grounded metal waste container to relieve the fluid pressure.
Skin Injection Hazard
The system pressure must be manually
relieved to prevent the system from starting
or spraying accidentally. Fluid under high
pressure can be injected through the skin
and cause serious injury. To reduce the risk of an
injury from injection, splashing fluid, or electric shock,
follow the Pressure Relief Procedure whenever you:
•
ti1341a
6. Lock the trigger.
are instructed to relieve the pressure
ti1356a
•
stop spraying
•
check or repair any of the system equipment
•
or install or clean the spray tip.
7. Open the pump drain valve and all other fluid drain
valves in the system, having a waste container
ready to catch the drainage. Leave the drain
valve(s) open until you are ready to spray again.
1. Turn the ES ON/OFF valve OFF.
I
ES
O
ti1290a
8. If the nozzle or hose is completely clogged or pressure is not fully relieved, slowly loosen the hose end
coupling. Now clear the nozzle or hose.
ti1337a
2. Lock the trigger.
ti1356a
t
3. Turn off the air bleed valves to the fluid source and
to the gun.
ti1289a
24
309295L
Repair
Prepare the Gun for Service
WARNING
•
Only use genuine Graco parts. Do not mix or use
parts from other PRO Gun models. Note that the air
cap, spray tip, and tip guard for this gun are orange.
•
Air Seal Repair Kit 244781 is available. The kit must
be purchased separately. Kit parts are marked with
an asterisk, for example (6*).
Electric Shock Hazard
Installing and repairing this equipment
requires access to parts that may cause
electric shock or other serious injury if the
work is not performed properly. Do not install or service this equipment unless you are trained and qualified.
WARNING
Some PRO Xs4 AA Gun replacement parts look similar to other PRO Gun parts but are not interchangeable! When repairing, do not mix or use other
PRO Gun parts that may look similar, but have
different part numbers! Use of parts other than
those specified in the PRO Xs4 AA Gun parts lists
could alter the grounding continuity of the gun, cause
parts to leak or rupture, or cause the gun to malfunction and result in serious injury, fire, explosion, or
property damage.
WARNING
Skin Injection Hazard
To reduce the risk of injury, follow the Pressure Relief Procedure on page 24 before
checking or repairing any part of the system
and whenever you are instructed to relieve
the pressure.
NOTE:
•
Check all possible remedies in Troubleshooting
before disassembling the gun.
•
Use a vise with padded jaws to prevent damage to
plastic parts.
•
Lubricate the power supply o-ring (18a) and the
plastic end of the fluid tube (14) with dielectric
grease (40).
•
Lightly lubricate o-rings and seals with non-silicone
grease. Order Part No. 111265 Lubricant. Do not
over-lubricate.
309295L
1. Flush the gun, page 16.
2. Relieve the pressure, page 24.
3. Disconnect the gun air and fluid lines.
4. Remove the gun from the worksite. Repair area
must be clean.
Tools Needed
•
2 mm driver (supplied)
•
4 mm driver (supplied)
•
Multi-Tool (supplied)
•
adjustable wrench
•
medium screwdriver
•
snap ring pliers
25
Repair
Tip Guard, Air Cap, Spray
Tip, or Seat Housing
Replacement
1. Prepare gun for service, page 25.
CAUTION
The barrel resistor cartridge (B) is part of the barrel
and is not replaceable. To avoid destroying the gun
barrel, do not attempt to remove the barrel resistor.
2. Remove the retaining ring (27), tip guard (4), air cap
(9a), and spray tip (3). You may have to turn the air
cap with the tip guard to remove it. See FIG. 8.
3. Replace the tip gasket (3a) if damaged.
3a
WARNING
Fire, Explosion, and Electric Shock
Hazard
The barrel contact ring (16a) is a conductive
contact ring, not a sealing o-ring. To reduce
the risk of sparking or electric shock, do not
remove the barrel contact ring (16a) except
to replace it and never operate the gun without the contact ring in place. Do not replace
the contact ring with anything but a genuine
Graco part.
3
9a
4
27
27a
B
2
Fig. 8. Tip Guard, Air Cap, and Spray Tip Replacement
37
4. Trigger the gun and remove the seat housing (2)
with the tool (37) provided. See FIG. 9.
Fig. 9. Seat Housing Replacement
Continued on page 27.
26
309295L
Repair
CAUTION
CAUTION
To avoid damaging the seat housing and gun barrel,
never over-tighten the seat housing. Over-tightening
may result in improper fluid shut-off.
To avoid damaging the tip guard (4), orientate the air
cap (9a) before tightening the retaining ring (27). Do
not turn the cap when the retaining ring is tight.
5. Trigger the gun and install the gray-colored seat
housing (2). Tighten until snug, then 1/4 turn more.
6. Assemble the spray tip (3), air cap (9a), and tip
guard (4). Make sure the electrode (9b) is not damaged or missing. Install the air cap assembly with
the retaining ring (27). The u-cup (27a) lips must
face forward.
7.
309295L
Test gun resistance, page 18.
27
Repair
Electrode Replacement
WARNING
Electric Shock Hazard
To reduce the risk of fire, explosion, or electric shock, do not operate the spray gun
without the electrode installed in the air cap.
4. Push the new electrode through the air cap hole.
Make sure the short end (BB) of the electrode
engages the hole (CC) in the back of the air cap.
Press the electrode in place firmly with your fingers.
See FIG. 10.
5. Install the air cap assembly, page 26.
6. Test gun resistance, page 18.
9b
1. Prepare the gun for service, page 25.
2. Remove the air cap assembly, page 26.
3. Pull the electrode (9b) out of the back of the air cap,
using a needle-nose pliers.
CC
BB
02013
Fig. 10. Electrode Replacement
28
309295L
Repair
Fluid Tube Replacement
Fluid Filter Removal
1. Prepare the gun for service, page 25.
1. Prepare the gun for service, page 25.
2. Disconnect the bottom fluid tube nut (C). See FIG.
11.
2. Disconnect the bottom fluid tube nut (C).
3. Remove the fluid filter (1) from the fluid fitting. Clean
or replace the filter, as needed. See FIG. 12.
3. Carefully unscrew the top fluid tube nut (D).
NOTE: Replacement filters are available in 100 mesh
(standard) or 60 mesh sizes. See page 45.
CAUTION
Be careful not to damage the fluid tube assembly (14)
when cleaning or installing it, especially the sealing
surface (E). If the sealing surface is damaged, the
entire fluid tube assembly must be replaced.
4. Apply dielectric grease (40) to the entire length of
the plastic extension on the end of the fluid tube
(14).
5. Apply low strength thread sealant to the fluid tube
nut threads.
4. Install the fluid filter in the fluid fitting. Tighten the
bottom nut (C) onto the fitting and torque to 20-30
in-lb (2.3-3.4 N•m). Make sure the top nut remains
tight.
CAUTION
Be sure the fluid tube (14) is not twisted after tightening the bottom nut (C).
6. Install the fluid tube into the gun barrel and tighten
the top nut (D) hand-tight, then 1/4 to 1/2 turn with a
wrench. There will be a gap between the nut and
barrel. Do not overtighten the nut.
7. Make sure the fluid filter (1) is in place in the fluid fitting. Tighten the bottom nut (C) onto the fitting and
torque to 20-30 in-lb (2.3-3.4 N•m). Make sure the
top nut remains tight.
TI1521A
14
C
C
1
E
1
D
ti1524a
Fig. 12. Fluid Filter Removal
Fig. 11. Fluid Tube Replacement
309295L
29
Repair
Fluid Needle Replacement
1. Prepare the gun for service, page 25.
55
2. Remove the air cap assembly and seat housing,
page 26.
26a
45
8
3. Remove the barrel (16), page 31.
4. Remove the trigger screws (8) and trigger (30).
30
TI1618A
5. Remove the spring cap (45) and the spring (26a)
from the barrel. See FIG. 13.
Fig. 13. Spring Cap and Springs
6. Place the 2 mm driver (44) in the back of the fluid
needle assembly. Push the tool in and turn it counterclockwise about 12 full turns to unthread the needle.
N
7. Using the u-shaped tool (37), pull back on the packing nut (N) to remove the fluid needle assembly. See
FIG. 14.
8. Install the fluid needle assembly in the gun barrel.
Push in on the needle with the 2 mm driver (44) and
tighten. See FIG. 15.
37
9. Install the spring (26a).
10. Install the spring cap (45), making sure the grounding spring (55) is in place.
Fig. 14. Fluid Needle Removal
11. Install the trigger (30) and screws (8).
12. Install the barrel (16), page 31.
TI1526B
CAUTION
8
To avoid damaging the seat housing and gun barrel,
never overtighten the seat housing. Overtightening
may result in improper fluid shutoff.
30
13. Install the seat housing and air cap, page 26.
14. Test gun resistance, page 18.
30
Fig. 15. Fluid Needle Replacement
309295L
Repair
Barrel Removal
2. Place the barrel (16) over the power supply (18) and
onto the gun handle (17).
1. Prepare the gun for service, page 25.
3. Tighten the three screws (11) oppositely and evenly
(about a half turn past snug).
2. Carefully loosen the nut (C) from the bracket fluid fitting (13). See FIG. 16.
CAUTION
3. Loosen the three screws (11).
Do not over-tighten the screws (11).
CAUTION
To avoid damaging the power supply (18), pull the
gun barrel straight away from the gun handle. If necessary, gently move the gun barrel from side to side
to free it from the gun handle.
4. Make sure the fluid filter (1) is in place in the fluid fitting. Tighten the bottom fluid tube nut (C) onto the
bracket (13) fluid fitting and torque to 20-30 in-lb
(2.3-3.4 N•m). Make sure the top nut remains tight.
4. Hold the gun handle (17) with one hand and pull the
barrel (16) straight off the handle.
CAUTION
Be sure the fluid tube (14) is not twisted after tightening the bottom nut (C).
13
C
5. Test gun resistance, page 18.
11
16
18
17
*10
11
16
TI1516A
13
17
ti1517a
Fig. 16. Barrel Removal
Barrel Installation
TI1520B
1
14
C
Fig. 17. Barrel Installation
1. Be sure the gasket (10*, FIG. 17.) and grounding
spring (55, FIG. 13.) are in place and the gasket air
holes are aligned properly. Replace if damaged.
309295L
31
Repair
Power Supply Removal and
Replacement
NOTE:
•
Inspect the gun handle power supply cavity for dirt
or moisture. Clean with a clean, dry rag.
•
Do not expose gasket (10) to solvents.
1. Prepare gun for service, page 25.
2. Remove the barrel (16), page 31.
CAUTION
7. Connect the 3-wire connector (B). Slide the alternator (19) down onto the power supply (18).
8. Lubricate the alternator o-ring (19a*) with non-silicone grease, Part No. 111265. Do not over-lubricate.
9. Lubricate the power supply o-ring (18a*) with dielectric grease (40).
10. Insert the power supply/alternator assembly in the
gun handle (17). Make sure the ground strips make
contact with the handle. On Smart Models only, connect the flexible circuit (59) to the socket at the top
of the handle. Push the 6-pin connector into the
socket to ensure it is properly connected.
11. Install the barrel (16), page 31.
12. Test gun resistance, page 18.
Be careful when handling the power supply (18) to
avoid damaging it.
3. Grasp the power supply (18) with your hand. With a
gentle side to side motion, free the power supply/alternator assembly from the gun handle (17),
then carefully pull it straight out. On Smart Models
only, disconnect the flexible circuit (59) from the
socket at the top of the handle (17). See FIG. 18.
17
*10
*19a
19
19e
4. Disconnect the 3-wire connector (B) from the power
supply. Slide the alternator up and off the power
supply. Inspect the power supply and alternator for
damage. On Smart Models only, disconnect the
6-pin flexible circuit (59) from the power supply.
B
59
ti1505c
5. Check the power supply resistance, page 19.
Replace if necessary.
NOTE: Before installing the power supply, make sure
the o-rings (18a*, 19a*), spring (18b), and pads (19e)
are in place.
6. On Smart Models only, connect the 6-pin flexible circuit (59) to the power supply.
32
18b
18
*18a
Fig. 18. Power Supply and Turbine Alternator
309295L
Repair
Turbine Alternator Removal
and Replacement
NOTE: Replace turbine bearings after 2000 hours of
operation. Order Part No. 223688 Bearing Kit.
1. Prepare gun for service, page 25.
2. Remove the power supply/alternator assembly,
page 32.
4. Measure resistance between the two outer terminals of the 3-wire connector (B); it should be 2.5-3.5
ohms. If outside this range, replace the alternator
coil.
5. Follow the bearing replacement procedure in the
bearing kit manual 308034.
6. Install the alternator on the power supply, page 32.
7. Install the power supply/alternator assembly, page
32.
3. Disconnect the alternator from the power supply,
page 32.
309295L
33
Repair
Atomizing Air Adjustment
Valve Repair
6. Clean all parts and inspect for wear or damage.
1. Prepare the gun for service, page 25.
7. When reassembling the atomizing air valve (20),
lightly lubricate the valve threads and screw the
stem (20d) fully into the housing (20c) until bottomed. Install the o-ring (20b*), lubricate, and
unscrew the valve stem until the o-ring enters the
housing.
2. Place a wrench on the flats of the valve assembly
(20) and unscrew it from the handle (17).
NOTE: You may replace the valve as an assembly (go to
step 9) or as individual parts (steps 3-9).
3. Remove the retaining ring (20a). See FIG. 19.
4. Turn the valve stem (20d) counterclockwise until it
comes free from the valve housing (20c).
5. Remove the o-ring (20b).
NOTE: Use non-silicone grease, Part No. 111265. Do
not over-lubricate.
8. Reassemble the retaining ring (20a). Unscrew the
valve stem from the housing until it is stopped by the
retaining ring.
9. Screw the valve assembly (20) into the gun handle,
using a wrench on the flats of the housing. Torque to
15-25 in-lb (1.7-2.8 N•m).
20d
TI1487A
20b*
20c
20a
Fig. 19. Atomizing Air Adjustment Valve
34
309295L
Repair
Air Valve Repair
5. Inspect the u-cup (6*). Do not remove the u-cup
unless damaged. If removed, install the new one
with its lips facing into the gun handle (17).
1. Prepare the gun for service, page 25.
2. Remove the barrel, page 31.
6. Install the air valve (21) and spring (15) into the gun
handle (17).
3. Remove the air valve cap (25) from the handle (17).
Remove the spring (15). See FIG. 20.
7. Install the air valve cap (25). Torque to 15-25 in-lb
(1.7-2.8 N•m).
8. Install the barrel, page 31.
CAUTION
Clean all parts in non-conductive solvent compatible
with the fluid being used, such as xylol or mineral
spirits. Use of conductive solvents can cause the gun
to malfunction.
21 15
25
4. Remove the air valve (21) with a pliers. Inspect the
the rubber sealing surface and replace the air valve
if damaged.
*6
CAUTION
ti1527a
Fig. 20. Air Valve
When removing the air valve (21) be careful not to
damage the seat area. The rubber seal is not removable.
309295L
35
Repair
ES ON/OFF Valve Repair
4. Clean and inspect parts for damage. Replace if necessary.
1. Prepare the gun for service, page 25.
NOTE: The protrusion on the retainer plate (22d) must
point upward.
2. Loosen the screw (48). Remove the valve.
3. Lubricate the o-rings (22a* and 22b*) with non-silicone grease, Part No. 111265. Do not over-lubricate.
5. Reinstall the valve. Torque the screw (48) to 15-25
in-lb (1.7-2.8 N•m).
22d
22g
22e
22b*
CAUTION
Do not over-lubricate parts. Excessive lubricant on
the o-rings can be pushed into the gun air passage
and blemish the finish on the workpiece.
22f
22c
22a*
48
TI1488A
Fig. 21. ES ON/OFF Valve
36
309295L
Parts
Parts
Part No. 244572 85 kV Electrostatic Gun, Series C (items 1-50)
See page 38 for detail views of the alternator (19), atomizing
air adjustment valve (20), and ES ON/OFF valve (22).
22
I
ES
19e 19
20
O
28
19a*
25
15
17
21***
18
ti1366a
11
*10
18b
*18a
45
26a
47
26
11
55
24a*
*6
24
13
8
16
14
30
35
16a
14 (Ref)
1
38
39
36
37
2
3a
44
9b
3
9a
4
ti1511C
27a*
27
309295L
37
Parts
Ref. No. 19: Alternator
Ref. No. 20: Atomizing Air Adjustment Valve
20d
19a*
19b
20b*
TI1487A
20c
19b
20a
TI1481a
19e
19d 19c
Ref. No. 22: ES ON/OFF Valve
22e
22d
22f
22g
22b*
22c
22a*
48
TI1488A
38
309295L
Parts
Part No. 244572 85 kV Electrostatic Gun, Series C (items 1-50)
Ref.
No.
Part No. Description
1
205264
FILTER, fluid, inline
1
2
245280
HOUSING, seat
1
3
GG3XXX
SPRAY TIP (customer’s choice);
includes item 3a
1
Qty
Ref.
No.
Part No. Description
20
244556
VALVE, adjustment, atomizing air;
includes items 20a-20d
1
20a
101021
. RING, retaining
1
20b*
106560
. O-RING; fluorocarbon
1
Qty
3a
183459
. SEAL, spray tip
1
20c
197566
. HOUSING, valve
1
4
276767
TIP GUARD
1
20d
197567
. STEM, valve
1
6*
188749
PACKING, u-cup, air valve;
UHMWPE
1
21*** 244557
VALVE, air;
1
22
244558
197369
SCREW, trigger
2
VALVE, electrostatics, ON/OFF;
includes items 22a-22g
1
8
9
245276
AIR CAP ASSEMBLY; includes
items 9a and 9b
1
22a*
111516
. O-RING; CV75
1
22b*
113137
. O-RING; fluoroelastomer
1
22c
198403
. SHAFT, valve
1
22d
198404
. PLATE, retaining
1
22e
198453
. WASHER
1
22f
198464
. PIN
1
22g
276753
. KNOB
1
24
249323
VALVE, exhaust; includes item
24a
1
24a*
112085
. O-RING; fluorocarbon
1
25
197966
CAP, air valve
1
26
244714
NEEDLE, fluid; includes item 26a
1
26a
112691
. SPRING, compression
1
27
244927
RING, retaining, air cap; includes
item 27a
1
27a*
198307
. PACKING, u-cup
1
28
276695
HOOK
1
30
276698
TRIGGER
1
35
185105
FITTING, air; left-hand threads
1
36
107460
WRENCH, ball end; 4 mm
1
37
276741
MULTI-TOOL
1
9a
198679
. AIR CAP
1
9b
244917
. ELECTRODE (kit of 5)
1
10*
197517
GASKET, barrel
1
11
197518
SCREW; socket-hd; 10-24 x 3/4
in. (19 mm)
3
13
15M680
BRACKET, inlet, fluid
1
14
244713
TUBE, fluid
1
15
185116
SPRING, compression
1
16
244531
BARREL, gun; includes item 16a
1
16a
197486
. O-RING; conductive
1
17
245286
HANDLE, gun (includes item 28)
1
18
244541
POWER SUPPLY, 85 kV; includes
items 18a-18b
1
18a*
103337
. O-RING; fluoroelastomer
1
18b
197624
. SPRING, compression
1
19
244555
TURBINE, alternator; includes
items 19a-19e
1
19a*
110073
. O-RING; fluoroelastomer
1
19b
223688
. BEARING KIT; includes front
and rear bearings and fan
1
19c
244577
. COIL
1
38
185103
TUBE, exhaust
1
19d
111745
. RING, retaining
1
39
110231
CLAMP
1
19e
198821
. PAD, pressure
2
40
116553
GREASE, dielectric, tube (not
shown)
1
309295L
39
Parts
Ref.
No.
Part No. Description
41
244915
COVER, gun; box of 10 (not
shown)
1
42
179791
TAG, warning (not shown);
replacement available at no cost
1
43
180060
SIGN, warning (not shown);
replacement available at no cost
1
44
112080
TOOL, needle; 2 mm
1
45
198516
CAP, spring
47
197967
PLUG
40
Qty
Ref.
No.
Part No. Description
48
198058
SCREW, cap, socket hd
1
49
222385
CARD, warning (not shown);
replacement available at no cost
1
50
188774
TAG, warning (not shown);
replacement available at no cost
1
Qty
* Included in Air Seal Repair Kit 244781.
*** Rubber seal is not removable.
1
Replacement Warning labels, signs, tags, and cards are
available at no cost.
309295L
Parts
Part No. 244573 85 kV Electrostatic Gun, Series C (items 1-59)
See page 42 for detail views of the alternator (19), atomizing air
adjustment valve (20), and ES ON/OFF valve (22).
53 (Ref)
0
KV
100%
μα
51 (Ref)
HI
LO
ES
I
22
ES
20
O
59
19
28
19a*
17
19e
53
52
54
51
25
15
21***
18
ti1253a
*10
18b
11
*18a
26a
45
26
47
11
55
*6
24a*
24
16
13
8
14
35
30
16a
38
14 (Ref)
2
3a
1
36
39
37
44
9b
3
ti1510d
9a
27
309295L
27a*
4
41
Parts
Ref. No. 19: Alternator
Ref. No. 20: Atomizing Air Adjustment Valve
20d
19a*
19b
20b*
TI1487A
20c
19b
20a
TI1481a
19e
19d 19c
Ref. No. 22: ES ON/OFF Valve
22e
22d
22f
22g
22b*
22c
22a*
48
TI1488A
Part No. 244573 85 kV Electrostatic Gun, Series C (items 1-59)
Ref.
No.
Part No. Description
1
9b
244917
. ELECTRODE (kit of 5)
1
HOUSING, seat
1
10*
197517
GASKET, barrel
1
GG3XXX
SPRAY TIP (customer’s choice);
includes item 3a
1
11
197518
SCREW; socket-hd; 10-24 x 3/4
in. (19 mm)
3
3a
183459
. SEAL, spray tip
1
13
15M680
BRACKET, inlet, fluid
1
4
276767
TIP GUARD
1
14
244713
TUBE, fluid
1
6*
188749
PACKING, u-cup, air valve;
UHMWPE
1
15
185116
SPRING, compression
1
16
244531
BARREL, gun; includes item 16a
1
8
197369
SCREW, trigger
2
16a
197486
. O-RING; conductive
1
9
245276
AIR CAP ASSEMBLY
1
17
245288
HANDLE, gun (includes item 28)
1
9a
198679
. AIR CAP
1
Ref.
No.
Part No. Description
1
205264
FILTER, fluid, inline
2
245280
3
42
Qty
Qty
309295L
Parts
Ref.
No.
Part No. Description
Qty
Ref.
No.
Part No. Description
18
244541
POWER SUPPLY, 85 kV; includes
items 18a-18b
1
27a*
198307
. PACKING, u-cup
1
18a*
28
276695
HOOK
1
103337
. O-RING; fluoroelastomer
1
30
276698
TRIGGER
1
18b
197624
. SPRING, compression
1
35
185105
FITTING, air; left-hand threads
1
19
244555
TURBINE, alternator; includes
items 19a-19e
1
36
107460
WRENCH, ball end; 4 mm
1
19a*
110073
. O-RING; fluoroelastomer
1
37
276741
MULTI-TOOL
1
19b
223688
. BEARING KIT; includes front
and rear bearings and fan
1
38
185103
TUBE, exhaust
1
39
110231
CLAMP
1
19c
244577
. COIL
1
40
116553
1
19d
111745
. RING, retaining
1
GREASE, dielectric, tube (not
shown)
19e
198821
. PAD, pressure
2
41
244915
COVER, gun; box of 10 (not
shown)
1
20
244556
VALVE, adjustment, atomizing air;
includes items 20a-20d
1
42
179791
TAG, warning (not shown);
replacement available at no cost
1
20a
101021
. RING, retaining
1
43
180060
106560
. O-RING; fluorocarbon
1
SIGN, warning (not shown);
replacement available at no cost
1
20b*
20c
197566
. HOUSING, valve
1
44
112080
TOOL, needle; 2 mm
1
20d
197567
. STEM, valve
1
45
198516
CAP, spring
21*** 244557
VALVE, air
1
47
197967
PLUG
1
22
244558
VALVE, electrostatics, ON/OFF;
includes items 22a-22g
1
48
198058
SCREW, cap, socket hd
1
49
222385
111516
. O-RING; CV75
1
CARD, warning (not shown);
replacement available at no cost
1
22a*
22b*
113137
. O-RING; fluoroelastomer
1
50
188774
1
22c
198403
. SHAFT, valve
1
TAG, warning (not shown);
replacement available at no cost
22d
198404
. PLATE, retaining
1
51
244627
SWITCH, ES HI/LO
1
22e
198453
. WASHER
1
52
111450
O-RING
1
22f
198464
. PIN
1
53
276734
PLUG, LO voltage adjustment
1
22g
276753
. KNOB
1
54
197910
SCREW, pivot
1
24
249323
VALVE, exhaust; includes item
24a
1
55
197624
SPRING, grounding
1
59
245265
CIRCUIT, flexible
1
24a*
112085
. O-RING; fluorocarbon
1
25
197966
CAP, air valve
1
26
244714
NEEDLE, fluid; includes item 26a
1
26a
112691
. SPRING, compression
1
27
244927
RING, retaining, air cap; includes
item 27a
1
309295L
Qty
* Included in Air Seal Repair Kit 244781.
*** Rubber seal is not removable.
Replacement Warning labels, signs, tags, and cards are
available at no cost.
43
Accessories
Accessories
Air Line Accessories
Air Line Quick Disconnect
112534
Swiveling quick disconnect replaces standard air inlet swivel.
AirFlex™ Flexible Grounded Air Hose
100 psi (7 bar, 0.7 MPa) Maximum Working Pressure
0.315 in. (8 mm) ID; 1/4 npsm(f) x 1/4 npsm(f) left-hand
thread
244963
6 ft (1.8 m)
244964
15 ft (4.6 m)
244965
25 ft (7.6 m)
244966
36 ft (11 m)
244967
50 ft (15 m)
244968
75 ft (23 m)
244969
100 ft (30.5 m)
Standard Grounded Air Hose
100 psi (7 bar, 0.7 MPa) Maximum Working Pressure
0.315 in. (8 mm) ID; 1/4 npsm(f) x 1/4 npsm(f) left-hand
thread
223068
6 ft (1.8 m)
223069
15 ft (4.6 m)
223070
25 ft (7.6 m)
223071
36 ft (11 m)
223072
50 ft (15 m)
223073
75 ft (23 m)
223074
100 ft (30.5 m)
Air Hose Adapter Nipple
185493
Use to connect multiple air hoses. 1/4 npt x
1/4 npsm left-hand thread.
Non-Swivel Air Inlet Fitting
185105
Replaces standard swivel. Left-hand thread.
Extended Air Inlet Fitting
189191
Replaces standard swivel to provide
extended handle grip area. Left-hand
thread.
Fluid Line Accessories
Nylon Fluid Hose
3000 psi (210 bar, 21 MPa) Maximum Working Pressure
223540
1/4 in. (6 mm) ID x 25 ft (7.6 m), 1/4 npsm
223541
1/4 in. (6 mm) ID x 50 ft (15.2 m), 1/4 npsm
Fluid Whip Hose
Grounded Air Whip Hose
100 psi (7 bar, 0.7 MPa) Maximum Working Pressure
0.188 in. (5 mm) ID; 1/4 npsm(m) x 1/4 npsm(f) left-hand
threads
236130
3 ft (0.9 m)
236131
6 ft (1.8 m)
Bleed-Type Master Air Valve
300 psi (21 bar, 2.1 MPa) Maximum Working Pressure
Relieves air trapped in the air line between this valve
and the pump air motor when closed.
107141
3/4 npt
Air Line Shutoff Valve
150 psi (10 bar, 1.0 MPa) Maximum Working Pressure
For turning air to gun on or off.
224754
1/4 npsm(m) x 1/4 npsm(f) left-hand thread.
44
3000 psi (210 bar, 21 MPa) Maximum Working Pressure
0.125 in. (3 mm) ID; 1/4 npsm(f) x 1/4 npt(m)
236134
3 ft (0.9 m)
236135
6 ft (1.8 m)
Fluid Shutoff/Drain Valve
5000 psi (350 bar, 35 MPa) Maximum Working Pressure
For turning fluid on or off to the gun and for relieving fluid
line pressure at the pump.
210657
1/2 npt(m), Fluoroelastomer seals
210658
3/8 npt(m), Fluoroelastomer seals
210659
3/8 npt x 1/4 npt(m), Fluoroelastomer seals
214037
1/4 npt(m), PTFE seals
Fluid Swivel
5800 psi (405 bar, 40 MPa) Maximum Working Pressure
115898
1/4 npsm(m) x 1/4 npsm(f)
309295L
Accessories
Gun Accessories
Gun Repair Kit
244781
Air Seal Repair Kit
Electrode Replacement Kit
244917
Includes five electrodes.
Cleaning Brush
105749
Miscellaneous Accessories
Ground Wire and Clamp
222011
Inline Fluid Filters
238561
238563
100 mesh filter. Set of three.
60 mesh filter. Set of three.
241079
Replaces inlet fitting with ball valve to shut
off air during flushing. Converts ES ON/OFF
valve to always ON condition.
722886
Medium Grip
Large Grip
722860
Gun Washer Kit
Use to convert Graco gun washers so they
can clean PRO Xs4 air-assisted spray guns.
Gun Valve Lubricant
111265
4 oz (113 g) tube of sanitary (non-silicone)
lubricant for fluid seals and wear areas.
Alternator Bearing Kit
223688
309295L
To repair the turbine alternator.
Use with 722886 Paint Resistance Meter to
measure resistance of paint.
Not for use in hazardous areas.
Safety Warning Sign
180060
245271
Use with 722860 Paint Probe to measure
resistance of paint.
Not for use in hazardous areas.
Paint Probe
Handle Grips
245263
245264
500 Volt output; 0.01-2000 megohms.
Not for use in hazardous areas.
Paint Resistance Meter
ES Always On Kit
244913
For grounding pump and other components
and equipment in the spray area.
12 gauge, 25 ft (7.6 m).
Megohmmeter
Round Pattern Kit
Provides higher level of performance to electrostatic
spraying.
245282
Includes tip of choice.
For cleaning air cap and fluid nozzle.
English Warning Sign. FM Approved. Available at no charge from Graco.
Instruction Signs
198310
198320
English Setup Instructions.
English Daily Care Instructions.
Electrostatic Conductive Gloves (box of 12)
117823
117824
117825
Small
Medium
Large
45
Spray Tip Selection Chart
Spray Tip Selection Chart
46
Part No.
Fan Width at
10 in. (250 mm)
in. (mm)
Orifice Size
in. (mm)
GG3107
2-4 (50-100)
0.007 (0.178)
GG3207
4-6 (100-150)
GG3307
6-8 (150-200)
GG3209
4-6 (100-150)
GG3309
6-8 (150-200)
GG3409
8-10 (200-250)
GG3211
4-6 (100-150)
GG3311
6-8 (150-200)
GG3411
8-10 (200-250)
GG3511
10-12 (250-300)
GG3611
12-14 (300-350)
GG3213
4-6 (100-150)
GG3313
6-8 (150-200)
GG3413
8-10 (200-250)
GG3513
10-12 (250-300)
GG3613
12-14 (300-350)
GG3215
4-6 (100-150)
GG3315
6-8 (150-200)
GG3415
8-10 (200-250)
GG3515
10-12 (250-300)
GG3615
12-14 (300-350)
0.009 (0.229)
0.011 (0.279)
0.013 (0.330)
0.015 (0.381)
Part No.
Fan Width at
10 in. (250 mm)
in. (mm)
Orifice Size
in. (mm)
GG3217
4-6 (100-150)
0.017 (0.432)
GG3317
6-8 (150-200)
GG3417
8-10 (200-250)
GG3517
10-12 (250-300)
GG3617
12-14 (300-350)
GG3319
6-8 (150-200)
GG3419
8-10 (200-250)
GG3519
10-12 (250-300)
GG3619
12-14 (300-350)
GG3719
14-16 (350-400)
GG3421
8-10 (200-250)
GG3521
10-12 (250-300)
GG3621
12-14 (300-350)
GG3721
14-16 (350-400)
GG3821
16-18 (400-450)
GG3423
8-10 (200-250)
GG3523
10-12 (250-300)
GG3623
12-14 (300-350)
GG3723
14-16 (350-400)
GG3823
16-18 (400-450)
GG3425
8-10 (200-250)
GG3525
10-12 (250-300)
GG3625
12-14 (300-350)
GG3725
14-16 (350-400)
GG3825
16-18 (400-450)
0.019 (0.483)
0.021 (0.533)
0.023 (0.584)
0.025 (0.635)
309295L
Technical Data
Technical Data
Category
Data
Maximum Working Fluid Pressure
3000 psi (21 MPa, 210 bar)
Maximum Working Air Pressure
100 psi (0.7 MPa, 7 bar)
Minimum Air Pressure to Gun Inlet
40 psi (0.28 MPa, 2.8 bar)
Maximum Fluid Operating Temperature
120°F (48°C)
Paint Resistivity Range
3 megohm/cm to infinity
Short Circuit Current Output
125 microamperes
Voltage Output
PRO Xs4 AA (244572): 85 kV
PRO Xs4 AA (244573): 40-85 kV
Sound Power (measured per ISO Standard 9216)
at 40 psi (0.28 MPa, 2.8 bar): 88.9 dB(A)
at 100 psi (0.7 MPa, 7 bar): 99.7 dB(A)
Sound Pressure (measured 1 m from gun)
at 40 psi (0.28 MPa, 2.8 bar): 86.0 dB(A)
at 100 psi (0.7 MPa, 7 bar): 95.0 dB(A)
Air inlet fitting, left-hand thread
1/4 npsm(m)
Fluid inlet fitting
1/4-18 npsm(m)
Gun Weight
29.1 oz (825 g)
Gun Length
11.4 in. (29 cm)
Wetted Parts
Stainless Steel; Nylon, Acetal, Ultra-High Molecular
Weight Polyethylene, Fluoroelastomer, PEEK, Tungsten
Wire, Polyethylene
Loctite® is a registered trademark of the Loctite Corporation.
309295L
47
Graco Standard Warranty
Graco warrants all equipment manufactured by Graco and bearing its name to be free from defects in material and workmanship on
the date of sale to the original purchaser for use. With the exception of any special, extended, or limited warranty published by
Graco, Graco will, for a period of twelve months or two thousand hours of operation from the date of sale, repair or replace any part
of the equipment determined by Graco to be defective. However, any deficiency in the barrel, handle, trigger, hook, internal power
supply, and alternator (excluding turbine bearings) will be repaired or replaced for thirty-six months or six thousand hours of
operation from the date of sale. This warranty applies only when the equipment is installed, operated and maintained in accordance
with Graco's written recommendations.
This warranty does not cover, and Graco shall not be liable for general wear and tear, or any malfunction, damage or wear caused
by faulty installation, misapplication, abrasion, corrosion, inadequate or improper maintenance, negligence, accident, tampering, or
substitution of non-Graco component parts. Nor shall Graco be liable for malfunction, damage or wear caused by the incompatibility
of Graco equipment with structures, accessories, equipment or materials not supplied by Graco, or the improper design,
manufacture, installation, operation or maintenance of structures, accessories, equipment or materials not supplied by Graco.
This warranty is conditioned upon the prepaid return of the equipment claimed to be defective to an authorized Graco distributor for
verification of the claimed defect. If the claimed defect is verified, Graco will repair or replace free of charge any defective parts. The
equipment will be returned to the original purchaser transportation prepaid. If inspection of the equipment does not disclose any
defect in material or workmanship, repairs will be made at a reasonable charge, which charges may include the costs of parts,
labor, and transportation.
THIS WARRANTY IS EXCLUSIVE, AND IS IN LIEU OF ANY OTHER WARRANTIES, EXPRESS OR IMPLIED, INCLUDING BUT
NOT LIMITED TO WARRANTY OF MERCHANTABILITY OR WARRANTY OF FITNESS FOR A PARTICULAR PURPOSE.
Graco's sole obligation and buyer's sole remedy for any breach of warranty shall be as set forth above. The buyer agrees that no
other remedy (including, but not limited to, incidental or consequential damages for lost profits, lost sales, injury to person or
property, or any other incidental or consequential loss) shall be available. Any action for breach of warranty must be brought within
two (2) years of the date of sale.
Graco makes no warranty, and disclaims all implied warranties of merchantability and fitness for a particular purpose in connection
with accessories, equipment, materials or components sold but not manufactured by Graco. These items sold, but not
manufactured by Graco (such as electric motors, switches, hose, etc.), are subject to the warranty, if any, of their manufacturer.
Graco will provide purchaser with reasonable assistance in making any claim for breach of these warranties.
In no event will Graco be liable for indirect, incidental, special or consequential damages resulting from Graco supplying equipment
hereunder, or the furnishing, performance, or use of any products or other goods sold hereto, whether due to a breach of contract,
breach of warranty, the negligence of Graco, or otherwise.
FOR GRACO CANADA CUSTOMERS
The parties acknowledge that they have required that the present document, as well as all documents, notices and legal
proceedings entered into, given or instituted pursuant hereto or relating directly or indirectly hereto, be drawn up in English. Les
parties reconnaissent avoir convenu que la rédaction du présente document sera en Anglais, ainsi que tous documents, avis et
procédures judiciaires exécutés, donnés ou intentés à la suite de ou en rapport, directement ou indirectement, avec les procedures
concernées.
Graco Information
For the latest information about Graco products, visit www.graco.com.
TO PLACE AN ORDER, contact your Graco distributor, or call this number to identify the distributor closest to you:
1-800-328-0211 Toll Free
612-623-6921
612-378-3505 Fax
All written and visual data contained in this document reflects the latest product information available at the time of publication.
Graco reserves the right to make changes at any time without notice.
This manual contains English. MM 309295
Graco Headquarters: Minneapolis
International Offices: Belgium, China, Japan, Korea
GRACO INC. P.O. BOX 1441 MINNEAPOLIS, MN 55440-1441
Copyright 2001, Graco Inc. is registered to ISO 9001
www.graco.com
Revised 10/2009