1
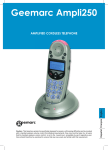
Feature telephone
User guide
T e l e p h o n e
TP38 clip
1. INSTALLATION
1.1 To Install the Batteries
Batteries are required for the Caller ID function and telephone operation of the unit.
To open the battery door and install the batteries, follow the procedure below :
1. Open the battery door by pulling back the latch.
2. Insert four (4) AAA alkaline batteries into the battery compartment.
3. Snap the battery door back into place.
The display will show “12:00 01/12” and “CALLS:00 NEW:00” which means both
the Total Call and New Call counter are Zero.
When the first call comes in, the time and date are automatically set from the Caller
ID information provided by your phone company.
Note:
• The speakerphone will not work if the batteries are not fitted.
• This unit will signal you when the batteries become weak and need replacement.
Once battery power has been sufficiently drained, the battery low icon will be lit
on the display. Replace the AAA batteries with four (4) fresh ones to make the
unit working properly.
1.2 Connecting the telephone
1. Plug one end of the telephone line cord into the jack marked LINE on the bottom
of the unit.
2. Plug the other end of the telephone line cord into the wall outlet.
3. Plug one end of the coil cord into the jack marked HANDSET on the bottom of
the unit.
4. Plug the other end of the coil cord into the jack of the handset.
1.3 Fitting the desk Support
If you intend to use your telephone on a desk, then the desk support supplied must
be fitted. To do this, turn the telephone over. Now insert the two upper hooks into the
openings provided and push the desk support firmly home.
If you ever need to remove the support, press gently on the middle clips on the upper
edge and then pull the desk support off.
2
1.4 Hanging the Phone on the Wall
Your telephone is also suitable for wall mounting. Use two screws for fixing. Drill two
holes vertically, one above the other, 67mm apart, and leave the screws protruding
from the wall by 5mm. Now place the telephone without the desk support over the
screws and push it slightly downwards.
There is a small hanging device in the receiver rest to prevent the receiver from
falling when it is placed on the rest with the telephone mounted on the wall. Using a
small screwdriver, turn this hanging device until a small hook appears at the upper
end.
If you are using the telephone fitted to the wall, you can hang the receiver on the
telephone without hanging up. You will find a small hook for this purpose at the
upper end of the receiver rest.
2. PREPARATION
2.1 Ringer Volume Control
The ringer can be adjusted from a loud (HI) to a soft (LO) sound level. When you
don’t want to be disturbed, slide the RINGER switch to the OFF position. You can
still make outgoing calls without being disturbed by incoming calls.
2.2 Receiver Volume Control
You can adjust the receiver volume for a more comfortable listening level. Set the
RECEIVER switch to NORM position to have a normal sound level, and set the
switch to HIGH position to have a louder sound level.
2.3 Display Contrast
With the receiver on the hook, the display contrast can be adjusted using
buttons.
3
and
3. TELEPHONE Operation
3.1 Dialling a Call
1. Pick up the handset or press
button (the speaker LED will light and the display will show “ ”) and wait for a dial tone.
2. Press the keypad for the telephone number you wish to dial. The display will
show the number that you dialled on the keypad. If you dial a number over 16
digits long, it will show the last 16 digits only.
3. When you have completed your call, hang up the handset or press
button
again to release the telephone line. The “ ” icon will be off.
3.2 Receiving a Call
When you receive a call, the display will show the CALL# and the caller telephone
number, if you want to talk to the caller:
button to answer the call.
1. Pick up the handset or press
button again.
2. At the end of the call, return the handset to the cradle or press
3.3 Speaker Volume Control
Under Speaker phone mode (not off hook mode), press or button to adjust the
speaker phone volume. When press , the hyphens display on the LCD increase,
which mean that the volume is increased. When press , the hyphens display on
the LCD decrease, which mean that the volume is decreased.
3.4 Call Timer
When you press
button or pick up the handset to get the dial tone, The timer
‘00:00’ appears on the display and starts counting up until you hang up the phone.
The timer shows by format “minute: second”. For example, the display showing “01:22”
stands for “one minute and twenty-two seconds. You can reset the timer to ‘00:00’ by
pressing TIMER button anytime. When the timer runs to “59:59”, it returns to “00:00”
and counts up again.
4
3.5 Redial
To redial the last number called:
button.
1. Lift the handset or press
2. Press the REDIAL button.
Noted : The last number dialed manually (up to 32 digits long) can be redialed.
3.6 Pause
You can insert a 3.6 seconds pause into dialing or storing a number into memory in
order to access custom and telebanking services, long distance, etc. Press REDIAL
button at the desired point in number. Press REDIAL button again if an additional 3.6
seconds is needed.
3.7 Recall
Many special network services, such as call waiting, require a switch hook signal.
RECALL provides the electronic equivalent of a switch hook operation.
For example, if you subscribe to Call Waiting, you can put your current call on hold
and answer another call on the same line by pressing RECALL button. Press RECALL button again to alternate between the two calls.
3.8 MUTE
You can press MUTE button (MUTE LED turns on) to mute the microphones of the
handset and base. Press the button again (the LED turns off) to resume.
3.9 Hearing Aid Compatibility
This unit is compatible with inductively coupled hearing aids.
5
4 The Phone Book
IMPORTANT: When using the phone book features, please note it is only available at data bank mode (CLIP icon turns off). If the CLIP icon is on, press
CALLER ID/DATA BANK button once.
You can store 100 telephone numbers with associated names in the phone book.
When the memory capacity of 100 numbers has been used, the display will show
the message MEMORY FULL the next time an attempt is made to store a number. In
this case, other telephone numbers must be deleted first.
4.1 To Store Telephone Numbers & Names in the Phone Book
1. Press STORE button. The display will show “SAVE?”.
2. Press STORE button again.
3. Enter the required telephone number with a maximum of 22 digits using the
number pad.
4. Press STORE button.
5. Enter the required name with a maximum of 16 letters. The next section will tell
you how to enter names.
6. Press STORE button. The display will show “SAVED!!”.
4.2 How to enter names
The number buttons are also inscribed with letters for entering the name. By repeatedly pressing the appropriate button, upper case letters as well as numbers and
special characters can be entered.
Overview:
1 space + & - / 1
2 A B C 2
3 D E F 3
4 G H I 4
5 J K L 5
6 M N O 6
7
8
9
0
*
#
P Q R S 7
T U V 8
W X Y Z 9
, . : ; ? 0
' @ ( ) *
$ _ % ! #
Incorrect entries can be deleted with DELETE button. To do this, move the cursor to
the correct position using the jog dial and then press DELETE button.
6
4.3 To review the Phone Book Memory
Enter the initial letter of the name of the person you wish to call using the number
pad. After a short time, the display will show the first stored telephone number with
this initial letter. You can now search for further numbers under this letter by turning
the jog dial to the right.
Notes:
• If no telephone number is stored, the display will show “EMPTY”.
• After you view all the call in memory, the display will show ‘END OF LIST’.
• If more than 16 digits number is entered, the number will be automatically scrolled
after 1.5 seconds.
4.4 To dial the displayed telephone number:
1. Press ENTER button. The display will show “PICK UP HANDSET”.
button. The display will show “DIALING...” and the
2. Lift the receiver or press
connection will be made.
4.5 To Edit the Phone Book Memory
1. Select the required location from the phone book by rotating the jog dial switch.
2. Press and hold STORE button for two seconds. The display will show “EDIT?”.
3. Press STORE button again.
4. You can move the cursor to the required position by turning the jog dial. To
delete the digit, press DELETE button, or press any numeric key to replace the
number or name.
5. Press STORE button to confirm the change.
6. You can follow the procedures of 4 and 5 to edit the name.
7. Press STORE button to confirm the change, the display shows “SAVED!!” and
return to standby mode.
7
4.5 To Delete the Phone Book Memory
1. Select the required location from the phone book by rotating the jog dial.
2. To delete single memory, press DELETE button once. The display will show the
“DELETE?”. Press DELETE button for 2 seconds. The telephone number and
name will be deleted and the display will now show another number from the
phone book or show “EMPTY” if there is no any data in the phone book.
To delete all entire memory, press and hold DELETE button until the display
shows “DELETE ALL?”. Press DELETE button for 2 seconds until “EMPTY” appears on the display.
5 The Caller ID
IMPORTANT: When using the Caller ID features, please note it is only available
at Caller ID mode (CLIP icon turns on). If the CLIP icon is off, press CALLER ID/
DATA BANK button once.
5.1 Receiving a Call
• If an incorrect, invalid or incomplete Caller ID signal is received, the display shows
“-ERROR-”.
• If only the caller’s phone number is received, the display shows the caller’s phone
number with the time and date it was received. The NEW icon turns on and NEW
CALL LED blinks.
Notes:
1. CALL#01 means this data is stored in Caller ID memory location #01.
2. The calling time and date are immediately recorded from the real-time clock.
• If both the caller’s name and phone number are received, the display shows the
caller’s name and phone number, with the time and date it was received. The
‘NEW’ icon turns on and NEW CALL LED blinks.
Note: If the caller’s name has more than 16 characters, only the first 16 characters will be displayed.
8
• If the name and number are not available due to the caller’s restriction, the display shows “PRIVATE” with the time and date received. The NEW icon turns on
and NEW CALL LED blinks.
• If the name and number are not available, the display will show “UNAVAILABLE”
with the call’s time and date. The NEW icon turns on and NEW CALL LED blinks.
• If a long distance call message is received, the display will show “LONG DISTANCE” with the call’s time and date and “LONG DISTANCE” will flash. The
NEW icon turns on and NEW CALL LED blinks.
NOTES:
1. If the Caller ID memory is full, the oldest data will be removed on a first-in/firstout basis.
2. If the Caller ID information received duplicates another call in memory, the time/
date will be updated and the “REPEAT” icon will be lit.
3. If no key is pressed within 20 seconds, the display will display the total call counter,
new call counter, current time and date.
5.2 View the Caller ID Memory
Turn the jog dial to the right to review more recent calls. The CALL# will increase.
After you view the most recent data in memory, the display will show “END OF LIST”.
Turn the jog dial to the left to review older calls. The CALL# will decrease.
After you view the oldest data in memory, the display will show “END OF LIST”.
If the data in memory is being reviewed for the first time, the NEW icon will be lit.
The NEW CALL LED will off if you review the data.
If no key is pressed within 20 seconds, the display will display the total call counter,
new call counter, current time and date.
9
5.3 Erase the Caller ID Memory
1. Select the required Caller ID memory location by rotating the jog dial.
2. To delete single memory, press DELETE button once. The display will show the
“DELETE?”. Press DELETE button for 2 seconds. The data for that call will be
erased, and the CALL# and Caller ID information will be updated. If the most
recent call in memory was erased, the display will show “END OF LIST”.
To delete all entire memory, press and hold DELETE button until the display
shows “DELETE ALL?”. Press DELETE for 2 seconds until “NO CALLS” appears
on the display. Both the total call and new call counters will become zero, and the
current time and date will be displayed.
5.4 Call Back (Redial) from the Caller ID Memory
With the handset hung up on the base. Select the required Caller ID memory location by rotating the jog dial.
Press ENTER button, the display will show “PICK UP HANDSET”, press speakerphone once or lift the handset, the display will show “DIALING...” and the connection
is made.
OR
With the handset is picked up, select the required Caller ID memory location by
rotating the jog dial, then press ENTER button. The display will show “DIALING...”
and the connection is made.
5.5 Copy from the Caller ID to the Phone Book
You can copy Caller ID information to the phone book while you are reviewing the
Caller ID information.
1. Select the required Caller ID memory location by rotating the jog dial.
2. Press STORE button, display will show “COPY TO DATABANK”.
3. Press STORE button again, display will show “SAVED!!”.
10
6 General Information
6.1 Approval
The apparatus is approved for connection to direct exchange lines and to approved,
compatible PABX’s. It cannot be guaranteed that the apparatus will operate correctly under all conditions when connected to some PABX’s. If difficulties are experienced, please contact your network supplier in the first instance.
6.2 Guarantee
From the moment your Geemarc product is purchased, Geemarc Telecom SA guarantee is for the period of one year. During this time, all repairs or replacements (at
our option) are free of charge.
Should you experience a problem then contact our helpline or visit our website at
www.geemarc.com.
The guarantee does not cover accidents, negligence or breakages to any parts.
The product must not be tampered with or taken apart by anyone who is not an
authorised Geemarc representative.
The guarantee of Geemarc Telecom SA in no way limits your legal rights.
IMPORTANT: YOUR RECEIPT IS PART OF YOUR GUARANTEE AND MUST BE
RETAINED AND PRODUCED IN THE EVENT OF A WARRANTY CLAIM
Please note: The guarantee applies to the United Kingdom only.
6.3 Declaration
Hereby Geemarc Telecom SA declares that this telephone is in compliance with the
essential requirements and other relevant provisions of the Radio and Telecommunications Terminal Equipment Directive 1999/5/EEC and in particular:
Article 3.1 (safety) : directive 73/23/CEE
Article 3.1b (EMC) : directive 89/336/CEE
Article 3.3 (line interface) : TBR 21/37/38
11
For product support and help visit our website
at www.geemarc.com
telephone 01707 384438
or fax 01707 372529
LIB955YY
UGTP38CLIP / ED01