1
B.
WIRING
Make all electrical connections in accordance with the
National Electrical Code and any applicable local code
requirements.
Verify that supply voltage is correct by comparing it to
nameplate.
IF SINGLE VOLTAGE:
All single voltage ballasts are pre-wired such that user
need only connect the supply conductors.
IF MULTIVOLT: (120/208/240/277 volts)
Connect the ballast lead with the insulated terminal to
the desired voltage terminal as indicated on the
ballast terminal nameplate.
IF MULTIWATT:
Multiwatt ballasts are available in various combinations
of wattage. See wiring instructions on wiring tag
inside the luminaire.
• Optional Features such as fusing and
photocontrols are voltage specific.
• Replace power fuses only with fuses of the
same type and rating.
• When changing voltage on reconnectable units,
move only the lead with the insulated connector.
C.
Use only lamps specified on nameplate. Observe lamp
manufacturer’s recommendations and restrictions on
lamp operation, particularly ballast type, burning
position, etc.
LAMP TIGHTNESS: The lamp should be securely inserted
to NEMA-EEI specified torque of 35 inch-pounds, which is
best achieved by very firmly tightening to insure application of sufficient torque. Tightening must be sufficient to
fully depress and load center contact of socket.
g
READ THOROUGHLY BEFORE INSTALLING
MAINTENANCE AND CLEANING
It will occasionally be necessary to clean the refractor
to maintain light levels. Frequency of cleaning will
depend on ambient dirt level and minimum light level
which is acceptable to the user. The refractor should be
washed in a solution of warm water and mild, nonabrasive household detergent, rinsed with clean water and
wiped dry.
The light output of a luminaire is dependent on the
age of the lamp. In applications where the light level is
critical, it may be desirable to replace lamps before they
burn out. The lamp manufacturer can provide data
showing how the lamp light output decreases with use.
LAMPS
WARNING
Risk of electric shock
• Turn power off before servicing
– see instructions
GENERAL
This luminaire is designed for use in outdoor applications
and must adhere to 25°C Max ambient temperature limitation. Install and maintain it according to the following
recommendations.
A.
CAUTION
MOUNTING
CAUTION
Risk of burn
• Allow lamp/fixture to cool before
handling
Unit will fall if not installed properly
• Follow installation instructions
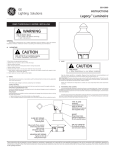
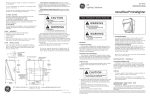
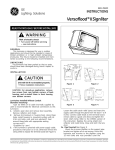
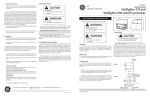
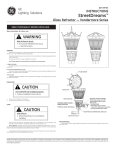
1. Place fixture on appropriately sized tenon.
2. Tighten fixture set screws to 18 to 22 ft-lbs. of torque.
3. Install Lamp (see section C of instruction sheet for lamp
instructions)
SOCKET
Lamps should be tightened to
35 inch-pounds torque.
INTERNAL GLASS REFRACTOR
(optional)
Install before lamp. Find street
side labeling and align
accordingly. Secure with
supplied clamp.
INSTRUCTIONS
Patriarch™ Luminaire
NOTE: Use of lubricants on lamp base or sockets can
cause rapid lamp failure and voids fixture warranty.
D.
GEH-5790
GE
Lighting Solutions
4. Install refractor making sure that asymmetric refractors are
properly oriented with respect to their “house side” or
“street side” labeling.
5. Tighten globe set screws to lightly contact globe.
6. Wire unit (see section B of instruction sheet for wiring
instructions)
7. Move slide bracket to closed position if it is in open
position and if no cord is present.
(See illustration)
8. Close door securely.
OPTIONAL PHOTO CONTROL
(Ordered separately)
Rotate base casting so that
PE window points away
from other light sources.
BALLAST CANNISTER
For multivolt ballasts,
see above instructions.
FUSE BLOCK
(optional)
SIMPLEX RECEPTACLE
(optional)
PROTECTIVE SHIELD
TERMINAL BOARD
SLIDE BRACKET
Move bracket to open position
(as shown) for electrical cord
passage. Be sure bracket is in
closed position when no
electrical cord is in place.
LINE
GROUND
g
LINE or NEUTRAL
GE Lighting Solutions • 1-888-MY-GE-LED • www.gelightingsolutions.com
1-88 8 - 6 9 - 4 3-5 3 3
GE Lighting Solutions is a subsidiary of the General Electric Company. Evolve and other trademarks belong to GE Lighting Solutions. The GE brand and logo are trademarks of the General Electric Company.
© 2011 GE Lighting Solutions. Information provided is subject to change without notice. All values are design or typical values when measured under laboratory conditions.
35-201578-Z9 (07/01)
These instructions do not purport to cover all details or variations in equipment nor to provide for every possible contingency to be met in connection with installation, operation or
maintenance. Should further information be desired or should particular problems arise which are not covered sufficiently for the purchaser’s purposes, the matter should be referred
to GE Lighting Solutions.
B.
WIRING
Make all electrical connections in accordance with the
National Electrical Code and any applicable local code
requirements.
Verify that supply voltage is correct by comparing it to
nameplate.
IF SINGLE VOLTAGE:
All single voltage ballasts are pre-wired such that user
need only connect the supply conductors.
IF MULTIVOLT: (120/208/240/277 volts)
Connect the ballast lead with the insulated terminal to
the desired voltage terminal as indicated on the
ballast terminal nameplate.
IF MULTIWATT:
Multiwatt ballasts are available in various combinations
of wattage. See wiring instructions on wiring tag
inside the luminaire.
• Optional Features such as fusing and
photocontrols are voltage specific.
• Replace power fuses only with fuses of the
same type and rating.
• When changing voltage on reconnectable units,
move only the lead with the insulated connector.
C.
Use only lamps specified on nameplate. Observe lamp
manufacturer’s recommendations and restrictions on
lamp operation, particularly ballast type, burning
position, etc.
LAMP TIGHTNESS: The lamp should be securely inserted
to NEMA-EEI specified torque of 35 inch-pounds, which is
best achieved by very firmly tightening to insure application of sufficient torque. Tightening must be sufficient to
fully depress and load center contact of socket.
g
READ THOROUGHLY BEFORE INSTALLING
MAINTENANCE AND CLEANING
It will occasionally be necessary to clean the refractor
to maintain light levels. Frequency of cleaning will
depend on ambient dirt level and minimum light level
which is acceptable to the user. The refractor should be
washed in a solution of warm water and mild, nonabrasive household detergent, rinsed with clean water and
wiped dry.
The light output of a luminaire is dependent on the
age of the lamp. In applications where the light level is
critical, it may be desirable to replace lamps before they
burn out. The lamp manufacturer can provide data
showing how the lamp light output decreases with use.
LAMPS
WARNING
Risk of electric shock
• Turn power off before servicing
– see instructions
GENERAL
This luminaire is designed for use in outdoor applications
and must adhere to 25°C Max ambient temperature limitation. Install and maintain it according to the following
recommendations.
A.
CAUTION
MOUNTING
CAUTION
Risk of burn
• Allow lamp/fixture to cool before
handling
Unit will fall if not installed properly
• Follow installation instructions
1. Place fixture on appropriately sized tenon.
2. Tighten fixture set screws to 18 to 22 ft-lbs. of torque.
3. Install Lamp (see section C of instruction sheet for lamp
instructions)
SOCKET
Lamps should be tightened to
35 inch-pounds torque.
INTERNAL GLASS REFRACTOR
(optional)
Install before lamp. Find street
side labeling and align
accordingly. Secure with
supplied clamp.
INSTRUCTIONS
Patriarch™ Luminaire
NOTE: Use of lubricants on lamp base or sockets can
cause rapid lamp failure and voids fixture warranty.
D.
GEH-5790
GE
Lighting Solutions
4. Install refractor making sure that asymmetric refractors are
properly oriented with respect to their “house side” or
“street side” labeling.
5. Tighten globe set screws to lightly contact globe.
6. Wire unit (see section B of instruction sheet for wiring
instructions)
7. Move slide bracket to closed position if it is in open
position and if no cord is present.
(See illustration)
8. Close door securely.
OPTIONAL PHOTO CONTROL
(Ordered separately)
Rotate base casting so that
PE window points away
from other light sources.
BALLAST CANNISTER
For multivolt ballasts,
see above instructions.
FUSE BLOCK
(optional)
SIMPLEX RECEPTACLE
(optional)
PROTECTIVE SHIELD
TERMINAL BOARD
SLIDE BRACKET
Move bracket to open position
(as shown) for electrical cord
passage. Be sure bracket is in
closed position when no
electrical cord is in place.
LINE
GROUND
g
LINE or NEUTRAL
GE Lighting Solutions • 1-888-MY-GE-LED • www.gelightingsolutions.com
1-88 8 - 6 9 - 4 3-5 3 3
GE Lighting Solutions is a subsidiary of the General Electric Company. Evolve and other trademarks belong to GE Lighting Solutions. The GE brand and logo are trademarks of the General Electric Company.
© 2011 GE Lighting Solutions. Information provided is subject to change without notice. All values are design or typical values when measured under laboratory conditions.
35-201578-Z9 (07/01)
These instructions do not purport to cover all details or variations in equipment nor to provide for every possible contingency to be met in connection with installation, operation or
maintenance. Should further information be desired or should particular problems arise which are not covered sufficiently for the purchaser’s purposes, the matter should be referred
to GE Lighting Solutions.