1
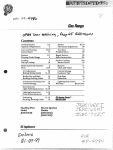
contents
Anti-TipDevice
ApplianceRegistration
Careand Cleaning
ControlPanel
Features
FlooringUnder Range
Preheating
Roasting,RoastingGuide
16-20
16
Shelves
ThermostatAdjustment
6,7
5
Leveling
Lift-UpCooktop
—
3,5
2
5
16
13
14
11,19
21
VentDuct
ProblemSolver
11
22
RepairService
SafetyInstructions
23
2-5
ModelandSerialNumbers
Oven
2
10,11
Air Adjustment
Baking,BakingGuide
12,13
Burners
Clockand Timer
19,20
9
BroilerPanand Rack
Broiling,BroilingGuide
19,20
15
ControlSettings
CookwareTips
8
9
SurfaceCooking
Burner Grates
21
Drip Pans
FlameSize
8,9
16,20
ContinuousCleaning Care
ControlSettings
17
11
Door Removal
Light
19
11
Lighting Instructions
8
Warranty
BackCover
LightingInstructions
Oven BottomRemoval
10
18
GEWer
m.u&2m
stan&ng Pflot
Modek
Hectric Ignition
Modek
JGBS03PK
@S03PK
JGSS05GPK
JGBS15PK
JGBS15GPK
JGBS03EK
JGSS05GEK
JGsco8Gm
JGBS15EK
JGBS15GEK
ps15GEK
&MeP
16,20
8
ReadthkbookCarefullye
It is intendedto helpyouoperate
and maintainyournewrange
properly.
FORYOURSAFEW
Ifyousmell gas:
If youdon’tunderstandsomething
or needmorehelp,write(include
yourphonenumber):
ConsumerAfftirs
GE Appliances
AppliancePark
Louisville,KY40225
1SOpen windows.
2. Don’t touch
electrical switches:
3. Extinguish any
open flame.
~, Immediately call
your gas suppliers
writedownthemodel
‘Don’tturnelectricswitches
on oroff because sparksmay
ignitethe gas.
Keepit handyfor answersto your
questions.
andserial nmbers.
You’llfindthemon a labellocated
behindthebroilerdrawer.
Thesenumbersare alsoon the
ConsumerProductOwnership
RegistrationCardthatcamewith
yourrange.Beforesendingin this
card, pleasewritethesenumbers
here:
Model Number
FORYOURSAFETY
Donot
store
oruse
gasoline or other
flammable Vapomand
liquids in the vicinity
of this or any other
appliance,
Serial Number
Use thesenumbersin any
correspondenceor servicecalls
concerningyourrange.
Immediatelycontactthe dealer(or
builder)that soldyouthe range.
save
timeandmoney.
Beforeyou request
service.
ee
Checkthe ProblemSolveron
page 22. It listscausesof minor
operatingproblemsthatyoucan
cgr~ect yourself.
.—
----
gw
.——.
Piug your Taageintoa no-volt
pan.Turnoffburner,then
smotherflamingpanbycovering
pancompletely
withwellGtting
lid,cookiesheetorflattray.
Flaminggreaseoutsideapan
canbeputoutbycovering
with
bakingsodaor,ifavailable,
a
multi-purpose
drychemical
orfo~ typefireextinguisher.
@~~~u~~~~~~
fl~,v~~~~
egrounded
outletOnlye
Donot
muvetheroundgrounding
prong
mtheplug.Ifindoubtabout
thegrounding
oftiehomeelwtricd
system,itisyourpersonal
responsibility
andobligation
to
ha~~em
ungruunde-doutiet
replaced
withaproperlyg~ounded
thrWprongoutletinaccordance
with
theNationalElectricalCode.Do
notUSeanextension
cordwith
..
..
materialsin the ovenor brouer
&awer or near the Caoktop.Do
notstoreorusegasolineorother
flammable
vaporsandliquidsin
thevicinityofthisoranyoth~r
‘appfiance~
cobkinggreasq
@Donoti~t
orotherfiamm~ble
@ateriaIs.
aceumulatetiorti~artherange.
@wfi~~Cootig prk, foHow’:
thedirections
exactlyandalways
cookthemetittoaninternal
fires,
Nevar pickupa Iaming
“--J
3
. ...”.
.—-..——.
———
....=.—..
. - -..- .--
—.—..-—..-—.——
—...
———
—.-—-..—
.
.-
-?.
~WIPORTNT SAXETYINSTRUCTIONS(continued).
QTomininlizethe possibility
ofburns9 ignition
offlammable
materials,andspillage,turn
cookware
handlestowardtheside
orbackoftherangewithout
extending
overadjacentburners.
e Mway$turn surfaceburnerto
OFFbeforeremovingCookwe.
~carefullywatchfoodsbehg
friedat Mghflamesetting.
e ~~v~~~~~~~
~~~~~~&(~~
opetings)oftherange.They
providetheairirdetandoutlet ~‘.
whichisnecessaryfortherange’‘ “
tooperateproperlywithcorrect~~~
~
e Aiways heat
fatslowly? and
watchasit heats.
@Usedeepfat thermometer
v~heneverpossibletoprevent
~verheating
fatbeyondthe
smotingpoint.
e USepFoper pan size—-~void
pansthatareunstableoreasily
tipped.Selectcoobare having
flatbottomslargeenoughto
properlycontainft]odavoiding
boilovers
andspillove~s,
butlarge
enoughtocoverburnergrate.
Thiswillbothsavecledng and
preventhazardous
accumulations
offoodjsinceheavyspattering
or
spillovers
leftonrangecanignite.
Usepanswithhandlesthatcanbe
easilygraspedandremaincool.
~m~n ~kg gI~SSCOOM~~~9
make sureit-isdesigned
fortoD-.
alreadymadesurepile@arelit,
turnoffthegastotherangeand
callaqualifiedservicetechnician.
Nevertiseanopenflametolocate
aleak.
thebroil~rpa~,
Yourrange,like manyother
householditems,isheavy and
can settleintosoft floorcoverings
suchas cushionedvinylor
carpeting.Whenmovingthe range
on this typeof flooring,use care,
andit is recommendedthatthese
simpleandinexpensiveinstructions
be followed.
The rangeshouldbe installedon
a sheetofplywood(or similar
material)as follows:men the
floor coveringendsat thefront of
the range,the area thatthe range
willrest on shouldbe builtup with
plywoodto the samelevelor higher
than the floorcovering.Thiswill
allowthe rangeto be movedfor
cleaningor servicing.
bveli~
the
Range
Levelinglegsare locatedon each
corner of thebase of therange.
Yourrangemustbe levelin orderto
producepropercookingandbaking
rcsulfi.Afterit isin itsfinallocation,
placea levelhortiontaUyon an
ovenshelfandcheckthe levelness
frontto backand sideto side. Level
the rangeby adjustingtheleveling
legsor byplacingshimsunderthe
cornersas needed.
One ofthe rear levelinglegswill
engagethe Anti-TipDevice(allow
for somesideto sideadjustment).
Allowa minimumclearanceof 1/8”
betweenthe rangeandthe leveling
leg that is to be installedinto
the Anti-TipDevice.
.
.—
YeaturesofYourRange
JGBS03PK
tith Shntig
tith Electric
LBS03PK&P gas only)
JGBS03EK
Riot
Igtition
tith Stiting Riot
JGSS05GPKtith Shnfing mot
~GSS05GEKtith Electric Igtition
Feature Index
2 SutiaceBurnerControls
3 SurfaceBurnersandGrates
JGSS05GPK
JGSS05GEKJGSC08GEK
see
page
2
e
8
4
4
4
4
16,19
4
4
4
4
4 O~~en
TemperatureControl
5 Clockand Timer
Digital
9
6 OvenVent
-u
7 OvenInteriorLight
11
8 OvenLightSwitch
(letsyouturn interiorovenlight
on and of~
11
9 OvenShelves
(easilyremovedor repositioned
on shelfsupports)
11,19
2
2
2
2
OvenShelfSupports
1 BroilerPanand Rck
U ChromePlatedDrip l?ans
19,20
16,20
13 RemovableOvenDoor
(easilyremovedfor ovencleaning)
19
14 Lift-UpCooktop
(locksin up position,to simpli~
cleaningunderneath)
16
e
15 RemovableOvenBottom
18
e
16 BroilerDrawer
19
17 PorcelainEnmel Ovenkterior
18
18 Continuous-CleaningOvenInterior
17
19 Anti-TipDevice
(seeSafetyInstmctions)
3,5
7
Surface
Cootiw
Lighti~ImtFuctiom
surface
BurnerControk
sanding Hlot Models
Theknobsthatturn the surface
burnerson andoffare locatedon
thelowercontrolpanelin frontof
the burners.
Thetwoon theleftcontroltheleft
frontandleftrear burners.Thetwo
on the rightcontrolthe rightfront
and rightrear burners.
JGBS03PK
&Bso3PK
JGBSEPK
JG~suGPK
JGSS05GPK
‘~hesurfaceburnerson these
rangeshavestandingpilotsthat
mustbe lit initially.Tolightthem:
1. Besure surfaceburnercontrol
knobsare in the OFF position.
ToL@t
a
HOW
h SelwtNme Sti ..-.
m
The flme sizeon a gas burner e’
shouldmatchthecookwareyou
are using.
surface
Burner
2. Removethe gratesandlifithe
cooktopup (seepage 16).
FOR SAFEWDLING OF
COO~ARE, NEVERLET THE
FLME EXTE~ UP THE SIDES
OF THE COOKWARE.Anyflame
largerthanthe bottomof the
cookwareis wastedand only
servesto heatthehandles.
3. Locatethe twopilotportsand
lighteachof themwitha match.
4. Lowerthe cooktop.Yoursurface
burnersare nowreadyfor use.
Pushthe controlknobin andturnit
to LITE.Onelectricignitionmodels,
youWMheara litdeclickingnoise—
thesoundof theelectricspark
ignitingtheburner.
I
I
I
EIectr’icIgtition Models
JGBS03EK
JGBsmK
JGBSEGEK
JGSC08GEK LBSBGEK
JGSS05GEK
Surfaceburnerson theserangesare
lightedby electricignition,ending
tie needfor standingpilotswith
constantlyburningflames.
h case of a power ou&ge9youcan
lightthepilotlessignitionsurface
burnerson yourrangewitha match.
Holdalighted matchto the burner,
thenturn the hob to the LITE
position.Use@reme Mutionwhen
lightingburners in this manner.
Surfaceburnersin use whenan
electricalpowerfailureoccurswill
continueto operatenormally.
A&r theburnerignites,turnthe
knobto adjusttheflamesize.
No&:
@DOnotoperatea burnerfor
extendedperiodsof timewithout
havingcookwareon thegrate.The
Msh on thegratemaychipwithout
cookwareto absorbtheheat.
pb andpans, adjustthe flame so
the circleit makesis about 1/2inch
smallerthanthebottomof the
cookware.
men boiting,usethis same
flamesize-1/2 inchsmallerthan
the bottomofthe cookware-no
matterwhatthe cookwareis made
of. Foodscookjust as quicklyat a
gentleboilas theydo at a firious,
rollingboil. A highboilcreates
steamandcooksawaymoisture,
flavorandnutrition.Avoidit except
for the fewcookingprocesses
whichneeda vigorousboil.
Whenfryingor warmingfoods
in stidess stee19castironor
enamelware,keepthe flamedown
lower—toabout 1/2the diameter
of the pan.
Whenfryingin glassor ceramic
cookware,lowerthe flameeven
more.
@Checkto be suretheburneryou
turnedon is theoneyouwantto use.
@Be surethe burnersandgratesme
coolbeforeyouplaceyourhand, a
pot holder,cleaningclothsor other
materialson them.
,m
“-
..—-
‘=~~p.Qf-Range
cookware
L
$.iuminug~~:
Medium-weight
.:~:.~dk%~
we>
%&aay.%.
~.-
a%
okwareis recommendedbecause
eztsquicklyand evenly.Most
foodsbrownevedy in an aluminum
skillet.Mineralsin foodand water
willstainbut willnotharm
aluminum.A quickscourwitha
soap-filledsteelwoolpad after
eachusekeepsaluminumcookware
lookingshinynew.Use.saucepans
withtight-fittinglids for cooking
withminimumamountsof water.
(on modelsso equipped)
Toset the Clock, pushin the knob
andturn the clockhandsto the
rightto the correcttime.Thenlet
the knobout and continueturning
to OFF.
Toset the Clock,turn the knobto
the Iefiuntilthewords“SET
TIME” appearin thedisplay.Then
tu~ theknobin eitherdirection
untilthe correcttimeis displayed.
Aftera slightpause,timeis set.
Cast Iron: If heatedslowly,most
skilletswillgivesatisfactoryresults.
Enamelware: Under some
conditions,the enamelof some
cookwaremaymelt.Foflowcooke
manufacturer’srecommendations
forcookingmethods.
Glass: Thereare twotypesof glass
cookware-those for ovenuse only
andtiose for top-of-rangecoo&Jng
(saucepans,coffeeand teapots).
_Glass conductsheatvery slowly.
-aititpi-o~f GlassCeramic:Can
Ae
usedfor eithersurfaceor oven
-.:oi:iilg.
It conductsheatvery
‘slowly andcoolsveryslowly.Check
cookwaremanufacturer’sdirections
.tobesureitcanbeusedongasranges.
StaidessSteel:Thismetalalonehas
poorheatingproperties,andisusu~y
combinedwith copper,aluminum
or othermetalsfor improvedheat
distribution.Combinationmetal
skilletsgenerallyworksatisfactorily
if usedat mediumheat as the
rnanufaclurerrecommends.
(on modelsso equipped)
mer
The Timerhas beencombinedwith
the rangeclock. Use it to timeall
yourprecisecookingoperations.
You’llrecognizethe Timeras the
pointerwhichis differentin color
than the clockhands.
Minutesare markedup to 30
andhoursare markedup to 4 on
the centerring of the clock.
T’ set the ~mer, turn the knobto
the lefi, withoutpushingin, until
thepointerreachesthe numberof
minutesor hoursyouwantto time.
At theend oftheset the, a
buzzer sounds totell you the is
up. ~rn theknob,withoutpushing
in, untilthe pointerreachesOFF
andthebuzzerstops.
tier
Toset the her, turn the knob
to therightuntilthe words“SET
TIMER’ appearin the display.
Thenturn the knobin either
directionuntilthe desiredtime
(minutesand seconds)is displayed.
Thetimerwill startcountingdown.
To.ca~celthe timer,turnthe knob
in eitherdirectionuntil “0:00”
appearsin the display,
At the end of the timeroperation,
*r the3 beep, thedisplayreturns
to timeofdayautomatically.During
tie timerfinction, the display
flashesback to thetimeof day
every 10seconds.
__=.
.. -.—
.....,...—
.——
9
Using
Youroven
LightiwImtructiom
shndingRiot Models
JGBS03PK
JGBstiPK
mBso3PK
JGBSEGPK
JGSS05GPK
Theserangeshavea standingoven
pilotport thatmustbe lit initially.
Tolight the ovenpilot port:
1. BesureOVENTEMPknobis in
the OFFposition.
2. Openthebroilerdrawerandpull
thedrawerdownflat.Put thebroiler
pan in the lowestpositionand slide
thedrawerbackintothe ran~e.This
willmakeit easierfor yout; reach
insidethe broilercompartment.
Li@ti~ ImtruetiQm
~a,
..
—-
ToIightthe oven~i~otduring
electrica~ power Outige, carefi~=
ElectricIgnitionModels
followthe stepsbelow.
JGBS03EK
~GBsm~
~GS$osGEK JGBSKGEK
JGSC08GEK .~BSBGEK
The ovenpiloton theserangesis
lightedbyelectricignition.
1. Be sureOVENTEMPknobi
in the OFF position,
Totight the burner,turnthe
OVENTEMPknobto the desired
temperature.Theburnershould
lightwithin60 seconds.Youwill
hear a litie clickingnoise—the
soundof the electricsparkigniting
the burner.
rower Ouhge?
Althoughthe oven/broilerburner
on theserangeswillnot self-light
in the eventof an electricalpower
outage,a burnerin usewhenan
electricalpowerftilure occursWN
continueto operatenormally.
2. Openboththe ovenandbroiler
doorsandwait5 minutesto allow
anypilotgasto dissipate.
3. Unplugthe rangefromthewdl
outiet,turn offthe circuitbreaker,
or removethefise toavoidamidenti
ignitionoftheovenif electricpower
is restoredwhileyouare lighting
thepilot.
4. Put thebroilerpan in thelowest
position.
5. Locatethe ovenpilo~assembly
by lookingintothebroileropening.
Thepilotis at thebackofthebroiler
compartment,on the lefisideof
theburner.
Note:The ovenmustbeat room
temperaturebeforeyoushould
attemptto lightthe ;ven pilot
manually.
6. Turnthe OVENTEMPknobto
the desiredtemperaturesetting.
.
3. Findthe ovenpilotport at the
backof the broilercompartment.
The longtube,runningfrom front
to back, is the ovenburner. The
pilotport is at theback, aboutone
inchbelowth~burner.
7. Lightthepilotwitha matchand
withdrawyourarm immediately
becausethe ovenburnermaylight
in as littleas 20 seconds.
8. Closethe ovenandbroilerdoors.
Note:It is necessaryto lightthe
pilotmanuallyeachtimethe oven
is usedduringa poweroutage.
4. Usinga longmatchor match
holder,reachin and lightthe oven
pilot.
Tolight the ovenburner:
Turnthe OVENTEMPknobto the
desiredtemperature.
Power outige? An electricalpower
failurewill notaffectalighted
standingovenpilot.
.—”—.—
--
‘*’ :
>-%
..
=-@_
O}’enTempemtum
Control
oven
vent
The OVEN TEMP controlis
locatedon thecontrolpanelon the
frontof the range(seepage6).
Simplyturn theknobtothedesired
cookingtemperatures,whichare
markedin 25“F.incrementson the
did. It willnormallytake60
secondsbeforetheflamecomeson.
Afterthe ovenreachestheselected
temperature,theovenburnercycles—
offcolnpletely,thenon witha fill
flame-to keeptheoventemperature
controlled.
The ovenis ventedthroughduct
openingsat the centerrear of the
range,(seepage6). Do notblock
theseopeningswhencookingin th(
oven—itis importantthattheflowoi
hotair fromtheovenandfreshair &
the ovenburnersbe uninterrupted.
oven
Li@t
(onmodelsso equipped)
Usethe switchon the controlpanel
to turn the lighton andoff.
oven
~Ventopeningsand nearby
surfaces maybecomehot. Do not
Toremovethe shelvesfromthe
oven,pLdlthemtowardyou,tflt
frontendupwardandpu~themout.
Toreplace, placeshelfon shelf
supportwith stop-locks(curved
extensionundershel~ facingup
andtowardrear of oven.Tiltup
frontandDushshelftowardbackof
ovenuntifit goespast “stop”on
ovenwall.Thenlowerfrontof shelf
andpushit W thewayback.
touch them.
@Han&es of pots and panson thf
cooktopmayb~ome hot if left
too closeto the vent.
shelves
shelfPositiom
The ovenhas fourshelfsupports—
A (bottom),B, C and D (top).
Shelfpositionsfor cookingare
suggestedon BakingandRoasting
pages.
@Do not leavepIasticitemson
the cooktop—theymaymeltif
left too closeto the vent.
oven
Mokture
Theshelvesare designedwithstoplocksso whenplacedcorrectlyon
theshelfsupports,theywillstop
beforecomingcompletelyoutof
theovenand wi~nottilt whenyou
are removingfoodfromthemor
placingfoodon them.
?Vhenplacingcookwareon a shelf,
pullthe shelfoutto the “stop”
position.Placethe cookwareon
fileshelf, then slidethe shelfback
intothe oven.ThiswUIeliminate
reachingintothe hotoven.
As yourovenheatsup, the
temperaturechangeofthe air
in the ovenmaycausewater
dropletsto form on the door
glass. Topreventthis, openthe
ovendoor for the first minute
of ovenheat-upto let the moist
air out.
.—
——
Baking
~ If moistureis noticeable
1. Positionthe shelfor shelvesin
the oven.If cookingon twoshelves
at the sametime,sta~er thepans
forbestheatcirculation.
2. Closeovendoor.~m OVEN
TEMPknobto desiredtemperature.
Preheatovenfor at least 15minutes
if preheatingis necessary.
3. Placefoodin ovenon center
of shelf.Allowat least2 inches
betweenedgeofbakewareand oven
wallor adjacentcookware.
4. Checkfoodfor donenessat
minimumtimeon recipe.Cook
longerif necessary.TurnOVEN
TEMPknobto OFF andremove
food.
Mostbakingis doneon the second
shelfposition(B)fromthebottom.
W7henbakingthreeor fouritems,
usetwoshelvespositionedon the
secondand fourthsetsof supports
(B& D) frombottomof oven.
Bakeangelfoodcakeson first shelf
position(A) frombottomof oven.
e FO1]OW
a testedrecipeand
measuretheingredientscarefully.
If youareusinga packagemix,
followlabeldirections.
the
frontoftheovendoorwhenfirst
turningontheoven,leavethedoor
ajarfora fewminutesor untilthe
oveniswarm.
@Donotopentheovendoorduring
a bakingoperation-heatWMbelost
andthebakingtimemightneedto
beextended.Thiscouldcausepoor
bakingresults.Ifyoumustopenthe
door,openitpartially-only 3 or4
inches—andcloseit asquicklyas
possible.
~Donotdisturbtheheatcirculation
intheovenwiththeuseofaluminum
foil.If foilisused,placea small
sheetofit, about10by 12inchesat
themost,ona lowershelfseveral
inchesbelowthefood.Donotplace
foilontheovenbottom.
~O~~Ou
Preheatingis veryimportantwhen
usingtemperaturesbelow225”F.
andwhenbakingfoodssuchas
biscuits,cookies,cakesandother
pastries..
Preheatingis notnecessarywhen
roastingor forlong-timecookingof
wholemeals.
on
~~ti~
ROblem
and Possible Solutiom
PES
Burfingaroundedges
@Edges
ofcrusttoothin.
e Incorrectbakingtemperature.
Bottomcrust soggyand unbaked
@Allowc~st and/~rfillingto cool
sufficientlybeforefillingpieshell.
~Fillingmaybetoothinorjuicy.
~Fillingallowedto standinpieshell
beforebaking,(Fillpieshellsand
bakeimmediately.)
@Ingredients
andpropermeasuring
affectthequalityofthecrust. Usea
testedrecipeandgoodtechnique.
Makesuretherearenotinyholesor
tearsin abottomcrust. “Patching”
a piecrustcouldcausesoaking.
Mefiilingrunsover
@Topandbottomcrustnotwell
sealedtogether.
@Edgesofpiecrustnotbuiltup
highenough.
@Toomuchfilling.
@Checksize of pie plate.
Wstry is tough; crustnotflaky
oToomuchhandling.
@Fattoo sofior cutintoofine.
Rolldoughlightlyandhandleas
littleaspossible.
.—.—
cAms
Cake rises
higheron oneside
@Batterspreadunevenlyinpan.
~oven shelvesnotlevel.
~Usingwarpedpans.
Cakescrackingontop
~Oventemperaturetoohigh.
*Battertoothick,followrecipe
or exactpackagedirections.
~Checkforpropershelfposition.
@Checkpansizecalledforin recipe.
~Impropermixingofcake.
Cakefalls
@Toomuchshortening,sugaror
liquid.
~Checkleaveningagent,baking
powderorbakingsodatoassure
freshness.Makea habitto note
expirationdatesofpackaged
ingredients.
~Cakebakedatincorrect
temperatureor notbakedlong
enough.
~If addingoilto a cakemix, make
certaintheoilisthetypeand
amountspecified.
Crustishard
@checktemperature.
~Checkshe~fposition.
Cakehassoggylayerorstreak at
bottom
~Underminingingredients.
@Shorteningtoosoftforproper
creaming.
~TOO
muchliquid.
coo& BIscmm
Doughycenter;heavycruston
surface
@Checktemperature.
e Checkshelfposition.
~Followbakinginstructions
carefullyasgiv~nin reliablerecipe
or onconveniencefoodpackage.
~Flatcookiesheetswillgivemore
evenbakingresults.Don’~overcrowd
foodsona ~akingsheet.
~Conveniencef;ods usedbeyond
theirexpirationdate.
Browningmorenoticeableon
oneside
*Ovendoornotclosedproperly, checkgasketseal.
+.
@Checkshelfposition.
1. Preheating isvery imporhnt
}}’helllRsillgtemperatllres below
22S”F.and when baking fOOds
such as biscui&~Cookiesycakes
a~~dother pastries.Preheatthe
ovenfor at least Is minutes.
Preheatingis notnecessarywhen
roastingor for long-timecooking
of wholemeals. Food
Bread
Biscuits(M-in.thick)
2. A1uminumpansconductheat
quickly.For mostconventional
baking,light, shinyfinishesgive
bestresultsbecausetheyhelp
preventoverbrowning.Forbest
browningresults,werecommend
dullbott~msurfacesforcakepans
andpieplates.
Cookware
ShinyCookieSheet
Coffeecake
~. Darkornon-shinyfinishesand
glasscookwaregenerallyabsorb
heatwhichmayresultin dry,crisp
crusts.Reduceovenheat25°F.if
lightercrustsare desired.Rapid
browningof somefoodscan be
achieved-bypreheatingcastiron
cookware.
Time,
Minutes
Shelf
Wsitions
Oven
Temmratures
B,C”
400”-475°
15-20
B
350°-4000
20-30
B
B
400°-4500
350°
20-40
45-55
Preheatcastironpanforcrispcrust,
B
B
400°-4250
375°
20-30
45-60
B
A, B
350°-3750
375°-4250
45-60
45-60
Decreaseabout5 minutesformuffinmix.
Or bakeat450”F.for25minutes,thenat
350”F.for 10to 15minutes.
Darkmetalor glassgivesdeepest
browning.
Muffins
Popovers
ShinyMetalPanwith
satin-finishbottom
CastIronor GlassPan
ShinyMetalPanwith
satin-finishbottom
ShinyMetalMuffinPans
DeepGlassor CastIronCups
Quickloafbread
Yeastbread(2loaves)
Metalor GlassLoafPans
Metalor GlassLoafPans
Plainrolls
Sweetrolls
Cakes
(withoutshortening)
Angelfood
Jellyroll
Sponge
Cakes
Bundtcakes
Cupcakes
Fruitcakes
ShinyOblongor MuffinPans
ShinvOblongor MuffinPans
B
B
375°-4250
350°-3750
10-25
20-30
AluminumTubePan
MetalJellyRollPan
Metalor CeramicPan
A
B
A
325°-3750
375°-4000
325°-3500
30-55
1o-15
45-60
Metalor CeramicPan
ShinyMetalMuffinPans
Metalor GlassLoafor
~be Pan
ShinyMetalPanwith
satin-finishbottom
ShinyMetalPanwith
satin-finishbottom
Metalor GlassLoafPans
A, B
B
A, B
325°-3500
350°-3750
275°-3000
45-65
20-25
2-4hrs.
B
350°-3750
20-35
B
350°-3750
25-30
B
350°
40-60
Metalor GlassPans
CookieSheet
B,C
B,C
325°-350”
350°-4000
25-35
10-20
CookieSheet
CookieSheet
B, C
B, C
400°-4250
375°-4000
———
6-12
7-12
A, B,C
B
350°-4000
300°-3500
30-60
30-60
B
325°
50-90
A
B
400°-4250
325°-3500
45-70
15-25
A, B
B
B
400°-4250
400°-4250
450°
45-60
40-60
13-16
A, B,C
A,B, C
B
325°-4000
325°-3750
300°-3500
60-90
30-60
30-75
Cornbreador muffins
Gingerbread
Layer
Layer,chocolate
Loaf
Cookies
Brownies
Drop
Refrigerator
Rolledor sliced
Fruits,
OtherDesserts
Bakedapples
Custard
Glassor MetalPans
GlassCustardCupsor
Casserole(setin panof hotwater)
GlassCustardCupsor
Casserole
Puddings,rice
andcustard
Res
Frozen
Meringue
FoilPanonCookieSheet
Spreadtocrustedges
I
1
I
Onecrust
Twocrust
Pastrvshell
Miscellaneous
Bakedpotatoes
Scallopeddishes
...souffles
..... ....
““.
-
Slassor Satin-finishMetal
31assor Satin-finishMetal
31assor Satin-finishMetalPan
$etonOvenShelf
;Iass or Metal
I GlassPan
—
I
j
—
Comments
Canned,refrigeratedbiscuitstake2 to4
minuteslesstime.
Twopiecepanis convenient.
Linepanwithwaxedpaper.
Paperlinersproducemoremoistcrusts.
Use300”F.andShelfB forsmallor
individualcakes.
If bakingfourlayersuse
shelvesB andD.
Barcookiesfrommixusesametime.
UseShelfC andincreasetemperature
25 to 50°F.formorebrowning.
Reducetemperatureto 300”F.forlarge
custard.
Cookbreador ricepuddingwithcustard
base80to 90minutes.
Largepiesuse400°F.andincreasetime.
Toquicklybrownmeringueuse400°F.for
9 to 11minutes.
Custardfillingsrequirelowertemperature,
longertime.
Increasetimeforlargeamountor size.
I
Roasting
Roas~ingis cookingbydry heat.
Tendermeator poultrycan be
roasteduncoveredin youroven.
Roastingtemperatures,which
shouldbelow and steady,keep
spatteringto a minimum.When
roasting,it is notnecessaryto sear,
baste,coveror add waterto your
meat. Roastingis easy,just follow
thesesteps:
Step 1: Positionovenshelfat
secondfrom bottomposition(B)
for smW sizeroast (~to 5 lbs.) and
at bottomposition(A)for larger
roasts.
Step2: Checkweightof roast.
Placemeatfat sideup or poultry
brsast sideup on roastingrack in a
shallowpan. Themeltingfatwill
bastethemeat. Selecta pan as
closeto the sizeofthe meatas
possible.(Broilerpan withrack is a
goodpanfor this.)
Step ~: firn OVENTEMl?to
desiredtemperature.Checkthe
RoastingGuidefor temperatures
andapproximatecookingtimes.
Step 4: Mostmeab continueto
*_.—.
--.—
cookslightlywhilestandingafter
beingremovedfromthe oven.
Standingtimerecommendedfor
roastsis 10to 20 minutesto allow
roastto firm up, makingit easierto
carve.Internaltemperaturewill
riseabout5°to 100F.;to compensate
fortemperaturerise, if desired,
removeroastfromovensoonerat 5°
to 10T.lessthantemperatureon
guide.
Frozenroastsofbeef,pork,
lamb,etc.canbe startedwithout
thawhg,butallow15to 25 minutes
perpoundadditionaltime(15
minutesperpoundforroastsunder5
pounds,moretimefor largerroasts).
Thawmostfrozenpoultrybefore
roastingto ensureevendoneness.
Somecommercialfrozenpoultry
canbe cookedsuccess~y without
thawing.Followdirectionsgivenon
packer’slabel.
..-.
Oven
mpemture
Doneness
Vd shoulder,legor loin*
Wrkloin,ribor shodded
Ham,pre-cooked
325°
325°
325°
Medium
WellDone
Wll Done
WellDone
ToWarm
Ham,raW
*Forbonelessrolledroastsover6-inches
thick,add5 to 10minutesperlb.totimes
given.
325°
Wel Done
3 toSIk.
6 toS-1b.
24-35
18-25
35-39
25-31
39-45
31-33
21-25
20-23
25-30
%28
30-35
28-33
3545
30-40
3545
3W
18-23minutesperlb.(anyweight)
Under10lb.
10tQSlk
27-35
24-27
Bultry
Chickenor Duck
Chickenpi=
325°
375°
WefiDone
WellDone
3 b 5-lM.
354
30-35
Wr 5 lhs.
30-35
10toElk
firkey
325°
WeflDone
Qver15lb
13-19
Meat
Tendercuts;rib,highquality
sirlointip,rumpor topround*
325°
~b
325°
legor bone-inshodded
Mdum
Mll Done
16-22
130°-lm0
150°-1600
170°-1850
130°-1400
150°-1600
170°-1850
170°-1800
170°-1800
115°-1250
170°
185°-190”
185°-1900
h this:
185°-iw0
mps
Broilingis cookingFoodbydirect
Brotiing
heatfromabovethe food.Your
@Use tongstoturnmeatover—
~ Steak and chopsshouldbe at
rangehasa convenientcompartment
least
1 inch thick for bestbroiling
piercedmeatlosesjuices.
belcwtheovenfor broiling.It also
results.Panbroilthinnerones.
hasa speciallydesignedbroilerpan
andrackthatallowdrippingfatto
drainawayfromthe foodsandbe
keptawayfromthe highheatof
thegas flame.
QuaIltity
Lst
Side 2ndSide
and/or
Broti Time, Time,
Distancefromthe heatsourcemay
Food
Thickness
Fosition Wnutes Minutes Comments
bechangedbypositioningthebrotier
Bacon
pan andrackon oneof threeshelf
lA-lb.(about8
B
3%
3
Arrangeinsinglelayer.
thinslices)
positionsinthebroilercompartment—
A (bottomof broilercompartment),
GroundBeef
l-lb.(4patties)
Spaceevenly.Upto8patties
WellDone
B
6-7
8-9
takeaboutsametime.
B (middle)andC (top).
I 1Ato %-in,thick
BroiIiw Guide
I
Both the ovenand broiler
compatiment doors should be
closedduring broiling.
Howto Broil
1. If meathas fat or gristlenearthe
edge,cutverticalslashesthrough
bothabout2 inchesapart, butdon’t
cut intomeat. Werecommendthat
youtrim fatto preventexcessive
smoking,leavinga layerabout
l/8-inchthick.
2. Removebroilerpan and rack
frombroilercompartmentand
placefoodon rack.
~. Pul~outdrawerand position
broderpanin compartment.Placing
foodclosertoflameincreasesexterior
browningof food,but alsoincreases
spatteringand the possibilityof fats
andmeatjuices igniting.
4. Closebroilerdoor and, for most
foods,turnOVEN?’EMPknobto
BROIL.Note:Chickenandhamare
broiledat450°in orderto cookfood
throughwithoutover-browningit.
5. Turnmostfoodsonceduring
cooking;(tte exceptionis thinftiets
offish: oi~one side, placethat side
downonbroilerrackandcookwithout
turninguntildone). Timefoodsfor
aboutone-halfthe totalcooking
time, turn food,then continueto
c{>ok
to preferreddoneness.
BeefSteaks
Rare
Medium
WellDone
Rare
Medium
WellDone
l-in.thick
(l-1 %lbs.)
1%-in.thick
(2-2%Ibs.)
Chicken(450°)
1whole
(2t02%-lbs.),
splitlengthwise
BakeryProducts
Bread(Toast)or
2-4slices
ToasterPastries
1pkg.(2)
EnglishMuffins 2-split
B
B
B
B,C
B
B
9
12
13
10
15
25
7
5-6
8-9
6-7
12-14
16-18
Steakslessthanl-in.cook
throughbeforebrowning.
Panfryingisrecommended.
Slashfat.
A
30-35
25-30
Reducetimesabout5to 10min.
per sideforcut-upchicken.
Brusheachsidewithmelted
butter.Broilwithskinsidedmn
fmt andbroilwithdoorclosed.
c
2-3
1/2-1
Spaceevenly.PlaceEnglish
muffinscut-side-upandbrush
withbutterifdesired.
c
3-5
B
13-16
Donot
turn
over.
Cutthroughbackofshell,sp~d
open.Brushwithmeltedbutter
beforebroilingandafterhalfof
broilingtime.
B,C
5
5
Handleandturnverycarefully.
Brushwithlemonbutterbefore
andduringcookingif desired.
Preheatbroilertoincrease
browning.
Hamslices(450°) l-in.thick
Precooked
B
8
8
Inc= times5-10min.perside
for 1%-in.thickorhomecured.
Porkchops
WellDone
2( Min.)
2 (l-in.thick),
about1lb.
B
B
10
13
4-5
9-12
Slashfat.
2(1inch)
about10-12oz.
2 (ll/zinch),
about1lb.
B
B
B
B
8
10
10
17
4-7
10
4-6
12-14
Slashfat.
hbster tails
(6to8-02.each)
2-4
~sh
l-lb.fillets %to
Yz-in.thick
I
Lambchops
Medium
WellDone
Medium
WellDone
Wieners,
l-lb. pkg.(10)
similarprecooked
sausages,
bratwurst
B, C
16
1-2
Ifdesired,splitsausagesinhalf
lengthwise;cutinto5to6-in.
pieces.
6, TurnOVENTEMP knobto
OFF.Removebroilerpan from
~-~>mpartment
anclservefood
i~n.w~ediate~
y. Leavepan outside
~.’t.?r.pafl~fnent
to cool.
-----“..———— ———..—
—.——
.—.—
..—
——
Care and Cleating
(see cleaning Guide on page20.)
Propercare andcleaningare
importantso yourrangewillgive
youefficientand satisfactory
service.Followthesedirections
carefullyin caringfor it to help
assuresafeandpropermaintenance.
m Yom
m
P!T
WGE
m
OF m.
Whenthe rangeis cool, washthe
top,frontand, if exposed,the sides
withmildsoapandwater.Neveruse
anyharshabrasivesor cleaning
powdersthatmayscratchor mar the
paintedsurface.Wnsethe surface
withcleanwateranddry witha sofi
cloth.If youwish, occasionally
applya thin coatof mildcleaning
waxto help protectthe finish.
Porcelain
Coowop
Thereare a numberof precautions
youcan taketo avoidmarringthe
porcelainenameledsurfaceofthe
cooktopandpreventit from
becomingdull. Don’tslideheavy
pansacrossit. If youspillfoods
witha lot of acid(tomatoes,
sauerkraut,fruitjuices, etc.)or
foodswith highsugarcontent,
cleanthemup as soonas possible.
If allowedto set, thesefoodscould
causea dull spot. Also,no matter
howstubbornthe foodstain,never
useharshabrasivecleansers.They
couldpermanentlydamagethe
enamelsurface.Werecommenda
cleansersuchas “SoftScrub””
brand.
controlRnel
BurnerGmks
It’sa goodideato wipethe.control
panelclem after eachuse ofthe
oven.Fora morethoroughcleaning,
the knobscan be removedby
pullingthemofftheknobstems.
Cleanwith mildsoapandwater,
rinse withcleanwaterandpolish
dry with a softcloth.
Do notuse abrasivecleansers,
strongliquidcleanersor oven
cleanerson the controlpanel—
theywilldamagethe finish.
Gratesshouldbe washedregularly
ad, of course,stir spiilovers.
Washthemin hot, soapywaterand
rinse withcleanwater.Dry the
grateswitha cloth-don’t putthem
backon the rangewet. When
replacingthegrates,be suretheyare
lockedintopositionovertheburners.
Togetrid of burned-onfood,soak
the gratesin a slightlydiluted
liquidcleaner.
Althoughtheyare durable,the
grateswillgraduallylosetheir
shine,regardlessofthe bestcare
youcan givethem. Thisis dueto
their continualexposureto high
temperatures.
Do notoperatea burnerfor an
extendedperiodof timewithout
cookwareon the grate.The finish
on the gratemaychipwithout
cookwareto absorbthe heat.
Brwhed Cbome msh
(Onmodelssoeqtippd)
Cleanthebrushedchrometop
withwarm, soapywateror an allpurposehouseholdcleanerand
immediatelydry it witha clean,
soficloth. Takecareto dry the
surfacefollowingthe “grain.”To
help preventfingermarksafter
cleaning,spreada tin fti ofbaby
oil on the surface.Wipeaway
excessoilwiti a clean, softcloth.
A goodappliancewaxwillhelp
protectthis finish.
LMt-up Coobp
Cleanthe area underthe cooktop
often.Built-upsoil, especially
grease, maycatchfire.
Tomakecleaningeasier,the
cooktopmaybe likd up.
Tor*e the Coowop:
1. Be sureburnersare turnedoff.
2. Removethe gratesand, on
modelsso equipped,the drip pans.
~. Graspthe twofrontburnerwells
and lifi up.
Dud supportrods on somemodels
will holdtie cooktopup whileyou
cleanunderneathit. Othermodels
havea singlesupportrod.
Mter cleating under the Co@ktop
with hot, soapywaterand a clean
cloti, lowerthe cooktop.Be
carefulnot to pinchyourfingers.
,...———-
——
DripMm
(onmodelsso equipped)
Removethe gratesandlift out the
chromedrippans.Washthem in
hot, soapywater.Rinsethemwith
clean, hot waterandpolishthem
dry witha cloth.Neveruse
abrasivecleaneror steelwool—
theywill scratchthe surface.
kstead, soakthe drip pansfor
about20 minutesin slightlydiluted
liquidcleanseror a mild solutionof
monia and water(1/2cup of
ammoniato onegallonof water).
After soaking,washthemin hot,
soapywater.Rnse with cleanwater
and polishwith a clean, softcloth.
-
specialcare
of
Continuous-cleaning
o7enInterior
[f)nmode!ssoequipped)
The conti~iuous-cleaningoven
c}~ansitself whilecooking.The
insideof the oven—top,sidesand
~ac~—isfinishedwitha special
coati}zgwhichcannotbe cleaned
intheusualmannerwithsoap,
detergents,steelwoolpads,
commercialovencleaners,coarse
abrasivepadsor coarsebrushes.
C-seof suchcleansersand/ortheuse
01ovensprayswillcausepermanent
damage.
The specia~
coatingis a porous
cemmicmateriaiwhichis dark in
colorand feelsslightlyroughto the
touch.If-magnified,the surface
t~ouldappearas peaks,valleys,and
sub-surface“tunnels~’Thisrough
finishtendsto preventgrease
spattersfrom forminglittlebeads
o; dropletswhichrun downthe
~ sidewallsof a hard-surfaceoven
~” liner leavingunsightlystreaksthat
_ r~~u~re
hand c~eaning.Instead,.
- ~~nenspatterhitsthe porousflnlsh
= it isdispersedand is partially
absorbed.This spreadingaction
increasesthe exposureof oven
seilto heatedair, ~d makesit
somewhatless noticeable.
Sotimay notdisappearcompletely
and at sometimeafier extended
usage,stainsmayappearwhich
c~lnotbe removed.
Thespecialcoatingwork beston
srnaliamou~~ts
of spatter.Itdoes
IIL’I workwellwithlargerspills,
especiallysugars,eggor dairy
nii.xtures.
Thisspecialcoatingisnot used
~:~~V~~ ~~e~ve~9 ~v~~ ~~~~~~ ~~
dt~orliner. Removetheseto clean
~~-jth
a commercialovencleanerto
preventdamagingthe continuous
cleancoating.
—..
.._.——..
TocleanthecontinuomCleaningoven:
1. Let rangepartscoolbefore
handling.Werecommendrubber
glovesbe wornwhencleaning.
2. Removeshelvesandcookware.
~. Soilvisibilitymaybereducedby
operatingthe ovenat 400°F.Close
thedoorandturn OVENTEMP
knobto 400”F.Timefor at least4
hours.Repeatedcyclesmaybe
necessarybeforeimprovementin
appearanceis apparent.
mMEmER: DURINGTHE
OPEMTIONOFTHEOVEN,THE
DOOR,WINDOW AND ~HER
RANGESU~ACESWILLGETH~
ENOUGH ~ CAUSEBURNS.DO N~
mucH. LETTHERANGECOOL
BEFOREREPLACING
OVENSHELVES.
4.If a spilloveror heavysotig
occurson theporoussurface,as
soonas theovenhascooled,remove
as muchof thesoilas possibleusing
a smallamountof wateranda stiff
bristlenylonbrush.Usewater
sparinglyandchangeit frequently,
keepingit as cleanas possible,and
be sureto blotit up withpaper
towels,cloths,or sponges.Do not
rubor scmb withpapertowels,
clothsor sponges,sincetheywill
leaveunsightlylinton theoven
finish.If waterleavesa whitering
on the finishas it dries,applywater
againandblot itwitha clean
sponge,startingat theedgeof the
ringandworkingtowardthecenter.
Do notme soap, detergent,
steelwoolpads,comereial
ovenc~aner~siliconeoven
sprays,coamepadsor coame
brmha on the poromsurface.
Theseproductswillspot,clog,
andmar the poroussurfaceand
reduceitsabilityto work.
Do not scrap the prous
stiace witha Me orspatula—
theycouldpermanentlydamage
thefinish.
Theovenbottomandthe inside
of the ovendoorhavea porcelain
enamelfinish. Thedoorliftsoff
andthebottomcomesoutfor
cleaningawayfromthe continuouscleaningoven.
.—
Removable
oven Bottom
Theovenbotiorncanbe removedto
makecleaningeasier.
Finger
Slgt
III
Toreplace the ovenbotbm:
1. Slideovenbottomintoovenso
rear tabsfit intoslotsin rear wallof
oven,
2. Graspovenbottomat finger
slotsandpushit backand then
downto hooktie flangeunderthe
frontframe.
~. Fit fronttabsintoslotsin front
frame.
I
‘Foremove:
1. Graspovenbottomat finger
slotson each side.
2. Lififrontedgeof ovenbottom
enoughto raisetabsfrom S1OK
in
frontframe.
~. Pushovenbottombackabout
1/4”to releaseflangefromfront
frame,thenpull out.
The ovenbotiomhas a porcelain
enamelfinish. Tomakecleaning
easier,protecttheovenbottom
fromexcessivespillovers.Thisis
particularlyimportantwhenbaking
a fmit pie or otherfoodswithhigh
acidcontent.Hothit fillingsor
foodsthatare acidin contentsuch
as milk, tomatoor sauerkraut,and
sauceswithvinegaror lemonjuice,
maycausepittinganddamageto
the porcelainenamelsurface.
Toprotecttheovenbottomsurface,
placeapiece of aluminumfoil
slightlylargerthantie bakingdish
or a smallcookiesheeton a lower
shelfor underthebakingdishto
catchanyboilovers.It shouldnot
completelycoverthe shelfas this
wouldcauseunevenheat in the
oven.Aluminumfoilshouldnotbe
placedon the ovenbottom.
If a spilloverdoesoccuron the
ovenbottomallowthe ovento cool
first. Youcan cleanthe bottomwith
soapandwater,a mildabrasive
cleanser,soap-fdledabrasivepads
or causticovencleanerfollowing
manufacturer’sdirections.
Withpropercaze,theporcelain
enamelinteriorwillretainitsgoodIookingfinishfor manyyears.
Soapand waterwillnormally
do thejob. Heavyspatteringor
spi~oversmayrequirecleaning
witha mfldabrasivecleanser.
Soapy,wetpadsmayalsobe used.
Do notallowfoodspi~switha high
sugaror acidcontent(suchas milk,
tomatoes,sauerkraut,fruitjuices
or pie ffiling)to remainon the
surface.Theymaycausea dull
spotevenaftercleaning.
Householdammoniamaymakethe
cleaningjob easier.Place 1/2cup in
a shallowglassor potterycontainer
in a coldovenovernight.The
ammoniafumeswillhelploosen
theburned-ongreaseandfood.
If necessary,youmayuse a caustic
cleaner.Followthepackage
directions.
Cautionsaboutusing
spray-onovencleaners:
Becarefulwherethe ovencleaner
is sprayed.
~ Do not sprayon the electrical
controlsandswitches(onmodelsso
equipped)becauseit couldcausea
shortcircuitandresultin sparting
or fire.
@Do not allowa filmfromthe
cleanertobuilduponthetemperature
sensingbulb—itcouldcausethe
ovento heatimproperly.(Thebulb
is locatedat theto~ of tie oven.)
Carefilly wipethebulb cleanafier
eachovencleaning,beingcarefil
notto movethebulb as a change
in its positioncouldaffecthow
the ovenbakes.
@Do not sprayanyovencleaner
on the ovendoor,handlesor any
exteriorsufice oftheoven,wood
or paintedsurfaces.The cleaner
can damagethesesurfaces.
..-..———.—
—
—
.....
m‘*- ~
Lift-off ovenDoor
BroilerDrawer
Rawe TopBurners
TIICoven door is removableto
makethe interiormoreaccessible.
To remove:
Theholesin theburnersofyour
rangemustbe keptcleanat all
timesfor properignitionandan
even,unhamperedflame.
Youshouldcleantheburners
routinelyandespeciallyafierbad
spilloverswhichcouldclogthese
holes.Burnersliftrightoutfor
cleaning.
Toremovethe door, openit a few
inchesto the specialstopposition
thatwillholdthedooropen. Grasp
firmlyon eachsideandliftthedoor
straightup and offthehinges.
Note:Becarefulnotto placehands
betweenthe springhingeandthe
ovendoor frameas the hingecould
snapbackand pinchfingers.
Washwithhot, soapywater.For
stubbornspots,use a solutionof
vinegarandwater.Do notimmerse
the door in water.
Toreplace the door, makesure the
hingesare in the “out”position.
Positionthe slotsin thebottomof
the door squarelyoverthe hinges.
Thenlowerthe door slowlyand
evenlyoverbothhingesat the same
time. If hingessnapbackagainst
the ovenframe, pullthembackout.
ovenshelves
Ovenshelvesmaybe cleanedwith
a mild abrasivecleanserfollowing
manufacturer’sdirections.Afier
cieaning,rinsetheshelveswithclean
waterand dry with a dry cloth. To
removeheavy,burned-onsoil,soapy
metalpadsmaybe usedfollowing
manufacturer’sdirections.After
scrubbing,washwithsoapywater,
rinseand dry.
1. Whenbroileris cool,remove
rack andpan.
2. Pullthebroilerdraweroutuntil
it stops,thenpushit backin about
oneinch.
3. Grasphandle,lifiandpull
broilerdrawerout(liftthe rollers
locatedunderthe draweroverthe
rollerguidestopsin therange).
To replace:
1. Put the rollersunderthebroiler
drawerbehindtherollerguide
stopsin therange.
2. Holdthebroilerdrawerin tie
raisedpositionas youslideit
partwayintothe range.Thenlower
the drawerandpushit completely
closed.
BroilerRn & Rack
Afierbroiling,removethe broiler
rack and carefilly pour offthe
grease.Washand rinsethe rack
in hot, soapywater.
If foodhasburnedon, sprinkle
the rack whilehot withdetergent
and coverwithwetpapertowelsor
a dish cloth.Thatway,burned-on
foodswill soakloosewhilethe
mealis beingserved.
Do not storea soiledbroilerpan
and rack in the ovenor broiler
compartment.
Note:A screwholdseachof
the burnersin placeto keepthem
fromwobblingaroundduring
shipment.Removeanddiscardthe
shippingscrew.Tiltthe burnerto
the rightto releaseits twotabsfrom
slotsin theburnersupportand
movethe burnertowardthebackof
the range.Thisdisengagesit from
the gasvalveat thefrontofthe
range,and it litisouteasily.
Toremoveburned-onfood,soak
theburnerin a solutionof a product
usedfor cleaningtheinsideofcoffee
makers.Soaktheburnerfor 20 to
30 minutes.If thefooddoesn’t
rinseoff completely,scrubit with
soapandwateror a mildabrasive
cleanserand a dampcloth.
Beforeputtingtheburnerback,dry
it thoroughlyby settingit in a warm
ovenfor 30 minutes.Thenplaceit
back in the range,makingsureit is
properlyseatedandlevel.
GENEWLDNCTIONS
~ SoapandWater
@Soap-FWedScouringRd
~ PlasticScouringPad
e DishwasherSafe
Drainfat, coolpanandrackslightly.(Donotlet soiledpanandrackstandinoventocool.)Spriidde
ondetergent.Fillthepanwithwarmwaterandspreadclothor papertoweloverthe rack.bt pan
andrackstandfora fw minutes.Wash;scourif n-sary. Rinseanddry.O~ION: Thebroilerpan
andrackmayalsobecleanedin a dishwasher.
~MildSoapandWater
Pulloffknobs.Washgently,butdonotsoak,Dryandreturncontrolstorange.
@SoapandWater
Washall glasswithclothdampenedin soapywater.Rinseandpolishwitha drycloth.If knobsm
Emoved,donotrdlw watertorundowninsidethesti~ ofglasswhilecleaning,
Metal, kcluding
Chrome~m Strips
andBwhed Chrome
Coohtop
~SoapandWater
~ ~~ USEs&lWOO~,
PorcelainEnameland
Wnted Sutiac&
* PaperTmel
Outsideof men Mr
Wash,rinseandthenpolishwitha drycloth.
abrasives,ammonia,acidsor
commercialovencleaners
DQ N~
USEovencleaners,
cleansingpowdersorharsh
abrasives.
Avoidcleaningpowdersor harshabrasiveswhichmayscratch
the surface.
Ifacidsshouldsp~ onthe rangewhileit is hot, usea drypaper
towelor clothto wipeuprightaway.Whenthe sufice has
cooled,washandrinse.
%r otherspills,suchasfatsmatterings,
etc., washwithsoapand
waterwhencooledandthenrinse.Polishwithdry cloth.
e SoapandWater
~ N~ USE
ovencleanem,
cleansingpowdersorharsh
abmsives.
Usesoapandwatertothoroughlycleanthetop,sidesandfront
oftheovendoor,
Onnon-self-cleaning
ovens,wipedoorwithsoapandwater.
Rinsewell.
NSoapleftondoorlinercauseaadditionalstaimwhen
theovenis reheated.
SheIvea
@SoapandWater
*Soap-FilledScouringPad
*CommercialOvenCleaner
Yourshelvescanbe cleanedbyusinganyor all mentionedmaterials.Rinsethoroughlyto removeall
materialsaftercleaning.NCYTE:
Somecommercialovencleanerscausedarkeningand
discoloration.Whenusingfor firsttime,testcleaneronsmallpartof shelfandcheckfor
discolorationbeforecompletelycleaning.
SurfaceBurner
Gmtes
@SoapandWater
KI
Soap-Fiiied
ScouringPad
(Non-metallic)
Liftoiltwhencool.Soak5 to 10minutesif desiredin solutionof warmwateranddishwasher
detergent.Scourwithmaterialsmentionedhereto removeburned-onfoodparticles.
SufiaceBmers
~Solutionfor Cleaning
bside ofCoffeeMakers
gSoapandWater
~MildAbrasiveCleanser
~DampCloth
Wipeoffburnerheads.If heavyspilloveroccurs,removeburnersfromrange(seepage 19)andsoak
themfor20 to 30minutesin solutionofhotwaterandproductforcleaninginsideofcoffeemakers,
suchas [email protected] sofldoesnotrinseoffcompletely,scrubburnerswithsoapandwateror a
mildabrasivecleanseranda dampcloth.Dryburnersina warmovenfor30minutesbefore
returningthemto therange,
e SoapandWater
~Soap-FilledScouringPad
@on-metallic)
~ PlasticScouring%d
~DishwasherSafe
Coolpanslightiy.SpriMe ondetergentandwashor scourpanwithwarmwater.Rinseanddry.In
addition,panmayalsobe cleanedin thedishwasher.
@DryCloth
@Soapand Water
e
OvenLiner
(CAUT?ON:
Whenoven
is in use,lightbulbscan
becomewarmenoughto
breakif touchedwith
moistcloti ortowel.
Whencleaning,avoid
touchingwarmlamps
withcleaningcloths.
mseebelow
Removeovendoor-s= page19.DON~ placedoorunderrunningwater,or immerse.Usesame
directionsforcleaningas forOvenLiner,below.
@SoapandWater
* Commercial
OvenCleaner
~ Soap-FilledScouringM
a PlasticScouringPad
Coolbeforecleaning.Frequentwipingswithmildsoapandwater(particularlyaftercookingmeat)
willprolongtimebetweenmajorcleanings.Rinsethoroughly.Soapleftonlinercancausestains.
For heavyaoiI,usenon-abrasivecleanerandfollowlabelinstructions,usingthinlayerofcleaner.
Useof rubberglovesis wommended, Wipe
or rublightlyonstubbornspots.Wipeoffanycleaner
thatgetsonthermostatbulbfoundin backor onside,neartopofoven.
Theovenbottompanelcanbe removedforcleaning(seepage 18).Usesamedirectionsforcleaning
as forOvenLinerabove.
*Spillageof marinades,fruitjuices, tomatosaucesandbastingmaterialscontainingacidsmaycausediscoloration,SDillovers
shouldbe wipedup immediately
.. .
*’
o5’eEl
Tllermos@t
Adjwtnlent
The temperaturecontrolin your
newovenhasbeencarefullyadjusted
to provideaccuratetemperatures.
However,if this ovenhasreplaced
oneyouhaveusedfor severalyears,
youmaynoticea differencein the
degreeof browningor the lengthof
timerequiredwhenusingyour
favoriterecipesbecauseoven
temperaturecontrolshavea tendency
to “drift” overa periodofyears.
Beforeattemptingto havethe
temperatureofyournewoven
changed,be sureyouhavefollowed
thebakingtimeand temperatureof
therecipecarefully.Then, after
youhaveusedthe ovena fewtimes
andyoufeelthe ovenis toohot
or toocool, thereis a simple
adjustmentyoucan makeyourself
on the OVENTEMPknob.
Pullthe knoboff the shafiandlook
at the backside. Thereis a discin
thecenterof the knobskirtwitha
seriesof marksoppositea pointer.
1
i
I
Loosen only the
locking screws
6 Note position of
pointer to marks
before adjustment
Note to whichmark thepointeris
pointing.Tomakean adjustment,
carefidlyloosen(approximately
oneturn), but do not completely
removethe twoscrewsthatholdthe
skirtto the knob.Hold the knob
biadein onehand and the outer
skirtin the otherhand.
Toraise the oventemperature,
movethepointerin the directionof
ihearrowfor WISE. Tolowerthe
temperature,movethe pointerin
thedirectionof arrow for LOWRR.
—. Eachmark will changethe oven
.— temperatureapproximately20°F.
.-:--~llesuggestthat youmakethe
P_..%
. _’~1
1+;!c[j
‘.,<--.~,.
-/’ ustmentonelmarkfrom the
----/,”
,... ..
..<.—.-”
--------
originalsettingandcheckoven
performancebeforemakingany
additiond adjustments.
After the adjustmentis made,
press skirt and knobtogetherand
retightenscrewsso theyare snug,
butbe carefillnotto overtighten.
Re-installknobon rangeand
checkperformance.
Note:Afier an adjustmenthas
been madeto the OVENTEMP
knob,OFF and BROILwillnot
lineup withthe indicatormark on
the controlpanelas theypreviously
did. This conditionis normaland
willnot createa problem.
ovenBurner
Nr Mjtiment Shut&r
The air adjustmentshutterfor the
ovenburner regulatesthe flowof
air to the flame.
The shutterfor theovenburner
is near the backwallof the oven
behindthe broilerdrawer.
surface Burner
Mr Adjtiment
Shutkm
An air adjustmentshutterfor each
surfaceburner regulatesthe flowof
air to the flame.
When the right amountof air
flowsintothe burner,the flame
willbe steady,relativelyquietand
haveapproximately3/4.”sharpblue
cones.This is usuallythe casewith
fa.cto~preset shuttersettings.
Withtoo muchair,the flamewill
be unsteady,possiblywon’tburn all
the wayaround,and willbe noisy,
soundinglikea blowtorch.
Toreachthe shutter,remove
the broilerdrawer(page19).
Toadjustthe flowof air to the
burner,loosenthePhdlipshead
screwandrotatethe shutterto
allowmore or lessair into the
burner tubeas needed.
Withriotenoughair,youwon’tsee
any sharpblueconesin the flame,
YOU
may seeye~owtips, and soot
mayaccumulateon potsandpans.
I
Air adjustment shutter
The air adjustmentshuttersset on
the hood of the valvesandare
positionedon the burnertubesby
frictionfit.
Toadjustthe flow of airto the
burners,applya blade-type
screwdriveragainstthefriction-fit
shuttersand push to adjustthe
shutters,allowingmoreor less air
intothe burner tubesas needed.
Todetermineif the burnerflame
is proper~lighttheburner. The
flameshouldhave1/2”to 3/4”blue
coneswith no yellowtipping,and
shouldnot extendout overthe
baffleedges.
—..
-*<:-~ ._.
-—
;g{FEQuestiom?
.——
-..—
---------UseThk Bob#emSolver
_m._..
.
T—. _
.
.—~
-
—.
..~==;
“——=——
PROBLEM
POSSWLECAUSEND/OR mAT TODO
mP BURNERS
Do NOTLIGHT
OR Do Nm
BURNEVENLY
@Pflotsare not lit. On modelswithstandingpilot,lift cooktopandholdlightedmatch
nextto pilotopeningbetweenfrontandrear burners(page8). Onmodelswithelectric
ignition,makesureelectricalplugis pluggedintoa livepoweroutlet.
@Burnerholeson the sideor aroundthetopofburnermaybe clogged.Removeburners
andcleanthemwitha.safetypin or paperclip.Makesureyoudo noterdargetheholes.
@Burnem.maynotbe fittedcorrectlyontothe mountingbrackets.Removeandreinstafl
.m
thempr~pegiy.
BURNERSHAVE
YELLOWOR
YELLOW-TIPPED
FLAMES
.,
@) YeNowtips on inner
(c) Sofi blae fiwes–
~~(A)Yguoi’fi*esC* fOrse~ice
cones——
NormalforLP gas
Normalfor natu~algas
~‘K~~~r ‘fl@6slooklike(A), call for service.Normalburnerfiam~sshouldlb~k
.
like(B)or (~),,dependingon thetypeof gasyouuse.
@‘With
i~.
ye~owtippingon inrierconesis normal.
:’ ,~” , ‘
,,~
. . gas,some
. .
BURNERFLAMES
VERYLARGE
OR YELLOW
OVENDOESN~
COOKPROPERLY
@If rangeis-cunnected
to”LPg%,checkall stepsin the Inptilation hstructions., ‘‘; ,, ~
.-,..
.,
.,. , ~..
..
,,
.,. ,.,,
.
. . .
ca~filarybulb (locatedin upperportionof oven)is in chrrect ‘~~
~ @Makeshre&e&ostat
.,,
position,not~pu~hifig.uven
sidesand notcoatedwithfiything, ‘
:~ ‘; ~ .. ~ ~
,,
. .
@Alurn.imlrn
foilbeingusedimproperlyin oven. ~
* oven ventblockedon top ofrange.
~Incoti~t cookwarebeingused.check
eachcookingsection“forcootime tips“or
~
.
recommendaiiotis.
{,
,,
~Oventittom notsecurelyseatedin position.
‘‘
~.,:’ ,~-. .
.,
‘~OVENCQ~RQL knobsetincorrectlyor not~urnedon,
‘‘.
~~~,
~. .
,,
* Checkkomtio~baking,roastingandbroilingproblemsonpag~s‘U-15.’:, ‘, ..
CLOCKDOES
NOT WOK
(on modelsso equipped)
~~nge elec”ticalplug mustbe securelyseatedin alive poweroutlet.Checkforblown
..
r, ‘
fise or trippedcircuitbreaker.
OVENLIGHTDOES ‘
Nm COMEON
(on modelsso equipped)
@BulbMaybeloosebr ,burnedout.
‘
@Electric~,plugmustbe pluggedinto a livepoweroutlet.
STRONGODOR
@bproper tir/$as ratioin oven.Adjustovenburner air shutter.
*‘Anodorhorn the’tisula~~onaroundthe ove~liner is normalfor $e first fewtimes
~.
otienis used, Thisis temporary.
. .
.
——
If YouNeedservice
To obtainservice,seeyourwarranty
on thebackpageof thisbook.
We’reproudof our serviceand
wantyouto be pleased.If for some
reasonyouare not happywiththe
serviceyoureceive,hereare three
stepsto followfor furtherhelp.
FIRST,contactthe peoplewho
servicedyourappliance.Explain
whyyouare not pleased.In most
cases,thiswill solvethe problem.
NEXT,if youare stillnotpleased,
writeall thedetails-including
yourphonenumber—to:
Manager,ConsumerRelations
GE Appliances
AppliancePark
Louisville,Kentucky40225
FINALLY,if yourproblemis still
not resolved,write:
MajorAppliance
CorlsumerActionPanel
20 NorthWackerDrive
Chicago,Illinois60606
23
.— -
YOURGENERALELECTRIC
Save
RANGE
WARRANTY
proof of originalpurchasedatesuchasyoursalesslip or cancelled checkto establishwarrantyperiod.
WHAT
Is COVERED
FULL ONEYEAR WARRANTY
Foroneyearfromdateof original
purchase,we will provide,freeof
charge,partsandservicelabor
in yourhometo repairor replace
anypart of the range thatfails
becauseof a manufacturingdefect.
WHAT [S ~m COVERED
~SeWiCe
triPstOYOUr
hornetO
teachyouhowto usethe product.
ReadyourUSeand Care material.
If you.thenhaveanyquestions
aboutoperatingthe product,
pleasecontactyourdealeror our
ConsumerAffairsofficeatthe
addressbelow,or call,toll free:
GEAnswerCenter@
800.626.2000
consumerinformationservice
Thiswarrantyis extendedto
the originalpurchaserand any
succeedingownerforproducts
purchasedfor ordinaryhomeuse
in the48 mainlandstates,Hawaii
andWashington,D.C.InAlaskathe
warrantyisthe sameexceptthatit is
LIMITEDbecauseyoumustpayto
shipthe productto theserviceshop
or fortheservicetechnician’stravel
coststoyourhome.
All warrantyservicewill,be provided
by our FactoryServiceCentersor
by ourauthorizedCustomerCare”
servicersduringnormalworking
hours.
LookintheWhiteor YellowPages
of yourtelephonedirectoryfor
GENERALELECTRICCOMPANY,
GENERALELECTRICFACTORY
SERVICE,GENERALELECTRICHOTPOINTFACTORY
SERVICEor
GENERALELECTRICCUSTOMER
CARE@
SERVICE.
~ Replacementof housefusesor
resettingof circuitbreakers.
~ Failureofthe productif it is used
for otherthan its intendedpurpose
or usedcommercially.
~ Damageto productcaused
by accident,fire,floodsor acts
of God.
WARRAN~R ISNOTRESPONSIBLE
FORCONSEQUENTIALDAMAGES.
~ Improperinstallation.
If you havean installationproblem,
contactyourdealeror installer.
Youare responsiblefor providing
adequateelectrical,gas,exhausting
and otherconnectingfacilities.
Somestatesdo notallowthe exclusionor limitationof incidentalor consequentialdamages,sothe abovelimitationor exclusion
maynotapplyto you.Thiswarrantygivesyouspecificlegalrights,andyoumayalsohaveotherrightswhichvaryfromstateto state.
To knowwhatyourlegalrightsarein yourstate,consultyourlocalor stateconsumeraffairsofficeor yourstate’sAttorneyGeneral.
W~~~n~Or: General Electric Company
if ffutiher help 1sneeded concerning this warranty, write:
Manager–Consumer Atiaim, GE Appliances, Louisville, KY 40225
JGBS03EK
JGBS03PK
JLBS03PK
JGSS05GEK
JGSS05GPK JGBS15PK
JGSC08GEK JGBS15GPK
JGBS15EK JLBS15GEK
JGBS15GEK