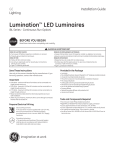
Download GE DI Series Round Wall Wash Installation Guide
Transcript
Installation Guide
GE
Lighting
Lumination LED Luminaire
TM
(DI Series)
BEFORE YOU BEGIN
Read these instructions completely and carefully.
WARNING/AVERTISSEMENT
RISK OF ELECTRIC SHOCK
• Turn power off before inspection, installation or removal.
• Properly ground electrical enclosure.
RISK OF ELECTRIC SHOCK
• Follow all NEC and local codes.
• Use only UL approved wire for input/output connections.
Minimum size 18 AWG or 14 AWG for continuous runs.
RISQUES DE DÉCHARGES ÉLECTRIQUES
• Coupez l’alimentation avant d’’inspecter, installer ou déplacer le luminaire.
• Assurez-vous de correctement mettre à la terre le boîtier d’alimentation électrique.
RISQUES D’INCENDIE
• Respectez tous les codes NEC et codes locaux.
• N’utilisez que des fils approuvés par UL pour les entrées/sorties de connexion. Taille minimum 18 AWG ou 14 AWG pour les rangées continues.
Save These Instructions
Use only in the manner intended by the manufacturer. If you have any questions, contact the manufacturer.
Prepare Electrical Wiring
Electrical Requirements
• The LED driver must be supplied with 120V for DIXXXXXXX1VXX fixtures, 277V for DIXXXXXXX2VXX fixtures, and 347V for DIXXXXXXX3VXX fixtures, 50/60 Hz and connected to an individual properly grounded branch circuit, protected by a 20 ampere circuit breaker. Use min. 75°C supply conductor.
Grounding Instructions
• The grounding and bonding of the overall system shall be done in accordance with National Electric Code (NEC) Article 600 and local codes.
imagination at work
Unit Installation
1
Fixture
Hole Size
4 in. round fixture
5 in. (126mm) diameter hole
6 in. round fixture
6½ in. (165mm) diameter hole
4 in. square fixture
5½ in. x 5½ in. (140mm x 140mm)
6 in. square fixture
7 in. x 7 in. (178mm x 178mm)
Cut the appropriate size hole into
ceiling tile (see table at right).
T-Grid
T-Grid
2
Slide hanger bars through
adjustable mounting brackets.
3
Option A: Mount fixture by
attaching hanger bars to
T-Grid ceiling (BH3 SKU 94890).
3
Option B: Mount fixture with ½”
EMT conduit.
Note: Supplied by 3rd party.
4
Adjust fixture height to be
flush with ceiling and secure
by tightening both adjustable
mounting bracket wingnuts.
5
Dust off any particles that may
have adhered to connection
points and heat sink during
installation process with a dry
cloth or compressed air. Twist
Infusion™ downlight module
into holder.
6
Slide reflector into the fixture.
Verify reflector trim is flush with
ceiling. Repeat Step 4 if trim is
not flush.
For wall wash reflectors, position
reflector so that light is directed
towards wall.
Electrical Connections
0-10V dimming
controller (optional)
Connect the black (line) of the AC line to the black 120V, 277V,
or 347V wire. Connect the white (neutral) wires of the AC line
to the white wires using the provided 18-12 AWG push-in
connectors. Connect the green wire to the ground screw.
From
module
holder
Thermal
protector
Optional: If using a 0-10V dimming controller, connect
matching-colored wires together.
Risk of damage: Make sure that supply connection, light
fixture wiring, and dimming cables are connected to proper
driver inputs. Wrong connection may cause damage to the
product.
Must use UL approved conduit fittings for all enclosure
box connections to prevent wire cuts by sharp edges and
excessive strain on wiring.
Wiring the Thermal Protector
AC line
0-10V Dimming Lighting Controller (optional)
0-10V wiring diagram
THERMAL
PROTECTOR
120V
Line (black)
DRIVER
Ground (green)
Blue
Black
120V
White
Line
Neutral (white)
(1-10) + (violet)
Neutral
DRIVER
Ground
(0-10V) (0-10V) +
(1-10) - (gray)
Common
Make appropriate connections to the output wires of the
LED driver using twist-on wire connectors. Follow lighting
controller installation instructions.
THERMAL
PROTECTOR
277V
DRIVER
NOTE: For 0-10V dimming SKUs.
Red
Black
277V
White
Lutron Ecosystem Lighting Controller (optional)
Ecosystem Wiring Diagram
EcoSystem (purple)
Common
EcoSystem (purple)
Line (black)
THERMAL
PROTECTOR
347V
See Note
Neutral (white)
E1
E2
L
DL
DRIVER
N
Line
White
Neutral
Black
Common
347V TRANSFORMER
Black
347V Input
DRIVER
Black
Red
Violet
Ground (green)
Note: DL, for use with 3-wire fluorescent control, (Lutron System)
Troubleshooting
Symptom
Solution
Luminaire does not light
• Check input voltage and check power supply input/output connections.
• Check circuit breaker.
• Check that the color of the supply side wires match the color of the wires they are
connected to.
• Check that the LED driver connector is fully engaged to the LED light engine connector.
• Check that the LED light engines are connected at the junction between the two
luminaires.
Luminaire is dim
• Dimming wire connection shall be checked and if connection is not proper, reconnect it.
If wire is harmed, replace it with an intact one. Also check that dimming wires are not in short circuit.
• Check that LED module is firmly seated in module holder and twisted in tightly.
Luminaire does not dim
• Check dimming wire connection.
Through Wiring
Lumen Level
Maximum number of fixtures
1000, 1500, 2000 lumen
30
3000, 4000 lumen
20
15A Circuit
Minimum Spacing Requirements
a) Center to center of adjacent luminaries
24”
(b) Top of luminaire to overhead building member
2.5”
(c) Luminaire center to side of building member
12”
This device complies with Part 15 of the FCC Rules. Operation is subject to the following two conditions: (1) This device may not cause harmful
interference, and (2) this device must accept any interference received, including interference that may cause undesired operation. This Class
[A] RFLD complies with the Canadian standard ICES-003. Ce DEFR de la classe [A] est conforme á la NMB-003 du Canada.
Note: This equipment has been tested and found to comply with the limits for a Class A digital device, pursuant to part 15 of the FCC Rules.
These limits are designed to provide reasonable protection against harmful interference when the equipment is operated in a commercial
environment. This equipment generates, uses, and can radiate radio frequency energy and, if not installed and used in accordance with the
instruction manual, may cause harmful interference to radio communications. Operation of this equipment in a residential area is likely to
cause harmful interference in which case the user will be required to correct the interference at his own expense.
Fixture intended for commercial use only. Use only in non-insulated applications.
GE Lighting • 1-888-MY-GE-LED
(1-888-69-43-533)
• www.gelighting.com
GE Lighting Solutions, LLC is a subsidiary of the General Electric Company. The GE brand, logo, Lumination are trademarks of the General Electric Company.
© 2015 GE Lighting Solutions, LLC. Information provided is subject to change without notice. All values are design or typical values when measured under laboratory conditions.
IND077-022315


