1
Installation Guide
GE
Lighting
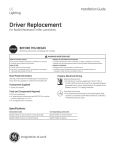
Remote Driver Enclosure
(For EP and EL Series)
Features
• For remote location application
• Suitable for dry or damp locations
BEFORE YOU BEGIN
Read these instructions completely and carefully.
WARNING/AVERTISSEMENT
RISK OF ELECTRIC SHOCK
• Turn power off before inspection, installation or removal.
• Properly ground electrical enclosure.
RISK OF FIRE
• Follow all NEC and local codes.
• Use only UL approved wire for input/output connections.
Minimum size 18 AWG.
RISQUES DE DÉCHARGES ÉLECTRIQUES
• Coupez l’alimentation avant d’’inspecter, installer ou déplacer le luminaire.
• Assurez-vous de correctement mettre à la terre le boîtier d’alimentation électrique.
RISQUES D’INCENDIE
• Respectez tous les codes NEC et codes locaux.
• N’utilisez que des fils approuvés par UL pour les entrées/sorties de connexion. Taille minimum 18 AWG.
Save These Instructions
Provided in the Package
Use only in the manner intended by the manufacturer.
If you have any questions, contact the manufacturer.
•
•
•
•
Prepare Electrical Wiring
Electrical Requirements
• The LED driver must be supplied with 120-277 VAC, 50/60 Hz (in 120-277V application).
• For model code: EL-DKIT360-S-347V and EP-DKIT400-S-347V, the unit must be supplied with 347 VAC, 60 Hz (in 347V application).
• Connected to an individual properly grounded branch circuit, protected by a 15 or 20 ampere circuit breaker. Use min. 75°C supply conductor.
Grounding Instructions
• The grounding and bonding of the overall system shall be done in accordance with National Electric Code (NEC) Article 600 and local codes.
Power supply - rated 120-277V, 50/60Hz
Grounding screw and washer
For model code EP-DKIT400UEVVA and EL-DKIT360-S-LN use Lutron Ecosystem 0-10V interface
For model code EP-DKIT400-S-347V and EL-DKIT360-S-347V Transformer GETR480/277-250W
Tools and Components Required
• #2 Phillips head screwdriver
• UL Recognized conduit connections per NEC/CEC for nominal conduit trade sizes ½” or ¾”
• UL Recognized wire connectors
Optional
If using a dimming controller, connect matching-colored
wires together.
Risk of Damage
Make sure that supply connection, light fixture wiring, and
dimming cables are connected to proper driver inputs. Wrong
connection may cause damage to the product.
Must use UL approved conduit fittings for all enclosure box
connections to prevent wire cuts by sharp edges and excessive
strain on wiring.
imagination at work
Driver Installation (EP-DKIT400 and EL-DKIT360-S)
Wiring Diagrams
Dimming Type: 1-10V
X
VIOLET-WHITE DALI/PROG
VIOLET (0-10V) +, DALI/PROG
GREY (0-10V) –
COMMON
RNTC
RSET
PSU
Light
Engine
BLUE-WHITE
BLACK-WHITE
YELLOW
+
RED
RED +
Line BLACK
–
BLACK
BLUE –
Neutral WHITE
X
X
X
Remote Switch
1-10V
(Optional)
(0-10V) –
(0-10V) +, DALI/PROG
GND
N
L
Dimming Type: DALI
COMMON
RNTC
RSET
VIOLET-WHITE DALI/PROG
VIOLET (0-10V) +, DALI/PROG
X
GREY (0-10V) –
PSU
Light
Engine
+
–
BLACK
X
X
X
Line BLACK
RED +
BLUE –
RED
BLUE-WHITE
BLACK-WHITE
YELLOW
Neutral WHITE
(0-10V) +, DALI/PROG
DALI/PROG
GND
N
L
Remote Switch
DALI
(Optional)
Electrical Connections
Remove cover
1/4-20 screws
1
Remove driver enclosure cover. Carefully remove
knockout for AC line input wires.
2
Install driver enclosure to a suitable structural member
using two ¼-20 screws.
AC line
From
luminaire
To dimming
controller
(optional)
3
4
First connect the black (line) and white (neutral) wires
of the AC line to the black and white wires of the power
supply using 18-24AWG (0.82-2.08mm2) twist-on wire
connectors. Next connect the luminaire wires to the blue
and red wires of the power supply. Connect the green
wires to the ground screw.
Replace electrical enclosure cover. Enclosure cover is on
top for installation.
Driver Installation (EP-DKIT400-LN and EL-DKIT360-S-LN)
Wiring Diagram
White
White
Orange
Black
AC line
Lutron Interface
GND (Green-Yellow)
Neutral (White)
Line (Black)
EcoSystem Link E1
EcoSystem Link E2
GND
N
Switched Hot/Out
Constant Hot/In
EcoSystem
Digital Link
Violet/White
DALI
DALI/0-10V
0-10V
Violet
Grey
0-10V
Output
–
+
Red
Blue
Red
Black
PSU
Line
Neutral
Black
White
+
–
Light Engine
Electrical Connections
1/4-20 screws
1
See previous steps 1 and 2.
2
Carefully place enclosure cover next to electrical
enclosure. Follow the wiring diagram, insert stripped wires
into Lutron interface connector as described in next step.
a) Grey
c) Green-yellow
d) White
e) Orange
b) Violet
AC line
Black
EcoSystem line
3
Connect Driver wires to Lutron interface as follows:
a) Driver 0-10V grey wire to Lutron grey connector.
b) Driver 0-10V violet wire to Lutron violet connector.
c) One green-yellow wire to Lutron green connector.
d) One Driver white wire to Lutron white connector.
e) Driver orange wire to Lutron orange connector.
4
Push out appropriate size knockout tabs and install
approved conduit connectors for both the AC and
EcoSystem lines.
6
After completing connections, replace enclosure cover
and screw down M4 screws and lock washers. Make sure
screws are tight and cover is secured.
E1 and E2
5
Connect AC line to black, white and green wires from
Lutron interface with twist-on wire caps. Connect
EcoSystem bus wires to the two purple Lutron
connectors (Link E1 and E2).
Next connect the luminaire wires to the blue and red
wires of the power supply. Connect the green wires to
the ground screw.
Driver Installation (EP-DKIT40D-S-347V and EL-DKIT36D-S-347V)
Wiring Diagrams
Dimming Type: 1-10V
X
VIOLET-WHITE DALI/PROG
VIOLET (0-10V) +, DALI/PROG
GREY (0-10V) –
COMMON
RNTC
RSET
PSU
Light
Engine
BLUE-WHITE
BLACK-WHITE
YELLOW
+
RED
RED +
Line BLACK
–
BLACK
BLUE –
Neutral WHITE
(0-10V) –
(0-10V) +, DALI/PROG
GND
N
L
Transformer
X
X
X
Remote Switch
1-10V
(Optional)
Dimming Type: DALI
VIOLET-WHITE DALI/PROG
VIOLET (0-10V) +, DALI/PROG
X
GREY (0-10V) –
PSU
Light
Engine
+
–
RED
BLACK
RED +
BLUE –
COMMON
RNTC
RSET
BLUE-WHITE
BLACK-WHITE
YELLOW
X
X
X
Line BLACK
Neutral WHITE
(0-10V) +, DALI/PROG
DALI/PROG
GND
N
L
Transformer
Remote Switch
DALI
(Optional)
Electrical Connections
To dimming
controller
(optional)
AC line
From
luminaire
1/4-20 screws
1
See previous steps 1 and 2.
2
First connect the black (line) and white (neutral) wires of
the AC line to the black and red wires of the transformer
using 18-24AWG (0.82-2.08mm2) twist-on wire
connectors. Next connect the luminaire wires to the blue
and red wires of the power supply. Connect the green
wires to the ground screw.
3
Replace driver enclosure cover. Enclosure cover is on top
for installation.
Troubleshooting
Symptom
Solution
Luminaire does not light
• Check input voltage and check power supply input/output connections.
• Check circuit breaker
Luminaire is dim
• Maximum recommended supply wire length is exceeded.
Luminaire is blinking
• Ensure power supply temperature does not exceed its maximum rating.
• Refer to the tc point located on power supply.
This device complies with Part 15 of the FCC Rules. Operation is subject to the following two conditions: (1) This device may not cause harmful
interference, and (2) this device must accept any interference received, including interference that may cause undesired operation. This Class [A] RFLD
complies with the Canadian standard ICES-003. Ce DEFR de la classe [ A ] est conforme à la NMB-003 du Canada.
Note: This equipment has been tested and found to comply with the limits for a Class A digital device, pursuant to part 15 of the FCC Rules. These
limits are designed to provide reasonable protection against harmful interference when the equipment is operated in a commercial environment. This
equipment generates, uses, and can radiate radio frequency energy and, if not installed and used in accordance with the instruction manual, may cause
harmful interference to radio communications. Operation of this equipment in a residential area is likely to cause harmful interference in which case the
user will be required to correct the interference at his own expense.
GE Lighting • 1-888-MY-GE-LED
(1-888-69-43-533)
• www.gelighting.com
GE Lighting Solutions, LLC is a subsidiary of the General Electric Company. The GE brand, logo, Lumination are trademarks of the General Electric Company. USG and Logix are trademarks of USG Interiors, LLC.
© 2013 GE Lighting Solutions, LLC. Information provided is subject to change without notice. All values are design or typical values when measured under laboratory conditions.
IND084-101113