1
g
GEH-5750D
GE
Lighting Solutions
INSTRUCTIONS
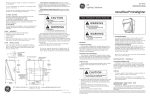
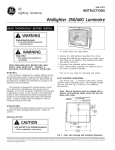
Flat Top Decasphere ® Luminaire
READ THOROUGHLY BEFORE INSTALLING
WARNING
Risk of electric shock
• Turn power off before servicing
– see instructions
Make all electrical connections in accordance with
the National Electrical Code and any applicable
local code requirements.
Verify that supply voltage is correct by comparing
it to nameplate.
Replace power fuses only with fuses of the same
type and ratings.
INSTALLATION
Step 1
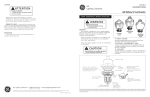
A. Drill pole per Fig. A if a square pole or Fig. B if a
round pole.
Fig. A
GENERAL
This luminaire is designed for use in outdoor applications and must adhere to 25°C Max ambient temperature
limitation. Install and maintain it according to the
following recommendations.
CAUTION
Unit will fall if not installed properly
• Follow installation instructions
Fig. B
These instructions do not purport to cover all details or variations in equipment nor to provide for every possible contingency to be
met in connection with installation, operation or maintenance. Should further information be desired or should particular problems arise
which are not covered sufficiently for the purchaser’s purposes, the matter should be referred to GE Lighting Solutions.
B. Mount frame and nut plate assembly to pole with (2)
3/8” bolts and lockwashers. If a round pole, install
Round Pole Adaptor.
C. Attach luminaire to frame feeding power leads
through Frame tube. Secure with (2) 3/8” bolts and
lockwashers.
D. Install cover over Frame and secure with #8-32 Screw.
E. Splice power leads to incoming power. Install pole
cap.
Strain relief for incoming power must be provided in the
pole top by the customer.
RELAMPING, CLEANING AND LIGHT DISTRIBUTION
CHANGES
CAUTION
To Install
Locate ballast between hooks on support. Slide tray up
under these hooks till 1/4” bolts can engage keyhole
slots, push in and up until tray is sitting on ledges of
support. Tighten 1/4” bolts and install two electrical
disconnects.
Risk of burn
• Allow lamp/fixture to cool before
handling
NOTE: Use only lamps specified on nameplate. Observe
lamp manufacturer’s recommendations and restrictions
on lamp operation, particularly ballast type, burning
position, etc.
To Open Lens Door
Loosen (3) 1/4 turn fasteners by turning CCW. Phillips
screw driver required. Lens door is hinged on pole side.
To Remove the Lens Door
Open to the position shown, lift and slide forward.
To Remove or Rotate the Reflector
Reflector may be removed to gain access to ballast and
wiring, or rotated 90° CW or CCW to orient light distribution by loosening screws at each of (4) keyhole slots in
reflector plate assembly.
Assembly is tethered to luminaire. If it is necessary to
detach assembly, remove screw that holds tether to
reflector plate.
WIRING
IF SINGLE VOLTAGE:
All single voltage ballasts are pre-wired such that user
need only connect the supply conductors.
IF MULTIVOLT: (120/208/240/277)
Connect the ballast lead with the insulated terminal to the
desired voltage terminal as indicated on the ballast
terminal nameplate.
IF MULTIWATT:
Multiwatt ballasts are available in various combinations of
wattage. See wiring instructions on wiring tag inside the
luminaire.
Removal of ballast tray may be required for access to
ballast terminals. Follow instructions for ballast tray
removal and installation as outlined above. Move
insulated terminal to appropriate ballast terminal
specified on wiring tag inside luminaire.
CLEANING INSTRUCTIONS AND CAUTIONS
BALLAST TRAY REMOVAL AND INSTALLATION
Open lens door and remove Reflector plate assembly per
instructions above,
To Remove
Disconnect incoming power and lamp leads at the
electrical disconnects. Loosen (2) 1/4” bolts, pull tray out
and drop to clear keyhole slots.
CAUTION: Be prepared to support the weight of the
ballast during removal.
g
Internal
Should internal reflector system require cleaning, use
only non-abrasive, neutral (pH 6-8) cleaner containing no
chlorinated or aromatic hydrocarbons. Rinse clean and
wipe.
External
Clean glass lens with a mild soap and water solution,
rinse clean and wipe dry.
GE Lighting Solutions • 1-888-MY-GE-LED • www.gelightingsolutions.com
1-88 8 - 6 9 - 4 3 -5 3 3
GE Lighting Solutions is a subsidiary of the General Electric Company. Evolve and other trademarks belong to GE Lighting Solutions. The GE brand and logo are trademarks of the General Electric Company.
© 2011 GE Lighting Solutions. Information provided is subject to change without notice. All values are design or typical values when measured under laboratory conditions.
35-201578-T4 11/99