1
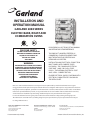
INSTALLATION AND
OPERATION MANUAL
GARLAND 2000 SERIES
ELECTRIC BAKE, ROAST AND
COMBINATION OVENS
FOR YOUR SAFETY:
DO NOT STORE OR USE GASOLINE
OR OTHER FLAMMABLE VAPORS OR
LIQUIDS IN THE VICINITY OF
THIS OR ANY OTHER
APPLIANCE
WARNING:
IMPROPER INSTALLATION, ADJUSTMENT,
ALTERATION, SERVICE OR MAINTENANCE
CAN CAUSE PROPERTY DAMAGE, INJURY,
OR DEATH. READ THE INSTALLATION,
OPERATING AND MAINTENANCE
INSTRUCTIONS THOROUGHLY
BEFORE INSTALLING OR
SERVICING THIS EQUIPMENT
PLEASE READ ALL SECTIONS OF THIS MANUAL
AND RETAIN FOR FUTURE REFERENCE .
THIS PRODUCT HAS BEEN CERTIFIED AS
COMMERCIAL COOKING EQUIPMENT AND
MUST BE INSTALLED BY PROFESSIONAL
PERSONNEL AS SPECIFIED .
INSTALLATION AND ELECTRICAL CONNECTION
MUST COMPLY WITH CURRENT CODES:
IN CANADA - THE CANADIAN ELECTRICAL
CODE PART 1 AND / OR LOCAL CODES .
IN USA – THE NATIONAL ELECTRICAL CODE
ANSI / NFPA – CURRENT EDITION .
ENSURE ELECTRICAL SUPPLY CONFORMS WITH
ELECTRICAL CHARACTERISTICS SHOWN ON
THE RATING PLATE .
Users are cautioned that maintenance and repairs must be performed by a Garland authorized service agent
using genuine Garland replacement parts . Garland will have no obligation with respect to any product that has been
improperly installed, adjusted, operated or not maintained in accordance with national and local codes or installation
instructions provided with the product, or any product that has its serial number defaced, obliterated or removed,
or which has been modified or repaired using unauthorized parts or by unauthorized service agents .
For a list of authorized service agents, please refer to the Garland web site at http://www .garland-group .com .
The information contained herein, (including design and parts specifications), may be superseded and is subject
to change without notice .
GARLAND COMMERCIAL INDUSTRIES
185 East South Street
Freeland, Pennsylvania 18224
Phone: (570) 66-1000
Fax: (570) 66-90
Part#4520414
# 4520414(01/28/08)
(01/28/08)
Part
GARLAND COMMERCIAL RANGES, LTD .
1177 Kamato Road, Mississauga, Ontario L4W 1X4
CANADA
Phone: 905-624-0260
Fax: 905-624-5669
Enodis UK LTD .
Swallowfield Way, Hayes, Middlesex UB 1DQ ENGLAND
Telephone: 081-561-04
Fax: 081-848-0041
© 2005 Garland Commercial Industries,
Inc .1
Page
IMPORTANT INFORMATION
WARNING:
This product contains chemicals known to the state of california to cause cancer and/or birth defects
or other reproductive harm. Installation and servicing of this product could expose you to airborne
particles of glass wool/ceramic fibers. Inhalation of airborne particles of glass wool/ceramic fibers
is known to the state of California to cause cancer.
Page Part # 4520414 (01/28/08)
TABLE OF CONTENTS
IMPORTANT INFORMATION . . . . . . . . . . . . . . . . . . . . . . . . . . . . . . . . . . . . . . . . . 2
SPECIFICATIONS . . . . . . . . . . . . . . . . . . . . . . . . . . . . . . . . . . . . . . . . . . . . . . . . . . . . 4
Model Description. . . . . . . . . . . . . . . . . . . . . . . . . . . . . . . . . . . . . . . . . . . . . . . . . . . . . . . . . . . . . . . 4
Loading Charts . . . . . . . . . . . . . . . . . . . . . . . . . . . . . . . . . . . . . . . . . . . . . . . . . . . . . . . . . . . . . . . . . . 4
INTRODUCTION . . . . . . . . . . . . . . . . . . . . . . . . . . . . . . . . . . . . . . . . . . . . . . . . . . . . 5
Uncrating. . . . . . . . . . . . . . . . . . . . . . . . . . . . . . . . . . . . . . . . . . . . . . . . . . . . . . . . . . . . . . . . . . . . . . . . 5
Rating Plate. . . . . . . . . . . . . . . . . . . . . . . . . . . . . . . . . . . . . . . . . . . . . . . . . . . . . . . . . . . . . . . . . . . . . . 5
INSTALLATION . . . . . . . . . . . . . . . . . . . . . . . . . . . . . . . . . . . . . . . . . . . . . . . . . . . . . 5
Clearances. . . . . . . . . . . . . . . . . . . . . . . . . . . . . . . . . . . . . . . . . . . . . . . . . . . . . . . . . . . . . . . . . . . . . . .
Assembly Instructions. . . . . . . . . . . . . . . . . . . . . . . . . . . . . . . . . . . . . . . . . . . . . . . . . . . . . . . . . . . .
Steam Injection (Optional Extra). . . . . . . . . . . . . . . . . . . . . . . . . . . . . . . . . . . . . . . . . . . . . . . . . .
Electrical Connections . . . . . . . . . . . . . . . . . . . . . . . . . . . . . . . . . . . . . . . . . . . . . . . . . . . . . . . . . . .
Break-In Procedure. . . . . . . . . . . . . . . . . . . . . . . . . . . . . . . . . . . . . . . . . . . . . . . . . . . . . . . . . . . . . . .
5
5
6
6
6
OPERATION AND MAINTENANCE . . . . . . . . . . . . . . . . . . . . . . . . . . . . . . . . . . . . 7
Thermostat Calibration. . . . . . . . . . . . . . . . . . . . . . . . . . . . . . . . . . . . . . . . . . . . . . . . . . . . . . . . . . . 7
Cleaning of Core Plates. . . . . . . . . . . . . . . . . . . . . . . . . . . . . . . . . . . . . . . . . . . . . . . . . . . . . . . . . . . 7
Part #4520414 (01/28/08)
Page SPECIFICATIONS
Model Description
All models are 55 1/2” wide x 36” deep (1410mm x 914mm)
MODEL
HEIGHT
DESCRIPTION
E2001
51” (1295mm)
Single Deck Bake Oven
E2011
66” (1676mm)
Double Deck Bake Oven
E2111
66” (1676mm)
Triple Deck Bake Oven
E2005
51” (1295mm)
Single Deck Roast Oven
E2055
67” (1702mm)
Double Deck Roast Oven
E2555
78” (1981mm)
Triple Deck Roast Oven
E2015
63” (1800mm)
One Bake and One Roast Combination Oven
E2115
70” (1778mm)
Two Bake and One Roast Combination Oven
E2155
74” (1879mm)
One Bake and Two Roast Combination Oven
Loading Charts
LOADING CHART
Model
Nominal Amperes Per Phase
Total Kw
Loading
3 Phase
240V
Single Phase
280V
240V &
208V
X
Y
Z
X
Y
Z
240V
208V
E2001
6.2
11
15
23
12.5
17.3
26
26
30
E2011
12.4
32
26
32
37
30
37
52
60
E2111
18.6
45
45
45
51.5
51.5
51.5
77.5
90
E2005
6.2
11
15
23
12.5
17.3
26
26
30
E2055
12.4
32
26
32
37
30
37
52
60
E2555
18.6
45
45
45
51.5
51.5
51.5
77.5
90
E2015
12.4
32
26
32
37
30
37
52
60
E2115
18.6
45
45
45
51.5
51.5
51.5
77.5
90
E2155
18.6
45
45
45
51.5
51.5
51.5
77.5
90
Page Part # 4520414 (01/28/08)
INTRODUCTION
Your new equipment should be given regular care and
maintenance. Periodic inspections by your dealer or a
qualified service agency are recommended.
This product has been certified as commercial cooking
equipment and must be installed by professional personnel
as specified.
Uncrating
Carefully remove unit from crate or carton. All packing
material should be removed from units. On stainless steel
units the protective material covering the stainless steel
should be removed.
After uncrating, immediately check the equipment for visible
signs of shipping damage.
If such damage has occurred, do not refuse shipment, but
contact the shipper and file the appropriate freight claims.
Rating Plate
When corresponding with the factory or your local
authorized factory service center regarding service problems
or replacement parts, be sure to refer to the particular unit
by the correct model number (including the prefix and suffix
letters and numbers) and the warranty serial number. The
serial plate is attached to the inside of the control panel of
the lower oven section contains this information.
Before attempting the electrical connection, the rating
pate should be checked to ensure that the unit’s electrical
characteristics and the supply characteristics agree.
INSTALLATION
Clearances
The 2000 E series ovens must be installed with a minimum
of zero (0”) clearance to the sides and back to walls of
combustible material.
Assembly Instructions
1. Open the bottom section of the crate and the leg crate.
Proceed with oven assembly as follows:
a. Fasten lefts to base using 1/4” hex head bolts, locking
washers and nuts provided.
b. Ensure the insulation is evenly spread and in the
proper position on the top of the lower unit.
c. Place an 1” x 4” x 60” (22mm x 100mm x 1525mm)
long piece of lumber across the rear top of the oven
to prevent the stacks from misaligning.
e. Remove the piece of lumber and lower the rear of the
oven section into position.
f. Secure the left and right out side front corners of
the oven section using No. 1-24 x 1/2” flat head bolts
supplied.
g. Secure the oven backs using six 10-1/2” truss head
sheet metal screws.
2. To connect the section feed wires to the main oven
terminal block, refer to the wiring diagram attached to
the main terminal block.
3. With the oven(s) in the desired position, use a sprint level
and level unit four ways: across front and back, and down
left and right edges.
4. When two pizza ovens (2001P) are stacked, remove the
top louvers on the bottom oven. Assemble as illustrated
in instructions found with the stacking plates.
d. Raise the center of top oven section up and on to the
lower oven section, sliding the oven section forward
until the main sides of the section engage behind the
oven front.
Part #4520414 (01/28/08)
Page INSTALLATION Continued
DO NOT under any circumstances; connect the vent stack
of the oven directly to the flue pipe or a vent system. If this
is done, it seriously decreases the efficiency and will cause
uneven heating of the section. If an outside flue connection
must be made, a suitable hood placed 12” (305mm) above
the oven flue must be provided to prevent direct suction of
the air through the oven sections.
Steam Injection (Optional Extra)
Steam is often used for baking of hard rolls, French bread,
Vienna bread and other hard crust breads. The steam
provided inside the oven is a cloud of atmospheric steam or
water vapor.
One quarter broiler h.p. for each bake deck is required at
the steam inlet of the deck. It is important that the steam
provided to the oven is lower pressure (3 lbs. To 5 lbs per
square inch), (2100 kg/m² to 3500 kg/m²) and condensate
must be drained from the steam line before it enters the
oven.
Electrical Connections
The installation and connection should comply with current
codes. In Canada - The Canadian Electrical Code Part 1 and/or
local codes. In the U.S.A. - The National Electrical Code ASNA/
NFPA - current edition.
Before attempting the electrical connection, the rating
plate should be checked to ensure that the unit’s electrical
characteristics and the supply characteristics agree.
The unit has been wired as specified on the factory order
and the rating plate is stamped with the information. If it is
necessary to change the phase, refer to the wiring diagram
attached to the main terminal block, or refer to the rating
plate.
Electrical connection may be made though the knockout at
the rear of bottom of the unit to the terminal block located
directly behind the switch panel on the main bottom. Hinge
switch panel open.
The steam will be sufficiently saturated at this pressure to
provide the vapor cloud effect that is needed to cover the
top of the product.
For the supply connection use suitable wire for 60° C.
When steam is required in the deck, it is recommended that
the steam valve at the deck is only open a half-turn for 3
to 5 seconds. The time will be determined by the operator.
Allowing too much steam to enter the oven will produce a
soggy product.
It is strongly recommended that the 2000 Series ovens
supplied with core plates be put through a break-in period
to eliminate possible warpage of the core plates caused by
moisture absorption.
Break-In Procedure
This action need only be carried out once providing the
ovens are used daily, however, if the ovens are left idle for an
extended period of time allowing the core plates to absorb
moisture, the following procedure must be again carried out.
Turn the top and bottom heat selector switched to HI, set the
thermostat to 300°F (149°C) maximum and allow the oven to
operate (without any product in the oven), for approximately
8 hours.
Page Part # 4520414 (01/28/08)
OPERATION AND MAINTENANCE
Top and bottom heating units are each operated by a three
heat heavy duty reversible switch. An oven thermostat with
pilot light is also provided. The thermostat maintains the
temperature and the switches determine the source of the
heat.
2. Turn oven temperature control dial to 400°F (204°C). In
order to allow the oven temperature to stabilize, the oven
control must be allowed to cycle twice before taking a
test reading
2 Turn the bottom heating unit to HIGH.
3. Check temperature reading control just as it cycles ‘OFF”
as indicated by the cycling pilot. If the temperature doe
not read within 15°F (8°C) of the dial setting, recalibrate
as follows
3. Set the oven thermostat to the desired temperature. The
pilot light will now come ON.
4. Carefully remove the thermostat dial, not disturbing the
dial setting.
4. When the desired temperature is reached, the pilot light
will go OFF. At this time the top heating unit switch may
be turned OFF or set as desired.
5. Hold the dial shaft steady and with a screwdriver, turn the
calibration screw, located inside the dial shaft clockwise
to decrease and counter-clock wise to increase the
temperature. I.E. 1/4 turn = 35°F (19.5°C).
1 Turn the top heating unit to HIGH.
5 The bottom heating unit switch may be left at HIGH or
adjusted as desired.
Thermostat Calibration
All electric ovens are equipped with snap action thermostats.
Field calibration is seldom necessary and should not be
resorted to unless experience with cooking results definitely
provides that the control is not maintaining the temperature
to which the dial is set. To check the oven temperature when
calibrating, use only a reliable mercury thermometer or
preferably an oven pyrometer.
1. Place the thermocouple of the test instrument or reliable
mercury thermometer in the center of the oven.
Part #4520414 (01/28/08)
6. Replace the thermostat dial and repeat steps 1 through 3
to verify that the correct adjustment has been made.
Cleaning of Core Plates
1. Set the thermostat dial to 550°F (288°C) at the end of the
cooking day and allow to cycle for one hour.
2. When the oven has cooled the residue will have
carbonized and can be removed by sweeping with a stiff
wire brush.
3. Stubborn residue can be loosened with a scraper.
Page