1
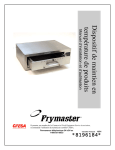
Heated Pass Through
Installation, Operation, Service, and Parts Manual
Frymaster, a member of the Commercial Food Equipment Service Association, recommends
using CFESA Certified Technicians.
*8195931*
24-Hour Service Hotline
1-800-551-8633
Price: $6.00
819-5931
April 2003
HEATED PASS THROUGH
INSTALLATION, OPERATION, SERVICE, AND PARTS
1.
Parts Ordering and Service Information
Parts orders may be placed directly with your local Frymaster Factory Authorized Service Center
(FASC)/Distributor. A list of Frymaster FASC/ Distributors was included with the unit when
shipped from the factory. Your nearest FASC can also be found on Frymaster’s Web site,
Frymaster.com. or you can contact the Frymaster Service Department at 1-800-24-FRYER or 1-318865-1711.
To speed up your order, the following information is required:
Model Number _________________________
Serial Number _________________________
Voltage_______________________________
Item Part Number_______________________
Quantity Needed _______________________
Service may be obtained by contacting your local Frymaster Authorized Service Center/Distributor.
Service information may be obtained by calling the Frymaster Service Department. The following
information will be needed in order to assist you quickly and efficiently:
Model Number _________________________
Serial Number _________________________
Nature of theProblem_____________________________________________________________
______________________________________________________________________________
______________________________________________________________________________
Also include any other information which may be helpful in solving your service problem.
RETAIN AND STORE THIS MANUAL IN THE EQUIPMENT MANUAL FOR FUTURE USE.
2.
General
The Heated Pass Through or HPT is designed to hold assembled sandwiches. By circulating heated
air evenly across the open staging area, the unit keeps sandwiches hot without drying or cooking.
3.
Installation/Set Up
Upon arrival, inspect the HPT for concealed damage. Immediately report any damage to the
delivering freight company. Claims must be filed within 15 days after receipt of the unit.
Make sure that the unit is placed on an even surface and that the area surrounding the HPT is free of
clutter that would interfere with airflow.
Install the Filter Screen
The filter screen is designed to prevent debris from
entering the cowl assembly and clogging the
blower. Slip the part over the vent opening on the
ON/OFF switch side of the unit. The filter screen
snaps into position. If it is equipped with an
optional holding screw, tighten the screw to pull the
filter screen snug into position.
1
The filter screen snaps into place on the air-intake
tower.
HEATED PASS THROUGH
INSTALLATION, OPERATION, SERVICE, AND PARTS
Power Requirements:
•
Voltage – 208 VAC
•
Frequency - 60 Hz
•
Single Phase
•
20 amp Service
4.
Operation
1. Plug the unit into the power source. *
2. Press the ON/OFF rocker switch to the ON
position.
3. Place product in the HPT in accordance with the
restaurant’s established procedures.
THIS APPLIANCE IS EQUIPPED WITH
A GROUNDING PLUG FOR YOUR
PROTECTION AGAINST SHOCK
HAZARD AND MUST BE PLUGGED
INTO A PROPERLY GROUNDED
RECEPTACLE. DO NOT CUT OR
REMOVE THE GROUNDING
PRONG.FROM THIS PLUG.
Air Tower
Heated air flows
from the air tower
across the plate
and into the cowl.
Plate
ON/OFF
Switch
Power Cord
Cowl
Air flow through the HPT
Blower
Plate
2
HEATED PASS THROUGH
INSTALLATION, OPERATION, SERVICE, AND PARTS
5.
Maintenance
Daily
1. Remove all product and turn the unit off.
2. Allow the unit to cool.
3. Use a wet sanitized cloth to clean the heated surfaces of the unit. Use a nylon pot brush on hard
to remove stains or food items.
Monthly
Remove the filter screen and clean it with a wet sanitized cloth. Dry the screen thoroughly before
reinstalling it in the unit.
6.
Service Procedures
6.1
Adjusting the Temperature
A.
Disconnect the unit from the electrical power source. This is imperative. Line voltage
is accessable on the controller board with the unit connected to the power source.
B.
A potentiometer regulates the heat produced by the air heater. It is mounted on the
HPT’s controller board and is accessible through a slot in the left side of the cowl
assembly (see Figure 1 below). NOTE: The filter screen must first be removed.
Figure 1: The potentiometer is accessible through the vent in the cowl
assembly indicated by the arrow.
C.
Use a long, narrow-blade screwdriver to turn the potentiometer clockwise to increase
the temperature; turn it counterclockwise to lower the temperature.
Figure 2: The potentiometer, indicated by the arrow, is adjusted using
a narrow-blade screwdriver.
D.
Reconnect the HPT to the power source and check temperature.
3
HEATED PASS THROUGH
INSTALLATION, OPERATION, SERVICE, AND PARTS
6.2
Replacing the Temperature Probe or High Limit Thermostat
A.
B.
C.
D.
E.
F.
G.
H.
I.
J.
Disconnect the unit from the electrical power source.
Turn the unit on its side. Remove the five screws from the chassis bottom.
Set the unit down on its base.
Carefully lift the cowl assembly upward until it is clear of the blower assembly, then
lay it on the table behind unit.
The air tower has two sections – a removable front section and the fixed rear section.
The front section must be removed to access the temperature probe and high limit
thermostat. A pair of slotted brackets, one at each end, holds the front section in place.
Insert a 5⁄16-inch nut driver through the air outlet opening and turn the nuts on the
outside studs counterclockwise to loosen them. Do not remove the nuts.
Grasp the bottom flange of the tower and push upward while rotating the bottom
outward to disengage the two slotted brackets on the front section from the studs on the
rear section.
Cut the leads of the failed component near the component.
If replacing the temperature probe, unplug the probe connector from the controller
board., but leave the leads in place for now.
Remove the failed component from its mounting and install the replacement component
in its place.
Securely connect the leads from the new component to the old leads cut in Step G on
the air tower side of the unit. Grasp the old leads at the opposite end and gently pull
them through the unit. NOTE: It is easier to pull one lead through at a time.
If the leads become disconnected while pulling them through, it will be necessary to
remove the plate. Refer to Steps G through J in procedure 6.3 below.
K.
L.
M.
N.
6.3
Once the new wires have been pulled through, replace the terminals cut off in Step J.
If replacing the temperature probe, use a pin pusher to disconnect the old leads from the
plug and connect the new wires. Reconnect the plug to the controller board.
If replacing the high limit, connect the leads as shown in the wiring diagram (polarity
does not matter).
Reassemble the unit by reversing Steps A through F.
Replacing the Air Heater
A.
B.
C.
D.
E.
F.
Disconnect the unit from the electrical power source.
Turn the unit on its side. Remove the five screws from the chassis bottom.
Set the unit down on its base.
Carefully lift the cowl assembly upward until it is clear of the blower assembly, then
lay it on the table behind unit.
The air tower has two sections – a removable front section and the fixed rear section.
The front section must be removed to access the temperature probe. A pair of slotted
brackets, one at each end, holds the front section in place. Insert a 5⁄16-inch nut driver
through the air outlet opening and turn the nuts on the outside studs counterclockwise
to loosen them. Do not remove the nuts.
Grasp the bottom flange of the tower and push upward while rotating the bottom
outward to disengage the two slotted brackets on the front section from the studs on the
rear section.
4
HEATED PASS THROUGH
INSTALLATION, OPERATION, SERVICE, AND PARTS
G.
H.
I.
J.
K.
L.
M.
N.
O.
P.
Q.
R.
S.
T.
U.
V.
W.
6.4
Disconnect the plate ground wire from the push-on terminal on the back wall of the air
tower.
Using a thin, sharp knife inserted between the plate and the HPT chassis, carefully cut
the silicon adhesive between the plate and the sides of the chassis.
Pry up one end of the plate, lifting it away from the chassis. NOTE: The plate is held
in place by acrylic tape and it will be difficult to break the bond between the plate and
the chassis.
Remove the acrylic tape from the frame to prevent rebounding while servicing the unit.
Remove the three screws in the air heater shield and remove the shield to expose the
heater.
Disconnect the air heater leads from terminal J2 on the controller board and from the
solid state relay (see Wiring Diagram on Page 7), and lift the heater from its bracket.
Install the replacement heater and connect the leads to terminal J2 on the controller
board and to the lower left terminal of the solid state relay.
Apply new acrylic tape to the HPT chassis, then stand the plate on its edge against the
blower side of the unit.
Once the plate is properly aligned with the chassis, gently lower it into place.
Reconnect the plate ground wire to the push-on terminal on the back wall of the air
tower.
Inspect the gaskets on the bottom of the cowl assembly and air tower assembly for
damage. If necessary, remove the old gasket material, clean the surfaces thoroughly,
and apply new gaskets.
Slip the slotted brackets on the front section of the air tower assembly up and under the
nuts on the tower mounting screws. Push inward and down to ensure that the front
section is properly seated.
Check for gaps in the seal between the front section of the air tower assembly and the
plate. If a gap is present, remove the front section and apply a second gasket over the
one already in place and reseat the front section.
Once the front section is properly positioned and seated, tighten the nuts on the
mounting studs to pull it flush against the back of the tower assembly.
Carefully lower the cowl into position and check for a proper seal between the cowl and
the plate. Install another gasket over the one already in place if there are gaps between
the base of the cowl and the plate.
Carefully turn the unit on its side and reinstall the five screws removed in Step B.
After the cowl is in place, reseal around the edges of the plate with RTV #108 silicone
rubber compound, P/N 811-0511.
Replacing the Blower Assembly
A.
B.
C.
D.
E.
Disconnect the unit from the electrical power source.
Remove the cowl, front section of the air tower, and the plate from the unit per Steps B
through J in procedure 6.3 above.
Remove the four 5⁄16-inch nuts that hold the blower bridge in place and remove the
bridge from the unit.
Remove the four 5⁄16-inch nuts securing the blower assembly to the chassis. NOTE: A
magnetized nut driver makes this task much easier.
Lay a piece of cardboard on the plate to prevent scratching it, then lift the blower
assembly out of the unit and set it on the plate.
5
HEATED PASS THROUGH
INSTALLATION, OPERATION, SERVICE, AND PARTS
F.
G.
H.
I.
J.
K.
L.
M.
N.
O.
P.
Q.
R.
6.5
Cut the wire ties on the wiring bundle and, one at a time, disconnect the wires from the
failed assembly and connect the corresponding wire from the replacement motor.
Position the replacement motor over the mounting studs and secure it in place with the
5
⁄16-inch nuts removed in Step D.
Reinstall the blower bridge and secure it in place with the 5⁄16-inch nuts removed in Step
C.
Apply new acrylic tape (P/N 811-1042) to the HPT chassis, then stand the plate on its
edge against the blower side of the unit.
Once the plate is properly aligned with the chassis, gently lower it into place.
Reconnect the plate ground wire to the push-on terminal on the back wall of the air
tower.
Inspect the gaskets on the bottom of the cowl assembly and air tower assembly for
damage. If necessary, remove the old gasket material, clean the surfaces thoroughly,
and apply new gaskets.
Slip the slotted brackets on the front section of the air tower assembly up and under the
nuts on the tower mounting screws. Push inward and down to ensure that the front
section is properly seated.
Check for gaps in the seal between the front section of the air tower assembly and the
plate. If a gap is present, remove the front section and apply a second gasket over the
one already in place and reseat the front section.
Once the front section is properly positioned and seated, tighten the nuts on the
mounting studs to pull it flush against the back of the tower assembly.
Carefully lower the cowl into position and check for a proper seal between the cowl and
the plate. Install another gasket over the one already in place if there are gaps between
the base of the cowl and the plate.
Carefully turn the unit on its side and reinstall the five screws removed in Step B.
After the cowl is in place, reseal around the edges of the plate with RTV #108 silicone
rubber compound, P/N 811-0511.
Replacing Other Electronic Components
A.
B.
C.
D.
E.
F.
Disconnect the unit from the electrical power source.
Turn the unit on its side. Remove the five screws from the chassis bottom.
Set the unit down on its base.
Carefully lift the cowl assembly upward until it is clear of the blower assembly, then
lay it on the table behind unit.
If replacing any component other than the ON/OFF switch, hold the replacement
component next to the component to be replaced, disconnect the wires from the failed
component and connect them to the new component. When all connections have been
made, remove the failed component from its mounting and install the replacement
component.
If replacing the ON/OFF switch, disconnect the wiring and push the switch out of the
chassis. Press the replacement switch into the chassis and reconnect the wiring in
accordance with the wiring diagram.
6
HEATED PASS THROUGH
INSTALLATION, OPERATION, SERVICE, AND PARTS
7.
Wiring Diagram
7
HEATED PASS THROUGH
INSTALLATION, OPERATION, SERVICE, AND PARTS
8
Common Repair Parts List
1
2
4
8
5
3
6
7
11
9
10
12
ITEM
PART #
1
826-1561
2
823-3922
3
810-1724
4
807-3308
5
807-3533
6
807-2820
7
807-2819
8
106-2790
9
826-1549
10
826-1551
11
807-3036
12
826-1959
*
810-2226
*
816-0418
*
811-0511
*
811-1042
* Not illustrated.
COMPONENT
Pad, Leg (pkg of 4)
Divider Assembly
Screen, HPT Filter
Switch, Black ON/OFF Rocker
Relay, 18-Amp Solid State
Block, .25 X 1.25 2-pole Fuse
Fuse, 3ab-314, 20-Amp
Board, HPT Controller
Kit, 208V Heater Replacement (includes heater and acrylic tape)
Kit, 208/240V Blower Replacement (includes blower and acrylic tape)
Probe, HPT Temperature
Kit, HPT High-Limit Replacement (includes high-limit and acrylic tape)
Plate, 22” HPT
Gasket, Cowl and Air Tower (one 2-foot gasket)
Rubber, RTV #108 Silicone
Tape, ½-inch Acrylic 1-Sided (36-yard roll)
8
NOTICE
IF, DURING THE WARRANTY PERIOD, THE CUSTOMER USES A PART FOR THIS ENODIS
EQUIPMENT OTHER THAN AN UNMODIFIED NEW OR RECYCLED PART PURCHASED DIRECTLY
FROM FRYMASTER/DEAN, OR ANY OF ITS AUTHORIZED SERVICE CENTERS, AND/OR THE
PART BEING USED IS MODIFIED FROM ITS ORIGINAL CONFIGURATION, THIS WARRANTY WILL
BE VOID. FURTHER, FRYMASTER/DEAN AND ITS AFFILIATES WILL NOT BE LIABLE FOR ANY
CLAIMS, DAMAGES OR EXPENSES INCURRED BY THE CUSTOMER WHICH ARISE DIRECTLY
OR INDIRECTLY, IN WHOLE OR IN PART, DUE TO THE INSTALLATION OF ANY MODIFIED PART
AND/OR PART RECEIVED FROM AN UNAUTHORIZED SERVICE CENTER.
THE HEATED PASS THROUGH IS NOT SUITABLE FOR OUTDOOR USE. WHEN OPERATING
THIS UNIT, IT MUST BE PLACED ON A HORIZONTAL SURFACE.
THE HEATED PASS THROUGH IS NOT SUITABLE FOR INSTALLATION IN AN AREA WHERE
A WATER JET CAN BE USED. THIS APPLIANCE MUST NOT BE CLEANED WITH A WATER
JET.
FOR YOUR SAFETY
DO NOT STORE OR USE GASOLINE OR OTHER FLAMMABLE VAPORS AND LIQUIDS IN
THE VICINITY OF THIS OR ANY OTHER APPLIANCE.
DO NOT OPERATE OR SERVICE THE HPT SERIES WITHOUT FIRST READING THIS
MANUAL.
DO NOT OPERATE THE HPT UNLESS IT HAS BEEN PROPERLY INSTALLED AND CHECKED.
DO NOT OPERATE THE HPT UNLESS ALL SERVICE AND ACCESS PANELS ARE IN PLACE
AND PROPERLY SECURED.
DO NOT ATTEMPT TO REPAIR OR REPLACE ANY COMPONENT OF THE HPT UNLESS ALL
POWER TO THE UNIT HAS BEEN DISCONNECTED.
USE CAUTION WHEN SETTING UP, OPERATING, OR CLEANING THE HEATED PASS
THROUGH TO AVOID CONTACT WITH HEATED SURFACES.
THIS PAGE INTENTIONALLY LEFT BLANK
Frymaster, L.L.C., 8700 Line Avenue, PO Box 51000, Shreveport, Louisiana 71135-1000
Shipping Address: 8700 Line Avenue, Shreveport, Louisiana 71106
TEL 1-318-865-1711
FAX (Parts) 1-318-219-7140
PRINTED IN THE UNITED STATES
FAX (Tech Support) 1-318-219-7135
SERVICE HOTLINE
1-800-551-8633
Price: $6.00
819-5931
April 2003