1
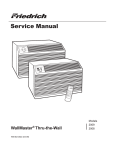
Installation and Operation Manual
Thru-the-wall
Air Conditioners and Heat Pumps
115-Volt: WS08, WS10, WS12
230-Volt: WS10, WS13, WS15, WE10, WE13, WE15, WY09, WY12
WallMaster
920-007-16 (5 -10)
Table of Contents
Your Safety and the safety of others .........................................................................................................................................3
General Information
Economizing Tips ........................................................................................................................................................................ 3
Electrical Data ............................................................ ...................................................................................................................3
Introduction
How to operate your Friedrich room air conditioner ..................................................................................................................4
.
To start unit .............................................................. ......................................................................................................................4
To set mode of operation...............................................................................................................................................................4
To adjust temperature ...................................................................................................................................................................4
To adjust fan speed...
.......................................................................................................................................................................4
To activate Smart Fan....................................................................................................................................................................4
To set hour clock............................................................................................................................................................................4
To set the timer ..............................................................................................................................................................................4
Automatic component protection .................................................................................................................................................5
Using the remote control ..............................................................................................................................................................5
How to clean the air filter ..............................................................................................................................................................6
How to change airfow direction.............................................................. ......................................................................................7
How to cover inner weather panel holes.....................................................................................................................................7
Electrical requirements..................................................................................................................................................................7
Never use an extension cord...................................................
........................................................................................................8
Power cord information..................................................................................................................................................................8
Troubleshooting tips and home maintenance ............................................................................................................................8
Installation instructions for WSD sleeve
Mounting hardware...................................................................................................................................................................... 9
Wall preparation........................................................................................................................................................................... 9
Installation requirements ...................................................
............................................................................................................10
Sleeve installation........................................................................................................................................................................10
WallMaster chassis installation instructions
WS, WE and WY models installation ........................................................................................................................................11
Condensate removal .................................................................................................................................................................12
Alternate drain kits ..................................................... ................................................................................................................12
Warranty ................................................................. ...................................................................................................................13
WELCOME to years of economical comfort
Your new Friedrich Room Air Conditioner has been carefully
engineered and manufactured to give you many years of dependable,
eficient operation, keeping your room at a comfortable temperature
and humidity level. Many extra features have been built into your
Friedrich Room Air Conditioner to assure quiet operation, greatest
circulation of cool, dry air, most flexible selection of function controls,
and high economy of operation.
There are many things you can do in and around your home to save
more money - and even increase the eficiency and long life of your
Friedrich unit. Here are a few examples:
1. Do not block the flow of air to and from the unit - make sure the
louvers are directed to give even distribution of air throughout
the room. Caution: If air is obstructed and/or deflected back
into the air conditioner, this may cause the unit to cycle on and
off rapidly, which could damage your unit.
These are some suggestions for saving money on cooling costs.
Some, however, may not be applicable to your house or area. Check
with your local utility company for more especialized information.
Electrical Data
Model
NEMA No. 5-15P 125 V-15 AMP
WS10, WS13, WS15
NEMA No. 6-15P
250V-15 AMP
WE10, WE13, WE15,
WY09, WY12
NEMA No. 6-20P
250V-20 AMP
WARNING
Electrical Shock Hazard
Make sure your electrical receptacle has the same
configuration as your air conditioner’s plug. If
different, consult a Licensed Electrician.
3. Caulking - air leaks around doors, windows, lighting and
plumbing fixtures can account for as much as 30% of the load
on heating and cooling systems. See that all these areas are
well caulked.
Do not use plug adapters.
Do not use an extension cord.
Do not remove ground prong.
4. Install weather stripping around exterior doors and windows.
Always plug into a grounded 3 prong outlet.
5. Have a fireplace? Be sure the damper is closed during air
conditioner operation.
7. Shade your outside walls (especially on the west) from the direct
sun; most importantly, shade the unit itself. Trees and shrubs
provide natural shading, but make sure they don’t block the air
flow around the unit. If natural shade isn’t present, awnings are
the best solution for shading the unit and the windows. Also,
avoid areas where too much dust or pollen would be drawn
into the air conditioner.
8. Inside the house, use blinds, screens, or drapes on windows
exposed to the sun. They will reduce your cooling needs.
(Lined or insulated draperies will also help cut heating costs
in winter).
9. Make sure your attic area is properly vented. In addition,
consider installing turbine or power ventilators to help remove
hot air from your attic.
10. Keep your Friedrich unit clean. Use a vacuum cleaner
attachment for accessible parts, but take care not to damage
them. Clean the reusable filter at least twice a month.
11. Set the thermostat at a higher temperature - save 5% in energy
usage for each degree of temperature over 72°F.
Circuit Rating,
Breaker or Time
Delay Fuse
WS08, WS10, WS12
2. Adequate insulation - walls, ceilings, and below floors - can save
up to 50% of the cost of cooling in most areas of the country.
6. When it’s time to reroof or repaint the outside of your home,
choose light colors. They reflect heat instead of absorbing it.
Plug Type
Failure to follow these instructions can result in death,
fire, or electrical shock.
Your safety and the safety of others are very important.
We have provided many important safety messages in this manual
and on your appliance. Always read and obey all safety messages.
This is a safety Alert symbol. This symbol alerts you
to potential hazards that can kill or hurt you and
others.
All safety messages will follow the safety alert
symbol with the word “WARNING” or “CAUTION”.
These words mean:
WARNING
Indicates a hazard which, if not
avoided, can result in severe
personal injury or death and damage
to product or other property.
CAUTION
Indicates a hazard which, if not
avoided, can result in personal injury
and damage to product or other property.
All safety messages will tell you what the potential hazard is, tell you
how to reduce the chance of injury, and tell you what will happen if
the instructions are not followed.
NOTICE
followed.
Indicates property damage can
occur if instructions are not
3
How to operate your Friedrich room air conditioner
To start unit
To activate Smart Fan (WY/WE heat-cool models)
If your air conditioner is installed and plugged into a proper receptacle,
it is ready to go. The first time the unit is started, the compressor will
delay for three minutes. See Automatic Component Protection on the
following page.
1
Touch the Power button once. The unit will automatically be in
Cool mode with the temperature set at 75°F (24°C) and the fan
speed at F1, the sleep setting.
To set mode of operation
When you fi rst turn the unit on, it will be in the Cool mode with constant fan.
2
In order to run the fan by itself, do the following:
To set the hour clock
10
NOTE: Set the HOUR CLOCK (Set Hour) before attempting to set
timer functions.
You can set the Start Time and Stop Time a minimum of one hour
apart, and a maximum of 23 hours apart.
On WY/WE heat-cool models, touch the Mode button once to
activate the Fan Only feature. The Fan Only setting will circulate
air in the room without the compressor coming on.
11
After setting the time, press the Set Hour button once (Start
light on). Use the and buttons to select the time that the
unit will START.
Continuing from MoneySaver® mode, touch the Mode button
once to activate the Fan Only feature (WS cool-only models).
12
After selecting the Start Time, press the Set Hour button once.
and
buttons to select the time
(Stop Light on). Use the
that the unit will STOP. After selecting the stopping time, press
the Set Hour button once.
13
Press the Timer On/Off button (light turns on) to activate the
timer function. To deactivate this function, press the Timer On/
Off button once again (light turns off). Once the on and off times
have been selected, they will remain in memory and cycle daily
until changed.
4
Use the Mode button to select either the Cool or MoneySaver ®
function (or Heat for WY/WE heat-cool models)
5
COOLER – Touch the
button to lower the room air temperature.
6
WARMER – Touch the
button to raise the room air temperature.
7
and
buttons at the same time to switch
Press both the
the temperature from Fahrenheit (°F) to Celsius (°C). Repeat
Step 7 to switch from °C back to °F.
To adjust fan speed
Touch the Fan Speed button to see the current setting. Touch
it again to change speed. F1 is the lowest setting (SLEEP
SETTING / LOW), F2 is MEDIUM, and F3 is HIGH.
To activate Smart Fan (WS cool-only models)
9
4
Touch the Set Hour button to see the current setting. The
number that is displayed is the approximate time (hour only).
buttons to change the settings. BE SURE
Use the and
TO SET A.M. AND P.M. ACCORDINGLY. (P.M. is indicated by
a red light in the upper left corner of the display).
To set the timer
To adjust temperature
8
Press the Smart Fan button to activate the Smart Fan. The light
will indicate that this feature is in use.
Smart Fan will adjust the fan speed automatically to maintain the
desired comfort level. For example, if the outside doors in your home
are opened for an extended period of time, or more people enter a
room, Smart Fan may adjust to a higher fan speed to compensate
for the increased heat load. This keeps you from having to adjust
the fan speed on your own.
On WS cool-only models, touch the Mode button once to activate
the MoneySaver ® (WS models only. See item 14 for Money Saver
instructions on WY/WE models).
MoneySaver® is a feature that cycles the fan with the compressor so that the fan does not run all the time. This saves energy
and improves dehumidi cation. MoneySaver® will also run to test
the temperature if the off cycle is too long. Or you may prefer
constant fan for more air movement. (To return to constant fan,
touch the Mode button two more times).
3
9
There is a fourth option, SF, when selecting the fan speed. This is
the SMART FAN function. SMART FAN DOES NOT OPERATE
IN CONJUNCTION WITH THE FAN ONLY MODE.
NOTE: If the unit is unplugged or the power is interrupted, the HOUR
must be reset or the Timer On/Off will not function when desired.
To Activate Money Saver (WY/WE models)
14
Press the Money Saver button to activate the Money Saver
feature. The light will indicate the Money Saver is in use.
MoneySaver® is a feature that cycles the fan with the compressor so that the fan does not run all the time. This saves energy
and improves dehumidi cation. MoneySaver® will also run to test
the temperature if the off cycle is too long. Or you may prefer
constant fan for more air movement. (To return to constant fan,
touch the Mode button two more times).
Digital Control Panels
Using the remote control
To start unit (See Figure 3, page 6)
1 POWER - Press the Power button once. The unit will automatically
start in the mode and fan speed it was last left on.
To set mode of operation
PM
2 COOL - Press the Cool button to automatically switch the operating mode to COOL.
Power
Cool
Fan
Speed
3 FAN ONLY - Press the Fan Only button if you want to run the
fan only.
Money Saver®
Mode
Fan Only
Clock
Timer
On/Off
Set
Hour
4
Start Time
Stop Time
Temp/Hour
5 MoneySaver ® - Press the Money Saver ® button to activate
the MoneySaver® feature. This feature cycles the fan with the
compressor so that the fan does not run all the time.
Figure 1: WS Model cool-only control panel
To adjust temperature
PM
1
Power
2
3
4
8
9
Cool
Smart
Fan
Fan
Speed
Mode
6
Fan Only
Heat
7
Clock
14
13
Money
Saver
Timer
On/Off
Set
Hour
HEAT (WY/WE models only) - Press the Heat button to
automatically switch the operating mode to HEAT.
5
Start Time
Stop Time
Temp/Hour
10 11 12
Figure 2: WY/WE Model heat-cool control panel
6 WARMER - Press the
setting.
Warmer button to raise the temperature
7 COOLER - Press the
setting.
Cooler button to lower the temperature
To adjust fan speed
8 FAN SPEED - Press the Fan Speed button to see the current
setting. Press again to change the fan speed. F1 is the lowest
setting (SLEEP / LOW), F2 is MEDIUM, F3 is HIGH, and SF is
the SMART FAN setting.
To set the hour clock
9 SET HOUR CLOCK - Press the Set Hour
. button once to see the
current clock setting. Continue pressing the button until you
arrive at the current time (Hour only). Minutes are not shown on
the display. Make sure that the A.M. / P.M. setting is correct.
Automatic component protection
Your unit is equipped with Automatic Component Protection.
To protect the compressor of the unit, there is a three minute delay
if you turn the unit off or if power is interrupted. The fan will not be
affected. Also, if you switch from Heat/Cool mode to Fan Only mode, and
switch back to Heat/Cool mode, there is a three-minute delay before the
compressor comes back on.
5
To set the timer
NOTE: You can set the START and STOP times a minimum of one
hour apart, and a maximum of 23 hours apart.
10 TIMER START - Press Start to view the current start time for cooling. Continue pressing the START button until you arrive at the start
time you desire. The start time for cooling will then be set.
Temperature
Cooler
11 TIMER STOP - Press the Stop button. Continue pressing the
STOP button until you arrive at the stop time you desire. The
stop time for cooling will then be set.
Cool
Additional RC1 wireless remote controls can be purchased from your Friedrich dealer.
Power
Heat
Fan
Fan
Money
Only
Speed
Saver®
Timer Operation
On/Off Start
12 TIMER ON / OFF - Press the On/Off button (under Timer
Operation) to activate (light on) or deactivate (light off) the timer.
Once the on and off times have been selected, they will remain
in memory and cycle daily until changed.
NOTE: If the unit is unplugged or the power is interrupted, the Set Hour.
function must be reset or the Timer On/Off function will not work.
Warmer
Stop
Set Hr.
Figure 3
WY/WE heat-cool model remote control
How to clean the air filter
Your Friedrich room air conditioner is equipped with a Permafoam
reusable air filter which is not affected by washing. The filter serves to
remove dust, pollen, and other impurities from the air.
KEEP THE FILTER CLEAN - A clogged, dirty fi lter will reduce the
operating effi ciency of your unit and contribute to frosting of the
indoor coil. Be sure to check the filter at least once a month,
more frequently if conditions warrant. The filter check
procedure is easy, due to the unique design of the Friedrich
DECORATIVE FRONT.
FILTER ACCESS - Remove the INTAKE GRILLE from the
DECORATIVE FRONT frame by grasping it at the upper right and
left side corners. Pull out until the GRILLE is released from the upper
retaining snaps. Tilt down toward you, lift up and out of the bottom
retaining snaps. This will expose the filter. Remove the filter by pulling
it toward you. Wash the filter in hot, soapy water, rinse, squeeze lightly
to remove excess water, shake dry - do not twist - and replace in the
unit on the two support hangers. Replace the INTAKE GRILLE by
positioning the bottom of the GRILLE into the bottom retaining snaps.
Tilt the front up and away from you. Press in lightly on top and the
GRILLE will position itself into the upper retaining snaps.
6
Filter
Figure 4
Intake Grille
How to change airflow direction
The DISCHARGE GRILLE is installed at the factory to provide 45º
upward airflow into the room. (Direction 1 in Figure 5). If a vertical
air flow is desired (Direction 2), the direction can be changed by rotating
the DISCHARGE GRILLE.
WARNING
Electrical Shock Hazard
Unplug the air conditioner.
Use correct circuit protection.
Failure to follow these instructions can
result in death, fire, or electrical shock.
Remove the DISCHARGE GRILLE RETAINER attached with one
screw in the right side of the grille.
Remove the DISCHARGE GRILLE from the retaining slots near the
CONTROLS, and rotate the grille as shown in Figure 5.
the chassis. Only alternating current (AC) can be used. Consult page
3 for the correct type of receptacle for your model.
Reinstall the DISCHARGE GRILLE by placing it in its retaining slots.
Reattach the DISCHARGE GRILLE RETAINER with the retaining
screw. The unit is now ready to operate.
An overloaded circuit will invariably cause malfunction or failure of an
air conditioner, therefore, it is extremely important that the electrical
power and the wiring is adequate. Consult your dealer or power
company if in doubt.
How to cover inner weather panel holes
Two beige plugs are included in the plastic bag taped to the WallMaster
chassis. These plugs may be used to cover the two holes left after
removing the inner weather panel (see Figure 5). The plugs must be
attached before the DECORATIVE FRONT frame is installed.
CIRCUIT PROTECTION - Before installing or relocating your
Friedrich Room Air Conditioner, check the amp rating of the circuit
breaker or "TIME-DELAY" fuse. Refer to the nameplate located on
the air conditioner chassis to determine the correct fuse or circuit
breaker amperage for your model. The rating MUST NOT exceed
the value stated on the nameplate. If the air conditioner is connected
to a circuit protected by a fuse, a "TIME-DELAY" fuse must be
used due to the momentary high current demands when your air
conditioner is started.
Electrical requirements
IMPORTANT: Before you begin the actual installation of your air
conditioner, check local electrical codes and the information below.
Your air conditioner must be connected to a power supply with the same
AC voltage and hertz rating as marked on the nameplate located on
Figure 5
1/4” Diameter Plug
WSD
Sleeve
2
Ro
2
tat
e
2
Airflow
Decorative
Front
MODE L# W S0 7A 10 B
AB123456C3567
1
1
1
Discharge
Grille
Return
Air Grille
7
WARNING
Electrical Shock Hazard
Do not use plug adapters.
Do not use an extension cord.
Do not remove ground prong.
Replace damaged cords with new cord
from manufacturer.
Failure to follow these instructions can
result in death, fire, or electrical shock.
Never use an extension cord
Your Friedrich room air conditioner is equipped with a three-prong
(grounded) plug for your protection against shock hazards and should
be plugged directly into a properly grounded three-prong receptacle.
If you have a two-prong receptacle you will need to have the circuit
replaced by a certi ed electrician with a grounded circuit that meets
all national and local codes and ordinances. Under no circumstances
should you remove the ground prong from the plug. You must use the
three-prong plug furnished with the air conditioner.
NEVER CUT OR REMOVE THE GROUNDING PRONG FROM THE
PLUG.
Power cord information
All Friedrich room air conditioners are shipped from the factory with
a Leakage Current Detection Interrupter (LCDI) equipped power
cord. The LCDI device meets the UL and NEC requirements for cord
connected air conditioners effective August 2004.
To test your power supply cord:
1. Plug power supply cord into a grounded 3 prong outlet.
2. Press RESET (See Figure 6).
3. Press TEST (listen for click; Reset button trips and pops
out).
4. Press and release RESET (listen for click; Reset button
latches and remains in). The power supply cord is ready for
operation.
NOTE: LCDI device is not intended to be used as a switch.
Once plugged in the unit will operate normally without the need to
reset the LCDI device.
If the device fails to trip when tested or if the power supply cord
is damaged it must be replaced with a new supply cord from the
manufacturer. We recommend you contact our Technical Assistance
Line at (800) 541-6645 ext. 845. To expedite service, please have your
model and serial number available.
8
Figure 6
NOTE: Your LCDI device will resemble one of these illustrations.
RESET
TEST
RESET
WARNING
TEST BEFORE EACH USE
1. PRESS RESET BUTTON
2. PLUG LDCI INTO POWER
RECEPTACLE
3. PRESS TEST BUTTON,
RESET BUTTON SHOULD
POP UP
TEST
4. PRESS TEST BUTTON,
FOR USE
DO NOT USE IF ABOVE TEST
FAILS
WHEN GREEN LIGHT IS ON
IT IS WORKING PROPERLY
Troubleshooting tips and home
maintenance
Won’t cool
If the unit operates, but won’t cool, determine if the controls are
properly set. Set the thermost to a cooler position in order to check
control settings. Check the filter and clean it thoroughly, if needed.
Check to see if the vent door is closed.
Check to see if the chassis seal gasket is properly installed (refer to
page 11 for seal gasket installation).
Won’t heat (for heat/cool models only)
If the unit operates, but won’t heat, determine if the control settings are
correct. Adjust the thermostat to a warmer position to determine if it
operates. Also, check the filter and clean it thoroughly, if needed.
Odors in heating (for heat/cool models only)
You may notice a smoke odor the first time the heater element comes
on. This is common in any type of heat system when fi rst turned on
for the winter. The odor comes from dust and other particles that
accumulate during the warm months. The odor will dissipate quickly.
Won’t run
If the unit fails to operate, check to see if the power cord is fi rmly
plugged in. Check for blown fuses, tripped circuit breakers or a
tripped LCDI Device (Refer to LCDI reset instructions in the Power
cord information section). Restore the circuit breaker or replace the
blown fuse with a proper size "TIME-DELAY" fuse. The proper fuse
size is shown on page 3 in these instructions. After restoring the current supply to the unit, wait three minutes before unit will restart.
Frosting of the indoor coil
Certain operating conditions may produce indoor coil frost. During
the cooling operation, a dirty filter or restricted air distribution in
combination with cool, damp weather could cause such an occurrence.
Should the indoor coil frost over while cooling, set the control to FAN
and keep it running until the frost on the coil is gone. Setting the
thermostat to a slightly warmer position will probably keep the coil
from frosting over again.
Cleaning the decorative front
The decorative front of your Friedrich room air conditioner, as well
as the complete cabinet, may be cleaned with warm water and mild
detergent. Under adverse operating conditions, the indoor and outdoor
coils and base pan may require periodic cleaning to maintain eficient
operation. Your Friedrich dealer should be called when this service
is required.
WARNING
Electrical Shock Hazard
Disconnect power before servicing.
Replace all parts and panels before
operating.
Things to know about a WallMaster heat pump
During the heat pump operation, you may notice some functions that
did not occur when the unit was used for cooling:
1. It is common for ice to form on the outdoor coil of your
WallMaster Heat Pump. The ice forms due to moisture in the
outdoor ir passing over cold (below freezing) coil surfaces.
2. When the outdoor coil forms ice, your heat pump will
automatically initiate a defrost. The compressor will stop
and the fan will continue to run. The electric heat will be
turned on to continue warming the room while the outdoor
air defrost the outdoor coil. After the defrost is completed,
the unit will automatically return to the heat pump mode.
3. Steam may be seen rising from the outdoor coil during the
defrost. This is similar to expelling warm breath on a cold
morning.
4. If the outdoor temperature drops below 43°F during heat
pump operation, your WallMaster Heat Pump will automatically switch to electric resistance heat and will continue to
operate in this mode as long as the outdoor temperature
remains at 43º F or below.
Failure to do so can result in death or
electrical shock.
Installation instructions for
WSD sleeve
WARNING
Falling Object Hazard
Not following Installation Instructions for
mounting your air conditioner can result
in property damage, injury, or death.
DESCRIPTION
QTY.
1
SCREW, #12A x 2"
7
Wall preparation
The wall opening required for a WSD SLEEVE is 17 ¼"
high by 27 ¼" wide.
LINTELS must be used in opening of brick veneer and
masonry walls to support the material above the WSD
SLEEVE. The following considerations should also be given:
Inside
Wall
Minimum Of 1" Spacing
Required On All Sides
Of The Unit.
Lintels
⅞" Minimum Beyond Inside
Wall
ITEM NO.
STEP 2
Figure 7
Side View
Minimum Of 24" Required
From Top Of Unit To Ceiling.
Mounting hardware provided
STEP 1
B. A minimum distance of 1" must be allowed on all sides of the unit
to adjacent wall and floor. Where the subbase is required, the
minimum distance from the floor to the sleeve must be 3 ½". To
minimize chances of short cycling of the compressor, the minimum
clearance between the ceiling and the top of the unit should be
24". (See Figure 7).
A. Adjustable SUBBASE (SB) or other unit support must be provided
for panel wall type construction and for walls less than 8" thick.
WSD Sleeve
Drain
Extension
9
1" Minimum
3 ½" For Subbase
5 1/2" Maximum for Subbase
16" Minimum
Beyond Outside
Wall
Outside Wall
9
Installation requirements
Sleeve installation
STEP 1
The WSD SLEEVE should be positioned so that the
DRAIN EXTENSION extends a minimum of 9 16" beyond
the OUTSIDE WALL (See Figure 7).
STEP 1
STEP 2
The WSD SLEEVE must extend a minimum of ⅞" beyond
the INSIDE WALL.
STEP 3
The WSD SLEEVE must be installed level side to side.
STEP 4
The WSD SLEEVE must also be installed with a downward
tilt toward the outside of the building. If a level is placed
so that it rests on the FRONT and BACK UNIT REST as
shown in Figure 8, a properly installed unit provides a ½
bubble slope to the outside of the building.
Figure 8
Raised
Ledge
Back Unit Rest
Level
Front Unit Rest
Slope
NOTICE
SLEEVE projections and leveling precautions
must be observed to prevent the entry of
water into the room.
10
After unpacking the WSD SLEEVE from the carton, remove
the FRONT PANEL. Place the WSD SLEEVE in the wall
opening following the instructions given in the INSTALLATION REQUIREMENTS. Attach the SLEEVE to the
INSIDE WALL by driving two #12A x 2" screws in each side
of the SLEEVE (see Figure 7). Shim at the top of the
SLEEVE, midway between the sides. Drive one #12A x 2"
screw in the top of the sleeve, close to the shim. Install
screws from inside the SLEEVE. If the wall opening is not
framed with wood, use expansion anchor bolts or molly
(toggle) bolts (not provided).
Please note that there will be an excess of two #12Ax2"
screws that will not be used.
STEP 2
Once the SLEEVE has been installed, check the LEVEL
again to be sure the ½ bubble downward tilt is maintained.
Apply shims, if required, to maintain the proper slope.
STEP 3
Caulk the perimeter of the entire opening on the inside and
the outside between the SLEEVE and the WALL.
STEP 4
The front panel removed in Step 1 above must be remounted back in place if masonry work is to be done and/or if the
"WallMaster" CHASSIS is to be installed at a later date.
WallMaster chassis installation
instructions for WS, WE and WY
models
STEP 3
The decorative front is packaged in a separate box inside
the chassis shipping car ton, between the chassis and
the carton. Remove this box and set the box aside until
later.
STEP 4
With the help of an assistant, remove the chassis from
the shipping carton. Be careful not to allow anything to
impact against the hairpins as this may result in damage
to them. With the help of an assistant, lift the chassis by
the basepan and slide it into the sleeve until it contacts
the rear grille. With the chassis in proper position, the
front edge of the basepan must extend out 4 ¾ inches
from the front (side) edge of sleeve.
STEP 5
CHASSIS SEAL GASKET INSTALLATION: After
installing the shell, slide the chassis into the shell stopping
approximately 3" from full insertion. Stuff the chassis seal
gasket one inch deep between the chassis and the shell
CAUTION
Excessive Weight Hazard
Use two or more people when installing
your air conditioner.
Failure to so can resut in back or other
injury.
CAUTION
(see Figure 9, Page 12). Make sure the gasket is installed
beginning from the lower right side corner and extending over the top and down to the lower left side corner.
Then push the chassis all the way into the shell for the
remaining distance so that the plastic front meets the
front edge of the shell.
If foam chassis seal gasket is not installed, the operation
of the unit will be negatively affected. Also, the operation
noise and outside noise will be amplified.
Cut/Sever
Although great care has been taken to
minimize sharp edges in the construction
of your unit, use gloves or other hand
protection when handling unit.
Failure to do so can result in minor to
moderate personal injury.
STEP 1
STEP 2
Check the sleeve to be certain it has been correctly installed
in the wall. Remove the front panel on the WSD SLEEVE.
Remove the rear WEATHER PANEL. Reverse grille.
Place lower edge into sleeve tab (Friedrich logo facing out).
Aligns slots with screw holes. Secure grille with screws.
A.
Check the anchor screws. There should be four
(4) in the WSD SLEEVE (two in each side).
B.
Determine if the sleeve has a downward slope,
to the outside, of ½ bubble on a level. See
page 10 for further details.
C.
Check to be sure the sleeve has been sealed
around all edges with an industrial type
caulking on both the outside and inside to
prevent rain entry.
D.
A sleeve sealing gasket has been provided
in the chassis shipping carton. Remove it
from the carton, peel the protective coating
from the adhesive, and install it in the sleeve
(adhesive down).
STEP 6
Remove the intake grille from the decorative front frame by
grasping it at the upper right and left side corners. Pull out
until the grille is released from the upper retaining snaps.
Tilt it down toward you, lift up and out of the bottom retaining
snaps. Install the decorative front frame in place over the
sleeve opening and attach it to the chassis with four sheet
metal screws as shown in Figure 9, Page 12. Replace
the intake grille by positioning the bottom of the grille
into the bottom retaining snaps. Tilt the front up and
away from you. Press in lightly on top, and the grille will
position retaining snaps. itself into upper
NOTE: Attach the frame to the chassis by installing four (4)
8A-5/8" screws through the slots in the frame and into the holes in
the chassis.
Check the electrical receptacle to see that it conforms to
the requirements for the chassis model to be installed.
See page 3, for the receptacle requirements.
11
Figure 9
Chassis Seal
Gasket
MODEL# WS07A10B
AB123456C3567
Decorative Front
Screws (4)
Return Air
Grille
WARNING
Alternate drain kits
Moving Object Hazard
Replace all panels before operating your air
conditioner.
Failure to do so can result in severe personal
injury or death and damage to product or
other property.
Condensate removal (WS, WE
and WY models)
If you desire to drain condensate from the basepan during unit operation, this unit is provided with a drain nipple that can be attached to
the basepan. You must provide a 3/8" outside diameter thin-wall
plastic or copper tube which will attach to the drain nipple.
Follow the instructions below:
Drain hose
Drain nipple
Basepan
Figure 10
Sleeve
DK (Drain Kit)
STEP 1
Find the drain rubber plug on the rear of the basepan
and remove it. (See Figure 10).
In the event that the outdoor temperature drops below 37°F, any water
that remains in the chassis basepan is drained into the sleeve pan on
WE and WY models to prevent freezing. (NOTE: In the cooling mode
of the WS, WE and WY models, condensate over flow is possible in
very humid climates). For these particular instances, an optional drain
kit (Accessory #DK) is available for water removal.
STEP 2
Remove the knockout in the lower right side of the rear
grille. Slide the chassis into the WSD SLEEVE so that the
drain nipple extends through the knockout.
IDK (Interior Drain Kit)
STEP 3
Slide the tubing over the drain nipple.
If the chassis must be removed from the sleeve for service, remove
the clamped drain hose before sliding the chassis out of the sleeve.
12
New construction allowing for condensate drain systems built within
the walls can use the Friedrich Interior Drain Kit (Accessory #IDK).
This kit is designed for installation in the bottom of the sleeve
below the condensate bellows valve (heat/cool models only).
Friedrich Air Conditioning Company
P.O. Box 1540
San Antonio, TX 78295
210.357.4400
www.friedrich.com
WALLMASTER
THRU-THE-WALL AIR CONDITIONERS
LIMITED WARRANTY
FIRST YEAR
ANY PART: If any part supplied by FRIEDRICH fails because of a defect in workmanship or material within twelve months from
date of original purchase, FRIEDRICH will repair the product at no charge, provided room air conditioner is reasonably accessible
for service. Any additional labor cost for removing inaccessible units and/or charges for mileage related to travel by a Service
Agency that exceeds 25 miles one way will be the responsibility of the owner. This remedy is expressly agreed to be the exclusive
remedy within twelve months from the date of the original purchase.
SECOND THROUGH FIFTH YEAR
SEALED REFRIGERANT SYSTEM: If the Sealed Refrigeration System (defined for this purpose as the compressor, condenser
coil, evaporator coil, reversing valve, check valve, capillary, filter drier, and all interconnecting tubing) supplied by FRIEDRICH in
your Room Air Conditioner fails because of a defect in workmanship or material within sixty months from date of purchase,
FRIEDRICH will pay a labor allowance and parts necessary to repair the Sealed Refrigeration System; PROVIDED FRIEDRICH will
not pay the cost of diagnosis of the problem, removal, freight charges, and transportation of the air conditioner to and from the
Service Agency, and the reinstallation charges associated with repair of the Sealed Refrigeration System. All such cost will be the
sole responsibility of the owner. This remedy is expressly agreed to be the exclusive remedy within sixty months from the date of the
original purchase.
APPLICABILITY AND LIMITATIONS: This warranty is applicable only to units retained within the Fifty States of the U.S.A., District
of Columbia, and Canada. This warranty is not applicable to:
1.
2.
3.
Air filters or fuses.
Products on which the model and serial numbers have been removed.
Products which have defects or damage which results from improper installation, wiring, electrical current
characteristics, or maintenance; or caused by accident, misuse or abuse, fire, flood, alterations and/or misapplication
of the product and/or units installed in a corrosive atmosphere, default or delay in performance caused by war,
government restrictions or restraints, strikes, material shortages beyond the control of FRIEDRICH, or acts of God.
OBTAINING WARRANTY PERFORMANCE: Service will be provided by the FRIEDRICH Authorized Dealer or Service
Organization in your area. They are listed in the Yellow Pages. If assistance is required in obtaining warranty performance, write
to: Room Air Conditioner Service Manager, Friedrich Air Conditioning Co., P.O. Box 1540, San Antonio, TX 78295-1540.
LIMITATIONS:
THIS WARRANTY IS GIVEN IN LIEU OF ALL OTHER WARRANTIES. Anything in the warranty
notwithstanding, ANY IMPLIED WARRANTIES OF FITNESS FOR PARTICULAR PURPOSE AND/OR MERCHANTABILITY
SHALL BE LIMITED TO THE DURATION OF THIS EXPRESS WARRANTY. MANUFACTURER EXPRESSLY DISCLAIMS AND
EXCLUDES ANY LIABILITY FOR CONSEQUENTIAL OR INCIDENTAL DAMAGE FOR BREACH OF ANY EXPRESSED OR
IMPLIED WARRANTY.
Performance of Friedrich’s Warranty obligation is limited to one of the following methods:
1. Repair of the unit
2. A refund to the customer for the prorated value of the unit based upon the remaining warranty period of the unit.
3. Providing a replacement unit of equal value
The method of fulfillment of the warranty obligation is at the sole discretion of Friedrich Air Conditioning.
NOTE: Some states do not allow limitations on how long an implied warranty lasts, or do not allow the limitation or exclusion of
consequential or incidental damages, so the foregoing exclusions and limitations may not apply to you.
OTHER: This warranty gives you specific legal rights, and you may also have other rights which vary from state to state.
PROOF OF PURCHASE: Owner must provide proof of purchase in order to receive any warranty related services.
All service calls for explaining the operation of this product will be the sole responsibility of the consumer.
All warranty service must be provided by an Authorized FRIEDRICH Service Agency, unless authorized by FRIEDRICH prior to
(10-04)
repairs being made.
13