1
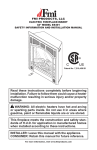
UNVENTED (VENT-FREE) FireBOX
OWNER’S OPERATION AND INSTALLATION MANUAL
PFS
®
US
Model FBPS, FGPN AND FGPN-LS
36" Peninsula Heat-Circulating Firebox
WARNING: If the information in these instructions
is not followed exactly, a fire or explosion may result
causing property damage, personal injury or death.
FOR YOUR SAFETY
— Do not store or use gasoline or any other flammable
vapors or liquids in the vicinity of this or any other
appliance.
— WHAT TO DO IF YOU SMELL GAS :
• Do not try to light any appliance.
• Do not touch any electrical switch;
• Do not use any phone in your building.
• Immediately call your gas supplier from a neighbor’s
phone. Follow the gas supplier’s instructions.
• If you cannot reach your gas supplier, call the fire
department.
— Installation and service must be performed by a qualified installer, service agency or the gas supplier.
INSTALLER: Leave this manual with the appliance.
CONSUMER: Retain this manual for future reference.
For more information, visit www.fmiproducts.com
WARNING: Improper installation, adjustment, alteration, service or maintenance can cause injury or
property damage. Refer to this manual for correct installation and operational procedures. For assistance
or additional information consult a qualified installer,
service agency or the gas supplier.
WARNING: For use only with decorative type unvented room heaters. Do not build a wood fire.
This firebox has been tested and approved by the
PFS Corporation for use with any ANS Z21.11.2
approved gas logs.
This firebox may be installed in an aftermarket*, permanently located, manufactured (mobile) home, where not
prohibited by state or local codes.
*Aftermarket: Completion of sale, not for purpose of resale, from the manufacturer.
TABLE OF CONTENTS
Safety................................................................... 2
Local Codes......................................................... 4
Unpacking............................................................ 4
Product Features.................................................. 4
Product Specifications.......................................... 5
Locating Firebox................................................... 5
Air for combustion and Ventilation........................ 6
Installation............................................................ 8
Operating Guidelines and Maintenance
Instructions...................................................... 16
Replacement Parts............................................. 16
Technical Service............................................... 17
Accessory........................................................... 17
Parts................................................................... 18
Warranty...............................................Back Cover
Safety
IMPORTANT: Read this owner’s
manual carefully and completely
before trying to assemble, operate or service this firebox.
Improper use of this firebox can
cause serious injury or death
from burns, fire, explosion, electrical shock or carbon monoxide
poisoning.
CAUTION: Carefully review
the instructions supplied with
the decorative type unvented
room heater for the minimum
firebox size requirement. Do not
install the appliance in this firebox unless this firebox meets the
minimum dimensions required
for the installation.
WARNING: Any change to
this firebox or its controls can
be dangerous.
2
www.fmiproducts.com
105163-01E
Safety
Continued
WARNING: Do not use a blower insert, heat exchanger insert
or other accessory not approved
for use with this firebox.
Do not allow fans to blow directly
into the firebox. Avoid any drafts
that alter burner flame patterns.
Ceiling fans can create drafts
that alter burner flame patterns.
Altered burner patterns can
cause sooting.
Firebox front and screen becomes very hot when running
firebox. Keep children and adults
away from hot surfaces to avoid
burns or clothing ignition. Firebox will remain hot for a time
after shutdown. Allow surfaces
to cool before touching.
Carefully supervise young children when they are in the room
with firebox.
You must operate this fireplace
with the provided fireplace
screen, hood and brick liner in
place. Make sure these parts are
in place and screens are closed
before running heater in firebox.
The supplied hoods may not be
replaced with hoods which may
be provided with a log heater.
Keep the appliance area clear
and free from combustible materials, gasoline and other flammable vapors and liquids.
105163-01E
1. This firebox shall not be installed in a
bedroom or bathroom.
2. Never install the firebox
•in a recreational vehicle
•where curtains, furniture, clothing or
other flammable objects are less than
42" from front, top or sides of firebox
•in high traffic areas
•in windy or drafty areas
3. Do not use this firebox as a wood-burning
fireplace. Use only decorative unvented
room heaters (log sets).
4. Do not add extra logs or ornaments such as
pine cones, vermiculite or rock wool. Using
these added items can cause sooting.
5. Use only the provided hoods or appropriate polished brass hood accessories. See
Accessories on page 17.
6. Vent-free gas log heaters installed in this
firebox require fresh air ventilation to run
properly. See Air for Combustion and
Ventilation, page 6.
7. Do not run heater in firebox
•where flammable liquids or vapors are
used or stored
•under dusty conditions
8. Do not use this firebox to cook food or
burn paper or other objects.
9. Never place any objects in firebox or on
logs.
10.Turn heater off and let cool before servicing. Only a qualified service person should
service and repair firebox.
11.Operating vent-free logs in a firebox above
elevations of 4,500 feet could cause pilot
outage.
12.Do not use the firebox if it has been under water due to the shock hazard that
could result with the blower accessary (if
installed) in place.
13.Provide adequate clearances around air
openings.
www.fmiproducts.com
3
Local Codes
Install and use firebox with care. Follow all
local codes. In the absence of local codes,
use the latest edition of The National Fuel Gas
Code ANS Z223.1/NFPA 54*. Firebox must
be electrically grounded in accordance with
the National Electrical Code, ANS/NFPA70
(latest edition).
*Available from:
American National Standards Institute, Inc.
1430 Broadway
New York, NY 10018
National Fire Protection Association, Inc.
Batterymarch Park
Quincy, MA 02269
State of Massachusetts: The installation
must be made by a licensed plumber or
gas fitter in the Commonwealth of Massachusetts.
Sellers of unvented propane or natural
gas-fired supplemental room heaters shall
provide to each purchaser a copy of 527
CMR 30 upon sale of the unit.
Vent-free gas products are prohibited for
bedroom and bathroom installation in the
Commonwealth of Massachusetts.
Unpacking
1. Remove all protective packaging from
inside firebox. Carefully lift the firebox off
the bottom corrugated tray.
2. Carton should contain 3 deflective hoods
and hardware packet in addition to firebox
assembly. If items are missing, inform
dealer where you bought firebox.
3. Check heater for any shipping damage. If
heater is damaged call FMI PRODUCTS,
LLC at 1-866-328-4537 for replacement
parts before returning to dealer.
Operation
Product Features
This firebox is designed for use with approved
ANS Z21.11.2 decorative type unvented room
heaters. (Physical size limitations apply. Refer
to minimum firebox requirements supplied
with log heater.) The maximum size log this
firebox will accept is: width of 32", depth of
19" and a height of 17".
This firebox requires no outside venting or
chimney making installation easy and inexpensive. When used without the blower, the
firebox requires no electricity making it ideal
for emergency backup heat.
4
NOTICE: The firebox identification label (including model
number, serial number, clearances, etc.) is located directly
above the brick liner and under
the heat shield. See Figure 20,
page 16.
Blower Accessory
The FBPS, FGPN and FGPN-LS firebox will
accept the GA3500A accessory. The variable
blower allows you to select the fan speed
you desire. The blower circulates heated air
from the firebox into the room. Use of blower
is optional.
Brick Liner
This firebox features a concrete brick liner. As
with all concrete liners, this liner may develop
slight cracks when exposed to heat. These
cracks will not affect the performance of the
firebox or vent-free gas logs.
www.fmiproducts.com
105163-01E
33 3/4"
4 3/4"
4"
1 /4"
1
1/2"
Product Specifications
5/8"
1 1/4"
4"
3 5/8"
1 3/4"
1/2"
(Edge of
Brick Liner)
4"
5/8"
24"
4 3/4"
33 3/4"
24"
4 1/2"
4"
3" TYP.
1 3/4"
1
4" 18 /2"
36 1/4"
(Edge of
Brick Liner)
3 5/8"
19 1/2"
4 1/2"
4"
40"
3" TYP.
9 1/8"
36 1/2"
18 1/2"
19 11/21"/2"
42 1/2"
40"
36 1/4"
9 1/8"
36 1/2"
1 1/2"
42 1/2"
Figure 1 - Peninsula (Three-Sided) Firebox
Locating Firebox
Planning
Plan where you will install the firebox. This will
save time and money later when you install
the firebox. Before installation, consider the
following:
1. Where the firebox will be located. Allow for
wall and ceiling clearances (see Installation Clearances, page 9).
2. Everything needed to complete installation.
3. This model CANNOT be installed in a
bedroom or bathroom.
4. Proper air for combustion and ventilation.
5. Consider a location where heat output
would not be affected by drafts, air condition ducts, windows or doors.
6. A location that minimizes modifications
on existing framing will make installation
easier.
Projected installations can extend any
distance into the room. A projection may
be ideal as a partition between two oth-
erwise common areas when added to an
existing, finished wall (see Figure 2).
Internal wall installation provides a
discreet viewing option between two
adjacent rooms or within an added wall
to subdivide an oversize room.
Figure 2 - Projected Installation
105163-01E
www.fmiproducts.com
5
Air for combustion and Ventilation
WARNING: This heater shall
not be installed in a room or
space unless the required volume of indoor combustion air
is provided by the method described in the National Fuel Gas
Code, ANSI Z223.1/NFPA 54, the
International Fuel Gas Code, or
applicable local codes. Read the
following instructions to insure
proper fresh air for this and
other fuel-burning appliances
in your home.
Today’s homes are built more energy efficient
than ever. New materials, increased insulation
and new construction methods help reduce
heat loss in homes. Home owners weather
strip and caulk around windows and doors
to keep the cold air out and the warm air in.
During heating months, home owners want
their homes as airtight as possible.
While it is good to make your home energy
efficient, your home needs to breathe. Fresh
air must enter your home. All fuel-burning appliances need fresh air for proper combustion
and ventilation.
Exhaust fans, fireboxes, clothes dryers and fuel
burning appliances draw air from the house to
operate. You must provide adequate fresh air
for these appliances. This will insure proper
venting of vented fuel-burning appliances.
PROVIDING ADEQUATE
VENTILATION
The following are excerpts from National
Fuel Gas Code ANS Z223.1/NFPA 54,Air for
Combustion and Ventilation.
All spaces in homes fall into one of the three
following ventilation classifications:
1. Unusually Tight Construction
2. Unconfined Space
3. Confined Space
The information on pages 6 through 8 will help
you classify your space and provide adequate
ventilation.
6
Unusually Tight Construction
The air that leaks around doors and windows
may provide enough fresh air for combustion
and ventilation. However, in buildings of unusually tight construction, you must provide
additional fresh air.
Unusually tight construction is defined as
construction where:
a. walls and ceilings exposed to the outside atmosphere have a continuous
water vapor retarder with a rating of one
perm (6 x 10-11 kg per pa-sec-m2) or less
with openings gasketed or sealed and
b. weather stripping has been added on
openable windows and doors and
c. caulking or sealants are applied to
areas such as joints around window
and door frames, between sole plates
and floors, between wall-ceiling joints,
between wall panels, at penetrations
for plumbing, electrical and gas lines
and at other openings.
If your home meets all of the three criteria
above, you must provide additional fresh
air. See Ventilation Air From Outdoors,
page 8.
If your home does not meet all of the three
criteria above, proceed to Determining
Fresh-Air Flow for Firebox Location,
page 7.
Confined and Unconfined Space
The National Fuel Gas Code ANS Z223.1/
NFPA 54 defines a confined space as a space
whose volume is less than 50 cubic feet per
1,000 Btu/hr (4.8 m3 per kw) of the aggregate
input rating of all appliances installed in that
space and an unconfined space as a space
whose volume is not less than 50 cubic feet
per 1,000 Btu/hr (4.8 m3 per kw) of the aggregate input rating of all appliances installed
in that space. Rooms communicating directly
with the space in which the appliances are
installed*, through openings not furnished
with doors, are considered a part of the unconfined space.
This heater shall not be installed in a confined
space or unusually tight construction unless
provisions are provided for adequate combustion and ventilation air.
* Adjoining rooms are communicating only if
there are doorless passageways or ventilation
grills between them.
www.fmiproducts.com
105163-01E
AIR FOR COMBUSTION AND VENTILATION
Continued
DETERMINING FRESH-AIR FLOW
FOR Firebox LOCATION
Determining if You Have a Confined or
Unconfined Space
Use this work sheet to determine if you have
a confined or unconfined space.
Space: Includes the room in which you will
install heater plus any adjoining rooms with
doorless passageways or ventilation grills
between the rooms.
1. Determine the volume of the space (length
x width x height).
Length x Width x Height =__________cu. ft.
(volume of space)
Example: Space size 22 ft. (length) x 18 ft.
(width) x 8 ft. (ceiling height) = 3168 cu. ft.
(volume of space)
If additional ventilation to adjoining room
is supplied with grills or openings, add the
volume of these rooms to the total volume
of the space.
2. Multiply the space volume by 20 to determine
the maximum Btu/Hr the space can support.
_ ________ (volume of space) x 20 = (Maximum Btu/Hr the space can support)
Example: 3168 cu. ft. (volume of space) x 20
= 63,360 (maximum Btu/Hr the space can
support)
3. Add the Btu/Hr of all fuel burning appliances
in the space.
Gas water heater*
___________ Btu/Hr
Gas furnace
___________ Btu/Hr
Vented gas heater
___________ Btu/Hr
Gas fireplace logs
___________ Btu/Hr
Other gas appliances*+__________ Btu/Hr
Total
=__________ Btu/Hr
* Do not include direct-vent gas appliances.
Direct-vent draws combustion air from the
outdoors and vents to the outdoors.
Example:
40,000 Btu/Hr
Gas water heater
___________
39,000 Btu/Hr
Gas firebox logs
+__________
79,000 Btu/Hr
Total
=__________
105163-01E
4. Compare the maximum Btu/Hr the space
can support with the actual amount of Btu/
Hr used.
_ _______ Btu/Hr (maximum the space can
support)
_ _______ Btu/Hr (actual amount of Btu/Hr
used)
Example: 63,360 Btu/Hr (maximum the
space can support)
79,000 Btu/Hr (actual amount of
Btu/Hr used)
The space in the above example is a confined
space because the actual Btu/Hr used is more
than the maximum Btu/Hr the space can support. You must provide additional fresh air.
Your options are as follows:
A. Rework work sheet, adding the space
of an adjoining room. If the extra space
provides an unconfined space, remove
door to adjoining room or add ventilation
grills between rooms. See Ventilation Air
from Inside Building, page 8.
B. Vent room directly to the outdoors. See
Ventilation Air from Outdoors, page 8.
C. Install a lower Btu/Hr gas log heater, if
lower Btu/Hr size makes room unconfined.
If the actual Btu/Hr used is less than the
maximum Btu/Hr the space can support, the
space is an unconfined space. You will need
no additional fresh air ventilation.
WARNING: If the area in which
the heater may be operated does
not meet the required volume for
indoor combustion air, combustion and ventilation air shall be
provided by one of the methods
described in the National Fuel
Gas Code, ANSI Z223.1/NFPA 54,
the International Fuel Gas Code,
or applicable local codes.
www.fmiproducts.com
7
AIR FOR COMBUSTION AND VENTILATION
Continued
Ventilation Air
Ventilation Air From Inside Building
This fresh air would come from an adjoining
unconfined space. When ventilating to an
adjoining unconfined space, you must provide
two permanent openings: one within 12" of the
ceiling and one within 12" of the floor on the
wall connecting the two spaces (see option
1, Figure 3). You can also remove door into
adjoining room (see option 2, Figure 3). Follow the National Fuel Gas Code ANS Z223.1/
NFPA 54 Air for Combustion and Ventilation
for required size of ventilation grills or ducts.
Ventilation
Grills
Into Adjoining
Room,
Option 1
Ventilation Air From Outdoors
Provide extra fresh air by using ventilation
grills or ducts. You must provide two permanent openings: one within 12" of the ceiling
and one within 12" of the floor. Connect these
items directly to the outdoors or spaces open
to the outdoors. These spaces include attics and crawl spaces. Follow the National
Fuel Gas Code ANS Z223.1/NFPA 54 Air for
Combustion and Ventilation for required size
of ventilation grills or ducts.
IMPORTANT: Do not provide openings for
inlet or outlet air into attic if attic has a thermostat-controlled power vent. Heated air entering
the attic will activate the power vent.
Outlet
Air
Or
Remove
Door into
Adjoining
Room,
Option
2
Outlet
Air
Ventilated
Attic
To Attic
To
Crawl
Space
Inlet
Air
4"
Inlet Air
Figure 3 - Ventilation Air from Inside
Building
Ventilated
Crawl Space
Figure 4 - Ventilation Air from Outdoors
Installation
NOTICE: This firebox in combination with unvented log
sets are intended for use as
supplemental heat. Use along
with your primary heating
system. Do not install them as
your primary heat source. If you
have a central heating system,
you may run system’s circulating blower while using heater.
This will help circulate the heat
throughout the house. In the
event of a power outage, you
can use unvented logs as your
primary heat source.
8
WARNING: A qualified service person must install firebox.
Follow all local codes.
WARNING: Never install the
firebox
• in a bedroom or bathroom
• in a recreational vehicle
• where curtains, furniture,
clothing or other flammable
objects are less than 42" from
the front, top or sides of the
firebox
• in high traffic areas
• in windy or drafty areas
www.fmiproducts.com
105163-01E
INSTALLATION
Continued
CAUTION: Log heaters installed in this firebox create warm
air currents. These currents move
heat to wall surfaces next to firebox. Installing firebox next to vinyl
or cloth wall coverings or operating firebox where impurities (such
as, but not limited to, tobacco
smoke, aromatic candles, cleaning fluids, oil or kerosene lamps,
etc.) in the air exist, may discolor
walls or cause odors.
IMPORTANT: Vent-free gas log heaters add
moisture to the air. Although this is beneficial,
installing firebox in rooms without enough
ventilation air may cause mildew to form from
too much moisture. See Air for Combustion
and Ventilation, page 6.
IMPORTANT: Make sure the firebox is level.
If firebox is not level, log set will not work
properly.
Note: Your Vanguard firebox is designed to
be used in zero clearance installations. Wall
or framing material can be placed against any
exterior surface on the rear, sides or top of
your firebox, except where standoff spacers
are integrally attached. If standoff spacers
are attached to your firebox, these spacers
can be placed directly against wall or framing materials.
Use dimensions shown for rough openings to
create the easiest installation (see Built-In or
Internal Wall Firebox Installation, page 9).
C. When the firebox is installed on carpeting or other combustible material, other
than wood flooring, the firebox should be
installed on a metal or wood panel extending the full width and depth of enclosure.
D. Clearances from the bottom of firebox to
the floor is 0".
E. Clearances from open end of firebox to facing wall shall should not be less than 36".
CAUTION: Do not install firebox directly on carpet or vinyl.
CAUTION: Use only the clearances specified in this manual or
on the firebox rating plate.
Minimum clearances to combustibles are:
• Sides of outer casing
0" min.
• Drywall to sides and top of
0" min.
front face
• Ceiling to opening
42' min.
• Floor (see Minimum Wall
0" min.
and Ceiling Clearances, note C)
• Perpendicular walls 4' min.
Right and Left
• Distance to Facing Walls
36" min.
on Sides and End of Firebox
0" Min. Clearance to Upper Frame/Wallboard
Carefully follow the instructions below. This
will ensure safe installation.
Minimum Wall and Ceiling Clearances
A. Clearances from edge of liner to any
combustible wall should not be less than
8" (see Figure 5).
B. Clearances from top of firebox opening to
the ceiling should not be less than 42".
105163-01E
42" Min.
Edge of
Brick Liner
INSTALLATION CLEARANCES
WARNING: Maintain the
minimum clearances. If you can,
provide greater clearances from
floor, ceiling and adjoining wall.
Ceiling
8" Min.
4"
Min.
0" to Wood
Floor
Figure 5 - Minimum Clearance Front View
1/2" Min. Clearance
to Combustibles
24"
43 3/4"
4" Min. from the Perpendicular
Side Wall to the Edge of Facia
36" Minimum
from Edge of
Facial to
Facing Wall
on Open End
of Firebox
Figure 6 - Minimum Clearance - Top View
www.fmiproducts.com
9
INSTALLATION
Continued
Mantel Clearances for Built-In
Installation
If placing custom mantel above built-in firebox, you must meet the minimum allowable
clearance between mantel shelf and top of
firebox opening shown in Figure 7. These are
the minimum allowable mantel clearances
for a safe installation. Use larger clearances
wherever possible to minimize the heating of
objects and materials placed on the mantel.
CAUTION: Do not allow the
vent-free gas log heater to touch
or extend beyond the firebox
screen.
If your installation does not meet the above
minimum clearances in Figure 7, you must:
• raise the mantel to an acceptable height,
OR
• remove the mantel.
Note: All vertical
measurements are
minimum distances
from top of fireplace
hood to bottom of
mantel shelf. These
minimum clearances
Mantel replace any other
recommended
Shelf clearances supplied
with your ANS Z21.11.2
approved gas logs.
9 1/4"
6"
3"
Wall board or facing material (above firebox)
may be of combustible material, including
decorative mantel ornaments or other similar
projections off of the facing material.
Top Frame
(Combustible Material)
Firebox Top
7" Min.
Built-In or Internal Wall
Firebox Installation
Built-in installation of this firebox involves
installing firebox into a framed-in enclosure.
This makes the front of firebox flush with wall.
If installing a mantel above the firebox, you
must follow the clearances shown in Figure
7. Follow the instructions below to install the
firebox in this manner.
1. Frame in rough opening. The firebox
framing should be constructed of 2 x 4
lumber or heavier. Construct framing
using dimensions shown in Figure 8 and
9, page 11. It is recommended that the
framing be constructed first and the unit
be placed in position. After sliding the unit
into place, the flanges may be nailed to
the framing before applying the wallboard
to the exterior framing.
2. If the vent-free firebox is to be installed
directly on carpeting, tile (other than ceramic) or any combustible material other
than wood flooring; the vent-free firebox
must be installed upon a metal or wood
panel extending the full width and depth
of the vent-free firebox.
Combustible 12" 15" 18"
Material 1 1/2"
Max Thickness
Wire-mesh
Screen
22 3/4"
Min.
Supplied
Firebox
Hoods Must
Be Used at
All Times
Wallboard
Note: Fireplace shown as cross-section for clarity.
Mantel material may not be less than 7" from top of
hood. Do not cover louver openings.
Figure 7 - Minimum Mantel Clearances
for Built-In Installation
Gas Line
Facing
Wall
4" Min.
40 1/4" Min.
Board
Base
36" Min. to
Facing Wall
Facing Wall
(Base line)
43 3/4" Min.
Figure 8 - Framing for Built-In Firebox
Installation
10
www.fmiproducts.com
105163-01E
INSTALLATION
Continued
3. If a raised platform is to be constructed,
ceiling clearances must be maintained.
4. Install gas piping to firebox location. See
Installing Gas Line and Connecting to Gas
Supply in log set owner’s manual.
5. Carefully set firebox in front of rough
opening.
6. Carefully insert firebox into rough opening.
7. Attach firebox to wall studs using nails
or wood screws through holes in nailing
flange (see Figure 10). Attach firebox to
board base through holes in firebox bottom (see Figure 10).
IMPORTANT: When finishing your firebox,
combustible materials such as wall board,
gypsum board, sheet rock, drywall, plywood,
etc. may be butted up next to the sides and
top of the firebox. Combustible materials
should never overlap the firebox front facing
more than 3/8".
WARNING: Do not allow any
combustible materials to overlap the firebox front facing (see
Figure 9).
IMPORTANT: Noncombustible materials such
as brick, tile, etc. may overlap the front facing,
but should never cover any necessary openings like louvered slots.
WARNING: Never modify or
cover the louvered slots on the
front of the firebox.
Combustible material must
Nailing Flange not overlap more than 3/8"
onto black metal front face. Edge
Drywall
of side
3/8" Max.
firebox
opening
SAFE
ZONE
4"
11/2" Max.
Min. from firebox
edge to combustible
material
8" Min. from adjacent
wall to fireplace opening
Figure 9 - Framing for Built-In Firebox
Installation, Top View
105163-01E
WARNING: Use only noncombustible mortar or adhesives when overlapping the front
facing with noncombustible
facing material.
Nails or
Wood
Screws
Nailing
Flanges
Nails or Wood
Screws
Figure 10 - Attaching Firebox to Wall Studs
Installing gas line
WARNING: A qualified service person must connect heater
to gas supply. Follow all local
codes.
IMPORTANT: See Connecting to Gas Supply
in your log set owner’s manual for details on
gas hookup.
Figure 11, page 12, shows the typical installation for the gas line. When you have
determined how the gas line will run, locate
one of the recessed knockouts in the firebrick floor (see Figure 12, page 12,). Firmly
tap the center of the knockout with a chisel
until it is released. Carefully chisel the rough
edges of the hole you have made to smooth
edges. This hole will line up with the hole in
the metal floor.
www.fmiproducts.com
11
INSTALLATION
Continued
CAUTION: Do not use excessive force to remove the knockout. Too much force may damage
the firebrick concrete insert.
A manual shutoff valve, CSA certified and
complying with the National Fuel Gas code,
ANS Z223.1/NFPA 54, must be included
within 6' of the vent-free firebox gas supply
system. It may be convenient to install the gas
shutoff outside the vent-free firebox enclosure
where it can be accessed with a key through
a wall as shown in Figure 13. Depending on
the type of installation, some local codes may
require you to install 2 manual shutoff valves
independently accessible from both rooms.
Check your local codes for applicable installation requirements.
A 36" long 1/2" NPT SCHD 40 flexible gas
connector line complying with the National
Fuel Gas code ANS Z223.1/NFPA 54, may
be run from the regulator to the incoming 1/2"
NPT black iron gas line. You may also route
the incoming 1/2" NPT black iron gas line
directly to the appliance regulator.
Remove the gas line cover plate from the
vent-free firebox’s outer surround and route
the gas line into the rear of the firebox (see
Figure 11).
If a sediment trap is not incorporated as a part
of the gas utilization equipment, one shall be
installed as close to the inlet of the equipment
as practical at the time of installation, as per
ANS Z223.1/NFPA 54. See Figure 14.
Firebrick Floor
Remove Knockout
3/4" Thick Liner
Figure 12 - Location of Knockouts for
Gas Line
Shut-Off Valve
Extension
Key
Gas Line Installed Through Access
Hole on One Side of Firebox
Figure 13 - Typical Exterior Wall Gas
Shut-Off Installation
Incoming
1/2" Gas Line
Permitted by
Local Codes
Manual Shutoff
Valve is Located
Under Firebox Floor
on Either Side
Figure 11 - Installing Gas Line and
Manual Shutoff Valve
12
Sediment Trap
(Not Supplied)
Figure 14 - Sediment Trap Installation
www.fmiproducts.com
105163-01E
INSTALLATION
Continued
Prepare incoming black iron gas line with
Teflon tape or pipe joint compound (check with
local codes as to the use of Teflon tape). Compounds used on threaded joints of gas piping
shall be resistant to the action of propane/LP
and should be applied lightly to ensure excess
sealant does not enter the gas line.
Complete your gas installation by connecting
the incoming gas line to the appliance regulator. Secure all joints tightly with wrench but do
not overtighten. If a flexible gas line is used,
take care not to kink the connector.
WARNING: All gas piping
and connections must be tested
for leaks after the installation is
completed. After ensuring that
the manual shutoff gas valve is
open, apply a soap and water
solution to all connections and
joints. If bubbles appear, leaks
can be detected and corrected.
DO NOT USE OPEN FLAME FOR
LEAK TESTING AND DO NOT
OPERATE ANY APPLIANCE IF
A LEAK IS DETECTED.
Gas supply testing
Note: This section is intended as a guide for
qualified technicians installing gas to this
vent-free firebox.
CAUTION: Do not connect
vent-free heater before pressure
testing gas piping. Damage to
gas valve may result and an unsafe condition may be caused.
The appliance and its’ individual shutoff valve
must be disconnected from the gas supply
piping system during any pressure testing of
that system at test pressures in excess of 1/2
psig (3.5 kPa).
The appliance must be isolated from the gas
supply piping system by closing manual shutoff valve during any pressure testing of the gas
supply piping system at test pressures equal
to or less than 1/2 psig (3.5 kPa).
105163-01E
Hard-wiring Firebox
Model FBPS and FGPN can be hard-wired
to the duplex outlet located inside the firebox
bottom if desired. This allows the blower accessory to be plugged into the duplex outlet.
NOTICE: A qualified electrician
must connect electrical wiring to
duplex outlet for built-in installation. Follow all local codes. In
absence of local codes follow
The National Electric Code ANS/
NFPA 70.
Electrical Installation
A model GA3500A blower system assembly
is available for use with the FBPS and FGPN
(-LS) vent-free firebox as an optional accessory. This blower is designed to be installed
on either side of the FBPS and FGPN(-LS)
firebox, when provisions for a 120 VAC supply connection are made at either end of the
cabinet. Use of a blower system other than
those manufactured by FMI PRODUCTS, LLC
voids the warranty.
Electrical connections are made within the
receptacle with wires that are routed through
the bushing provided (see Figure 15). The receptacle may be relocated to either side, when
necessary. However, the cover plate must be
replaced over the unused access point. Be
certain to properly ground the vent-free firebox
using the green grounding wire.
Gas Connection
Access Hole
Electrical
Cover
Connection
Plates
Access Hole
Figure 15 - Locating Electrical
Connection and Gas Connection on
Either Side of Fireplace
www.fmiproducts.com
13
INSTALLATION
Continued
Note: A 120V supply connection to the leads
to the receptacle must be provided for use
with the optional blower kit whether installed
during or after initial firebox installation. You
may not be able to install a supply connection
after the final installation is completed.
Heat Deflective Hood
installation
CAUTION: Do not clean hood
with abrasive cleanser. Use only
regular household cleaners and
a smooth cloth.
Front Hood
(Typical Each Side)
The factory supplied heat deflective hoods
must be installed inside the fireplace opening
on both sides for the safe operation of the unit
as shown in Figure 16.
1. Remove protective covering from
hoods.
2. Position deflective hood into opening
on one side of the firebox and secure
to the top of the opening using screws
provided.
3. Secure the ends of the hood to the firebox
using two screws (provided) for each
side.
4. Repeat steps 2 and 3 to install hood on the
remaining side and end of the firebox.
Corner
Post
3 Screws
2 Screws Each (Top)
End of Hood
Figure 16 - Typical Hood Installation
(Both Sides)
Operating Guidelines and Maintenance
Instructions
When lit for the first time, a vent-free log
heater will emit a slight odor for about an hour
or two. This is a normal occurrence which is
due to the “curing” of the logs and the “burn-in”
of internal paints and lubricants used in the
manufacturing process.
Keep control compartments, logs, burners
and areas surrounding the logs clean by
vacuuming or brushing at least twice a year.
Temporary removal of the log set may ease
the cleaning of the burner and pilot assembly.
In cleaning, take care not to alter the settings
on the pilot assembly. See the operating
instructions supplied with your vent-free log
heater for additional cleaning instructions.
WARNING: Logs can be very
hot! Allow logs to cool before
handling.
IMPORTANT: Turn off the gas supply at the
external shutoff valve before servicing appliance. Any safety screen or guard removed for
servicing must be replaced prior to operating
the appliance.
14
Installation and repair should be done by a
qualified person. The appliance should be
inspected before use and at least annually by
a professional service person. More frequent
cleaning may be required due to excessive lint
from carpeting, pet hair, etc. It is imperative
that the control compartments, burners and
circulating air passageways of the appliance
be kept clean.
WARNING: Children and
adults should be alerted to the
hazards of high surface temperatures and to stay away to avoid
burns or clothing ignition. Young
children should be carefully
supervised when they are in the
same room as the appliance.
For lighting and operating this vent-free
firebox, please refer to the vent-free gas logs
manufacturer’s instruction manual.
www.fmiproducts.com
105163-01E
Replacement Parts
Note: Use only original replacement parts.
This will protect your warranty coverage for
parts replaced under warranty.
Contact authorized dealers of this product.
If they can’t supply original replacement
part(s), call FMI PRODUCTS, LLC at
1-866-328-4537.
When calling, have ready:
• your name
• your address
• model and serial numbers of your heater
• how heater was malfunctioning
• purchase date
Usually, we will ask you to return the part to
the factory.
Technical Service
You may have further questions about installation, operation, or troubleshooting. If so, contact
FMI PRODUCTS, LLC at 1-866-328-4537.
When calling please have your model and serial
numbers of your heater ready.
You can also visit FMI PRODUCTS, LLC’s
web site at www.fmiproducts.com.
Accessory
Purchase these accessories from your
local dealer. If they can not supply these
accessories call FMI PRODUCTS, LLC at
1-866-328-4537 for information. You can
also write to the address listed on the back
page of this manual.
105163-01E
www.fmiproducts.com
15
Parts
ModelS FBPS, FGPN AND FGPN-LS
16
6
Typ.
16
Typ.
4
16
3 15
16
18
17
15
17**
10**
17
1
17**
14
17**
15
5**
17**
11**
13
17**
7-3
16
6 Typ.
7-1
17
8**
12
17**
7-2
17**
2
17**
8**
9**
16
17**
**These items are used on both sides of fireplace.
16
www.fmiproducts.com
105163-01E
PARTS
ModelS FBPS, FGPN AND FGPN-LS
This list contains replaceable parts used in your firebox. When ordering parts, follow the
instructions listed under Replacement Parts on page 15 of this manual.
KEY PART
NO. NO.
1
2
3
4
5
6
7-1
7-2
7-3
8
9
10
11
12
13
14
15
16
17
18
***
***
***
23982
26731
26740
02013
02014
02036
24007
12125
26752
26733
14200
21171
12126
26771
11164
11165
26762
DESCRIPTION
Firebox Assembly
Firebox Bottom
Firebox Top
Top Spacer
Deflector Hood
Nailing Flange
Side Refractory Brick Liner
Bottom Refractory Brick Liner
Bottom Refractory Brick Liner
Side Refractory Retainer
Screen
Extruded Louver
Lower Door Panel
Receptacle
Access Hole Cover
Screen
Extruded Louver (End)
Screw, #10 x 1/2, zinc PH
Screw, #10 x 5/8, zinc PH
Deflector Hood (End)
QTY.
1
1
1
4
2
12
1
1
1
2
4
2
2
1
3
1
1
24
67
1
*** Not a field replaceable part.
105163-01E
www.fmiproducts.com
17
NOTES
_____________________________________________________
______________________________________________________
______________________________________________________
______________________________________________________
______________________________________________________
______________________________________________________
______________________________________________________
______________________________________________________
______________________________________________________
______________________________________________________
______________________________________________________
______________________________________________________
______________________________________________________
_____________________________________________________
______________________________________________________
______________________________________________________
______________________________________________________
______________________________________________________
______________________________________________________
______________________________________________________
______________________________________________________
______________________________________________________
______________________________________________________
______________________________________________________
______________________________________________________
______________________________________________________
_____________________________________________________
______________________________________________________
______________________________________________________
______________________________________________________
______________________________________________________
______________________________________________________
______________________________________________________
______________________________________________________
______________________________________________________
18
www.fmiproducts.com
105163-01E
NOTES
_____________________________________________________
______________________________________________________
______________________________________________________
______________________________________________________
______________________________________________________
______________________________________________________
______________________________________________________
______________________________________________________
______________________________________________________
______________________________________________________
______________________________________________________
______________________________________________________
______________________________________________________
_____________________________________________________
______________________________________________________
______________________________________________________
______________________________________________________
______________________________________________________
______________________________________________________
______________________________________________________
______________________________________________________
______________________________________________________
______________________________________________________
______________________________________________________
______________________________________________________
______________________________________________________
_____________________________________________________
______________________________________________________
______________________________________________________
______________________________________________________
______________________________________________________
______________________________________________________
______________________________________________________
______________________________________________________
______________________________________________________
105163-01E
www.fmiproducts.com
19
Warranty
KEEP THIS WARRANTY
Model (located on product or identification tag)______________________________
Serial No. (located on product or identification tag)___________________________
Date Purchased ___________________________
Keep receipt for warranty verification.
FMI PRODUCTS, LLC LIMITED WARRANTIES
New Products
Standard Warranty: FMI PRODUCTS, LLC warrants this new product and any parts thereof to be free from defects
in material and workmanship for a period of two (2) years from the date of first purchase from an authorized dealer
provided the product has been installed, maintained and operated in accordance with FMI PRODUCTS, LLC’s
warnings and instructions.
For products purchased for commercial, industrial or rental usage, this warranty is limited to 90 days from the date
of first purchase.
Factory Reconditioned Products
Limited Warranty: FMI PRODUCTS, LLC warrants factory reconditioned products and any parts thereof to be
free from defects in material and workmanship for 30 days from the date of first purchase from an authorized dealer
provided the product has been installed, maintained and operated in accordance with FMI PRODUCTS, LLC’s
warnings and instructions.
Terms Common to All Warranties
The following terms apply to all of the above warranties:
Always specify model number and serial number when contacting the manufacturer. To make a claim under this
warranty the bill of sale or other proof of purchase must be presented.
This warranty is extended only to the original retail purchaser when purchased from an authorized dealer, and only
when installed by a qualified installer in accordance with all local codes and instructions furnished with this product.
This warranty covers the cost of part(s) required to restore this product to proper operating condition and an allowance for labor when provided by a FMI PRODUCTS, LLC Authorized Service Center or a provider approved by
FMI PRODUCTS, LLC. Warranty parts must be obtained through authorized dealers of this product and/or FMI
PRODUCTS, LLC who will provide original factory replacement parts. Failure to use original factory replacement
parts voids this warranty.
Travel, handling, transportation, diagnostic, material, labor and incidental costs associated with warranty repairs,
unless expressly covered by this warranty, are not reimbursable under this warranty and are the responsibility of
the owner.
Excluded from this warranty are products or parts that fail or become damaged due to misuse, accidents, improper
installation, lack of proper maintenance, tampering, or alteration(s).
This is FMI PRODUCTS, LLC’s exclusive warranty, and to the full extent allowed by law; this express warranty
excludes any and all other warranties, express or implied, written or verbal and limits the duration of any and all
implied warranties, including warranties of merchantability and fitness for a particular purpose to two (2) years on
new products and 30 days on factory reconditioned products from the date of first purchase. FMI PRODUCTS, LLC
makes no other warranties regarding this product.
FMI PRODUCTS, LLC’s liability is limited to the purchase price of the product, and FMI PRODUCTS, LLC shall not
be liable for any other damages whatsoever under any circumstances including indirect, incidental, or consequential
damages.
Some states do not allow limitations on how long an implied warranty lasts or the exclusion or limitation of incidental
or consequential damages, so the above limitation or exclusion may not apply to you.
This warranty gives you specific legal rights, and you may also have other rights which vary from state to state.
For information about this warranty contact:
2701 S. Harbor Blvd.
Santa Ana, CA 92704
1-866-328-4537
www.fmiproducts.com
105163-01
Rev. E
01/10