1
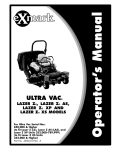
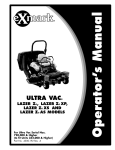
ULTRA VAC
®
LAZER Z®, LAZER Z® AS
SERIES X, AND LAZER Z® AS
MODELS
For Ultra Vac Serial Nos.
850,000 & Higher
(To fit Lazer Z (LZZ) and
Lazer Z AS Series X (LZAS) Units
Serial Nos. 790,000 & Higher)
(To fit Lazer Z AS (LZA) Units
Serial Nos. 850,000 & Higher)
Part No. 4500-608 Rev. A
Exmark reserves the right to make changes or
add improvements to its products at any time
without incurring any obligation to make such
changes to products manufactured previously.
Exmark, or its distributors and dealers, accept
no responsibility for variations which may be
evident in the actual specifications of its products
and the statements and descriptions contained
in this publication.
© 2009—Exmark Mfg. Co., Inc.
Industrial Park Box 808
Beatrice, NE 68310
2
Contact us at www.Exmark.com.
Printed in the USA
All Rights Reserved
Introduction
CONGRATULATIONS on the purchase of your
Exmark Ultra Vac. This product has been carefully
designed and manufactured to give you a maximum
amount of dependability and years of trouble-free
operation.
This manual contains operating, maintenance,
adjustment, and safety instructions for your Exmark
Ultra Vac
Figure 1
1. Model and serial number location
BEFORE OPERATING YOUR MOWER,
CAREFULLY READ THIS MANUAL IN ITS
ENTIRETY.
Model No.
By following the operating, maintenance, and safety
instructions, you will prolong the life of your Ultra
Vac, maintain its maximum efficiency, and promote
safe operation.
Serial No.
If additional information is needed, or should you
require trained mechanic service, contact your
authorized Exmark equipment dealer or distributor.
Exmark parts manuals are available online at
http://www.exmark.com/manuals.htm.
All Exmark equipment dealers and distributors are
kept informed of the latest methods of servicing
and are equipped to provide prompt and efficient
service in the field or at their service stations. They
carry ample stock of service parts or can secure them
promptly for you from the factory.
All Exmark parts are thoroughly tested and inspected
before leaving the factory, however, attention is
required on your part if you are to obtain the fullest
measure of satisfaction and performance.
Whenever you need service, genuine Exmark parts,
or additional information, contact an Authorized
Service Dealer or Exmark Customer Service and have
the model and serial numbers of your product ready.
Figure 1 identifies the location of the model and serial
numbers on the product. Write the numbers in the
space provided.
3
Contents
Introduction ........................................................... 3
Safety ..................................................................... 5
Safety Alert Symbol ......................................... 5
Safe Operating Practices .................................. 5
Safety and Instructional Decals ....................... 8
Specifications ....................................................... 10
Model Numbers ............................................ 10
Systems ......................................................... 10
Dimensions................................................... 10
Torque Requirements .................................... 10
Product Overview ................................................ 11
Operation ............................................................. 11
Pre-Start........................................................ 11
Operating Instructions .................................. 11
Transporting ................................................. 17
Maintenance ......................................................... 20
Recommended Maintenance Schedule(s) ........... 20
Periodic Maintenance ....................................... 20
Check Blower Housing/Impeller ................... 20
Check Bags.................................................... 20
Check Exhaust Diverter................................. 21
Lubricate Grease Fittings............................... 21
Check Condition of Belt ................................ 21
Adjustments ..................................................... 21
Adjusting the Blower Drive Belt
Position..................................................... 21
Cleaning ........................................................... 22
Clean Muffler and Rear Frame Area................ 22
Clean Rear Screen In Hopper......................... 22
Clean Blower................................................. 22
Troubleshooting ................................................... 23
4
Safety
Safety
• Never let children or untrained people operate
or service the equipment. Local regulations may
restrict the age of the operator.
Safety Alert Symbol
• Only adults and mature teenagers should operate
a mower, and even mature teenagers should have
adult supervision. Be sure a teenager:
This Safety Alert Symbol (Figure 2) is used both in
this manual and on the machine to identify important
safety messages which must be followed to avoid
accidents
1. has read and understands the Operator’s
Manual and recognizes the risks involved;
This symbol means: ATTENTION! BECOME
ALERT! YOUR SAFETY IS INVOLVED!
2. is sufficiently mature to use caution; and
3. is of sufficient size and weight to operate
the controls comfortably and to manage the
mower without taking risks.
Figure 2
• The owner/user can prevent and is responsible
for accidents or injuries occurring to himself or
herself, other people or property.
1. Safety alert symbol
The safety alert symbol appears above information
which alerts you to unsafe actions or situations
and will be followed by the word DANGER,
WARNING, or CAUTION.
Preparation
• Evaluate the terrain to determine what accessories
and attachments are needed to properly and safely
perform the job. Only use on machines approved
by Exmark.
DANGER: White lettering / Red background.
Indicates an imminently hazardous situation which, if
not avoided, Will result in death or serious injury.
• Wear appropriate clothing including safety glasses,
substantial footwear, long trousers, and hearing
protection. Do Not operate when barefoot or
when wearing open sandals.
WARNING: Black lettering / Orange background.
Indicates a potentially hazardous situation which, if
not avoided, Could result in death or serious injury.
CAUTION
CAUTION: Black lettering / Yellow background.
Indicates a potentially hazardous situation which, if
not avoided, May result in minor or moderate injury.
This machine produces sound levels in
excess of 85 dBA at the operator’s ear and
can cause hearing loss through extended
periods of exposure.
This manual uses two other words to highlight
information. Important calls attention to special
mechanical information and Note emphasizes
general information worthy of special attention.
Wear hearing protection when operating this
machine.
Safe Operating Practices
• Inspect the area where the equipment is to be
used and remove all rocks, toys, sticks, wires,
bones, and other foreign objects which can be
thrown by the machine and may cause personal
injury to the operator or bystanders.
Training
• Read the tractor and Ultra Vac Operator’s Manuals
and other training material. If the operator(s) or
mechanic(s) can not read English it is the owner’s
responsibility to explain this material to them.
Operation
• Become familiar with the safe operation of the
equipment, operator controls, and safety signs.
• Operate only in daylight or good artificial light,
keeping away from holes and hidden hazards.
• All operators and mechanics should be trained.
The owner is responsible for training the users.
• Never mow with the discharge deflector raised,
removed or altered unless there is a grass
5
Safety
Slope Operation
collection system or mulch kit in place and
working properly.
Use Extreme caution when mowing and/or turning
on slopes as loss of traction and/or tip-over could
occur. The operator is responsible for safe operation
on slopes.
DANGER
There are rotating blades in the blower and
under the mower deck. Blade contact can
cause serious operator or bystander injury
or even death.
DANGER
Operating on wet grass or steep slopes can
cause sliding and loss of control. Wheels
dropping over edges, ditches, steep banks, or
water can cause rollovers, which may result
in serious injury, death or drowning.
• Do Not reach into blower unless rotation
indicator has stopped. Disengage PTO,
stop engine, remove key, wait for all
moving parts to stop. Engage parking
brake.
• Do Not mow slopes when grass is wet.
• Never operate mower unless discharge
deflector, entire grass collection system,
or mulch kit is installed.
• Do Not mow near drop-offs or near water.
• Do Not mow slopes greater than 15
degrees.
• Stop engine, wait for all moving parts to stop,
remove key and engage parking brake:
• Reduce speed and use extreme caution
on slopes.
– Before checking, cleaning or working on the
mower.
• Avoid sudden turns or rapid speed
changes.
– After striking a foreign object or abnormal
vibration occurs (inspect the mower for
damage and make repairs before restarting
and operating the mower).
• Keep the roll bar in the raised and locked
position and use seat belt.
• See inside the back cover to determine the
approximate slope angle of the area to be mowed.
– Before clearing blockages.
– Whenever you leave the mower.
• Use a walk behind mower and/or a hand trimmer
near drop-offs, ditches, steep banks or water.
(Figure 3).
WARNING
Hands, feet, hair, clothing, or accessories can
become entangled in rotating parts. Contact
with the rotating parts can cause traumatic
amputation or severe lacerations.
• Do Not operate the machine without
guards, shields, and safety devices in
place and working properly.
• Keep hands, feet, hair, jewelry, or clothing
away from rotating parts.
• Stop the blades, slow down, and use caution when
crossing surfaces other than grass and when
transporting the mower to and from the area to
be mowed.
• Be aware of the mower discharge path and direct
discharge away from others.
6
Safety
progressively greater care on slopes as the hopper
fills.
Maintenance and Storage
• Disengage PTO, set parking brake, stop engine
and remove key or disconnect spark plug wire.
Wait for all movement to stop before adjusting,
cleaning or repairing.
• Use care when checking blades. Wrap the blade(s)
or wear gloves, and use caution when servicing
them. Only replace damaged blades. Never
straighten or weld them.
• Keep all guards, shields and all safety devices in
place and in safe working condition.
Figure 3
1. Safe Zone-Use the mower here on slopes less than 15
degrees
2. Danger Zone-Use a walk behind mower and/or hand
trimmer on slopes greater than 15 degrees, near
drop-offs and water.
3. Water
• Check all bolts frequently to maintain proper
tightness.
• Frequently check for worn or deteriorating
components that could create a hazard.
• All replacement parts must be the same as
or equivalent to the parts supplied as original
equipment.
• Remove or mark obstacles such as rocks, tree
limbs, etc. from the mowing area. Tall grass can
hide obstacles.
• Watch for ditches, holes, rocks, dips and rises that
change the operating angle, as rough terrain could
overturn the machine.
• Avoid sudden starts when mowing uphill because
the mower may tip backwards.
• Be aware that operating on wet grass, across steep
slopes or downhill may cause the mower to lose
traction. Loss of traction to the drive wheels may
result in sliding and a loss of braking and steering.
• Always avoid sudden starting or stopping on a
slope. If tires lose traction, disengage the blades
and proceed slowly off the slope.
• Follow the manufacturer’s recommendations for
wheel weights or counter weights to improve
stability. Always install and remove the Ultra Vac,
including counter weights, as instructed. Failure
to do so will cause a reduction in stability or
traction. Do Not operate the mower with only a
portion of the Ultra Vac installed.
• Use extreme care with grass catchers or
attachments. These can change the stability of the
machine and cause loss of control. The stability
and traction of the machine will change as the
Ultra Vac hopper fills with grass clippings. Use
7
Safety
Safety and Instructional Decals
• Keep all safety signs legible. Remove all grease,
dirt and debris from safety signs and instructional
labels.
• Replace all worn, damaged, or missing safety
signs.
• When replacement components are installed, be
sure that current safety signs are affixed to the
replaced components.
• If an attachment or accessory has been installed,
make sure current safety signs are visible.
• New safety signs may be obtained from
your authorized Exmark equipment dealer or
distributor or from Exmark Mfg. Co. Inc.
• Safety signs may be affixed by peeling off the
backing to expose the adhesive surface. Apply
only to a clean, dry surface. Smooth to remove
any air bubbles.
• Familiarize yourself with the following safety signs
and instruction labels. They are critical to the safe
operation of your Exmark commercial mower.
1-653558
103-6605
98-5954
103-2076
103-6607
LZUV3B Units Only
103-6604
LZUV2B Units Only
8
Safety
103-3508
LZUV2B Units Only
109-5890
LZUV3B Units Only
9
Specifications
Specifications
Model Numbers
Serial Nos: 850,000 and Higher
LZUV2B–Fits Lazer Z (LZZ), Lazer Z AS Series X (LZAS), and Lazer Z AS (LZA) with 48 or 52 inch deck.
LZUV3B–Fits Lazer Z (LZZ) and Lazer Z AS Series X (LZAS) with 60 or 72 inch deck. Fits Lazer Z AS (LZA)
with 60 inch deck.
Systems
Overall Length:
LZUV2B
Bagging System
w/Ultra Vac
• Collection bins:
– Commercial grade, cloth mesh bags with
reinforced bottoms.
– LZUV2B Capacity: 8.0 bushels
Lazer Z w/48 inch Deck
102.25 inches (259.7 cm)
Lazer Z w/52 inch Deck
102.25 inches (259.7 cm)
LZUV3B
– LZUV3B Capacity: 13.4 Bushels
w/Ultra Vac
• Dump Mechanism: Manual lift off
• Blower Tube: Fixed, abrasion resistant molded
polyethylene.
• Impeller: 5–bladed, 1/4 inch (6.4 mm) thick
abrasion resistant steel, with vertical axis.
Lazer Z w/60 inch Deck
107.00 inches (271.8 cm)
Lazer Z w/72 inch Deck
110.00 inches (279.4 cm)
Curb Weight:
LZUV2B
• Impeller bearings: 1 inch (2.5 cm) sealed
non-greaseable bearings.
Ultra Vac Weight
Dimensions
For units w/48 inch Deck
(3 toe board weights)
309 lb (140 kg)
266 lb (120 kg)
Overall Width:
For units w/52 inch Deck
(2 toe board weights)
LZUV2B
LZUV3B
w/Ultra Vac QDS
Lazer Z w/48 inch Deck
62.50 inches (158.8 cm)
Lazer Z w/52 inch Deck
67.75 inches (172.1 cm)
Ultra Vac Weight
LZUV3B
w/Ultra Vac
Lazer Z w/60 inch Deck
75.00 inches (190.5 cm)
Lazer Z w/72 inch Deck
87.25 inches (221.6 cm)
For units w/60 inch Deck
(2 toe board weights)
449 lb (204 kg)
For units w/72 inch Deck
(1 toe board weights)
406 lb (184 kg)
Torque Requirements
10
Bolt Location
Torque
Impeller Spindle Bottom
Nut
55-60 ft-lb (75-81 N-m)
Impeller Spindle Top Nut
75-80 ft-lb (102-108 N-m)
Operation
Product Overview
Operation
Note: Determine the left and right sides of the
machine from the normal operating position.
Important: For Serial Numbers 790,000 and
higher, multiple accessories added to a base
unit can change the stability of the machine.
Read the unit operator’s manual to determine
if counterbalance weights are necessary for the
accessories installed on the unit.
Important: Due to the added weight of the
Ultra Vac, it is important to ensure the parking
brake on your mower is adjusted properly. Before
installing the Ultra Vac, make sure to re-adjust
the parking brake on your mower as outlined in
the “Adjusting the Parking Brake” procedure in
the Maintenance section of the tractor Operator’s
manual.
Figure 4
1. Hopper
2. Toeboard weight
3. Caster weight (LZUV3B
Units Only)
4. Blower
5. Tube
6. Bag
Pre-Start
Make sure you understand the controls, their
locations, their functions, and their safety
requirements.
Ensure the blower, belt cover, bags, tubes and hopper
are in good condition, properly attached, and latched.
Important: Verify that the reinforced bumpers
are installed on your unit prior to operation.
Refer to the Maintenance section and perform all the
necessary inspection and maintenance steps.
Operating Instructions
Mowing
1. The Ultra Vac blower operates when the PTO
is engaged. Be sure that all persons are clear
of the mower deck before engaging the cutting
blades. Set the throttle to “midway” position. Pull
outward on the PTO switch to the “ROTATE”
position. Accelerate to full throttle to begin
mowing.
2. To disengage the PTO, set the throttle to
“midway” position. Push in on the PTO switch
to the “STOP” position to stop the cutting blades
and blower. The cutting blades will require a
slightly longer amount of time to come to a
complete stop when the blower is installed on
the deck. Verify that all rotation indicators have
11
Operation
stopped before clearing blower assembly or
mower deck.
3. To remove the bags, first disengage the PTO, stop
the engine and wait for all moving parts to stop.
Open the hopper and remove the bags by lifting
up on the rear of the bag, then unhooking the
front clip. Empty the bags by inverting them.
4. Reinstall bags, close and latch hopper before
continuing mowing.
Tips for mowing conditions:
• When mowing in areas with sandy soil, use
low lift blades on the cutting deck and higher
cutting heights to minimize wear on the blower
components.
• When mowing in wet conditions, such as just after
a rain or in heavy dew, use low lift blades on the
cutting deck to minimize plugging of the blower.
• Maintaining a ground speed that does not pull
down the engine RPM will allow for the highest
productivity and best quality of cut. Bogging the
engine RPM down by going too fast will cause
plugging and quality of cut issues.
• When the Ultra Vac gets full, the sound of
the blower will change and there will be slight
blowout from the front right corner of the deck.
Emptying the Ultra Vac at this point will minimize
the potential for the tube to plug.
Figure 5
1.
2.
3.
4.
5.
6.
Hopper
7. Toe board weight
8. Belt cover
Reinforced bumpers
9. Blower
Clevis pin
10. Tubes
Caster arm weight
Hairpin
11. Bag
For LZUV3B Units Only
4. Remove the knob from the belt cover bracket and
take off the belt cover.
Collection System Removal for Side
Discharge
1. Empty the hopper.
CAUTION
The hopper assembly is heavy when it is full,
which may make it difficult to remove the
hopper assembly from the unit. The entire
hopper assembly may fall, which may cause
injury.
Figure 6
1. Belt cover bracket
2. Belt cover
3. Knob
Prior to removing the hopper assembly from
the unit, first empty the contents.
2. Disengage the PTO, stop engine and wait for all
moving parts to stop. Remove key and engage
parking brake.
3. Remove the discharge tube by releasing the latches
at the blower. Slide the tube off the blower outlet
and remove the upper end from the hopper.
12
4. Belt
5. Deck sheave
Operation
CAUTION
WARNING
The deck sheave will become very hot.
Touching a hot deck sheave can cause severe
burns.
An uncovered discharge opening will
allow objects to be thrown in operator’s or
bystander’s direction. Also, contact with
blade could occur. Thrown objects or blade
contact can cause serious injury or kill you
or bystanders.
Allow the deck sheave to cool completely
before removing the belt.
Never operate mower unless discharge
deflector, or entire grass collection system, or
mulch kit is installed.
5. Pull the idler release handle and remove the belt
from the upper groove of the deck sheave.
6. Unlatch the front end of the blower. Pivot the
blower back and lift it off the deck.
8. Re-install the plastic belt cover and tighten the
knobs.
9. Remove the bags from the hopper assembly by
opening the hopper and lifting up on the rear of
the bag and then unhooking the front clip.
10. Remove the hopper assembly. Do Not use the
exhaust diverter as a handle when removing the
hopper.
CAUTION
The exhaust diverter is hot. Touching a hot
exhaust diverter can cause severe burns.
Figure 7
Allow the exhaust diverter to cool completely
before removing the hopper assembly.
1. Blower latch
2. Pivot blower away from deck
A. Push and hold the hopper assembly towards
the unit and pull the hairpins and mount pins
from frame mount barrel located on each side
of the frame legs.
7. Install the discharge deflector using the chute
pivot pin and hairpin (see Figure 8).
WARNING
When the mount pins have been removed,
the hopper assembly may fall. A falling
hopper assembly may cause injury.
Use care when the mount pins are removed
and if necessary, use assistance when
lowering the hopper assembly to the ground.
Figure 8
1. Hairpin
2. Chute pivot pin
3. Discharge deflector
B. If necessary, use assistance and carefully lower
the hopper assembly to the ground.
C. Re-insert the mount pins into the frame
mount barrel and secure with the hairpin.
11. The removable weights must be removed from
the unit. To remove the weight on the front of
13
Operation
the toe board, remove the two hairpins that retain
it and then lift it from the mount bracket. The
bracket bolted to the toe board remains on the
unit.
2. Remove hairpin and chute pivot pin. Remove
discharge deflector. Pivot pin and hair pin may be
stored in the pivot holes of the discharge deflector
during bagging operation.
For the LZUV3B Units: Remove the caster
weights by loosening the clamping knobs until the
weight can be moved relative to the caster arm.
Remove the hairpins and clevis pins that hold
the weights to the caster arms. Carefully lift the
weights off of the caster arms.
3. Lay the hopper assembly down as shown in
Figure 9.
Note: The removable weights are heavy. Use
care when lifting them. Make sure that you can
hold them securely before lifting them. Use
caution when positioning your hands so that you
Do Not set them down on your hands or fingers.
Figure 9
Note: The portions of the Ultra Vac collection
system that are not bolted to the mower are
designed to be installed or removed in their
entirety. Do Not operate the mower with only a
portion of the Ultra Vac installed.
1. Lower bagger mount bar
2. Frame notch
4. Remove the hairpin from the mount pin and pull
the mount pin out of the frame mount barrel.
5. Pick up the frame legs and hook the notch onto
the lower mount bar (see Figure 9).
WARNING
Caster or toe board weights installed without
the collection system may cause loss of
traction and steering control. Loss of control
can result in an accident which may cause
death, injury, or property damage.
6. Lift the hopper assembly and pivot it upward
towards the back of the unit (see Figure 10).
Install caster or toe board weights ONLY
when the collection system is installed.
12. The machine can now be used for side discharge
mowing.
Collection System Installation
Important: Verify that the reinforced bumpers
are installed on your unit prior to operation.
Important: Due to the added weight of the
Ultra Vac, it is important to ensure the parking
brake on your mower is adjusted properly. Before
installing the Ultra Vac, make sure to re-adjust
the parking brake on your mower as outlined in
the “Adjusting the Parking Brake” procedure in
the Maintenance section of the tractor Operator’s
manual.
Figure 10
1.
2.
3.
4.
1. Stop engine, remove key, and wait for all moving
parts to stop. Engage parking brake.
Rotate hopper assembly
Rear bumper
Mount bracket
Frame mount barrel
5. Hairpin
6. Mount pin
7. Opening
7. Continue to push the hopper assembly forward
until it contacts the mount bracket.
14
Operation
8. Adjust the exhaust diverter up or down in the
slots so it fits over the muffler.
side or temporarily removed. Either loosen
or remove both nuts on the top and bottom
of the belt guide. Once the belt is installed
on the impeller sheave, reinstall the belt guide
and tighten all hardware.
9. If needed, install washers between the exhaust
diverter and the frame to space the guard outward.
10. Install the mount pin into the frame mount
barrel. Make sure that it extends into the opening
between the rear bumper and the mount bracket
(see Figure 10).
11. Align the holes in the mount pin and frame
mount barrel and insert the hairpin to lock the
hopper assembly into place.
12. Tighten the hardware on the exhaust diverter.
13. Raise the hopper and install the bag assemblies by
inserting the hook portion into the slots in the
bagger support rods.
14. Remove the belt cover on the right side of the
deck.
Figure 12
15. Mount the blower on the deck by inserting the
mounting pin into the tube welded to the rear
corner of the deck (see Figure 11). Pivot the
blower until the front pin engages the slot in
the deck. Adjust the position of the front pin
if necessary to engage the slot. Use the latches
to lock the blower in this position. Adjust the
tension on the latch to hold the blower up to the
deck, yet allow for release by hand.
1. Nut
2. Belt guide
B. Pull the spring loaded idler release handle
back and install the belt in the upper groove
of the top spindle sheave. The belt should be
routed as shown in Figure 13.
Figure 13
Small Decks — View from Top of Blower
Figure 11
1. Slot
2. Front pin
3. Blower latch
1. Spring loaded idler
2. Impeller sheave
3. Fixed idler
4. Mounting pin
5. Deck tube
4. Belt guide
5. Deck sheave
For Large Decks:
16. Belt Installation:
Pull the spring loaded idler back and slip the belt
over the top deck sheave.
For Small Decks:
A. Slip the belt over the impeller sheave on the
blower.
Note: It may be easier to install the belt if
the belt guide is temporarily shifted to one
15
Operation
Figure 14
Large Decks — View from Top of Blower
1. Impeller sheave
2. Deck sheave
Figure 16
1. Blower
2. Belt cover
3. Spring loaded idler
3. Deck lip
20. Install the knob and its hardware.
21. Slip the upper and the lower tubes together.
22. Insert the upper tube into the hopper seal –
push in then pull out so that the seal is extended
outward.
23. Align the dimple on the upper tube with the end
of hopper seal and center between the two screws
as shown in Figure 17.
17. Position the belt cover at an angle and slide it
under the mower frame (see Figure 15).
Figure 15
1. Blower
2. Belt cover
3. Mower frame
Figure 17
18. Push down on the back of the cover and slide it
backwards under the blower.
1. Dimple
19. Slide the belt cover forward until it is seated under
both lips on the deck.
24. Set the deck in lowest cutting position.
25. Slide the lower tube onto the blower and attach
the latches. (Make sure that the upper tube does
not move out of alignment).
26. If the lower tube is replaced, drill three 7/32 inch
holes in the lower tube using the upper tube holes
as reference. See Figure 18.
27. Remove the tubes from unit and assemble the
upper and the lower tubes using three #10-24
x 3/4 inch hex washer head screws, three #10
washers, and three #10-24 nyloc nuts. The screw
head should be installed to the inside of the
16
Operation
tube to provide minimum obstruction to flow.
Make sure that the upper and the lower ends are
oriented properly as the tubes are assembled.
(Parting lines should roughly be lined up.)
Figure 19
30. For LZUV3B Units Only:
A. Install the removable caster weights on the
caster arms (see Figure 20).
B. Insert the clevis pin through the bracket hole
and fasten with a hairpin.
C. Tighten knob on weight assembly until the
weight is clamped securely to the caster arm.
Figure 18
1. Drill the holes here
28. Slide the lower end of the tube assembly over the
blower outlet and align the notch with the tube
latch. Latch the tube to the blower.
29. Install the removable weights. Hook the front toe
board weight assembly over the top of the weight
mounting plate and secure with two hairpins
Figure 19).
Weight Quantities
Deck
Size
48 inch
52 inch
60 inch
72 inch
Toe
Board
Weight
3
2
2
1
Caster
Weight
—
Figure 20
For LZUV3B Units Only
—
2
2
1. Clevis pin
2. Knob
Note: The removable weights are heavy. Use
care when lifting them. make sure that you can
hold them securely before lifting them. Use
caution when positioning your hands to that you
Do Not set them down on your hands or fingers.
3. Hairpin
4. Caster weight
Transporting
Transporting a Unit
Use a heavy-duty trailer or truck to transport the
machine. Lock brake and block wheels. Securely
fasten the machine to the trailer or truck with straps,
chains, cable, or ropes. Be sure that the trailer or truck
17
Operation
has all necessary lighting and marking as required by
law. Secure a trailer with a safety chain.
loading units on trailers or trucks. One full width
ramp that is wide enough to extend beyond the rear
tires is recommended instead of individual ramps for
each side of the unit. The lower rear section of the
tractor frame extends back between the rear wheels
and serves as a stop for tipping backward. Having
a full width ramp provides a surface for the frame
members to contact if the unit starts to tip backward.
If it is not possible to use one full width ramp, use
enough individual ramps to simulate a full width
continuous ramp.
CAUTION
This unit does not have proper turn
signals, lights, reflective markings, or a
slow moving vehicle emblem. Driving on a
street or roadway without such equipment
is dangerous and can lead to accidents
causing personal injury. Driving on a street
or roadway without such equipment may also
be a violation of State laws and the operator
may be subject to traffic tickets and/or fines.
Ramp should be long enough so that the angles
between the ramp and the ground and the ramp and
the trailer or truck Do Not exceed 15°. A steeper
angle may cause mower deck components to get
caught as the unit moves from ramp to trailer or
truck. Steeper angles may also cause the unit to tip
backward. If loading on or near a slope, position
the trailer or truck so it is on the down side of the
slope and the ramp extends up the slope. This will
minimize the ramp angle. The trailer or truck should
be as level as possible.
Do Not drive a unit on a public street or
roadway.
WARNING
Loading a unit on a trailer or truck increases
the possibility of backward tip-over.
Backward tip-over could cause serious injury
or death.
Important: Do Not attempt to turn the unit
while on the ramp, you may lose control and
drive off the side.
• Use extreme caution when operating a
unit on a ramp.
Avoid sudden acceleration when driving up a ramp
and sudden deceleration when backing down a ramp.
Both maneuvers can cause the unit to tip backward.
• Use only a single, full width ramp; Do
Not use individual ramps for each side
of the unit.
• If individual ramps must be used, use
enough ramps to create an unbroken
ramp surface wider than the unit.
Rollover Protection System (ROPS)
The roll bar has an intermediate position that allows
the bar to be lowered to provide over head clearance,
but not rest directly on the Ultra Vac assembly. Insert
a 1/2 x 3 inch bolt and 1/2 inch nut (or Exmark
service parts: clevis pin P/N 283-55 and hairpin P/N
1-806005) into the downstop hole on each side and
lower the roll bar.
• Do Not exceed a 15° angle between ramp
and ground or between ramp and trailer
or truck.
• Avoid sudden acceleration while driving
unit up a ramp to avoid tipping backward.
• Avoid sudden deceleration while backing
unit down a ramp to avoid tipping
backward.
Loading a Unit
Do Not transport the unit with the hopper full.
Empty the hopper before attempting to load unit
on trailer or truck. This will reduce the chance
of rearward tip up. Use extreme caution when
Figure 21
1. Intermediate position
18
2. Downstop hole
Operation
Important: The roll bar is an integral and
effective safety device. Keep the roll bar in the
raised and locked position when operating the
mower. Lower the roll bar temporarily only when
absolutely necessary.
Refer to the Operator’s manual supplied with your
tractor for additional ROPS safety and operating
instructions.
19
Maintenance
Maintenance
Note: Determine the left and right sides of the machine from the normal operating position.
WARNING
WARNING
While maintenance or adjustments are being
made, someone could start the engine.
Accidental starting of the engine could
seriously injure you or other bystanders.
The engine can become very hot. Touching
a hot engine can cause severe burns.
Allow the engine to cool completely before
service or making repairs around the engine
area.
Remove the key from the ignition switch,
engage parking brake, and pull the wire(s)
off the spark plug(s) before you do any
maintenance. Also push the wire(s) aside
so it does not accidentally contact the spark
plug(s).
Recommended Maintenance Schedule(s)
Maintenance Service
Interval
Maintenance Procedure
Before each use or daily
•
•
•
•
•
Check the blower housing/impeller.
Check bags.
Check exhaust diverter.
Clean muffler and rear frame area.
Clean rear screen in the hopper.
Every 25 hours
• Lubricate grease fittings.
Every 50 hours
• Check condition of belt.
Yearly or before storage
• Clean blower.
Periodic Maintenance
Check Bags
Check Blower
Housing/Impeller
Service Interval: Before each use or daily
1. Stop engine, wait for all moving parts to stop, and
remove key. Engage parking brake.
2. Inspect the bags for wear, tears, or damage.
Service Interval: Before each use or daily
1. Stop engine, wait for all moving parts to stop, and
remove key. Engage parking brake.
WARNING
Under normal use the bag will deteriorate
and wear. Objects could exit through worn
bag at high speeds. Thrown objects can
cause serious injury or kill you or bystanders.
2. Inspect for wear or damage daily. Replace or
repair worn parts as needed.
Note: When mowing in areas with sandy soil,
use low lift blades on the cutting deck and higher
cutting heights to minimize wear on the blower
components.
Check bags frequently for tears and holes.
Replace worn bags.
20
Maintenance
Adjustments
Check Exhaust Diverter
Service Interval: Before each use or daily
Adjusting the Blower Drive
Belt Position
CAUTION
The exhaust diverter is hot. Touching a hot
exhaust diverter can cause severe burns.
1. Read the operator’s manual for the UltraVac
and mower before performing this adjustment.
Make sure that you understand the controls, their
locations their functions and safety requirements.
Allow the exhaust diverter to cool completely
before performing maintenance.
2. Ensure the blower, belt cover, bags, tube and
hopper are in good condition, properly attached
and latched.
1. Stop engine, wait for all moving parts to stop, and
remove key. Engage parking brake.
2. Inspect and remove debris from the exhaust
diverter daily.
3. Run the unit with the PTO and the blower
engaged for two minutes.
Lubricate Grease Fittings
4. Disengage the PTO, stop the engine and remove
the key.
Note: See chart for service intervals.
1. Stop engine, wait for all moving parts to stop, and
remove key. Engage parking brake.
2. Lubricate fittings with NGLI grade #2
multi-purpose gun grease.
5. Remove the belt cover and check to make sure
that the belt is riding near the center of the flat
idler on the idler arm. If the belt is not riding near
the center of the idler, remove the blower, and
bend the idler arm slightly.
6. Reinstall the blower and belt cover and perform
steps 3-5 again to verify belt position.
Refer to the following chart for fitting locations
and lubrication schedule.
Lubrication Chart
Fitting
Locations
1. Idler
Bushings
Initial
Pumps
Number of
Places
Service
Interval
1–2
1
25 Hours
Check Condition of Belt
Service Interval: Every 50 hours
All Units
1. Stop engine, wait for all moving parts to stop, and
remove key. Engage parking brake.
2. Inspect the belt for damage or wear. Replace belt
with one of the following:
Deck
Part No.
48 inch
1-653333
52 inch
1-653438
60 inch
103-0866
72 inch
103-0867
21
Maintenance
Cleaning
Clean Muffler and Rear
Frame Area
Service Interval: Before each use or daily
Stop engine, wait for all moving parts to stop, and
remove key. Engage parking brake.
WARNING
Operating engine parts, especially the
muffler, become extremely hot. Severe burns
can occur on contact and debris, such as
leaves, grass, brush, etc. can catch fire.
• Allow engine parts, especially the muffler,
to cool before touching.
• Remove accumulated debris from muffler
and engine area.
Clean Rear Screen In Hopper
Service Interval: Before each use or daily
1. Stop engine, wait for all moving parts to stop, and
remove key. Engage parking brake.
2. Open hopper and remove clippings that are stuck
to the screen.
Clean Blower
Service Interval: Yearly or before storage
Grass build up may cause problems with the impeller
when the unit is put back into operation.
1. Stop engine, wait for all moving parts to stop, and
remove key. Engage parking brake.
2. Remove grass buildup from around the impeller
before placing it in storage.
22
Troubleshooting
Troubleshooting
Important: It is essential that all operator safety mechanisms be connected and in proper operating
condition prior to mower use.
When a problem occurs, Do Not overlook the simple causes. For example: starting problems could be
caused by an empty fuel tank.
The following table lists some of the common causes of trouble. Do Not attempt to service or replace major
items or any items that call for special timing or adjustment procedures (such as valves, governor, etc.). Have
this work done by your Engine Service Dealer.
Note: When disconnecting electrical connectors Do Not pull on the wires to separate the connectors.
Problem
Possible Cause
Corrective Action
1. Cutting blade(s) is/are bent or unbalanced.
1. Install new cutting blade(s).
2. Blade mounting bolt is loose.
3. Loose blower pulley or pulley assembly.
4. Blower impeller blades are bent.
2. Tighten the blade mounting bolt.
3. Tighten the appropriate pulley.
4. Contact an Authorized Service Dealer.
Blower drive belt snaps or breaks frequently.
1. Idler arm is out of alignment.
1. Correct the alignment of the idler arm.
Excessive grass blowout from the deck.
1. Bags are full.
1. Empty bags more frequently.
2. Plugged screen in bagger hopper.
2. Remove debris, leaves or grass clippings
from the screen.
3. Drive slower at full throttle.
4. Install new blower belt.
5. Locate and remove plugged debris.
6. Use lower lift blade.
Abnormal vibration.
3.
4.
5.
6.
Blower and tubes plug too frequently.
Ground speed is too fast.
Blower belt is worn, loose, or broken.
Plugged tube or blower.
Conditions are dry.
1. Bags are too full.
1. Empty bags more frequently
2. Ground speed is too fast.
3. Grass is too wet.
4. Grass is too long.
2. Drive slower at full throttle.
3. Cut grass when it is dry.
4. Cut grass more frequently or at higher cut
height.
5. Remove debris, leaves, or grass clippings
from the screen.
6. Install new belt.
5. Plugged screen in bagger hopper.
6. Blower drive belt is worn, loose, or
broken.
7. Blower is plugged.
7. Use low lift blades in wet conditions.
1. Plugged blower.
1. Remove debris, leaves, or grass clippings
from the blower impeller.
2. Impeller not aligned.
2. Contact an Authorized Service Dealer.
Plowing leaves.
1. Deck is too low.
1. Raise the deck slightly.
Chasing leaves.
1. Blowout from deck.
1. Check for clogged tubes.
2. Hopper is full.
2. Dump more frequently.
1. Sand or dry conditions.
1. Use low lift blades on the cutting
deck and higher cutting heights.
Clean air cleaners and cooling fins
frequently.
Blower impeller does not spin freely.
Blower components show signs of wear
and/or air cleaners and cooling fins are dirty.
23
Exmark Commercial Attachments and Accessories
1 Year Limited Warranty
Conditions and Products Covered
Exmark Mfg. Co. Inc. and its affiliate, Exmark Warranty
Company, pursuant to an agreement between them, jointly
warrant on the terms and conditions herein, that we will repair,
replace or adjust any part on these products and found by us
(in the exercise of our reasonable discretion) to be defective in
factory materials or workmanship for a period of one year.
Owner’s Responsibilities
If your product requires warranty service it must be returned
to an authorized Exmark service dealer within the warranty
period. This warranty extends only to commercial attachments
and accessories operated under normal conditions. You must
read the operator’s manual. You must also properly service
and maintain your Exmark product as described in the
operator’s manual or other operational instructions provided
by Exmark. Such routine maintenance, whether performed by
a dealer or by you, is at your expense.
This warranty applies to Exmark commercial attachments and
accessories sold in the U.S. or Canada. This warranty may
only be assigned or transferred to a second (or third) owner by
an authorized Exmark dealer. The warranty period commences
upon the date of the original retail purchase.
Warranty Exceptions
• Bags, Belts and Tires
General Conditions
The sole liability of Exmark and Exmark Warranty Company
with respect to this warranty shall be repair or replacement of
defective components as set forth herein. Neither Exmark
nor Exmark Warranty Company shall be liable for any
incidental or consequential loss or damage.
Warranty Period
90 days
This warranty only includes the cost of parts and labor.
Items and Conditions Not Covered
This warranty does not cover the following:
• Pickup and delivery charges to and from any authorized
Exmark Service Dealer.
• Any damage or deterioration due to normal use, wear and
tear, or exposure.
• Cost of regular maintenance service or parts, such as filters,
fuel, lubricants, tune-up parts, and adjustments.
• Any product or part which has been altered or misused or
required replacement or repair due to normal wear,
accidents, or lack of proper maintenance.
• Any repairs necessary due to use of parts, accessories or
supplies, including gasoline, oil or lubricants, incompatible
with the attachment or accessory or other than as
recommended in the operator's manual or other operational
instructions provided by Exmark.
Such damages include but are not limited to:
• Expenses related to gasoline, oil or lubricants.
• Travel time, overtime, after hours time or other
extraordinary repair charges or charges relating to repairs or
replacements outside of normal business hours at the place
of business of the authorized Exmark Service Dealer.
• Rental of like or similar replacement equipment during the
period of any warranty, repair or replacement work.
• Any telephone or telegram charges or travel charges.
• Loss or damage to person or property other than that
covered by the terms of this warranty.
• Any claims for lost revenue, lost profit or additional cost as
a result of a claim of breach of warranty.
• Attorney's fees.
No Claim of breach of warranty shall be cause for cancellation
or rescission of the contract of sale of any Exmark attachment
or accessory.
All implied warranties of merchantability (that the
product is fit for ordinary use) and fitness for use (that the
product is fit for a particular purpose) are limited to the
duration of the express warranty.
Some states do not allow exclusions of incidental or
consequential damages, or limitations on how long an
implied warranty lasts, so the above exclusions and
limitations may not apply to you.
All warranty work must be performed by an authorized
Exmark Service Dealer using Exmark approved replacement
parts.
Instructions for Obtaining Warranty Service
The product must be registered with original proof of purchase
by an Exmark Service Dealer before obtaining any warranty
service.
Contact any Exmark Service Dealer to arrange service at their
dealership. To locate a dealer convenient to you, access our
website at www.exmark.com. U.S. or Canada customers may
also call 402-223-6375.
This warranty gives you specific legal rights, and you may
also have other rights which vary from state to state.
If for any reason you are dissatisfied with the Service Dealer’s
analysis or with the assistance provided, contact us at:
Exmark Customer Service Department
The Exmark Warranty Company
2101 Ashland Avenue
Beatrice, NE 68310
402-223-6375 or
[email protected]
G4500-433_B
24
Notes:
25
Service Record
Date:
Description of Work Done:
26
Service Done By:
G011841
Figure 22
This page may be copied for personal use.
1. The maximum slope you can safely operate the machine on is 15 degrees. Use the slope indicator to determine the
degree of slope of hills before operating. Do Not operate this machine on a slope greater than 15 degrees. Fold
along the appropriate line to match the recommended slope.
2. Align this edge with a vertical surface, a tree, building, fence pole, etc.
3. Example of how to compare slope with folded edge.
27
SEE EXMARK’S COMPLETE LINE OF ACCESSORIES AND OPTIONS
MID-MOUNT RIDING ACCESSORIES AND OPTIONS
CUSTOM RIDE SEAT SUSPENSION SYSTEM
OPERATOR CONTROLLED DISCHARGE
FULL SUSPENSION SEAT
ROLL OVER PROTECTION SYSTEM (ROPS)
DECK LIFT ASSIST KIT
SUN SHADE
HITCH KIT
TRASH CONTAINER
LIGHT KIT
TURF STRIPER
12V POWER PORT
ULTRA VAC COLLECTION SYSTEM
MICRO-MULCH SYSTEM
ULTRA VAC QUICK DISPOSAL SYSTEM
OUT-FRONT RIDING ACCESSORIES AND OPTIONS
CUSTOM RIDE SEAT SUSPENSION SYSTEM
SNOW BLADE
DUAL-TAIL WHEEL
SNOWBLOWER
FLOOR PAN EXTENDER
SUN SHADE
HITCH KIT
TRASH CONTAINER
LIGHT KIT
ULTRA VAC COLLECTION SYSTEM
MICRO-MULCH SYSTEM
ULTRA VAC QUICK DISPOSAL SYSTEM
ROLL OVER PROTECTION SYSTEM (ROPS)
WEATHER CAB
WALK-BEHIND ACCESSORIES AND OPTIONS
GRASS CATCHER
TURF STRIPER
MICRO-MULCH SYSTEM
STANDON
Place Model No. and Serial No.
Label Here (Included in the Literature
Pack) or Fill in Below
Date Purchased
Model No.
Serial No.
© 2009 Exmark Mfg. Co., Inc.
Industrial Park Box 808
Beatrice, NE 68310
All Rights Reserved
Part No. 4500-608 Rev. A
(402) 223-6300
Fax (402) 223-5489
Printed in the USA
www.exmark.com