Transcript
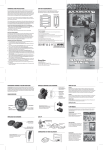
148.5 mm
INSTALLATION
GAME INSTRUCTIONS
1
1.5V AA
1.5V AA
1.5V AA
1.5V AA
2. Remove the battery cover by loosening the
FREE KICK, CORNER KICK and PENALTY KICK.
Use “
screw with a screwdriver. Adult supervision is
”, “
” button to select the desired game, then
step on “Start / Select” to enter. You can step on“Back”
recommended.
to go back to previous menu at all point of selection.
3. This unit is powered by 4 x AA batteries
< Free Kick >
2
There are four different play modes that are “Practice”, “Player 1
Vs Com”, “Player 1 Vs Player 2” & “Team A Vs Team B”.
1.5V AA
1.5V AA
cover and tighten the screw.
1.5V AA
polarity, noticing (+) and (-) marks. Replace the
1.5V AA
compartment. Set the batteries at the correct
Practice:
4. Fix the non-slip pads on each corner of the mat.
Model No.: EI-AB04
Carefully place the mat in the desired location
1.
USE 4 x AA BATTERIES
(NOT INCLUDED)
Select the footballer by using “
”, “
”, “
2.
CONNECTION TO A TV
3 IN 1
ick
• Free K
r Kick
• Corne
ty Kick
• Penal
” button, then stepping on the
Select the desired free kick position by stepping on the “
button, then choose the shooting angle “
3.
Quick run on the “
”, “
”, “
”, “
”, “
”, “
”, “
”
” to enter.
” to increase the shooting power. There is direction bar
“X” moves from left to right & “Y” moves from up to down in the bottom centre,
The Free Kick mat can be connected to a TV's
RCA sockets. Ensure your TV is switched off during
connection.
NOTE : Due to differences in refresh rates, this
product may not play correctly on high definition,
LCD or plasma TV sets.
1. Plug the AV cable into the sockets on the front or
rear of your TV. Ensure you connect the color
coded heads to the corresponding
colors on the socket.
2. Turn on your TV and set it
to the AV (video)
channel.
Press the
“POWER” button
to turn on the
Free Kick mat.
”, “
“Start / Select”.
and smooth out the pad.
210 mm
EXCALIBUR ELECTRONICS, INC., warrants to the original consumer that its products
are free from any electrical or mechanical defects for a period of 90 DAYS from the date of
purchase. If any such defect is discovered within the warranty period, EXCALIBUR ELECTRONICS, INC., will repair or replace the unit free of charge upon receipt of the unit, shipped
postage prepaid and insured to the factory address shown below.
The warranty covers normal consumer use and does not cover damage that occurs in
shipment or failure that results from alterations, accident, misuse, abuse, neglect, wear and
tear, inadequate maintenance, commercial use, or unreasonable use of the unit. Removal of
the top panel voids all warranties. This warranty does not cover cost of repairs made or
attempted outside of the factory.
Any applicable implied warranties, including warranties of merchantability and fitness, are
hereby limited to 90 DAYS from the date of purchase. Consequential or incidental damages
resulting from a breach of any applicable express or implied warranties are hereby excluded.
Some states do not allow limitations on the duration of LIMITED 90-DAY WARRANTY
implied warranties and do not allow exclusion of incidental or consequential damages, so the
above limitations and exclusions in these instances may not apply.
The only authorized service center in the United States is:
Excalibur Electronics, Inc.
13755 SW 119th Ave
Miami, Florida 33186 U.S.A.
Phone: 305.477.8080
Fax: 305.477.9516
www.ExcaliburElectronics.com
Ship the unit carefully packed, preferably in the original carton, and send it prepaid, and
adequately insured. Include a letter, detailing the complaint and including your daytime
telephone number, inside the shipping carton. If your warranty has expired and you want an
estimated fee for service, write to the above address, specifying the model and the problem.
There are three different games to choose from,
switched “OFF” before installing batteries.
(not included). Place the batteries into the
90-DAY LIMITED WARRANTY
Step on any button to enter the game.
1. Unpack the Free Kick mat and make sure it is
player should catch the right time then kick pass the motion sensor on the plastic
console of the Free Kick mat.
Player 1 Vs Com:
1.
Select footballer for yourself and computer by using “
”, “
”, “
”, “
” button,
then stepping on the “Start / Select”.
2.
Select the desired free kick position by stepping on the “
then choose the shooting angle “
3.
Quick run on the “
”, “
”, “
”, “
”, “
”, “
”, “
” button,
” to enter.
” to increase the shooting power. There is direction bar
“X” moves from left to right & “Y” moves from up to down in the bottom centre,
Excalibur Electronics, Inc. reserves the right to make technical changes without notice in the
interest of progess.
player should catch the right time then kick pass the motion sensor on the plastic
console of the Free Kick mat.
4.
NOTE: Please do not send your unit without first receiving an estimate for servicing from
EXCALIBUR ELECTRONICS, INC. Contact us before sending your unit. We cannot store
your unit!
Player 1 can select “Action Replay” by choosing “Yes” then “Start / Select”,
otherwise select “No” then “Start / Select” will move on to next shot.
5.
Computer will kick the ball from the same place and angle as selected by Player 1.
6.
Each has 6 shots, Player 1 selects free kick position first then the computer and so
on, finally the one who gets the most goal will become the winner.
P1
P2
For Ages 3+
Back Page
Cover Page
< Corner Kick >
Player 1 Vs Player 2:
1.
Player 1 selects the footballer by using “ ”, “
”, “
”, “
” button, then stepping on
the “Start / Select”. Player 2 selects the footballer by using “
”, “
”, “
”, “
“Player 1 Vs Player 2”. Use “
”
button, then stepping on the “Start / Select”. Then Player 1 selects the desired free
kick position by stepping on the “
shooting angle “
2.
Quick run on the “
”, “
”, “
”, “
”, “
”, “
”,“
”, “
” button to select the desired
game, then step on “Start / Select” to enter.
” button, and choose the
Player 1 Vs Com:
” to enter.
” to increase the shooting power. There is direction bar
1. The ball will be kicked by the computer automatically.
“X” moves from left to right & “Y” moves from up to down in the bottom centre,
2. Accuracy bar will be moving on screen, player needs to catch the right point on the
player should catch the right time then kick pass the motion sensor on the plastic
accuracy bar then kick over the motion sensor on the plastic console of the soccer mat.
console of the Free Kick mat.
3.
SAFETY WARNINGS
There are two different play modes that are “Player 1 Vs Com” and
3. Each has 5 shots, finally the one who gets the most goal will become the winner.
Player 1 can select “Action Replay” by choosing “Yes” then “Start / Select”,
4.
Player 2 will kick the ball from the same place and angle as selected by Player 1.
1. The ball will be kicked by the computer automatically.
5.
Player 2 can select “Action Replay” by choosing “Yes” then “Start / Select”,
2. Accuracy bar will be moving on screen, Player 1 & Player 2 need to take turn and
otherwise select “No” then “Start / Select” will move on to next shot.
catch the right point on the accuracy bar then kick over the motion sensor on the
Each player has 6 shots, Player 1 selects free kick position first then Player 2 and so
plastic console of the soccer mat.
on, finally the player who gets the most goal will become the winner.
3. Each has 5 shots, finally the one who gets the most goal will become the winner.
< Penalty Kick >
Team A Vs Team B:
1.
Total 8 countries for player to choose.
2.
Team A selects the country from country's flag by using “
There are two different play modes that are “Player 1 Vs Com” and
”, “
”, “
”, “
”
“Player 1 Vs Player 2”. Use “
button, then stepping on the “Start / Select”. Team B selects the country from
country's flag by using “
”, “
”, “
”, “
4.
”, “
” button, and choose the shooting angle “
Quick run on the “
”, “
”, “
”, “
”, “
”,
1.
” to enter.
2.
Team A can select “Action Replay” by choosing “Yes” then “Start / Select”,
Team B can select “Action Replay” by choosing “Yes” then “Start / Select”,
1.
”, “
” to increase the shooting power. There is direction bar
Player 1 & Player 2 should take turn and catch the right time then kick pass the
motion sensor on the plastic console of the Free Kick mat.
Each team has 6 shots, Team A selects free kick position first then Team B and so
on, finally the team who gets the most goal will become the winner.
Quick run on the “
“X” moves from left to right & “Y” moves from up to down in the bottom centre,
otherwise select “No” then “Start / Select” will move on to next shot.
8.
Each has 5 shots, finally the one who gets the most goal will become the winner.
Player 1 Vs Player 2 :
otherwise select “No” then “Start / Select” will move on to Team B.
7.
” to increase the shooting power. There is direction bar
console of the Free Kick mat.
console of the Free Kick mat.
Team B will kick the ball from the same place and angle as selected by Team A.
”, “
player should catch the right time then kick pass the motion sensor on the plastic
player should catch the right time then kick pass the motion sensor on the plastic
6.
Quick run on the “
“X” moves from left to right & “Y” moves from up to down in the bottom centre,
” to increase the shooting power. There is direction bar
“X” moves from left to right & “Y” moves from up to down in the bottom centre,
5.
” button to select the desired
Player 1 Vs Com:
Team A then selects the desired free kick position by stepping on the “
“
”, “
game, then step on “Start / Select” to enter.
” button, then stepping on the
“Start / Select”.
3.
Bare feet should be used to operate mat. Do not use with shoes or stocking feet.
Mat should be used on a clean, flat surface. Do not use the mat on concrete, rock or
any surface with sharp or abrasive objects.
Keep mat away from open flame and other heat sources.
When mat is not in use, it should be removed from the playing area and stored properly.
Do not use the mat on a wet surface.
Remove furniture or other objects in proximity to the mat, and use it in an area
with plenty of space, away from walls or windows.
The cord for the mat should be placed properly to avoid tripping risk.
Mat should be used with care to avoid injury.
The unit is a delicate piece of machinery. Do not dismantle, modify, or intentionally
abuse the mat.
•
•
•
•
•
•
•
Player 1 Vs Player 2 :
otherwise select “No” then “Start / Select” will move on to Player 2.
6.
•
•
P3
2.
Each has 5 shots, finally the one who gets the most goal will become the winner. P4
BATTERY SAFETY
•
•
•
•
•
•
•
•
•
•
•
•
•
•
•
•
The unit is powered by 4 x AA (UM-3/LR6) batteries.
Make sure that the power of unit is switched “OFF” before installing/changing batteries.
Unscrew the battery cover and insert the batteries following the polarity as indicated
inside the battery compartment.
Place 4 x AA alkaline (recommended) batteries into the compartment.
Replace the battery cover and secure the screw.
Non-rechargeable batteries are not to be recharged.
Rechargeable batteries are to be removed from the toy before being charged
(if removable).
Rechargeable batteries are only to be charged under adult supervision (if removable).
Different types of batteries or new and used batteries are not to be mixed.
Only batteries of the same or equivalent type as recommended are to be used.
Batteries are to be inserted with the correct polarity.
Exhausted batteries are to be removed from the toy.
The supply terminals are not to be short-circuited.
Dispose the exhausted batteries safely.
If batteries are mis-used, there is possibility of heat generation, explosion or battery
leakage.
Do not mix alkaline, standard (carbon-zinc) or rechargeable (nickel-cadmium) batteries.
FCC Warning Information
Information to the user
This device complies with Part 15 of the FCC Rules.
Operation is subject to the following two conditions:
(1) this device may not cause harmful interference, and
(2) this device must accept any interference received,
including interference that may cause undesired operation.
WASTE ELECTRICAL PRODUCTS SHOULD NOT BE
DISPOSED OF WITH HOUSEHOLD WASTE. PLEASE
RECYCLE WHERE FACILITIES EXIST. CHECK WITH
YOUR LOCAL AUTHORITY FOR RECYCLING ADVICE.
P5