1
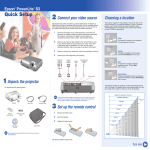
EPSON PowerLite 9300i
®
®
Quick Setup
TART
HERE
Connect the projector
to your notebook
S
1
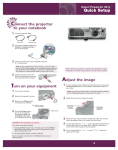
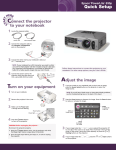
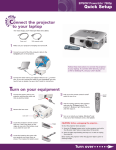
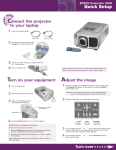
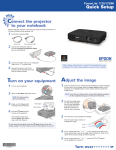
Locate the required cables:
Power cord
Computer cable
2
Connect the computer cable to the
Computer 1 port on the projector.
3
Connect the other end to your notebook’s video-out
or
monitor port.
NOTE: If your notebook has a DVI connector, you need to either
use a DVI-to-VGA adapter with the included computer cable (see
your computer’s documentation), or purchase an optional DVI
cable (for a higher-quality image). See your User’s Guide.
4
Follow these instructions to connect the projector to your
notebook. For other setup options, see your User’s Guide.
Connect the power cord to the
projector, then plug the other end
into a grounded electrical outlet.
Adjust the image
Turn on your equipment
1
Turn on your notebook.
2
Remove the projector’s lens cover.
3
1
If you’ve turned on your notebook and you don’t see an image, press
the Computer/DVI button on the projector to select the image source.
NOTE: If you still see a blank screen or have other display problems,
see the troubleshooting tips on the back of this sheet.
2
Make sure the
power light
is orange and not flashing.
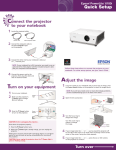
Adjust the sharpness, size, and height of the image:
Select an
image source
Power light is orange
and not flashing
Power button
4
Press the
Power button
to turn on the projector.
Focus
to sharpen
the image
CAUTION: Before unplugging the projector...
To shut down the projector properly:
1. Press the
Power button twice. Let the projector cool while
the power light flashes orange (about 30 seconds).
2. Once the light stops flashing and stays on, it’s safe to unplug
the projector.
Never unplug the projector when the
flashing orange.
3
4
Zoom
to adjust the
image size
Lens Shift
to adjust the
image height
If your image looks like
or
, you’ve placed the projector off to
one side of the screen at an angle. Place it directly in front of the
center of the screen, facing the screen squarely.
If your image looks like
square up the image.
or
, use the Keystone buttons to
power light is green or
Turn over
Quick Setup
EPSON PowerLite 9300i
®
Using the remote control
1
If this is your first time using the remote,
make sure its batteries are installed as shown.
®
Troubleshooting
If you see a blank screen...
If you see a blank screen or the No signal message after turning on
your notebook, check the following:
2
Turn on the power switch
on the side of the remote.
Power
E-Zoom
Zoom in on part of
the projected image
A/V Mute
R/C
ON
OFF
Turn projector
on and off
Re
siz
e
ze
ee
Fr
Turn off projector
display and sound
lor
Co ode
M
Page
Freeze the projector display
(presentation and sound
continue unless stopped)
Navigate projector
menus
Menu
Source
Choose which source
to display
Control projector
volume
Preset
Auto
Focus
Zoom
LensShift
Make sure the
power light on the projector is green
and not flashing, and the lens cover is off.
Press the Computer/DVI button on the projector
to select Computer 1 as the image source.
If you’re using a Windows® notebook, press the function key on your
keyboard that lets you display on an external monitor. It may be
labelled CRT/LCD or have an icon such as
. You may have to
hold down the Fn key while pressing it. Allow a few seconds for
the projector to sync up after changing the setting.
If the projector and notebook
don’t display the same image...
If your image displays either on the projector or notebook, but not on
both, check the following:
Windows
Try using the CRT/LCD or
key as described above. On most systems,
this key lets you toggle between the LCD screen and the projector,
or display on both at the same time.
Help
Preview
If that doesn’t work, check your monitor settings to make sure both the
LCD screen and the external monitor port are enabled.
1.
From the Windows Control Panel, open the Display utility.
2.
In the Display Properties dialog box, click the
Settings tab, then click Advanced.
3.
The method for adjusting the setting varies;
you may have to click a Monitor tab, then
make sure the external Monitor port is set
as your primary display and/or enabled.
See your notebook’s manual or online help
for details.
Volume
Num
You can use the remote control to control the projector. With an
optional USB cable, you can use the remote as a wireless mouse.
For more information on using the remote control, see
your User’s Guide.
W here to get help
Telephone Support Services
To use the EPSON PrivateLine® Support service, call (800) 637-7661
and enter the PIN on the EPSON PrivateLine Support card included in
your Start Here kit. This service is available 6 AM to 6 PM, Pacific Time,
Monday through Friday, for the duration of your warranty period.
You may also speak with a projector support specialist by dialing
one of these numbers:
U.S.:
(562) 276-4394, 6 AM to 6 PM, Pacific Time,
Monday through Friday
Canada: (905) 709-3839, 6 AM to 6 PM, Pacific Time,
Monday through Friday
Toll or long distance charges may apply.
Electronic Support Services
EPSON provides technical assistance through electronic support
services 24 hours a day at http://support.epson.com. For tips,
templates, and training for developing successful presentations
go to http://www.presentersonline.com.
Macintosh® OS X
1.
From the Apple® menu, select System
Preferences, then select Displays.
2.
Select the Color LCD dialog box.
3.
Click the Arrange (or Arrangement) tab
and click Mirror Displays.
Macintosh OS 9.x or earlier
1.
From the Apple menu, select Control
Panels, then click Monitors or
Monitors and Sound.
2.
Click the Arrange icon.
3.
Drag one monitor icon
on top of the other.
If the Arrange option isn’t available,
click the Monitor icon and select a
Simulscan resolution.
EPSON is a registered trademark of SEIKO EPSON CORPORATION. PowerLite and PrivateLine are registered trademarks of Epson America, Inc.
General Notice: Other product names used herein are for identification purposes only and may be trademarks of their respective owners.
EPSON disclaims any and all rights in those marks. © 2003 Epson America, Inc. 10/03
Printed in XXX
CPD-17184