1
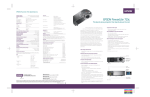
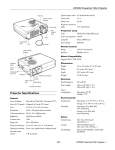
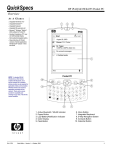
EPSON
Date:
PSB #:
Reference:
Product(s):
Subject:
PRODUCT SUPPORT BULLETIN
06/30/2000
Originator: ESC
PSB.2000.07.001
Authorization:
N/A
Total Pages: 2
Multimedia Projectors
Multimedia Projector Accessories – Ceiling Mounts and Suspension Adapters
This bulletin provides specification and warranty information on Ceiling Mounts and
Suspension Adapters for EPSON Multimedia Projectors:
CEILING MOUNTS:
Part Number:
Compatibility:
Dimension:
ELPMB31
PowerLite 5300, 5350, 7200, 7250, 7300, 7350,
8000i, 8000NL, 9000i and 9000NL
11.6” x 10.8” x 1.5”
Part Number:
Compatibility:
Dimension:
ELPMB32
PowerLite 500C, 700C and 710C
7.2” x 9” x 1.5”
Part Number:
Compatibility:
Dimension:
ELPMB33
PowerLite 5500C, 5550C, 7500C, and 7550C
10.7” x 9.6” x 1.8”
Warranty:
Description:
30-days whole unit exchange
Epson’s ceiling mounts provide the added flexibility of
mounting a PowerLite projector on the ceiling. They are
designed to be installed easily and include a quick release
feature for removal of the projector so it’s easy to change the
lamp, or remove the projector for portable use. The ceiling
mounts can also be used for rear projection applications.
Each ceiling mount is custom designed for use with a specific
Epson projector.
Page 1 of 2
SUSPENSION ADAPTERS:
Part Number:
Compatibility:
Dimension:
ELPMBAST
ELPMB31, ELPMB32 and ELPMB33
1 l/2” Pipe
Part Number:
Compatibility:
Dimensions:
ELPMBAPS
ELPMB32 and ELPMB33
1” Pipe
Warranty:
Description:
30-days whole unit exchange
Adjustable tubing extensions to increase the distance from the
ceiling to the projector—adjustable from 12” to 46”.
Page 2 of 2
EPSON
Date:
PSB #:
Reference:
Product(s):
Subject:
PRODUCT SUPPORT BULLETIN
06/02/2000
PSB.2000.06.001
N/A
Multimedia Projectors
Projector Compatibility with iMac’s
Originator: ESC
Authorization:
Total Pages: 1
This bulletin provides useful information on how to connect EPSON Multimedia Projectors to
iMac models that have no external video port and have Mac OS 8.1, 8.5 or 8.6 factory
installed.
Problem:
The earlier versions of the iMac’s do not have an external video port to connect an EPSON
projector. It is possible to output video signal from the iMacs by using a third party external
video adapter.
Resolution:
The current line of EPSON's multimedia projectors do support the iMacs, using the
recommended third party external video adapter from PowerR, at the supported video
resolution 1024 x 768 with refresh rate of 75Hz. The iPresenter video adapter is
a compact device that installs into an Apple iMac computer.
iPresenter RGB Video Adapter for iMac
Model: iP-10
Power R Inc.
756 Aloha Street
Seattle, WA. 98109
(800) 729-6970
www.powerr.com
Supports iMac version:
Versions A,B,C,D – no video out
Supported Video Resolution
1024 x 768, 75Hz
Page 1 of 1
EPSON
Date:
PSB #:
Reference:
Product(s):
Subject:
PRODUCT SUPPORT BULLETIN
05/18/2000
Originator: AP
PSB.2000.05.001
Authorization:
N/A
Total Pages: 1
Multimedia Projectors
Multi-Monitor Support Function of Newer Macintosh Notebook Computers
This bulletin provides configuration procedures for the newer Macintosh notebook computers
with the EPSON Multimedia Projectors.
Problem description:
When the projector is connected to an Apple notebook, part of the Mac OS desktop may not
display on either the LCD panel or the projector. Often, only the desktop wallpaper is visible on
one screen, with the other containing the complete video output.
Reason:
Newer Macintosh notebook computers are often configured for extended desktop video output
instead of video mirroring. This results in partial information being sent to either the LCD
panel or the projector. This feature has been observed on Powerbook and G3 Powerbook
models running Mac OS 8.x and later, but it is possible the issue has been experienced by
other Macintosh users.
Resolution:
1. Click the Apple Menu to select the Control Panels, Monitors and Sound option.
When the projector is powered on while connected to the computer, there will be an
“Arrange” icon in the Monitors and Sound control panel.
2. Click the “Arrange” icon to access that control. In the “Arrange” control view window, there
should be icons for two monitors.
3. Click one of the monitor icons and drag it on top of the other monitor icon. Release that
icon on the other icon. This enables dual display support where both screens receive and
display all video information.
Page 1 of 1