1
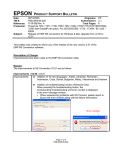
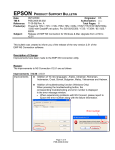
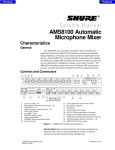
EPSON
Date:
PSB #:
Reference:
Product(s):
Subject:
PRODUCT SUPPORT BULLETIN
8/30/2007
Originator: DS
PSB.2007.08.001
Authorization:
N/A
Total Pages: 1
Epson Projectors with an HD-15 VGA Analog/Component Input
Elmo HV-110XG Document Camera and Projector Compatibility
This bulletin was created to inform you of an operational issue with the Elmo HV-110XG
Document Camera when initially connected to an Epson projector.
Problem:
When attempting to use the Elmo HV-110XG Document Camera connected via the VGA HD15
connection to display content from its document bed. When connected to the projector, the
projector displays only the Blue Screen - No Signal message and will blink off and on or
display just the Blue Screen - No Signal message. When a computer is connected to the Elmo
HV-110XG Document Camera and switched to Pass-Through mode, the computer image is
displayed correctly by the projector. When switching back to the document table source of the
Elmo HV-110XG Document Camera, the problem returns. The Elmo HV-110XG Document
Camera puts out a Progressive Scan 20fps signal to the projector's VGA Analog port. This
signal is detected at 15 kHz Vertical and 291.8 kHz Horizontal frequencies which are beyond
projector sync specifications.
Solution:
With the Elmo HV-110XG Document Camera powered on and connected to the projector via
the VGA computer cable, access the Computer1/Computer2 setting in the projector menu
system and select the Component setting within the appropriate connection. This will allow
the Elmo HV-110XG Document Camera and projector to sync and the projector to display the
image of the document camera bed and its contents. However, the image will have a pink
cast. To eliminate the pink cast, change the projector setting from Component to RGB then to
Auto and exit from the menu. The projected image will now look normal. This will now allow
the Elmo HV-110XG Document Camera to sync and display the image properly to any other
connected Epson projector without having to change the projector settings.
Page 1 of 1
EPSON
Date:
PSB #:
Reference:
Product(s):
Subject:
PRODUCT SUPPORT BULLETIN
04/02/2002
PSB.2002.04.007
TI01-12e
PowerLite 505c / 715c
Compact Flash Card and Adapter Support
Originator: JAM
Authorization:
Total Pages: 3
This bulletin was created to inform you of Compact Flash Support for the PowerLite 505c and
PowerLite 715c projectors.
Cards tested:
The following Compact Flash cards and adapters have been tested and added to the Extended Card
Support Listing.
Compact Card Make/Size
Epson 8MB Flash Card
Lexar 32MB Flash Card
Lexar 48MB Flash Card
Lexar 64MB Flash Card
SimpleTechnology 128MB Card
Memorex 256MB Card
SanDisk 512MB Card
Epson CF Adapter
Supported
Supported
Supported
Supported
Supported
Partially supported *1, *5
Partially supported *1, *6
SimpleTechnology Adapter
Supported
Supported
Supported
Supported
Supported
Partially supported *1, *5
Partially supported *1, *6
Extended Card Support Listing:
Manufacturer
Micro drive
IBM
Memory stick SONY
SONY
SONY
Smartmedia
Hagiwara
Syscom
FUJIFILM
MELCO
FUJIFILM
Name of product
340MB microdrive
MEMORY STICK 4MB
MEMORY STICK 32MB
MEMORY STICK 64MB
SmartMedia 2MB
SmartMedia 16MB
BUFFALO 32MB
SmartMedia-ID 64MB
Vol.
340MB
4MB
32MB
64MB
2MB
16MB
32MB
64MB
Model number
Adapter
manufacturer
Adapter model name
Supporting status
DMDM-10340
IBM
PC Card Adapter for IBM
microdrives
Supported
MSA-4A
SONY
MSAC-PC1
Supported
MSA-32A
MSA-64A
SMFV002
MG-16S
SMFDV032
MG-64SW
SONY
MSAC-PC2
Supported
I-O DATA
PCMS-ADP
Supported
SONY
MSAC-PC1
Supported
SONY
MSAC-PC2
Supported
I-O DATA
PCMS-ADP
Supported
SONY
MSAC-PC1
Supported
SONY
MSAC-PC2
Supported
I-O DATA
PCMS-ADP
Supported
Problem and Remarks
countermeasure
*4
*4
*4
Hagiwara Syscom HPC-SV03A
Partially supported
*1
MELCO
RFD-A2
Partially supported
*1
I-O DATA
PCFDCⅣ-ADP
Supported
OLYMPUS
MA-2
Supported
FUJIFILM
PC-AD3
Supported
Hagiwara Syscom HPC-SV03A
Partially supported
*1
MELCO
RFD-A2
Partially supported
*1
I-O DATA
PCFDCⅣ-ADP
Supported
OLYMPUS
MA-2
Supported
FUJIFILM
PC-AD3
Supported
Hagiwara Syscom HPC-SV03A
Partially supported
*1
MELCO
RFD-A2
Partially supported
*1
I-O DATA
PCFDCⅣ-ADP
Supported
OLYMPUS
MA-2
Supported
FUJIFILM
PC-AD3
Supported
Hagiwara Syscom HPC-SV03A
Partially supported
*1&*2
With ID
MELCO
Partially supported
*1&*2
With ID
RFD-A2
I-O DATA
PCFDCⅣ-ADP
Partially supported
*2
With ID
OLYMPUS
MA-2
Partially supported
*2
With ID
FUJIFILM
PC-AD3
Partially supported
*2
With ID
Card type
Compact
flash
Manufacturer
Name of product
Vol.
Model number
Adapter
manufacturer
Supporting status
EPSON
CompactFlash Card 8MB
8MB
60045390
EPSON
60045400
Supported
EPSON
CompactFlash Card 8MB
8MB
ECFA-08A
EPSON
60045400
Supported
EPSON
CompactFlash Card 8MB
8MB
ECFB-08
EPSON
60045400
Supported
EPSON
CompactFlash Card 16MB
16MB
60046790
EPSON
60045400
Supported
EPSON
CompactFlash Card 16MB
16MB
ECFA-16
EPSON
60045400
Supported
EPSON
CompactFlash Card 16MB
16MB
ECFD-16
EPSON
60045400
Partially supported
LEXAR MEDIA
Compact Flash Card 32MB
32MB
LEXAR MEDIA
Compact Flash Card 48MB
48MB
LEXAR MEDIA
Compact Flash Card 64MB
64MB
MITSUBISHI
CompactFlash 15MB
15MB
MEMOREX
Compact Flash Card 256MB
256MB
SANDISK
Compact Flash Card 512MB
512MB
SIMPLE
Compact Flash Card 128MB
TECHNOLOGY
I-O DATA
PCCF-40M
128MB
40MB
EPSON/Simple
Technology
EPSON/Simple
Technology
Problem and Remarks
countermeasure
EasyMP
Ver1.10
or upper
version
Supported
Supported
Supported
MF0015M03BA01
PCCF-40M
EPSON
EPSON/Simple
Technology
EPSON/Simple
Technology
EPSON/Simple
Technology
EPSON
I-O DATA
Flash ATA
Adapter model name
EPSON
60045400
Supported
Partially Supported
*1 & *5
Partially Supported
*1 & *6
Supported
60045400
Supported
CompactFlash Platform
Adapter
60045400
Supported
Supported
MELCO
RCF-C
48MB
RCF-C
MELCO
RCF-A
Supported
EPSON
Flash Packer 40MB
40MB
FP40
-
-
Supported
TDK
Flash Memory 96MB
96MB
SFD096H
-
-
Supported
Modem
Not supported
LAN
Not supported
IDE interface
Not supported
*1 When Capture/Scenario is created with overwrite protection mode, files can become inaccessible (both read or write) and a
warning message, "there is no file" is displayed. When the card is removed and re-inserted, the card recovers.
*2 When capture is made with overwrite protection mode, in some cases the message "under overwrite protection"
or "capture failed" can appear.
*3 It can take five to ten seconds until the card slot access LED is
activated.
*4 This adapter (MSAC-PCA) needs more time for formatting compared to other card adapters.
(Ordinarily 1 sec. or less is normal but it takes about 2 sec. for this one.)
*5 More than one format may be required before total card size is displayed.
*6 More than one format may be required to use card.
*3
For
external
CD-ROM
EPSON
Date:
PSB #:
Reference:
Product(s):
Subject:
PRODUCT SUPPORT BULLETIN
03/27/2002
PSB.2002.03.004A
TI01-35e, Rev. A
PowerLite 715c and PowerLite 505c
EasyMP SlideMaker update to Version 1.20
Originator: JAM
Authorization:
Total Pages: 1
This bulletin was created to inform you of a software update for EasyMP SlideMaker Program.
Reasons:
The update is now compatible with the full version or new installation of Microsoft Office XP.
Versions 1.02 and 1.10 of SlideMaker would fail to transfer slide presentations with the full
version. However upgrades from Office ’97 or Office 2000 to Office XP would function properly
with the previous versions of SlideMaker.
Recommendation:
Please verify the version of EasyMP installed on your system before downloading or installing the
update. Open EMP SlideMaker, click on Help and click on “About EMP SlideMaker”. If you
should see the following screen image, you have an older version of SlideMaker.
Compatibility:
SlideMaker scenario files made from the previous version can be converted to the new update,
however version 1.20 files cannot be opened or viewed by version 1.02 SlideMaker.
File location:
The file update is posted on Epson’s WEB site with this bulletin.
Updating the software:
The update utility Epson10316.exe is self-extracting program.
extract all the update files to the following folder:
Double-clicking the utility will
C:\EPSON\epson10316
The setup utility will automatically launch after the files have extracted. Follow the onscreen
instructions during the installation process.
Page 1 of 2
Reboot the system after the update is complete in order for the changes to take effect.
Page 2 of 2
EPSON
Date:
PSB #:
Reference:
Product(s):
Subject:
PRODUCT SUPPORT BULLETIN
06/26/2001
PSB.2001.06.006
None
PowerLite 715c and PowerLite 505c
Removing the Projector USB files and devices
Originator: JAM
Authorization:
Total Pages: 4
This bulletin was created to inform you how to remove the files and devices associated with
the USB projector(s). Also listed below are example screen shots to assist you.
Reasons:
1. You wish to remove all of the projector’s USB support “Files” and “Devices” from a system,
on which they are no longer being used.
2. The projector would not install properly and you wish to re-install it from a clean condition.
3. You are experiencing USB conflicts and need to make sure the projector is not the source
of the conflicts by removing it.
Files:
There are only 2 files associated with the projector that should be removed. The two files are
located in the following Windows folder: C:\WINDOWS\INF\OTHER. These are the file
names:
EPSONeasympstusb.inf
EPSONeasympstvxd.inf
(The prefix EPSON in the filename may or may not be listed)
(The prefix EPSON in the filename may or may not be listed)
1.) To remove click on START, Programs, Windows Explorer.
2.) From the pull-down menus, go to View, Folder Options, folder tab View, Hidden files
folder and click in the circle ‘Show all files’ so that it has a bullet, then click on the
‘APPLY’ button, then click on the ‘OK’ button.
3.) Click on the C: drive button so the folders expand down.
4.) Locate and click on the WINDOWS folder so the folders expand down.
5.) Locate and click on the INF folder so the folder expands down.
6.) Locate and click on the OTHER folder so the folder opens. On the right side of the
screen, locate and click on one of the file names listed above. Refer to Image # 1
below.
7.) From the pull-down menus, go to File, Delete, on the ‘Confirm File Delete’ screen, click
on Yes.
8.) Locate the second file and delete it also.
Devices:
There are 4 devices that should be removed and their name and locations are:
EPSON ELP/EMP-715
USB Human Interface Device
ELP/EMP-Series wdm Storage
Generic USB Hub
(located under Disk drives from Device Manager)
(located under Human Interface Devices from Device Manager)
(located under Universal Serial Bus controllers from Device Manager)
(located under Universal Serial Bus controllers from Device Manager)
Page 1 of 4
1.) To remove the devices click on START, Settings, Control Panel, double click on the
SYSTEM icon.
2.) On the System Properties screen, click on the tab Device Manager. Double click on the
DISK DRIVES icon. Refer to Image # 2 below.
3.) Click on the EPSON ELP/EMP-715 icon. Click on the REMOVE button on the bottom
of current screen. On the ‘Confirm Device Removal’ screen, click on the OK button.
4.) On the System Properties screen, click on the tab Device Manager. Double click on the
Human Interface Devices icon. Refer to Image # 3 below.
5.) Click on the USB Human Interface Device icon. Click on the REMOVE button on the
bottom of current screen. On the ‘Confirm Device Removal’ screen, click on the OK
button.
6.) On the System Properties screen, click on the tab Device Manager. Double click on the
Universal Serial Bus Controllers icon. Refer to Image # 4 below.
7.) Click on the ELP/EMP-Series wdm Storage icon. Click on the REMOVE button on the
bottom of current screen. On the ‘Confirm Device Removal’ screen, click on the OK
button.
8.) Click on the Generic USB HUB icon. Click on the REMOVE button on the bottom of
current screen. On the ‘Confirm Device Removal’ screen, click on the OK button.
9.) After doing so, restart the system and USB projector support will be completely
removed from the system.
Screen Shots:
Image # 1 - Windows Explorer screen shot of... C:\WINDOWS\INF\OTHER folder
Highlight and delete the “easympstusb.inf” and “easmpstvxd.inf” files.
Page 2 of 4
Image # 2 - Screen shot of... Device Manager/Disk drives
Highlight and remove the “EPSON ELP/EMP-715 device”.
Image # 3 - Screen shot of... Device Manager/Human Interface Devices
Highlight and remove the “USB Human Interface Device”.
Page 3 of 4
Image #4 - Screen shot of... Device Manager/Universal Serial Bus controllers
Highlight and remove the “ELP/EMP-Series wdm Storage” and “Generic USB Hub”.
Page 4 of 4
EPSON
Date:
PSB #:
Reference:
Product(s):
Subject:
PRODUCT SUPPORT BULLETIN
05/18/2001
PSB.2001.05.002
None
PowerLite 715c and PowerLite 505c
USB driver won't install on Windows 98
Originator: JAM
Authorization:
Total Pages: 1
This bulletin was created to inform you of a work-around for an error encountered when
installing the USB drivers for the PowerLite 715c and PowerLite 505c projectors.
Note: You will need to have the Windows 98 CD to extract a “Windows-USB” driver
or know the location of the Windows 98 “Source Files” on your hard disk. These
files are sometimes installed by the manufacturer of the computer system.
Error encountered:
The system displays the following warning message:
"Windows was unable to locate a driver for this device.
If you do not want to install a driver now, click Next.
To search again, click Back."
To proceed, click Next and then click Finish.
Work-Around:
The installation script for the USB driver does not indicate the location of the file accurately,
however the driver can be installed manually. A warning message appears on the installation
splash screen when trying to install the third of three driver files. The driver file in question is:
EPSONeasympstvxd.inf
1.) The first driver to successfully install is: USB Human Interface Device. This is the driver
required from the Windows 98 CD mentioned above. This file installs automatically.
2.) The second driver to successfully install is: ELP\EMP-Series wdm storage. This driver
automatically installs during the process from the provided Easy MP Software CD.
3.) The third driver that fails to install is: EPSON ELP/EMP-Series_wdm_storage. At the
warning message, click Next and on the following screen click Finish to exit the
process.
3.) Use Windows Explorer and browse to the following sub-directory on the installation CD:
drive letter:\USB-Driver\Win98\Eng\Disk1
4.) Copy the file (EPSONeasympstvxd.inf) to the following sub-directory on the hard disk
drive: C:\Windows\Inf\Other
Once the file is copied, re-boot the computer and re-start the projector. The USB port and
Compact Flash card will now be available and functional for use.
Page 1 of 1