1
PowerLite 1940W/1950/1960
®
Quick Setup
Before using the projector, make sure you read the safety instructions in the
online User’s Guide.
Video device
4Press the
power button on the projector or remote control. The
projector beeps, the power light flashes green, and then stays on.
Connect up to 4 video devices and use the Source Search button on the
projector or remote control to switch between them.
Make sure the batteries are installed as shown (two AA batteries).
RCA video cable (composite video)
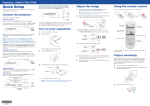
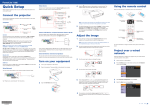
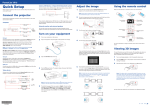
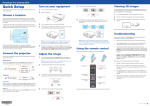
Connect the projector
Audio cable
Choose from the following connections. See the sections below or the online
User's Guide for details.
Computer
Component video to VGA cable
Audio cable
DisplayPort cable
Note: To shut down the projector, press the
5The default language of the menu system is English. To select another
language, press the Menu button on the remote control. Select
Extended and press
. Select Language and press
. Select your
language and press
. Press the Menu button to exit the menu system.
HDMI cable
Camera, USB device, or EPSON document camera DC-06
Connect a digital camera, USB flash drive, USB storage device, or EPSON
document camera DC-06 to the projector’s USB-A (flat) port.
Access projector
menus
Turn off projector
display
projector or the remote control to select the image source.
USB port
Connect the square end of a USB cable to the projector’s USB-B (square) port.
Connect the flat end of the cable to any USB port on your computer.
Note: If you still see a blank screen or have other display problems, see
the troubleshooting tips on the back of this sheet.
Windows® 2000 SP4 or later: After turning on the projector, follow
the on-screen instructions to install the EPSON® USB Display software
(EMP_UDSE.EXE; only on first connection).
2To raise the image, press the foot release button and lift the front of the
Note: If the software screen does not display automatically, open My
Computer or Computer, then double-click EPSON_PJ_UD.
Mac OS X 10.5.1 or higher: After turning on the projector, the setup folder
for USB Display appears in the Finder. Double-click USB Display Installer and
follow the on-screen instructions to install the EPSON USB Display software
(only on first connection).
Monitor port
Connect one end of a VGA cable to the projector’s Computer1 or
Computer2 port, and the other end to your computer’s
monitor port. If
you are using a laptop, switch it to external display (see “Troubleshooting”).
You can also connect an audio cable.
HDMI port
projector. Release the button to lock the foot in position.
If you connect a digital camera, USB flash drive, or USB storage device, you can
use the projector’s Slideshow feature to project images. See the online User’s
Guide for details.
You can also connect an external monitor and external speakers to your
projector to enhance your presentations. See the online User’s Guide for details.
1
Turn on your computer or video source.
2
Plug in the projector. The power light on the projector turns orange.
Connect one end of an HDMI cable to the projector’s HDMI port and the other
end to an HDMI port on your computer.
Get solutions to
common problems
For more information on using the remote control, see the online User’s
Guide.
Project over a wired
network
External monitor and external speakers
Turn on your equipment
Navigate projector
menus
Adjust the image
1If you don’t see an image, press the Source Search button on the
HDMI cable
Choose which
source to display
Turn projector
on and off
power button twice, then
unplug it. You don’t have to wait for the projector to cool down.
VGA cable
USB cable
Using the remote control
3
Turn the zoom ring to reduce or enlarge the image.
Follow the steps here to configure your projector for your wired network
using the projector’s menu system.
1
W
T
Plug in and turn on the projector.
2Press the Menu button on the remote control, select the Network
menu, and press
.
4Turn the focus ring to sharpen the image.
DisplayPort
Connect one end of a DisplayPort cable to the projector’s DisplayPort and the
other end to a DisplayPort on your computer.
Wired network
You can connect the projector to your network using an Ethernet® cable.
3
Open the A/V Mute slide all the way.
5
If your image looks like
or
, you’ve placed the projector off
to one side of the screen at an angle. Use the horizontal slider on the
projector to correct it. Or place the projector directly in front of the
center of the screen, facing the screen squarely.
See “Project over a wired network” for instructions.
6Your projector automatically adjusts images that look like
but if necessary you can press the
correct it.
*412289800*
*412289800*
or
or
,
buttons on the projector to
3
Select Network Configuration and press
4
Select the Basic menu and press
.
.
PowerLite 1940W/1950/1960
®
Quick Setup
Before using the projector, make sure you read the safety instructions in the
online User’s Guide.
Video device
4Press the
power button on the projector or remote control. The
projector beeps, the power light flashes green, and then stays on.
Connect up to 4 video devices and use the Source Search button on the
projector or remote control to switch between them.
Make sure the batteries are installed as shown (two AA batteries).
RCA video cable (composite video)
Connect the projector
Audio cable
Choose from the following connections. See the sections below or the online
User's Guide for details.
Computer
Component video to VGA cable
Audio cable
DisplayPort cable
Note: To shut down the projector, press the
5The default language of the menu system is English. To select another
language, press the Menu button on the remote control. Select
Extended and press
. Select Language and press
. Select your
language and press
. Press the Menu button to exit the menu system.
HDMI cable
Camera, USB device, or EPSON document camera DC-06
Connect a digital camera, USB flash drive, USB storage device, or EPSON
document camera DC-06 to the projector’s USB-A (flat) port.
Access projector
menus
Turn off projector
display
projector or the remote control to select the image source.
USB port
Connect the square end of a USB cable to the projector’s USB-B (square) port.
Connect the flat end of the cable to any USB port on your computer.
Note: If you still see a blank screen or have other display problems, see
the troubleshooting tips on the back of this sheet.
Windows® 2000 SP4 or later: After turning on the projector, follow
the on-screen instructions to install the EPSON® USB Display software
(EMP_UDSE.EXE; only on first connection).
2To raise the image, press the foot release button and lift the front of the
Note: If the software screen does not display automatically, open My
Computer or Computer, then double-click EPSON_PJ_UD.
Mac OS X 10.5.1 or higher: After turning on the projector, the setup folder
for USB Display appears in the Finder. Double-click USB Display Installer and
follow the on-screen instructions to install the EPSON USB Display software
(only on first connection).
Monitor port
Connect one end of a VGA cable to the projector’s Computer1 or
Computer2 port, and the other end to your computer’s
monitor port. If
you are using a laptop, switch it to external display (see “Troubleshooting”).
You can also connect an audio cable.
HDMI port
projector. Release the button to lock the foot in position.
If you connect a digital camera, USB flash drive, or USB storage device, you can
use the projector’s Slideshow feature to project images. See the online User’s
Guide for details.
You can also connect an external monitor and external speakers to your
projector to enhance your presentations. See the online User’s Guide for details.
1
Turn on your computer or video source.
2
Plug in the projector. The power light on the projector turns orange.
Connect one end of an HDMI cable to the projector’s HDMI port and the other
end to an HDMI port on your computer.
Get solutions to
common problems
For more information on using the remote control, see the online User’s
Guide.
Project over a wired
network
External monitor and external speakers
Turn on your equipment
Navigate projector
menus
Adjust the image
1If you don’t see an image, press the Source Search button on the
HDMI cable
Choose which
source to display
Turn projector
on and off
power button twice, then
unplug it. You don’t have to wait for the projector to cool down.
VGA cable
USB cable
Using the remote control
3
Turn the zoom ring to reduce or enlarge the image.
Follow the steps here to configure your projector for your wired network
using the projector’s menu system.
1
W
T
Plug in and turn on the projector.
2Press the Menu button on the remote control, select the Network
menu, and press
.
4Turn the focus ring to sharpen the image.
DisplayPort
Connect one end of a DisplayPort cable to the projector’s DisplayPort and the
other end to a DisplayPort on your computer.
Wired network
You can connect the projector to your network using an Ethernet® cable.
3
Open the A/V Mute slide all the way.
5
If your image looks like
or
, you’ve placed the projector off
to one side of the screen at an angle. Use the horizontal slider on the
projector to correct it. Or place the projector directly in front of the
center of the screen, facing the screen squarely.
See “Project over a wired network” for instructions.
6Your projector automatically adjusts images that look like
but if necessary you can press the
correct it.
*412289800*
*412289800*
or
or
,
buttons on the projector to
3
Select Network Configuration and press
4
Select the Basic menu and press
.
.
5Select the Projector Name setting and enter a name (up to 16
Troubleshooting
Use the displayed keyboard to enter characters. Press the arrow buttons
on the remote control to highlight the characters and press
to select
them.
If you see a blank screen or the No signal message after turning on your
computer or video device, check the following:
characters long) to identify your projector over the network.
•Make sure the power light on the projector is green and not flashing, and
the A/V Mute slide is open.
Note: See the online User’s Guide for information on adding passwords.
6
Select the Wired LAN menu and press
.
•
Press the Source Search button on the projector or the remote control to
switch to the correct image source, if necessary.
•
If you’re using a Windows laptop, press the function key on your
keyboard that lets you display on an external monitor. It may be labeled
CRT/LCD or have an icon such as
. You may have to hold down the
Fn key while pressing it (such as Fn + F7). Wait a moment for the display
to appear.
•
7
Choose IP Settings and press
.
8If your network assigns addresses automatically, select IP Settings and
turn on the DHCP setting. If not, turn off the DHCP setting and enter
the projector’s IP Address, Subnet Mask, and Gateway Address,
as needed.
9
To prevent the IP address from appearing on the network standby
screen, set the IP Address Display setting to Off.
10When you are finished, select Complete and press
If you’re using a Mac laptop, open System Preferences and select
Displays. Select the VGA Display or Color LCD option if necessary, then
click the Arrange or Arrangement tab, and select the Mirror Displays
check box.
Where to get help
Manuals
11Press the Menu button to exit the menu system.
12See “Install network software” for additional instructions.
Install network software
Install the EasyMP® Network Projection software on each computer that will
project over the network. Use the CD labeled Epson Projector Software to
install the program.
For more information about using the projector, click the icons on your desktop
to access the online manuals (requires an Internet connection). If you don’t
have icons to the manuals, you can install them from the projector CD or go to
the Epson website, as described below.
Telephone support services
To use the EPSON® PrivateLine® Support service, call (800) 637-7661 and enter
the PIN on the EPSON PrivateLine Support card included with your projector.
This service is available 6 am to 6 pm, Pacific Time, Monday through Friday, for
the duration of your warranty period. You may also speak with a projector
support specialist by dialing:
US: (562) 276-4394, 6 am to 8 pm, Pacific Time, Monday through Friday, and 7 am
to 4 pm, Pacific Time, Saturday
Canada: (905) 709-3839, 6
am
to 8
pm,
Pacific Time, Monday through Friday
Days and hours of support are subject to change without notice. Toll or long
distance charges may apply.
For instructions on installing and using your network software, click the icon
on your desktop to access the online EasyMP Network Projection Operation
Guide (requires an Internet connection). If you don’t see the EasyMP Network
Projection Guide icon, you can install it from the projector CD or go to the
Epson website, as described on the right.
Internet support
To monitor and control your projector over the network, download and install
the EasyMP Monitor software and manual from the Epson support web site.
You can install a link to the downloads page from the projector CD or go to
the Epson website, as described on the right.
Registration
Declaration of Conformity
According to 47CFR, Part 2 and 15, Class B Personal Computers and Peripherals;
and/or CPU Boards and Power Supplies used with Class B Personal Computers
We:
Located at: Telephone: Epson America, Inc.
3840 Kilroy Airport Way
MS: 3-13
Long Beach, CA 90806
(562) 290-5254
Declare under sole responsibility that the product identified herein, complies
with 47CFR Part 2 and 15 of the FCC rules as a Class B digital device. Each
product marketed, is identical to the representative unit tested and found
to be compliant with the standards. Records maintained continue to reflect
the equipment being produced can be expected to be within the variation
accepted, due to quantity production and testing on a statistical basis as
required by 47CFR §2.909. Operation is subject to the following two conditions:
(1) this device may not cause harmful interference, and (2) this device must
accept any interference received, including interference that may cause
undesired operation.
Trade Name: EPSON
Type of Product: Projector
Model:
H474A/H491A/H473A
Marketing Name:PowerLite 1940W/1950/1960
Epson America, Inc. Limited Warranty
, then press
again to save your settings.
Notices
Visit www.epson.com/support (U.S.) or www.epson.ca/support
(Canada) for solutions to common problems. You can download utilities and
documentation, get FAQs and troubleshooting advice, or e-mail Epson.
Register today to get product updates, special promotions, and customer-only
offers. You can use the CD included with your projector or register online at
www.epson.com/webreg.
Optional accessories
For a list of optional accessories, see the online User’s Guide.
Two-Year Projector Limited Warranty and 90-Day Lamp Limited Warranty
What Is Covered: Epson America, Inc. (“Epson”) warrants to the original retail
purchaser of the EPSON projector product enclosed with this limited warranty
statement that the product, if purchased new and operated in the United
States, Canada, or Puerto Rico will be free from defects in workmanship and
materials for a period of two (2) years from the date of original purchase. This
limited warranty applies only to the projector and not to the projector lamp,
which carries a limited warranty period of ninety (90) days from the date of
original purchase. For warranty service, you must provide proof of the date of
original purchase.
What Epson Will Do To Correct Problems: If your product requires service during
the limited warranty period, please call Epson at the number on the bottom of
this statement and be prepared to provide the model, serial number, and date
of original purchase. Epson will, at its option, repair or replace the defective
unit, without charge for parts or labor. If Epson authorizes an exchange for the
defective unit, Epson will ship a replacement product to you, freight prepaid, so
long as you use an address in the United States, Canada, or Puerto Rico. You are
responsible for securely packaging the defective unit and returning it to Epson
within five (5) working days of receipt of the replacement. Epson requires a
debit or a credit card number to secure the cost of the replacement product in
the event that you fail to return the defective one. If Epson authorizes repair
instead of exchange, Epson will direct you to send your product to Epson or
its authorized service center, where the product will be repaired and sent back
to you. You are responsible for packing the product and for all costs to and
from the EPSON authorized service center. When warranty service involves
the exchange of the product or of a part, the item replaced becomes Epson
property. The exchanged product or part may be new or refurbished to the
Epson standard of quality, and at Epson’s option, the replacement may be
another model of like kind and quality. Epson’s liability for replacement of the
covered product will not exceed the original retail selling price of the covered
product. Exchange or replacement products or parts assume the remaining
warranty period of the product covered by this limited warranty. If Epson
replaces the lamp as part of the warranty service, the replacement lamp carries
the limited 90-day warranty stated above.
What This Warranty Does Not Cover: This warranty covers only normal use
in the United States, Canada or Puerto Rico. Twenty-four hours per day or
other excessive continual use is not considered normal use. This warranty
does not cover consumables such as filters. This warranty is not transferable.
Epson is not responsible for warranty service should the Epson label or logo
or the rating label or serial number be removed. Epson is not responsible
for warranty service should the product fail to be properly maintained or
fail to function properly as a result of misuse, abuse, improper installation,
neglect, improper shipping, damage caused by disasters such as fire, flood,
and lightning, improper electrical current, software problems, interaction with
non-EPSON products, or service other than by Epson or an EPSON Authorized
Servicer. Postage, insurance, or shipping costs incurred in presenting your
EPSON product for carry-in warranty service are your responsibility. Epson will
pay for all freight charges if you choose to send your unit to Epson for repair.
If a claimed defect cannot be identified or reproduced in service, you will be
held responsible for costs incurred.
THE WARRANTY AND REMEDY PROVIDED ABOVE ARE EXCLUSIVE AND IN
LIEU OF ALL OTHER EXPRESS OR IMPLIED WARRANTIES INCLUDING, BUT NOT
LIMITED TO, THE IMPLIED WARRANTIES OF MERCHANTABILITY OR FITNESS
FOR A PARTICULAR PURPOSE. SOME LAWS DO NOT ALLOW THE EXCLUSION
OF IMPLIED WARRANTIES. IF THESE LAWS APPLY, THEN ALL EXPRESS AND
IMPLIED WARRANTIES ARE LIMITED TO THE WARRANTY PERIOD IDENTIFIED
ABOVE. UNLESS STATED HEREIN, ANY STATEMENTS OR REPRESENTATIONS
MADE BY ANY OTHER PERSON OR FIRM ARE VOID. IN THE EVENT THE
REMEDIES ABOVE FAIL, EPSON’S ENTIRE LIABILITY SHALL BE LIMITED TO A
REFUND OF THE PRICE PAID FOR THE EPSON PRODUCT COVERED BY THIS
LIMITED WARRANTY. EXCEPT AS PROVIDED IN THIS WRITTEN WARRANTY,
NEITHER EPSON AMERICA, INC. NOR ITS AFFILIATES SHALL BE LIABLE FOR
ANY LOSS, INCONVENIENCE, OR DAMAGE, INCLUDING DIRECT, SPECIAL,
INCIDENTAL, OR CONSEQUENTIAL DAMAGES, RESULTING FROM THE USE OR
INABILITY TO USE THE EPSON PRODUCT, WHETHER RESULTING FROM BREACH
OF WARRANTY OR ANY OTHER LEGAL THEORY
In Canada, warranties include both warranties and conditions.
Some jurisdictions do not allow limitations on how long an implied warranty
lasts and some jurisdictions do not allow the exclusion or limitation of
incidental or consequential damages, so the above limitations and exclusions
may not apply to you. This warranty gives you specific legal rights, and you
may also have other rights, which vary from jurisdiction to jurisdiction.
To find the EPSON Authorized Reseller nearest you, please visit our website at:
www.epson.com.
To find the EPSON Customer Care Center nearest you, please visit
www.epson.com/support.
To contact the EPSON ConnectionSM , please call (800) 637-7661 + PIN or
(562) 276-4394 in the U.S. and (905) 709-3839 in Canada or write to
Epson America, Inc., P.O. Box 93012, Long Beach, CA 90809-3012.
You can purchase screens or other accessories from an Epson authorized
reseller. To find the nearest reseller, call 800-GO-EPSON (800-463-7766). Or you
can purchase online at www.epsonstore.com (U.S. sales) or www.epson.ca
(Canadian sales).
EPSON, EasyMP, and PowerLite are registered trademarks, and EPSON Exceed Your Vision is a registered
logomark of Seiko Epson Corporation. PrivateLine is a registered trademark and EPSON Connection is a service
mark of Epson America, Inc.
General Notice: Other product names used herein are for identification purposes only and may be trademarks
of their respective owners. Epson disclaims any and all rights in those marks.
This information is subject to change without notice.
© 2012 Epson America, Inc. 2/12
Printed in XXXXXX
CPD-36660
5Select the Projector Name setting and enter a name (up to 16
Troubleshooting
Use the displayed keyboard to enter characters. Press the arrow buttons
on the remote control to highlight the characters and press
to select
them.
If you see a blank screen or the No signal message after turning on your
computer or video device, check the following:
characters long) to identify your projector over the network.
•Make sure the power light on the projector is green and not flashing, and
the A/V Mute slide is open.
Note: See the online User’s Guide for information on adding passwords.
6
Select the Wired LAN menu and press
.
•
Press the Source Search button on the projector or the remote control to
switch to the correct image source, if necessary.
•
If you’re using a Windows laptop, press the function key on your
keyboard that lets you display on an external monitor. It may be labeled
CRT/LCD or have an icon such as
. You may have to hold down the
Fn key while pressing it (such as Fn + F7). Wait a moment for the display
to appear.
•
7
Choose IP Settings and press
.
8If your network assigns addresses automatically, select IP Settings and
turn on the DHCP setting. If not, turn off the DHCP setting and enter
the projector’s IP Address, Subnet Mask, and Gateway Address,
as needed.
9
To prevent the IP address from appearing on the network standby
screen, set the IP Address Display setting to Off.
10When you are finished, select Complete and press
If you’re using a Mac laptop, open System Preferences and select
Displays. Select the VGA Display or Color LCD option if necessary, then
click the Arrange or Arrangement tab, and select the Mirror Displays
check box.
Where to get help
Manuals
11Press the Menu button to exit the menu system.
12See “Install network software” for additional instructions.
Install network software
Install the EasyMP® Network Projection software on each computer that will
project over the network. Use the CD labeled Epson Projector Software to
install the program.
For more information about using the projector, click the icons on your desktop
to access the online manuals (requires an Internet connection). If you don’t
have icons to the manuals, you can install them from the projector CD or go to
the Epson website, as described below.
Telephone support services
To use the EPSON® PrivateLine® Support service, call (800) 637-7661 and enter
the PIN on the EPSON PrivateLine Support card included with your projector.
This service is available 6 am to 6 pm, Pacific Time, Monday through Friday, for
the duration of your warranty period. You may also speak with a projector
support specialist by dialing:
US: (562) 276-4394, 6 am to 8 pm, Pacific Time, Monday through Friday, and 7 am
to 4 pm, Pacific Time, Saturday
Canada: (905) 709-3839, 6
am
to 8
pm,
Pacific Time, Monday through Friday
Days and hours of support are subject to change without notice. Toll or long
distance charges may apply.
For instructions on installing and using your network software, click the icon
on your desktop to access the online EasyMP Network Projection Operation
Guide (requires an Internet connection). If you don’t see the EasyMP Network
Projection Guide icon, you can install it from the projector CD or go to the
Epson website, as described on the right.
Internet support
To monitor and control your projector over the network, download and install
the EasyMP Monitor software and manual from the Epson support web site.
You can install a link to the downloads page from the projector CD or go to
the Epson website, as described on the right.
Registration
Declaration of Conformity
According to 47CFR, Part 2 and 15, Class B Personal Computers and Peripherals;
and/or CPU Boards and Power Supplies used with Class B Personal Computers
We:
Located at: Telephone: Epson America, Inc.
3840 Kilroy Airport Way
MS: 3-13
Long Beach, CA 90806
(562) 290-5254
Declare under sole responsibility that the product identified herein, complies
with 47CFR Part 2 and 15 of the FCC rules as a Class B digital device. Each
product marketed, is identical to the representative unit tested and found
to be compliant with the standards. Records maintained continue to reflect
the equipment being produced can be expected to be within the variation
accepted, due to quantity production and testing on a statistical basis as
required by 47CFR §2.909. Operation is subject to the following two conditions:
(1) this device may not cause harmful interference, and (2) this device must
accept any interference received, including interference that may cause
undesired operation.
Trade Name: EPSON
Type of Product: Projector
Model:
H474A/H491A/H473A
Marketing Name:PowerLite 1940W/1950/1960
Epson America, Inc. Limited Warranty
, then press
again to save your settings.
Notices
Visit www.epson.com/support (U.S.) or www.epson.ca/support
(Canada) for solutions to common problems. You can download utilities and
documentation, get FAQs and troubleshooting advice, or e-mail Epson.
Register today to get product updates, special promotions, and customer-only
offers. You can use the CD included with your projector or register online at
www.epson.com/webreg.
Optional accessories
For a list of optional accessories, see the online User’s Guide.
Two-Year Projector Limited Warranty and 90-Day Lamp Limited Warranty
What Is Covered: Epson America, Inc. (“Epson”) warrants to the original retail
purchaser of the EPSON projector product enclosed with this limited warranty
statement that the product, if purchased new and operated in the United
States, Canada, or Puerto Rico will be free from defects in workmanship and
materials for a period of two (2) years from the date of original purchase. This
limited warranty applies only to the projector and not to the projector lamp,
which carries a limited warranty period of ninety (90) days from the date of
original purchase. For warranty service, you must provide proof of the date of
original purchase.
What Epson Will Do To Correct Problems: If your product requires service during
the limited warranty period, please call Epson at the number on the bottom of
this statement and be prepared to provide the model, serial number, and date
of original purchase. Epson will, at its option, repair or replace the defective
unit, without charge for parts or labor. If Epson authorizes an exchange for the
defective unit, Epson will ship a replacement product to you, freight prepaid, so
long as you use an address in the United States, Canada, or Puerto Rico. You are
responsible for securely packaging the defective unit and returning it to Epson
within five (5) working days of receipt of the replacement. Epson requires a
debit or a credit card number to secure the cost of the replacement product in
the event that you fail to return the defective one. If Epson authorizes repair
instead of exchange, Epson will direct you to send your product to Epson or
its authorized service center, where the product will be repaired and sent back
to you. You are responsible for packing the product and for all costs to and
from the EPSON authorized service center. When warranty service involves
the exchange of the product or of a part, the item replaced becomes Epson
property. The exchanged product or part may be new or refurbished to the
Epson standard of quality, and at Epson’s option, the replacement may be
another model of like kind and quality. Epson’s liability for replacement of the
covered product will not exceed the original retail selling price of the covered
product. Exchange or replacement products or parts assume the remaining
warranty period of the product covered by this limited warranty. If Epson
replaces the lamp as part of the warranty service, the replacement lamp carries
the limited 90-day warranty stated above.
What This Warranty Does Not Cover: This warranty covers only normal use
in the United States, Canada or Puerto Rico. Twenty-four hours per day or
other excessive continual use is not considered normal use. This warranty
does not cover consumables such as filters. This warranty is not transferable.
Epson is not responsible for warranty service should the Epson label or logo
or the rating label or serial number be removed. Epson is not responsible
for warranty service should the product fail to be properly maintained or
fail to function properly as a result of misuse, abuse, improper installation,
neglect, improper shipping, damage caused by disasters such as fire, flood,
and lightning, improper electrical current, software problems, interaction with
non-EPSON products, or service other than by Epson or an EPSON Authorized
Servicer. Postage, insurance, or shipping costs incurred in presenting your
EPSON product for carry-in warranty service are your responsibility. Epson will
pay for all freight charges if you choose to send your unit to Epson for repair.
If a claimed defect cannot be identified or reproduced in service, you will be
held responsible for costs incurred.
THE WARRANTY AND REMEDY PROVIDED ABOVE ARE EXCLUSIVE AND IN
LIEU OF ALL OTHER EXPRESS OR IMPLIED WARRANTIES INCLUDING, BUT NOT
LIMITED TO, THE IMPLIED WARRANTIES OF MERCHANTABILITY OR FITNESS
FOR A PARTICULAR PURPOSE. SOME LAWS DO NOT ALLOW THE EXCLUSION
OF IMPLIED WARRANTIES. IF THESE LAWS APPLY, THEN ALL EXPRESS AND
IMPLIED WARRANTIES ARE LIMITED TO THE WARRANTY PERIOD IDENTIFIED
ABOVE. UNLESS STATED HEREIN, ANY STATEMENTS OR REPRESENTATIONS
MADE BY ANY OTHER PERSON OR FIRM ARE VOID. IN THE EVENT THE
REMEDIES ABOVE FAIL, EPSON’S ENTIRE LIABILITY SHALL BE LIMITED TO A
REFUND OF THE PRICE PAID FOR THE EPSON PRODUCT COVERED BY THIS
LIMITED WARRANTY. EXCEPT AS PROVIDED IN THIS WRITTEN WARRANTY,
NEITHER EPSON AMERICA, INC. NOR ITS AFFILIATES SHALL BE LIABLE FOR
ANY LOSS, INCONVENIENCE, OR DAMAGE, INCLUDING DIRECT, SPECIAL,
INCIDENTAL, OR CONSEQUENTIAL DAMAGES, RESULTING FROM THE USE OR
INABILITY TO USE THE EPSON PRODUCT, WHETHER RESULTING FROM BREACH
OF WARRANTY OR ANY OTHER LEGAL THEORY
In Canada, warranties include both warranties and conditions.
Some jurisdictions do not allow limitations on how long an implied warranty
lasts and some jurisdictions do not allow the exclusion or limitation of
incidental or consequential damages, so the above limitations and exclusions
may not apply to you. This warranty gives you specific legal rights, and you
may also have other rights, which vary from jurisdiction to jurisdiction.
To find the EPSON Authorized Reseller nearest you, please visit our website at:
www.epson.com.
To find the EPSON Customer Care Center nearest you, please visit
www.epson.com/support.
To contact the EPSON ConnectionSM , please call (800) 637-7661 + PIN or
(562) 276-4394 in the U.S. and (905) 709-3839 in Canada or write to
Epson America, Inc., P.O. Box 93012, Long Beach, CA 90809-3012.
You can purchase screens or other accessories from an Epson authorized
reseller. To find the nearest reseller, call 800-GO-EPSON (800-463-7766). Or you
can purchase online at www.epsonstore.com (U.S. sales) or www.epson.ca
(Canadian sales).
EPSON, EasyMP, and PowerLite are registered trademarks, and EPSON Exceed Your Vision is a registered
logomark of Seiko Epson Corporation. PrivateLine is a registered trademark and EPSON Connection is a service
mark of Epson America, Inc.
General Notice: Other product names used herein are for identification purposes only and may be trademarks
of their respective owners. Epson disclaims any and all rights in those marks.
This information is subject to change without notice.
© 2012 Epson America, Inc. 2/12
Printed in XXXXXX
CPD-36660