1
PowerLite® 1915/1925W
Quick Setup
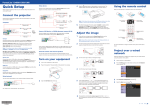
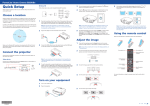
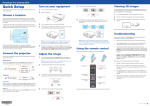
Video Player
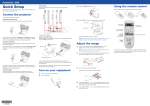
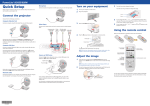
Connect a computer using the VGA cable that came with the projector.
Component video to VGA cable*
Turn on your equipment
1
2
3
Press the Focus buttons to sharpen the image.
Turn the zoom ring to reduce or enlarge the image.
Turn on your computer or video source.
Focus
Plug in the projector.
Zoom
HDMI cable*
Computer Monitor Port
VGA cable
Choose from the following connections:
Audio cable*
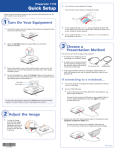
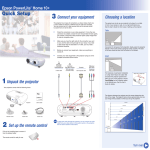
Connect the projector
RCA video cable (composite video)*
Before using the projector, make sure you read the safety instructions in the
User’s Guide on your projector CD.
S-Video cable*
Connect up to 5 video devices and use the remote control to switch between
them.
3
Open the A/V Mute slide all the way.
4
If your image looks like
or
, you’ve placed the projector off to
one side of the screen at an angle. Place it directly in front of the center
of the screen, facing the screen squarely.
5
If your image looks like
projector to correct it.
or
, press the
or
buttons on the
Using the remote control
Make sure the batteries are installed as shown (two AA batteries).
* These cables are optional.
Connect one end to the projector’s Computer1 or Computer2 port, and the
other end to your computer’s
monitor port. If you are using a notebook,
switch it to external display. You can also connect an audio cable.
Camera or USB Device
Connect a digital camera or other USB device to the projector’s USB1 Type A
(flat) port.
Computer USB Port
4
Connect a computer (Windows® 2000 or later only) using the USB cable that
came with the projector.
Press the
power button on the projector or remote control.
Power light
Turn projector
on and off
Connect the square end of the USB cable to the projector’s
USB
TypeB (square) port. Connect the flat end of the cable to any USB
port on your computer.
Power button
Thumb drive
Choose which
source to display
Turn off projector
display and sound
Digital camera
Connect an Epson Document Camera to the USB2
Follow the on-screen instructions to install the Epson USB Display software.
(You need to install the software only the first time you connect.) Then press
the USB button on the remote control.
port.
The power light flashes green, then stays on.
NOTE: To shut down the projector, press the
power button twice, then
unplug it. You don’t have to wait for the projector to cool down.
Adjust the image
DC-06 document camera
Network (LAN)
Connect the projector to a wired network using an Ethernet cable.
See “Project Over a Wired Network” on the back of this sheet for more
information.
1
If you don’t see an image, press the Source Search button on the
projector or the remote control to select the image source.
NOTE: If you still see a blank screen or have other display problems, see
the troubleshooting tips on the back of this sheet.
®
2
If you connect a digital camera or USB storage device, you can use the
projector’s EasyMP Slide Converter feature. See the Network and PC Free
Operation Guide on your projector CD.
For information on connecting an external monitor or external speakers, see
the User’s Guide on your projector CD.
To connect to a wireless network, see “Project Wirelessly” on the back of the
sheet for instructions.
To raise the image, press the gray foot release lever and lift the front of
the projector. Release the lever to lock the foot in position.
Change
presentation
slides (USB
connection only)
Control projector volume
Navigate
projector
menus
You can use the remote control to operate the projector. With the USB cable,
you can use the remote as a wireless mouse. For more information on using
the remote control, see your User’s Guide.
PowerLite® 1915/1925W
Quick Setup
Video Player
Connect a computer using the VGA cable that came with the projector.
Component video to VGA cable*
Turn on your equipment
1
2
3
Press the Focus buttons to sharpen the image.
Turn the zoom ring to reduce or enlarge the image.
Turn on your computer or video source.
Focus
Plug in the projector.
Zoom
HDMI cable*
Computer Monitor Port
VGA cable
Choose from the following connections:
Audio cable*
Connect the projector
RCA video cable (composite video)*
Before using the projector, make sure you read the safety instructions in the
User’s Guide on your projector CD.
S-Video cable*
Connect up to 5 video devices and use the remote control to switch between
them.
3
Open the A/V Mute slide all the way.
4
If your image looks like
or
, you’ve placed the projector off to
one side of the screen at an angle. Place it directly in front of the center
of the screen, facing the screen squarely.
5
If your image looks like
projector to correct it.
or
, press the
or
buttons on the
Using the remote control
Make sure the batteries are installed as shown (two AA batteries).
* These cables are optional.
Connect one end to the projector’s Computer1 or Computer2 port, and the
other end to your computer’s
monitor port. If you are using a notebook,
switch it to external display. You can also connect an audio cable.
Camera or USB Device
Connect a digital camera or other USB device to the projector’s USB1 Type A
(flat) port.
Computer USB Port
4
Connect a computer (Windows® 2000 or later only) using the USB cable that
came with the projector.
Press the
power button on the projector or remote control.
Power light
Turn projector
on and off
Connect the square end of the USB cable to the projector’s
USB
TypeB (square) port. Connect the flat end of the cable to any USB
port on your computer.
Power button
Thumb drive
Choose which
source to display
Turn off projector
display and sound
Digital camera
Connect an Epson Document Camera to the USB2
Follow the on-screen instructions to install the Epson USB Display software.
(You need to install the software only the first time you connect.) Then press
the USB button on the remote control.
port.
The power light flashes green, then stays on.
NOTE: To shut down the projector, press the
power button twice, then
unplug it. You don’t have to wait for the projector to cool down.
Adjust the image
DC-06 document camera
Network (LAN)
Connect the projector to a wired network using an Ethernet cable.
See “Project Over a Wired Network” on the back of this sheet for more
information.
1
If you don’t see an image, press the Source Search button on the
projector or the remote control to select the image source.
NOTE: If you still see a blank screen or have other display problems, see
the troubleshooting tips on the back of this sheet.
®
2
If you connect a digital camera or USB storage device, you can use the
projector’s EasyMP Slide Converter feature. See the Network and PC Free
Operation Guide on your projector CD.
For information on connecting an external monitor or external speakers, see
the User’s Guide on your projector CD.
To connect to a wireless network, see “Project Wirelessly” on the back of the
sheet for instructions.
To raise the image, press the gray foot release lever and lift the front of
the projector. Release the lever to lock the foot in position.
Change
presentation
slides (USB
connection only)
Control projector volume
Navigate
projector
menus
You can use the remote control to operate the projector. With the USB cable,
you can use the remote as a wireless mouse. For more information on using
the remote control, see your User’s Guide.
Project wirelessly
Follow the steps here to connect the projector wirelessly over an 802.11g,
802.11b, or 802.11a wireless network. Your computer must have a
wireless card or built-in wireless interface, and be running Windows
Vista®, Windows XP Professional x64, Windows XP, or Windows 2000, or
Mac OS® X 10.3 to 10.5.
1
To install the LAN module, remove the projector’s wireless LAN
module cover.
9
If your network assigns addresses automatically turn on DHCP. If not,
turn off DHCP and enter the projector’s IP Address, Subnet Mask, and
Gateway Address, as needed.
To enter numbers, use the arrow buttons on the remote control to
highlight a number, then press the Enter button. When you’re finished
entering an address, highlight Return, then press Enter.
10 To prevent the SSID and IP address from appearing on the network
standby screen, set the SSID Display and/or IP Address Display
settings to Off.
11 See “Install network software” for additional instructions.
2
3
Insert the LAN module into the port and replace the cover.
Project over a wired
network
Install network software
Where to get help
Install EasyMP® Network Projection and Easy Management® EasyMP Monitor
(Windows only) on each computer that will project over the network. Use the
CD labeled Epson Projector Software for Meeting & Monitoring to install
these programs.
Manuals
For instructions on installing and using your network software, see the Network
and PC Free Operation Guide.
Telephone Support Services
For instructions on installing and using EasyMP Monitor to monitor projectors
over the network, see the EasyMP Monitor Operation Guide.
These guides are installed along with your projector User’s Guide and are
viewable by clicking the icons for them on your computer desktop.
Troubleshooting
If you see a blank screen...
If you need to configure the projector for your network, you can use the
projector’s menu system.
If you see a blank screen or the No signal message after turning on your
computer, check the following:
1
•
Make sure the power light on the projector is green and not flashing, and
the A/V Mute slide is open.
•
Press the Source Search button on the projector or the remote control to
select the computer as the image source.
Press the Menu button on the remote control, select the Network menu,
then press Enter.
Secure the cover using the screw that came with the LAN module.
•If you’re using a Windows notebook, press the function key on your
keyboard that lets you display on an external monitor. It may be labelled
CRT/LCD or have an icon such as
. You may have to hold down the
Fn key while pressing it.
If the projector and notebook don’t display the
same image...
2
3
4
4
To configure your projector for your wireless network, do one of the
following:
•If you’re using the optional Quick Wireless Connection USB key,
5
Choose Network Configuration and press Enter.
Select the Wired LAN menu and press Enter.
Choose IP Settings and press Enter. You see a screen like the following:
If you’re not using the key, continue with these steps.
Press the Menu button on the remote control, select the Network
menu, and press Enter.
5 Do one of the following:
• If your network assigns addresses automatically, turn on the DHCP
setting.
6
7
8
•
To enter numbers, use the arrow buttons on the remote control to
highlight a number, then press the Enter button. When you’re finished
entering an address, highlight Return, then press Enter.
6
To prevent the IP address from appearing on the network standby screen,
set the IP Address Display setting to Off.
7
When you’re done making all necessary changes, select Setup complete
and press Enter to save your settings. Then press Enter again to confirm.
8
Press the Menu button to exit the menu system.
Choose Network Configuration and press Enter.
Select the Wireless LAN menu and press Enter.
Try using the CRT/LCD or
key as described above. On most systems, this
key lets you toggle between the LCD screen and the projector, or display on
both at the same time.
To use the Epson PrivateLine® Support service, call (800) 637-7661 and enter
the PIN on the Epson PrivateLine Support card included with your projector.
This service is available 6 AM to 6 PM, Pacific Time, Monday through Friday, for
the duration of your warranty period. You may also speak with a projector
support specialist by dialing:
(562) 276-4394 (U.S.) or (905) 709-3839 (Canada), 6
Monday through Friday
AM
to 6
PM,
Pacific Time,
Days and hours of support are subject to change without notice. Toll or long
distance charges may apply.
Internet Support
Visit epson.com/support for solutions to common problems. You can
download utilities and documentation, get FAQs and troubleshooting advice,
or e-mail Epson with your questions.
Registration
Register today to get product updates, special promotions, and customer-only
offers. You can use the CD included with your projector or register online at
www.epson.com/webreg.
Optional accessories
For a list of optional accessories, see your projector User’s Guide.
You can purchase screens, carrying cases, or other accessories from an Epson
authorized reseller. To find the nearest reseller, call 800-GO-EPSON
(800-463-7766). Or you can purchase online at www.epsonstore.com (U.S.
sales) or www.epson.ca (Canadian sales).
If that doesn’t work, check your monitor settings to make sure both the LCD
screen and the external monitor port are enabled.
insert it into the projector’s USB1 port, look for the displayed
message, remove the key, and connect it to a USB port on your
computer. Follow the on-screen instructions to install the driver,
then run your presentation. For details, see your User’s Guide.
•
Windows
For more information about using the projector, install the manuals from your
projector CD.
If your network does not assign addresses automatically, turn off
DHCP and enter the projector’s IP Address, Subnet Mask, and
Gateway Address, as needed.
1
From the Windows Control Panel, open the Display utility. In Windows
Vista, right-click on the desktop and select Personalize, then select
Display Settings.
2
3
Click Settings, then click Advanced or Advanced Settings.
The method for adjusting the setting varies; you may have to click a
Monitor tab, then make sure the external Monitor port is set as your
primary display and/or enabled.
Mac OS X
1
From the Apple® menu, select System Preferences, then select Display
or Displays.
2
3
4
Click Detect Displays.
Make sure the VGA Display or Color LCD dialog box is selected.
Click Arrangement or Arrange, then make sure Mirror Displays is
selected.
Epson, EasyMP, and Easy Management are registered trademarks, and Epson Exceed Your Vision is a
registered logomark of Seiko Epson Corporation. PowerLite and PrivateLine are registered trademarks of
Epson America, Inc.
Click Quick or Advanced, and enter your network’s SSID.
General Notice: Other product names used herein are for identification purposes only and may be trademarks
of their respective owners. Epson disclaims any and all rights in those marks.
This information is subject to change without notice.
© 2009 Epson America, Inc. 8/09
Printed in XXXXXX
CPD-27672
Project wirelessly
Follow the steps here to connect the projector wirelessly over an 802.11g,
802.11b, or 802.11a wireless network. Your computer must have a
wireless card or built-in wireless interface, and be running Windows
Vista®, Windows XP Professional x64, Windows XP, or Windows 2000, or
Mac OS® X 10.3 to 10.5.
1
To install the LAN module, remove the projector’s wireless LAN
module cover.
9
If your network assigns addresses automatically turn on DHCP. If not,
turn off DHCP and enter the projector’s IP Address, Subnet Mask, and
Gateway Address, as needed.
To enter numbers, use the arrow buttons on the remote control to
highlight a number, then press the Enter button. When you’re finished
entering an address, highlight Return, then press Enter.
10 To prevent the SSID and IP address from appearing on the network
standby screen, set the SSID Display and/or IP Address Display
settings to Off.
11 See “Install network software” for additional instructions.
2
3
Insert the LAN module into the port and replace the cover.
Project over a wired
network
Install network software
Where to get help
Install EasyMP® Network Projection and Easy Management® EasyMP Monitor
(Windows only) on each computer that will project over the network. Use the
CD labeled Epson Projector Software for Meeting & Monitoring to install
these programs.
Manuals
For instructions on installing and using your network software, see the Network
and PC Free Operation Guide.
Telephone Support Services
For instructions on installing and using EasyMP Monitor to monitor projectors
over the network, see the EasyMP Monitor Operation Guide.
These guides are installed along with your projector User’s Guide and are
viewable by clicking the icons for them on your computer desktop.
Troubleshooting
If you see a blank screen...
If you need to configure the projector for your network, you can use the
projector’s menu system.
If you see a blank screen or the No signal message after turning on your
computer, check the following:
1
•
Make sure the power light on the projector is green and not flashing, and
the A/V Mute slide is open.
•
Press the Source Search button on the projector or the remote control to
select the computer as the image source.
Press the Menu button on the remote control, select the Network menu,
then press Enter.
Secure the cover using the screw that came with the LAN module.
•If you’re using a Windows notebook, press the function key on your
keyboard that lets you display on an external monitor. It may be labelled
CRT/LCD or have an icon such as
. You may have to hold down the
Fn key while pressing it.
If the projector and notebook don’t display the
same image...
2
3
4
4
To configure your projector for your wireless network, do one of the
following:
•If you’re using the optional Quick Wireless Connection USB key,
5
Choose Network Configuration and press Enter.
Select the Wired LAN menu and press Enter.
Choose IP Settings and press Enter. You see a screen like the following:
If you’re not using the key, continue with these steps.
Press the Menu button on the remote control, select the Network
menu, and press Enter.
5 Do one of the following:
• If your network assigns addresses automatically, turn on the DHCP
setting.
6
7
8
•
To enter numbers, use the arrow buttons on the remote control to
highlight a number, then press the Enter button. When you’re finished
entering an address, highlight Return, then press Enter.
6
To prevent the IP address from appearing on the network standby screen,
set the IP Address Display setting to Off.
7
When you’re done making all necessary changes, select Setup complete
and press Enter to save your settings. Then press Enter again to confirm.
8
Press the Menu button to exit the menu system.
Choose Network Configuration and press Enter.
Select the Wireless LAN menu and press Enter.
Try using the CRT/LCD or
key as described above. On most systems, this
key lets you toggle between the LCD screen and the projector, or display on
both at the same time.
To use the Epson PrivateLine® Support service, call (800) 637-7661 and enter
the PIN on the Epson PrivateLine Support card included with your projector.
This service is available 6 AM to 6 PM, Pacific Time, Monday through Friday, for
the duration of your warranty period. You may also speak with a projector
support specialist by dialing:
(562) 276-4394 (U.S.) or (905) 709-3839 (Canada), 6
Monday through Friday
AM
to 6
PM,
Pacific Time,
Days and hours of support are subject to change without notice. Toll or long
distance charges may apply.
Internet Support
Visit epson.com/support for solutions to common problems. You can
download utilities and documentation, get FAQs and troubleshooting advice,
or e-mail Epson with your questions.
Registration
Register today to get product updates, special promotions, and customer-only
offers. You can use the CD included with your projector or register online at
www.epson.com/webreg.
Optional accessories
For a list of optional accessories, see your projector User’s Guide.
You can purchase screens, carrying cases, or other accessories from an Epson
authorized reseller. To find the nearest reseller, call 800-GO-EPSON
(800-463-7766). Or you can purchase online at www.epsonstore.com (U.S.
sales) or www.epson.ca (Canadian sales).
If that doesn’t work, check your monitor settings to make sure both the LCD
screen and the external monitor port are enabled.
insert it into the projector’s USB1 port, look for the displayed
message, remove the key, and connect it to a USB port on your
computer. Follow the on-screen instructions to install the driver,
then run your presentation. For details, see your User’s Guide.
•
Windows
For more information about using the projector, install the manuals from your
projector CD.
If your network does not assign addresses automatically, turn off
DHCP and enter the projector’s IP Address, Subnet Mask, and
Gateway Address, as needed.
1
From the Windows Control Panel, open the Display utility. In Windows
Vista, right-click on the desktop and select Personalize, then select
Display Settings.
2
3
Click Settings, then click Advanced or Advanced Settings.
The method for adjusting the setting varies; you may have to click a
Monitor tab, then make sure the external Monitor port is set as your
primary display and/or enabled.
Mac OS X
1
From the Apple® menu, select System Preferences, then select Display
or Displays.
2
3
4
Click Detect Displays.
Make sure the VGA Display or Color LCD dialog box is selected.
Click Arrangement or Arrange, then make sure Mirror Displays is
selected.
Epson, EasyMP, and Easy Management are registered trademarks, and Epson Exceed Your Vision is a
registered logomark of Seiko Epson Corporation. PowerLite and PrivateLine are registered trademarks of
Epson America, Inc.
Click Quick or Advanced, and enter your network’s SSID.
General Notice: Other product names used herein are for identification purposes only and may be trademarks
of their respective owners. Epson disclaims any and all rights in those marks.
This information is subject to change without notice.
© 2009 Epson America, Inc. 8/09
Printed in XXXXXX
CPD-27672