1
Senna_QRG_CPD20397.qxd
7/20/05
2:18 PM
Page 2
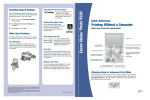
Inserting Your Memory Card
Loading 4 x 6 " Photo Paper
1
2
Place the paper against the
right side of the feeder.
Slide the left edge
guide against the
paper.
7
Press
or
to highlight the correct paper
type setting (see “Paper Type Setting” to the
right), then press OK.
8
Press
press
or
.
Choose 4x6in, then press OK.
10
Press OK, then check your settings and press
the green
Start button to print your photo.
• Filter: Choose Off, Black & White, or
Sepia
• Brightness: Choose Standard, Brighter,
Brightest, Darker, or Darkest
• Contrast: Choose Standard, Higher, or
Highest
Customizing Your Prints
Printing a 4 x 6 " Photo
Memory Stick®
(middle)
1
Press the Memory Card button to choose
Memory Card mode.
2
Press
or
to highlight View and Print
Photos, then press OK.
SDTM (Secure Digital)
or MMC (MultiMediaCard)
(middle)
• Sharpness: Choose Standard, Sharper,
Sharpest, Softer, or Softest
You can select layouts, adjust image quality
manually or automatically, and add the date or time
to your prints.
1
Press the Memory Card button to choose
Memory Card mode.
2
Press
or
to highlight View and Print
Photos, Print All Photos, Print Range of
Photos, or Print by Date, then press OK.
3
Choose your photos if necessary, then press
Print Settings.
Press
or
to highlight one of these
options, then press :
• Quality: Choose Standard, Higher, or
Highest
to highlight Paper Size, then
9
CompactFlash®
or MicrodriveTM
(left)
8
• Saturation: Choose Standard, Higher,
Highest, Lower, or Lowest
9
Adjust any settings as necessary, then press
OK.
Paper Type Setting
Paper
Paper Type
setting
Plain paper
Plain Paper
Epson Premium Bright White Paper
3
SmartMediaTM
(right)
Epson Photo Quality Ink Jet Paper
Press
or
to scroll through your photos.
(Press and hold one of the buttons to scroll
quickly.)
4
When the photo you want is shown on the
LCD, press
to select one copy.
5
Press the Print Settings button.
xD Picture CardTM
(right)
When you insert the card, you see a message
indicating that you have inserted a memory card.
The printer reads and counts the images on
your card.
NOTE: The printer recognizes the first 999 files
only. If your photos aren’t recognized, see your
Printer Basics book for troubleshooting
information.
6
Press
press
or
.
to highlight Paper Type, then
4
Press
press
or
to highlight Layout, then
.
Epson Premium Glossy Photo Paper
Premium Glossy
Epson Ultra Premium Glossy
Photo Paper
Ultra Premium
Epson Premium Semigloss
Photo Paper
Semigloss
Epson Semigloss Scrapbook
Photo Paper
5
Choose one of the layouts then press OK.
6
Press
or
to highlight Date Format or
Time Format then press .
Epson Premium Luster Photo Paper
Premium Luster
Epson Glossy Photo Greeting Card
Photo Paper
7
Press
or
to highlight a format setting,
then press OK.
Epson Photo Paper
Epson Glossy Photo Paper
Epson Matte Paper Heavyweight
PremierArtTM Matte Scrapbook
Photo Paper
Matte