1
Start
Here
EPSON Stylus CX5400
4 Plug In and Turn On
®
1 Unpack
4046293-00 CPD-16736
1
2 Unlock
1
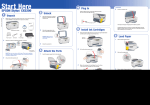
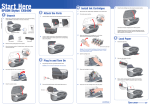
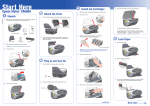
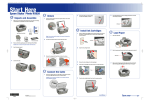
Make sure you have all the parts shown here. If any parts are missing,
contact EPSON as described on the back of this sheet.
1
continued
5
Lower the scanner unit.
Plug the Stylus CX into a grounded electrical outlet.
Do not connect the USB cable yet.
Open the scanner lid, as shown.
Remove any packing materials
under the lid.
The Stylus CX begins charging the ink delivery system.
2
EPSON Stylus CX5400
Software
CD-ROM
Press and hold the On button until the green light comes on.
On
Quick Reference
Guide
On button
Error
Scan
Recall
Save(3sec)
2
Paper support
2
USB cable
Ink cartridges
Charging takes about 2 minutes. The green light flashes and the
Stylus CX makes various sounds. Don’t turn it off while the green
light is flashing or you’ll waste ink.
Reset
Reset all(3sec)
Slide the transportation lock
to the
unlocked position.
6 Load Paper
Feeder guard
1
Flip the feeder guard forward.
2
Slide out the edge guide.
3
Place a stack of paper against the right side of the feeder,
but don’t push it in. Slide the edge guide against the paper.
4
Flip the feeder guard back over the stack of paper.
Caution: Make sure you
unlock the scanner, or it
won’t work.
Remove all tape, as shown.
5 Install Ink Cartridges
3
Remove tape and
open the output tray
1
Lift up the entire scanner unit.
Don’t remove
this sticker yet
Note: There may be packing materials or tape in different locations.
3 Attach the Parts
1
3
Close the scanner lid.
Set the feeder guard into its two slots at the back of the Stylus CX.
Lift up the entire scanner
unit. If it doesn’t open,
make sure you have
removed all the tape.
2
Shake the package of ink cartridges four or five times.
Then remove the cartridges from the package.
Don’t touch the green part
4
5
Peel off the tape from the
ink cartridge holder and
from the top of the printer.
Make sure you don’t leave
any tape inside.
Lower the scanner unit.
Caution: You must install all cartridges and leave them installed
for all types of printing. To avoid damaging the Stylus CX, never
move the print head by hand.
2
Insert the paper support into its two grooves behind the
feeder guard.
3
4
Lower each cartridge into
its holder as shown.
Press down on each cartridge
until it is firmly seated.
continue
Turn over
Start
Here
EPSON Stylus CX5400
4 Plug In and Turn On
®
1 Unpack
4046293-00 CPD-16736
1
2 Unlock
1
Make sure you have all the parts shown here. If any parts are missing,
contact EPSON as described on the back of this sheet.
1
continued
5
Lower the scanner unit.
Plug the Stylus CX into a grounded electrical outlet.
Do not connect the USB cable yet.
Open the scanner lid, as shown.
Remove any packing materials
under the lid.
The Stylus CX begins charging the ink delivery system.
2
EPSON Stylus CX5400
Software
CD-ROM
Press and hold the On button until the green light comes on.
On
Quick Reference
Guide
On button
Error
Scan
Recall
Save(3sec)
2
Paper support
2
USB cable
Ink cartridges
Charging takes about 2 minutes. The green light flashes and the
Stylus CX makes various sounds. Don’t turn it off while the green
light is flashing or you’ll waste ink.
Reset
Reset all(3sec)
Slide the transportation lock
to the
unlocked position.
6 Load Paper
Feeder guard
1
Flip the feeder guard forward.
2
Slide out the edge guide.
3
Place a stack of paper against the right side of the feeder,
but don’t push it in. Slide the edge guide against the paper.
4
Flip the feeder guard back over the stack of paper.
Caution: Make sure you
unlock the scanner, or it
won’t work.
Remove all tape, as shown.
5 Install Ink Cartridges
3
Remove tape and
open the output tray
1
Lift up the entire scanner unit.
Don’t remove
this sticker yet
Note: There may be packing materials or tape in different locations.
3 Attach the Parts
1
3
Close the scanner lid.
Set the feeder guard into its two slots at the back of the Stylus CX.
Lift up the entire scanner
unit. If it doesn’t open,
make sure you have
removed all the tape.
2
Shake the package of ink cartridges four or five times.
Then remove the cartridges from the package.
Don’t touch the green part
4
5
Peel off the tape from the
ink cartridge holder and
from the top of the printer.
Make sure you don’t leave
any tape inside.
Lower the scanner unit.
Caution: You must install all cartridges and leave them installed
for all types of printing. To avoid damaging the Stylus CX, never
move the print head by hand.
2
Insert the paper support into its two grooves behind the
feeder guard.
3
4
Lower each cartridge into
its holder as shown.
Press down on each cartridge
until it is firmly seated.
continue
Turn over
Start
Here
EPSON Stylus CX5400
4 Plug In and Turn On
®
1 Unpack
4046293-00 CPD-16736
1
2 Unlock
1
Make sure you have all the parts shown here. If any parts are missing,
contact EPSON as described on the back of this sheet.
1
continued
5
Lower the scanner unit.
Plug the Stylus CX into a grounded electrical outlet.
Do not connect the USB cable yet.
Open the scanner lid, as shown.
Remove any packing materials
under the lid.
The Stylus CX begins charging the ink delivery system.
2
EPSON Stylus CX5400
Software
CD-ROM
Press and hold the On button until the green light comes on.
On
Quick Reference
Guide
On button
Error
Scan
Recall
Save(3sec)
2
Paper support
2
USB cable
Ink cartridges
Charging takes about 2 minutes. The green light flashes and the
Stylus CX makes various sounds. Don’t turn it off while the green
light is flashing or you’ll waste ink.
Reset
Reset all(3sec)
Slide the transportation lock
to the
unlocked position.
6 Load Paper
Feeder guard
1
Flip the feeder guard forward.
2
Slide out the edge guide.
3
Place a stack of paper against the right side of the feeder,
but don’t push it in. Slide the edge guide against the paper.
4
Flip the feeder guard back over the stack of paper.
Caution: Make sure you
unlock the scanner, or it
won’t work.
Remove all tape, as shown.
5 Install Ink Cartridges
3
Remove tape and
open the output tray
1
Lift up the entire scanner unit.
Don’t remove
this sticker yet
Note: There may be packing materials or tape in different locations.
3 Attach the Parts
1
3
Close the scanner lid.
Set the feeder guard into its two slots at the back of the Stylus CX.
Lift up the entire scanner
unit. If it doesn’t open,
make sure you have
removed all the tape.
2
Shake the package of ink cartridges four or five times.
Then remove the cartridges from the package.
Don’t touch the green part
4
5
Peel off the tape from the
ink cartridge holder and
from the top of the printer.
Make sure you don’t leave
any tape inside.
Lower the scanner unit.
Caution: You must install all cartridges and leave them installed
for all types of printing. To avoid damaging the Stylus CX, never
move the print head by hand.
2
Insert the paper support into its two grooves behind the
feeder guard.
3
4
Lower each cartridge into
its holder as shown.
Press down on each cartridge
until it is firmly seated.
continue
Turn over
Start
Here
EPSON Stylus CX5400
4 Plug In and Turn On
®
1 Unpack
4046293-00 CPD-16736
1
2 Unlock
1
Make sure you have all the parts shown here. If any parts are missing,
contact EPSON as described on the back of this sheet.
1
continued
5
Lower the scanner unit.
Plug the Stylus CX into a grounded electrical outlet.
Do not connect the USB cable yet.
Open the scanner lid, as shown.
Remove any packing materials
under the lid.
The Stylus CX begins charging the ink delivery system.
2
EPSON Stylus CX5400
Software
CD-ROM
Press and hold the On button until the green light comes on.
On
Quick Reference
Guide
On button
Error
Scan
Recall
Save(3sec)
2
Paper support
2
USB cable
Ink cartridges
Charging takes about 2 minutes. The green light flashes and the
Stylus CX makes various sounds. Don’t turn it off while the green
light is flashing or you’ll waste ink.
Reset
Reset all(3sec)
Slide the transportation lock
to the
unlocked position.
6 Load Paper
Feeder guard
1
Flip the feeder guard forward.
2
Slide out the edge guide.
3
Place a stack of paper against the right side of the feeder,
but don’t push it in. Slide the edge guide against the paper.
4
Flip the feeder guard back over the stack of paper.
Caution: Make sure you
unlock the scanner, or it
won’t work.
Remove all tape, as shown.
5 Install Ink Cartridges
3
Remove tape and
open the output tray
1
Lift up the entire scanner unit.
Don’t remove
this sticker yet
Note: There may be packing materials or tape in different locations.
3 Attach the Parts
1
3
Close the scanner lid.
Set the feeder guard into its two slots at the back of the Stylus CX.
Lift up the entire scanner
unit. If it doesn’t open,
make sure you have
removed all the tape.
2
Shake the package of ink cartridges four or five times.
Then remove the cartridges from the package.
Don’t touch the green part
4
5
Peel off the tape from the
ink cartridge holder and
from the top of the printer.
Make sure you don’t leave
any tape inside.
Lower the scanner unit.
Caution: You must install all cartridges and leave them installed
for all types of printing. To avoid damaging the Stylus CX, never
move the print head by hand.
2
Insert the paper support into its two grooves behind the
feeder guard.
3
4
Lower each cartridge into
its holder as shown.
Press down on each cartridge
until it is firmly seated.
continue
Turn over
7 Install Software and
Connect to Your Computer
continued
9
TM
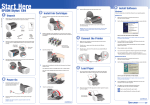
The software works with Windows® 98, Me, 2000, and XP, and Macintosh®
OS 8.6 to 9.2.2 and 10.2.x. Follow the steps below (for Windows), or the steps
in the next column (for Macintosh).
Windows
1
Make sure the Stylus CX is not
connected to your computer,
then turn on your computer.
2
3
At the end of the installation, click Exit.
11
When you see the Product Registration screen, register your Stylus CX
as instructed. At the last screen, click Done or close your browser.
2
Remove the CD-ROM.
1
Remove the sticker from the USB port on the Stylus CX.
2
Connect the flat end of the cable to any USB port on your Macintosh,
then connect the square end of the USB cable to the USB port on the
Stylus CX.
When you see the message about
disabling your antivirus software,
click Continue.
Read the license agreement, then click Agree. The Software Installation
screen opens automatically.
5
Click Install.
Note: If the install screen
doesn’t open automatically,
do the following:
3
For Windows XP: click Start >
My Computer. Then double-click
the EPSON CD-ROM icon.
Insert the EPSON Stylus CX5400 CD-ROM in your CD-ROM or
DVD drive.
4
Double-click the EPSON CD-ROM icon.
5
If you are using Mac OS X, double-click the Mac OS X folder,
then double-click the EPSON icon.
If you are using Mac OS 8.6 to 9.x, double-click the EPSON icon.
8
When you see this screen, make sure
your Stylus CX is turned on, then remove
the sticker from the USB port.
6
Connect the
Stylus CX USB port.
When you see the license agreement, click Agree to continue.
8
At the Software Installation screen,
click Install. Enter your Administrator
name and password if necessary.
Click Stylus CX5400. The Page
Setup pull-down menu at the
bottom of the screen becomes
active.
5
Open the Page Setup pull-down
menu and select All.
6
Click the Add button. You see the
Printer List again with the Borderless
feature available.
7
Close Print Center. You’re ready to copy,
scan, and print.
8
Now start up your Macintosh in OS 9.x. Follow the instructions in the
previous column to install the OS 9.x drivers and optional software for
Macintosh Classic programs.
Selecting the Stylus CX in the Chooser
for Mac OS 8.6 to 9.x
9
2
Open the Chooser from the Apple
menu. Select CX5400, then select
your USB port and turn on
background printing.
Close the Chooser. You’re ready
to copy, scan, and print.
EPSON Stylus CX 5400 Quick Reference Guide
On-screen EPSON Information Center
Double-click the
EPSON Information Center icon
on your desktop to view Print Show animations and your
EPSON User’s Guide.
On-screen Help for EPSON Smart Panel,™ ArcSoft™ PhotoImpression,™
EPSON Scan, and ABBYY FineReader Sprint.
Click the Help button or question mark that appears on the screen
when you’re using any of these programs.
EPSON Technical Support
• World Wide Web
http://support.epson.com
• Automated Telephone Services
To use these services, you must have a touch tone telephone and call
(800) 922-8911. Your EPSON SoundAdviceSM Express Code is 70465.
Use this code to quickly select your product in SoundAdvice.
• To Speak to a Technical Support Representative
Dial (562) 276-4382 (U.S.) or (905) 709-3839 (Canada), 6 AM to 6 PM,
Pacific Time, Monday through Friday. Toll or long distance charges
may apply.
Software Technical Support
Software
Telephone
Fax
Internet and E-mail
EPSON Smart
Panel
(510) 445-8616
(510) 445-8601
[email protected]
ArcSoft
PhotoImpression
(510) 440-9901
8:30 AM to
5:30 PM, PT
Monday–Friday
(510) 440-1270
www.arcsoft.com
[email protected]
(510) 226-6069
www.abbyyusa.com
[email protected]
ABBYY
FineReader Sprint (510) 226-6719
Need Paper and Ink?
For the best prints and copies, use genuine EPSON ink and paper. You can
buy them from your local store or from the EPSON StoreSM at (800) 873-7766
or www.epsonstore.com (U.S. sales only). In Canada, please call
(800) 463-7766 for dealer referral.
Look for these cartridges and paper:
T032120
Black Ink
Cartridge
T042220
Cyan Ink
Cartridge
T042320
Magenta Ink
Cartridge
T042420
Yellow Ink
Cartridge
Any Problems?
Premium Bright White Paper
Ultra-smooth white paper perfect for everyday
use—especially two-sided documents.
If the red Error light is on, check the message on the Stylus CX. Try
turning the Stylus CX off and then back on to clear the error. If your problem
is listed here, try these suggestions. For more information, see your software
Help, Quick Reference Guide, or your on-screen EPSON Information Center.
Note: If you’re installing on
Macintosh OS 8.6 to 9.x, you may
see a prompt to update your
Carbon Library. After the CarbonLib
installation is complete and you’ve
restarted your system, double-click
the EPSON icon, then click Install to
continue the installation.
square end of the USB cable to your
Select EPSON USB at the top of the next screen.
When you see the message about disabling your antivirus software,
click Continue.
7
Connect the
flat end of the USB cable to any available
USB port on your computer.
If the Stylus CX5400 already appears in the printer list, click it,
then click Add.
4
1
For Windows 2000/Me/98:
double-click
My Computer.
Then double-click the EPSON CD-ROM icon.
7
3
Macintosh
Insert your Stylus CX CD-ROM
in your CD-ROM or DVD drive.
Open the OS X Applications folder,
then open the Utilities folder and
double-click Print Center.
If the Stylus CX5400 doesn’t appear in the printer list, make sure it is
connected and turned on. Then click Add.
Now you’re ready to copy, scan, and print. See the Quick Reference
Guide or your on-screen EPSON Information Center for instructions.
4
6
1
If you see this screen, click Add.
10
Any Questions?
Here’s where to look for answers:
Note: It will take several minutes to install the remaining software.
Don’t cancel the installation.
12
Note: If your Stylus CX is turned
on and connected to your computer,
you may see several New Hardware
Wizard screens. Click Cancel for
each of these screens and disconnect
your Stylus CX. You can’t install
your software that way.
Continue following the instructions on the screen to install the rest
of your software, including ABBYY® FineReader® Sprint and
ArcSoft® PhotoImpression.
Adding the Stylus CX to Print Center
for Mac OS X
Follow the on-screen instructions to install the software, including
ABBYY® FineReader® Sprint and ArcSoft® PhotoImpression.
The Found New Hardware
Wizard appears on
your screen.
Click Cancel and follow the steps in
section 7. Disconnect the Stylus CX
before installing the software.
You see an error message
when you try to print
or scan.
Make sure your Stylus CX is connected to
your computer, plugged into a power
source, and turned on.
The Stylus CX
doesn’t work.
Make sure you removed the tape from the ink
cartridge holder, as described in section 1.
Turn the Stylus CX off and then on again.
DURABrite® Ink Glossy Photo Paper
Heavier weight paper for long-lasting enlargements
and snapshots. You can load up to 20 sheets at
a time, glossy side up. Choose the DB Photo
Paper setting.
TM
10
At the end of the installation, click Exit.
11
When you see the Product Registration screen, register your Stylus CX
as instructed. At the last screen, click Quit or close your browser.
12
After you connect your Stylus CX, Windows displays several messages
as it detects your device. If you don’t see the messages, make sure
your Stylus CX is turned on.
continue
Remove the CD-ROM and restart your Macintosh to fully activate
the Stylus CX.
Follow the instructions in the next column to add the Stylus CX to
the Print Center (for OS X). If you’re using OS 8.6 to 9.x, follow the
instructions in the next column to select the Stylus CX in the Chooser.
Double-Sided Matte Paper
The ideal paper for high quality printing of
brochures, newsletters, or flyers. Choose
the Matte Paper HW setting.
Slide the transportation lock under the
lid to unlock the scanner. See section 2.
Make sure the ink cartridges are pushed
all the way down.
Make sure you’re using the USB cable that
came with your Stylus CX. Try connecting
it to a different USB port on your computer.
Make sure your EPSON Stylus CX5400
software is installed correctly.
EPSON and EPSON Stylus are registered trademarks and EPSON Smart Panel is a trademark
of SEIKO EPSON CORPORATION. DuraBrite is a registered trademark, EPSON Software is a
trademark, and EPSON Store and SoundAdvice are service marks of Epson America, Inc.
General Notice: Other product names used herein are for identification purposes only and may be
trademarks of their respective owners. EPSON disclaims any and all rights in those marks.
Copyright © 2003 by Epson America, Inc. 7/03
Printed in XXX
7 Install Software and
Connect to Your Computer
continued
9
TM
The software works with Windows® 98, Me, 2000, and XP, and Macintosh®
OS 8.6 to 9.2.2 and 10.2.x. Follow the steps below (for Windows), or the steps
in the next column (for Macintosh).
Windows
1
Make sure the Stylus CX is not
connected to your computer,
then turn on your computer.
2
3
At the end of the installation, click Exit.
11
When you see the Product Registration screen, register your Stylus CX
as instructed. At the last screen, click Done or close your browser.
2
Remove the CD-ROM.
1
Remove the sticker from the USB port on the Stylus CX.
2
Connect the flat end of the cable to any USB port on your Macintosh,
then connect the square end of the USB cable to the USB port on the
Stylus CX.
When you see the message about
disabling your antivirus software,
click Continue.
Read the license agreement, then click Agree. The Software Installation
screen opens automatically.
5
Click Install.
Note: If the install screen
doesn’t open automatically,
do the following:
3
For Windows XP: click Start >
My Computer. Then double-click
the EPSON CD-ROM icon.
Insert the EPSON Stylus CX5400 CD-ROM in your CD-ROM or
DVD drive.
4
Double-click the EPSON CD-ROM icon.
5
If you are using Mac OS X, double-click the Mac OS X folder,
then double-click the EPSON icon.
If you are using Mac OS 8.6 to 9.x, double-click the EPSON icon.
8
When you see this screen, make sure
your Stylus CX is turned on, then remove
the sticker from the USB port.
6
Connect the
Stylus CX USB port.
When you see the license agreement, click Agree to continue.
8
At the Software Installation screen,
click Install. Enter your Administrator
name and password if necessary.
Click Stylus CX5400. The Page
Setup pull-down menu at the
bottom of the screen becomes
active.
5
Open the Page Setup pull-down
menu and select All.
6
Click the Add button. You see the
Printer List again with the Borderless
feature available.
7
Close Print Center. You’re ready to copy,
scan, and print.
8
Now start up your Macintosh in OS 9.x. Follow the instructions in the
previous column to install the OS 9.x drivers and optional software for
Macintosh Classic programs.
Selecting the Stylus CX in the Chooser
for Mac OS 8.6 to 9.x
9
2
Open the Chooser from the Apple
menu. Select CX5400, then select
your USB port and turn on
background printing.
Close the Chooser. You’re ready
to copy, scan, and print.
EPSON Stylus CX 5400 Quick Reference Guide
On-screen EPSON Information Center
Double-click the
EPSON Information Center icon
on your desktop to view Print Show animations and your
EPSON User’s Guide.
On-screen Help for EPSON Smart Panel,™ ArcSoft™ PhotoImpression,™
EPSON Scan, and ABBYY FineReader Sprint.
Click the Help button or question mark that appears on the screen
when you’re using any of these programs.
EPSON Technical Support
• World Wide Web
http://support.epson.com
• Automated Telephone Services
To use these services, you must have a touch tone telephone and call
(800) 922-8911. Your EPSON SoundAdviceSM Express Code is 70465.
Use this code to quickly select your product in SoundAdvice.
• To Speak to a Technical Support Representative
Dial (562) 276-4382 (U.S.) or (905) 709-3839 (Canada), 6 AM to 6 PM,
Pacific Time, Monday through Friday. Toll or long distance charges
may apply.
Software Technical Support
Software
Telephone
Fax
Internet and E-mail
EPSON Smart
Panel
(510) 445-8616
(510) 445-8601
[email protected]
ArcSoft
PhotoImpression
(510) 440-9901
8:30 AM to
5:30 PM, PT
Monday–Friday
(510) 440-1270
www.arcsoft.com
[email protected]
(510) 226-6069
www.abbyyusa.com
[email protected]
ABBYY
FineReader Sprint (510) 226-6719
Need Paper and Ink?
For the best prints and copies, use genuine EPSON ink and paper. You can
buy them from your local store or from the EPSON StoreSM at (800) 873-7766
or www.epsonstore.com (U.S. sales only). In Canada, please call
(800) 463-7766 for dealer referral.
Look for these cartridges and paper:
T032120
Black Ink
Cartridge
T042220
Cyan Ink
Cartridge
T042320
Magenta Ink
Cartridge
T042420
Yellow Ink
Cartridge
Any Problems?
Premium Bright White Paper
Ultra-smooth white paper perfect for everyday
use—especially two-sided documents.
If the red Error light is on, check the message on the Stylus CX. Try
turning the Stylus CX off and then back on to clear the error. If your problem
is listed here, try these suggestions. For more information, see your software
Help, Quick Reference Guide, or your on-screen EPSON Information Center.
Note: If you’re installing on
Macintosh OS 8.6 to 9.x, you may
see a prompt to update your
Carbon Library. After the CarbonLib
installation is complete and you’ve
restarted your system, double-click
the EPSON icon, then click Install to
continue the installation.
square end of the USB cable to your
Select EPSON USB at the top of the next screen.
When you see the message about disabling your antivirus software,
click Continue.
7
Connect the
flat end of the USB cable to any available
USB port on your computer.
If the Stylus CX5400 already appears in the printer list, click it,
then click Add.
4
1
For Windows 2000/Me/98:
double-click
My Computer.
Then double-click the EPSON CD-ROM icon.
7
3
Macintosh
Insert your Stylus CX CD-ROM
in your CD-ROM or DVD drive.
Open the OS X Applications folder,
then open the Utilities folder and
double-click Print Center.
If the Stylus CX5400 doesn’t appear in the printer list, make sure it is
connected and turned on. Then click Add.
Now you’re ready to copy, scan, and print. See the Quick Reference
Guide or your on-screen EPSON Information Center for instructions.
4
6
1
If you see this screen, click Add.
10
Any Questions?
Here’s where to look for answers:
Note: It will take several minutes to install the remaining software.
Don’t cancel the installation.
12
Note: If your Stylus CX is turned
on and connected to your computer,
you may see several New Hardware
Wizard screens. Click Cancel for
each of these screens and disconnect
your Stylus CX. You can’t install
your software that way.
Continue following the instructions on the screen to install the rest
of your software, including ABBYY® FineReader® Sprint and
ArcSoft® PhotoImpression.
Adding the Stylus CX to Print Center
for Mac OS X
Follow the on-screen instructions to install the software, including
ABBYY® FineReader® Sprint and ArcSoft® PhotoImpression.
The Found New Hardware
Wizard appears on
your screen.
Click Cancel and follow the steps in
section 7. Disconnect the Stylus CX
before installing the software.
You see an error message
when you try to print
or scan.
Make sure your Stylus CX is connected to
your computer, plugged into a power
source, and turned on.
The Stylus CX
doesn’t work.
Make sure you removed the tape from the ink
cartridge holder, as described in section 1.
Turn the Stylus CX off and then on again.
DURABrite® Ink Glossy Photo Paper
Heavier weight paper for long-lasting enlargements
and snapshots. You can load up to 20 sheets at
a time, glossy side up. Choose the DB Photo
Paper setting.
TM
10
At the end of the installation, click Exit.
11
When you see the Product Registration screen, register your Stylus CX
as instructed. At the last screen, click Quit or close your browser.
12
After you connect your Stylus CX, Windows displays several messages
as it detects your device. If you don’t see the messages, make sure
your Stylus CX is turned on.
continue
Remove the CD-ROM and restart your Macintosh to fully activate
the Stylus CX.
Follow the instructions in the next column to add the Stylus CX to
the Print Center (for OS X). If you’re using OS 8.6 to 9.x, follow the
instructions in the next column to select the Stylus CX in the Chooser.
Double-Sided Matte Paper
The ideal paper for high quality printing of
brochures, newsletters, or flyers. Choose
the Matte Paper HW setting.
Slide the transportation lock under the
lid to unlock the scanner. See section 2.
Make sure the ink cartridges are pushed
all the way down.
Make sure you’re using the USB cable that
came with your Stylus CX. Try connecting
it to a different USB port on your computer.
Make sure your EPSON Stylus CX5400
software is installed correctly.
EPSON and EPSON Stylus are registered trademarks and EPSON Smart Panel is a trademark
of SEIKO EPSON CORPORATION. DuraBrite is a registered trademark, EPSON Software is a
trademark, and EPSON Store and SoundAdvice are service marks of Epson America, Inc.
General Notice: Other product names used herein are for identification purposes only and may be
trademarks of their respective owners. EPSON disclaims any and all rights in those marks.
Copyright © 2003 by Epson America, Inc. 7/03
Printed in XXX
7 Install Software and
Connect to Your Computer
continued
9
TM
The software works with Windows® 98, Me, 2000, and XP, and Macintosh®
OS 8.6 to 9.2.2 and 10.2.x. Follow the steps below (for Windows), or the steps
in the next column (for Macintosh).
Windows
1
Make sure the Stylus CX is not
connected to your computer,
then turn on your computer.
2
3
At the end of the installation, click Exit.
11
When you see the Product Registration screen, register your Stylus CX
as instructed. At the last screen, click Done or close your browser.
2
Remove the CD-ROM.
1
Remove the sticker from the USB port on the Stylus CX.
2
Connect the flat end of the cable to any USB port on your Macintosh,
then connect the square end of the USB cable to the USB port on the
Stylus CX.
When you see the message about
disabling your antivirus software,
click Continue.
Read the license agreement, then click Agree. The Software Installation
screen opens automatically.
5
Click Install.
Note: If the install screen
doesn’t open automatically,
do the following:
3
For Windows XP: click Start >
My Computer. Then double-click
the EPSON CD-ROM icon.
Insert the EPSON Stylus CX5400 CD-ROM in your CD-ROM or
DVD drive.
4
Double-click the EPSON CD-ROM icon.
5
If you are using Mac OS X, double-click the Mac OS X folder,
then double-click the EPSON icon.
If you are using Mac OS 8.6 to 9.x, double-click the EPSON icon.
8
When you see this screen, make sure
your Stylus CX is turned on, then remove
the sticker from the USB port.
6
Connect the
Stylus CX USB port.
When you see the license agreement, click Agree to continue.
8
At the Software Installation screen,
click Install. Enter your Administrator
name and password if necessary.
Click Stylus CX5400. The Page
Setup pull-down menu at the
bottom of the screen becomes
active.
5
Open the Page Setup pull-down
menu and select All.
6
Click the Add button. You see the
Printer List again with the Borderless
feature available.
7
Close Print Center. You’re ready to copy,
scan, and print.
8
Now start up your Macintosh in OS 9.x. Follow the instructions in the
previous column to install the OS 9.x drivers and optional software for
Macintosh Classic programs.
Selecting the Stylus CX in the Chooser
for Mac OS 8.6 to 9.x
9
2
Open the Chooser from the Apple
menu. Select CX5400, then select
your USB port and turn on
background printing.
Close the Chooser. You’re ready
to copy, scan, and print.
EPSON Stylus CX 5400 Quick Reference Guide
On-screen EPSON Information Center
Double-click the
EPSON Information Center icon
on your desktop to view Print Show animations and your
EPSON User’s Guide.
On-screen Help for EPSON Smart Panel,™ ArcSoft™ PhotoImpression,™
EPSON Scan, and ABBYY FineReader Sprint.
Click the Help button or question mark that appears on the screen
when you’re using any of these programs.
EPSON Technical Support
• World Wide Web
http://support.epson.com
• Automated Telephone Services
To use these services, you must have a touch tone telephone and call
(800) 922-8911. Your EPSON SoundAdviceSM Express Code is 70465.
Use this code to quickly select your product in SoundAdvice.
• To Speak to a Technical Support Representative
Dial (562) 276-4382 (U.S.) or (905) 709-3839 (Canada), 6 AM to 6 PM,
Pacific Time, Monday through Friday. Toll or long distance charges
may apply.
Software Technical Support
Software
Telephone
Fax
Internet and E-mail
EPSON Smart
Panel
(510) 445-8616
(510) 445-8601
[email protected]
ArcSoft
PhotoImpression
(510) 440-9901
8:30 AM to
5:30 PM, PT
Monday–Friday
(510) 440-1270
www.arcsoft.com
[email protected]
(510) 226-6069
www.abbyyusa.com
[email protected]
ABBYY
FineReader Sprint (510) 226-6719
Need Paper and Ink?
For the best prints and copies, use genuine EPSON ink and paper. You can
buy them from your local store or from the EPSON StoreSM at (800) 873-7766
or www.epsonstore.com (U.S. sales only). In Canada, please call
(800) 463-7766 for dealer referral.
Look for these cartridges and paper:
T032120
Black Ink
Cartridge
T042220
Cyan Ink
Cartridge
T042320
Magenta Ink
Cartridge
T042420
Yellow Ink
Cartridge
Any Problems?
Premium Bright White Paper
Ultra-smooth white paper perfect for everyday
use—especially two-sided documents.
If the red Error light is on, check the message on the Stylus CX. Try
turning the Stylus CX off and then back on to clear the error. If your problem
is listed here, try these suggestions. For more information, see your software
Help, Quick Reference Guide, or your on-screen EPSON Information Center.
Note: If you’re installing on
Macintosh OS 8.6 to 9.x, you may
see a prompt to update your
Carbon Library. After the CarbonLib
installation is complete and you’ve
restarted your system, double-click
the EPSON icon, then click Install to
continue the installation.
square end of the USB cable to your
Select EPSON USB at the top of the next screen.
When you see the message about disabling your antivirus software,
click Continue.
7
Connect the
flat end of the USB cable to any available
USB port on your computer.
If the Stylus CX5400 already appears in the printer list, click it,
then click Add.
4
1
For Windows 2000/Me/98:
double-click
My Computer.
Then double-click the EPSON CD-ROM icon.
7
3
Macintosh
Insert your Stylus CX CD-ROM
in your CD-ROM or DVD drive.
Open the OS X Applications folder,
then open the Utilities folder and
double-click Print Center.
If the Stylus CX5400 doesn’t appear in the printer list, make sure it is
connected and turned on. Then click Add.
Now you’re ready to copy, scan, and print. See the Quick Reference
Guide or your on-screen EPSON Information Center for instructions.
4
6
1
If you see this screen, click Add.
10
Any Questions?
Here’s where to look for answers:
Note: It will take several minutes to install the remaining software.
Don’t cancel the installation.
12
Note: If your Stylus CX is turned
on and connected to your computer,
you may see several New Hardware
Wizard screens. Click Cancel for
each of these screens and disconnect
your Stylus CX. You can’t install
your software that way.
Continue following the instructions on the screen to install the rest
of your software, including ABBYY® FineReader® Sprint and
ArcSoft® PhotoImpression.
Adding the Stylus CX to Print Center
for Mac OS X
Follow the on-screen instructions to install the software, including
ABBYY® FineReader® Sprint and ArcSoft® PhotoImpression.
The Found New Hardware
Wizard appears on
your screen.
Click Cancel and follow the steps in
section 7. Disconnect the Stylus CX
before installing the software.
You see an error message
when you try to print
or scan.
Make sure your Stylus CX is connected to
your computer, plugged into a power
source, and turned on.
The Stylus CX
doesn’t work.
Make sure you removed the tape from the ink
cartridge holder, as described in section 1.
Turn the Stylus CX off and then on again.
DURABrite® Ink Glossy Photo Paper
Heavier weight paper for long-lasting enlargements
and snapshots. You can load up to 20 sheets at
a time, glossy side up. Choose the DB Photo
Paper setting.
TM
10
At the end of the installation, click Exit.
11
When you see the Product Registration screen, register your Stylus CX
as instructed. At the last screen, click Quit or close your browser.
12
After you connect your Stylus CX, Windows displays several messages
as it detects your device. If you don’t see the messages, make sure
your Stylus CX is turned on.
continue
Remove the CD-ROM and restart your Macintosh to fully activate
the Stylus CX.
Follow the instructions in the next column to add the Stylus CX to
the Print Center (for OS X). If you’re using OS 8.6 to 9.x, follow the
instructions in the next column to select the Stylus CX in the Chooser.
Double-Sided Matte Paper
The ideal paper for high quality printing of
brochures, newsletters, or flyers. Choose
the Matte Paper HW setting.
Slide the transportation lock under the
lid to unlock the scanner. See section 2.
Make sure the ink cartridges are pushed
all the way down.
Make sure you’re using the USB cable that
came with your Stylus CX. Try connecting
it to a different USB port on your computer.
Make sure your EPSON Stylus CX5400
software is installed correctly.
EPSON and EPSON Stylus are registered trademarks and EPSON Smart Panel is a trademark
of SEIKO EPSON CORPORATION. DuraBrite is a registered trademark, EPSON Software is a
trademark, and EPSON Store and SoundAdvice are service marks of Epson America, Inc.
General Notice: Other product names used herein are for identification purposes only and may be
trademarks of their respective owners. EPSON disclaims any and all rights in those marks.
Copyright © 2003 by Epson America, Inc. 7/03
Printed in XXX
7 Install Software and
Connect to Your Computer
continued
9
TM
The software works with Windows® 98, Me, 2000, and XP, and Macintosh®
OS 8.6 to 9.2.2 and 10.2.x. Follow the steps below (for Windows), or the steps
in the next column (for Macintosh).
Windows
1
Make sure the Stylus CX is not
connected to your computer,
then turn on your computer.
2
3
At the end of the installation, click Exit.
11
When you see the Product Registration screen, register your Stylus CX
as instructed. At the last screen, click Done or close your browser.
2
Remove the CD-ROM.
1
Remove the sticker from the USB port on the Stylus CX.
2
Connect the flat end of the cable to any USB port on your Macintosh,
then connect the square end of the USB cable to the USB port on the
Stylus CX.
When you see the message about
disabling your antivirus software,
click Continue.
Read the license agreement, then click Agree. The Software Installation
screen opens automatically.
5
Click Install.
Note: If the install screen
doesn’t open automatically,
do the following:
3
For Windows XP: click Start >
My Computer. Then double-click
the EPSON CD-ROM icon.
Insert the EPSON Stylus CX5400 CD-ROM in your CD-ROM or
DVD drive.
4
Double-click the EPSON CD-ROM icon.
5
If you are using Mac OS X, double-click the Mac OS X folder,
then double-click the EPSON icon.
If you are using Mac OS 8.6 to 9.x, double-click the EPSON icon.
8
When you see this screen, make sure
your Stylus CX is turned on, then remove
the sticker from the USB port.
6
Connect the
Stylus CX USB port.
When you see the license agreement, click Agree to continue.
8
At the Software Installation screen,
click Install. Enter your Administrator
name and password if necessary.
Click Stylus CX5400. The Page
Setup pull-down menu at the
bottom of the screen becomes
active.
5
Open the Page Setup pull-down
menu and select All.
6
Click the Add button. You see the
Printer List again with the Borderless
feature available.
7
Close Print Center. You’re ready to copy,
scan, and print.
8
Now start up your Macintosh in OS 9.x. Follow the instructions in the
previous column to install the OS 9.x drivers and optional software for
Macintosh Classic programs.
Selecting the Stylus CX in the Chooser
for Mac OS 8.6 to 9.x
9
2
Open the Chooser from the Apple
menu. Select CX5400, then select
your USB port and turn on
background printing.
Close the Chooser. You’re ready
to copy, scan, and print.
EPSON Stylus CX 5400 Quick Reference Guide
On-screen EPSON Information Center
Double-click the
EPSON Information Center icon
on your desktop to view Print Show animations and your
EPSON User’s Guide.
On-screen Help for EPSON Smart Panel,™ ArcSoft™ PhotoImpression,™
EPSON Scan, and ABBYY FineReader Sprint.
Click the Help button or question mark that appears on the screen
when you’re using any of these programs.
EPSON Technical Support
• World Wide Web
http://support.epson.com
• Automated Telephone Services
To use these services, you must have a touch tone telephone and call
(800) 922-8911. Your EPSON SoundAdviceSM Express Code is 70465.
Use this code to quickly select your product in SoundAdvice.
• To Speak to a Technical Support Representative
Dial (562) 276-4382 (U.S.) or (905) 709-3839 (Canada), 6 AM to 6 PM,
Pacific Time, Monday through Friday. Toll or long distance charges
may apply.
Software Technical Support
Software
Telephone
Fax
Internet and E-mail
EPSON Smart
Panel
(510) 445-8616
(510) 445-8601
[email protected]
ArcSoft
PhotoImpression
(510) 440-9901
8:30 AM to
5:30 PM, PT
Monday–Friday
(510) 440-1270
www.arcsoft.com
[email protected]
(510) 226-6069
www.abbyyusa.com
[email protected]
ABBYY
FineReader Sprint (510) 226-6719
Need Paper and Ink?
For the best prints and copies, use genuine EPSON ink and paper. You can
buy them from your local store or from the EPSON StoreSM at (800) 873-7766
or www.epsonstore.com (U.S. sales only). In Canada, please call
(800) 463-7766 for dealer referral.
Look for these cartridges and paper:
T032120
Black Ink
Cartridge
T042220
Cyan Ink
Cartridge
T042320
Magenta Ink
Cartridge
T042420
Yellow Ink
Cartridge
Any Problems?
Premium Bright White Paper
Ultra-smooth white paper perfect for everyday
use—especially two-sided documents.
If the red Error light is on, check the message on the Stylus CX. Try
turning the Stylus CX off and then back on to clear the error. If your problem
is listed here, try these suggestions. For more information, see your software
Help, Quick Reference Guide, or your on-screen EPSON Information Center.
Note: If you’re installing on
Macintosh OS 8.6 to 9.x, you may
see a prompt to update your
Carbon Library. After the CarbonLib
installation is complete and you’ve
restarted your system, double-click
the EPSON icon, then click Install to
continue the installation.
square end of the USB cable to your
Select EPSON USB at the top of the next screen.
When you see the message about disabling your antivirus software,
click Continue.
7
Connect the
flat end of the USB cable to any available
USB port on your computer.
If the Stylus CX5400 already appears in the printer list, click it,
then click Add.
4
1
For Windows 2000/Me/98:
double-click
My Computer.
Then double-click the EPSON CD-ROM icon.
7
3
Macintosh
Insert your Stylus CX CD-ROM
in your CD-ROM or DVD drive.
Open the OS X Applications folder,
then open the Utilities folder and
double-click Print Center.
If the Stylus CX5400 doesn’t appear in the printer list, make sure it is
connected and turned on. Then click Add.
Now you’re ready to copy, scan, and print. See the Quick Reference
Guide or your on-screen EPSON Information Center for instructions.
4
6
1
If you see this screen, click Add.
10
Any Questions?
Here’s where to look for answers:
Note: It will take several minutes to install the remaining software.
Don’t cancel the installation.
12
Note: If your Stylus CX is turned
on and connected to your computer,
you may see several New Hardware
Wizard screens. Click Cancel for
each of these screens and disconnect
your Stylus CX. You can’t install
your software that way.
Continue following the instructions on the screen to install the rest
of your software, including ABBYY® FineReader® Sprint and
ArcSoft® PhotoImpression.
Adding the Stylus CX to Print Center
for Mac OS X
Follow the on-screen instructions to install the software, including
ABBYY® FineReader® Sprint and ArcSoft® PhotoImpression.
The Found New Hardware
Wizard appears on
your screen.
Click Cancel and follow the steps in
section 7. Disconnect the Stylus CX
before installing the software.
You see an error message
when you try to print
or scan.
Make sure your Stylus CX is connected to
your computer, plugged into a power
source, and turned on.
The Stylus CX
doesn’t work.
Make sure you removed the tape from the ink
cartridge holder, as described in section 1.
Turn the Stylus CX off and then on again.
DURABrite® Ink Glossy Photo Paper
Heavier weight paper for long-lasting enlargements
and snapshots. You can load up to 20 sheets at
a time, glossy side up. Choose the DB Photo
Paper setting.
TM
10
At the end of the installation, click Exit.
11
When you see the Product Registration screen, register your Stylus CX
as instructed. At the last screen, click Quit or close your browser.
12
After you connect your Stylus CX, Windows displays several messages
as it detects your device. If you don’t see the messages, make sure
your Stylus CX is turned on.
continue
Remove the CD-ROM and restart your Macintosh to fully activate
the Stylus CX.
Follow the instructions in the next column to add the Stylus CX to
the Print Center (for OS X). If you’re using OS 8.6 to 9.x, follow the
instructions in the next column to select the Stylus CX in the Chooser.
Double-Sided Matte Paper
The ideal paper for high quality printing of
brochures, newsletters, or flyers. Choose
the Matte Paper HW setting.
Slide the transportation lock under the
lid to unlock the scanner. See section 2.
Make sure the ink cartridges are pushed
all the way down.
Make sure you’re using the USB cable that
came with your Stylus CX. Try connecting
it to a different USB port on your computer.
Make sure your EPSON Stylus CX5400
software is installed correctly.
EPSON and EPSON Stylus are registered trademarks and EPSON Smart Panel is a trademark
of SEIKO EPSON CORPORATION. DuraBrite is a registered trademark, EPSON Software is a
trademark, and EPSON Store and SoundAdvice are service marks of Epson America, Inc.
General Notice: Other product names used herein are for identification purposes only and may be
trademarks of their respective owners. EPSON disclaims any and all rights in those marks.
Copyright © 2003 by Epson America, Inc. 7/03
Printed in XXX