1
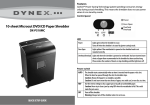
Quick Setup Guide Cross Cut Shredder | DX-PS06CC Package contents Setting up your shredder • Cross cut shredder with wastebasket • Quick Setup Guide 1 Place the shredder head securely on the rim of the supplied wastebasket. 6 WARNING Read instructions before use. To avoid injury to yourself and others, please follow safety instructions before operating this device. Avoid touching the document feed opening with your hands. Never insert your hand or fingers into the feed opening. Product is not intended for use by children (product is not a toy). Do not spray or keep any aerosol products in or around shredder. Avoid loose clothing or jewelry touching the document feed opening. Insert one credit card into the credit card slot. Do not shred paper with paperclips or staples. Do not shred gummed or wet paper. Avoid getting your hair or face near the document feed opening. Do not let hair touch the document feed opening. Serious injury may result. Do not exceed the shredder’s maximum capacity of six sheets. Caution: Your shredder has very sharp, exposed blades on the underside. Use care when mounting the shredder to the wastebasket. Note: Do not use bags to line the wastebasket. 2 Connect the power cord to a power outlet. Note: Always make sure that the two labels are aligned when you place the shredder head onto the basket. This shredder has a safety interlock which prevents it from operating unless the shredder head is placed on the basket correctly. Back of shredder Features Ready Overheat # Item Description 1 Switch On/Auto ( | ) - Shreds an item when inserted into the document feed opening, then stops when it is finished shredding. Off () - Turns off the shredder. Rev () - Reverses the paper to clear a jam or remove unshredded paper. 2 Ready LED indicator Lights green when the power is on. On/Auto Off Rev Before using your new product, please read these instructions to prevent any damage. 3 Overheat LED indicator Lights red when the shredder is overheated. 4 Document feed opening Put paper (maximum of six sheets) or a single credit card into this opening to shred. 5 Shredder head Contains the control panel and the cutting head. 6 Window Allows you to see when the wastebasket is full. 7 Wastebasket Empty when 2/3 full. Using your shredder IMPORTANT SAFETY INFORMATION 1 Slide the power switch to On/Auto. 2 Insert paper (up to 6 pages) or one credit card into the document feed opening. The shredder automatically shreds what you insert. • Avoid touching the document feed opening with your hands. • Keep pets and children away from the shredder. • Keep loose clothing, jewelry, hair, and other personal items away from the shredder. • Unplug the shredder before cleaning or emptying the wastebasket. • Do not place the shredder near a heat source or store in a humid environment for long periods of time. • Unplug the shredder if it will not be used for a long period of time. • Do not use aerosol products near the shredder. • The socket-outlet shall be near the shredder and shall be easily accessible. Note: Do no put paper clips, adhesive paper, or tape through the shredder. 3 If the shredder jams, slide the switch to REV to reverse the paper, clear the paper jam, then slide the switch to On/Auto. 4 When the wastebasket is 2/3 full, slide the switch to OFF, unplug it from the power outlet, then remove and empty the wastebasket. Replace the wastebasket. Troubleshooting Problem Solution The shredder does not stop running • Slide the switch to OFF, unplug it from the power outlet, then empty the wastebasket. • Slide the switch to OFF, unplug it from the power outlet, then push the shredded paper down to make sure that it is away from the shredder head. • Slide the switch to REV to remove extra paper or credit card from the shredder. The shredder is jammed • Slide the switch to REV to remove the stuck paper or credit card. • Make sure that you only send 6 sheets of paper or one credit card through the shredder at a time. The shredder will not run • Change the position of the paper as you insert it. • The paper may be too thin or crumpled for the shredder to recognize it. Fold the paper, then reinsert it. • Slide the switch to REV. • Make sure that you only send 6 sheets of paper or one credit card through the shredder at a time. • Unplug the shredder from the power outlet and let it cool for at least 30 minutes. The overheat LED indicator turned on • Unplug the shredder from the power outlet and let it cool for at least 30 minutes. One-year limited warranty Visit www.dynexproducts.com for details. Contact Dynex: For customer service, call 1-800-305-2204 (U.S. and Canada) or 01-800-926-3020 (Mexico) www.dynexproducts.com DYNEX is a trademark of Best Buy and its affiliated companies. Registered in some countries. Distributed by Best Buy Purchasing, LLC 7601 Penn Ave South, Richfield, MN 55423 U.S.A. ©2014 Best Buy. All rights reserved. Made in China Specifications Cutting style Entry width Shred capacity Cross cut 8.8 in. (225 mm) 6 sheets (75g/m2 A4 paper) 1 credit card Shred size Duty cycle Input Net weight Basket capacity .19 × 1.34 in. (5 × 34 mm) 2 mins ON / 30 mins OFF AC120V, 60Hz, 1.5A 7.0 lbs. (3.2 kg) 3.5 gal (12 L) V1 ENGLISH 14-0680