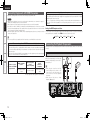
1
English
Use this manual in combination with the operating guide
displayed on the GUI screen.
S-302
Español
Utilice este manual conjuntamente con la guía de uso que
aparece en la pantalla GUI.
Operaciones del menú GUI (vpágina 16)
Mapa del menú de la GUI (vpágina 17)
Idioma (vpágina 18)
Operaciones con el mando a distancia (vpágina 40)
Owner‘s Manual
Troubleshooting
Manuel de l‘Utilisateur
Remote Control Information
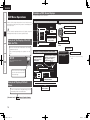
DVD HOME ENTERTAINMENT SYSTEM
Playback
Utilisation du menu de l’interfacegraphique (vpage 16)
Carte du menu(vpage 17)
Langue (vpage 18)
Fonctionnement de la télécommande (vpage 40)
Setup
Français
Utilisez ce manuel en même temps que le guide d’utilisation
affiché sur l’écran GUI (Interface graphique).
Connections
GUI Menu Operations (vpage 16)
GUI Menu Map (vpage 17)
Language (vpage 18)
Remote Control Unit Operations (vpage 40)
Getting Started
Graphical User Interface
Manual del usuario
1.S-302E3_1st.indd
1
2007/07/31
17:44:18
ENGLISH FRANCAIS ESPAÑOL
SAFETY INSTRUCTIONS
nSAFETY PRECAUTIONS
1.
CAUTION
RISK OF ELECTRIC SHOCK
DO NOT OPEN
CAUTION:
2.
3.
4.
5.
TO REDUCE THE RISK OF ELECTRIC SHOCK, DO NOT REMOVE
COVER (OR BACK). NO USER-SERVICEABLE PARTS INSIDE.
REFER SERVICING TO QUALIFIED SERVICE PERSONNEL.
6.
The lightning flash with arrowhead symbol, within an equilateral
triangle, is intended to alert the user to the presence of
uninsulated “dangerous voltage” within the product’s enclosure
that may be of sufficient magnitude to constitute a risk of electric
shock to persons.
8.
The exclamation point within an equilateral triangle is intended
to alert the user to the presence of important operating
and maintenance (servicing) instructions in the literature
accompanying the appliance.
WARNING:
TO REDUCE THE RISK OF FIRE OR ELECTRIC SHOCK, DO NOT
EXPOSE THIS APPLIANCE TO RAIN OR MOISTURE.
7.
9.
10.
nLASER SAFETY
CLASS g LASER PRODUCT
CAUTION:
VISIBLE AND INVISIBLE LASER RADIATION WHEN OPEN.
DO NOT STARE INTO BEAM.
LOCATION: INSIDE, NEAR THE DVD DRIVE MECHANISM.
CAUTION:
USE OF CONTROLS OR ADJUSTMENTS OR PERFORMANCE OF
PROCEDURES OTHER THAN THOSE SPECIFIED HEREIN MAY
RESULT
IN HAZARDOUS RADIATION EXPOSURE.
THIS PRODUCT SHOULD NOT BE ADJUSTED OR REPAIRED BY
ANYONE EXCEPT PROPERLY QUALIFIED SERVICE PERSONNEL.
11.
12.
Read Instructions – All the safety and operating instructions should be read
before the product is operated.
Retain Instructions – The safety and operating instructions should be
retained for future reference.
Heed Warnings – All warnings on the product and in the operating
instructions should be adhered to.
Follow Instructions – All operating and use instructions should be followed.
Cleaning – Unplug this product from the wall outlet before cleaning. Do not
use liquid cleaners or aerosol cleaners.
Attachments – Do not use attachments not recommended by the product
manufacturer as they may cause hazards.
Water and Moisture – Do not use this product near water – for example,
near a bath tub, wash bowl, kitchen sink, or laundry tub; in a wet basement;
or near a swimming pool; and the like.
Accessories – Do not place this product on an unstable cart, stand, tripod,
bracket, or table. The product may fall, causing serious injury to a child or
adult, and serious damage to the product. Use only with a cart, stand,
tripod, bracket, or table recommended by the manufacturer, or sold with the
product. Any mounting of the product should
follow the manufacturer’s instructions, and should
use a mounting accessory recommended by the
manufacturer.
A product and cart combination should be moved
with care. Quick stops, excessive force, and
uneven surfaces may cause the product and cart
combination to overturn.
Ventilation – Slots and openings in the cabinet are provided for ventilation
and to ensure reliable operation of the product and to protect it from
overheating, and these openings must not be blocked or covered. The
openings should never be blocked by placing the product on a bed, sofa,
rug, or other similar surface. This product should not be placed in a built-in
installation such as a bookcase or rack unless proper ventilation is provided
or the manufacturer’s instructions have been adhered to.
Power Sources – This product should be operated only from the type of
power source indicated on the marking label. If you are not sure of the type
of power supply to your home, consult your product dealer or local power
company. For products intended to operate from battery power, or other
sources, refer to the operating instructions.
Grounding or Polarization – This product may be equipped with a polarized
alternating-current line plug (a plug having one blade wider than the other).
This plug will fit into the power outlet only one way. This is a safety feature.
If you are unable to insert the plug fully into the outlet, try reversing the
plug. If the plug should still fail to fit, contact your electrician to replace your
obsolete outlet. Do not defeat the safety purpose of the polarized plug.
FIGURE A
EXAMPLE OF ANTENNA GROUNDING
AS PER NATIONAL
ELECTRICAL CODE
(306/%
$-".1
nCopyrights / Droits d’auteur / Derechos de Autor
•It is prohibited by law to reproduce, broadcast, rent or play discs in
public without the consent of the copyright holder.
• La reproduction, la diffusion, la location, le prêt ou la lecture
publique de ces disques sont interdits sans le consentement du
détenteur des droits d’auteur.
• De acuerdo con las leyes está prohibido reproducir, emitir, alquilar
o interpretar discos en público sin la autorización del propietario de
los derechos de autor.
"/5&//"
-&"%*/
8*3&
"/5&//"
%*4$)"3(&6/*5
/&$4&$5*0/
&-&$53*$
4&37*$&
&26*1.&/5
(306/%*/($0/%6$5034
/&$4&$5*0/
(306/%$-".14
108&34&37*$&(306/%*/(
&-&$530%&4:45&.
/&$/"5*0/"-&-&$53*$"-$0%& /&$"351"35)
13. Power-Cord Protection – Power-supply cords should be routed so that they
are not likely to be walked on or pinched by items placed upon or against
them, paying particular attention to cords at plugs, convenience receptacles,
and the point where they exit from the product.
15. Outdoor Antenna Grounding – If an outside antenna or cable system is
connected to the product, be sure the antenna or cable system is grounded
so as to provide some protection against voltage surges and built-up static
charges. Article 810 of the National Electrical Code, ANSI/NFPA 70, provides
information with regard to proper grounding of the mast and supporting
structure, grounding of the lead-in wire to an antenna discharge unit, size
of grounding conductors, location of antenna-discharge unit, connection to
grounding electrodes, and requirements for the grounding electrode. See
Figure A.
16. Lightning – For added protection for this product during a lightning storm,
or when it is left unattended and unused for long periods of time, unplug it
from the wall outlet and disconnect the antenna or cable system. This will
prevent damage to the product due to lightning and power-line surges.
17. Power Lines – An outside antenna system should not be located in the
vicinity of overhead power lines or other electric light or power circuits, or
where it can fall into such power lines or circuits. When installing an outside
antenna system, extreme care should be taken to keep from touching such
power lines or circuits as contact with them might be fatal.
18. Overloading – Do not overload wall outlets, extension cords, or integral
convenience receptacles as this can result in a risk of fire or electric shock.
19. Object and Liquid Entry – Never push objects of any kind into this product
through openings as they may touch dangerous voltage points or short-out
parts that could result in a fire or electric shock. Never spill liquid of any kind
on the product.
20. Servicing – Do not attempt to service this product yourself as opening or
removing covers may expose you to dangerous voltage or other hazards.
Refer all servicing to qualified service personnel.
21. Damage Requiring Service – Unplug this product from the wall outlet
and refer servicing to qualified service personnel under the following
conditions:
a)When the power-supply cord or plug is damaged,
b)If liquid has been spilled, or objects have fallen into the product,
c) If the product has been exposed to rain or water,
d)If the product does not operate normally by following the operating
instructions. Adjust only those controls that are covered by the operating
instructions as an improper adjustment of other controls may result in
damage and will often require extensive work by a qualified technician to
restore the product to its normal operation,
e)If the product has been dropped or damaged in any way, and
f)When the product exhibits a distinct change in performance – this
indicates a need for service.
22. Replacement Parts – When replacement parts are required, be sure the
service technician has used replacement parts specified by the manufacturer
or have the same characteristics as the original part. Unauthorized
substitutions may result in fire, electric shock, or other hazards.
23. Safety Check – Upon completion of any service or repairs to this product,
ask the service technician to perform safety checks to determine that the
product is in proper operating condition.
24. Wall or Ceiling Mounting – The product should be mounted to a wall or
ceiling only as recommended by the manufacturer.
25.Heat – The product should be situated away from heat sources such as
radiators, heat registers, stoves, or other products (including amplifiers) that
produce heat.
I
1.S-302E3_1st.indd
2
2007/07/31
17:44:19
ESPAÑOL FRANCAIS ENGLISH
FCC Information (For US customers)
1. COMPLIANCE INFORMATION
Product Name: DVD Home Entertainment System
Model Number: S-302
This product contains FCC ID: BV2- MPGBR052.
This product complies with Part 15 of the FCC Rules. Operation is subject to the following two conditions: (1) this
product may not cause harmful interference, and (2) this product must accept any interference received, including
interference that may cause undesired operation.
Denon Electronics (USA), LLC
100 Corporate Drive, Marwah, NJ 07430-2041
Tel. 201-762-6500 (Main)
2. IMPORTANT NOTICE: DO NOT MODIFY THIS PRODUCT
This product, when installed as indicated in the instructions contained in this manual, meets FCC requirements.
Modification not expressly approved by DENON may void your authority, granted by the FCC, to use the product.
3. CAUTION
•To comply with FCC RF exposure compliance requirement, separation distance of at least 20 cm must be
maintained between the antenna of this product and all persons.
•This product and its antenna must not be co-located or operating in conjunction with any other antenna or
transmitter.
4. NOTE
This product has been tested and found to comply with the limits for a Class B digital device, pursuant to Part 15
of the FCC Rules. These limits are designed to provide reasonable protection against harmful interference in a
residential installation.
This product generates, uses and can radiate radio frequency energy and, if not installed and used in accordance
with the instructions, may cause harmful interference to radio communications. However, there is no guarantee
that interference will not occur in a particular installation. If this product does cause harmful interference to radio or
television reception, which can be determined by turning the product OFF and ON, the user is encouraged to try to
correct the interference by one or more of the following measures:
•Reorient or relocate the receiving antenna.
•Increase the separation between the equipment and receiver.
•Connect the product into an outlet on a circuit different from that to which the receiver is connected.
•Consult the local retailer authorized to distribute this type of product or an experienced radio/TV technician for
help.
IC Information (For Canadian customers)
1. PRODUCT
This product contains IC 6963A-MPGBR052.
This product complies with RSS-210 of Industry Canada. Operation is subject to the following two conditions:
(1) this product may not cause harmful interference, and (2) this product must accept any interference received,
including interference that may cause undesired operation.
This Class B digital apparatus complies with Canadian ICES-003.
APPAREIL
Cet appareil contiens IC 6963A- MPGBR052.
Cet appareil est conforme à la norme CNR-210 du Canada. L’utilisation de ce dispositif est autorisée seulement
aux deux conditions suivantes : (1) il ne doit pas produire de brouillage, et (2) l’utilisateur du dispositif doit être
prêt à accepter tout brouillage radioélectrique reçu, même si ce brouillage est susceptible de compromettre le
fonctionnement du dispositif.
Cet appareil numérique de la classe B est conforme à la norme NMB-003 du Canada.
2. CAUTION
To reduce potential radio interference to other users, the antenna type and its gain should be so chosen that the
equivalent isotropically radiated power (e.i.r.p.) is not more than that permitted for successful communication.
ATTENTION
Afin de réduire le risque d’interférence aux autres utilisateurs, il faut choisir le type d’antenne et son gain de façon à
ce que la puissance isotrope rayonnée équivalente (p.i.r.e.) ne soit pas supérieure au niveau requis pour l’obtention
d’une communication satisfaisante.
II
1.S-302E3_1st.indd
3
2007/07/31
17:44:19
ENGLISH FRANCAIS ESPAÑOL
nNOTE ON USE / OBSERVATIONS RELATIVES A L’UTILISATION
• Avoid high temperatures.
Allow for sufficient heat dispersion when
installed in a rack.
• Eviter des températures élevées.
Tenir compte d’une dispersion de chaleur
suffisante lors de l’installation sur une
étagère.
• Evite altas temperaturas.
Permite la suficiente dispersión del calor
cuando está instalado en la consola.
• Do not let foreign objects into the unit.
• Ne pas laisser des objets étrangers dans
• Keep the unit free from moisture, water,
l’appareil.
and dust.
• No deje objetos extraños dentro del
• Protéger l’appareil contre l’humidité, l’eau
equipo.
et la poussière.
• Mantenga el equipo libre de humedad,
agua y polvo.
• Do not let insecticides, benzene, and
thinner come in contact with the unit.
• Unplug the power cord when not using the • Ne pas mettre en contact des insecticides,
du benzène et un diluant avec l’appareil.
unit for long periods of time.
• Débrancher le cordon d’alimentation • No permita el contacto de insecticidas,
gasolina y diluyentes con el equipo.
lorsque l’appareil n’est pas utilisé pendant
de longues périodes.
• Desconecte el cordón de energía cuando
no utilice el equipo por mucho tiempo.
• Handle the power cord carefully.
Hold the plug when unplugging the cord.
• Manipuler le cordon d’alimentation avec
précaution.
Tenir la prise lors du débranchement du
cordon.
* (For apparatuses with ventilation holes)
• Maneje el cordón de energía con cuidado.
Sostenga el enchufe cuando desconecte el
cordón de energía.
• Do not obstruct the ventilation holes.
• Ne pas obstruer les trous d’aération.
• No obstruya los orificios de ventilación.
• Never disassemble or modify the unit in
any way.
• Ne jamais démonter ou modifier l’appareil
d’une manière ou d’une autre.
• Nunca desarme o modifique el equipo de
ninguna manera.
III
1.S-302E3_1st.indd
4
2007/07/31
17:44:20
ENGLISH
Contents
Getting Started
Accessories·······················································································2
Cautions on Handling······································································2
System Configuration·····································································2
Cautions on Installation··································································3
Other Cautions················································································3
Discs··································································································4
Discs usable on the S-302······························································4
Holding Discs··················································································4
Loading Discs··················································································4
Cautions on Loading Discs······························································5
Cautions on Handling······································································5
Cautions on Storing Discs·······························································5
Cleaning Discs················································································5
About the Remote Control Unit·····················································5
Inserting the Batteries·····································································5
Operating Range of the Remote Control Unit·································5
Part Names and Functions······························································6
Front Panel······················································································6
Display····························································································6
Rear Panel·······················································································7
Bottom Panel (Subwoofer)······························································7
Remote Control Unit·······································································8
Connections
Preparations·····················································································9
Cables Used for Connections·························································9
Video Conversion Function···························································· 10
Connecting the System···························································10, 11
Connecting the Monitor································································ 11
Connecting Equipment with HDMI connectors·························· 12
Connecting the Playback Components······································· 12
Control Dock for iPod···································································· 12
Apple iPod Dock············································································ 13
TV Tuner························································································ 13
Satellite Receiver·········································································· 13
Connections to Other Devices······················································ 13
USB Port······················································································· 13
Antenna Terminals········································································· 14
External Controller········································································ 14
Network Audio·············································································· 15
Once Connections are Completed··············································· 15
GUI Menu Operations
Example of the Display of the GUI Mark at a Title····················· 16
Example of Display of Default Values·········································· 16
Examples of GUI Screen Displays················································ 16
Example: Browse Menu (Top Menu)············································ 16
Example: During Playback (NET/USB)··········································· 16
Cursor Position Display································································· 16
Operations······················································································ 17
GUI Menu Map··············································································· 17
Setup
SETUP····························································································· 18
a Language·················································································· 18
s Video Setup·············································································· 19
d Audio Setup·············································································· 19
f Network Setup·································································20 ~ 22
g Others······················································································22
h Timer··················································································22, 23
Playback
Preparations···················································································24
Turning the Power On···································································24
Loading Discs·················································································24
Input source switching·································································24
Adjusting the Master Volume·······················································24
Playing a DVD/Music CD Disc······················································25
Using the Top Menu/DVD Menu (DVD Video)·······························25
Switching the Audio Language, Subtitle Language and Angle
(DVD Video)···················································································26
Using the Playback Control Function (DVD Video)·························26
Playing Frame by Frame (DVD Video)············································26
Slow Playback (DVD Video)···························································26
Playing in the Zoom Mode (DVD Video)········································26
Playing Repeatedly <Repeat playback>
(DVD Video/Music CD)··································································27
Playing Tracks in the Desired Order <Program>
(Music CD)····················································································27
Playing Random Order <Random playback>
(Music CD)····················································································27
Playing Music Files
Before Playing MP3 or WMA Files················································27
Creating MP3 and WMA Files Compatible with the S-302···········27
Playing MP3 or WMA Files······················································27, 28
Playing Still Picture Files (JPEG format)······································28
Creating JPEG Files Compatible on the S-302······························28
Playing JPEG Files········································································29
Playing Picture CD/Fujicolor CD····················································29
Enjoying Surround Sound····························································29
Set the Input Mode·······································································29
Selecting Surround Mode·····························································30
Set the Surround Parameter·························································30
Playing Dolby Digital/DTS Multi-Channel Sources
(Digital input only)·········································································31
Playing Dolby Digital/PCM/Analog 2-Channel Sources·················31
Listening in the Dolby Headphone Mode·····································31
Listening to Radio Broadcasts······················································31
Tuning in Broadcast Stations···················································31, 32
Naming the Currently Tuned in Broadcast Station and
Presetting it···················································································32
Automatically Presetting FM Stations (Auto preset)·····················32
Listening to Preset Stations··························································32
iPod® Playback··············································································33
Listening to Music········································································33
Viewing Still Pictures
(Only for iPods Equipped with the Photo Function)······················33
Disconnecting the iPod·································································33
Playing Network Audio or USB Memory Devices·················34, 35
Basic Operation·············································································35
Listening to Internet Radio······················································35, 36
Playing Files Stored on a Computer········································36, 37
Playing Files Stored on USB Memory Devices·····························37
Playing a Portable Audio·······························································37
1.S-302E3_1st.indd
5
2007/07/31
17:44:21
ENGLISH
Getting Started
Connections
Advanced Operation
Setting the Sleep Timer································································38
Other Functions·············································································38
Adjusting the Tone·········································································38
Turning the Sound Off Temporarily (Muting)··································38
Convenient Functions···································································39
Personal Memory Plus Function···················································39
Last Function Memory··································································39
Backup Memory············································································39
Auto Power On··············································································39
Resetting the Microprocessor·······················································39
Setup
Playback
Remote Control Unit Operations
Setting the preset memory function·············································40
Operating a component stored in the preset memory·················40
Setting the punch through function·········································40, 41
Remote Control Information
Other Information·································································42 ~ 45
Troubleshooting····································································46 ~ 49
Specifications················································································ 50
List of preset codes············································ End of this manual
Cautions on Handling
•Before turning the power switch on
Check once again that all connections are correct and that there are
no problems with the connection cables.
Getting Started
Thank you for purchasing this DENON product. To ensure proper
operation, please read these owner’s manual carefully before using
the product.
After reading them, be sure to keep them for future reference.
Accessories
Check that the following parts are supplied with the product.
Troubleshooting
qRemote control (RC-1072)........................................................ 1
wR6P/AA batteries...................................................................... 2
eSystem cable (D-SUB25P) (Cord length: Approx. 10 ft/3 m)..... 1
rSpeaker cable (Cord length: Approx. 16 ft/5 m)........................ 2
tVideo cable (Cord length: Approx. 5 ft/1.5 m)........................... 1
yAM loop antenna...................................................................... 1
uFM indoor antenna................................................................... 1
iSpeaker stand........................................................................... 2
oWall bracket.............................................................................. 2
Q0Screw....................................................................................... 4
Q1Hex wrench.............................................................................. 1
Q2Rod antenna for wireless LAN.................................................. 1
Q3Anti slip pads............................................................................ 4
Q4Owner’s manual (with Quick setup sheet ).............................. 1
Q5Warranty (for North America model only )................................ 1
Q6Service station list.................................................................... 1
w
q
e
•Power is supplied to some of the circuitry even when the unit is
set to the standby mode. When traveling or leaving home for long
periods of time, be sure to unplug the power cord from the power
outlet.
•Sufficiently ventilate the place of installation
If the unit is left in a room full of the smoke from cigarettes, etc., for
long periods of time, the surface of the optical pickup could get dirty,
in which case it will not be able to read the signals properly.
•About condensation
If there is a major difference in temperature between the inside of
the unit and the surroundings, condensation (dew) may form on
the operating parts inside the unit, causing the unit not to operate
properly.
If this happens, let the unit sit for an hour or two with the power
turned off and wait until there is little difference in temperature
before using the unit.
•Cautions on using mobile phones
Using a mobile phone near this unit may result in noise. If so, move
the mobile phone away from this unit when it is in use.
•Moving the unit
Turn off the power and unplug the power cord from the power
outlet.
Next, disconnect the connection cables to other system units before
moving the unit.
•Note that the illustrations in these instructions may differ from the
actual unit for explanation purposes.
System Configuration
r
i
t
o
y
Q0
Speaker
Unit name : SC-S302
u
Q1
Q2
DVD surround receiver
Unit name : ADV-S302
Sub woofer
Unit name : DSW-S302
1.S-302E3_1st.indd
6
2007/07/31
17:44:21
ENGLISH
Cautions on Installation
Note:
For proper heat dispersal, do not install this unit in a confined
space, such as a bookcase or similar enclosure.
b
b Note
b
Wall
b
Other Cautions
b
b
Wall
•Switching the input function when input terminals are not
connected.
A clicking noise may be produced if the input function is switched
when nothing is connected to the input terminals. If this happens,
either turn down the VOLUME control knob or connect components
to the input terminals.
Remote Control Information
• When watching TV broadcasts with the S-302's power turned on,
depending on the conditions of the TV broadcast's signals, striped
patterns may appear on the picture. This is not a malfunction of the
S-302 or the TV. Turn the S-302's power off when watching TV.
•Note that if a magnet or a piece of furniture or equipment using
magnets is placed nearby, interaction with the S-302 could result in
color blotching on the TV.
Troubleshooting
DThe quality of the sound produced from the speaker is affected
by the size and type of the room, as well as by the method of
installation. Consider the points listed below before installing the
speaker.
• Placing speakers on the same stand or shelf as the record player
could result in howling.
• If there is a wall, glass door, etc., behind or to the sides of the
speakers, resonance and reflections can be prevented by using a
thick curtain, etc.
• The speakers are of the shielded type. With some TVs, however,
placing the speakers near the TV could cause color blotching on the
TV's picture. If this happens, turn the TV's power off, move it away,
wait 15 to 30 minutes, then turn the TV's power back on. If the color
blotching persists, move the speakers further away.
• Mount on a wall sufficiently sturdy to bear the weight of the
speaker. Note that DENON will except no responsibility whatsoever
for damages or accidents caused by the speaker falling.
• To ensure safety, have a specialist install the speakers on the wall.
• Be sure to fasten the speaker connection cables to the wall, etc.,
so that you do not get your feet or hands caught in them, causing
the set to fall.
• Place the subwoofer on a flat floor to prevent accidents due to the
subwoofer tipping over.
• Do not place a record player, CD player or other such device on top
of the subwoofer.
• Do not set the subwoofer with the baffle surface against the
floor. Doing so will prevent you from achieving satisfactory sound
effects.
Playback
b
b Note
Setup
(DSW-S302)
Connections
(ADV-S302)
Getting Started
CAUTION
•Be sure to fasten the speaker cords to a wall, etc., to
prevent people from tripping over them or otherwise
pulling on them accidentally, causing the speaker
systems to fall.
•Be sure to check for safety after installing the speaker systems.
Afterwards, perform safety inspections at regular intervals to be
sure there is no danger that the speaker systems will fall. DENON
will accept no responsibility for damages or accidents caused by
inappropriate choice of the place of installation or improper installation
procedures.
NOTE
•This product uses a semiconductor laser. To ensure stable operation,
it is recommended to use the product indoors at a temperature of 5
°C (41 °F) ~ 35 °C (95 °F).
1.S-302E3_1st.indd
7
2007/07/31
17:44:22
ENGLISH
Getting Started
Discs
Discs usable on the S-302
Connections
Usable discs
Mark (logo)
Recorded
Signals
Disc size
DVD video
Setup
DVD-R/DVD+R
(z1) (z2)
Playback
%7%3
Digital audio
+
Digital video
(MPEG2)
12cm
The following types of discs cannot be played on the S-302:
•DVD videos with region numbers other than “1” or “ALL”
•DVD-ROM/RAM
•CD-ROMs (Only JPEG / MP3 / WMA)
•VSDs / CVD /SVCD/Video CD
•CDV (only the audio portion can be played)
•CD-Gs (only the audio portion can be played)
•Photo CDs (NEVER play such discs on the S-302)
Remote Control Information
DVD-RW/
DVD+RW
(z1) (z3)
%7%3F8SJUBCMF
CD
CD-R
(z4)
CD-RW
(z4)
r
Digital audio
MP3
Digital picture
(JPEG)
z1 : DVD ± R/DVD ±RW discs recorded on a DVD recorder in the
video mode and finalized can be played on the S-302.
Note, however, that in some cases the discs may not play
properly, depending on their recording conditions.
Discs that have not been finalized or DVD ± R/DVD ±RW discs
recorded in the VR mode or in CPRM cannot be played.
z2 : DVD+R DL.(Dual Layer) cannot be played.
z3 : DVD-RW discs recorded in the VR mode and finalized can be
played.
z4 : According to recording quality, some CD-R/RW cannot be
played.
CD-R/CD-RW discs recorded and finalized can be played on the
S-302.
12cm / 8cm
Troubleshooting
Picture CD
Digital picture
(JPEG)
12cm
Fujicolor CD
Digital picture
(JPEG)
12cm
WMA
Digital audio
12cm
bPlaying discs with special shapes
could damage the set. Do not use
such discs.
Holding Discs
Do not touch the signal surface.
Loading Discs
•Set the disc with the labeled side facing up.
•Make sure the disc tray is fully open when inserting the disc.
•Place the discs flatly, 12 cm discs in the outer tray guide (Figure 1), 8
cm discs in the inner tray guide (Figure 2).
Figure 1
Figure 2
Outer tray guide
Inner tray guide
NOTE
DVD players and DVD video discs have region
numbers (numbers assigned for different regions of
the world).
The numbers must match or the discs cannot be
played.
The Region number for this DVD video player is 1.
NOTE
•Recordings you have made should only be used for your personal
enjoyment, and as per copyright laws may not be used in other ways
without permission of the copyright holder.
•Do not play CD-R/CD-RW discs containing files in formats other than
music CD (CD-DA format), MP3, WMA or JPEG. Depending on the
type of file, the set may malfunction or be damaged.
12 cm disc
8 cm disc
•Place 8 cm discs in the inner tray guide without using an adapter.
•“STOP” is displayed if a disc that cannot be played is loaded.
•“0h00m00s” is displayed if the disc is loaded upside-down or if no
disc is loaded.
NOTE
Do not push the disc tray in by hand when the power is turned off.
Doing so could damage the set.
1.S-302E3_1st.indd
8
2007/07/31
17:44:25
ENGLISH
•If there are fingerprints or dirt on discs, wipe them off before using
the disc. Fingerprints and dirt can impair sound quality and cause
interruptions in playback.
•Use a commercially available disc cleaning set or a soft cloth to clean
discs.
NOTE
Do not use record spray, antistatic agents, or benzene, thinner or other
solvents.
Operating Range of the Remote Control
Unit
Point the remote control unit at the remote sensor when operating it.
About the Remote Control Unit
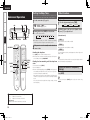
Inserting the Batteries
q Slide the rear lid in the
direction of the arrow and
remove it.
Troubleshooting
•Be sure to remove discs after using them.
•Be sure to store discs in their cases to protect them from dust,
scratches, warping, etc.
•Do not store discs in the following places:
1.Places exposed to direct sunlight for long periods of time
2.Dusty or humid places
3.Places exposed to heat from heating appliances, etc.
Do not wipe with a circular
motion.
Approx. 23 feet/7 m
w Load the two batteries properly
as indicated by the marks in the
battery compartment.
Remote Control Information
Cautions on Storing Discs
Gently wipe the disc from the
inside towards the outside.
Playback
•Do not get fingerprints, oil or dirt on discs.
•Take special care not to scratch discs when removing them from
their cases.
•Do not bend or heat discs.
•Do not enlarge the hole at the center.
•Do not write on the labeled (printed) surface with ball-point pens,
pencils, etc., or stick new labels on discs.
•Water droplets may form on discs if they are moved suddenly from a
cold place (outdoors for example) to a warm place, but do not try to
dry them off using a hairdryer, etc.
Setup
Cautions on Handling
•Replace the batteries with new ones if the set does not operate even
when the remote control unit is operated close to the unit.
•The supplied batteries are only for verifying operation.
•When inserting the batteries, be sure to do so in the proper direction,
following the “q” and “w” marks in the battery compartment.
•To prevent damage or leakage of battery fluid:
•Do not use a new battery together with an old one.
•Do not use two different types of batteries.
•Do not attempt to charge dry batteries.
•Do not short-circuit, disassemble, heat or dispose of batteries in
flames.
•If the battery fluid should leak, carefully wipe the fluid off the inside
of the battery compartment and insert new batteries.
•Remove the batteries from the remote control unit if it will not be in
use for long periods.
•When replacing the batteries, have the new batteries ready and
insert them as quickly as passible.
Connections
•Only load one disc at a time. Loading two or more discs can damage
the unit or scratch the discs.
•Do not use cracked or warped discs or discs that have been repaired
with adhesive, etc.
•Do not use discs on which the sticky part of cellophane tape or labels
is exposed or on which there are traces of where labels have been
removed. Such discs can get caught inside the player and damage
it.
NOTE
Cleaning Discs
Getting Started
Cautions on Loading Discs
30°
30°
NOTE
The set may function improperly or the remote control unit may not
operate if the remote control sensor is exposed to direct sunlight,
strong artificial light from an inverter type fluorescent lamp or infrared
light.
e Put the rear cover back on.
1.S-302E3_1st.indd
9
2007/07/31
17:44:27
ENGLISH
Getting Started
Part Names and Functions
Display
For buttons not explained here, see the page indicated in parentheses ( ).
Front Panel
Connections
Q5
Q4
Q6 Q5
Q4 Q3
q
w
Q1
Q2
Q1
Q0 oi u y
Q3 Q2 Q1
Setup
Playback
Remote Control Information
q1 (the play indicator) lights when a disc is
playing, and 3 (the pause mode) is set.
q w e r
t
y
qPower operation button
(ON/STANDBY)············································ (24)
Troubleshooting
wPortable jack················································ (37)
eFUNCTION button······································· (24)
rUSB port······················································· (13)
tAudyssey Dynamic EQ indicators·············· (44)
yDisplay
uRemote control sensor·································· (5)
iDimmer sensor············································ (22)
ui o
Q0
oVOLUME control knob································ (24)
Q0Headphones jack········································· (31)
Q1Skip buttons (8, 9)····························· (25)
Tuning/Preset buttons (+, –)······················· (31)
Q2Play/Pause button (1 3)····························· (25)
Q3Stop/band button (2 BAND)················ (25, 31)
Q4Disc tray·························································· (4)
Q5Disc tray open/close button (5)··················· (4)
wDisc section indicator·································· (25)
eReception mode indicator·························· (31)
rTone indicator·············································· (38)
tInformation display
Various information is displayed here, depending
on the operation mode.
yRemote control signal reception
e
r
t
oHDCD indicator············································ (44)
Q0Dolby Virtual Speaker mode indicator······· (31)
Q1Input signal indicators································ (31)
Q2Dolby Headphone mode indicator············· (31)
Q3Play mode indicator·······························(27, 28)
Q4Disc indicator················································· (4)
Q5Progressive output indicator·······················(11)
Q6HDMI output indicator································ (12)
indicator························································· (5)
uMaster volume indicator····························· (24)
iTimer indicator············································ (38)
1.S-302E3_1st.indd
10
2007/07/31
17:44:28
ENGLISH
Bottom Panel (Subwoofer)
Q8
Q7
Q6
Q4
Q5
Getting Started
Rear Panel
Q3
Connections
Setup
Playback
q
q
w
e r t
y
u
i
iAUX1 / AUX2 / AUX3 Analog audio connectors
oAUX1 Digital audio connectors
(VIDEO/S-VIDEO OUT)·································(11)
(ANALOG AUDIO IN)··································· (13)
eCOMPONENT VIDEO connectors
Q0AUX2 Digital audio connectors
(COMPONENT VIDEO OUT)·························(11)
(OPTICAL DIGITAL IN/OUT)························ (13)
rAUX1 COMPONENT VIDEO connectors
Q1iPod connector············································· (12)
Q2ETHERNET connector·································· (15)
Q3WLAN ANTENNA terminal·························· (15)
Q4FM/AM antenna terminals
(COMPONENT VIDEO IN)···························· (13)
tAUX1 VIDEO / S-VIDEO connectors
(VIDEO/S-VIDEO IN)···································· (13)
yAUX2 VIDEO / S-VIDEO connectors
(VIDEO/S-VIDEO IN)···································· (12)
(COAXIAL DIGITAL IN)································ (13)
Q0
Q1
Q2
Q5DOCK CONTROL jack·································· (12)
Q6REMOTE CONTROL jack····························· (14)
Q7RS-232C connector······································ (14)
Q8SYSTEM connector
(SYSTEM CONNECTOR)······························ (10)
qSYSTEM connector······································ (10)
wPROTECT indicator······································ (46)
eSPEAKER SYSTEMS connector·················· (10)
rPower cord··················································· (10)
Troubleshooting
qHDMI connectors (HDMI OUT)····················(11)
wVIDEO / S-VIDEO connectors
o
Remote Control Information
w
e
r
(ANTENNA)·················································· (14)
u Video output selector switch
(HDMI/PROGRESSIVE/INTERLACED)……… (11)
1.S-302E3_1st.indd
11
2007/07/31
17:44:29
ENGLISH
Getting Started
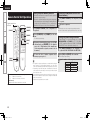
Remote Control Unit
nFront
nRear
q
Connections
Q3
w
Q4
Setup
e
Q5
Playback
r
Q6
t
qSignal transmission indicator···················· (40)
wExternal device power button···················· (41)
eTV input selector button····························· (41)
rFunction button··········································· (24)
tPLAY (1) button·········································· (25)
ySTILL/PAUSE (3) button····························· (25)
uSKIP (8, 9) buttons···························· (25)
iSEARCH (6, 7) buttons······················· (25)
Remote Control Information
Q7
y
Q8
u
Q9
W0
i
Troubleshooting
W1
o
W2
Q0
Q1
W4
Q2
TUNING +, – buttons··································· (31)
oTOP MENU button······································· (25)
Q0Cursor buttons (uio p)·························· (25)
Q1TOOL button
Q2HOME button··············································· (17)
Q3Remote control signal transmitter··············· (5)
Q4ON/STANDBY button·································· (24)
Q5SUB WOOFER LEVEL button
Adjust the subwoofer volume level.
Q6DISPLAY button··········································· (27)
Q7STOP (2) button·········································· (25)
Q8Dolby virtual speaker/STEREO button······· (31)
Q9Master volume control buttons
W3
CHANNEL +, – buttons································ (35)
(VOLUME)···················································· (24)
W0Muting button (MUTE)································ (38)
W1MENU/GUIDE button·································· (25)
W2ENTER button·············································· (26)
W3RETURN button··········································· (26)
W4SOURCE CONTROL switch························· (40)
q
Q2
w
Q3
e
Q4
r
Q5
t
Q6
Q7
Q8
Q9
y
u
i
o
W0
Q0
W1
Q1
qSUBTITLE/PTY button································ (26)
wAUDIO/RDS button····································· (26)
eCharacter/Number································ (25, 32)
rCLEAR button·············································· (27)
tCALL button················································· (27)
yHDMI button················································ (12)
uSLEEP button··············································· (38)
iSTATUS button············································ (31)
oTOOL button
Q0SURROUND button····································· (30)
Q1SURROUND PARAMETER button·············· (30)
Q2ANGLE/CT button······································· (26)
Q3ZOOM/RT button········································· (26)
Q4RANDOM button········································· (27)
Q5REPEAT button············································· (27)
Q6PROGRAM button······································· (27)
Q7TONE button················································ (38)
Q8Cursor buttons (uio p)·························· (25)
Q9ENTER button·············································· (26)
W0RETURN button··········································· (26)
W1MEMO button·············································· (32)
NOTE
The TOOL button cannot be used.
bTo operate the S-302, set to the “DVD / CD /
FM/AM / iPod / NET/USB” position.
NOTE
•The TOOL button cannot be used.
•If buttons on the front or rear are pressed strongly, the button on the opposite side will be activated too.
1.S-302E3_1st.indd
12
2007/07/31
17:44:30
ENGLISH
Connections
Cables Used for Connections
Select the cables according to the equipment being connected.
Audio cables
Coaxial digital (75Ω / ohms pin-plug) cable
Turn the hexagonal wrench in the direction of arrow
Component video cable
Optical transmission cable
(Red)
S-Video connections
L
L
R
R
S-Video cable
Video connections
(Yellow)
75Ω / ohms pin-plug video cable
Network connections (wired LAN)
Audio and video cables
LAN cable
HDMI connections
19-pin HDMI cable
B to loosen the cable.
Signal direction
Pull out the old cable. (Arrow C)
bBe careful not to leave any broken wire parts inside the
connector.
4
5
Troubleshooting
the side of the connector’s “+” side. (Arrow A)
(PR/CR)
Remote Control Information
Insert the included hexagonal wrench into the hole at
(PB/CB)
(Red)
Optical digital connections
Stereo pin-plug cable
Refer to the procedure below if you want to switch to a different
speaker cable. This example describes how to mount the “+” side
cable to the connector. Mount the “–“ side cable in the same way.
(Blue)
Analog connections (stereo)
(White)
(Y)
Playback
To change the speaker cable
Component video connections
(Green)
Setup
•Do not plug in the power supply cord until all connections have been
completed.
•When making connections, also refer to the owner’s manual of the
other components.
•Be sure to connect the left and right channels properly (left with left,
right with right).
•Do not bundle power supply cords together with connection cables.
Doing so can result in humming or noise.
Video cables
Coaxial digital connections
(Orange)
NOTE
Connections
Connections for all compatible audio and video signal formats are
described in these operating instructions. Please select the types
of connections suited for the equipment you are connecting.
With some types of connections, certain settings must be made
on the S-302. For details, refer to the instructions for the respective
connection items below.
1
2
3
Getting Started
Preparations
Audio signal:
Video signal:
Input
Output
Input
Output
Peel off the cable’s sheath and insert the new cable .
(Arrow D)
Input
Output
Input
Output
Turn the hexagonal wrench in the direction of Arrow
E and tighten securely so that the cable cannot be
pulled out.
bIf the polarities are inverted, the phase
may be off and the bass sound may
be missing, resulting in an unnatural
sound.
C
A
D
B
E
1.S-302E3_1st.indd
13
2007/07/31
17:44:31
ENGLISH
Connections
•This function automatically converts various formats of video signals input to the S-302 into the format
used to output the video signals from the S-302 to a TV.
•The S-302’s video input/output circuitry is compatible with the following three types of video signals:
Analog video signals: Component video, S-Video and video
A home theater can be achieved easily using the included cables to connect the DVD surround receiver
(ADV-S302), subwoofer (DSW-S302), speakers (SC-S302) and your TV set.
DSW-S302
SC-S302
GFlow of video signals inside the S-302H
Setup
High picture
quality playback
Playback
The set includes
a built-in clock
function. Connect
the set's power
cord to a wall
power outlet to
which power is
always supplied.
HDMI terminal
Remote Control Information
Component video
terminals
Component video
terminals
S-Video terminal
S-Video terminal
Video terminal
Video terminal
Video inputs
Video outputs
TV
System cable
Getting Started
Connecting the System
Video Conversion Function
White
Red
Power cord
-
3
White
Red
To household
power outlet
(AC 120 V, 60 Hz)
Speaker cable
: When the 480i/576i signals are input
Troubleshooting
ADV-S302
Speaker cable
TV
•When not using this function, output the signals to the TV using the same type of terminal as the video
input terminal to which the signals are being input.
•The picture quality is not improved even if the video format to which the signal is converted using this
function offers a high picture quality. The picture quality of the video signals output from the S-302
depends on the input signal.
Video cable
7*%&0
*/
NOTE
•1080p component video input signals cannot be converted into other formats.
•480p, 576p, 720p and 1080i component video input signals cannot be converted into S-Video or video
format.
NOTE
•Connect the set's video output directly to the TV. Do not connect it via a VCR (video cassette recorder).
Some discs contain copy prohibit signals, and the picture could be disturbed if such discs are played via
a VCR.
•Insert the plugs securely. Incomplete connections will result in the generation of noise.
•Do not unplug the power cord while the set is operating.
•When connecting system cables and speaker cables, first lay them out sideways. When laying them out
take care not to damage them.
10
1.S-302E3_1st.indd
14
2007/07/31
17:44:33
ENGLISH
Connecting the Monitor
Select and connect using one of the video cables below according to the TV's terminals. The terminals
provide playback with different picture qualities, in the following order (from highest to lowest):
qHDMI terminals, wComponent video terminals, eS-Video terminals, rVideo terminals
Monitor
7*%&0
)%.*
*/
7*%&0
*/
47*%&0
*/
$0.10/&/57*%&0
*/
:
1# 13
Setup
Screws
(included)
Playback
Speaker Stand
(included)
Remote Control Information
Note on speaker impedance
Wall
Screws
(included)
Wall bracket
(included)
Switching the video output format
Set the HDMI/PROGRESSIVE/INTERLACED switch on the rear panel according to the video output format
of the TV connected to the set.
bBe sure to turn the power off before operating the switch.
Troubleshooting
If speakers with an impedance below the specified
impedance (4 Ω/ohms) are used (for example,
speakers with an impedance of 3 Ω/ohms) with
the volume turned up high for long periods of
time, the temperature may rise, activating the
protective circuit.
When the protection circuit is activated, the output
to the speakers is cut off and the power indicator
blinks. If this happens, unplug the power supply
cord, wait for the set to cool off and improve
ventilation around the unit. Also check the wiring
of the input cables and the speaker cables. After
doing this, plug the power supply cord back in and
turn the unit’s power back on.
If the protection circuit is activated again even
though there are no problems with the wiring
or the ventilation around the unit, switch off the
power and contact a DENON service center.
bBe sure to tighten the screws completely.
bAlso be careful when installing.
Connections
The protection circuit will be activated in the
following cases:
•When the speaker output is short-circuited
•When the temperature around the set is
extremely high
•When the set is used for long periods of time
with a high output and the internal temperature
rises
When the protection circuit is activated, the
speaker output is cut off and the power indicator
flashes. Should this occur, please follow these
steps: be sure to switch off the power of this unit,
check whether there are any faults with the wiring
of the speaker cables or input cables, and wait for
the unit to cool down if it is very hot. Improve the
ventilation condition around the unit and switch
the power back on.
If the protection circuit is activated again even
though there are no problems with the wiring
or the ventilation around the unit, switch off the
power and contact a DENON service center.
Mounting the speaker stand and bracket
Getting Started
Protector circuit
The component video terminals may be indicated differently on your TV. For details, see the TV's operating
instructions.
Anti slip pads here.
bWhen placing the speaker system (SC-S302) on a
stand, etc., stick the included cushion pads at the
two corners of the bottom surface. (Refer to the
illustration below.)
11
1.S-302E3_1st.indd
15
2007/07/31
17:44:34
ENGLISH
Getting Started
Connecting Equipment with HDMI Connectors
Digital video and digital audio can both be connected using a single HDMI cable.
NOTE
Connections
Setup
•When playing multichannel sources, the audio output is downmixed to two channels for output. In
addition, the sampling frequency is lowered to 48 kHz.
•Video signals are not output properly when using devices that are not HDCP-compatible.
•Use a cable on which the HDMI logo is indicated (a certified HDMI product) for connection to the HDMI
connector. Normal playback may not be possible when using a cable other than one on which the HDMI
logo is indicated (a non-HDMI-certified product).
•The audio signals output from the HDMI connector (sampling frequency, bit rate, etc.) may be restricted
by the connected device.
Copyright protection system
In order to play the digital video and audio signals of a DVD Video disc using HDMI connections, both the
connected DVD player and TV must be equipped for a copyright protection system called “HDCP” (Highbandwidth Digital Content Protection).
HDCP is a copy protection technology consisting of data encoding and mutual identification of the
devices. The S-302 is HDCP-compatible. Check the operating instructions of your TV to see if they are
compatible.
Setting the HDMI output resolution
Set the resolution of the video signals output from the HDMI output terminal to a resolution with which the
connected devices are compatible. Press HDMI on the remote control unit to select.
Playback
480p/576p
720p
1080i
1080p
AUTO
If the connected TV is only compatible with DVI-D terminals, use an HDMI/DVI conversion cable.
Remote Control Information
When connecting with an HDMI/DVI converter cable (adapter)
•HDMI video signals are theoretically compatible with the DVI format.
When connecting to a TV, etc., equipped with a DVI-D terminal, connection is possible using an HDMI/
DVI converter cable, but depending on the combination of components in some cases the video signals
will not be output.
•When connecting using an HDMI/DVI converter adapter, the video signals may not be output properly
due to poor connections with the connected cable, etc.
Troubleshooting
Condition of signals
from the S-302's HDMI
output terminal
HDMI-compatible
monitor
DVI-D-compatible
monitor
(HDCP compatible)
DVI-D-compatible
monitor
(HDCP non
compatible)
Both video and audio
output
Only video outputz
Neither video nor audio
output
z: Only output when video signals are of RGB format.
Connecting the Playback Components
Carefully check the left (L) and right (R) channels and the inputs and outputs, and be sure to interconnect
correctly.
Control Dock for iPod
Use either a DENON Control Dock for iPod
(ASD-1R, sold separately) or an iPod cable
(AK-P100, sold separately) to connect the S302 and an iPod.
iPod
•When using the Control Dock for iPod,
certain settings must be made on the
Control Dock for iPod. For details, refer
to the Control Dock for iPod’s operating
instructions.
•When using an iPod, refer to “iPod®
Playback” (vpage 33).
12
1.S-302E3_1st.indd
16
2007/07/31
17:44:35
ENGLISH
Satellite Receiver
Getting Started
Apple iPod Dock
Connect the cables to be used.
DBS / BS tuner
7*%&0
$0.10/&/57*%&0
065
13 1#
:
The following iPod docks can be used with this method:
•iPod Dock M9868G/A (For iPod with color displays)
•iPod Dock MA072G/A (For iPod nanos)
7*%&0
065
"6%*0
47*%&0
065
"6%*0
065
3
015*$"065
$0"9*"065
Connections
•When using an iPod, make the setting at GUI
iPod
menu “SETUP” – “Others” – “iPod Assign”.
iPod Dock (Sold separately)
R
L
R
Setup
L
Playback
Connect the cables to be used.
TV tuner
7*%&0
$0.10/&/57*%&0
065
13 1#
:
7*%&0
065
"6%*0
47*%&0
065
"6%*0
065
3
015*$"065
Connections to Other Devices
Troubleshooting
TV Tuner
Remote Control Information
•When there are multiple input signals, the input signals are detected and the input signal to be output from
the video monitor output terminal is selected automatically in the following order: S-Video, composite
video.
•The S-302 is equipped with a function for up and down converting video signals (vpage 10).
•Connect to “OPT. AUX1” when using the OPTICAL terminal for the digital audio input, to “AUX2” when
using the COAXIAL terminal.
USB Port
L
R
L
R
nFront panel
USB memory device
USB
13
1.S-302E3_1st.indd
17
2007/07/31
17:44:37
ENGLISH
Getting Started
AM loop antenna assembly
Antenna Terminals
An F-type FM antenna cable plug can be connected directly.
Remove the vinyl tie and take out the connection
line.
AM/FM
Connect to the AM antenna terminals.
Connections
Direction of broadcasting station
FM antenna
Video
Recorder etc.
015*$"*/
Extension jack for future use.
AM loop antenna
(Supplied)
Bend in the reverse direction.
Input
Setup
Playback
Mount
Remote Control Information
Black
Output
Infrared
retransmitter
a.With the antenna on top any stable
surface.
75 Ω/ ohms
Coaxial cable
FM indoor antenna
(Supplied)
External Controller
"69
065
Infrared
sensor
b.With the antenna attached to a wall.
Installation hole Mount on wall, etc.
White
Connection of AM antennas
1.Push the
lever.
2.Insert the
conductor.
3.Return the
lever.
RS-232C connector
This connector is used for an external controller.
Troubleshooting
Ground
AM outdoor antenna
Note to CATV system installer:
This reminder is provided to call the CATV system installer’s
attention to Article 820-40 of the NEC which provides guidelines for
proper grounding and, in particular, specifies that the cable ground
shall be connected to the grounding system of the building, as
close to the point of cable entry as practical.
NOTE
•Do not connect two FM antennas simultaneously.
•Even if an external AM antenna is used, do not disconnect the AM
loop antenna.
•Make sure the AM loop antenna lead terminals do not touch metal
parts of the panel.
b If you wish to control the S-302 from an external
controller using the RS-232C connector,
perform the operation below beforehand.
q Turn the S-302’s power.
w Turn off the S-302’s power from the external
controller.
e Check that the S-302 is in the standby mode.
14
1.S-302E3_1st.indd
18
2007/07/31
17:44:39
ENGLISH
nBroadband Internet connection
[Wired LAN]
Computer
Modem
A broadband line connection to the Internet is required in order to
use the S-302’s Internet radio function.
nModem
nRouter
To LAN port
LAN port/
Ethernet port
The S-302 does not come with an Ethernet cable.
Purchase a cable of the required length.
nComputer
Modem
Computer
Internet radio
bFree space is required to save music files. The following sizes are
approximate.
Format
To WAN side
MP3 / WMA
Wireless LAN rod
antenna (Supplied)
Router with access point
Turn right
WAV (LPCM)
Bit rate
128kbps
192kbps
256kbps
392kbps
1400kbps
Per minute
Approx. 1 MB
Approx. 1.5 MB
Approx. 2 MB
Approx. 3 MB
Approx. 10 MB
Per hour
Approx. 60 MB
Approx. 90 MB
Approx. 120 MB
Approx. 180 MB
Approx. 600 MB
Troubleshooting
[Wireless LAN]
A computer with the following specifications is required to operate
the music server:
•OS
Windows® XP Service Pack2, Windows Vista
•Software
.NET Framework 1.1, Windows Media Connect (Windows XP),
Windows Media Player Ver.11
•Internet browser
Microsoft Internet Explorer 5.01 or later
•LAN port
•300 MB or more free disk space
•If you have an ISP contract for a line on which network settings are
made manually, make the settings at “Network Setup” (vpage
20, 21).
•When using a broadband router (DHCP function), the S-302 makes
the network settings automatically, so there is no need to make
them yourself.
•If connecting the S-302 to a network with no DHCP function, make
the settings at “Network Setup” (vpage 20, 21).
•The S-302 is not compatible with PPPoE. A PPPoE-compatible
router is required if you have a contract for a line of the type with
which the PPPoE is set.
•Depending on the ISP with which you have your contract, it may
be necessary to make proxy server settings to use the Internet
radio function. If you made proxy server settings on the computer
to connect to the Internet, make the same proxy server settings on
the S-302.
•The S-302 uses the DHCP and Auto IP functions to make the
network settings automatically.
Remote Control Information
nEthernet cable (CAT-5 or greater recommended)
Router
nOthers
Playback
To LAN port
NOTE
A contract with an ISP is required to connect to the Internet.
No additional contract is needed if you already have a broadband
connection to the Internet.
Setup
To WAN side
When using the S-302, we recommend you to use a router
equipped with the following functions:
•Built-in DHCP (Dynamic Host Configuration Protocol) server
This function automatically assigns IP addresses on the LAN.
•Built-in 100 BASE-TX switch
When connecting multiple devices, we recommend a switching
hub with a speed of 100 Mbps or greater.
Connections
This is a device that is connected to the broadband line to
communicate with the Internet.
Internet radio
•Depending on the server, video files may be displayed, but they
cannot be played on the S-302.
•For connections to the Internet, contact an ISP (Internet Service
Provider) or a computer shop.
•The types of routers that can be used depend on the ISP. Contact an
ISP (Internet Service Provider) or a computer shop for details.
Getting Started
Required system
Network Audio
nEthernet cable (CAT-5 or greater recommended)
No Ethernet cable is included with the S-302. Procure a cable with
the necessary length.
NOTE
Be sure to use a shielded type cable for USB/Ethernet connections.
Depending on the connected computer/router, there may be much
noise generated from the cable.
(1MB = 106 bytes)
Once Connections are Completed
Turning the Power On (vpage 24)
15
1.S-302E3_1st.indd
19
2007/07/31
17:44:40
ENGLISH
Getting Started
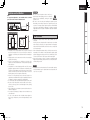
Examples of GUI Screen Displays
Some typical examples are described below.
GUI Menu Operations
Connections
With the S-302, settings and operations for most functions can be
performed by operating while looking at the GUI menu displayed on
the monitor screen.
Example: Browse Menu (Top Menu)
nIcon
Switch the selected item
Setup
Setup
Playback
Remote Control Information
Example of the Display of the GUI
Mark at a Title
Troubleshooting
Make detailed settings for various
parameters.
Proceed to the next item
List of subsequent items
Guidance text for item at
cursor position
Change configuration settings.
Selected item
Switch the selected item
nList
Selected item
Example: During Playback (NET/USB)
The playback options
(repeat, random, etc.)
are displayed.
SETUP
Selected item
name
Language
Video Setup
Audio Setup
Network Setup
Others
Timer
The GUI cannot be superimposed when xvYCC signals, component
1080p signal and computer’s resolution (e.g.VGA) are input.
Items for which this mark is indicated at the title can be
operated from the GUI.
We recommend performing such operations from the
GUI.
Cursor Position Display
The playback status is indicated
with the icons shown below.
Play , Pause , Stop ,
Manual search ,
OSD Language
DVD Language
Switch to the next item
bSwitch the selected item using
ui.
NET/USB
Selected item name
This is the GUI icon for this setting
item or for the menu series to which
this item belongs.
Playback time
00:00
90%
Connection status
Example of Display of Default
Values
Français
Español
Artist
Album
Title information, artist information
and album information
Back
In lists of selectable items or adjustable ranges, the item
surrounded by a border is the default value.
[Selectable items] English
Now Playing
Song
Operation
button guidance
Deutsch
16
1.S-302E3_1st.indd
20
2007/07/31
17:44:42
ENGLISH
The same operation is possible on the remote
control unit.
The GUI menu is displayed.
Press the u
i p button to select the menu to be set
or operated.
DVD/CD
(vpage 24)
Play from DVD/CD.
TUNER
(vpage 31)
Listen to Radio.
NOTE
AUX1 ~ AUX3
(vpage 24)
Play from AUX1 ~ AUX3.
(vpage 34)
Play from Network or USB device.
iPod
Troubleshooting
NET/USB
Remote Control Information
Press the HOME button again to quit the GUI menu screen.
• Network Setup
·Network Setup
·Other
Character
PC Language
·Network Information
• Others
·Auto Power Mode
·Rating
Rating Level
Password
·Captions
·Display
On Screen Display
Dimmer Sensor
Display
·iPod Assign
·Slide Show
·Custom Setting
Volume Limit Setting
Startup Mode
• Timer
·Once Timer
Once Timer
Start Time
End Time
Function
·Everyday Timer
Everyday Timer
Start Time
End Time
Function
·Set Time
Playback
3
Press the ENTER or p button to enter the setting.
(vpage 18)
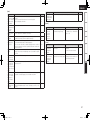
nSETUP
• Language
·OSD Language
·DVD Language
Subtitle
Dialog
Disc Menu
• Video Setup
·TV Setup
TV Aspect
TV Type
Squeeze Mode
·Screen Setup
Screen Saver
Wallpaper
·HDMI Setup
HDMI Auto Format
Color Space
RGB Range
HDMI Audio Out
·Progressive Mode
Auto1
Auto2
Video1
Video2
Video3
• Audio Setup
·Digital Output Setup
·Speaker Setup
Channel Level
Distance
·Input Mode
Auto
PCM
DTS
Analog
Setup
bTo return to the previous item, press the o.
SETUP
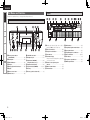
Connections
1
2
Press the HOME button.
GUI Menu Map
Getting Started
Operations
(vpage 33)
Play from iPod.
FRONT IN
(vpage 37)
Play from FRONT IN.
17
1.S-302E3_1st.indd
21
2007/07/31
17:44:44
ENGLISH
Getting Started
nDialog
Select language for dialog.
Setup
Connections
SETUP
Setup
F Menu tree F
[Selectable items] English
German
Spanish
Others
French
Italian
Japanese
nDisc Menu
Select disc menu language.
Make detailed settings for various
parameters.
SETUP
[Selectable items] English
German
Spanish
Others
French
Italian
Japanese
If “Other” was selected, refer to the “Language code list” and input
the code number using the NUMBER (0 ~ 9) buttons.
Playback
Language code list
a Language
Code
s Video Setup
Remote Control Information
d Audio Setup
Language
Code
Language
Code
Language
6565
Afar
7079
Faroese
7678
Lingala
Code
Language
8375
Slovak
Troubleshooting
6566
Abkhazian
7082
French
7679
Laothian
8376
Slovenian
f Network Setup
6570
Afrikaans
7089
Frisian
7684
Lithuanian
8377
Samoan
g Others
6577
Ameharic
7165
Irish
7686
Latvian, Lettish
8378
Shona
h TIMER
6582
Arabic
7168
Scots Gaelic
7771
Malagasy
8379
Somali
6583
Assamese
7176
Galician
7773
Maori
8381
Albanian
6589
Aymara
7178
Guarani
7775
Macedonish
8382
Serbian
6590
Azerbaijani
7185
Gujarati
7776
Malayalam
8385
Sundanese
6665
Bashkir
7265
Hausa
7778
Mongolian
8386
Swedish
6669
Byelorussian
7273
Hindi
7779
Moldavian
8387
Swahili
6671
Bulgarian
7282
Croatian
7782
Marathi
8465
Tamil
6672
Bihari
7285
Hungarian
7783
Malay
8469
Telugu
6678
Bengali; Bangla
7289
Armenian
7784
Maltese
8471
Tajik
6679
Tibetan
7365
Interlingua
7789
Burmese
8472
Thai
6682
Breton
7378
Indonesian
7865
Nauru
8473
Tigrinya
6765
Catalan
7383
Icelandic
7869
Nepali
8475
Turkmen
6779
Corsican
7384
Italian
7876
Dutch
8476
Tagalog
6783
Czech
7387
Hebrew
7879
Norwegian
8479
Tonga
6789
Welsh
7465
Japanese
7982
Oriya
8482
Turkish
6865
Danish
7473
Yiddish
8065
Panjabi
8484
Tatar
6869
German
7487
Javanese
8076
Polish
8487
Twi
6890
Bhutani
7565
Georgian
8083
Pashto, Pushto
8575
Ukrainian
6976
Greek
7575
Kazakh
8084
Portuguese
8582
Urdu
6978
English
7576
Greenlandic
8185
Quechua
8590
Uzbek
6979
Esperanto
7577
Cambodian
8277
Rhaeto-Romance
8673
Vietnamese
6983
Spanish
7578
Kannada
8279
Romanian
8679
Volapük
6984
Estonian
7579
Korean
8285
Russian
8779
Wolof
6985
Basque
7583
Kashmiri
8365
Sanskrit
8872
Xhosa
7065
Persian
7585
Kurdish
8368
Sindhi
8979
Yoruba
7073
Finnish
7589
Kirghiz
8372
Serbo-Croatian
9072
Chinese
7074
Fiji
7665
Latin
8373
Singhalese
9085
Zulu
aLanguage
Make settings for GUI language, DVD subtitle/dialog
language etc.
OSD Language
Select the language displayed on the GUI screen.
[Selectable items]
English
Deutsch
Nederlands
Français
Italiano
Español
Svenska
DVD Language
Make language settings for DVD playback.
nSubtitle
Select language for subtitles.
[Selectable items]
English
German
Others
Franch
Off Japanese
Italian
Spanish
18
1.S-302E3_1st.indd
22
2007/07/31
17:44:46
ENGLISH
Make video output settings to match connected monitor.
TV Setup
Speaker Setup
Make settings for HDMI video/audio output.
Make detailed speaker settings.
nHDMI Auto Format
nChannel Level
Make settings for resolution of HDMI video output signal.
nTV Aspect
Set the AUTO function selected with the remote control unit's
HDMI button.
[Selectable items]
Select monitor aspect ratio.
Normal (4:3PS)
Test Tone Front Left Speaker Front Right Speaker
NTSC
PAL
Multi
nSqueeze Mode
Select display method of 4:3 material on 16:9 screen.
OFF
nRGB Range
Make settings for RGB output range.
[Selectable items] Normal
Enhanced
nHDMI Audio Out
Select whether to output audio via HDMI. (DVD only)
[Selectable items]
ON
OFF
nDistance
Set distance from listening position to speakers.
Distance Front Left Speaker Front Right Speaker
Select optimum progressive mode for video material.
Auto1
Auto2 Video1 Video2 Video3
There is no effect with interlaced video outputs.
Subwoofer
Default
Input Mode
Set the input mode for this source.
dAudio Setup
Screen Setup
Subwoofer
[Selectable items]
Progressive Mode
[Selectable items]
•The volume can be adjusted between the range of -12dB to +12dB.
•When “TEST TONE” is selected, the test tones are output in intervals
of 4 seconds for the first two cycles, 2 seconds from the third cycle
on, in the order shown below.
Front right
Front left
Troubleshooting
ON
RGB
Make settings for audio playback.
[Selectable items]
Auto
PCM
Remote Control Information
Select video signal format for monitor.
YCbCr
Playback
nTV Type
Subwoofer
Make settings for output color space.
[Selectable items]
With the “NORMAL (4:3PS)” setting, 16:9 pictures are displayed with
the left and right sides cut off. Sources not compatible with panning
and scanning are displayed with black bands at the top and bottom.
[Selectable items]
Setup
Normal (4:3LB)
[Selectable items]
Max. Resolution
nColor Space
[Selectable items]
[Selectable items]
Panel Resolution
Listening to the test tones at the listening position, adjust the level
of the speakers for the different channels so that the volume level
sounds the same from all speakers.
Connections
Make settings for aspect ratio, video signal format etc.
Wide (16:9)
HDMI Setup
Getting Started
sVideo Setup
DTS
Analog
Make GUI related settings.
Digital Output Setup
nScreen Saver
Use the screen saver to prevent burn-in on the monitor screen.
[Selectable items]
ON
OFF
Make settings for digital audio signal format.
[Selectable items] Normal
PCM
nWallpaper
Change the GUI background.
[Selectable items]
Picture Blue Gray Black
19
1.S-302E3_1st.indd
23
2007/07/31
17:44:47
ENGLISH
Getting Started
fNetwork Setup
Make settings for wired or wireless LAN.
Wired LAN
Connections
Make settings for wired LAN.
Turn on the S-302’s power.
If a Ethernet cable is connected
Setup
The mode automatically switches to “Wired”.
Playback
Remote Control Information
To acquire the IP address automatically
using the DHCP function
To enter the IP address manually
At the GUI menu “SETUP” – “Network Setup”
– “Network Setup” – “Detail” setting, set
“DHCP” to “OFF” and enter the IP address,
subnet mask, default gateway, primary DNS
and secondary DNS.
Troubleshooting
To not pass through the proxy server
To connect via proxy server
This setting is required when the network
is established via proxy servers.
At the GUI menu “SETUP” – “Network
Setup” – “Network Setup” – “Proxy” setting,
set “Proxy” to “ON” and enter the address or
domain name and port numbers.
This completes the setting.
Recheck the connections and settings if you cannot connect to the Internet (vpage 15).
NOTE Knowledge about networks is required to make the IP address and proxy settings. For details, consult a network administrator.
20
1.S-302E3_1st.indd
24
2007/07/31
17:44:48
ENGLISH
Getting Started
Wireless LAN settings
Make settings for wireless LAN.
Turn on the S-302’s power.
Connection
Connections
If no Ethernet cable is connected
The mode automatically switches to “Wireless”.
Display GUI menu “SETUP” – “Network Setup” – “Network Setup”.
To set manually
Search
Select the access point to
be set.
If searching is not possible
q Input the SSID.
w If there is security, select
the encryption method.
e Input the encryption key.
r If “WEP” was selected in
step w, select the default
key.
Normally select “1”.
To not pass through the proxy server
To connect via proxy server
This setting is required
when the network is
established via proxy
servers.
Make the SSID setting at
“Manual”.
Troubleshooting
If searching is possible, the
access points are displayed.
“Detail” setting
Remote Control Information
To search for the network automatically
At the GUI menu “SETUP” – “Network
Setup” – “Network Setup” – “Detail” setting,
set “DHCP” to “OFF” and enter the IP address,
subnet mask, default gateway, primary DNS
and secondary DNS.
z
Playback
Access point settings
To enter the IP address manually
Setup
To acquire the IP address automatically
using the DHCP function
At the GUI menu “SETUP” –“Network
Setup” – “Network Setup” – “Proxy” setting,
set “Proxy” to “ON” and enter the address or
domain name and port numbers.
Without security
With security
This completes the setting.
For a encryption key and
WEP, also input the default
key.
z: This is the flow for infrastructure type communications. For ad-hoc communications, set “Mode” at
the “Detail” settings to “Ad-hoc”.
NOTE Knowledge about networks is required to make the IP address and proxy settings. For details,
Connection (continued on right page)
consult a network administrator.
21
1.S-302E3_1st.indd
25
2007/07/31
17:44:49
ENGLISH
Getting Started
Other
iPod Assign
nRating Level
Select viewer restriction level.
Make setting for computer language environment.
Select iPod connection method.
[Selectable items] 0 (Lock All)
nCharacter
1~7
8 (No Limit)
Set the character code type of the MP3 ID3-Tag played by USB.
Connections
[Selectable items]
Auto
Latin
Japanese
Setup
If the characters are not properly displayed when set to “Auto”, set to
“Latin” or “Japanese”.
Playback
Remote Control Information
ara
chi (smpl) chi (trad)
cze
dan
dut
eng
hun
ita
por (BR)
fin
ger
gre
heb
Old Password (0000 ~ 9999)
jpn
kor
nor
pol
por
Confirm
rus
spa
swe
tur
New Password (0000 ~ 9999)
[Items to be checked] Wired or Wireless
SSID
Captions
[Selectable items]
Troubleshooting
gOthers
Make various other settings.
ON
nEnd Time
Make viewer restriction related settings.
ON
Disable
Set Timer Start Time. (12-hour display)
Example: PM 0:35
Example: PM 1:00
nFunction
Select Timer Function.
OFF
[Selectable items]
nDimmer Sensor
DVD/CD
Tuner
iPod
Make settings for automatic display brightness adjustment.
[Selectable items]
Rating
Startup Mode
Set Timer End Time. (12-hour display)
Make settings for display of operation information.
[Selectable items]
15sec
Settings for once-only timer.
OFF
Display
nOn Screen Display
This function only works when the input source is set to “DVD/CD”.
~
Once Timer
nStart Time
Control auto power-off 30 min. after DVD playback stop (power saver
mode).
OFF
5sec
[Selectable items] Volume Limit Setting
DVDs including closed caption signals are indicated by the
,
and
marks.
Subtitles are not displayed for DVDs not containing closed caption
signals.
Make display related settings.
ON
[Selectable items]
[Selectable items] Enable
Auto Power Mode
[Selectable items]
Make slideshow settings.
Settings for Timer.
DHCP= ON or OFF IP Address
MAC Address
Slide Show
hTimer
Make settings for closed-caption info on DVD (separate decoder
required).
Display network information.
Apple Dock
Make settings for volume control.
[Selectable items]
fre
Network Information
DENON Dock
Custom Setting
Change password.
Select computer environment language.
[Selectable items]
iPod Connect Cable
When “1 – 7” is selected, viewing cannot be restricted for adult DVDs
on which no viewer restriction level has been recorded.
However, when “0 (Lock All)” is selected, playback is prohibited for
all discs, even discs on which no viewer restriction level has been
recorded.
nPassword
nPC Language
[Selectable items]
ON
OFF
nDisplay
Adjust display brightness of the receiver.
[Selectable items]
Bright
Medium
Dim
OFF
22
1.S-302E3_1st.indd
26
2007/07/31
17:44:51
ENGLISH
Set Time
Settings for Everyday Timer.
Set Current Time.
[Selectable items] Enable
Getting Started
Everyday Timer
Disable
Set Timer Start Time. (12-hour display)
Connections
The clock is synchronized with the power supply frequency. It may be
off by about 2 to 3 minutes per month.
In such cases, reset the time.
nStart Time
Example: PM 0:35
Setup
nEnd Time
Set Timer End Time. (12-hour display)
Playback
Example: PM 1:00
nFunction
Select Timer Function.
DVD/CD
Tuner
Remote Control Information
[Selectable items]
iPod
•Be sure to set the current time if you want to use the timer playback
function.
•When the function is set to “TUNER”, also set the preset number.
•If the times set for the sleep timer, every timer and once timer
overlap, the priority is as follows:
q sleep timer w once timer
e every timer
Troubleshooting
Checking whether or not the timer is enabled
In the standby mode, press the STATUS button.
The status is displayed on the S-302's display.
1 on/Eoff
(When the once timer is on and the everyday timer is off)
Canceling the timer
Select “DISABLE”.
To turn the timer back on, select “ENABLE”.
Changing the timer settings
Redo the timer setting operation from the beginning.
The previous settings are cleared and replaced with the new settings.
If there has been a power failure
The settings are cleared.
Reset the current time, then make the settings over from the
beginning.
23
1.S-302E3_1st.indd
27
2007/07/31
17:44:51
ENGLISH
Getting Started
<5> <FUNCTION>
89
2 13
Input source switching
Playback
Press <FUNCTION> or [DVD/CD], [FM/AM] or [AUX].
When <FUNCTION> is pressed
Connections
DVD/CD
NET/USB
Preparations
Setup
ON/STANDBY
<MASTER VOLUME>
Turning the Power On
Playback
ON/STANDBY
Remote Control Information
[DVD/CD], [FM/AM],
[AUX]
2
1
[VOLUME]
[3]
89
[6 7]
[MENU/GUIDE]
Setting the power to the standby mode:
[NUMBER]
Press ON/STANDBY.
Turning the power off:
[CALL]
Unplug the power cord from the wall outlet.
[uio p]
[ENTER]
Troubleshooting
[TOP MENU]
[ENTER]
[uio p]
Power indicator
Standby ∙∙∙∙∙∙∙∙∙∙∙∙∙∙∙∙∙∙∙∙Red
Power on ∙∙∙∙∙∙∙∙∙∙∙∙∙∙∙∙∙∙∙∙Blue
When the timer is set ∙∙∙∙∙∙∙∙∙∙∙∙∙∙∙∙∙∙∙∙Orange
NOTE
Be sure to stop playback before turning the power off.
Loading Discs
In the stop mode, press <5> to open the disc tray.
b“Loading discs” (vpage 4).
bAs long as the menu is displayed on the TV screen, the disc is still
turning. Be sure to stop the disc first, then open the disc tray.
About the button names in these explanations
< > : Buttons on the main unit
[
] : Buttons on the remote control unit
Button name only:
Buttons on the main unit and remote control unit
To close the disc tray
Press <5> again.
AUX2
AUX3
When [AUX] is pressed
AUX1
Press ON/STANDBY.
When no disc is loaded, “0h00m00s” is displayed.
When a disc is loaded, playback starts automatically. (DVD only)
TUNER
AUX1
Front In
iPod
b
b (Portable)
AUX2
AUX3
Front In
(Portable)
: “DVD/CD”, “TUNER”, “AUX1”(vpage 17)
b“iPod” and “Front In” are only displayed when the corresponding
device is connected.
bWhen using a Control Dock for iPod, “AUX2” is not displayed.
[Selectable items]
DVD/CD
: You can view/listen to DVDs or CDs.
TUNER
: You can listen to AM or FM broadcasts.
AUX1, 2
: You can listen to the sound or view the picture of an
external device.
: You can listen to the sound of an external device.
AUX3
FRONT IN : You can listen to the sound of a portable player.
iPod
NET/USB
: You can listen to the music of an iPod or view photo
data.
: You can listen to the Internet radio or music stored on
a USB memory device.
Adjusting the Master Volume
Either turn <MASTER VOLUME> or press [VOLUME
df]
The volume level is displayed.
bThe volume can be adjusted within the range of –60 to 0 to +18dB.
Depending on the input signal, surround mode, speaker settings
and channel level settings, however, it may not be possible to
adjust the volume up to +18dB.
NOTE
Do not place any foreign objects in the disc tray. Doing so could
damage it.
24
1.S-302E3_1st.indd
28
2007/07/31
17:44:52
ENGLISH
Press 1.
The “1” indicator lights and playback begins.
Press 9 or 8 during playback.
•The disc is skipped the number of chapters or tracks equal to the
number of times the button is pressed.
•When pressed once in the return direction, playback returns to the
beginning of the currently playing chapter or track.
•If pressed within 3 seconds after playback has started, the previous
chapter is selected.
Finding tracks directly
Press 2.
Stopping playback temporarily
.
Use uio p to select the desired title, then press
or 1.
Or, use
title.
For DVD video discs: Title ↔ Chapter
Press [NUMBER] (0 ~ 9, +10) to select the track.
Example : Track 4 : [4]
Example : Track 12: [+10] [2]
Example : Track 20: [+10] [+10] [0]
bThe search mode set by pressing [CALL] is stored in the memory
until the power is turned off.
[TOP MENU] or [MENU/
( ~ 9, +10) to select the desired
Playback starts.
TOP MENU
DVD MENU
Apple
Banana
Orange
Strawberry
2. AUDIO
Peach
Pineapple
3. ANGLE
Example : Top menu
1. SUBTITLE
Example : DVD menu
Discs are divided into a number of large sections (Title) and small
sections (Chapter). Each of these sections is assigned a number.
For example:
DVD Video
Title 1
Title 2
Troubleshooting
bThe resume play memory function is canceled if the disc tray is
opened or the 2 button is pressed a second time.
bThe resume play memory function only works for discs for which
the elapsed time is shown on the display during playback.
During playback, use
Remote Control Information
•Resume play memory function (DVD only)
With the S-302, when the 2 button is pressed, that position is stored
in the memory. (At this time, “1” flashes on the display.)
When the 1 button is pressed after pressing the 2 button, playback
resumes from the position at which it was stopped.
2
1 GUIDE]
[
]
2 [ENTER]
[NUMBER] 0
Chapter 1 Chapter 2 Chapter 3 Chapter 1 Chapter 2
Press <13> or [3].
Playback
Stopping playback
mode.
[CALL] to select the search
On DVDs containing multiple titles, it is possible to select
and play the desired title from the top menu. Some DVDs
include a special menu called the “DVD menu”.
Setup
1
During playback, use
Using the Top Menu/DVD Menu (DVD
Video)
Connections
•For details, refer to the respective disc's instructions. Some discs
may be intentionally designed by their authors to work in ways other
than described in this manual.
•Before playing DVD video discs, switch the connected TV's input.
Moving to the beginning of tracks (skipping)
Getting Started
Playing a DVD/Music CD Disc
The “3” indicator lights.
bTo resume playback, press <13> or [1].
Music CDs
Fast-forwarding and fast-reversing (searching)
During playback, press [6] or [7].
Track 1
Track 2
Track 3
Track 4
Track 5
The fast-forward/fast-reverse speed increases each time the button
is pressed.
bTo return to normal playback, press [1].
25
1.S-302E3_1st.indd
29
2007/07/31
17:44:54
ENGLISH
Getting Started
Switching the Audio Language, Subtitle
Language and Angle (DVD Video)
1
Connections
For DVDs containing multiple audio languages, subtitle
languages and angles, the language or angle can be
switched during playback.
During playback, use [AUDIO/RDS], [SUBTITLE/PTY] or
[ANGLE/CT].
The language or angle switches each time the button is pressed.
Setup
Playback
[SUBTITLE/PTY]
[ANGLE/CT]
Remote Control Information
[DISPLAY]
1
[3]
[6 7]
[uio p]
Troubleshooting
[ENTER]
[RETURN]
[ZOOM/RT]
[AUDIO/RDS]
[NUMBER]
[REPEAT]
[RANDOM]
[ENTER]
[uio p]
[RETURN]
[PROGRAM]
[CALL]
[CLEAR]
To return to the menu screen
During playback, press [RETURN].
Playing Frame by Frame
(DVD Video)
In the still mode, press [3] on the remote control unit.
The picture moves forward one frame each time the button is
pressed.
bPress 1 to return to normal playback.
•With some discs it is not possible to change the audio language
during playback. In such cases, select from the “GUI SETUP”.
•The language selected in the default settings (vpage 18) is set
when the power is turned on and when the disc is replaced.
Using the Playback Control Function
(DVD Video)
For DVD Video on which “Includes playback control” or the
like is indicated on the disc or jacket, a menu screen is
displayed.
Select the item you want to see, then start playback.
Select the item you want to see using [uio p], then
press [ENTER] or 1.
Or, use [NUMBER] (0 ~ 9, +10) to select the desired title.
Playback starts.
Example :
1. Opening
2. 1st movement
3. 2nd movement
Slow Playback
(DVD Video)
In the still mode, press [6] or [7] on the remote
control unit.
When pressed again, the slow play speed increases.
bPress 1 to return to normal playback.
Playing in the Zoom Mode
(DVD Video)
1
During playback or still mode, press [ZOOM/RT].
2
OFF
A1.5
A2
A4
Press [uio p].
Move the zoomed picture.
4. 3rd movement
5. Ending
About the button names in these explanations
< > : Buttons on the main unit
[
] : Buttons on the remote control unit
Button name only:
Buttons on the main unit and remote control unit
•The zoom function may not work properly at some scenes.
•Zooming is not possible with some discs.
•Zooming is not possible at the top menu or the menu screen.
26
1.S-302E3_1st.indd
30
2007/07/31
17:44:55
ENGLISH
During playback, press [REPEAT].
Playback in the respective repeat mode starts.
The “RAND” indicator lights.
Press 1.
The tracks start playing in random order.
Canceling random playback
In the stop mode, press [RANDOM].
The “PROG” indicator lights.
Use [NUMBER] (0 ~ 9, +10) to select the traks.
bExample :To program tracks 3, 12, 7 to play in that order:
[3] [+10] [2] [7]
3
Press 1.
Checking the order of the programmed tracks
In the stop mode, press [CALL] repeatedly.
The track numbers are displayed in the programmed order each time
the button is pressed.
Clearing programmed tracks one track at a time
MP3
32, 44.1, 48
32 ~ 320
.MP3
WMA
32, 44.1, 48
64 ~ 160
.WMA
Playing Music Files
Before Playing MP3 or WMA Files
There are many music distribution sites on the Internet allowing you
to download music files in MP3 or WMA (Windows Media® Audio)
format. The music (files) downloaded from such sites can be stored on
CD-R or CD-RW discs and played on the S-302.
“Windows Media” and “Windows” are registered trademarks or
trademarks in the United States and other countries of Microsoft
Corporation of the United States.
Creating MP3 and WMA Files
Compatible with the S-302
•Writing software format: “ISO9660 level 1”.
See the writing software’s instructions.
•Compatible: ID3-Tag (Ver.1 or 2), meta-tag.
•Incompatible: Packet write, playlists.
•Displayable characters: “Hankaku” English letters and numbers,
capital letters and _ (underscore).
No. characters displayable: 256
Extension
Playing MP3 or WMA Files
1
Load a CD-R or CD-RW disc containing music files in
the MP3 or WMA format into the disc tray (vpage
4).
2 [ENTER]
3 [ENTER]
Select the folder you want to play using [ui], then
press
.
Select the file you want to play using [ui], then press
or 1.
Playback starts.
Switching the time display
Troubleshooting
Bit rate
(kbps)
Remote Control Information
1
2
File format
The “RAND” indicator turns off.
Up to 20 tracks can be programmed.
In the stop mode, press [PROGRAM].
Playable MP3/WMA file
Sampling
frequency
(kHz)
Playback
Playing Tracks in the Desired Order
<Program> (Music CD)
In the stop mode, press [RANDOM].
Setup
bMusic CD discs:
Track repeated (
)
→ Disc repeated ( ) → Repeat playback cancelled →
1
2
•When Playing MP3 or WMA Files, the digital output is converted to
PCM. The signals are output with the same sampling frequency as
when they were written.
•The positions of the folders or files may have been changed by the
writing software when burning the MP3/WMA files onto the CDR/CD-RW disc, so the files may not play in the expected order.
•Copyright-protected files cannot be played. Note that depending on
the software used for burning and other conditions, some files may
not play or display correctly.
Connections
bDVD video discs:
Chapter repeated (“
” lights on the display)
→ Title repeated (“ ” lights on the display)
→ Repeat playback cancelled (indicator turns off) →
Playing Random Order <Random playback>
(Music CD)
Getting Started
Playing Repeatedly <Repeat playback>
(DVD Video/Music CD)
During playback, press [DISPLAY].
bSINGLE ELAPSED (Elapsed time of currently playing track)
→ SINGLE REMAIN (Remaining time of currently playing track) →
In the stop mode, press [CLEAR].
The last track programmed is cleared each time the button is
pressed.
Clearing the last programmed track
In the stop mode, press [PROGRAM].
The “PROG” indicator turns off.
27
1.S-302E3_1st.indd
31
2007/07/31
17:44:56
ENGLISH
Getting Started
Changing the play mode
FOLDER:
Playing Still Picture Files (JPEG
format)
FOLDER REPEAT:
Still picture files in JPEG format recorded on CD-R/CD-RW
discs, picture CDs and Fujicolor CDs can be played as slide
shows on the S-302.
Playing all the files in the selected folder in order
2
Playing all the files in the selected folder repeatedly
Connections
RANDOM ON:
Playing all the files in the selected folder in random order
TRACK REPEAT:
Playing only the selected file repeatedly
Setup
Playback
Setting random playback using the remote control
unit
[ZOOM/RT]
Remote Control Information
[1]
2
[6 7]
[uiop]
[CALL]
[REPEAT]
[RANDOM]
[uio p]
[ENTER]
Troubleshooting
[ENTER]
In the stop mode, press [RANDOM] , then press [1] or [ENTER].
The “RAND” indicator lights and random playback begins.
bThe way in which the files are played in random order depends on
the selected play mode.
Setting repeat playback using the remote control
unit
During playback, press [REPEAT] , then press [1] or [ENTER].
Creating JPEG Files Compatible on the
S-302
•Writing software format: “ISO9660 level 1”.
See the writing software’s instructions.
•Displayable characters: “Hankaku” English letters and numbers,
capital letters and _ (underscore).
•JPEG files written on Macintosh computers cannot be played.
•The order in which the JPEG files are played may differ from the
order you expect because the writing software may change the
position of the folders or files when writing them on the CD-R/CDRW disc.
•Depending on the writing conditions and software, it may not be
possible to play or display properly some files.
bTRACK REPEAT → FOLDER REPEAT → FOLDER (Repeat off)
Programmed playback is not possible on discs containing MP3/WMA
files.
Playable JPEG file
Resolution
(pixel)
Extension
0000×0000 ~ 2048×1536
.JPG/.JPE
About the button names in these explanations
< > : Buttons on the main unit
[
] : Buttons on the remote control unit
Button name only:
Buttons on the main unit and remote control unit
28
1.S-302E3_1st.indd
32
2007/07/31
17:44:57
ENGLISH
Operate in the same way as described at “Playing MP3
or WMA Files” (vpage 27).
“Playing MP3 or WMA Files” (vpage 27)
Changing the play mode
Play the image in the zoom mode
During playback or still mode, press [ZOOM/RT].
6: zoom out
7: zoom in
The way of switching to the next image during
continuous JPEG image playback (SLIDE SHOW)
can be selected
During playback, press [CALL].
SLIDE SHOW MODE: 1 to 11 → RANDOM → OFF
Playback of the still pictures starts automatically.
bThe pictures are played repeatedly until 2 is pressed.
Set the Input Mode
When the input source is set to “DVD/CD”, “AUX1” or
AUX2”, the input mode can be switched (“Audio setup”,
“Input mode” vpage 19).
•When playing CDs containing live recordings, etc., in the “auto”
mode, the sound may be slightly broken when starting playback. If
so, play in the “PCM” mode.
•When playing DTS sources in the “AUTO” mode, there may be noise
when starting playback or searching. If so, play in the “DTS” mode.
•When playing DTS-compatible CDs in the “PCM” mode, noise is
output. When playing DTS-compatible sources, be sure to do so in
the “auto” or “DTS” mode.
Troubleshooting
bPress [uio p] (to move the zoomed picture).
bContinuous playback (SLIDE SHOW) is not possible in the zoom
mode.
Load the picture CD or Fujicolor CD in the disc tray.
qTurn on the power of the S-302 and TV.
(“Turning the Power On” (vpage 24), TV operating
instructions)
wSwitch the TV’s input.
(TV operating instructions)
eSwitch the input source (vpage 24).
rSet the input mode.
tSelect the surround mode.
yPlay the source.
uSet the surround parameter (vpage 30).
iAdjust the volume (vpage 24).
Remote Control Information
During playback or still mode, press [uio p].
u: Invert vertically
i: Invert horizontally
o: Rotate 90° counterclockwise
p: Rotate 90°clockwise
“KODAK” is a trademark of Eastman Kodak Company.
“FUJICOLOR CD” is a trademark of Fuji Photo Film Co, Ltd.
[Connection procedure]
Playback
Changing the orientation of the picture
bPicture CDs are CDs containing photographs taken on conventional
silver film cameras which have been converted into digital data.
For details on Kodak Picture CDs and Fujicolor CDs, please contact
a store offering film development services.
Dolby Digital, DTS and other multi-channel sources, CD,
video and other 2-channel sources can be played with
similar atmospherics to the cinema.
Setup
“Playing MP3 or WMA Files” (vpage 28)
The S-302 can play Kodak Picture CDs and Fujifilm Fujicolor CDs so
you can view the photographs stored on them on a TV screen.
Enjoying Surround Sound
Connections
Changing the folder or file to be played
Playing Picture CD/Fujicolor CD
Getting Started
Playing JPEG Files
29
1.S-302E3_1st.indd
33
2007/07/31
17:44:57
ENGLISH
Getting Started
Selecting Surround Mode
<FUNCTION>
<BAND> <+/–>
Press [SURROUND] to select the surround mode.
DOLBY VS REF.
DOLBY VS WIDE
JAZZ CLUB
ROCK ARENA
STEREO
Connections
bThe “DOLBY VS REF. (WIDE)” and “STEREO” modes can also be
selected by pressing [DVS/STEREO].
[Selectable items]
Setup
<PHONES>
DOLBY VS REF.
Playback
(Dolby Virtual Speaker reference mode):
This is the standard mode for experiencing 5.1-channel surround sound
with only speakers for the two front channels.
DOLBY VS WIDE
Remote Control Information
[FM/AM]
(Dolby Virtual Speaker wide mode):
The Dolby Virtual Speaker mode's front channel sound field is expanded.
[DVS/STEREO]
[STATUS]
[o p]
[TUNING +/–]
[op]
Troubleshooting
[SURROUND
PARAMETER]
[SURROUND]
DOLBY H/P
(Dolby Headphone mode):
This is the surround mode for playing with headphones.
A surround sound field is played with regular headphones.
DOLBY H BYPAS (Dolby Headphone bypass mode):
The sound is played in the normal stereo mode rather than the surround mode when playing with headphones.
STEREO
:
Sound is played in the direct or stereo mode.
ROCK ARENA
Set the Surround Parameter
Use [SURROUND PARAMETER] to display the various
surround parameters, then select with [o p] .
After several seconds, the display returns to normal and the
parameters you have set are entered automatically.
[Selectable items]
D.COMP
(Dynamic range compression):
Optimized setting for late-night listening.
D.COMP only works when playing program sources record in Dolby
Digital or DTS.
LFE
(Low Frequency Effect):
This sets the level of the subwoofer reproducing the low bass signals.
bRecommended level
When playing Dolby Digital software: 0 dB
When playing DTS movie software: 0 dB
When playing DTS music software: -10 dB
CINEMA
:
When the Dolby Headphone mode is selected, analog, PCM or other
2-channel sources are decoded in the Dolby Pro Logic g Cinema mode
and transformed into multiple channels for playback.
MUSIC
:
When the Dolby Headphone mode is selected, analog, PCM or other
2-channel sources are decoded in the Dolby Pro Logic g Music mode
and transformed into multiple channels for playback.
:
This is an original DENON surround mode.
It achieves the atmosphere of a live concert in an arena with reverberations circling in from the sides.
JAZZ CLUB
About the button names in these explanations
< > : Buttons on the main unit
[
] : Buttons on the remote control unit
Button name only:
Buttons on the main unit and remote control unit
:
This is an original DENON surround mode.
This achieves the atmosphere of a live concert hall with a low ceiling
surrounded by hard walls, as if the artist were playing very close to
you.
The “ROCK ARENA” and “JAZZ CLUB” modes may not achieve very
strong effects, depending on the source being played. In this case,
try other surround modes, without worrying too much about their
names.
30
1.S-302E3_1st.indd
34
2007/07/31
17:44:59
ENGLISH
(DVD, AUX1 or AUX2 digital input)
Use [SURROUND] to select the "DOLBY VS REF" or
or
mark sources.
Use [SURROUND PARAMETER] to display the various
LFE
Playing Dolby Digital/PCM/Analog 2Channel Sources
Use [SURROUND] to select the "DOLBY VS REF" or
3
"DOLBY VS WIDE".
The “
” indicator lights.
Play sources with the
4
mark or PCM/
Analog sources.
The “
” indicator lights, depending on the playback source's
signal format.
Use [SURROUND PARAMETER] to display the various
surround parameters, then select with [o p].
[Selectable items]
D.COMP
LFE
2
3
4
Press [SURROUND] to select the “DOLBY H/P”
The “
” indicator lights.
Play the source.
Use [SURROUND PARAMETER] to display the various
surround parameters, then select with [o p].
[Selectable items]
D.COMP
LFE
CINEMA
MUSIC
NOTE
Be careful not to set the volume too high when using headphones.
: ”TUNER” (vpage 17)
2
Use
<BAND> or [FM/AM] to select the reception
band.
FM AUTO
3
FM MONO
AM
<+/–>, [TUNING +/–] or [o p] to select the
reception frequency.
Use
When a station is received, the “TUNED” indication will light.
A humming sound may be heard when using a TV nearby while
receiving AM programs. If this happens, move the system as far from
the TV as possible.
Display of the FM broadcast reception status
•When the reception band mode is set to “FM AUTO” and a stereo
broadcast is tuned in, the “ST” indicator lights.
•If the signal is weak and stable stereo reception is not possible, set
the reception band mode to “FM MONO” and receive the program
in monaural. The “MONO” indicator lights.
Main unit <+/–> button
Troubleshooting
1
2
Switch the input source (vpage 24).
The sound from the speakers is automatically cut off.
Use <FUNCTION> or [FM/AM] to select “TUNER”.
Remote Control Information
surround parameters, then select with [o p].
Plug the headphones (sold separately) into the
jack.
1
Playback
The “
” or “
” indicator lights, depending on the playback
source's signal format.
[Selectable items] D.COMP
1 <PHONES>
Switch the input source (vpage 24).
” indicator lights.
Play sources with the
4
Listening in the Dolby Headphone Mode
Tuning in Broadcast Stations
Setup
3
"DOLBY VS WIDE".
The “
In the stop mode, press [STATUS].
bThe playback source and the various surround settings are shown
on the display each time the button is pressed.
Switch the input source (vpage 24).
Listening to Radio Broadcasts
Connections
1
2
To check the currently playing source and various
settings
Getting Started
Playing Dolby Digital/DTS MultiChannel Sources (Digital input only)
There are two, switchable modes fo <+/–> the tuning mode for setting
the reception frequency (setting upon purchase), and the preset mode
for selecting the preset broadcast station.
nSwitching the preset mode
Pressing <+> while pressing in <BAND>.
“PRESET” is flashes for approximately 5 seconds.
nSwitching the tuning mode
Pressing <–> while pressing in <BAND>.
“TUNING” is flashes for approximately 5 seconds.
Auto tuning
When <+/–>, [TUNING +/–] or [o p] is pressed and held in, the set
automatically starts searching for a broadcast station.
bStations whose signal is weak cannot be tuned in.
31
1.S-302E3_1st.indd
35
2007/07/31
17:45:00
ENGLISH
Getting Started
<FUNCTION>
1 <+/–>
To stop the auto tuning
To only preset
Press <+/–>, [TUNING +/–] or [o p].
qPress [MEMO] while the broadcast station is tuned in.
wSelect the number using [ui], then press [ENTER].
Or use [NUMBER] (0 ~ 9, +10) to select the number.
Manual tuning
Connections
The reception frequency changes each time <+/–>, [TUNING +/–] or
[o p] is pressed.
Naming the Currently Tuned in Broadcast
Station and Presetting it
Setup
ON/STANDBY
Up to 60 stations (total for AM and FM) can be preset.
Names of up to 8 characters can be input.
Playback
Remote Control Information
1
2 [MEMO]
[
3 [ENTER]
1
[DISPLAY]
[CHANNEL +/–]
[TUNING +/–]
[uio p]
[CALL]
[ENTER]
Press
: ”TUNER” (vpage 17)
twice.
The name input mode is set.
Use
ui] to select the character , then press
.
bCharacters that can be input.
Troubleshooting
[RETURN]
[MEMO]
[uio p]
[ENTER]
[RETURN]
A to Z, 0 to 9 + [CALL] for small letters
! “ # $ % & ’ ( ) * + , - . / : ; < = > ? @ [ \ ] ˆ _ { ¦ } (space)
bPress [o p] to move the cursor.
Use this to correct input characters.
bTo cancel character input, press [MEMO].
Everything that has been input is canceled.
4
5
Once you are finished inputting, press [ENTER].
“P0 –” flashes on the preset number display.
Use [ui] to select the number, then press
About the button names in these explanations
< > : Buttons on the main unit
[
] : Buttons on the remote control unit
Button name only:
Buttons on the main unit and remote control unit
Up to 60 stations can be preset.
Use <FUNCTION> or [FM/AM] to select “TUNER”.
[NUMBER]
Automatically Presetting FM Stations
(Auto preset)
1
Tune in the broadcast station
[DVD/CD],
[FM/AM], [AUX],
[iPod], [NET/USB]
NOTE
If a station is preset at a number that has already been preset, the old
settings are deleted and replaced with the new settings.
[ENTER].
Or use [NUMBER] (0 ~ 9, +10) to select the number.
The preset number, reception band and reception frequency are
displayed, then the name of the broadcast station appears.
Changing the broadcast station name
2
Press and hold in <1>.
“AUTO PRESET?” and “–:NO/+:START” are displayed alternately.
bPress <–> to cancel auto presetting.
3
Press <+>.
“SEARCH” flashes, then “COMPLETED” is displayed.
•Broadcast stations whose antenna signal are weak cannot be preset
automatically. If you wish to preset such stations, tune them in
manually.
•Once auto presetting starts, it cannot be canceled (it takes about 60
seconds to be completed).
Listening to Preset Stations
Use <+/–>, [CHANNEL] or [NUMBER] (0 ~ 9, +10) to select
the preset number.
bOperate <+/–> after switching to the preset mode (vpage 315).
qCall out the preset name you want to change, then press [MEMO]
twice.
wPerform steps 3 and 4 at “Naming the currently tuned in broadcast
station and presetting it”.
32
1.S-302E3_1st.indd
36
2007/07/31
17:45:02
ENGLISH
With the S-302, you can listen to music or view photo data
on an iPod. It is also possible to operate the iPod from the
main unit or remote control unit.
Switching the S-302’s display (FL)
During playback, press [DISPLAY].
The display switches each time the button is pressed.
Title name
Album title
Artist name
Remaining time
Elapsed time
NOTE
1
Use <FUNCTION> or [iPod] to select “iPod”.
: ”iPod” (vpage 17)
to the S-302 input.
Press [ENTER] or 1.
Playback starts.
bAlso read the iPod’s operating instructions.
Remote control unit buttons
iPod buttons
1
13
Play the track.
3
13
Pause the track.
8, 9
8, 9
Play the track from the beginning/
Play the next track.
6, 7
6, 7
Fast-reverse the track/Fast-forward the track.
o, p, u, i
Click Wheel
ENTER
Select
RETURN
–
Switch between the browse
mode and the remote mode.
REPEAT
–
Switch the repeat function.
RANDOM
–
Switch the shuffle function.
: ”iPod” (vpage 17)
2
3
4
5
Turn on the TV’s power. Set the TV’s input function
to the S-302 input.
Press [RETURN] to select the “Remote iPod”.
The iPod’s display menu is displayed.
Watching the iPod’s display, press [ui] to select the
“Photos”.
Press [ENTER].
The iPod’s photographs are displayed on the TV monitor.
MENU/GUIDE
MENU
Operation on the S-302
b Play/Pause in remote mode
Select an item.
Enter the selection or plays the
track.
Troubleshooting
2
3
Turn on the TV’s power. Set the TV’s input function
1
Use <FUNCTION> or [iPod] to select “iPod”.
Remote control and iPod button relations
Remote Control Information
Listening to Music
Viewing Still Pictures
(Only for iPods Equipped with the Photo
Function)
It is also possible to use <FUNCTION>, [DVD/CD], [FM/AM],[AUX] or [NET/
USB] to switch the input source to something other than “iPod” then
disconnect the iPod.
Playback
•DENON will accept no responsibility whatsoever for any loss of iPod
data.
•Depending on the type of iPod and the software version, some
functions may not operate.
•In the browse mode, when “Songs” is selected from the “TOP
MENU” while a track is playing, the track stops.
•The maximum battery charging output from the iPod terminal is 8W.
•See page 33 for the remote control unit buttons that can be operated
when the function is set to “iPod”.
Setup
bThe iPod may only be used to copy or play contents that are not
copyrighted or contents for which copying or playback is legally
permitted for your private use as an individual. Be sure to comply
with applicable copyright legislation.
Set the S-302’s power to the standby mode using ON/
STANDBY.
Connections
iPod is a trademark of Apple Computer, Inc., registered in
the U.S. and other countries.
Disconnecting the iPod
Getting Started
iPod® Playback
Display the menu or return to the
previous menu.
b In remote mode, the iPod backlight
goes off when you press Play/Pause
for an extended period.
When an iPod is connected and a slide show is playing, the iPod is not
charged. Charge it ahead of time.
33
1.S-302E3_1st.indd
37
2007/07/31
17:45:04
ENGLISH
Getting Started
<FUNCTION>
2
Connections
This procedure can be used to play Internet radio stations
or music or still picture (JPEG) files stored on a computer or
USB memory device.
nAbout the Internet radio function
Setup
Playback
Remote Control Information
[NET/USB]
2
[3]
[CHANNEL +/–]
Troubleshooting
[TUNING +/–]
[uio p]
GSlide show functionH
Playing Network Audio or USB
Memory Devices
[uio p]
[ENTER]
•Internet radio refers to radio broadcasts distributed over the
Internet. Internet radio stations from around the world can be
tuned in.
The S-302 is equipped with the following Internet radio functions:
· Stations can be selected by genre and region.
· Internet radio stations in MP3 and WMA (Windows Media Audio)
format can be listened to.
· Your favorite radio stations can be registered by accessing an
exclusive DENON Internet radio URL from a Web browser on a
computer.
bThe function is managed for individual users, so you must
provide your MAC or e-mail address.
Exclusive URL: http://www.radiodenon.com
bThe radio station database service may be suspended without
notice.
•The S-302’s Internet radio station list is created using a radio
station database service (vTuner). This database service provides a
list edited and created for the S-302.
vTuner services may be discontinued without notice.
nMusic server
[ENTER]
This function lets you play music files and playlists (m3u, wpl)
stored on a computer (music server) connected to the S-302 via
a network.
With the S-302’s network audio playback function, connection to
the server is possible using one of the technologies below.
· Windows Media Player Network Sharing Service
· Windows Media DRM10
GAlbum art functionH
When a WMA (Windows Media Audio), MP3 or MPEG-4 AAC file
includes album art data, the album art can be displayed while the
music files are playing.
About the button names in these explanations
< > : Buttons on the main unit
[
] : Buttons on the remote control unit
Button name only:
Buttons on the main unit and remote control unit
For music files in WMA (Windows Media Audio) format, the album art
is only played when using Windows Media Player ver. 11.
Still picture (JPEG) files stored in folders on a music server can be
played as slide shows.
The time for which each picture is displayed can be set.
When still picture (JPEG) files are played on the S-302, they are played
in the direction in which they are stored in the folder, so store in them
in the direction in which you want them to play.
Installing Windows Media Player ver. 11
qIf Windows XP Service Pack 2 has not yet been installed, either
download it free of charge from Microsoft or install it via a
Windows update installer.
wDownload the latest version of Windows Media Player ver.
11, either directly from Microsoft or using a Windows update
installer.
b When using Windows Vista, there is no need to download a new
version of Windows Media Player.
nUSB memory devices
A USB memory device can be connected to the S-302’s USB
port to play music and still picture (JPEG) files stored on the USB
memory device.
· Only USB memory devices conforming to mass storage class and
MTP (Media Transfer Protocol) standards can be played on the S302.
· The S-302 is compatible with USB memory devices in “FAT16” or
“FAT32” format.
GAlbum art functionH
When an MP3 music file includes album art data, the album art can
be displayed while playing the file.
GSlide show functionH
Still picture (JPEG) files stored on USB memory devices can be
played as slide shows.
The time for which each picture is displayed can be set.
When still picture (JPEG) files are played on the S-302, they are played
in the direction in which they are stored in the folder, so store in them
in the direction in which you want them to play.
34
1.S-302E3_1st.indd
38
2007/07/31
17:45:05
ENGLISH
Music serverb
S
S
S
S
–
–
S
Sz
USBb
Sz
S
S
Sz
S
S
–
S
S
[Playable formats]
<FUNCTION> or [NET/USB] to select “NET/
Use
USB”.
: “NET/USB” (vpage 17)
3 [p] [ui]
4 [ENTER]
Use
to select the menu, then press [ENTER] or
to select the file you want to play.
Press
Playback starts.
or [p] .
Stopping playback temporarily
Sampling
frequency
Bit rate
Extension
32/44.1/48 kHz
48~192 kbps
.wma
32/44.1/48 kHz
32~320 kbps
.mp3
32/44.1/48 kHz
32/44.1/48 kHz
–
16~320 kbps
.wav
.aac/.m4a/.mp4
32/44.1/48 kHz
–
.flac
During playback, press [3].
To stop
During the play or pause mode, press 2.
Searching up or down pages
Press [CHANNEL –] (down) or [CHANNEL +] (up).
Searching by first letter (Character search)
This operation is convenient for choosing items from the menu screens
for Internet radio stations or files stored on the computer.
[ui]
1 [ENTER]
[p]
2 [ui]
[ENTER]
Use
or
Use
press
to select “Internet Radio”, then press
.
to select the item you want to play, then
or [p].
The station list is displayed.
A “ ” mark is indicated in front of stations that can be played.
3 [p] [ui]
Use
.
to select the station, then press [ENTER] or
Playback starts once buffering reaches “100%”.
•There are many Internet radio stations on the Internet, and the
quality of the programs they broadcast as well as the bit rate of the
tracks varies widely.
Generally, the higher the bit rate, the higher the sound quality, but
depending on the communication lines and server traffic, the music
or audio signals being streamed may be interrupted.
Inversely, lower bit rates mean a lower sound quality but less
tendency for the sound to be interrupted.
•“Server Full” or “Connection Down” is displayed if the station is
busy or not broadcasting.
•On the S-302, folder and file names can be displayed as titles. Any
characters that cannot be displayed are replaced with “ . (period)”.
Troubleshooting
WMA (Windows
Media Audio)
MP3 (MPEG-1
Audio Layer-3)
WAV
MPEG-4 AAC
FLAC (Free
Lossless Audio
Codec)
2
Listening to Internet Radio
Remote Control Information
•The S-302 is compatible with MP3 ID3-Tag (Ver. 2) standards.
•The S-302 is compatible with WMA META tags.
q Check the network environment, then turn on the S-302’s power.
(vpage 15 “Network Audio”)
w If settings are required, make the network settings.
(vpage 20 ~ 22 “Network Setup”)
e Prepare the computer. (vComputer’s operating instructions)
Install “Windows Media Player ver. 11”.
•The time for which the GUI menus are displayed can be set at GUI
menu “NET/USB” (vpage 17).
•The display can be switched between the artist name, track name,
album name.
Playback
z:Only files that are not protected by copyright can be played on the
S-302.
bContents downloaded from pay sites on the Internet are copyright
protected. Also, files encoded in WMA format when ripped from
a CD, etc., on a computer may be copyright protected, depending
on the computer’s settings.
1
Make the necessary preparations.
Setup
–
Basic Operation
Connections
WMA (Windows
Media Audio)
MP3 (MPEG-1
Audio Layer-3)
WAVz
MPEG-4 AAC
FLAC (Free
Lossless Audio
Codec)
JPEG
Internet
radio
Getting Started
[Compatible formats]
WAV format Quantization bit rate: 16 bits.
35
1.S-302E3_1st.indd
39
2007/07/31
17:45:06
ENGLISH
Getting Started
Recently Played Internet Radio Stations
Recently played internet radio stations can be selected from “Recently
Played” in top menu.
<FUNCTION>
[ui]
1 [ENTER]
[p]
2 [ui]
[ENTER]
Use
Connections
or
Use
press
to select “Recently Played”, then press
.
to select the item you want to play, then
or [p].
Setup
Up to 20 stations stored in “Recently Played”.
Playback
Registering Internet Radio Stations as Your
Favorites
Remote Control Information
[CLEAR]
[RANDOM]
[REPEAT]
[8 9],
[CHANNEL +/–]
[o p]
[o p]
[ENTER]
[PROGRAM]
Troubleshooting
[ENTER]
Press [PROGRAM] while the Internet radio station you
want to register is playing.
Listening to Internet Radio Stations Registered in
Your Favorites
1
2
Use
1
2
3
4
[ui] to select “Favorites”, then press [ENTER]
Use
or [p].
Use [ui] to select the item you want to clear.
Press [CLEAR].
“Clear to Favorite” appears on the display.
Use [o p] to select “Yes”, then press [ENTER].
NOTE
[AUX]
Clearing Internet Radio Stations from Your Favorites
[ui] to select “Favorites”, then press [ENTER]
or [p].
[ui] to select the Internet radio station, then
press [ENTER] or [p].
Use
The S-302 automatically connects to the Internet and playback
begins.
Playing Files Stored on a Computer
Use this procedure to play music files, image files or
playlists.
1
Use [ui] to select the host name of the computer on
2
which the music file you want to play is located, then
press [ENTER] or [p].
[ui] to select the search item or folder, then
press [ENTER] or [p].
Use
A “ ” mark is indicated in front of music files that can be
played, and a “ ” mark is indicated in front of image files that
can be played.
3 [p] [ui]
Use
.
to select the file, then press [ENTER] or
Playback starts once buffering reaches “100%”.
About the button names in these explanations
< > : Buttons on the main unit
[
] : Buttons on the remote control unit
Button name only:
Buttons on the main unit and remote control unit
36
1.S-302E3_1st.indd
40
2007/07/31
17:45:07
ENGLISH
During playback, either press [8] (previous track) or [9] (next
track).
Make the necessary preparations.
•Set the USB port to be used.
: “NET/USB”-“USB” (vpage 17)
•Connect the USB memory device to the set USB port.
2 [p] [ui]
3 [ui]
[ENTER]
Use
.
Use
press
to select “USB”, then press [ENTER] or
to select the search item or folder, then
or [p].
A “ ” mark is indicated in front of music files that can be
played, and a “ ” mark is indicated in front of image files that
can be played.
4 [p] [ui]
Use
.
to select the file, then press [ENTER] or
Depending on the size of the still picture (JPEG) file, some time may
be required for the file to be displayed.
Your portable audio player can be connected to the S302’s portable jack to play tracks on the portable audio
player.
1
Use <FUNCTION> or [AUX] to select “Front in”.
: ”Front in” (vpage 17)
2
Troubleshooting
Playback starts once buffering reaches “100%”.
Playing a Portable Audio
Remote Control Information
NOTE
•When the operation described below is performed, the music
server’s database is updated and it may no longer be possible to play
or favorite music files.
•When you quit the music server and then restart it.
•When music files are deleted or added on the music server.
•When using an ESCIENT server, place “ESCIENT” before the server
name.
1
Playback
Files can be preset, registered in your favorites and played using the
same operations as for Internet radio stations.
Basic Operation
NOTE
•DENON will take no responsibility whatsoever for any loss or damage
to data on USB memory devices when using the USB memory
device connected to the S-302.
•USB memory devices will not work via a USB hub.
•DENON does not guarantee that all USB memory devices will operate
or receive power. When using a USB connection type portable hard
disk of the type for which power can be supplied by connecting an
AC adapter, we recommend using the AC adapter.
•It is not possible to connect and use a computer via the S-302’s USB
port using a USB cable.
•The S-302 is not compatible with the iPod shuffle.
Setup
Playing files that have been Registered in Your
Favorites
Only USB memory devices conforming to mass storage
class and MTP (Media Transfer Protocol) standards can be
played on the S-302.
•If the USB memory device is divided into multiple partitions, only the
top partition can be selected.
•The S-302 is compatible with MP3 files conforming to “MPEG-1
Audio Layer-3” standards.
Connections
•Connections to the required system and specific settings must be
made in order to play music files (vpage 15).
•Before starting, you must launch the computer’s server software
and set the files as server contents. For details, see the operating
instructions of your server software.
•Depending on the size of the still picture (JPEG) file, some time may
be required for the file to be displayed.
Playing Files Stored on USB Memory
Devices
Getting Started
Selecting tracks
Play the portable audio player.
The Portable Audio are output.
bAlso read the portable audio player’s operating instructions.
Playing repeatedly
Press [REPEAT] on the remote control unit.
Playing in random order
Press [RANDOM] on the remote control unit. (Only valid in the stop
mode)
Selecting tracks
During playback, either press [CHANNEL–] (previous track) or [CHANNEL+]
(next track).
Portable
"6%*0-*/&
065
Connect the S-302 and portable audio player using a separately sold
mini-stereo audio cable.
37
1.S-302E3_1st.indd
41
2007/07/31
17:45:08
ENGLISH
Getting Started
Other Functions
Setting the Sleep Timer
Use this function to automatically switch the power to the
standby mode after a specific amount of time (minutes).
Advanced Operation
1
Set the current time (vpage 22).
Connections
<1> <8>
<5>
1
Select the adjustment mode using [TONE].
: “SETUP” – “TIMER” –
“Set Time” (vpage 22)
2
Setup
During playback, use [SLEEP] to select the time.
Playback
ON/STANDBY
<FUNCTION>
VOLUME
The "SLEEP" indicator flashes.
120
90 60
50
40 30
“SLEEP”indicator off
20
10
Remote Control Information
bAfter about 4 seconds, the “SLEEP” indicator stops flashing,
remaining lit, and the settings are automatically entered.
3
The power is set to the standby mode after the set
ON/STANDBY
amount of time.
Canceling the sleep timer
Press [SLEEP] until the “SLEEP” indicator turns off.
Troubleshooting
VOLUME
[MUTE]
[STATUS]
[TONE]
[o p]
[SLEEP]
[o p]
Adjusting the Tone
bThe sleep timer can also be canceled by setting the S-302's power
to the standby mode using ON/STANDBY.
Checking the time remaining until the sleep timer
starts
In the stop mode, press [STATUS].
The time is displayed.
bThe time can be displayed by pressing [STATUS] when the power is
in the standby mode. (When this is done, the set is no longer in the
low power consumption standby mode.)
When pressed twice while the time is displayed, the display turns
off and the set is put back in the low power consumption standby
mode.
If the sleep timer and everyday timer settings overlap, the sleep
timer has priority.
BASS
2
TREBLE
DEFEAT
With the name of the item to be adjusted selected,
press [o p] to adjust the level.
[Selectable mode]
BASS
:
Adjusts the bass sound (-10 dB to +10 dB).
TREBLE
:
Adjusts the treble sound (-10 dB to +10 dB).
DEFEAT
:
The tone adjustment circuitry can be bypassed to achieve high sound
quality. ”0dB“
If no operation is performed within 4 seconds, the display switches
back to what was previously displayed.
Turning the Sound Off Temporarily
(Muting)
Press [MUTE].
To cancel, either press
VOLUME.
[MUTE] again or adjust the volume using
About the button names in these explanations
< > : Buttons on the main unit
[
] : Buttons on the remote control unit
Button name only:
Buttons on the main unit and remote control unit
38
1.S-302E3_1st.indd
42
2007/07/31
17:45:10
ENGLISH
Resetting the Microprocessor
Personal Memory Plus Function
Perform this procedure if the display is abnormal or if
operations cannot be performed.
When the microprocessor is reset, all the settings are
reset to their default values.
1
Set the standby mode using <ON/STANDBY> .
bSet to the standby mode and wait 5 seconds.
<ON/STANDBY>
2 <FUNCTION>
<8>
3
Once the display starts flashing at intervals of about 1
second, release the three buttons.
Remote Control Information
This stores the settings as they were directly before the
standby mode was set.
When the power is turned back on, the settings are
restored to as they were directly before the standby mode
was set.
while simultaneously pressing
.
Playback
Last Function Memory
and
Setup
Press
The surround parameters, tone adjustment and the volumes of the
different speakers are stored for the individual surround modes.
Connections
This function sets the settings (input mode, surround
mode, etc.) last selected for the individual input sources.
When you switch to an input source, the settings are
automatically set to the ones that were set the last time
that input source was used.
Getting Started
Convenient Functions
If in step 3 the display does not flash at intervals of about 1 second,
start over from step 1.
Backup Memory
Troubleshooting
The various settings are backed up for about 1 week,
even if the power is turned off or the power cord is
disconnected.
Auto Power On
When the power is in the standby mode, the power turns
on simply by pressing <5> or <1>.
39
1.S-302E3_1st.indd
43
2007/07/31
17:45:10
ENGLISH
Getting Started
Setting the preset memory function
Remote Control Unit Operations
Connections
Signal transmission
indicator
[TV INPUT]
[AUDIO/RDS]
[ZOOM/RT]
Setup
[NUMBER]
Playback
[REPEAT]
Remote Control Information
[CALL]
DENON and other makers of components can be operated
by setting the preset memory.
This remote control unit can be used to operate components
of other manufacturers without using the learning function
by registering the manufacturer of the component as
shown in the list of preset codes ( End of this manual).
1
2
Set
[SOURCE CONTROL] to the component to be
registered.
Press
3
time.
The indicator starts flashing.
of this manual), press [NUMBER] (0 ~ 9) to input the
preset code (a 3-digit number) for the manufacturer
of the component whose signals you want to store in
the memory.
To store the codes of another component in the
[SOURCE
CONTROL]
Troubleshooting
About the button names in these explanations
< > : Buttons on the main unit
[
] : Buttons on the remote control unit
Button name only:
Buttons on the main unit and remote control unit
1
2
Set
[SOURCE CONTROL] to the component you want
to operate.
Operate the component.
bFor details, refer to the component’s operating instructions.
bSome models cannot be operated with this remote control unit.
[AUDIO/RDS] and [ZOOM/RT] at the same
Referring to the included list of preset codes (vEnd
4
Operating a component stored in the
preset memory
memory, repeat steps 2 to 3.
Setting the punch through function
“Punch Through” is a function allowing you to operate
[SOURCE CONTROL] and [TV INPUT] on “TV”, “SAT/CABLE”
or “VCR” components when in the “DVD / CD / FM/AM /
iPod NET/USB” mode. By default, nothing is set.
1
2
3
[SOURCE CONTROL] to the component to be
registered (DVD / CD / FM/AM / iPod NET/USB).
Set
Press [CALL] and [REPEAT] at the same time.
The indicator starts flashing.
Input the number of the component you want to set.
•The signals for the pressed buttons are emitted while setting the
preset memory. To avoid accidental operation, cover the remote
control unit’s transmitting window while setting the preset memory.
• Depending on the model and year of manufacture, this function
cannot be used for some models, even if they are of makes listed in
the list of preset codes.
• Some manufacturers use more than one type of remote control code.
Refer to the included list of preset codes to change the number and
verify correct operation.
• Operation is not possible for some models.
TV
SAT/CABLE
VCR
No setting
Number
1
2
3
0
40
1.S-302E3_1st.indd
44
2007/07/31
17:45:11
ENGLISH
[0 ~ 9, +10]
[ENTER]
[RETURN]
[uio p]
SOURCE CONTROL
DVD/CD
iPod
NET/USB
TUNER
DVD / CD / FM/AM / DVD / CD / FM/AM / DVD / CD / FM/AM / DVD / CD / FM/AM /
iPod / NET/USB
iPod / NET/USB
iPod / NET/USB
iPod / NET/USB
TV
Satellite Receiver,
Cable TV
Video cassette
recorder
TV
SAT/CABLE
VCR
SOURCE POWER
Punch through
Punch through
Punch through
Punch through
Power on / off
Power on / off
Power on / off
TV INPUT
Punch through
Punch through
Punch through
Punch through
Input mode selection
Input mode selection
Input mode selection
DISPLAY
Display
Display
Display
–
Display
Display
–
Playback
DVD/CD Playback
Auto Preset (Hold)
–
–
Playback
1
Playback
Playback
Stop
–
Stop
–
–
–
Stop
Still / Pause
Still / Pause
Still / Pause
–
–
–
Pause
8 9,
CHANNEL + / –
Auto search (cue)
Auto search (cue)
Auto search (cue)
Switch channels
Switch channels
Switch channels
Switch channels
Tuning
–
–
Search (reverse,
forward)
6 7,
TUNING + / –
Manual search (fast- Manual search (fast- Manual search (fastreverse/fast-forward) reverse/fast-forward) reverse/fast-forward)
Menu / Guide
Menu
–
–
Menu / Guide
Menu
–
u i o p
Cursor
Cursor
Cursor
Cursor
Cursor
Cursor
–
ENTER
Enter
Enter
Enter
Enter
Enter
Enter
–
RETURN
–
Browse/Remote
Return
–
–
Return
–
Special remarks
q, w
q, w
q, w
q, w
q
q
q
DVD/CD
iPod
NET/USB
TUNER
TV
Satellite Receiver,
Cable TV
Video cassette
recorder
TV
SAT/CABLE
VCR
[Rear]
Device operated
SOURCE CONTROL
DVD / CD / FM/AM / DVD / CD / FM/AM / DVD / CD / FM/AM / DVD / CD / FM/AM /
iPod / NET/USB
iPod / NET/USB
iPod / NET/USB
iPod / NET/USB
0 ~ 9, +10
Number input / Track
selection
–
–
Channel selection
Channel selection
Channel selection
Channel selection
u i o p
Cursor
Cursor
Cursor
Cursor
Cursor
Cursor
–
ENTER
Enter
Enter
Enter
Enter
Enter
Enter
–
RETURN
–
Browse/Remote
Return
–
–
Return
–
Special remarks
q
q
q
q
q
q
q
Troubleshooting
MENU/GUIDE
Remote Control Information
2
STILL / PAUSE 3
Playback
[ENTER]
[RETURN]
[SOURCE
CONTROL]
Device operated
Setup
[uio p]
[Front]
Connections
[SOURCE POWER]
[TV INPUT]
[DISPLAY]
[2]
[1]
[STILL/PAUSE 3]
[CANNEL +/–,
8 9]
[TUNING +/–,
6 7]
[MENU/GUIDE]
Getting Started
Functions of Buttons by Component
GSpecial RemarksH
qOnly one component can be preset for each mode. If a new code is preset, the previous code is automatically cleared.
wThe TV, SAT/CABLE or VCR buttons can be assigned to a DVD, CD, TUNER, iPod or NET/USB (v page 40).
41
1.S-302E3_1st.indd
45
2007/07/31
17:45:12
ENGLISH
Getting Started
bSources recorded in Dolby Surround
Other Information
Connections
Surround
Setup
The S-302 is equipped with a digital signal processing circuit that lets
you play program sources in the surround mode to achieve the same
sense of presence as in a movie theater.
Playback
Dolby Surround
Remote Control Information
Dolby Digital
Troubleshooting
Dolby Digital is a multichannel digital signal format developed by Dolby
Laboratories.
A total of 5.1-channels are played: 3 front channels (“FL” , “FR” and
“C”), 2 surround channels (“SL” and “SR”) and the “LFE” channel for
low frequencies.
Because of this, there is no crosstalk between channels and a realistic
sound field with a “three-dimensional” feeling (sense of distance,
movement and positioning) is achieved.
A real, overpowering sense of presence is achieved when playing
movie sources in AV rooms as well.
Dolby Pro Logic g
Dolby Pro Logic g is a matrix decoding technology developed by Dolby
Laboratories.
Regular music such as that on CDs is encoded into 5-channels to
achieve an excellent surround effect.
The surround channel signals are converted into stereo and full band
signals (with a frequency response of 20 Hz to 20 kHz or greater)
to create a “three-dimensional” sound image offering a rich sense of
presence for all stereo sources.
Sources recorded in Dolby Surround are indicated with the following
logo marks.
Dolby Surround support mark :
Manufactured under license from Dolby Laboratories.
“Dolby”, “Pro Logic” and the double-D symbol are trademarks of
Dolby Laboratories.
DTS Surround
DTS Digital Surround
DTS Digital Surround is the standard digital surround format of DTS,
Inc., compatible with a sampling frequency of 44.1 or 48 kHz and up
to 5.1-channels of digital discrete surround sound.
Manufactured under license under U.S. Patent #’s: 5,451,942;
5,956,674; 5,974,380; 5,978,762; 6,487,535 & other U.S. and
worldwide patents issued & pending. DTS is a registered
trademark and the DTS logos, Symbol and DTS Virtual are
trademarks of DTS, Inc. © 1996-2007 DTS, Inc. All Rights
Reserved.
Dolby Virtual Speaker
Dolby Virtual Speaker technology uses proprietary technology of Dolby
Laboratories to create a virtual surround sound field using only two
speakers for the front channels, allowing the user to experience sound
as if surround speakers were actually being used.
Features of Dolby Virtual Speaker sound
Accurate surround sound field positioning
The virtual surround speakers are positioned at 105° to the left and
105° to the right.
Multi-channel programs played according to the producer’s
intentions
Sound set at the rear left is heard from the rear left.
Stereo programs played in surround
The Dolby Pro Logic g circuit is used together with the Dolby Virtual
Speaker circuitry to create a rich virtual surround sound field with
stereo programs as well.
Selecting the listening mode
Two listening modes are provided: Reference and Wide.
Reference mode
Dolby Headphone
Wide mode
: 2 front channels
: Virtual sound field created with the Dolby Virtual Speaker mode
Dolby Headphone is a 3D sound technology developed jointly by Dolby
Laboratories and Lake Technology of Australia achieving surround
sound with regular headphones.
Dolby Headphone simulates speaker playback in a room and positions
the sound sources to the front or the sides, outside of the head,
achieving a powerful sound similar to that of a movie theater or home
theater.
42
1.S-302E3_1st.indd
46
2007/07/31
17:45:13
ENGLISH
Presence/absence of signals and controllability in the various modes
Channel output
FRONT
L/R
DHP
STEREO
ROCK ARENA
JAZZ CLUB
Surround Mode
DHP
REFERENCE
WIDE
DOLBY H/P
Multich
2ch
BYPASS
STEREO
ROCK ARENA
JAZZ CLUB
Multi channel
S
S
S
S D.MIX
S D.MIX
S
S
Surround parameter (default)
Cinema/
D.COMP
LFE
DOLBY DIGITAL/DTS only
Music
A
S (OFF)
S (0dB)
A
S (OFF)
S (0dB)
A
S (OFF)
S (0dB)
S (CINEMA) S (OFF)
S (0dB)
A
S (OFF)
S (0dB)
A
S (OFF)
S (0dB)
A
S (OFF)
S (0dB)
A
S (OFF)
S (0dB)
DTS
2-channel
F PLg
F PLg
F PLg
S
S
S
S
Multi channel
S
S
S
S D.MIX
S D.MIX
S
S
PCM
ANALOG
2-channel
F PLg
F PLg
F PLg
S
S
S
S
2-channel
F PLg
F PLg
F PLg
S
S
S
S
TONE
CONTROL
S (OFF)
S (OFF)
S (OFF)
S (OFF)
S (OFF)
S (OFF)
S (OFF)
S (OFF)
Remote Control Information
DVS
Source
S
S
A
A
S
S
S
DOLBY DIGITAL
2-channel
F PLg
F PLg
F PLg
S
S
S
S
Playback
S
S
A
A
S
S
S
AUX1, 2, 3 / TUNER
/ iPod / Portable
DVD / NET/USB / AUX1, 2
Setup
REFERENCE
WIDE
DOLBY H/P
BYPASS
DVS
SUB
WOOFER
Input signal per input source
Connections
Surround Mode
DVS:
Dolby Virtual Speaker
DHP:
Dolby Headphone
(H/P only)
Getting Started
Surround Modes and Parameters
S :Signal present or controllable.
F :Can be selected with 2-channel decode mode.
A :No signal or not controllable.
D.MIX:Compatible with down-mixing.
PLg :Compatible with PLg processing.
Slide Switch Position
OUTPUT VIDEO
INPUT
AUX1
AUX 2
AUX 3
Front in
iPod
NET/
USB
S
VIDEO
S-video
480i/576i
480p/576p
720p
1080i
1080p
Video
S-video
line L/R
component
DVD/CD
TUNER
Conector
dock
USB playback
internet Radio
DLNA client
S
S
S
A
A
A
A
S
S
S
S
S
S
S
Interlace
Component
S-video
480i/576i 480p/576p 720p
S
S
A
A
A
A
S
S
A
A
S
S
A
A
S
S
A
A
A
A
S
A
A
A
A
S
A
A
A
A
A
A
A
A
S
S
A
A
S
S
A
A
A
A
A
A
S
S
A
A
S
S
A
A
S
S
A
A
S
S
A
A
S
S
A
A
1080i
A
A
A
A
A
A
A
S
A
A
A
A
A
A
A
A
A
A
1080p
A
A
A
A
A
A
A
A
Sz1
A
A
A
A
A
A
A
A
A
HDMI
VIDEO
A
A
A
A
A
A
A
A
A
A
A
A
A
A
A
A
A
A
S
S
S
S
A
A
A
A
S
S
S
S
S
S
S
Progressive
Component
S-video
480i/576i 480p/576p 720p
S
A
S
A
A
A
S
S
A
A
S
S
A
A
S
S
A
A
A
A
S
A
A
A
A
S
A
A
A
A
A
A
A
A
S
S
A
A
S
S
A
A
A
A
A
A
S
S
A
A
S
S
A
A
S
S
A
A
S
S
A
A
S
S
A
A
1080i
A
A
A
A
A
A
A
S
A
A
A
A
A
A
A
A
A
A
1080p
A
A
A
A
A
A
A
A
Sz1
A
A
A
A
A
A
A
A
A
HDMI
VIDEO
S-video
A
A
A
A
A
A
A
A
A
A
A
A
A
A
A
A
A
A
S
S
S
S
S
A
A
A
A
S
S
S
S
S
A
A
A
A
S
S
S
S
S
S
S
S
S
S
S
S
HDMI
Compo480p/576p
nent
A
S
A
A
S
A
S
A
S
A
S
A
A
A
A
A
A
A
S
A
S
A
A
A
S
A
S
A
S
A
S
A
S
720p
S
HDMI
1080i
S
1080p
S
1080p
S
S
S
S
S
S
A
A
S
S
S
S
S
S
A
S
A
S
S
S
S
S
S
S
S
A
S
S
S
S
S
S
Sz2
Sz2
A
S
S
S
S
S
S
S
S
S
S
S
S
S
S
S
S
S
S
S
S
S
S
Troubleshooting
Video output table
S :Video output.
:Only OSD output.
z1:No OSD (through only)
z2:If the AUTO setting is lower than the input signal when the input signal is 720p/1080i, the signal is output according
to the input resolution.
43
1.S-302E3_1st.indd
47
2007/07/31
17:45:14
ENGLISH
Getting Started
Progressive Scan Circuit “DCDi™”
Connections
“DCDi™” is trademark of Faroodja, a division of Genesis Microchip
Inc.
The S-302 is equipped with a high precision Progressive Scan circuit
“DCDi™” allowing it to reproduce movies and other images on DVDs
with a quality near that of the original.
Setup
AL24 Processing (Stereo mode only)
Playback
Remote Control Information
AL24 Processing has inherited the technology of the original ALPHA
Processing that was used in DENON’s highly-successful referenceclass audio components.
AL24 Processing further reduces quantization distortion and represents
the ultimate analog waveform reproduction technology designed to
support the higher numbers of bits and higher sampling.
AL24 Processing senses the nature of the digital data being input and
interpolates the data so that it faithfully replicates the original analog
waveform. AL24 processing operates when CD, MP3 or WMA data
is inputted.
HDCD®
(High Definition Compatible Digital®)
(Stereo mode only)
Troubleshooting
HDCD® is an encoding/decoding technology that greatly reduces
the distortion that occurs upon digital recording while maintaining
compatibility with the conventional CD format, thus expanding the
dynamic range and achieving a high resolution.
Conventional CDs and HDCD compatible CDs are identified
automatically to select the optimum digital processing.
Audyssey Dynamic EQ.
Audyssey Dynamic EQ. is a technology that automatically corrects the
tonal balance of an audio system when the volume is changed. It
is based on psychoacoustic research that better matches to human
perception than other loudness compensation that was used before.
The tonal balance is adjusted continuously with variation in both
program material and volume setting.
Audyssey BassXT
Audyssey BassXT is a solution to extend bass performance to lower
frequencies without increasing cabinet size, driver size or weight.
BassXT actively monitors the incoming low frequency signal and
drives subwoofers to their maximum capability at all volumes, thereby
producing deeper bass at all volume levels. This allows the subwoofer
to play low bass content when it can and protects it only for the few
times when it can’t. It is not like simple bass boost or tone control
as the system is fully customized for each speaker design by DSP
processing and works in real time.
Manufactured under license from Audyssey Laboratories, Inc.
U.S. and foreign patents pending.
Audyssey BassXT™ and Audyssey Dynamic EQ™ are trademarks
of Audyssey Laboratories, Inc.
About Networks
Windows Media Player Ver.11
This is a media player distributed free of charge by Microsoft
Corporation.
It can be used to play playlists created with Windows Media Player
Ver. 11 as well as files in such formats as WMA, DRM WMA, MP3
and WAV.
vTuner
This is a free online contents server for Internet radio. Note that usage
fees are included in upgrade costs.
For inquiries about this service, visit the vTuner site below.
vTuner website: http://www.radiodenon.com
This product is protected by certain intellectual property rights of
Nothing Else Matters Software and BridgeCo. Use or distribution of
such technology outside of this product is prohibited without a license
from Nothing Else Matters Software and BridgeCo or an authorized
subsidiary.
DLNA
•DLNA and DLNA CERTIFIED are trademarks and/or service marks of
Digital Living Network Alliance.
•Some contents may not be compatible with other DLNA CERTIFIED™
products.
®, HDCD®, High Definition Compatible Digital® and
Microsoft® are either registered trademarks or trademarks of
Microsoft Corporation, Inc. in the United States and/or other
countries. HDCD system manufactured under license from
Microsoft Corporation, Inc. This product is covered by one or more
of the following: In the USA: 5,479,168, 5,638,074, 5,640,161,
5,808,574, 5,838,274, 5,854,600, 5,864,311, 5,872,531, and in
Australia: 669114. Other patents pending.
44
1.S-302E3_1st.indd
48
2007/07/31
17:45:15
ENGLISH
A copyright-protected technology developed by Microsoft.
•Windows Vista and the Windows logo are trademarks of the
Microsoft group of companies.
IEEE 802.11b
This is one wireless LAN standard set by the 802 working group
that establishes LAN technology standards at the IEEE (Institute of
Electrical and Electronics Engineers) of the United States. It uses the
2.4 GHz band usable freely without a radio frequency license (ISM
band), enabling communications at a maximum speed of 11 Mbps.
Infrastructure Communications
“Infrastructure Communications” refers to networks using wireless
LAN access points.
This function can be used to connect to the Internet or a wired LAN
via a wireless LAN access point. Wireless LAN access points include
wireless broadband routers.
Ad-hoc Communications
Signal transfer through wireless interconnection of computers is referred
to as “ad hoc communications”. With such ad hoc communications
there is no connection to the Internet. Ad hoc communications are
suited for establishing simple temporary networks.
This is a new version of the WPA established by the Wi-Fi Alliance,
compatible with more secure AES encryption.
WPA-PSK/WPA2-PSK (Pre-shared Key)
This is a simple authentication system for mutual authentication when
a preset character string matches on the wireless LAN access point
and client.
Passphrase
This refers to the code key used for WPA-PSK/WPA2-PSK authentication,
a WPA authentication method.
TKIP (Temporal Key Integrity Protocol)
This is a network key used for WPA. The encryption algorithm is RC4,
the same as for WEP, but the security level is increased by changing
the network key used for encryption for each packet.
Network Names (SSID: Security Set Identifier)
AES (Advanced Encryption Standard)
When forming wireless LAN networks, groups are formed to prevent
interference, data theft, etc. This grouping is done by “SSID” or
“Security Set Identifiers”. For further security, a WEP key is set and
signal transfer is not possible unless the SSID and WEP key match.
This is a next generation standard encryption method replacing the
current DES and 3DES, and because of its high security it is expected to
be applied widely to wireless LANs in the future. It uses the “Rijndael”
algorithm developed by two Belgian cryptographers to divide the data
into blocks of fixed lengths and encrypt each block. It supports data
lengths of 128, 192 and 256 bits and key lengths of 128, 192 and 256
bits as well, offering extremely high encryption security.
WEP Key (Network Key)
This is key information used for encrypting data when conducting data
transfer. On the S-302, the same WEP key is used for data encryption
and decryption, so the same WEP key must be set on both devices in
order for communications to be established between them.
Troubleshooting
Wi-Fi Certification assures tested and proven interoperability by the
Wi-Fi Alliance, a group certifying interoperability among wireless LAN
devices.
The value indicated above is the maximum theoretical value for the
wireless LAN standard, and does not indicate the actual data transfer
rate.
WPA2 (Wi-Fi Protected Access 2)
Remote Control Information
Wi-Fi®
This is a security standard established by the Wi-Fi Alliance. In addition
to the conventional SSID (network name) and WEP key (network key),
it also uses a user identification function and encrypting protocol for
stronger security.
Playback
About Wireless LAN
This is another wireless LAN standard set by the 802 working group
that establishes LAN technology standards at the IEEE (Institute of
Electrical and Electronics Engineers) of the United States, and is
compatible with IEEE 802.11b. It also uses the 2.4 GHz band, but
enables communications at a maximum speed of 54 Mbps.
Setup
•Content providers are using the digital rights management technology
for Windows Media contained in this device (WM-DRM) to protect
the integrity of their content (Secure Content) so that their intellectual
property, including copyright, in such content is not misappropriated.
This device uses WM-DRM software to play Secure Content (WMDRM Software). If the security of the WM-DRM Software in this
device has been compromised, owners of Secure Content (Secure
Content Owners) may request that Microsoft revoke the WM-DRM
Software’s right to acquire new licenses to copy, display and/or play
Secure Content. Revocation does not alter the WM-DRM Software’s
ability to play unprotected content. A list of revoked WM-DRM
Software is sent to your device whenever you download a license
for Secure Content from the Internet or from a PC. Microsoft may,
in conjunction with such license, also download revocation list onto
your device on behalf of Secure Content Owners.
WPA (Wi-Fi Protected Access)
Connections
•The PlaysForSure logo, Windows Media and the Windows logo are
trademarks or registered trademarks of Microsoft Corporation in the
United States and/or other countries.
IEEE 802.11g
Getting Started
Windows Media DRM
The value indicated above is the maximum theoretical value for the
wireless LAN standard, and does not indicate the actual data transfer
rate.
45
1.S-302E3_1st.indd
49
2007/07/31
17:45:15
ENGLISH
Troubleshooting
Page
11
11
9
When the
subwoofer
indicator has lit.
Countermeasure
in •Check the insertion of the power
cord plug.
•Speaker cables not securely
connected.
•Device you want to play and set
input source do not match.
•Volume control set to minimum.
•MUTING is on.
•Digital signals not input Digital
input selected.
•Connect securely.
•Select an appropriate input
source.
•Turn volume up to suitable level.
•Switch off MUTING.
•Input digital signals or select
input terminal to which digital
signals are being input.
•Connections between the video •Check whether the connections
output terminal of this unit are correct.
and the input connector of the
monitor are incomplete.
•The input setting of the monitor •Set the input switching of the
TV is different.
TV to the terminal to which the
video input is connected.
•The subwoofer and main unit are •Check whether or not the cable
not properly connected with the is properly connected.
system cable.
If the indicator lights even though
the cable is properly connected,
there may be a malfunction.
Page
10
10
24
24
38
13
11
GRemote Control UnitH
Symptom
Cause
Set does not work •Batteries are worn.
properly when
•You are operating outside of the
remote control
specified range.
unit operated.
•Obstacle between main unit and
remote control unit.
•The batteries are not inserted in
the proper direction, as indicated
by the polarity marks in the
battery compartment.
•The set’s remote control sensor
is exposed to strong light (direct
sunlight, inverter type fluorescent
bulb light, etc.).
•SOURCE CONTROL switch position
is different.
Countermeasure
•Replace with new batteries.
•Operate within the specified
range.
•Remove the obstacle.
Page
5
5
•Insert the batteries in the
proper direction, following the
polarity marks in the battery
compartment.
•Move the set to a place in which
the remote control sensor will
not be exposed to strong light.
5
•Set the SOURCE CONTROL switch
for the device you wish to use.
8
5
5
Troubleshooting
Troubleshooting
Monitor does not
display an image.
Cause
•Power cord not plugged
securely.
Remote Control Information
Remote Control Information
Symptom
Display not lit
and sound not
produced when
power switch set
to on.
Display lit but
sound not
produced.
Playback
Playback
GGeneralH
Setup
Setup
–
Connections
Connections
If a problem should arise, first check the following:
1. Are the connections correct?
2. Is the set being operated as described in the owner’s manual?
3. Are the other components operating properly?
If this unit does not operate properly, check the items listed in the table below. Should the problem persist,
there may be a malfunction.
In this case, disconnect the power immediately and contact your store of purchase.
Cause
Countermeasure
•Protection circuit activated due •Turn off the power, wait for the
to rise of internal temperature.
set to fully cool down, then turn
the power back on.
•Place the set in a well-ventilated
place.
•Core wires of two speakers are •First unplug the power cord,
touching each other or a core then twist the core wires tightly
wire is sticking out of the terminal or terminate the speaker cables,
and touching the set’s rear panel, then reconnect.
activating the protection circuit.
•Set is damaged.
•Turn off the power and contact a
DENON service center.
Getting Started
Getting Started
Symptom
Power turns off
suddenly and
power indicator
flashes red.
11
10
46
1.S-302E3_1st.indd
50
2007/07/31
17:45:16
ENGLISH
Countermeasure
•Is there condensation on the disc or player ? (Let stand for 1 or 2
hours.)
•Discs other than DVDs and music CDs cannot be played.
•Disc is dirty. Wipe off the dirt.
Page
–
4
5
Symptom
Menu screen
messages for the
desired language
do not display.
Countermeasure
•Check the default setting for the disc language’s menu language.
Page
18
Cause
Countermeasure
•HDMI audio signal output •Set to “Setup” – “Video Setup”
– “HDMI Setup” – “HDMI Audio
destination setting is wrong.
Out”– “On”.
Page
19
Connections
GAudioH
•Some disturbance is normal.
•Some operations are disabled for some discs.
–
–
18
–
–
22
Symptom
Continuous noise
is heard when
receiving FM
programs
Hissing or
continuous noise
is heard when
receiving AM
programs
Cause
Countermeasure
Page
•Antenna cable is not properly •Connect the antenna cable
connected.
properly.
•Connect an outdoor antenna.
14
•This may be noise from a TV or •Turn off the TV.
interference from a radio station. •Change the position and direction
of the AM loop antenna.
–
Troubleshooting
39
GTunerH
Remote Control Information
26
Symptom
No sound is
output from
the monitor
connected
with HDMI
connections.
Playback
•Subtitles are not displayed for DVDs not containing subtitles.
•Subtitles are turned off. Turn the subtitles setting on.
•The audio (or subtitle) language does not switch for discs which do
not include multiple audio (or subtitle) languages.
•For some discs the audio (or subtitle) language cannot be switched
when the operation to switch it is performed, but can be switched on
the menu screens.
Angle does not
•The angle cannot be switched for DVDs which do not contain multiple
switch.
angles. In some cases multiple angles are only recorded for specific
scenes.
Playback does not •Check the “RATINGS” setting.
start when the
title is selected.
The password for •Initialize using the procedure described at “Resetting the
rating level has
Microprocessor”.
been forgotten.
Reset all the DVD
setting to Factory
Preset.
•The disc does not play with the selected audio or subtitle language if
The disc is not
played with the
that audio or subtitle language is not included on that DVD.
audio or subtitle
language set
as the default
setting.
Picture is not
•At the GUI menu’s “TV Aspect” setting, select “Normal (4:3LB)/
displayed in 4:3
Normal (4:3PS)/Wide (16:9)” and set according to the TV you are
(or 16:9).
using.
–
Setup
Symptom
Playback does
not start when 1
button is pressed.
Playback stops
immediately.
Picture is
disturbed during
the search
operation.
Buttons do not
operate.
No subtitles are
displayed.
Audio (or subtitle)
language does
not switch.
Getting Started
GDVDH
18
19
47
1.S-302E3_1st.indd
51
2007/07/31
17:45:16
ENGLISH
Getting Started
GiPodH
GNET/USBH
Symptom
iPod cannot be
played.
Connections
Setup
iPod slide show
is not output to
the TV.
Cause
Countermeasure
•The input source assigned to •Switch to the input source
“iPod Assign” is not selected.
assigned at “Assign iPod”.
•Cable is not properly connected. •Reconnect.
•Control Dock for iPod’s AC •Plug the Control Dock for iPod’s
adapter is not connected to AC adapter into a power outlet.
power outlet.
•Set the iPod slide show correctly.
See your iPod user’s manual for
–
more details on how to operate.
Page
22
12, 13
–
–
Playback
Remote Control Information
GVideoH
Symptom
The on-screen
display does not
appear.
No picture
appears.
Troubleshooting
No picture
appears
with HDMI
connections.
DVDs cannot be
copied on a VCR.
Cause
Countermeasure
•The format of the GUI and TV •Match the format of the GUI and
(NTSC or PAL) do not match.
TV.
Page
19
•The connections between the S- •Check the connections.
302 and monitor are faulty.
•The monitor’s input setting is •Set properly.
wrong.
11
•The connections to the HDMI •Check the connections.
connectors are faulty.
•The monitor is not compatible •Connect a monitor that is
with
copyright
protection compatible
with
copyright
(HDCP).
protection (HDCP).
•This is not a malfunction. Most
movie software includes copy
–
prevention signals and cannot be
copied.
11
–
12
–
Symptom
Cause
Countermeasure
When a USB
•The set cannot recognize a USB •Check the connection.
memory device is
memory device.
connected, “USB” •A USB memory device not •Connect a USB memory device
is not displayed on conforming to mass storage class conforming to mass storage
the GUI menu.
or MTP standards is connected.
class or MTP standards.
•A USB memory device that •This is not a malfunction. DENON
the set cannot recognize is does not guarantee that all USB
connected.
memory devices will operate or
receive power.
•USB memory device is connected •Connect the USB memory device
via USB hub.
directly to the USB port.
Files on a USB
•USB memory device is in format •Set the format to FAT16 or
memory device
other than FAT16 or FAT32.
FAT32. For details, refer to the
cannot be played.
USB memory device’s operating
instructions.
•USB memory device is divided •When divided into multiple
into multiple partitions.
partitions, only files stored in the
top partition can be played.
•Files are stored in a non- •Record the files in a compatible
compatible format.
format.
•You are attempting to play a file •Files that are copyright protected
that is copyright protected.
cannot be played on this set.
The file names
•Characters that cannot be •This is not a malfunction. On
are not displayed
displayed are used.
this set, characters that cannot
properly (“...”, etc.).
be displayed are replaced with a
“ . (period)”.
Files stored on a
•Files are stored in a non- •Record in a compatible format.
computer cannot
compatible format.
be played.
•You are attempting to play a file •Files that are copyright protected
that is copyright protected.
cannot be played on this set.
•Set and computer are connected •The set’s USB port cannot
by USB cable.
be used for connection to a
computer.
Page
13
–
–
–
–
–
34
34
–
34
34
–
48
1.S-302E3_1st.indd
52
2007/07/31
17:45:17
ENGLISH
Page
15
–
GWireless LANH
Symptom
Cannot connect
to network.
–
35
–
Played sound is
interrupted or
sound cannot be
played.
–
Remote Control Information
–
20, 21
–
–
Playback
–
Page
21
Setup
20, 21
–
Cause
Countermeasure
•The settings of the SSID •Match the network settings with
and network key (WEP) are the S-302’s settings.
incorrect.
•The reception is poor and the •Shorten the distance from the
signals cannot be received.
wireless LAN’s access point,
remove any obstacles and
otherwise improve visibility, then
try reconnecting. Also install
away from microwave ovens
and the access points of other
networks.
•There are multiple networks and •Set the access point’s channel
the usable channels overlap.
settings away from the channels
used for other networks.
Alternatively, connect using a
network cable.
•There are multiple networks and •Set the access point’s channel
the usable channels overlap.
settings away from the channels
used for other networks.
Alternatively, connect using a
network cable.
Connections
–
–
Troubleshooting
Cause
Countermeasure
•Ethernet cable is not properly •Check the connection status.
connected
or
network
is
disconnected.
•Program is being broadcast in •Only Internet radio programs in
non-compatible format.
MP3 and WMA can be played on
this set.
•The computer’s or router’s •Check the computer’s or router’s
firewall is activated.
firewall settings.
•Radio station is not currently •Choose a radio station that is
broadcasting.
currently broadcasting.
•IP address is wrong.
•Check the set’s IP address.
Server is not
•The computer’s or router’s •Check the computer’s or router’s
found, or it is
firewall is activated.
firewall settings.
not possible to
•Computer’s power is not turned •Turn on the power.
connect to the
on.
server.
•Server is not running.
•Launch the server.
•Set’s IP address is wrong.
•Check the set’s IP address.
Cannot connect to •Radio station is not currently •Wait a while before trying again.
preset or favorite
broadcasting.
radio stations.
•Radio station is not currently in •It is not possible to connect to
service.
radio stations that are no longer
in service.
For some
•Station is congested or not •Wait a while before trying again.
radio stations,
currently broadcasting.
“Server Full”
or “Connection
Down” is
displayed and
station cannot be
connected to.
Sound is broken
•Network’s signal transfer speed •This is not a malfunction. When
during playback.
is slow or communications lines playing broadcast data with a
or radio station is congested.
high bit rate, the sound may
be broken, depending on the
communications conditions.
Sound quality is
•File being played has a low bit •This is not a malfunction.
poor or played
rate.
sound is noisy.
Getting Started
Symptom
Internet radio
cannot be played.
–
–
49
1.S-302E3_1st.indd
53
2007/07/31
17:45:17
ENGLISH
Getting Started
Specifications
Connections
Setup
Playback
nAudio section
nGeneral
• Power amplifer
Front:
Rated output:
50 W + 50 W (4 Ω/ohms)
• Analog
Input sensitivity / Input impedance: 200 mV / 47 kΩ/kohms
Power supply:
Power consumption:
Maximum external dimensions:
Weight:
nTuner section
Remote Control Information
Reception frequency range:
Receiving sensitivity:
FM stereo separation:
FM: 87.50 MHz ~ 107.9 MHz
FM: 1.5 μV/75 Ω/ohms
35 dB (1 kHz)
AM: 520 kHz to 1710 kHz
AM: 20 μV
nVideo section
• Standard video connectors
Input / output level and impedance:
• S-Video connectors
Input / output level and impedance:
• Color component video connector
Input / output level and impedance:
1 Vp-p, 75 Ω/ohms
Y (brightness) signal — 1 Vp-p, 75 Ω/ohms
C (color) signal — 0.286 Vp-p, 75 Ω/ohms
Y (brightness) signal — 1 Vp-p, 75 Ω/ohms
PB / CB signal — 0.648 Vp-p, 75 Ω/ohms
PR / CR signal — 0.648 Vp-p, 75 Ω/ohms
Troubleshooting
Pin connector : 1 set/S-Video connector : 1 set/
Component video connector : 1 set
nDVD section
Signal format:
NTSC/PAL
(1)DVD-VIDEO discs
Supported discs:
12 cm single side 1 layer, 12 cm single side 2 layers,
12 cm both sides 2 layers (single side 1 layer),
8 cm single side 1 layer, 8 cm single side 2 layers,
8 cm both sides 2 layers (single side 1 layer)
(2)Compact Disc (CD-DA)
12 cm discs, 8 cm discs
nClock/Timer section
Clock method:
Timer:
Power line frequency synchronized method
Everyday/Once timer: One system each
Sleep timer: 120 minutes, maximum
120 V AC, 60 Hz
78 W
0.3 W (standby)
380 (W) x 97 (H) x 301 (D) mm (14-61/64” x 3-13/16” x 11-27/32”)
(ADV-S302) (including system cable)
4.3 kg (9 lbs 7 oz) (ADV-S302)
nRemote control unit (RC-1072)
Remote control method:
Power supply:
Maximum external dimensions:
Weight:
IR pulse method
R6/AA Type (two batteries)
52 (W) x 243 (H) x 21 (D) mm (2-3/64” x 9-9/16” x 13/16”)
175 g (Approx 6 oz) (including batteries)
nSpeakers
• Speaker system
Type:
Maximum external dimensions:
Weight:
• Subwoofer
Type:
Maximum external dimensions:
Weight:
SC-S302
2-way, 3-speakers, Closed box / Low-leakage-flux
8 cm cone bass-mid x 2 / 2 cm high range x 1
131 (W) x 335 (H) x 76 (D) mm (5-5/32” x 13-3/16” x 2-63/64”)
2.0 kg (4 lbs 14 oz) (per unit)
DSW-S302
1-way, 1-speaker, Reflex box / Low-leakage-flux / Built-in amplifier
16 cm cone x 1
212 (W) x 378 (H) x 406 (D) mm (8-11/32” x 14-7/8” x 15-31/32”)
(including foot)
11.2 kg (24 lbs 11 oz) (including base)
nWireless LAN
Network type (wireless LAN standards) :Conforming to IEEE 802.11b
Conforming to IEEE 802.11g
(Conforming to Wi-Fi®)z
Transfer rate:
DS-SS: 11 / 5.5 / 2 / 1 Mbps (Automatic switching)
OFDM: 54 / 48 / 36 / 24 / 18 / 12 / 9 / 6 Mbps (Automatic switching)
SSID (Network name)
Security:
WEP key (network key) (64/128 bits)
WPA-PSK (TKIP/AES)
WPA2-PSK (TKIP/AES)
2,412 MHz ~ 2,462 MH
Used frequency range:
Conforming to IEEE 802.11b : 11ch (DS-SS) (Of which 1 channel used)
No. of channels:
Conforming to IEEE 802.11g : 11ch (OFDM) (Of which 1 channel used)
zWi-Fi® conformity indicates tested and proven interoperability by the “Wi-Fi Alliance”, a group certifying interoperability
among wireless LAN devices.
bFor purposes of improvement, specifications and design are subject to change without notice.
bThis product incorporates copyright protection technology that is protected by method claims of certain U.S. patents
and other intellectual property rights owned by Macrovision Corporation and other rights owners. Use of this copyright
protection technology must be authorized by Macrovision Corporation, and is intended for home and other limited
viewing uses only unless otherwise authorized by Macrovision Corporation. Reverse engineering or disassembly is
prohibited.
50
1.S-302E3_1st.indd
54
2007/07/31
17:45:17
List of preset codes / Liste von voreingestellten Codes / Liste de codes préréglés / Lista dei codici pre-regolati /
Lista de códigos pre-ajustados / Lijst van vooringestelde codes / Förteckning över förinställda koder
DVD Player
A
D
H
J
K
M
P
S
T
Z
Aiwa
Denon
Hitachi
JVC
Konka
Magnavox
Mitsubishi
Panasonic
Philips
Pioneer
Sanyo
Sony
Toshiba
Zenith
Citizen
009
014, z[111]
010
006, 011
012, 013
005
004
014
005, 015, 016, 017
003, 008
018
002, 019, 020
001, 021, 022
023
VDP
D
M
P
R
S
Denon
Magnavox
Mitsubishi
Panasonic
Philips
Pioneer
RCA
Sony
028, 029, 112
026
028
029, 030
026
028, 031
032
033, 034, 035, 036
Craig
Curtis Mathes
Cybernex
D
E
Daewoo
Daytron
DBX
Dumont
Dynatech
Electrohome
Electrophonic
Emerson
F
Fisher
G
GE
H
Go Video
Goldstar
Gradiente
Grundig
Harley Davidson
Harman Kardon
Hi-Q
Hitachi
VCR
A
Admiral
Aiko
Aiwa
Akai
B
C
Alba
Amstrad
ASA
Asha
Audio Dynamic
Audiovox
Beaumark
Broksonic
Calix
Candle
Canon
Capehart
Carver
CCE
081
095
009
026, 027, 070, 072, 082, 083,
084
055
009
042
087
005, 085
088
087
086, 093
088
006, 087, 088, 089, 090
049, 057
025, 055, 056, 071
015
095
J
JC Penny
Jensen
JVC
K
L
M
Kenwood
Kodak
Lloyd
LXI
Magnavox
Magnin
Marantz
Marta
MEI
Memorex
Metz
MGA
MGN Technology
Midland
Minolta
006, 007, 087, 088, 089, 090,
095
007, 087, 088, 091, 115
006, 049, 073, 080, 087, 090,
092
087
025, 055, 059, 074, 089, 093,
095, 096
025, 055
005, 085
053
009
001, 088, 097
088
001, 009, 017, 027, 086, 088,
089, 092, 093, 097, 100, 101,
102, 103, 104, 117
009, 028, 031, 053, 054, 091,
099, 115
007, 011, 049, 050, 051, 052,
073, 080, 087
047, 048
000, 006, 012, 062, 088
094
042
094
040, 062
091
009, 013, 023, 026, 058,
z[108], 109, 110, 111
004, 005, 007, 023, 028, 049,
062, 085, 087, 088
013, 026
004, 005, 006, 026, 029, 043,
044, 045, 046, 085
004, 005, 006, 026, 029, 033,
045, 085, 090
088
009, 094
088
015, 016, 042, 049, 063, 106
087
004, 005, 006, 015, 042, 049,
085, 090
088
049
009, 033, 049, 053, 060, 081,
087, 088, 091, 094, 115
123, 124, 125, 126, 127, 128
001, 017, 027, 041, 097
087
011
013, 023
Mitsubishi
Motorola
Montgomery Ward
N
MTC
Multitech
NAD
NEC
O
P
Nikko
Noblex
Optimus
Optonica
Panasonic
Perdio
Pentax
Philco
Philips
Pilot
Pioneer
Q
R
Portland
Proscan
Pulsar
Quartz
Quasar
Radio Shack
Radix
Randex
RCA
Realistic
S
Ricoh
Salora
Samsung
Sanky
Sansui
Sanyo
SBR
Scott
Sears
Sentra
Sharp
001, 003, 008, 013, 014, 017,
027, 029, 039, 040, 041, 045,
097
081
001, 002, 007, 009, 049, 063,
081, 115, 117
009, 087, 094
007, 009, 011, 087, 090, 094
038
004, 005, 006, 018, 026, 029,
045, 061, 062, 085
088
087
081, 088
021
024, 049, 064, 066, 067,
068, 069, 107
009
009, 013, 023, 058, 090
015, 016, 049
015, 021, 042, 049, 105
088
005, 013, 029, 036, 037, 038,
045, 085
025, 055, 090
063, 080
060
033
034, 035, 049
001, 002, 021, 081, 087, 088,
091, 094, 097, 098, 115
088
088
007, 013, 019, 023, 058, 063,
064, 065, 073, 080, 082, 087
009, 021, 031, 033, 049, 053,
081, 087, 088, 091, 094, 097,
098
055
033, 041
007, 011, 051, 059, 070, 083,
087, 089, 113
081
005, 026, 029, 045, 061, 085,
114
032, 033, 053, 087, 091, 115,
116
042
017, 020, 086, 089, 093, 117
013, 023, 028, 031, 033, 053,
054, 088, 091, 098, 099, 115
055
001, 002, 021, 097
Shogun
Sony
STS
Sylvania
T
Symphonic
Tandy
Tashiko
Tatung
Teac
Technics
Teknika
TMK
Toshiba
U
V
W
X
Y
Z
Totevision
Unirech
Vecrtor Research
Victor
Video Concepts
Videosonic
Wards
XR-1000
Yamaha
Zenith
087
075, 076, 077, 078, 079, 121,
122
023
009, 015, 016, 017, 041, 049,
094
009, 094
009
009, 088
004, 026, 030
004, 009, 026, 094
024, 049
009, 010, 022, 049, 088, 094
087, 092
013, 017, 020, 041, 059, 089,
098, 099, 117
007, 087, 088
087
005, 062, 085, 089, 090
005, 045, 046, 085
005, 027, 085, 089, 090
007, 087
013, 021, 023, 087, 088, 089,
091, 094, 097, 118, 119, 120
094
004, 005, 006, 026, 062, 085
060, 078, 079
Celebrity
Circuit City
Citizen
Concerto
Colortyme
Contec
Cony
Craig
Crown
Curtis Mathes
D
E
Admiral
Adventura
Aiko
Akai
Alleron
A-Mark
Amtron
Anam
Anam National
AOC
B
C
Archer
Audiovox
Bauer
Belcor
Bell & Howell
Bradford
Brockwood
Candle
Capehart
045, 121
122
054
016, 027, 046
062
007
061
006, 007, 036
061, 147
003, 007, 033, 038, 039, 047,
048, 049, 133
007
007, 061
155
047
045, 118
061
003, 047
003, 030, 031, 032, 038, 047,
049, 050, 122
003
Daytron
Dimensia
Dixi
Electroband
Electrohome
Elta
Emerson
F
Television
A
Daewoo
G
Envision
Etron
Fisher
Formenti
Fortress
Fujitsu
Funai
Futuretech
GE
Goldstar
Grundy
H
Hitachi
I
J
Hitachi Pay TV
Infinity
Janeil
JBL
JC Penny
JCB
JVC
K
Kawasho
Kenwood
Kloss
Kloss Novabeam
KTV
046
003
029, 030, 031, 032, 034, 038,
047, 049, 050, 054, 061, 095,
122, 123
031, 047, 049
003, 047, 049, 135
013, 051, 052, 061
051, 052, 061
004, 061
029
029, 034, 038, 044, 047, 049,
053, 095, 118
027, 029, 039, 048, 049, 054,
055, 106, 107, 137
003, 049
044
007, 015, 027
046
029, 056, 057, 058, 147
027
029, 051, 059, 060, 061, 062,
118, 123, 124, 139, 148
038
027
014, 021, 063, 064, 065, 118
155
012
004, 062
004, 062
004
020, 036, 037, 040, 044, 058,
066, 088, 119, 120, 125, 147
000, 015, 029, 031, 039, 048,
051, 056, 057, 067, 068, 069,
116
062
029, 031, 051, 052, 070, 111,
112, 113, 124, z[134]
151
017, 071
122
017, 071
020, 034, 039, 040, 041, 044,
048, 050, 058, 066, 069, 076,
088, 090, 095, 125, 136, 159
046
019, 051, 052, 072, 073, 091,
117, 126
018, 046
038, 056, 057
010, 032
005, 122, 127, 131
074, 123
PRESET CODE
4.S-302E3_Preset.indd
1
2007/07/31
18:07:46
L
Loewe
Logik
Luxman
LXI
M
Magnavox
Marantz
Matsui
Memorex
Metz
MGA
Midland
Minutz
Mitsubishi
N
Montgomery Ward
Motorola
MTC
NAD
National
National Quenties
NEC
O
Nikko
NTC
Optimus
Optonica
Orion
P
Panasonic
Philco
Philips
Q
R
Pioneer
Portland
Price Club
Proscan
Proton
Pulsar
Quasar
Radio Shack
RCA
S
Realistic
Saisho
Samsung
Sansui
Sanyo
SBR
071
144
031
008, 014, 017, 024, 040, 044,
063, 071, 075, 076, 077, 118,
125
005, 010, 017, 030, 033, 038,
050, 056, 071, 078, 079, 085,
089, 108, 109, 110, 127, 131,
132, 145
015, 017, 071, 080
027
014, 027, 045, 083, 118, 144
160, 161, 162, 163
001, 039, 048, 056, 057, 058,
065, 081, 083
125
066
001, 016, 039, 048, 056, 057,
058, 065, 081, 082, 083, 105
011, 020, 144, 145, 146
121, 147
031, 034, 039, 048, 095
008, 075, 076, 128
002, 036, 061, 147
002
031, 038, 039, 048, 057, 084,
086, 135, 147
054
054
128
011, 012, 093, 121
004, 139
002, 009, 017, 036, 037, 071,
141, 143, 147
005, 010, 030, 050, 051, 056,
079, 085, 127, 131, 132, 145,
147
005, 015, 017, 050, 051, 056,
078, 087, 088, 089, 131, 132,
147
124, 128, 142
054
095
040, 044, 125
035, 051, 092, 129
042
036, 037, 074, 141
011, 044, 063, 093, 118
040, 044, 125, 130, 137, 151,
152
014, 063, 093, 118
027
003, 015, 034, 053, 055, 057,
094, 095, 136, 153
139
013, 014, 021, 022, 063, 064,
081, 096
015
Schneider
Scott
Sears
Sharp
Siemens
Signature
Simpson
Sony
Soundesign
Spectricon
Squareview
Supre-Macy
Supreme
Sylvania
T
Symphonic
Tandy
Tatung
Technics
Teknika
Tera
THOMSON
Toshiba
U
V
Universal
Victor
Video Concepts
Viking
W
Wards
Z
Zenith
Zonda
015
062
008, 014, 021, 022, 023, 024,
025, 040, 052, 057, 062, 063,
064, 065, 073, 075, 076, 097,
098, 125, 159
011, 012, 013, 026, 093, 099,
100, 104, 121
013
045, 144
050
043, 046, 138, 146, 150
030, 050, 062
007, 033
004
032, 122
046
005, 010, 017, 030, 078, 079,
085, 089, 101, 127, 131, 132,
145, 155
004, 148
012, 121
036, 124
037
001, 030, 032, 034, 052, 054,
078, 083, 095, 144, 156, 157
035, 129
165, 166
008, 014, 034, 063, 075, 076,
095, 097, 136, 158, 159
020, 066, 088
019, 073, 126
016
032, 122
005, 045, 066, 078, 085, 088,
089, 093, 102, 103, 131, 132,
148
042, 114, 115, 140, 144,149
007
CABLE
A
C
E
G
H
J
M
ABC
Archer
Century
Citizen
Colour Voice
Comtronic
Eastern
Garrard
Gemini
General Instrument
Hytex
Jasco
Jerrold
Magnavox
006, z[007], 008, 009
010, 011
011
011
012, 013
014
015
011
030, 033, 034
030, 031, 032
006
011
009, 016, 017, 026, 032
018
N
O
P
R
S
T
U
V
Z
Movie Time
NSC
Oak
Panasonic
Philips
Pioneer
RCA
Regency
Samsung
Scientific Atlanta
Signal
SL Marx
Starcom
Stargate
Teleview
Tocom
TV86
Unika
United Artists
Universal
Viewstar
Zenith
019
019
000, 006, 020
001, 005
011, 012, 013, 018, 021
002, 003, 022
029
015
014, 023
004, 024, 025
014
014
009
014
014
007, 016
019
011
006
010, 011
018, 019
027, 028
Satellite Receiver
A
C
D
E
G
H
J
K
M
N
P
R
S
Alphastar
Chaparral
Dishnet
Drake
Echostar Dish
GE
General Instruments
Grundig
Hitachi
Hughes Network
JVC
Kathrein
Magnavox
Nokia
Philips
Primestar
Proscan
RCA
Realistic
Sierra I
Sierra II
Sierra III
Sony
STS1
STS2
STS3
SRS4
054
035, 036
053
037, 038
062, 066
048, 055, 056
039, 040, 041
070, 071, 072, 073
058, 059
063, 064, 065, 069
057
074, 075, 076, 083
060
070, 080, 084, 085, 086
060
051
048, 055, 056
048, 055, 056, 068
042
036
036
036
049, 067
043
044
045
046
T
U
Technisat
Toshiba
Uniden
077, 078, 079, 081, 082
047, 050
061
CD Player
A
B
C
D
E
F
J
K
M
O
P
S
T
W
Y
Z
Aiwa
Burmster
Carver
Denon
Emerson
Fisher
JVC
Kenwood
Magnavox
Marantz
MCS
Onkyo
Optimus
Philips
Pioneer
Sears
Sony
Teac
Technics
Wards
Yamaha
Zenith
001, 035, 043
002
003, 035
z[111], 044
004, 005, 006, 007
003, 008, 009, 010
018, 019
011, 012, 013, 014, 017
006, 015, 035
016, 028, 035
016, 024
025, 027
017, 020, 021, 022, 023
014, 032, 033, 035
006, 022, 030
006
023, 031
002, 009, 028
016, 029, 036
035, 037
038, 039, 040, 041
042
CD Recorder
D
P
Denon
Philips
z[111],
112
112
Denon
Kenwood
Onkyo
Sharp
Sony
113
003, 004
007
005
006
TAPE
A
C
D
H
J
K
M
O
Aiwa
Carver
Denon
Harman/Kardon
JVC
Kenwood
Magnavox
Marantz
Onkyo
S
T
V
W
Y
Optimus
Panasonic
Philips
Pioneer
Sony
Technics
Victor
Wards
Yamaha
001, 002
002
z[111]
002, 003
004, 005
006
002
002
016, 018
007, 008
012
012
007, 008, 009
013, 014, 015
012
004
007
010, 011
[ ]z: Preset codes set upon shipment
from the factory.
: Sie Voreinstellungscodes wurden
vor der Auslieferung werkseitig
eingestellt.
: Les codes préréglés diffèrent en
fonctiom des livraison de l’usine.
: I codici di presettaggio sono
impostati in fabbrica prima della
consegna.
: Los códigos vienen preprogramados
de fábrica.
: Vooringestelde codes bij hey
verlaten van de fabriek.
: Förinställda koder har ställts in vid
transporten från fabriken.
DVD preset codes
DVD-Voreinstellungscodes
Codes préréglés DVD
Codici di preselezione DVD
Códigos de preajuste de DVD
DVD-voorkeuzecodes
Förinställda DVD-koder
e
MD
D
K
O
S
P
Model No.
Modellnr
Modéle numéro
Modello No
Nº de modelo
Modelnr
Modellnr
111
DVD-550
DVD-700
DVD-900
DVD-1000
DVD-1400
DVD-1500
DVD-1710
DVD-1910
DVD-2200
DVD-2800
DVD-2800g
DVD-2900
DVD-2910
DVD-3800
DVD-3910
DVD-A11
DVD-A1
DVD-A1XV
014
DVD-800
DVD-1600
DVD-2000
DVD-2500
DVD-3000
DVD-3300
PRESET CODE
4.S-302E3_Preset.indd
2
2007/07/31
18:07:47
4.S-302E3_Preset.indd
3
2007/07/31
18:07:47
www.denon.com
Denon Brand Company, D&M Holdings Inc.
Printed in China 00D 511 4622 104
4.S-302E3_Preset.indd
6
2007/07/31
18:07:48