1
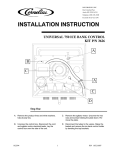
IMI CORNELIUS INC g One Cornelius Place g Anoka, MN 55303-6234
Telephone (800) 238-3600
Facsimile (612) 422-3246
INSTALLING REPLACEMENT AGITATOR MOTOR
KITS (P/N 569000207 AND P/N 569000208)
ON
VANTAGE DISPENSERS
IMPORTANT: Only qualified Personnel should install this kit.
Unpack and inspect the kit. Make sure all kit items are present and in good condition.
Table 1. Loose-Shipped Parts
Item
No.
Part No.
Name
Qty.
1
314072000
314150000
Agitator Motor Ass’y, 115 VAC (Kit P/N 569000207)
Agitator Motor Ass’y, 230 VAC (Kit P/N 569000208)
1
1
2
319828000
Screw, Thread Rolling, Phil Pn Hd; No. 10–24, .375 Long
3
3
560001745
Mounting Template
1
4
000268010
Drill Bit, 5/32
1
REMOVING OLD AGITATOR MOTOR ASSEMBLY
WARNING: Disconnect electrical power from the Unit to prevent personal injury before
attempting any internal maintenance. Only qualified personnel should service the internal
components or electrical wiring.
1. Disconnect electrical power from the Dispenser.
2. Remove hood from Dispenser, then remove cover from electrical control box (see Figure 1).
3. Disconnect old agitator motor assembly electrical wires from L1 and L2 terminals on the PC board (see
Figures 1 and 4) inside the electrical control box.
4. Remove old agitator motor assembly from refrigeration deck. Discard old motor and it’s mounting screws.
INSTALLING NEW AGITATOR MOTOR ASSEMBLY
1. Cut out “AGIT PORT CUT-OUT” area of the MOUNTING TEMPLATE (item 3) with a scissors as shown in
Figure 2. Remove adhesive covering from back side of the mounting template, then place template (align
template holes with existing agitator motor mounting holes) over the existing agitator motor cut-out in the
refrigeration deck.
2. Temporarily install the electrical control box cover to protect the PC boards from metal shavings while
drilling. Center punch two hole locations indicated on the mounting template, then using DRILL BIT (item 4)
drill indicated holes in the refrigeration deck.
May 20, 1997
EIMI Cornelius Inc; 1997
560001744
3. Remove electrical control box cover. Remove mounting template from the refrigeration deck, then
install new AGITATOR MOTOR ASSEMBLY (item 1) on the refrigeration deck (see Figure 3) and
secure with two SCREWS (item 2).
4. Connect agitator motor assembly electrical wires to L1 and L2 terminals on the PC board inside the
electrical control box as shown in Figure 4.
5. Install cover on the electrical control box. MAKE SURE AGITATOR MOTOR WIRES ENTERING
THE ELECTRICAL CONTROL BOX ARE NOT PINCHED.
6. Install hood on the Dispenser, then connect electrical power to the Dispenser. Check Dispenser for
proper operation.
ELECTRICAL CONTROL
BOX COVER
ITEM 3
AGIT. PORT
CUTOUT
o
o
FRONT
OLD AGITATOR
MOTOR
AGITATOR MOTOR
MOUNTING TEMPLATE
MOUNTING TEMPLATE
(ITEM 3)
P.C.
BOARDS
APPLY TO
REFRIGERATION DECK
FIGURE 1.
FIGURE 2.
ITEM 2
AGIT. MTR.
LEADS
COND. AREA
AGIT. MTR.
SLINGER
(DO NOT MOVE)
PUMP
B
JUMPER
RIBBED COMP
A
MOUNTING TEMPLATE
(ITEM 3)
SERV CORD
REFRIGERATION
DECK
FIGURE 3.
560001744
FIGURE 4.
2


![Service Manual VA13 Carbonator [ 002818 ]](http://vs1.manualzilla.com/store/data/006013608_1-0f8f87056a0ab013b1dd01dac3912d47-150x150.png)