1
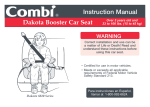
Instruction Manual
Prim Baby™ Infant Car Seat
L AT C H
rC
H
fo
22 lbs. or less
(10 kg o menos)
WARNING
dr
Lo wer A
a n d T eth er
Correct installation and use can be
a matter of Life or Death! Read and
understand these instructions before
using this car seat.
• Certified for use in motor vehicles
and aircraft.
Prim Baby™
???? Series
Para instrucciones en Español,
llamar al: 1-800-992-6624.
• Meets or exceeds all applicable
requirements of Federal Motor
Vehicle Safety Standard 213.
Instruction
Manual
Designed by Parents, for Parents
Keep this instruction manual for future use.
Store inside pouch located on back of seat pad.
© 2007 Combi USA, Inc.
8040B 0707
Combi USA, Inc. • 1962 Hwy 160 West, Suite #100 • Fort Mill, SC 29708-8027
• For technical questions, call 1-800-992-6624 • Se Habla Español 1-803-548-6633
• Fax 1-803-548-3663 • 8:30 a.m. - 5:00 p.m. Eastern Time • Monday - Friday
• www.combi-intl.com
Instruction Manual
Combi Connection™ Infant Car Seat
WARNING
rC
Hi
Correct installation and use can be
a matter of Life or Death! Read and
understand these instructions before
using this car seat.
h
fo
L o w er Anc
ldre n
T
LA CH
or
22 lbs. or less
(10 kg o menos)
a n d T eth er
• Certified for use in motor vehicles
and aircraft.
Combi Connection™
8040 and 8045 Series
Para instrucciones en Español,
llamar al: 1-800-992-6624
or log onto www.combi-intl.com.
• Meets or exceeds all applicable
requirements of Federal Motor
Vehicle Safety Standard 213.
1
Section 1 - Warnings
WARNING
DEATH or SERIOUS INJURY can occur
• Failure to follow these instructions and car seat labels can result in injury or death to a child
from striking the vehicle’s interior during a sudden stop or crash.
• Use only in a rear-facing position when using this infant car seat in a vehicle. Serious
•
•
•
•
crippling injury or death can result if infant faces front of vehicle.
Use only with children who weigh 22 pounds (10 kg) or less and whose height is 29 inches
(74 cm) or less.
Discontinue use when infant’s weight exceeds 22 pounds (10 kg).
DO NOT use this car seat in a vehicle front seat location with an air bag. Child’s head and
back may be seriously injured when an inflating air bag hits back of car seat.
Snugly adjust harness provided with the car seat around child. Infant MUST be secured by
harness system at all times, when infant seat is used in vehicle or outside of vehicle.
• For proper harness fit:
•
•
•
•
•
•
- Infant insert must be used with small infants.
- Shoulder belts MUST be through shoulder belt slots in infant insert.
- Discontinue use of the infant insert when shoulder harness straps belts are through top
slots of car seat or shoulder belts become too short to fit infant.
Secure this child restraint with the vehicle’s LATCH System if available or with a vehicle seat
belt as shown in this manual.
LATCH System or vehicle seat belt MUST stay tightly adjusted around car seat at all times.
Secure this child restraint to the vehicle, even when not occupied. Unsecured items may
injure occupants in a crash.
DO NOT allow any re-use of this car seat after a crash unless crash and car seat meet ALL
conditions in “Re-use After A Crash” section of this manual.
DO NOT use infant car seat if it is damaged, missing instructions, or missing parts.
Register your child restraint with the manufacturer.
2
3
Section 2 - Table of Contents
Section
Section
Section
Section
Section
Section
Section
Section
Section
1.
2.
3.
4.
5.
6.
7.
8.
9.
Section 9. Installation of Infant Car Seat
In Vehicle (continued)
• Securing Base With
Vehicle Seat Belt..................................27
• Securing Infant Car Seat
Without Base........................................31
Section 10. Stroller or Travel System Use................... 36
Section 11. Operation and Adjustment
• Harness Use and Adjustment..............37
• Changing Use Position And
Harness Length....................................38
• Carry Handle Operation....................... 41
• Base Adjustment.................................. 42
• Mommy’s Lap Infant Insert................... 43
• Canopy................................................. 45
Warnings....................................................1
Table of Contents........................................3
Connection™ Infant Car Seat Parts............5
Proper Use Check List................................7
Use Recommendations..............................8
Securing Infant in Car Seat........................9
Selecting A Vehicle Seating Location........14
LATCH System.........................................16
Installation of Infant Car Seat
In Vehicle..................................................18
• Attachment of Infant Car Seat
To Base.................................................19
• Securing Base With
LATCH System.....................................21
Section 2 - Table of Contents (continued)
Section 12. Vehicle Seat Belt Systems........................ 46
Locking Clip..............................................51
Section 13. Additional Information
• Certification..........................................53
• Aircraft Use...........................................53
• Warm Weather......................................53
• Vehicle Seat Protection.........................53
• Car Seat Useful Life.............................53
• Instruction Manual Storage..................53
Proper Use Is Required:
No car seat can guarantee protection from injury in
every situation, but proper use helps reduce the
risk of serious injury or death.
Section 14. Care and Cleaning....................................54
Section 15. Re-Use After A Crash................................55
Section 16. Registration Information...........................56
Section 17. Limited Warranty.......................................57
4
Keep this instruction manual for future use.
Store instruction manual inside pouch
located on back of seat pad.
5
Section 3 - Connection™ Infant Car Seat Parts
Instruction
Manual
Head Pillow
Shoulder Harness
Strap Cover
Shoulder
Harness Slot
Shoulder
Harness
Strap
Stroller
Latch
Vehicle Lap
Belt Guide
(Without Base)
Buckle
with
Tongues
ldre n
rC
Hi
Correct installation and use can
a matter of Life or Death! Read and
understand these instructions befor
using this car seat.
fo
a n d T eth er
• Certified for use in motor vehicles
and aircraft.
Combi Connection™
8040 Series
Para instrucciones en Español,
llamar al: 1-800-992-6624.
requirements of Federal Motor
Vehicle Safety Standard 213.
Locking Clip
Vehicle
Shoulder
Belt Guide
Metal
Rod
Handle
Adjustment
Button
Metal
Harness Plate
Harness
Adjuster Strap
CAR SEAT BASE
Blue Lap Belt Guides
LATCH
Connector
Base
Car Seat
Release
Handle
Recline
Adjustment
Handle
Instruction
Manual Pouch
• Meets or exceeds all applicable
Stroller
Latch
Crotch Strap
Harness
Adjuster Lever
(Under Seat Pad)
22 lbs. or less
(10 kg o menos)
WARNING
T
LA CH
or
Shoulder
Harness
Strap
Chest Clip
Recline
Indicator
Recline
Foot
Instruction Manual
Combi Connection™ Infant Car Seat
h
Infant Insert
INFANT CAR SEAT
L o w er Anc
Carry
Handle
Canopy
LATCH
Lower
Anchor
Belt
LATCH Lower
Anchor Belt
6
LATCH
Connector
LATCH
Connector
Storage
Pins
7
Need help installing your infant car seat?
Section 4 - Proper Use Check List
Contact Combi USA Consumer Service or one of the
following sources:
• Your vehicle dealer to locate a child safety seat
inspection station in your area.
• Call 1-866-SEAT CHECK (1-866-732-8243).
• Log onto www.nhtsa.dot.gov
- For a car seat inspection station select “Locate a
Child Safety Seat Inspection Station By State or
Zip Code”.
- To locate a certified “Child Passenger Safety”
Technician in your area, select tab “Vehicles &
Equipment”, select topic “Child Seats’ and then
select link “Child Passenger Safety Contact
Locator” or “Child Passenger Safety Seat
Inspection Station Locator”.
• Visit www.seatcheck.org.
• Proper use is required. Read and understand
instructions and car seat labels.
• Use this infant car seat rear-facing only.
• Snugly adjust harness straps around child.
• Securely install car seat with LATCH System or
vehicle seat belt as specified in this instruction
manual.
• Do not use this infant car seat in a front vehicle
seating location with an air bag.
• Secure children in back seat whenever possible.
• Never leave child unattended.
• Do not allow anyone (babysitter, relatives, etc.) to
use car seat without first reading and understanding
all instructions and car seat labels.
Section 5 - Use Recommendations
Height and Weight Limits:
This infant car seat is designed for rear-facing use only.
Use this car seat for infants whose:
- Weight is 22 pounds (10 kg) or less and
- Height is 29 inches (74 cm) or less.
Infants With Special Needs
A preterm infant or low birth weight infant may be at special risk traveling reclined in a vehicle or aircraft.
According to the American Academy of Pediatrics, these infants may be at increased risk of suffering breathing
or other difficulties if improperly reclined or positioned in a car seat.
Have your physician or hospital staff evaluate your infant in this car seat before you and your infant leave the
hospital. If your infant is not able to travel in a reclined position, DO NOT use this car seat. Use a car bed for
your infant.
8
9
Section 6 - Securing Infant In Car Seat
WARNING
DEATH or SERIOUS INJURY can occur
• Keep harness straps snug and positioned on shoulders and thighs. Infant MUST be secured
by harness system at all times, when infant seat is used in vehicle or outside of vehicle.
• For proper harness fit:
- Infant insert must be used with small infants.
- Shoulder belts MUST be through shoulder belt slots in infant insert.
• Discontinue use of the infant insert when:
- Harness is through top shoulder belt slots of car seat.
- Shoulder belts become too short to fit infant.
• Child must be dressed in clothing with arms and legs that will not interfere with buckling,
snugly adjusting or positioning harness.
• DO NOT use accessories or parts other than those provided by Combi USA or Strolee. Use of
accessories or parts from other manufacturers could alter the performance of the car seat.
• Never leave child unattended, even when sleeping.
• Suffocation Hazard: Infant car seat can roll over on soft surfaces and suffocate child. Never
place infant car seat on beds, sofas or other soft surfaces.
• Strangulation Hazard: Child can strangle in loose harness straps. Never leave child in an
infant car seat when straps are loose or undone.
• Fall Hazard: Child’s movement can slide infant car seat. Never place infant car seat near edges
of countertops, tables or other elevated surfaces.
10
11
Positioning of shoulder harness and infant insert to fit infant’s size:
Check positioning of shoulder harness through seat back when first using the car seat and periodically after that
to verify correct fit and positioning of the harness for infant’s size.
NOTE: Infant insert MUST always be used with small infants.
Shoulder harness straps MUST be through:
- Shoulder harness slots at or just below infant’s shoulders.
- Shoulder harness slots in infant insert.
See “Operation and Adjustment” section to change position of harness.
Securing infant in car seat:
1
Unsnap harness adjuster strap from front of car seat pad (fig. a).
2
Loosen harness - Insert finger under adjuster cover, press on harness adjustment lever,
and pull harness straps out (fig. b).
3
Unbuckle harness - Press red release button on buckle and pull tongues out of buckle.
4
Place infant in car seat with back and rump contacting seating surfaces.
5
Place harness straps over child’s shoulders and thighs.
6
Insert buckle tongues into buckle (fig. c). You should
hear a click.
7
Pull up on tongues to be sure they are locked.
(fig. a)
(fig. b)
Click
12
(fig. c)
13
8
Pull harness adjuster strap (fig. d) to snugly adjust harness straps onto child.
- Check that harness straps are snug on shoulder and thighs. Straps should not
allow a finger to pass between the belt and the child’s shoulder.
- A snug harness strap should not allow any slack. It lies in a relatively straight
line without sagging. It does not press on the child’s flesh or push the child’s
body into an unnatural position.
Harness
Adjuster
Strap
NOTE: If harness can not be snugly adjusted as described above:
- See “Harness Use and Adjustment” section.
9
Close chest clip and position chest clip at arm pit level (fig. e).
10
Snap harness adjuster strap to front of car seat pad.
Pull
(fig. d)
Rolled Towel
Chest Clip
Small infants:
For a small infant, a rolled towel can be used on each side for support (fig. e). Towels
MUST not interfere with the ability to snugly adjust the harness system. DO NOT place
towel or other items behind infant or between infant and harness.
(fig. e)
Section 7 - Selecting A Vehicle Seating Location
The National Highway Traffic Safety Administration (NHTSA) alerts vehicle owners that according to accident
statistics, children up to age 12 are safer when properly restrained in rear seating positions rather than front
seating positions.
2
Refer to vehicle owner’s manual for car seat installation
instructions for your vehicle.
- Use car seat in a rear vehicle seat location whenever
possible.
- DO NOT use this car seat in a vehicle front seat
location with an air bag.
NO coloque el asiento infantil para el automóvil orientado hacia
atrás en el asiento delantero del vehículo que tenga una bolsa
neumática de seguridad. El niño podría MORIR O SUFRIR
LESIONES GRAVES. El asiento trasero es el lugar más seguro
para los niños de 12 años o menores.
100795050
TICS13C
- For vehicles with air bags, always follow child restraint
installation information provided in vehicle owner’s manual.
3
DO NOT use car seat on vehicle seats which face the side
(fig. a) or face the rear (fig. b) of the vehicle.
14
(fig. a)
(fig. b)
!
- Never put a car seat in a front seat location unless
recommended by vehicle owner’s manual.
WARNING
DO NOT place rear-facing child seat
on front seat with air bag. DEATH OR
SERIOUS INJURY can occur.
The back seat is the safest place for
children 12 and under.
!
1
15
Options For Securing A Car Seat:
This infant car seat can be secured to a vehicle using the LATCH system or a vehicle seat belt.
1. LATCH System:
LATCH stands for Lower Anchorage and Tether for CHildren.
The LATCH System can be used when securing the car seat with the base.
Starting with model year 2003, all vehicles are equipped with LATCH Systems. See “LATCH
System” section for more information. Check vehicle owner’s manual to determine if your
vehicle has the LATCH System that may be identified with the symbol in fig. c.
(fig. c)
Some vehicle owner’s manuals may identify the LATCH System as “ISOFIX”. An ISOFIX
System can be used in the same way as the LATCH System.
If your vehicle has the LATCH System, the LATCH System should be used whenever possible.
2. Vehicle Seat Belt:
The car seat with the base or without the base can be secured using vehicle seat belts.
If your vehicle does not have the LATCH System, the car seat MUST be secured to the vehicle using a
vehicle seat belt.
Check vehicle owner’s manual for seating locations recommended for car seat use.
Section 8 - LATCH System
LATCH System On This Car Seat:
The LATCH System on the Combi Connection™ Car Seat consists
of a lower anchor belt 1 with lower anchor connectors 2 .
The lower anchor connectors 2 on the car seat connect to the
LATCH System in a vehicle.
2 1
(fig. a)
5
LATCH System On Vehicles:
Child restraint anchorage system (LATCH) in the vehicle consists of two lower
anchorages 3 located at the vehicle seat bight 4 and a top tether anchorage 5
(fig. b). Refer to vehicle owner’s manual for seating locations which have the
LATCH System.
The Combi Connection™ uses the lower anchor anchorages but does not
use the top tether.
16
3
4
(fig. b)
17
Lower anchorages are visible in some vehicles and not in others.
Those that are not visible are identified by a marker placed just above the anchorage on the
seat back. This marker can be a solid color round dot as shown in fig. c.
The vehicle manufacturer may provide funnel guides to separate the vehicle seat cushions
providing easier access to the lower anchorage. See vehicle owner’s manual.
(fig. c)
Section 9 - Installation of Infant Car Seat in Vehicle
WARNING
DEATH or SERIOUS INJURY can occur
• Use only in a rear-facing position when using this infant car seat in a vehicle.
• Secure this child restraint with the LATCH System or a vehicle seat belt as shown in this
manual.
• LATCH belt or vehicle seat belt must stay tightly adjusted around car seat or base at all
times. If LATCH belt or vehicle seat belt does not stay tight, read the vehicle owner’s
manual and “Vehicle Seat Belts” section in this manual.
• Rear-facing car seat must be properly reclined:
- Too reclined can result in injury or ejection.
- Too upright can result in breathing difficulties.
• After installing infant car seat in base, lift car seat to be sure it is securely locked.
18
19
Attachment Of Infant Car Seat To Base:
2
Removal Of Infant Car Seat From Base:
1
Pull car seat release handle 1 and lift car seat from base 2 (fig. a).
Car Seat
Release
(fig. a) 1 Handle
Attaching Infant Car Seat To Base:
1
Verify that there are no objects on top of base or between base
and infant car seat that will prevent proper latching of car seat.
- Verify lower anchor belt is routed or stored properly.
2
With child facing the rear of the vehicle, lower car seat into
base and push down on car seat to lock car seat into base
(fig. b).
3
Test to be sure car seat is locked in base. Lift on car seat
at top of seat back 1 (fig. c) and at child’s feet 2 .
1
2
(fig. b)
4
Carry handle should be kept in the carry position (see “Carry Handle Operation”
section).
5
Adjust recline using recline indicator on the side of car seat. Line on recline
indicator MUST be in green striped zone (fig. d).
(fig. c)
If line is not in green striped zone, adjust base using the recline foot (see
“Base Adjustment” section), and recheck recline of car seat. Repeat until
recline indicator is in green striped zone.
(fig. d)
If base can not be adjusted to locate the line in the green
striped zone:
Green
Striped
Zone
1. Try a different seating position.
2. Do not use this infant car seat.
NOTE: Vehicle must be parked on flat, level surface during this installation.
6
Verify that LATCH belt or vehicle seat belt is still tightly adjusted around base.
20
Line
Recline
Indicator
21
Securing Base With LATCH System:
WARNING
DEATH or SERIOUS INJURY can occur
• Only use the car seat LATCH System in vehicle seating locations recommended by the
vehicle manufacturer for use with LATCH and that have an anchor spacing of 280 mm (11 inches).
• LATCH connectors must be secured to the vehicle LATCH anchorages only. Connection to
other vehicle components could result in the anchor tearing free in a crash.
• Never attach more than one anchor connector to a vehicle lower anchorage unless
recommended by the vehicle owner’s manual for that vehicle.
1
Refer to vehicle owner’s manual to identify the seating locations with LATCH System. Select
the seating location to be used and locate the vehicle lower anchorages at the seat bight.
A LATCH Anchorage System with 280 mm (11 inch) spacing may not be available in
your vehicle in the rear center seating position. If use of the rear center position is
preferred, use the vehicle seat belt to secure the car seat. See “Securing Base
With Vehicle Seat Belt” section.
2
If vehicle seat back is adjustable, adjust vehicle seat back into
most upright position.
LATCH Lower
Anchor Connectors
3
Remove car seat from base.
4
Lift the LATCH lower anchor connectors out of the base (fig. a).
5
Lengthen lower anchor belt. While pressing adjuster release button,
pull belt to extend the length of lower anchor belt (fig. b).
6
Place lower anchor belt over side of base and into
belt slot in vehicle lap belt guide with the belt adjuster
slide buttons facing away from the car seat (fig. c).
If the adjuster is not in that position, turn the belt and
adjuster over.
Repeat for opposite side.
7
Check that the belts are not twisted.
Lower
Anchor
Belt
22
(fig. a)
Pull
Vehicle Lap
Belt Slot
Adjuster
Release
Button
(fig. b)
(fig. c)
23
8
Place base rear-facing in the vehicle seat location selected with blue lap belt guides
toward vehicle seat back and centered between the vehicle lower anchors (fig. d).
Attach car seat to base.
9
Adjust recline using recline indicator on the side of the car seat. Line of recline
indicator MUST be in green striped zone (fig. e). If line is not in green striped
zone, adjust base using recline foot (see “Base Adjustment” section), and recheck
recline of car seat. Repeat until recline indicator is in green striped zone.
If base can not be adjusted to locate the line in the green striped zone:
1. If necessary, place tightly rolled towel, pool noodle, or firm object
under recline foot to level car seat.
2. Try a different seating position.
3. Do not use this infant car seat.
NOTE: Vehicle must be parked on horizontal surface
during this installation.
Green
Remove car seat from base.
Striped Zone
10
(fig. d)
(fig. e)
Recline
Indicator
11
12
Connect lower anchor connectors to vehicle lower anchors:
- With hook-on connector opening facing down 1 , position the opening of the
connector over the vehicle lower anchorage. Push down 2 and then pull out 3
on the connector to lock it onto the vehicle anchorage (fig. f). You should hear
a click.
- Pull on connector to be sure it is locked onto the anchorage.
- Repeat for connector on opposite side.
1
2
3
(fig. f)
Tighten lower anchorage belt to secure the base. Press down
in center of base to depress the vehicle cushion and pull free
end of lower anchor belt to tighten belt around base (fig. g).
Check for secure installation. Pull base front to back and left
to right to check for secure installation (fig. h). LATCH belt
MUST stay tight.
If LATCH belt does not stay tight or base can not be securely
installed, try a different LATCH location or use the vehicle’s
seat belt to secure the base.
24
(fig. g)
(fig. h)
25
13
Attach car seat to base.
14
Recheck recline of car seat. Adjust if necessary (see step 8).
Removal Of Base Installed With LATCH:
1
Loosen lower anchor belt:
- While pressing down in center of base to reduce tension on lower anchorage belt,
push adjuster release button and loosen belt.
2
Press and hold the connector retainer spring 1 .
3
Push connector in, then rotate connector 2 , and pull out 3 to unhook from the
vehicle anchorage (fig. a). If the connector can’t be rotated, push in and lift the
connector to unhook from the vehicle anchorage.
3
2
1
(fig. a)
Repeat to remove connector on opposite side.
Storage Of Lower Anchorage Belt And Lower Anchor Connectors:
When not using the LATCH System, store the anchor belt adjuster and lower anchor
connectors by placing the connectors over the pins inside base and folding belts into
the recessed areas of the base (fig. a).
- Belts and lower anchor connectors MUST be properly stored in base to allow
secure attachment of car seat to base.
Pins
LATCH Lower
Anchor Connector
26
(fig. a)
27
Securing Base With Vehicle Seat Belt:
WARNING
DEATH or SERIOUS INJURY can occur
• Not all vehicle seat belts can be used with a car seat. Read vehicle owner’s manual and
“Vehicle Seat Belts” section in this manual.
1
Refer to vehicle owner’s manual to identify the seating locations which can be used
with a car seat. Check for specific instructions for car seat use.
2
After selecting a seating location, if vehicle seat back is adjustable, adjust vehicle
seat back into most upright position.
3
Place base with car seat attached rear-facing on vehicle seat with blue lap belt
guides toward vehicle seat back (fig. a).
(fig. a)
4
Adjust recline of car seat. Line inside recline indicator on side of car seat MUST
be in green striped zone (fig. b). If line is not in green striped zone, adjust base
(see “Base Adjustment” section), and recheck recline of car seat. Repeat until
recline indicator is in the green striped zone.
If base can not be adjusted to locate the line in the green striped zone:
1. If necessary, place tightly rolled towel, pool noodle, or firm object
under recline foot to level car seat.
Green
2. Try a different seating position.
Striped Zone
3. Do not use this infant car seat.
NOTE: Vehicle must be parked on horizontal surface
during this installation.
5
Remove car seat from base.
28
(fig. b)
Recline
Indicator
29
6
Position vehicle lap belt on vehicle seat.
Center Section
Of Lap Belt
a. Extend vehicle lap belt all the out the way out and buckle vehicle belt.
b. Place center section of lap belt flat on vehicle seat as shown in fig. c.
Check that vehicle lap belt is not twisted and lays flat across seat.
7
Route vehicle lap belt through base.
(fig. c)
a. Center base on the center section of lap belt.
b. On side of base lift lap belt up and hook over blue belt guide 1 , placing
lap belt into belt slot on blue belt guide 2 (fig. d). Check that lap belt is
not twisted.
c. Repeat step b for opposite side of base.
2
NOTE: When installing with a lap and shoulder belt, route
only the lap belt through the base, DO NOT route
the shoulder belt through base.
8
Tighten vehicle belt to secure the base. Press down in
center of base to depress the vehicle cushion while
tightening vehicle belt (fig. e & f).
- When using a vehicle lap and shoulder belt, after
tightening lap portion of the belt, place shoulder belt
into slot in corner of base and allow shoulder belt to
rest against vehicle seat back (fig. g).
9
Check for secure installation. Pull base front to back and
left to right to check for secure installation (fig. h). Vehicle
lap belt MUST stay tight.
10
If the vehicle lap belt does not stay tight or base cannot be
securely installed, see vehicle owner’s manual, “Vehicle
Seat Belts” section or move to a different seating location.
11
Attach car seat to base. Lift car seat to ensure it is properly
attached to the base (see “Attachment Of Car Seat To
Base” section).
12
Recheck recline of car seat. Adjust if necessary
(see step 4).
1
(fig. d)
(fig. e)
Lap Belt
(fig. g)
30
(fig. f)
Lap and
Shoulder Belt
(fig. h)
31
Securing Infant Car Seat Without Base:
WARNING
DEATH or SERIOUS INJURY can occur
• Not all vehicle seat belts can be used with a car seat. Read vehicle owner’s manual and
“Vehicle Seat Belts” section in this manual.
Installation with Lap Belt Only:
1
Refer to vehicle owner’s manual to identify the seating locations which can be used
with a car seat. Check for specific instructions for car seat use.
2
After selecting a seating location, if vehicle seat back is adjustable, adjust vehicle seat
back into most upright position.
3
4
Place car seat rear-facing on vehicle seat.
Thread vehicle lap belt through vehicle lap belt guides on car seat (fig. a) and buckle
vehicle belt. Be sure vehicle lap belt is not twisted.
5
Press down firmly on car seat to compress vehicle seat
cushion while tightening vehicle lap belt (fig. b).
6
Adjust recline using the recline indicator on the side of
car seat (fig. c). Line on recline indicator must be in green
striped zone.
If line is not in green striped zone, place a tightly rolled up
towel, blanket or firm foam (pool noodle) under end of car
seat contacting vehicle seat back.
If car seat can not be adjusted to locate the line in the green
striped zone:
1. Try a different seating position.
2. Do not use this infant car seat.
NOTE: Vehicle must be parked on horizontal surface
during this installation.
(fig. b)
Green Striped
Zone
Recline
Indicator
32
(fig. a)
(fig. c)
33
7
Check for secure installation. Pull front to back and left to right to check for secure
installation (fig. d). Vehicle lap belt MUST stay tight.
If vehicle lap belt does not stay tight, see “Installation with Lap/Shoulder Belts” below.
8
Recheck car seat recline. Verify line is in green striped zone of recline indicator.
9
Carry handle should be kept in the carry position, (see “Carry Handle Operation”
section).
(fig. d)
Installation with Lap And Shoulder Belts:
• When using vehicle lap and shoulder belts, shoulder belt may
be used for additional support. Place shoulder belt around
back of Combi Connection™ (fig. e) and through the vehicle
shoulder belt guide on back of car seat shell (fig. f). If
shoulder belt is too short to go around back of Combi
Connection™, position shoulder belt against vehicle seat
back (fig. g). Do not route shoulder belt through lap belt
guides on either side of car seat.
Shoulder
Belt Guide
(fig. e)
(fig. f)
(fig. g)
(fig. h)
• Lap/shoulder belt with free sliding latch plate:
- Pull out on latch plate (fig. h). If belt slides freely
through latch plate, a locking clip must be used as
described in “Locking Clip” section.
- Some combination lap/shoulder belts with free sliding
latch plates may be converted into an “automatic
locking mode” that will allow use without a locking clip.
See vehicle owner’s manual and label on vehicle belts
for instructions.
34
35
Removal Of Infant Car Seat From Vehicle:
1
Unhook shoulder belt from behind car seat and unbuckle vehicle
seat belt.
2
Remove lap belt from vehicle lap belt guides.
3
Remove car seat from vehicle.
Section 10 - Stroller or Travel System Use
This infant car seat can only be used with certain Combi stroller models to transport your infant.
Check Combi stroller information or the Combi USA, Inc. website at www.combi-intl.com, for an updated
list of stroller models that will work with your Combi Connection Infant Car Seat.
See stroller instructions for securing car seat and use information.
WARNING
DEATH or SERIOUS INJURY can occur
• Infant car seat MUST be secured to stroller. After installation, lift car seat to verify it is
securely locked onto stroller.
• Stroller latch is for releasing car seat from stroller. Stroller latch automatically locks to
stroller. NEVER push down on stroller latch. Stroller latch could be damaged.
36
37
Section 11 - Operation and Adjustment
Harness Use and Adjustment
Harness Strap Adjustment:
• To tighten: Pull front adjuster strap (fig. a).
• To loosen: Insert finger under adjuster cover on pad,
press harness adjuster lever, and pull harness straps
out.
• If the harness cannot be adjusted to properly fit
child, (see “Changing Harness Length And Use
Position” section).
Harness
Adjuster
Lever
(Under
Adjuster
Cover)
Harness
Adjuster
Strap
(fig. a)
1
Chest Clip Operation:
• To open: Press tabs 1 and pull apart 2 (fig. b).
• To close: Snap halves together. Make sure chest clip is locked
by pulling out.
2
2
1
(fig. b)
Shoulder Strap Covers: Either “Folding” or “Tube” style covers are provided
Folding Style Covers:
Open folded shoulder strap cover, place over shoulder belt above chest clip
with folded side toward child, and close shoulder belt cover (fig c.)
Tube Style Covers:
Unhook harness and pull out through seat back, see “Changing Shoulder
Harness Slot Position” section. Slide shoulder belt up through strap cover,
rethread harness straps through seat back, and re-attach harness to metal
harness plate.
(fig. c)
Changing Use Position and Harness Length
WARNING
• Shoulder belts MUST be through belt slots in infant insert.
• Shoulder harness MUST snugly adjust around infant.
• Shoulder harness straps MUST be through slots at or just
below shoulders.
Each shoulder harness strap has two harness adjustment loops,
1 and 2 , to adjust harness fit as the infant grows. 38
1
Shoulder
Harness
Loops
2
(fig. a)
39
Changing Shoulder Harness Length:
1. Buckle harness and chest clip.
Shoulder
2. From front of car seat, unsnap harness adjuster strap from
Harness
front of car seat pad, loosen harness straps by pressing
Adjuster
harness adjuster lever, 3 , and pulling harness straps out,
(Under
4 (fig. d).
Adjuster
3. From back of car seat, remove both harness adjustment
Cover )
loops from metal harness plate (fig. e).
Metal
4. Route shoulder harness straps between plastic
Rod
seat and metal rod.
To lengthen shoulder harness:
- Re-attach metal harness plate
in lower adjustment loops 2
Shoulder
on shoulder harness straps (fig. f).
Harness
To shorten shoulder harness:
Loop
- Re-attach metal harness plate
in upper adjustment loops 1
on shoulder harness straps.
(fig. e)
Tab
5. Check that loops are completely in slots
of metal harness plate, and under tabs
Metal
on both sides (fig. f).
Harness Plate
4
3
(fig. d)
2
1
(fig. f)
Changing Shoulder Harness Slot Position:
1. Buckle harness and chest clip.
2. Loosen harness straps, (see “Harness Use And Adjustment” section).
3. From back of car seat unhook both harness loops from
metal harness plate (fig. b).
4. From front of car seat, pull harness straps out through infant
Metal
insert, seat pad, and car seat shell.
Harness Plate
(fig. b)
5. From front of car seat, rethread harness straps through infant
insert (for use with lower slots on seat back only), desired
Metal
harness strap slots of seat pad, and seat back.
Rod
Make sure harness straps are not twisted
and are threaded through matching slot of
infant insert, seat pad and seat back.
Shoulder
Harness
6. From back of car seat, route shoulder harness
Loops
straps between plastic seat and metal rod,
then re-attach harness adjustment loops to
metal harness plate (fig. c).
(fig. c)
Check that loops are completely in slots
of metal harness plate and under tabs
Metal
Tab
on both sides.
40
Harness Plate
41
Carry Handle Operation - Carry handle has four positions (fig. c):
A. Vehicle use position and carrying position
A
B. Rocking position
2
B
C. Rocking position
C
1
D. Reclined seat position
1
D
Each handle position can be used for vehicle positions
depending on size of vehicle.
(fig. c)
To change carrying handle position:
• Push in handle adjustment buttons on each side of handle 1 (fig. d).
• Rotate handle forward or backward 2 until it locks into a use position.
(fig. d)
Handle
Adjustment
Button
IMPORTANT: Check to be sure carry handle is locked before lifting car seat.
NOTE: Handle does not lock between position C and position B. Handle will move from position C into position
B without pushing in handle adjustment buttons.
Base Adjustment:
WARNING
DEATH or SERIOUS INJURY can occur
• Rear-facing car seat MUST be properly reclined:
- Too reclined can result in injury or death from ejection.
- Too upright can result in breathing difficulties.
The base has a three position adjustable recline foot to assist in properly reclining the car seat.
Use recline indicator to verify proper car seat recline position.
To Adjust:
- Pull out on recline adjustment handle and lower or
raise recline foot to desired position (fig. a).
Recline
Adjustment
Handle
1
2
- Release recline adjustment handle to lock recline foot in position.
3
42
(fig. a)
43
Mommy’s Lap Infant Insert:
WARNING
• To prevent ejection:
- Shoulder belts MUST be through belt slots in infant insert.
- For proper harness fit, infant insert MUST be used for small infants.
• Discontinue use of the infant insert when:
- Harness is through top shoulder belt slots on car seat.
- Shoulder belts become too short to fit infant.
To Assemble Infant Insert:
1. Unhook harness straps, see “Changing Shoulder Harness Slot Position” steps 1 - 4.
2. Unbuckle harness and chest clip.
3. Place infant insert in car seat.
4. Thread shoulder harness belts and crotch belt with buckle up
through slots in infant insert, rethread harness straps through
infant insert and lower harness strap slots of seat back.
5. From back of car seat, route shoulder straps between plastic seat and
metal rod, then re-attach harness adjustment loops to metal harness
plate, (see “Changing Shoulder Harness Slot Position” section).
6. Route strap at top of infant insert over top of seat back and snap to
seat pad.
Infant Insert
Reverse above steps to remove infant insert.
Head Pillow:
Use of head pillow is not required
To Attach:
Infant Insert
1. Thread strap on head pillow up through desired slot in top of infant
insert and snap strap on head pillow to strap on infant insert.
To Remove:
1. Unsnap strap on head pillow from strap on infant insert and slide
head pillow down to pull strap out of infant insert.
44
Infant Insert
Pillow
45
Top Canopy
Bracket
Canopy:
1
Insert bottom canopy lever into bottom canopy bracket (fig. b).
2
3
Slide bottom canopy lever into smaller opening to lock canopy into place (fig. c).
4
Slide top canopy lever into smaller opening to lock canopy into place (fig. e).
5
Repeat above steps for opposite side of canopy.
Insert top canopy lever into top canopy bracket (fig. d).
(fig. b)
(fig. c)
Bottom Canopy (fig. a)
Bracket
(fig. d)
(fig. e)
Section 12 - Vehicle Seat Belt Systems
Design and operation of vehicle seat belt systems vary from vehicle to vehicle and from seating location to seating
location in the same vehicle. Not all vehicle seat belts can be used with a child restraint. Refer to the information in
this section for information on the various types of vehicle seat belt systems.
WARNING
DEATH or SERIOUS INJURY can occur
• Not all vehicle seat belts can be used with a car seat. Read vehicle owner’s manual and
“Vehicle Seat Belts” section in this manual.
To provide a secure installation of the car seat:
• Read the vehicle owner’s manual regarding car seat installation and vehicle seat belt use with car seat.
• Follow all instruction labels on vehicle seat belt and car seat.
If car seat does not stay tightly secured after following instructions in this manual, vehicle seat belt labels, and
vehicle owner’s manual:
• Move car seat to another seating location and try again, or
• Contact vehicle dealer for assistance and possible seat belt modification parts.
• Obtain assistance, see “Need Help Installing Your Car Seat” in “Proper Use Checklist” section.
46
47
Belts Forward of Seat Bight
Vehicle seat belts located forward of seat bight
(fig. a & b) may not securely hold car seat. Check
vehicle owner’s manual or see vehicle dealer for
car seat installation requirements.
• If seating position is approved for use with car seat,
install car seat and check for secure installation by
pulling car seat front to back. If car seat slides
forward or vehicle seat belt does not stay tight,
DO NOT use these seat belts.
Seat
Bight
Seat
Bight
(fig. a)
Belt Forward
of Seat Bight
(fig. b)
Buckle
Forward of
Seat Bight
Lap Belts - Manually Adjustable
Manually adjustable lap belts (fig. c) normally will hold a car seat tightly. However, in
some cases, the locking latch plate on some seat belts may slip and loosen if positioned
at a certain angle. If this happens, flip latch plate over (fig. c) and re-buckle. Test
installation again to see if lap belt stays tight. If not, move car seat to another seating
location.
Flip
(fig. c)
Lap Belts - With Retractor
Lap belts with retractors (fig. d) may or may not hold a car seat securely.
Follow these steps to determine if you have a retractor system that will hold car seat
securely:
a. Pull belt all the way out.
b. Allow belt to retract about 6 inches (15 cm).
c. Pull out on belt again.
If belt is locked and you cannot pull the belt out any further, you have an Automatic
Locking Retractor which may be used with a car seat. Remember, when installing a
car seat, pull belt all the way out, buckle belt, and then tighten.
If the belt pulls out (step c), the retractor is an Emergency Locking Retractor which must
not be used with a car seat.
48
(fig. d)
49
Passive Restraints
Lap Belt with Motorized Shoulder Belt (fig. e)
DO NOT use with any car seat.
- See your vehicle dealer for available hardware or options for securing a child
restraint in this location.
(fig. e)
Front
Door
Lap or Shoulder Belt Mounted on Front Door (fig. f)
DO NOT use a car seat in any front seating location that has belts mounted
to the front door. Belts will not stay tight while driving.
- See your vehicle dealer for available hardware or options for securing
a child restraint in this location.
(fig. f)
Combination Lap/Shoulder Belt with Free Sliding Latch Plate
Pull out on latch plate. If belt slides freely through latch plate (fig. g), the locking
clip MUST be used (see “Locking Clip” section).
- Use the locking clip to secure the lap belt around the base or the car seat
(see “Locking Clip” section).
Some combination lap/shoulder belts with free sliding latch plates may be
converted into an “automatic locking mode”. Always use the belt lock-off with
these belt systems.
(fig. g)
Combination Lap/Shoulder Belt with Locking Latch Plate
Vehicle seat belts with locking latch plates (fig. h) normally hold a car seat
tightly. However in some cases, the locking latch plate on some seat belts
may slip and loosen after being buckled on car seat if positioned at a certain
angle. If this happens, flip the latch plate over and re-buckle. Test installation
again to see if this works. If not, move car seat to another seating location.
50
Flip
(fig. h)
51
Section 12 - Vehicle Seat Belt Systems
Locking Clip (stored in pouch on back of car seat):
You MUST use locking clip provided with this car seat with a vehicle belt that slides freely through the latch plate or if
the lap portion of the lap/shoulder belt cannot be tightly secured.
WARNING
DEATH or SERIOUS INJURY can occur
Avoid serious injury or death:
• Failure to use locking clip where required will result in car seat not being securely held in
place.
• Remove locking clip from vehicle seat belts when not being used with car seat.
• DO NOT use locking clip as a vehicle seat belt shortener.
1
2
3
Install car seat or base rear-facing on vehicle seat and tighten vehicle seat belts.
While holding vehicle seat belts to together at latch plate (fig. a), unbuckle belt.
Slide vehicle belt out of vehicle lap belt guide on the side of the seat or base which
the buckle is on.
4
Slide locking clip onto vehicle seat belts approximately 1/2 inch (1 cm) away from latch
plate (fig. b).
5
Slide vehicle belt back into vehicle lap belt guide.
- Check to be sure vehicle lap belt is still correctly routed throughout entire belt path.
6
7
Re-buckle vehicle seat belt.
(fig. a)
Test installation to see if car seat or base is secure.
If not secure, additional vehicle seat belt tightening may be necessary.
• Unbuckle vehicle seat belt.
• Hold vehicle seat belts together and remove locking clip.
• Shorten length of vehicle lap belt portion slightly by pulling vehicle lap belt through
latch plate.
1/2 inch (1 cm)
• Re-attach locking clip.
• Buckle vehicle seat belt.
HINT: Press car seat or base down into vehicle seat cushion to help buckle vehicle seat belt.
Test installation to see if car seat or base is secure, if not secure, repeat above steps until
(fig. b)
car seat is secure.
52
53
Section 13 - Additional Information
Certification
Warm Weather
Car seat parts can get very hot in the sun or
warm weather.
To avoid burns, always check before putting
child in car seat.
This child restraint system conforms to all applicable
Federal Motor Vehicle Safety Standards for use in
motor vehicles and aircraft.
Aircraft Use
Vehicle Seat Protection
This restraint is Certified for Use in Motor
Vehicles and Aircraft (see label on car seat).
Contact airline about their policy on use of child
restraints on the Aircraft.
Use this car seat only on forward-facing aircraft seats.
Install car seat on aircraft the same way it is
installed in a vehicle.
Protect vehicle seat. Use a thin car seat mat, thin
towel or thin blanket under and behind car seat.
Car Seat Useful Life
DO NOT use after 7 years from date of
manufacture on label.
Instruction Manual Storage
Store instruction manual inside pouch located on
back of seat pad.
Section 14 - Care and Cleaning
Cleaning Seat Pad and Infant Insert:
Cleaning Harness and Crotch Straps:
To Remove Seat Pad and Infant Insert:
1. Remove shoulder harness.
2. Unsnap top of infant insert and remove.
3. Pull down on corners of pad behind handle
adjustment buttons to remove pins from slots.
4. Pull pad off top of car seat back.
5. Pull bottom of pad gently away from car seat
bottom pulling out tabs under corners.
To Launder Seat Pad and Infant Insert:
1. Machine wash separately in cold water - delicate
cycle, no bleach, and drip dry.
To Reassemble Seat Pad and Infant Insert:
Reverse above steps for replacing seat pad and
harness system.
Surface wash only with mild soap and damp cloth.
If harness straps are frayed or heavily soiled, they
MUST be replaced.
Cleaning Shell:
Wipe with mild solution of soap and water. Avoid
wetting labels.
Never use “household detergents”: they can
weaken plastic.
Cleaning Buckle:
Rinse buckle with warm water. DO NOT use
household detergents. Never lubricate buckle.
54
55
Section 15 - Re-use After A Crash
WARNING
DEATH or SERIOUS INJURY can occur
• DO NOT allow any re-use of this car seat after a crash unless crash and car seat meet ALL
conditions in “Re-use After A Crash” section of this manual. Do not sell or allow others to use
a car seat that has been in a crash and does not comply with ALL of these conditions.
Car seats are damaged in vehicle crashes and in many cases, the car seat must be destroyed and replaced.
However, the National Highway Traffic Safety Administration (NHTSA) advises that if a child restraint (car seat) has
been used in a minor crash that the child restraint can continue to be used with your child.
For information on car seat re-use after a crash, check the NHTSA website at:
www.nhtsa.gov/people/injury/childps/ChildRestraints/ReUse/RestraintReUse.htm.
Damage to car seats may be difficult to see or it may be difficult to verify the damage to the car seat. For those
situations where any of the NHTSA Child Restraint Re-use criteria has not been met, or if there is uncertainty
whether damage to the seat has occurred, NHTSA and Combi USA advise parents or caregivers to contact their
automobile insurance company regarding its policy on replacement of seats.
DO NOT risk your child’s safety.
Section 16 - Registration Information
Child restraints (car seats) could be recalled for safety reasons. You must register this restraint to be reached in a
recall. Fill out the registration card attached to car seat or send your name, address, and the restraint’s model
number and manufacturing date to:
Combi USA
1962 Hwy 160 West, Suite #100
Fort Mill, SC 29708
or call 1-800-992-6624
or fax 1-803-548-3663
or log onto www.combi-intl.com
For recall information:
• Call the U.S Government’s Vehicle Safety Hotline at 1-888-327-4236 (TTY: 1-800-424-9153)
or go to http://www.NHTSA.gov
• Log onto the National Highway Traffic Safety Administration recall website at:
http://www-odi.nhtsa.dot.gov/cars/problems/recalls/childseat.cfm
• Contact Combi USA, Inc. (see contact information above)
56
57
Section 17 - Limited Warranty
1. Combi USA products, when purchased from an authorized retailer, are warranted to the original purchaser to
be free of defect in materials and workmanship for a period of one (1) year from date of purchase. Warranty is
valid for products purchased and used in the U.S. only and used in compliance with the warrantor’s use and
maintenance instructions. Save your carton and receipt in case return for warranty service is necessary.
2. During the warranty period your Combi product will either be repaired or replaced, at the warrantor’s discretion,
without charge if it is purchased from an authorized Combi dealer and is found to be defective in workmanship or
materials. For service call 1-800-99-COMBI (1-800-992-6624). The warrantor shall not be responsible for any
costs incurred by the consumer in returning a defective product for repair.
This limited warranty shall not apply to normal wear to the product, or if the product has been:
a. Damaged due to accidents, misuse, abuse or neglect as determined by Combi.
b. Tampered with or repaired by other than an authorized Combi repair center or with parts other than Combi
approved parts.
c. Leased or rented for commercial use.
THE WARRANTY PROVIDED HEREIN IS EXCLUSIVE AND IS IN LIEU OF ALL OTHER EXPRESS WARRANTIES.
ANY IMPLIED WARRANTIES, INCLUDING ANY IMPLIED WARRANTY OF MERCHANTABILITY OR FITNESS FOR
A PARTICULAR PURPOSE ARE EXPRESSLY EXCLUDED. WARRANTOR’S OBLIGATIONS AND THE
CONSUMER’S OR OTHER BUYERS REMEDIES UNDER THE LIMITED WARRANTY ABOVE ARE EXCLUSIVE
AND ARE STRICTLY LIMITED TO REPAIR OR REPLACEMENT AS STATED. ANY INCIDENTAL OR
CONSEQUENTIAL DAMAGES ON THE PART OF THE WARRANTOR AND ANY SUPPLIER OR DEALER ARE
HERBY ALSO EXPRESSLY EXCLUDED.
Some states limit or do not allow exclusions or limitations on how long an implied warranty lasts so the above
limitations may not apply to you. Some states do not allow the exclusion or limitations of incidental or consequential
damages, so the above limitations or exclusion may not apply to you. This warranty gives you specific legal rights,
and you may also have other rights which vary from state to state.
58