1
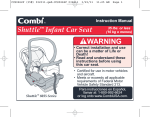
INSTRUCTION MANUAL
5 to 22 lbs.
(2.3 to 10 kg)
Centre Infant Car Seat
TM
rC
H
h
or
Combi USA, Inc.
a n d T eth er
WARNING
Correct installation and use can be a
matter of life or death! Read and
understand these instructions before
using this car seat.
Store these instructions in the pocket
provided at the back of the car seat.
Certified for use in motor vehicles and
aircraft.
Meets or exceeds all applicable
requirements of Federal Motor Vehicle
Safety Standard 213.
CEICS10/05
Keep this instruction manual for future use.
Store in the pocket at the back of the car seat
fo
Lo wer Anc
il d r e n
L AT C H
Centre ST 8065 Series
Centre DX 8074 Series
Centre EX 8086 Series
Para instrucciones en Espanol,
llamar al: 1-800-992-6624
Section 1 - Contents
1
Section 1 - Contents
2
Section 1. Contents....................................................................................1
Section 11. Vehicle Belt Systems.......................................................39 - 44
Section 2. Warnings.............................................................................3 & 4
Section 12. Accessories...................................................................45 & 46
Section 3. Proper Use ................................................................................5
Section 13. Stroller, Travel System and Airplane use.........................47 & 48
Section 4. Assistance..................................................................................6
Section 14. Other Uses......................................................................49 & 50
Section 5. Car Seat and Base Parts....................................................7 - 10
Section 15. Care & Cleaning.. ...................................................................51
Section 6. Securing Infant in Car Seat...............................................11 - 18
Section 16. Additional Information..............................................................52
Section 7. Installing the Car Seat - General Information.................. 19 - 24
Section 17. Registration Information...................................................66 - 77
Section 8. Installing the Car Seat Base with LATCH ....................... 25 - 28
Section 18. Replacement Parts...........................................................66 - 77
Section 9. Installing the Car Seat Base with Vehicle Belts............... 29 - 34
Section 10. Installing the Car Seat without the Base ...................... 35 - 38
WARNING: No infant car seat can guarantee protection from
injury in every possible situation.
However proper use of this infant car seat helps reduce the risk of
serious injury or death.
Section 2 - Warnings
WARNING
3
DEATH or SERIOUS INJURY can occur
Failure to follow the information in these instructions, and on the car
seat labels, can result in injury or death to a child due to the child
striking the vehicle's interior during a sudden stop or crash.
Warnings concerning use with an infant:
Use only with children who weigh between 5 and 22 pounds (2.3 and 10
kg) and whose height is 29 inches or less (74 cm).
Do not use the car seat if the top of the infant's head is above the top of
the car seat backrest.
Snugly adjust car seat harness around infant. Infant MUST be secured
by harness system at all times, both when car seat is used in vehicle,
and when car seat is used outside of vehicle.
Section 2 - Warnings
4
If using the car seat base, secure with the LATCH system if anchorage
points are available in the vehicle, otherwise use one of the vehicle
seat belt systems to secure the base.
If using the car seat without the base, secure with one of the vehicle
belts.
LATCH system straps or vehicle belts MUST stay tightly adjusted
around the car seat at all times.
Secure the base and car seat, or car seat only, to the vehicle even
when not occupied. Unsecured items may injure other occupants in a
crash.
Warnings concerning the car seat:
DO NOT allow any re-use of this car seat after a crash unless crash
and car seat meet ALL condiutions from NHTSA's information on "Reuse after a crash".
For information on re-use after a crash, check the NHTSA website at:
www.nhtsa.gov/people/injury/childps/ChildRestraints/ReUse/
The car seat MUST be installed REAR facing in the vehicle. Serious
injury or death can result if the infant faces forward.
DO NOT use the car seat if it is damaged, has missing parts, or
missing instructions.
Section 3 - Proper Use Check List
WARNING
DEATH or SERIOUS INJURY can occur
WARNING: AIRBAGS
Do not use the car seat in a vehicle front seating location with an
air bag. Child's head and back may be seriously injured when an
inflating air bag hits back of car seat.
Owners of vehicles with front passenger side air bags should refer to
their vehicle ownerís manual for child restraint installation instructions.
.
..
..
..
5
Proper Use is required. Read and understand the instructions and
car seat labels.
Use this infant car seat REAR-facing only.
Snugly adjust harness straps around infant.
Securely install the car seat with LATCH system, or vehicle belt.
Secure the car seat in back seat whenever possible.
Never leave child unattended.
Do not allow anyone (babysitters, relatives etc) to use the car seat
without first reading and understanding all the car seat instructions and
labels.
Section 4 - Assistance
6
NEED HELP?
Contact one of the following sources:
1. your vehicle dealer to locate a child safety seat inspection station in your
area.
2. call 1-866-SEAT CHECK ( 1-866-732-8243).
3. visit www.nhtsa.dot.gov and select "Child Seat Inspections".
4. visit www.seatcheck.org.
5. contact a certified child passenger safety technician in your area. To
locate a certified "Child Passenger Safety" technician in your area visit
www.nhtsa.dot.gov and select "Child Passenger Safety" and then select
"Technician Contact Locator".
Section 5 - Car Seat Parts
Carry Handle
7
Section 5 - Car Seat Parts
Adjustable Headrest
(not all models)
Instruction
Storage Pocket
Harness Buckle
and Tongues
Optional
Rebound Bar (not
all models)
Shoulder Strap
Slots
Canopy
Attachment
Points
Chest Clip
Crotch Pad
Handle
Release Button
Harness Adjuster
Button
Vehicle Lap
Belt Slots
Harness
Adjuster Strap
Stroller Latch
8
Release Handle
for Stroller and
Base
Locking Clip
Storage Position
Headrest
Adjuster Knob
Harness
Connector Plate
Base Latch
Section 5 - Base Parts
9
Recline Foot
Adjustment
Section 5 - Base Parts
Vehicle Belt
Routing Tabs
Recline Foot
retaining catch
(behind flap)
LATCH strap
(stored in pocket
in Recline Foot).
Vehicle Belt
Locking Clip
Car Seat
Latching Points
Level Indicator
Adjustable
Recline Foot
LATCH Strap
Connector
10
LATCH strap
adjuster
LATCH Strap
Connector
Vehicle Belt
Path
Section 6 - Securing Infant in Car Seat
11
Section 6 - Securing Infant in Car Seat
12
OVERVIEW
WARNING
DEATH or SERIOUS INJURY can occur
When the infant is in the car seat, ALWAYS secure with the harness and
adjust the harness to a snug ( not loose) fit.
Child must be dressed in clothing with arms and legs that will not
interfere with buckling, snugly adjusting or positioning harness.
DO NOT use accessories other than those provided by Combi USA Inc.
Use of accessories from other manufacturers may alter the performance
of the car seat.
Never leave infant unattended, even when sleeping.
CAUTION: After reading this page, read the following detailed instructions carefully
Shoulder Straps close to top of
infant's shoulders
Chest Clip at correct height
and fastened
Shoulder Straps snug
fit on infant
Infant's body in
full contact with
car seat
Straps not
twisted
Suffocation Hazard: Infant Car Seat can roll over on soft surfaces and
suffocate child. NEVER place infant car seats on beds, sofas and other
soft surfaces.
Harness Buckle
securely fastened
Strangulation Hazard: Child can strangle in loose harness straps.
NEVER leave child in car seat with straps that are loose or not
connected.
Harness pulled
up to a secure
and firm fit
Fall Hazard: Infant's movement may slide car seat. NEVER place car
seat near edge of table, countertop or other elevated surface.
If infant's head is above top
of car seat, infant is too big
for this car seat.
Infant dressed in
clothes that allow the
harness to pull firmly
on child's body
Use only with children who weigh between 5 and 22 pounds (2.3
and 10 kg) and whose height is 29 inches (74 cm) or less.
Section 6 - Securing Infant in Car Seat
PULL
PRESS
13
Loosen harness by pressing Harness Adjuster
Button and pulling the shoulder straps
outwards.
To open harness press red button on buckle
NOTE: On some models the Harness Adjuster
Button is under the cover, or under a flap.
Section 6 - Securing Infant in Car Seat
14
CORRECT POSITIONING OF THE
SHOULDER STRAPS HEIGHT IS
IMPORTANT.
Non-Adjustable Headrest Models
The shoulder straps must pass through slots in
the car seat backrest that are closest to the top
of the infant's shoulders.
Place infant in car seat with back and rump
contacting seating surfaces.
Adjustable Headrest Models
Note where the top of the infant's shoulders
are located relative to shoulder strap slots.
Adjust the height of the Headrest until you get
a position that is closest to the top of the
infant's shoulders.
Section 6 - Securing Infant in Car Seat
15
Section 6 - Securing Infant in Car Seat
Non-Adjustable Headrest Models
16
Place harness straps over infants shoulders
and thighs, and secure the Harness Buckle.
If the height of the shoulder straps needs
adjusting, turn the car seat over and detach
the straps from the steel connector plate.
Reposition the straps as required and
reattach the straps.
The harness must be a snug (not loose) fit on
the infant.
A snug strap should not allow any slack. It lies
in a relatively straight line without sagging. It
does not press the infant's body into an
unnatural position.
To increase the tension of the harness, pull the
harness adjuster strap
IMPORTANT: Check that the shoulder straps
are securely attached to the connector plate.
Straps must not be twisted!
"CLICK"
IMPORTANT: You should hear a "click" as the
buckle tongues engage.
Section 6 - Securing Infant in Car Seat
Press to release
17
The Chect Clip increases the safety of the
harness by holding the shoulder straps
together.
Position the Harness Tie at arm pit level
Always use the Chest Clip when the Infant is
secured by the harness.
For a small infant a rolled towel can be used
on each side for support. Towels must not
prevent the harness from being adjusted to a
secure fit on the infant.
DO NOT place towel or other items behind
the infant or between the infant and the
harness.
Section 6 - Securing Infant in Car Seat
18
INFANTS WITH SPECIAL NEEDS
A preterm infant or a low birth weight infant may be at special risk traveling reclined
in a vehicle or aircraft. According to the American Academy of Pediatrics, these
infants may be at increased risk of suffering breathing or other difficulties if
improperly reclined or positioned in a car seat.
Have your physician or hospital staff evaluate your infant in this car seat before you
and your infant leave the hospital. If your infant is not able to travel in a reclined
position, DO NOT use this car seat. Use a car bed for your infant.
Section 7 -Installing the Car Seat
WHERE IS THE SAFEST PLACE TO INSTALL THIS CAR SEAT?
Lap/Shoulder Belt
DO NOT place the car seat in front of an airbag
19
Section 7 - Installing the Car Seat
If your car has a lap
only or lap shoulder
seat belt in the
CENTRE of the back
seat, install the car
seat in that position.
The safest place in
the car for your car
seat is in the back
seat.
Otherwise
use the
outside
position
closest to the
side of the
road.
20
Lap/Shoulder Belt
Lap only Belt
Lap/Shoulder Belt
Buckle Tongue
Refer to Vehicle's
Owners Manual for
installation information
Section 7 - Installing the Car Seat
WARNING
!
21
DEATH or SERIOUS INJURY can occur
Section 7 - Installing the Car Seat
22
DO NOT use car seat on vehicle seats that
face the side or the rear of the vehicle.
See page 5 for important information about use of this car seat in a
vehicle with an airbag.
Car seat must be reclined as shown in these instructions, and on the
labels :
- too reclined can result in injury or ejection,
- too upright can result in breathing difficulties.
Never put a car seat in a front vehicle seat unless recommended by the
vehicle owner's manual. The National Highway Traffic Safety
Administration (NHTSA) alert that according to accident statistics,
children up to the age of 12 are safer when properly restrained in a rear
seating position, rather than a front seating position.
The carry handle must be up when the car
seat is used in a vehicle.
Refer to the vehicle owners manual for car seat installation instructions.
After installing car seat into base, lift car seat to ensure it is securely
locked into the base.
DO NOT use car seat in base if it is not securely locked into place.
To rotate the carry handle, press in both
release buttons on the sides of the handle at
the same time, hold them in, and rotate.
Section 7 - Installing the Car Seat
23
Section 7 - Installing the Car Seat Base - General
TWO DIFFERENT METHODS OF
INSTALLING THE CAR SEAT IN THE
VEHICLE.
LATCH symbol
Lap/Shoulder Belt
LATCH.
This is a new system (since 2003) that
provides anchor points specifically intended
for car seats.
Check your vehicles Owners Manual to see if
your vehicle is fitted with LATCH.
The mounting points may also be identified in
your vehicle by the LATCH symbol.
VEHICLE BELTS
Pull flap forward
The car seat may also be installed using a
lap/shoulder belt or a lap only belt.
Lap only Belt
WARNING: Not all vehicle belts are
suitable for a car seat installation. See
Section 11 for more information on
suitable vehicle belts.
Adjust recline foot
24
INSTALLATION USING THE BASE.
Place the vehicle on a level surface.
Decide where in the vehicle the car seat is to
be installed.
Place the car seat base onto the vehicle seat
and adjust the level of the base using the
adjustable recline foot.
Use the level indicator towards the back of the
base as a reference to achieve the correct
level.
In some vehicles it may be necessary to use a
rolled towel or pool noodle under the front of
the base to assist in getting the correct level.
To move the base foot to a new position, pull
the front panel outwards and reposition the
base foot as required.
WARNING: Read the information on page
21 about having the car seat too upright or
too reclined.
If it is not possible to install the base at the
correct angle, try a different position or do
not install in the vehicle.
Section 8 - Installing the Car Seat Base with LATCH
25
Section 8 - Installing the Car Seat Base with LATCH
The LATCH strap is stored in the base foot.
To remove the LATCH strap, swing the base
foot open by adjusting it to the maximum
downwards position and then pressing the
release catch.
LATCH strap stored in
base foot
Remove the LATCH strap from its storage
position.
WARNING:LATCH connectors must be
secured to the vehicle LATCH
anchorages only.
Pull
LATCH
strap
tight
Press down
firmly on base
26
If the LATCH strap is too short, rotate the
LATCH strap adjuster upwards to loosen the
LATCH strap.
Route the LATCH strap under the Vehicle Belt
Routing Tabs and over the top of the base as
shown.
Connect the LATCH strap connectors to the
vehicle anchorages.
Excess vehicle belt can be passed back
under the routing lugs and through the built-in
Locking Clip.
See page 31 for information on using the
built-in Locking Clip.
Press down on the base and pull the
LATCH strap as tight as possible.
WARNING: Never attach more than one
anchor to a vehicle lower anchorage unless
recommended by the vehicle Owners
Manual.
Section 8 - Installing the Car Seat Base with LATCH
27
Section 8 - Installing the Car Seat Base with LATCH
28
Check that the base is securely held.
FITTING THE CAR SEAT INTO THE BASE.
If the base moves easily more than 1"
(25mm) to either side, try another position, or
do not use the car seat in the vehicle.
Before putting the car seat into the base
make sure there are no objects on or in the
base.
"CLICK"
Connect the car seat to the base.
NOTE: listen for a "CLICK" when the car seat
is installed into the base, and lift the car seat
to ensure the car seat is fully conected to the
base.
When installing the base, ensure the bottom
of the base is in contact with the vehicle
seat.
NOTE: See additional information on page
33 about putting extra support under the
front of the base.
To remove the carseat from the base, pull
firmly upwards on the release lever at the rear
of the car seat, and lift the carseat upwards.
WARNING: DO NOT use the car seat if it
is not securely connected to the base.
Section 9 - Installing the Car Seat Base with Vehicle Belts
Pull Belt
tight
Press down
firmly on base
29
LAP ONLY BELT
Select the best position in the vehicle and
position the base at the correct angle. (See
pages 19,20,21 and 24)
Section 9 - Installing the Car Seat Base with Vehicle Belts
Pull Belt
tight
Press down
firmly on base
30
LAP/SHOULDER BELT
Select the best position in the vehicle and
position the base at the correct angle. (See
pages 19,20,21 and 24)
Pass the vehicle Lap belt over the front of the
base threading the belt under the routing
lugs, and through the built-in Locking Clip.
Route the vehicle Lap belt over the front of
the base threading the belt under the routing
lugs, and through the built-in Locking Clip.
Pull the belt tight!
Pull the belt tight!
Excess vehicle belt can be passed back
under the routing lugs and through the builtin Locking Clip.
WARNING: Read the information on page
21 about having the car seat too upright or
too reclined.
If it is not possible to install the base at the
correct angle, try a different position or do
not install in the vehicle.
Shoulder belt
Then pass the shoulder belt back under the
routing lugs and through the Locking Clip.
Maintain the belt tension.
WARNING: Not all vehicle belts are
suitable for a car seat installation. See
Section 11 for more information on
suitable vehicle belts.
Section 9 - Installing the Car Seat Base with Vehicle Belts
Locking Clip
31
Section 9 - Installing the Car Seat Base with Vehicle Belts
32
BUILT-IN LOCKING CLIP
Check that the base is securely held.
Always pass the belt holding the Base
through the Locking Clip even when only one
belt is used, e.g. a LATCH or Lap only belt.
If the base moves easily more than 1"
(25mm) to either side, try another position, or
do not use the car seat in the vehicle.
Using the Locking Clip will improve the overall
performance of the car seat in a crash.
LATCH or Lap Belt
Locking Clip
Lap Belt
Shoulder
Belt
When the Base is secured with a
Lap/Shoulder Belt both the Lap and Shoulder
belts need to pass through the Locking Clip.
When installing the base, ensure the bottom
of the base is in contact with the vehicle
seat.
Section 9 - Installing the Car Seat Base with Vehicle Belts
33
Section 9 - Installing the Car Seat Base with Vehicle Belts
FITTING THE CAR SEAT INTO THE BASE.
Some vehicle seats do not provide enough
support to hold the base up at the required
angle.
If extra support iis required a tightly rolled
towel or a firm foam roll (pool noodle) can be
used.
34
Before putting the car seat into the base
make sure there are no objects on or in the
base.
"CLICK"
Connect the car seat to the base.
NOTE: listen for a "CLICK" when the car seat
is installed into the base, and lift the car seat
to ensure the car seat is fully conected to the
base.
Any extra support used to hold the car seat
up must not interfere with the Vehicle Belts.
To remove the carseat from the base, pull
firmly upwards on the release lever at the rear
of the car seat, and lift the carseat upwards.
WARNING: DO NOT use the car seat if it
is not securely connected to the base.
Section 10 - Installing the Car Seat without the Base
35
Section 10 - Installing the Car Seat without the Base
ADDITIONAL SUPPORT FOR THE CAR
SEAT
Decide where in the vehicle to install the car
seat.
Check that the carseat will sit firmly in that
position.
Some vehicle seats do not provide enough
support to hold the car seat up at the required
angle.
To position the car seat at the correct angle
adjust it until the line on the side labels is
level.
This line must be horizontal
If it is not possible to get the carseat sitting
firmly and level move it to another position in
the vehicle or do not install in that vehicle.
Rolled Towel or similar
This line must be horizontal
If extra support is required a tightly rolled
towel or firm foam roll (pool noodle) can be
used.
Any extra support used to hold the car seat
up must not interfere with the Vehicle Belts.
Some models have a rebound bar for
additional stability in the vehicle. Carseats
having this bar must still be positioned as
shown by the line on the label.
WARNING: Not all vehicle belts are
suitable for a car seat installation. See
Section 11 for more information on
suitable vehicle belts.
36
Vehicle Belts must run in
straight line
SECTION 10 - Installing the Car Seat without the Base
37
38
LAP ONLY BELT
LOCKING CLIP
To install with a Lap only belt pass the belt
from one side of the carseat to the other. Fit
the belt under the lugs in front of the handle.
A Locking Clip is supplied with the car seat
and is stored at the back of the carseat.
Pull the belt tight!
LAP/SHOULDER BELT
To install with a Lap/shoulder belt pass the
Lap belt from one side of the carseat to the
other. Fit the belt under the lugs in front of the
handle.
Fit a Locking Clip to the Lap and Shoulder
belts just above the vehicle belt latch.
Pull the belts tight!
Locking Clip
SECTION 10 - Installing the Car Seat without the Base
NOTE: A Locking Clip MUST be used with a
Lap/Shoulder belt with a tongue that moves
freely along the belt, or with a Lap/shoulder
belt where the Lap portion of the belt cannot
be tightly secured.
To fit the Locking Clip, first fit to the Lap Belt
as shown opposite, then fit the Shoulder Belt
through the Locking Clip over the top of the
Lap belt.
Keep the belts tight!
WARNING: If the Locking Clip is not used
where required, the car seat will not be
held securely in place.
Remove Locking Clip from the vehicle belt
when not in use.
DO NOT use the Locking Clip as a vehicle
belt shortener.
Section 11 Vehicle Belt Systems
WARNING
39
DEATH or SERIOUS INJURY can occur
Section 11 Vehicle Belt Systems
Seat
Bight
Not all vehicle seat belts can be used with a car seat. The car seat must
be held tight at all times by a lap belt (or the lap portion of a lap/shoulder
belt) that will not loosen while driving.
.
.
.
.
.
Follow all instruction labels on vehicle seat belt and car seat.
If the car seat does not stay tightly secured after following instructions:
Belt forward of seat bight
Seat
Bight
Move car seat to another location in the vehicle, or
Contact vehicle dealer for assistance, or
See page 6 of this manual for other sources of aassistance.
BELTS FORWARD OF SEAT BIGHT
Vehicle seat belts located forward of the seat
bight may not hold the car seat securely.
Check vehicle Owners Manual or see
vehicle dealer for car seat installation
instruction.
To provide a secure installation in the vehicle:
Read the Owners Manual regarding car seat installation and vehicle
seat belt use with a car seat,
40
Buckle forward of seat
bight
If seating position is approved for use with
car seat, install car seat and check for
secure installation by pulling car seat front to
back. If car seat slides forward or vehicle
seat belt does not stay tight, DO NOT use
these seat belts.
Section 11 Vehicle Belt Systems
Flipping latch plate
over in some cases
improves locking
41
Section 11 Vehicle Belt Systems
42
LAP BELTS - Manually Adjustable
LAP BELTS - With Retractor
Manually adjustable lap belts normally hold a
car seat tightly. However in some cases the
locking latch plate on some seat belts may slip
and loosen if positioned at a certain angle.
If this happens flip the latch plate over and
rebuckle.
Install car seat and test installation again to
see if lap belt stays tight.
If not, move car seat to another seating
location in the vehicle or do not use in that
vehicle.
Some lap belts with a retractor will not hold a
car seat securely.
Follow these steps to determine if you have a
retractor system that will hold a car seat
securely:
1. Pull belt all the way out.
2. Allow belt to retract about 6 inches (15 cm).
3. Pull out on belt again.
If belt is locked and you cannot pull the belt
out any further, you have an Automatic
Locking Retractor which may be used with a
car seat. Remember, when installing a car
seat, pull the belt all the way out, buckle belt,
then tighten.
If the belt pulls out (step 3) the Retractor is an
Emergency Locking Retractor which must
NOT be used with a car seat.
Section 11 Vehicle Belt Systems
43
Section 11 Vehicle Belt Systems
Combination Lap/Shoulder Belt with Free
Sliding Latch Plate
Pull out on latch plate. If belt slides freely
through latch plate, the Locking Clip
MUST be used .
Some combination lap/shoulder belts with
free sliding latch plates may be converted
into an ìautomatic locking modeî. Always
use the Locking Clip with these belt
systems.
Combination Lap/Shoulder Belt with
Locking Latch Plate
Vehicle seat belts with locking latch plates
normally hold a car seat tightly.
However in some cases, the locking latch
plate on some seat belts may slip and loosen
after being buckled on car seat if positioned
at a certain angle. If this happens, flip the
latch plate over and re-buckle. Test
installation again to see if this works. If not,
move car seat to another seating location.
44
PASSIVE RESTRAINTS
Lap Belt with Motorized Shoulder Belt
DO NOT use with any car seat.
Front Door
PASSIVE RESTRAINTS
Lap or Shoulder belt mounted on Front
Door
DO NOT use a car seat in any front seating
location that has belts mounted to the front
doors. Belts will not stay tight when driving.
Section 12 Accessories
45
INFANT IINSERT
Some models have a canopy with plastic
stays that connect to the car seat.
Some models have a separate infant insert
inside the car seat for greater comfort.
When the canopy is used make sure it is
always connected securely to the car seat.
WARNING: Shoulder straps must pass
through slots in insert.
Failure to do this might result in the shoulder
straps not holding the infant securely.
TO CONNECT:
REBOUND BAR
1. Feed the canopy stay into the mounting.
Some models have a Security Bar that installs
to the front of the car seat. Always follow the
instructions fully and test that the bar is firmly
locked into place once installed.
When removing take care not to bend the
mounting.
2
46
CANOPY
2. Swing the canopy stay inwards until the
stay locks in place.
1
Section 12 Accessories
WARNING
Do not lift or carry car seat by rebound bar
Section 13 Stroller or Travel System and Airplane use
47
STROLLER or TRAVEL SYSTEM
(Also see Travel System Instructions for
further information)
Section 13 Stroller or Travel System and Airplane use
To remove the car seat from the stroller, pull
firmly upwards on the release lever at the rear
of the car seat, and lift the car seat upwards.
This car seat will only fit into certain Combi
stroller models.
To connect the car seat to the stroller hold the
carseat above the mounting points on the
stroller and carefully push downwards.
Listen for the "click" to indicate the car seat is
securely engaged, then pull upwards to test
for secure engagement.
NEVER use the car seat in a stroller if it is not
securely engaged.
"CLICK"
WARNING: Do not use this car seat with other
model strollers unless approved by Combi
USA Inc.
48
This restraint is Certified for Use in motor vehicles and
aircraft.
Contact airline about their policy on use of car seats in their
aircraft.
Use this car seat only on forward facing aircraft seats.
Follow the installation instructions for Lap Belt only when
used on aircraft.
Section 14 Other Uses
49
Section 14 Other Uses
50
ROCKER POSITION
FEEDER POSITION
When the carry handle is back, the car seat
can be used as a rocker.
When the carry handle is fully rotated, the
car seat can be used as a feeder.
WARNING: Adult supervision is required, do
not leave unattended.
WARNING: Adult supervision is required, do
not leave unattended.
DO NOT carry a child in the car seat by
holding the front edge of the car seat and the
handle in the position shown.
WARNING: Car seats are intended for the safe transport of infants.
To securely restrain the infant, their movement is restricted by the
seat and the harness.
Infants should not be left in this position for long periods of time.
Section 15 Care and Cleaning
51
CLEANING COVER
To remove cover first detach shoulder straps by disconnecting the splitter
plate at the rear of the seat.
Then withdraw the shoulder straps and pull them through the cover.
Lift the cover off.
Wash according to the instructions on the back of the cover.
CAUTION: When replacing the cover always check that the shoulder straps
are correctly secured to the splitter plate. See page 15.
CLEANING HARNESS
Surface wash with mild soap and damp cloth.
CLEANING SHELL
Wipe with a mild solution of soap and water. Avoid wetting labels.
CLEANING BUCKLE
Rinse buckle with warm water. DO NOT use household detergents. Never
lubricate buckle.
Additional Information
52
CERTIFICATION
This child restraint comforms to all applicable Federal Motor Vehicle Safety
Standards for use in motor vehicles and aircraft.
WARM WEATHER
Car seat parts can get very hot in the sun or warm weather.
To avoid burns always check before putting the child in the car seat.
VEHICLE SEAT PROTECTION
Protect vehicle seat. Use a thin car seat mat, thin towel or thin blanket
under and the behind car seat.
CAR SEAT USEFUL LIFE
DO NOT use after 7 years from date of manufacture on label.
INSTRUCTION MANUAL STORAGE
Store Instructions in the pocket at the back of the car seat.
Registration Information
53
Child restraints ( car seats) can be recalled for safety reasons. You must
register this restraint to be reached in a recall. Fill out the registration card
attached to the car seat or send your name, address, and the restraint's
model number and manufacturing date to:
Combi USA, Inc.
1962 Highway 160 W., Suite #100
Fort Mill, SC 29708
or call:
Toll Free: 1-800-992-6624(Se habla EspaÒol)
or Fax:
1-803-548-3663
for recall information:
Call the US Governments Auto Safety Hotline at 1-888-327-4236 (TTY: 1800-424-9153),
or go to http://www.NHTSA.gov
Replacement Parts
If you need replacements parts call our customer service department:
Toll Free: 1-800-992-6624 (Se habla EspaÒol)
54