1
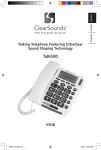
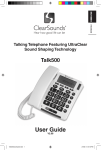
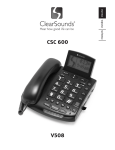
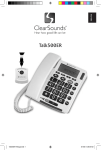
SPANISH ENGLISH
Talking Telephone Featuring UltraClear
Sound Shaping Technology
Talk500
User Guide
V2.08
1 – ENGLISH
Talk500UserGuide.indd 1
2/4/08 5:10:18 PM
Congratulations on your purchase of the Talk500 Phone
from ClearSounds Communications™. Please read
this User Guide carefully in order to get the very best
results from your telephone. Keep the manual near the
telephone for easy reference.
Please visit our web site at www.clearsounds.com to:
Register your product
Download additional manuals and trouble shooting tips
Conditions for use
IMPORTANT SAFETY INSTRUCTIONS
Read and understand the Installation Guide & User Manual. When using your
telephone equipment, basic safety precautions should always be followed
to reduce the risk of fire, electric shock and injury to person, including the
following.
WARNING: The Talk500 phone is capable of amplifying sounds to a loud
volume. It is important to instruct all potential users of its proper operation. It is
advised to adjust the volume control to its minimum level (Low) when not in use
and alert other users that hearing damage can potentially result from misuse.
WARNING: To avoid the possibility of electrical shock, do not use this product
near water (For example, near a bathtub, wash basin, kitchen sink or laundry
tub, in a wet basement or near a swimming pool) while in the bathtub or shower
or when you are wet. If the phone becomes submerged in water, do not attempt
to retrieve it until after you have unplugged the line cord from the modular wall
jack. Do not plug the phone back in until it has dried completely.
WARNING: Avoid using the telephone during electrical storms. There may be
a remote risk of electric shock from lightning. If the electrical storm is present
in your immediate area, possibility of electrical shock exists.
WARNING: Do not use the phone if you suspect a gas leak in the area. The
phone’s electrical contacts could create a spark, which could ignite any heavy
concentration of leaking gas.
WARNING: Do not use liquid cleaners or aerosol cleaners on the telephone.
Use a damp cloth for cleaning.
PLEASE SAVE THESE INSTRUCTIONS
2 – ENGLISH
Talk500UserGuide.indd 2
2/4/08 5:10:19 PM
location of controls
1
12
2
13
3
14
4
5
6
15
16
17
18
7
19
20
21
22
8
9
23
24
10
11
25
1. Telephone Line Jack TEL.LINE 14. LCD Display
2. Hook switch
15.
/ Up & Down Buttons
3. Delete Button
16. Ringer Hi/Mid/Low switch
4. Holder
17. Menu button
5. Dial Button
18. CLIP/Phonebook button
6. Memory Buttons (M1-M3) 19. Tone Hi/Lo switch
7. Speaker
20. Speakerphone Volume Hi/Lo switch
8. Keypad
21. Call Waiting button
9. Handset volume control
22. Voice Mail button
10. Boost LED
23. Redial button
11. Volume Booster
24. Speakerphone button with LED
12. AC Power Jack
25. Ringer LED
13. New Call LED
3 – ENGLISH
Talk500UserGuide.indd 3
2/4/08 5:10:20 PM
FCC WANTS YOU TO KNOW
This equipment complies with Part 68 of the FCC rules and the requirements
adopted by the ACTA. On the bottom of this equipment is a label that contains,
among other information, a product identifier in the format US: AAAEQ##TXXXX.
If requested, this number must be provided to the telephone company. An
applicable certification jacks Universal Service Order Codes (USOC) for
the equipment is provided (i.e., RJ11C) in the packaging with each piece of
approved terminal equipment
The REN is useful to determine the quantity of devices you may connect to
your telephone line and still have all of those devices ring when your telephone
number is called. In most, but not all areas, the sum of the REN’s of all devices
connected to one line should not exceed five (5.0). To be certain of the number
of devices you may connect to your line, as determined by the REN, you should
contact your local telephone company to determine the maximum REN for
your calling area.
If your telephone equipment causes harm to the telephone network, the
telephone company may discontinue your service temporarily. If possible,
they will notify you in advance. But if advance notice isn’t practical, you will
be notified as soon as possible. You will be informed of your right to file a
complaint with the FCC.
Your telephone company may make changes in its facilities, equipment,
operations, or procedures that could affect the proper functioning of your
equipment. If they do, you will be notified in advance to give you an opportunity
to maintain uninterrupted telephone service. If you experience trouble with this
telephone equipment disconnect from the network until the problem has been
corrected or until you are sure that the equipment is not malfunctioning.
This equipment may not be used on coin service provided by the telephone
company. Connection to party lines is subject to state tariffs. This equipment is
hearing aid compatible.
Warning: Changes or modifications to this unit not expressly approved by the
party responsible for compliance could void the user’s authority to operate the
equipment.
Note: This equipment has been tested and found to comply with the limits for
a Class B digital device, pursuant to Part 15 of the FCC Rules. These limits are
designed to provide reasonable protection against harmful interference in a
residential installation. Some cordless telephones operate at frequencies that
may cause interference to nearby TV’s and VCR’s; to minimize or prevent such
interference, the base of the cordless telephone should not be placed near or
on top of a TV or VCR; and, if interference is experienced, moving the cordless
telephone farther away from the TV or VCR will often reduce or eliminate the
interference. However, there is no guarantee that interference will not occur in
a particular installation. If this equipment does cause harmful interference to
4 – ENGLISH
Talk500UserGuide.indd 4
2/4/08 5:10:20 PM
radio or television reception, which can be determined by turning the equipment
off and on, the user is encouraged to try to correct the interference by one or
more of the following measures:
• Reorient or relocate the receiving antenna.
• Increase the separation between the equipment and receiver.
• Connect the equipment into an outlet on a circuit different from that to which
the receiver is connected.
• Consult the dealer or an experienced radio TV technician for help.
INSTALLATION
Installing Batteries
Your telephone requires four AA batteries (not supplied) in case of network
power failure for LCD backup & operations. When appears on the display
or the display dims, replace the batteries with 4 AA fresh ones. Note: Should
you choose not to install batteries - the telephone numbers in memory and the
voice recordings are stored in non-volatile flash memory and will not be lost.
1. Before opening the battery compartment, make sure the telephone is
disconnected from the telephone line and the power supply.
2. Use a flat-blade screwdriver to lift the battery compartment door.
3. Insert 4 AA batteries into the compartment as indicated by the polarity
symbols. Never mix battery types (different chemistries, brands and/or
fresh vs. used).
4. Snap the battery compartment door back into place.
Connecting The Telephone
1. Plug one end of the telephone line cord into the TEL.LINE jack at the back
of the telephone base.
2. Plug the other end of the telephone line cord into the wall outlet.
3. Plug one end of the coil cord into the handset’s modular jack.
4. Plug the other end of the coil cord into the left side of the telephone base.
Connecting The Power Supply
Plug the AC adapter into the AC Power Jack on the back of your phone, then
into an electrical outlet or surge protector, if you are using one. For safety
reasons, use only the AC120v DC9v 200mA adapter provided. Note: The
adapter is required for the telephone to work correctly.
Hanging The Phone On The Wall
1. Mount using an existing wall plate adapter or drill two holes vertically, one
above the other, 83mm apart, and leave the screws protruding from the wall
by 5mm.
2. Press and lift out the handset holder. Remove the hanging peg (located by
the hook switch) by pushing it upwards and snap it into place so it will hold
the handset in place when the phone is mounted on the wall.
3. Insert the mounting bracket’s two tabs into the matching slots opposite the
5 – ENGLISH
Talk500UserGuide.indd 5
2/4/08 5:10:21 PM
keyhole slot on the underside phone’s base. Then press down and slide the
bracket upward until the tabs snap into place.
4. Plug one end of the telephone line cord into the TEL. LINE jack at the back
of the base.
5. Plug the cord’s other end into the wall plate jack, then align the base’s
keyhole slots with the screws and slide the phone downward to secure it.
Setting Up
Setting The Contrast
1. Press the MENU button. The display shows LCD CONTRAST.
2. Press the DIAL button. The display shows the current contrast setting with
values between 1 and 5.
3. Press or to select the contrast level and confirm with DIAL button.
4. The display now shows to ENTER TIME/DATE, you can refer to next section
to set the time and date or press
button to exit the set-up mode.
Note: You can select the desired LCD function by pressing the number key. For
example: You can press MENU button, then press 5 digit, NAME RECORDING
will show.
Setting The TIME And DATE
1. Press and release the MENU button until ENTER TIME/DATE is shown.
2. Press the DIAL button. The display shows ENTER TIME and the hours
digits is flashing.
3. Select the current hour using the or and confirm with DIAL button. The
minutes will now flash in the display.
4. Select the required minutes using the or and confirm with DIAL button.
The display now shows ENTER DATE and the month digit is flashing.
5. Select the current month using the
or
and confirm with DIAL button.
The day will now flash in the display.
6. Select the current day using the or and confirm with DIAL button.
7. Exit the set-up mode using the
button.
Setting The Language
1. Press and release the MENU button until LANGUAGE is shown.
2. Press the DIAL button.
3. Select the current language (English, ItalianO, francAIS and
Espanol) using the or and confirm with DIAL button.
4. Press
button to exit the set-up mode.
6 – ENGLISH
Talk500UserGuide.indd 6
2/4/08 5:10:21 PM
Setting The Voice Prompt YES/NO
The telephone is factory preset with all voice features ON. The volume of the
voice features is regulated through the volume HI/LO slide switch.
If the user does not wish to hear the voice prompts, they can turn off the voice
feature.
1. Press and release the MENU button until VOICE is shown.
2. Press the DIAL button.
3. Using the
or
to select between VOICE ON or OFF and confirm with
DIAL button.
4. Press
button to exit the set-up mode.
Setting Tone /Pulse Dialing Mode
You can select the required dialing type Tone/Pulse.
1. Press and release the MENU button until Tone/Pulse is shown.
2. Press the DIAL button.
3. Select the required dialing type using the
or
and confirm with DIAL
button.
4. Press
button to exit the set-up mode.
Setting Ringer Volume Control
The ringer sound level can be adjusted by sliding the RINGER switch to select
HI, mid and lo level.
The red bright LED will flash with all incoming calls.
Setting The Handset Volume Control
The Boost LED is used to reflect the handset extra volume setting.
1. Press the
button, the Boost LED will turn ON.
2. Increase the handset volume by rotating the
knob to select the listening
level (level 1 to level 9).
3. During the conversation, you may turn OFF the Boost by pressing the
button, the Boost LED will turn OFF and the sound level will return to
normal.
4. When you hang up, the phone will reset to normal sound level.
Note: Choose not to press the
button and the Boost LED will remain OFF. This
is the setting to use for people who do not require the level of amplification and tone
control offered on the phone.
Setting Tone Control (TONE HI/LO)
The Tone control allows you to fit your specific hearing needs, so words are
clearer and easier to understand. Slide the Tone control DOWN to boost
the lower frequency range. Slide the Tone control UP to boost the high
frequency range. Note: The tone control function will not be effective when
the Boost LED is OFF.
7 – ENGLISH
Talk500UserGuide.indd 7
2/4/08 5:10:22 PM
Setting Speaker Volume Control
You can adjust the speaker volume for a more comfortable listening level by
sliding the volume HI/LO switch.
Dialing A Call
1. Pick up the handset or press
button (the speaker LED will light) and wait
for a dial tone.
2. Press the keypad for the telephone number you wish to dial. The display will
show the number that you dialed on the keypad. If you dial a number over
14 digits long, it will show the last 14 digits only.
3. When you have completed your call, hang up the handset or press
button
again to release the telephone line.
It is possible to switch from a handset conversation to a speakerphone
conversation by pressing the
button and picking up or hanging up the
handset accordingly.
Pre-Dialing A Call
1. Dial on the keypad the telephone number. The telephone will voice the digits
dialed (with voice option YES) as well as display them on the LCD. To correct
a number press the DELETE button for each incorrect digit.
2. Either a) pick up the handset, b) press the DIAL button or c) press
button.
Redial
To redial the last number called:
1. Lift the handset or press
button.
2. Press the REDIAL button.
Note: The last number dialed manually (up to 32 digits long) can be redialed.
Pause
You can insert a 3.6 seconds pause into dialing or storing a number into memory
in order to access custom and telebanking services, long distance, etc. Press
REDIAL button at the desired point in number. Press REDIAL button again if
an additional 3.6 seconds is needed.
Receiving A Call
When you receive a call, the telephone rings, the Ringer LED flashes, and the
display shows the CALL# and the caller telephone number (with Caller ID service
activated), and says the name of the caller if the number matches with a name
recorded in the phone book, if not, it will say the numbers of the calling party.
This feature allows you to decide to pick up the phone or not depending on
who is calling.
If you want to talk to the caller:
1. Pick up the handset or press
button to answer the call.
8 – ENGLISH
Talk500UserGuide.indd 8
2/4/08 5:10:22 PM
2. At the end of the call, return the handset to the cradle or press
button again.
Call Waiting
Many special telephone services, such as Call Waiting, require a switch-hook
signal. For example, if you have Call Waiting, you can put a call on hold and
take a second incoming call on the same line by pressing Call Waiting
button. Press Call Waiting again to alternate between the two calls.
Note: If you do not have any special phone services requiring a switch-hook
signal, pressing Call Waiting might disconnect the current calls.
Message Waiting Indicator
If you have Voice Mail Service from your local phone company, when you
are unable to answer a call, the incoming call will be forwarded to a mailbox
where the caller can leave a message. Your Talk500 will display MESSAGE
WAITING if a recorded message has been left. The New Call LED will blink
until the message is retrieved.
Or you can press the DELETE button once, the display shows DELETE ?,
press and hold the DELETE button to turn OFF the New Call LED and the
MESSAGE WAITING message.
Note: Subscription is required to use the Message Waiting services.
Hearing Aid Compatibility
This unit is compatible with inductively coupled hearing aids and cochlear
processors. Adjust your hearing aid’s or processor’s “T-switch” to the “T”
position. Make sure to hold the handset close to your hearing aid or processor.
The Phone Book
Important: When using the phone book features, please note it is only available at
phone book mode ( icon turns on). If the icon is off, press
button once.
Storing numbers in the phone book (Can be stored up to 30 lists)
1. Press and release the MENU button until STORE NUMBER is shown.
2. Press the DIAL button. The cursor will flash in the first position.
3. Enter the required telephone number with a maximum of 22 digits using the
number pad and confirm with DIAL button.
4. Enter the required name with a maximum of 16 letters. The next section will
tell you how to enter names.
5. Confirm with DIAL button. The display now shows NAME RECORDING.
6. To record voice, hold down DIAL button, speak clearly into microphone after
a beep and “VOICE” icon flashing. Release the button when you finished or
the unit will stop recording after 3 seconds. The voice prompt will then be
played automatically.
7. You can repeat step 2 to 6 to enter more numbers or press
button to exit.
Note: When the memory location is full, FULL will displayed.
9 – ENGLISH
Talk500UserGuide.indd 9
2/4/08 5:10:22 PM
How To Enter Names
The number buttons are also inscribed with letters for entering the name.
By repeatedly pressing the appropriate button, upper case letters as well as
numbers and special characters can be entered.
Overview:
Button
1
2
3
4
5
6
7
8
9
*
0
#
Letters/symbols
[Space character] + & - / 1
A........................................................... B
D........................................................... E
G.......................................................... H
J........................................................... K
M.......................................................... N
P........................................................... Q
T........................................................... U
W.......................................................... X
‘............................................................ @
,............................................................ .
$........................................................... _
C
F
I
L
O
R
V
Y
(
:
%
2
3
4
5
6
S
8
Z
)
;
!
7
9
*
? 0
#
Incorrect entries can be deleted with DELETE button. To do this, move the
cursor the correct position using or and then press DELETE button.
To Review The Phonebook Memory
1. Press and release
button, until
icon is shown. (If you have selected
the VOICE feature ON – immediately after pressing and releasing the
button - the phone will announce the mode selected “Phonebook” or “Caller
ID”.
2. Review the stored phone number by pressing
or , or enter the initial
letter of the name of the person you wish to call using the number pad. After
a short time, the display will show the first stored telephone number with
this initial letter, say the name and VOICE icon is shown if it was recorded,
or voice the telephone number. You can now search for further numbers
under this letter by pressing .
Please Note:
• If no telephone number is stored, the display will show EMPTY.
• After you view all the calls in memory, the display will show END OF LIST.
To Dial A Number From The Phonebook
1. With the required telephone number showing on the display (step above),
press DIAL button. The telephone dials out the displayed telephone number
automatically in speakerphone mode.
2. The display shows dialed out telephone number and counting timer.
10 – ENGLISH
Talk500UserGuide.indd 10
2/4/08 5:10:23 PM
-OR1. Pick up the handset or press
button (the speaker LED will light) and wait
for a dial tone.
2. Press and release
button, until icon is shown.
3. Review the stored phone number by pressing or .
4. Press DIAL button.
Recording / Editing / Deleting Voice Prompt Of Name Of
Phonebook
With Caller ID service activated, when an incoming call is received, the unit will
display and announce the caller’s phone number. If the caller’s phone number
is stored in the phonebook, caller’s name will be displayed too.
If the voice prompt is recorded for this phone number, the unit will announce
the voice prompt recorded instead of the caller’s phone number.
1. Press and release the MENU button until the “NAME RECORDING” is
shown.
2. Press the DIAL button. A list of the phone book entries will be display.
3. Press or to select the list you like to record a voice or name for it.
4. To record or edit the voice, hold down DIAL button. Speak clearly into the
microphone after a beep and “VOICE” icon flashing. Release the button
when you are finished or the unit will stop recording after 3 seconds. The
new voice prompt will then be played automatically. Note: To delete the
voice prompt recorded, press DELETE button while the voice prompt is
playing.
5. Repeat step 3 to 4 to edit or delete more entries or exit the set-up mode by
pressing the
button.
To Edit The Phonebook Memory
1. Press and release button, icon is shown.
2. Select the required location from the phone book by pressing or .
3. Press and hold MENU button for two seconds. The display will show
EDIT?.
4. Press DIAL button, the first digit of the selected phone number will flash.
5. You can move the cursor to the required position by pressing
or . To
delete the digit, press DELETE button, or press any numeric key to inset
the digit and confirm with DIAL button. Then the display shows the flashing
first letter of the name.
6. Move the cursor to the required position by pressing
or . To delete
the letter, press DELETE button, or press any numeric key to replace the
name, and confirm with DIAL button, “SAVED!” is shown.
7. You can repeat step 2 to 6 to edit more numbers or press
to exit.
To Delete the Phonebook Memory
11 – ENGLISH
Talk500UserGuide.indd 11
2/4/08 5:10:24 PM
1. Press and release
button, icon is shown.
2. Select the required location from the phone book by pressing or .
3. To delete single memory, press DELETE button once. The display will show
the DELETE?. Press DELETE button for 2 seconds. The telephone number
and name will be deleted and the display will now show another number
from the phone book.
To delete all entire memory, press and hold DELETE button until the display
shows DELETE ALL?. Press DELETE button for 2 seconds until EMPTY
appears on the display.
Storing Numbers In The MEMORY Button
This telephone has 3 One-Touch memories numbered M1, M2 and M3.
Once a number has been stored in a memory location, you only need to
press one button to make the call.
1. Press and release the MENU button until the STORE NUMBER is shown.
2. Press the DIAL button. The cursor will flash in the first position.
3. Enter the required telephone number with a maximum of 22 digits using the
number pad and confirm with DIAL button.
4. Press the memory button (M1, M2 and M3). The number has now been
saved and display shows SAVED!.
Dialing Using The Memory Buttons
1. Lift the handset or press
button and wait for a dial tone.
2. Select the required memory location (M1- M3) by pressing the corresponding
button.
-OR1. Pressing the corresponding button.
2. Lift the handset, press the DIAL button or press
button, the number will
dial out automatically.
Voice Mail
You can store your VOICE MAIL box telephone number for easy dailing
1. Press and release the MENU button until the STORE NUMBER is shown.
2. Press the DIAL button. The cursor will flash in the first position.
3. Enter the required telephone number with a maximum of 22 digits using the
number pad and confirm with DIAL button.
4. Press the memory button VOICE MAIL. The number has now been saved
and display show SAVED!.
To access your message(s):
1. Press the VOICE MAIL button. Your call will be put through to the mailbox
and your message(s) played back to you.
2. Replace the handset to end the call.
Note: Subscription is required to use the Voice Mail service.
12 – ENGLISH
Talk500UserGuide.indd 12
2/4/08 5:10:24 PM
The Caller ID
NOTE: In order to utilize the Caller ID features, you must subscribe to Caller
ID service through your local phone company. There are fees for Caller ID
services, and it may not be available in all areas. This product can provide
information only if both you and the caller are in areas offering Caller ID
service, and if both telephone companies use compatible equipment.
Important: When using the Caller ID features, please note it is only available
at Caller ID mode (CLIP icon turns on). If the CLIP icon is off, press
button
once.
Receiving a Call (Can be stored up to 64 calls)
• If an incorrect, invalid or incomplete Caller ID signal is received, the display
shows NO NUMBER.
• If only the caller’s phone number is received, the display shows the caller’s
phone number with the time and date it was received. The NEW icon turns
on and NEW CALL LED blinks.
• If both the caller’s name and phone number are received, the display shows
the caller’s name and phone number, with the time and date it was received.
The “NEW” icon turns on and NEW CALL LED blinks. Note: If the caller’s
name has more than 16 characters, only the first 16 characters will be
displayed.
• Your unit displays incoming call waiting Caller ID information while you are
on another call. If you receive a call while the display shows the CALL
WAITING icon. Note: The Call Waiting information will be disappear 20
seconds after you review it.
• If the name and number are not available due to the caller’s restriction, the
display shows PRIVATE with the time and date received. The NEW icon
turns on and NEW CALL LED blinks.
• If the name and number are not available, the display will show OUT OF
AREA with the call’s time and date. The NEW icon turns on and NEW CALL
LED blinks.
• If a long distance call message is received, the display will show LONG
DISTANCE with the call’s time and date. The NEW icon turns on and NEW
CALL LED blinks.
Please Note:
1. If the Caller ID memory is full, the oldest data will be removed on a first-in/
first-out basis.
2. If the Caller ID information received duplicates another call in memory, the
time/date will be updated and the REPEAT icon will be lit.
3. If no key is pressed within 20 seconds, the display will display the total call
counter, new call counter, current time and date.
13 – ENGLISH
Talk500UserGuide.indd 13
2/4/08 5:10:24 PM
View the Caller ID Memory
Press
to review more recent calls. The CALL# will decrease.
After you view the most recent data in memory, the display will show END OF LIST.
Press
to review older calls. The CALL# will increase.
After you view the oldest data in memory, the display will show END OF LIST.
If the data in memory is being reviewed for the first time, the NEW icon will be lit.
The NEW CALL LED will turn off if you review the data.
If no key is pressed within 20 seconds, the display will display the total call
counter, new call counter, current time and date.
Erase The Caller ID Memory
1. Select the required Caller ID memory location by using the or button.
2.To delete single memory, press DELETE button once. The display will show
the DELETE?. Press DELETE button for 2 seconds. The data for that call
will be erased, and the CALL# and Caller ID information will be updated.
-OR-
To delete all entire memory, press and hold DELETE button until the display
shows DELETE ALL?. Press DELETE for 2 seconds until NO CALLS
appears on the display. Both the total call and new call counters will become
zero, and the current time and date will be displayed.
Call Back (Redial) From The Caller ID Memory
With the handset hung up on the base.
1. Select the required Caller ID memory location by pressing or .
2. Press DIAL button, the speakerphone will on automatically and dial the
selected number.
-ORLift the handset or press the
button, select the required Caller ID memory
location by pressing or , then press DIAL button.
Note: If the Caller ID number is 10 digits, press DIAL button once, the unit will
insert “1” before the Caller ID number automatically. You can press
button
to select insert “1” or not. Press DIAL again, the speakerphone will turn on
automatically and dial the display number.
14 – ENGLISH
Talk500UserGuide.indd 14
2/4/08 5:10:24 PM
Copy From The Caller ID To The Phonebook
You can copy Caller ID information to the phone book while you are reviewing
the Caller ID information.
1. Select the required Caller ID memory location by pressing or .
2. Press and hold MENU button for two seconds, display will show COPY TO
MEMORY.
3. Press DIAL button, display will show SAVED!.
TROUBLESHOOTING GUIDE
No dial tone
1. Check that all phone cord connections (including the curly cord) and AC
Adapter are securely plugged into the telephone & wall jack.
2. Check that the phone is in the correct dialing mode, Touch-Tone / Pulse
Setting.
3. Plug another phone into the jack to make sure your phone service is
functioning properly.
Call will not dial or dials very slowly
1. Check that the phone is in the correct dialing mode, Touch-Tone / Pulse
Setting
No audible ringer
1. You may have too many extensions on your line. Try unplugging a few devices.
Having too many telephones /accessories can also create problems such
as low ringer volume or impaired quality during calls.
No amplification
1. Check to see if the
amplify button is “ON”. The red light should be lit.
2. Check the AC Power Adapter and make sure it is plugged into the wall and
into the appropriate jack on the phone.
Noise, Static, Interference while using the handset
1. A filter may be required for homes with DSL line or near Radio towers.
There is a red light that continues to flash
1. You have un-reviewed Caller ID / Call Waiting information or missed a call.
Caller ID information does not show
1. Make sure you are subscribed to Caller ID through your local phone
company.
No Caller ID information while on a call
1. Make sure your service provides Caller ID Information while you are on a call.
This is sometimes known as “Caller ID on Call Waiting” or “Type II Caller ID”.
2. The phone cannot display the information if another phone on the same line
is in use. Make sure all extensions are on hook.
Cannot dial out of Caller ID
1. Make sure your area code is set up properly
15 – ENGLISH
Talk500UserGuide.indd 15
2/4/08 5:10:24 PM
warranty & service
ClearSounds Communications™ warrants the Talk500 Phone against any
defect in materials or workmanship for the period of one year from the date
of purchase. Should you experience a problem, contact our customer service
department or visit our website at www.clearsounds.com
Be sure to save your sales receipt as proof of purchase date should you need warranty
service.
Within a period of one year from purchase date, ClearSounds Communications™
will repair or replace (our discretion) your Talk500 phone, if a defect in materials or
workmanship is found. If we elect to replace your phone, we may replace it with a new
or reconditioned product of the same or similar design. Repair or replacement will be
warranted for a period of 90 days or the original time the original warranty, whichever
is longer.
The warranty does not cover accidents, negligence or breakage to any parts. This
includes shipping damage, failure to follow instructions, misuse, fire, floods, use of
incompatible accessories, Acts of God or failure in your phone service carrier’s line
service. The product must not be tampered with or taken apart by anyone who is not an
authorized ClearSounds Communications™ representative. Tampering with the phone
will void any written or implied warranties.
ClearSounds Communications™ shall not be responsible for loss of time, inconvenience,
loss of use of your Talk500 phone, property damage by your Talk500 or any other or
consequential damages.
Warranty service is available only with proof of purchase.
IMPORTANT: YOUR RECEIPT IS PART OF YOUR WARRANTY AND MUST BE
RETAINED AND PRODUCED IN THE EVENT OF A WARRANTY CLAIM.
Shipping cost must be prepaid and the product must be packaged appropriately
for shipping.
Service in United States
ClearSounds Communications
Attention: Repair Center
8160 S Madison Street
Service in CANADA
ClearSounds Canada
Attention: Repair Center
220 Donaghy Ave
Burr Ridge, IL 60527
USA
800-965-9043
North Vancouver, BC
CANADA V7P 2L5
604-980-6686
For Product Support and help visit our website at
www.clearsounds.com
e-mail: [email protected]
Telephone: 800-965-9043 - Spanish: 888-758-6056 - TTY: 888-814-5359 - Fax: 888-654-9219
16 – ENGLISH
Talk500UserGuide.indd 16
2/4/08 5:10:25 PM
SPANISH ENGLISH
Teléfono parlante con tecnología de
modelado sonido UltraClear
Talk500
Manual del usuario
V2.08
1 – SPANISH
Talk500UserGuide.indd 1
2/4/08 5:10:25 PM
Felicitaciones por la compra de su teléfono Talk500 de ClearSounds
Communications™. Para aprovechar al máximo todas las funcionalidades
de su teléfono, le recomendamos leer detenidamente este manual de
uso. Tenga el manual cerca del teléfono para consultarlo en cualquier
momento.
En nuestro sitio de la red www.clearsounds.com usted podrá:
Registrar su producto
Descargar manuales complementarios y consejos para la identificación de
problemas
Condiciones de uso
INSTRUCCIONES DE SEGURIDAD IMPORTANTES
Lea y entienda el contenido de esta guía de instalación y manual de uso. Al utilizar
el teléfono, siempre tome las precauciones de seguridad mínimas, como las que se
indican a continuación, para reducir el riesgo de incendio, descargas eléctricas y
lesiones personales.
ADVERTENCIA: El teléfono Talk500 puede amplificar el volumen del sonido. Es
importante que todos los posibles usuarios conozcan cómo manejar este aparato
correctamente. Se recomienda poner el volumen del teléfono en el nivel mínimo
(Low) cuando el aparato no esté en uso y advertir a los demás usuarios que su uso
inadecuado podría provocar lesiones auditivas.
ADVERTENCIA: Para evitar posibles descargas eléctricas, no utilice el aparato cerca
de agua (por ejemplo, en las proximidades de una tina de baño, lavatorio, lavadero o
tina de lavar ropa, en un sótano con humedad o cerca de una piscina), al bañarse en
tina o ducha o cuando su cuerpo esté mojado. Si el teléfono cae dentro del agua, no
trate de recuperarlo mientras no halla desconectado su cable de la roseta teléfonica.
No vuelva a conectar el teléfono mientras no halla secado por completo.
ADVERTENCIA: Trate de no ultilizar el teléfono durante tormentas eléctricas. Existe la
remota posibilidad de que algún rayo o relámpago provoque una descarga eléctrica.
Si hay tormenta eléctrica en la zona donde usted se encuentra, entonces existe la
probabilidad de que se produzca una descarga eléctrica.
ADVERTENCIA: No utilice el teléfono si sospecha que hay un escape de gas en el
área donde usted se encuentra. Los contactos eléctricos del teléfono podrían generar
una chispa que, a su vez, podría hacer arder alguna concentración fuerte del gas de
escape.
ADVERTENCIA: No aplique al teléfono limpiadores líquidos o en aerosol. Límpielo con
un trapo húmedo.
GUARDE ESTAS INSTRUCCIONES
2 – SPANISH
Talk500UserGuide.indd 2
2/4/08 5:10:25 PM
Ubicación de los controles
1
12
2
13
3
14
4
5
6
15
16
17
18
7
19
20
21
22
8
9
23
24
10
11
25
1. Conector de línea telefónica
14. Pantalla LCD
2. Gancho conmutador
15. Teclas /
3. Tecla Delete (Borrar)
16. Interruptor de timbre Alto/Medio/Bajo
4. Soporte
17. Tecla Menu (Menú)
5. Tecla Dial (Marcar)
18. Tecla CLIP/Phonebook (Agenda telefónica)
6. Teclas de memoria (M1-M3) 19. Interruptor de tono Alto/Bajo
7. Altavoz
20. Interruptor de volumen Alto/Bajo
8. Teclado
21. Tecla Call Waiting (Llamada en espera)
9. Control de volumen del auricular
22. Tecla Voice Mail (Buzón de voz)
10.LED de aumento
23. Tecla Redial (Volver a marcar)
11.Intensificador de volumen
24. Tecla de altavoz del teléfono con LED
12.Conector de alimentación
25. LED de timbre
13.LED de llamada nueva
3 – SPANISH
Talk500UserGuide.indd 3
2/4/08 5:10:26 PM
LA FCC INFORMA
Este equipo cumple con la Sección 68 de los reglamentos de la FCC y con los
requisitos adoptados por ACTA. En la parte inferior de este equipo se encuentra una
etiqueta que contiene, entre otra información, el identificador del producto en el formato
US: AAAEQ##TXXXX. Si se solicita, se debe suministrar este número a la compañía
telefónica. En el empaque se suministra un conector de certificación aplicable del
código de orden de servicio universal (USOC) para el equipo (es decir, RJ11C) con
cada pieza de equipo terminal aprobada
El REN es útil para determinar la cantidad de dispositivos que se puede conectar a
su línea telefónica sin perder el timbrado de aquellos dispositivos cuando llamen a su
número telefónico. En la mayoría de las áreas, pero no en todas, la suma de los REN
de todos los dispositivos conectados a una línea no debe ser superior a cinco (5.0).
Para estar seguro de la cantidad de dispositivos que puede conectar a su línea, según
lo determinado por REN, debe comunicarse con su compañía telefónica local para
determinar el REN máximo para su área de llamadas.
Si su equipo telefónico causa daño a la red telefónica, es posible que la compañía
telefónica descontinúe su servicio temporalmente. Si es posible, le notificarán por
adelantado. Pero si el aviso por adelantado resulta no ser práctico, se le avisará lo antes
posible. Se le informará acerca de su derecho de presentar un reclamo ante la FCC.
Es posible que su compañía telefónica efectúe modificaciones en sus instalaciones,
equipos, operaciones o procedimientos que puedan afectar el funcionamiento adecuado
de su equipo. Si así ocurre, se le notificará por adelantado para darle la oportunidad
de mantener el servicio telefónico ininterrumpido. Si experimenta problemas con este
equipo telefónico, desconéctelo de la red hasta que el problema se haya corregido o
hasta que esté seguro de que el equipo no presenta problemas.
Este equipo no debe usarse con un servicio en base a monedas proporcionado por la
compañía telefónica. La conexión a líneas telefónicas compartidas está sujeta a tarifas
estatales. Este equipo es compatible con aparatos auditivos.
Advertencia: Los cambios o modificaciones a esta unidad no aprobados expresamente
por la parte responsable del cumplimiento, podrían invalidar la autoridad del usuario
de operar este equipo.
NOTA: Este equipo ha sido probado y cumple con los límites para un aparato digital
Clase B, en conformidad con la Sección 15 de los reglamentos de la FCC. El propósito
de estos límites es de proporcionar una protección razonable contra toda interferencia
perjudicial en una instalación residencial. Algunos teléfonos inalámbricos operan en
frecuencias que pueden causar interferencia si se encuentran cerca de televisores
o videograbadoras; para minimizar o evitar dicha interferencia, la base del teléfono
inalámbrico no se debe colocar cerca ni sobre un televisor o una videograbadora; además,
si hay interferencia, alejar el teléfono inalámbrico del televisor o la videograbadora
reducirá o eliminará la interferencia. No obstante, no existe garantía alguna de que
no se producirá interferencia en una instalación en particular. En caso de que este
equipo provocara interferencia perjudicial en la recepción de radio o televisión, lo que
se puede determinar al apagar y encender el equipo, se recomienda al usuario que
trate de corregir la interferencia utilizando una o más de las siguientes medidas:
• volver a orientar o ubicar la antena receptora.
• aumentar la separación entre el equipo y el receptor.
4 – SPANISH
Talk500UserGuide.indd 4
2/4/08 5:10:26 PM
• conectar el equipo a una salida en un circuito distinto al circuito al que está
conectado el receptor.
• consultar con el distribuidor o con un técnico experimentado en radio/TV para
recibir ayuda.
INSTALACIÓN
Conexión a la fuente de energía principal
Inserte el conector de la fuente de energía en la toma de alimentación de la parte
posterior del teléfono y conecte la fuente de energía a un tomacorriente correctamente
instalado. Por motivos de seguridad, sólo use la fuente de energía AC120v DC9v
200mA proporcionada. Conecte el adaptador al tomacorriente que se encuentra cerca
del equipo y al cual es fácil acceder.
Conexión del teléfono
1. Conecte un extremo del cable del teléfono al enchufe TEL.LINE (Línea telefónica) en
la parte posterior de la base del aparato.
2. Conecte el otro extremo del cable del teléfono al tomacorriente de la pared.
3. Conecte un extremo del cable de bobina al enchufe modular del auricular.
4. Conecte el otro extremo del cable de bobina al costado izquierdo de la base del
teléfono.
Instalación de las baterías
El teléfono usa cuatro baterías AA (DOBLE A, no suministradas) para reserva. Los
números telefónicos de la memoria y las grabaciones de voz se guardan en una
memoria “flash” no volátil que no requiere reserva de batería. Cuando aparezca un
símbolo como éste en la pantalla o ésta se atenúe, reemplace las baterías por 4
baterías AA (DOBLE A) nuevas.
Antes de abrir el compartimiento de las baterías, asegúrese de que el teléfono esté
desconectado de la línea telefónica y de la fuente de energía principal.
1. Use un destornillador plano para levantar la tapa del compartimiento de las
baterías.
2. Inserte cuatro baterías AA (DOBLE A) en el compartimiento siguiendo los símbolos
de polaridad que aparecen en éste.
3. Vuelva a colocar la tapa del compartimiento de las baterías.
Colocación del teléfono sobre la pared
1. Taladre dos orificios en forma vertical, uno sobre el otro, con 83 mm de separación
y deje que los tornillos sobresalgan de la pared unos 5 mm.
2. Presione y levante el soporte del auricular. Retire la punta colgante (ubicada cerca
del gancho conmutador) empujándola hacia arriba y colóquela en su lugar para que
sostenga el auricular cuando el teléfono esté montado sobre la pared.
3. Inserte las dos pestañas de las abrazaderas de montaje en las ranuras coincidentes
opuestas a la ranura del orificio de alineación debajo de la base del teléfono.
Presione y deslice la abrazadera hacia arriba hasta que las pestañas encajen.
4. Conecte un extremo del cable del teléfono al enchufe TEL.LINE (Línea telefónica)
en la parte posterior de la base del aparato.
5. Conecte el otro extremo del cable al enchufe de la pared y alinie las ranuras del
orificio de alineación de la base con los tornillos y deslice el teléfono hacia abajo
para asegurarlo.
5 – SPANISH
Talk500UserGuide.indd 5
2/4/08 5:10:26 PM
Configuración
Configuración del contraste de la pantalla
1. Presione la tecla MENU. La pantalla muestra LCD CONTRAST.
2. Presione la tecla DIAL. La pantalla muestra la configuración de contraste actual con
valores entre 1 y 5.
3. Presione
o
para seleccionar el nivel de contraste y confirme con la tecla
DIAL.
4. La pantalla muestra ahora ENTER TIME/DATE (Ingresar Fecha/Hora); puede
consultar la siguiente sección para configurar la hora y la fecha o presione la tecla
con éste símbolo
para salir del modo de configuración.
Nota: puede seleccionar la ubicación deseada de la pantalla de cristal líquido
presionando la tecla numérica. Por ejemplo: puede presionar la tecla MENU y luego
presionar el número 5, después de lo cual aparecerá NAME RECORDING (Grabación
del nombre).
Configuración de FECHA y HORA
1. Presione y suelte la tecla MENU hasta que aparezca ENTER TIME/DATE.
2. Presione la tecla DIAL. La pantalla muestra ENTER TIME (Ingresar hora) y los
dígitos de las horas parpadean.
3. Seleccione la hora actual con o y confirme con la tecla DIAL. Ahora parpadearán
los minutos en la pantalla.
4. Seleccione los minutos requeridos con
o y confirme con la tecla DIAL. Ahora
la pantalla muestra ENTER DATE (Ingresar fecha) y el dígito del mes parpadea.
5. Seleccione el mes actual con o y confirme con la tecla DIAL. Ahora parpadeará
el día en la pantalla.
6. Seleccione el día actual con
o y confirme con la tecla DIAL.
7. Salga del modo de configuración presionando la tecla con éste símbolo .
Configuración del idioma
1. Presione y suelte la tecla MENU hasta que aparezca LANGUAGE (Idioma).
2. Presione la tecla DIAL.
3. Seleccione el idioma actual (inglés, italiano, francés y español) con
y confirme con la tecla DIAL.
4. Presione la tecla con éste símbolo
para salir del modo de configuración.
o
Configuración de la indicación de voz
El teléfono está predeterminado de fábrica con todas las funciones de voz activadas.
El volumen de estas funciones se regula a través del interruptor deslizante volume
HI/LO.
Si el usuario no desea escuchar las indicaciones de voz, puede desactivar esta
función.
1. Presione y suelte la tecla MENU hasta que aparezca VOICE (Voz).
2. Presione la tecla DIAL.
3. Use o para seleccionar entre VOICE ON (Voz activada) u OFF (Voz desactivada)
y confirme con la tecla DIAL.
4. Presione la tecla con éste símbolo
para salir del modo de configuración.
6 – SPANISH
Talk500UserGuide.indd 6
2/4/08 5:10:27 PM
Configuración de Tono/Pulso
Puede seleccionar el tipo de marcado necesario: Tono o Pulso.
1. Presione y suelte la tecla MENU hasta que aparezca Tone/Pulse (Tono/Pulso).
2. Presione la tecla DIAL.
3. Seleccione el tipo de marcado necesario con
o y confirme con la tecla DIAL.
Control de volumen del timbre
El nivel de sonido del timbre se puede ajustar deslizando el interruptor RINGER
(Timbre) para seleccionar HI, Mid y Lo.
El LED de color rojo brillante parpadeará con todas las llamadas entrantes.
Control de volumen del receptor
El LED de aumento se usa para reflejar la configuración de volumen del receptor.
Presione la tecla
; el LED de aumento se encenderá; luego aumente el volumen del
receptor girando la perilla
para seleccionar el nivel de escucha (nivel 1 al 9). El LED de
aumento se apagará cuando el volumen del receptor se configure en el nivel mínimo.
Ajuste del tono de recepción
También puede usar el interruptor deslizante TONE HI/LO para aumentar el volumen de
recepción de los sonidos de alta frecuencia de acuerdo con sus propios requisitos de
escucha, de modo que las palabras sean más claras y fáciles de comprender. Nota: la
función de ajuste del tono no se verá afectada cuando el LED de aumento esté apagado.
FUNCIONAMIENTO DEL TELÉFONO
Marcar una llamada
1. Levante al auricular o presione la tecla
(el LED del altavoz se iluminará) y espere
el tono de marcado.
2. Presione el teclado para marcar el número telefónico al cual desea llamar. La
pantalla mostrará el número marcado en el teclado. Si marca un número de más de
14 dígitos, en la pantalla sólo se verán los últimos 14 dígitos.
3. Cuando haya finalizado su llamada, cuelgue el auricular o presione la tecla
liberar la línea telefónica.
para
Es posible cambiar de una conversación de auricular a una conversación de altavoz
presionando la tecla
y levantando o colgando el auricular, según corresponda.
Marcado previo de una llamada
1. Marque el número telefónico en el teclado. El teléfono pronunciará los dígitos
marcados (con la opción de voz en YES). Para corregir un número, presione la tecla
DELETE para cada dígito incorrecto
2. Levante el auricular, presione la tecla DIAL o la tecla
.
Recepción de una llamada
Cuando recibe una llamada, el teléfono timbra, el LED de timbre parpadea y la pantalla
muestra el número de llamada y el número telefónico de la persona que llama (con un
servicio de identificación de llamadas activado) y pronuncia el nombre de la persona
que llama si el número coincide con alguno de los nombres grabados en la agenda
7 – SPANISH
Talk500UserGuide.indd 7
2/4/08 5:10:27 PM
telefónica; si eso no es así, pronuncia los números de la llamada entrante.
Esta función le permite decidir si desea contestar o no la llamada dependiendo de
quien llame.
Si desea hablar con la persona que llama:
1. Levante el auricular o presione la tecla
para atender la llamada.
2. Al finalizar la llamada, devuelva el auricular a su posición o vuelva a presionar la tecla
.
Control de volumen del altavoz
Es posible ajustar el volumen del altavoz para obtener un nivel de escucha
más cómodo deslizando el interruptor de volumen HI/LO.
Volver a marcar
Para volver a marcar el último número al que se llamó:
1. Levante el auricular o presione la tecla
2. Presione la tecla REDIAL.
.
Nota: es posible volver a marcar el último número que se marcó manualmente
(de hasta 32 dígitos de largo).
Colocar en pausa
Es posible insertar una pausa de 3.6 segundos para marcar o almacenar un número en
la memoria a fin de acceder a servicios personalizados y de operaciones bancarias en
línea, llamadas de larga distancia, etc. Presione la tecla REDIAL en el punto deseado del
número. Presione la tecla REDIAL si se necesita una pausa adicional de 3.6 segundos.
Llamada en espera
Varios servicios telefónicos especiales, como la llamada en espera, requieren una
señal de gancho conmutador.
Por ejemplo, si tiene una llamada en espera, puede colocar una llamada en espera
y tomar una segunda llamada entrante en la misma línea al presionar la tecla Call
Waiting. Vuelva a presionar Call Waiting para alternar entre las dos llamadas.
Nota: si no tiene servicios telefónicos especiales que requieran una señal de gancho
conmutador, es posible que al presionar Call Waiting se desconecte la llamada actual.
Indicador de mensaje en espera
Cuando no pueda atender una llamada, la llamada entrante se enviará a un
buzón de voz donde la persona que llama puede dejar un mensaje. El LED de
llamada nueva parpadeará y la pantalla mostrará MESSAGE WAITING (Mensaje
en espera) para avisarle que tiene un mensaje almacenado para escuchar.
El LED de llamada nueva y el mensaje MESSAGE WAITING desaparecerán
después de recibir la siguiente llamada.
También puede presionar la tecla DELETE una vez, para que la pantalla
muestre DELETE ? (¿Borrar?), mantenga presionada la tecla DELETE para
apagar el LED de llamada nueva y el mensaje MESSAGE WAITING.
Nota: es necesario contar con una suscripción para usar los servicios de
mensaje en espera.
8 – SPANISH
Talk500UserGuide.indd 8
2/4/08 5:10:27 PM
Compatibilidad con aparatos auditivos
Esta unidad es compatible con aparatos auditivos con acoplamiento inductivo.
Agenda telefónica
Importante: cuando use las funciones de la agenda telefónica, observe que
sólo está disponible en el modo de agenda telefónica (el icono se activa). Si
el icono está desactivado, presione la tecla
una vez.
Almacenamiento de números en la agenda telefónica (es
posible almacenar hasta 30 listas)
1. Presione y suelte la tecla MENU hasta que aparezca STORE NUMBER
(Almacenar número).
2. Presione la tecla DIAL. El cursor parpadeará en la primera posición.
3. Ingrese el número telefónico requerido con un máximo de 22 dígitos usando
el teclado numérico y confírmelo con la tecla DIAL.
4. Ingrese el nombre requerido con un máximo de 16 letras. La siguiente
sección le indicará cómo ingresar nombres.
5. Presione la tecla DIAL. La pantalla muestra NAME RECORDING.
6. Para grabar su voz, mantenga presionada la tecla DIAL, hable claro en
el micrófono después de escuchar un tono y de ver el icono “VOICE”
parpadeando. Suelte la tecla cuando termine o la unidad dejará de
grabar después de 3 segundos. Luego, el mensaje de voz se reproducirá
automáticamente.
7. Puede repetir los pasos 2 al 6 para ingresar más números o presione la
tecla
para salir.
Nota: cuando la ubicación de memoria esté llena, FULL aparecerá en la pantalla.
Cómo ingresar nombres
Las teclas numéricas también tienen letras inscritas para el ingreso de nombres.
Al presionar la tecla adecuada en forma repetida, es posible ingresar letras en
mayúscula, al igual que números y caracteres especiales.
Descripción general:
Tecla
1
2
3
4
5
6
7
8
9
*
0
#
Letras/símbolos
[Carácter de espacio] + & - / 1
A........................................................... B
D........................................................... E
G.......................................................... H
J........................................................... K
M.......................................................... N
P........................................................... Q
T........................................................... U
W.......................................................... X
‘............................................................ @
,............................................................ .
$........................................................... _
C
F
I
L
O
R
V
Y
(
:
%
2
3
4
5
6
S
8
Z
)
;
!
7
9
*
? 0
#
9 – SPANISH
Talk500UserGuide.indd 9
2/4/08 5:10:27 PM
Las entradas incorrectas se pueden eliminar con la tecla DELETE. Para
hacerlo, mueva el cursor a la posición correcta con o y presione la tecla
DELETE.
Para revisar la memoria de la agenda telefónica
1. Presione y suelte la tecla
hasta que aparezca el icono .
2. Revise el número telefónico almacenado al presionar
o
o ingrese
la letra inicial del nombre de la persona a la que desea llamar usando el
teclado numérico. Luego de un período breve, la pantalla mostrará el primer
número telefónico almacenado con esta letra inicial, pronunciará el nombre y
aparecerá el icono VOICE, si fue grabado, o pronunciará el número telefónico.
Puede buscar más números bajo esta letra presionando .
Notas:
• Si no hay números telefónicos almacenados, la pantalla mostrará EMPTY
(Vacía).
• Después de ver todas las llamadas en memoria, la pantalla mostrará END
OF LIST (Fin de la lista).
Para marcar el número telefónico mostrado de la memoria
de la agenda telefónica:
1. Con el número telefónico requerido en pantalla, presione la tecla DIAL.
El teléfono disca el número telefónico en pantalla automáticamente en el
modo de altavoz del teléfono.
2. La pantalla muestra el número telefónico marcado y el temporizador de conteo.
O BIEN
1. Levante al auricular o presione la tecla (el LED del altavoz se iluminará)
y espere el tono de marcado.
2. Presione y suelte la tecla
hasta que aparezca el icono .
3. Revise el número telefónico almacenado al presionar o .
4. Presione la tecla DIAL.
Grabación / Edición / Eliminación de la indicación de voz de
los nombres de la agenda telefónica
Con el servicio de identificación de llamadas activado, cuando se recibe
una llamada entrante, la unidad mostrará y anunciará el número telefónico
de la persona que llama. Si el número telefónico de la persona que llama
está almacenado en la agenda telefónica, también aparecerá el nombre de la
persona que llama.
Si la indicación de voz se graba para este teléfono, la unidad anunciará la indicación
de voz grabada en lugar del número telefónico de la persona que llama.
1. Presione y suelte la tecla MENU hasta que aparezca “NAME
RECORDING”.
2. Presione la tecla DIAL. Aparecerá una lista de las entradas de la agenda
telefónica.
10 – SPANISH
Talk500UserGuide.indd 10
2/4/08 5:10:28 PM
3. Presione
o
para seleccionar la lista para la cual desea grabar un
mensaje o nombre.
4. Para grabar o editar su voz, mantenga presionada la tecla DIAL, hable
claro en el micrófono luego de escuchar un tono y de ver el icono “VOICE”
parpadeando. Suelte la tecla cuando termine o la unidad dejará de
grabar después de 3 segundos. El nuevo mensaje de voz se reproducirá
automáticamente.
Nota: para eliminar el mensaje de voz grabado, presione la tecla DELETE
durante la reproducción del mensaje de voz.
5. Repita los pasos 3 al 4 para editar o eliminar más entradas o salga del
modo de configuración presionando la tecla .
Para editar la memoria de la agenda telefónica
1. Presione y suelte la tecla
hasta que aparezca el icono .
2. Seleccione la ubicación requerida desde la agenda telefónica presionando
o .
3. Mantenga presionada la tecla MENU durante dos segundos. La pantalla
mostrará EDIT? (¿Editar?).
4. Presione la tecla DIAL; el primer dígito del número telefónico seleccionado
parpadeará.
5. Puede mover el cursor a la posición requerida presionando
o . Para
eliminar el dígito, presione la tecla DELETE, o presione cualquier tecla
numérica para insertar el dígito y confírmelo con la tecla DIAL. Luego, la
pantalla mostrará la primera letra parpadeante del nombre.
6. Mueva el cursor a la posición requerida presionando o . Para eliminar
la letra, presione la tecla DELETE, o presione cualquier tecla numérica
para reemplazar el nombre y confírmelo con la tecla DIAL; aparecerá el
mensaje “SAVED!” (Guardado).
7. Puede repetir los paso 2 al 6 para editar más números o presionar para salir.
Para eliminar la memoria de la agenda telefónica
1. Presione y suelte la tecla
hasta que aparezca el icono .
2. Seleccione la ubicación requerida de la agenda telefónica presionando o .
3.Para eliminar una sola memoria, presione una vez la tecla DELETE. La
pantalla mostrará DELETE? Presione la tecla DELETE durante 2 segundos.
El número telefónico y el nombre se eliminarán y la pantalla mostrará otro
número de la agenda telefónica.
Para eliminar todas las entradas de la memoria, mantenga presionada la
tecla DELETE hasta que la pantalla muestre DELETE ALL? (¿Borrar
todo?). Presione la tecla DELETE durante 2 segundos hasta que EMPTY
aparezca en la pantalla.
Memoria
Este teléfono tiene 3 memorias de un toque numeradas: M1, M2 y M3.
Cuando se ha guardado un número en una ubicación de memoria, sólo necesita
presionar una tecla para efectuar la llamada.
11 – SPANISH
Talk500UserGuide.indd 11
2/4/08 5:10:28 PM
Almacenamiento de números en la tecla MEMORY
(Memoria)
1. Presione y suelte la tecla MENU hasta que aparezca el mensaje STORE
NUMBER.
2. Presione la tecla DIAL. El cursor parpadeará en la primera posición.
3. Ingrese el número telefónico requerido con un máximo de 22 dígitos usando el
teclado numérico y confírmelo con la tecla DIAL.
4. Presione la tecla de memoria (M1, M2 y M3). El número se ha guardado y en la
pantalla aparece SAVED!
Marcado utilizando las memorias
1. Levante el auricular o presione la tecla
y espere un tono de marcado.
2. Seleccione la ubicación de memoria requerida (M1 a M3) presionando la
tecla correspondiente.
O BIEN
1. Presione la tecla correspondiente.
2. Levante el auricular, presione la tecla DIAL o presione la tecla
marcará automáticamente.
; el número se
Buzón de voz
Puede almacenar un número telefónico en la tecla VOICE MAIL (M1 a M3).
Si una persona está tratando de llamar y la línea está ocupada, su llamada se
enviará a un buzón de voz donde podrá dejar un mensaje.
Para accesar a sus mensajes:
1. Presione la tecla VOICE MAIL. Su llamada se conectará al buzón de voz y se
reproducirán sus mensajes.
2. Cuelgue el auricular para finalizar la llamada.
Identificador de llamadas
Importante: cuando use las funciones del identificador de llamadas, observe que sólo
está disponible en el modo del identificador de llamadas (el icono CLIP se activa). Si el
icono CLIP está desactivado, presione una vez la tecla
.
Recepción de una llamada (es posible almacenar hasta 64
llamadas)
• Si se recibe una señal de identificación de llamada incorrecta, no válida o incompleta,
la pantalla mostrará NO NUMBER (Sin número)
• Si sólo se recibe el número telefónico de la persona que llama, la pantalla muestra
el número telefónico de esta persona con la hora y fecha de recepción de la llamada.
El icono NEW (Nueva) se activa y el LED de llamada nueva parpadea.
Notas:
1. CALL# 01 (N.º de llamada 01) significa que esta información se ha almacenado en la
ubicación de memoria de identificación de llamadas N.° 01.
2. La hora y fecha de la llamada se graban inmediatamente de acuerdo al reloj en
tiempo real.
12 – SPANISH
Talk500UserGuide.indd 12
2/4/08 5:10:29 PM
• Si se recibe el nombre y número telefónico de la persona que llama, la pantalla
muestra el nombre y número telefónico de esta persona con la hora y fecha de
recepción de la llamada. El icono “NEW” se activa y el LED de llamada nueva
parpadea.
Nota: si el nombre de la persona que llama tiene más de 16 caracteres, sólo se
muestran los primeros 16 caracteres.
• Su unidad muestra la información de identificación de llamada de la llamada
entrante en espera mientras usted está en otra llamada, si recibe una llamada
mientras la pantalla muestra el icono CALL WAITING.
Nota: la información de la llamada en espera desaparecerá 20 segundos después
de revisarla.
• Si el nombre y número no están disponibles debido a la restricción de la persona
que llama, la pantalla muestra PRIVATE (Privada) con la hora y fecha de recepción.
El icono NEW se activa y el LED de llamada nueva parpadea.
• Si el nombre y número no están disponibles, la pantalla mostrará OUT OF AREA
(Fuera de área) con la hora y fecha de la llamada. El icono NEW se activa y el LED
de llamada nueva parpadea.
• Si se recibe un mensaje de llamada de larga distancia, la pantalla mostrará
LONG DISTANCE (Larga distancia) con la hora y fecha de la llamada. El
icono NEW se activa y el LED de llamada nueva parpadea.
NOTAS:
1. Si la memoria de identificación de llamadas está llena, se eliminarán los datos más
antiguos de la memoria.
2. Si la información recibida del identificador de llamadas duplica otra llamada
en la memoria, se actualizará la hora y fecha y se iluminará el icono REPEAT
(Repetida).
3. Si no se presiona ninguna tecla dentro de 20 segundos, la pantalla mostrará el contador
total de llamadas, el contador de llamadas nuevas, la hora y la fecha actuales.
Ver la memoria del identificador de llamadas
Presione
para revisar las llamadas más recientes. CALL# disminuirá.
Después de ver los datos más recientes en memoria, la pantalla mostrará END OF
LIST.
Presione
para revisar las llamadas más antiguas. CALL# aumentará.
Después de ver los datos más antiguos en memoria, la pantalla mostrará END OF
LIST.
Si los datos de la memoria se revisan por primera vez, se iluminará el icono NEW. El
LED de llamada nueva se apagará si revisa los datos.
Si no se presiona ninguna tecla dentro de 20 segundos, la pantalla mostrará el contador
total de llamadas, el contador de llamadas nuevas, la hora y la fecha actuales.
Borrar la memoria del identificador de llamadas
1. Seleccione la ubicación de memoria del identificador de llamadas usando la tecla
o
.
2. Para eliminar una sola memoria, presione una vez la tecla DELETE. La pantalla
mostrará DELETE? Presione la tecla DELETE durante 2 segundos. Los datos
13 – SPANISH
Talk500UserGuide.indd 13
2/4/08 5:10:29 PM
para dicha llamada se borrarán y se actualizará la información de CALL# y del
identificador de llamadas.
Para eliminar todas las entradas de la memoria, mantenga presionada la tecla
DELETE hasta que aparezca el mensaje DELETE ALL? Presione DELETE
durante 2 segundos hasta que aparezca en pantalla el mensaje NO CALLS (Sin
llamadas). Los contadores de llamadas totales y de llamadas nuevas volverán a
cero y aparecerá la hora y la fecha actuales.
Devolver una llamada (Volver a marcar) desde la memoria
del identificador de llamadas
Con el auricular colgado, seleccione la ubicación de memoria del identificador de
llamadas presionando
o .
Presione la tecla DIAL; el altavoz del teléfono se activará automáticamente y marcará
el número seleccionado.
O BIEN
Cuando tome el auricular o presione la tecla
, seleccione la ubicación de memoria
requerida del identificador de llamadas presionando
o
y luego presione la tecla
DIAL.
Nota: si el número del identificador de llamadas es de 10 dígitos, presione una vez la
tecla DIAL; la unidad insertará el “1” antes del número del identificador de llamadas
automáticamente. Puede presionar la tecla para seleccionar la inserción o no del “1”.
Presione la tecla DIAL nuevamente; el altavoz del teléfono se activará automáticamente
y marcará el número en pantalla.
Copiar desde el identificador de llamadas a la agenda
telefónica
Puede copiar información del identificador de llamadas a la agenda telefónica mientras
revisa la información del identificador de llamadas.
1. Seleccione la ubicación de memoria del identificador de llamadas presionando
o
.
2. Mantenga presionada la tecla MENU durante dos segundos; la pantalla mostrará
COPY TO MEMORY (Copiar a la memoria).
3. Presione la tecla DIAL; la pantalla mostrará SAVED! (Grabado)
Garantía y servicio técnico
ClearSounds Communications™ garantiza el teléfono Talk500 contra defectos de
material o mano de obra por el plazo de un año contado a partir de la fecha de compra.
En caso de experimentar algún problema, comuníquese con nuestro departamento de
servicio al cliente o visite nuestro sitio de la red www.clearsounds.com.
Guarde su comprobante de compra para demostrar la fecha que adquirió el aparato en
caso que requiera el servicio contemplado por la garantía.
Dentro del plazo de un año contado a partir de la fecha de compra, ClearSounds
Communications™ reparará o reemplazará (de acuerdo a nuestro propio criterio) el
teléfono Talk500, si se detectara algún defecto de material o mano de obra.
14 – SPANISH
Talk500UserGuide.indd 14
2/4/08 5:10:29 PM
Si decidimos reemplazar el teléfono, lo haremos con un aparato nuevo o reacondicionado
del mismo tipo o de tipo similar. La reparación o reemplazo se garanitiza por un plazo
de 90 días o por el plazo original de la garantía original, dependiendo de lo que tenga
mayor duración.
La garantía no cubre accidentes, negligencia o violación de ninguna pieza. Es decir, no
cubre daños que se produzcan durante el envío, incumplimiento de las instrucciones,
uso incorrecto, incendio, inundaciones, uso de accessorios incompatibles, desastres
naturales o fallas de servicio de la compañía teléfonica. El producto no puede ser
abierto ni desarmado por quien no sea representante autorizado por ClearSounds
Communications™. Si se abre el teléfono se invalidará cualquier garantía escrita o
implícita.
ClearSounds Communications™ no se hará responsable del tiempo perdido, alguna
dificultad, la pérdida de uso del teléfono Talk500, daños materiales causados por este
mismo aparato u otros daños indirectos o emergentes.
La garantía de servicio es aplicable únicamente contra presentación del comprobante
de compra (factura).
IMPORTANTE: SU FACURA O RECIBO ES PARTE DE LA GARANTIA Y DEBERA
CONSERVARSE Y PRESENTARSE EN CASO DE UN RECLAMO EFECTUADO EN
TERMINOS DE LA GARANTIA.
Los costos de envío deberán ser pagados por adelantado y el producto deberá
empacarse apropiadamente para su envío.
Servicio y Reparación en
Estados Unidos.
ClearSounds Communications
Attention: Repair Center
8160 S Madison St
Burr Ridge, IL 60527
USA
800-965-9043
Servicio y Reparación
en Canadá
ClearSounds Canada
Attention: Repair Center
220 Donaghy Ave
North Vancouver, BC
CANADA V7P 2L5
604-980-6686
Si desea servicio técnico o asistencia con este aparato,
ingrese en nuestro sitio de la red www.clearsounds.com
correo electrónico :[email protected]
Teléfono: 800-965-9043 - Asistencia en Español 888-758-6056
Teléfono para personas con problemas de audición y lenguaje:888-814-5359 Fax:
888-654-9219
15 – SPANISH
Talk500UserGuide.indd 15
2/4/08 5:10:29 PM
NOTES/NOTA:
16 – SPANISH
Talk500UserGuide.indd 16
2/4/08 5:10:29 PM