1
Printed in China
IGSRK5 2003
R
SRK5
Installation /Wire Connections Guide
FEATURES
High-powered amplifier with maximum of 50W output power.
5-3/4" full range drivers in the front for high frequency response.
2 low frequency drivers in the rear for mid bass reinforcement.
This design delivers clear and stunning sound to your 5.1 surround
sound system.
Strong neodymium boron magnets are used in the speaker drivers
to create powerful playback of audio signals, even though the
speaker's drivers are 1" and less in diameter.
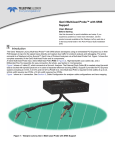
Included in with the center speaker are mounting brackets
and hardware to allow the unit to be installed just about anywhere,
including a 1/2 din opening.
ACCESSORIES
Item
Q'ty
Surface mount screws ......... 8
Bracket mount screws ......... 4
Brackets .............................. 2
Owner's Manual .................. 1
Warranty Card ..................... 1
SPECIFICATIONS
Amplifier
Rated Output
Maximum Output
Distortion
S/N
Input Sensitivity
Frequency Response
Power Supply Voltage
Current Consumption
Dimensions
Weight
20W (1kHz @ into 4 Ohm at 1% THD)
20W
0.1% at 1.0W 1kHz
70dB (0dB=1kHz 1W 4 Ohm)
200mV to 4V
200Hz to 29kHz
10.8V to 15.6V
3A
1-3/4"H x 3-3/8"W x 5-3/4"L
1lb
Speaker Box
Five (5) - 3/4" Full Range Speakers
Two (2) - 1" Low Frequency Speakers
Peak Power Input ...................... 50W
Continuous Power Input ............. 20W
Dimensions ............................... 1"H x 6-3/4"L x 6-1/2"L
Weight ....................................... 0.5lb
SPEAKER INSTALLATION
1. Determine desired location for speaker box and amplifier
insuring that access is available to all needed items
(i.e. power source, audio signal input, gain control, etc.).
2. Install speaker box mounting brackets using provided screws
(if needed).
3. Mount amplifier using provided screws.
4. Connect the speaker wire from amplifier to speaker's box.
5. Connect the RCA to your processor or head unit RCA output.
6. Connect the ground cable from amplifier to a proper grounding
connection on the vehicle chassis.
7. Connect the DC power to amplifier.
8. Adjust amplfier gain appropriately.
Clear (-)
Clear/Red Stripe (+)
Bracket
Screw
Tapping
Screw
Bracket
Installation of the unit should not be in a location that would
interfere with the vehicle safety air bag or placed in a location
that could cause danger or damage to the unit or person.
Installation Surface
AMPLIFIER INSTALLATION
Secure the amplifier unit to the surface with the provided screws.
Surface Mount
Screw
WIRE CONNECTIONS
Main Power Supply (Yellow)
Ground (Black)
Amplifier Control (Blue/White)
RCA Input (White)
CENTER UNIT
DVH920
or
Head Unit
Output (RCA)
Center Audio Output
Center Speaker Box
Center Speaker Amplifier
Clear/Red Stripe
(+)
Clear
(-)
Clear/Red Stripe
(+)
Clear
(-)
Do not replace amplifier or speaker with any other source.
Replacement of incorrect amplifier or speaker may result
in potential damage to equipment.
Clarion Corporation of America
www.clarion.com