1
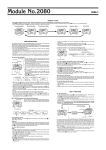
Module No. 2030
2030-1
GETTING ACQUAINTED
Congratulations upon your selection of this CASIO watch. To get the most out
of your purchase, be sure to read this manual carefully and keep it on hand
for later reference when necessary.
Warning!
• The measurement functions built into this watch are not intended for
taking measurements that require professional or industrial precision.
Values produced by this watch should be considered as reasonable
representations only.
• The longitude, lunitidal interval, Moon phase indicator, and tide graph
data that appears on the display of this watch is not intended for
navigation purposes. Always use proper instruments and resources to
obtain data for navigation purposes.
• This watch is not an instrument for calculating low tide and high tide
times. The Tide Graph of this watch is intended to provide a reasonable
approximation of tidal movements only.
• CASIO COMPUTER CO., LTD. assumes no responsibility for any loss,
or any claims by third parties that may arise through the use of this
watch.
About This Manual
• Button operations are indicated using the
letters shown in the illustration.
• Each section of this manual provides you
with the information you need to perform
operations in each mode. Further details
and technical information can be found in
the “REFERENCE” section.
TIMEKEEPING MODE
Moon phase indicator
Day of week
Tide graph
Hour : Minutes
Seconds
PM indicator
Month – Day
In addition to normal timekeeping, use the
Timekeeping Mode to set the current time and
date.
• The Moon phase indicator shows the
current Moon phase for the currently
selected time zone, in accordance with the
current data as kept in the Timekeeping
Mode.
• The tide graph shows tidal movements for
the current date in accordance with the
current time as kept in the Timekeeping
Mode.
Important!
The watch cannot produce correct Moon
phase or tide graph data unless the
Timekeeping Mode current time and date
settings, as well as the GMT differential,
longitude, and lunitidal interval settings are all
be correct.
Resetting the Seconds Count to Zero
1. In the Timekeeping Mode, hold down A until the seconds digits start to
flash, which indicates the setting screen.
2. Press D to reset the seconds count to 00.
• Pressing D while the seconds count is in the range of 30 to 59 resets the
seconds to 00 and add 1 to the minutes. In the range of 00 to 29, the
minutes count is unchanged.
3. Press A three times to exit the setting screen.
(Light)
Setting the Time and Date
1. In the Timekeeping Mode, hold down A
until the seconds digits start to flash, which
indicates the setting screen.
• While the seconds digits are flashing, press
D to reset the seconds count to 00.
2. Press C to move the flashing in the
sequence shown below to select other
settings.
GENERAL GUIDE
• Press C to change from mode to mode.
• Pressing D in the Timekeeping Mode directly enters the Thermo Scanner
Mode.
• In any mode, press L to illuminate the display.
Timekeeping Mode
Thermo Scanner Mode
Seconds
Minutes
Hour
12/24-Hour
Format
Press D.
▲
▲
Day
Month
Year
3. While the hour, minutes, year, month, or day setting is flashing, use D (+)
and B (–) to change it.
• When the 12/24-hour setting is flashing, press D to toggle between
12-hour (12H) and 24-hour (24H) timekeeping.
4. Press A three times to exit the setting screen and return to the current
time screen.
• The day of the week is automatically displayed in accordance with the date
(year, month, and day) settings.
• The year can be set in the range of 1995 to 2039.
• The watch’s built-in full automatic calendar automatically makes
allowances for different month lengths and leap years. Once you set the
date, there should be no reason to change it except after you have the
watch’s battery replaced.
Press C.
▲
Press C.
▲
Site Mode
Setting the Daylight Saving Time and GMT differential
▲
Moon Data Mode
Alarm Mode
• Daylight Saving Time (DST) automatically advances the time setting by
one hour from Standard Time. Whether you should use Daylight Saving
Time depends on the geographic area where you are currently located.
• GMT differential is the difference between the time in the displayed time
and Greenwich Mean Time (GMT).
To set the Daylight Saving Time and GMT differential
▲
DST
GMT differential
1. In the Timekeeping Mode, hold down A
until the seconds digits start to flash, which
indicates the setting screen.
2. Press A again to move the flashing to the
DST On/Off setting.
3. Press D to toggle the Daylight Saving
Time (ON) and standard time (OFF).
4. Press C to move the flashing to the GMT
differential setting, and then use D (+) and
B (–) to change it.
• Each press of C moves the flashing between the DST On/Off setting and
the GMT differential setting.
• The “CITY DATA LIST” provides GMT differential information for a number
of time zones, cities and longitudes around the world.
5. Press A twice to exit the setting screen and return to the current time
screen.
• The DST indicator appears on the display to indicate that daylight saving
time is turned on.
2030-2
Setting the Longitude and Lunitidal Interval
• The lunitidal interval is the time elapsing between the Moon’s transit over
the meridian and the next high tide. See “Lunitidal Interval” for more
information.
• This watch displays lunitidal intervals in terms of hours and minutes.
To set the longitude and lunitidal interval
Lunitidal interval
1. In the Timekeeping Mode, hold down A
until the seconds digits start to flash, which
indicates the setting screen.
2. Press A twice to move the flashing to the
Longitude setting.
3. Press C to move the flashing in the
sequence shown below to select other
settings.
• “Thermo Scanner Mode” provides important precautions and other
supplementary information about taking measurements with the Thermo
Scanner.
Checking the Current Emissivity Setting
In the Thermo Scanner Mode, hold down B to display the current emissivity
setting.
Changing the Emissivity Setting
Emissivity indicator
Longitude
Lunitidal Interval
Longitude
Hours
Minutes
4. While the longitude, or lunitidal interval hours or minutes setting is
flashing, use D (+) and B (–) to change it.
• The “CITY DATA LIST” provides GMT differential information for a number
of time zones, cities and longitudes around the world.
• Longitude can be specified in the range of 179°W to 180°E, in 1-degree
steps.
5. Press A to exit the setting screen and return to the current time screen.
SITE MODE
Tide graph
Site name
Current date
THERMO SCANNER MODE
The Thermo Scanner Mode uses a sensor built into the watch to measure the
surface temperature of an object with the touch of a button.
Warning!
• The Thermo Scanner of this watch is not a precision measurement.
Its readings should be regarded as reasonably accurate values only.
• Getting too close to a very hot object creates the risk of burn injury, even
if you do not actually touch the object. Make sure you do not get too close
to hot objects when performing Thermo Scanner measurements.
• Do not rely on Thermo Scanner readings to determine whether or not
a very hot or very cold object is safe to touch.
• Do not use the Thermo Scanner as a clinical thermometer.
• The temperature reading produced by the Thermo Scanner indicates
only the surface temperature, and not the actual temperature of an
object.
Using the Thermo Scanner
Object
7.8cm
10cm
Current time
Sensor
Measured value
1. As shown in the illustration, point the
sensor of the watch at the object whose
surface temperature you want to measure.
2. Enter the Thermo Scanner Mode, and then
press D to start temperature measurement.
• Pressing D in the Timekeeping Mode
directly enters the Thermo Scanner Mode
and immediately starts temperature
measurement.
Note
• The area measured by the Thermo Scanner
is roughly equivalent to a circle whose
diameter can be approximated by the
formula: d (diameter) = D × 0.78.
The value of “D” is the distance in centimeters
between the object and the sensor.
• For the example shown in the illustration, the diameter of the area
measured is approximately 7.8cm (10 × 0.78).
• You can change the measured temperature value displayed by this watch
between Celsius (°C) and Fahrenheit (°F). See “To change the
temperature units”.
How the Thermo Scanner Measures Temperature
The Thermo Scanner doesn’t actually measure temperature directly. Instead,
it calculates the temperature of an object after detecting how much infrared
radiation is being emitted by the object. All objects emit infrared radiation in
accordance with their temperature, their constituent material, and their
surface properties. The intensity of radiation that an object emits (due to the
material it is made out of and its surface properties) is called its emissivity.
The Thermo Scanner of this watch calculates temperatures based on the
amount of infrared radiation detected and preset emissivity values.
• Setting the correct emissivity value for the object whose temperature you
are measuring helps to ensure results that are more accurate.
• The initial factory default emissivity setting is 0.95, because this is the most
common emissivity for object we encounter in daily life.
1. In the Thermo Scanner Mode, hold down
A until the emissivity value starts to flash,
which indicates the setting screen.
2. Use D (+) and B (–) to change the
setting.
• You can set a value in the range of 0.10 to
1.20 in steps of 0.05.
• Pressing B and D at the same time resets
the emissivity value to its initial default
setting of 0.95.
3. Press A to exit the setting screen.
Current time in the
selected site
Moon phase indicator
You can use the Site Mode to view the current
time, Moon phase, and tide graph for any one
of 10 different sites.
• The watch comes pre-programmed with site
data (site name, GMT differential, longitude,
and lunitidal interval) for famous fishing
sites around the world. You can use this site
data as it is or change it to suit your needs.
• See “Moon Phase Indicator” and “Tide
Graph” for more information about these
display items.
• See “PRE-PROGRAMMED SITE DATA” for
more information about the preprogrammed data.
• When you enter the Site Mode, the site that
was displayed when you last exited the
mode appears first.
Viewing Site Data
In the Site Mode, press D to scroll forward through site data and B to scroll
in reverse.
• If the site name is longer than four characters, the display alternates
between the first four characters and the remaining characters.
• The site named HOME is your Home Site, which is the one used for your
Timekeeping Mode settings.
Changing Site Data
Site data consists of the site name, DST (Daylight Saving Time) setting, GMT
differential, longitude, and lunitidal interval of the site. Changing site data
causes its time to be set automatically in accordance with the GMT
differential.
• You cannot change the site data of your HOME site.
• Having the watch battery replaced causes all sites to revert to their initial
factory defaults. If you want to use your own site data, you must re-input it
each time you have the battery replaced.
To change site data
1. In the Site Mode, use B and D to display
the name of the site whose data you want
to change.
2. Hold down A until the DST On/Off setting
starts to flash, which indicates the setting
screen.
• Pressing C moves the flashing between
the settings in the sequence shown below.
GMT differential
DST On/Off
GMT differential
Site name
3. Use C to move the flashing to the DST On/Off setting.
4. Press D to toggle Daylight Saving Time on (ON) and off (OFF).
5. Press C to move the flashing to the GMT differential setting, and then
use D (+) and B (–) to change it.
• The “CITY DATA LIST” provides GMT differential information for a number
of time zones, cities and longitudes around the world.
2030-3
6. Press C to move the flashing to the first
character of the site name.
7. Input the site name you want.
• Use D and B to cycle through characters
at the current input position in the sequence
shown below.
Site name
Press D.
Year
Month – Day
Press B.
A to Z
(space)
_
.
Viewing the Moon Age for a Particular Date
0 to 9
• When the character you want is shown, press C to move the flashing to
the right and input the next character.
• To delete a character, input a space.
• You can input up to eight characters. Inputting eight characters causes the
flashing to return to the DST On/Off setting. If your site name has fewer
than eight characters, you must press C to skip past all the unused
spaces in order to move the flashing to the DST On/Off setting.
8. After the DST On/Off, GMT differential, and site name settings are the
way you want, press A and the longitude setting starts to flash on the
display.
• Pressing C moves the flashing between the settings in the sequence
shown below.
Viewing Tide Data during a Particular Timeframe
Timeframe
Lunitidal Interval
Longitude
Hours
Minutes
3.
4.
•
•
ALARM MODE
Alarm on indicator
Current time
10. Press C to move the flashing to the
lunitidal interval hours setting, and then use
D (+) and B (–) to change it.
11. Press C to move the flashing to the
lunitidal interval minutes setting, and then
use D (+) and B (–) to change it.
12. After everything is the way you want, press
A to exit the setting screen.
Hours : Minutes
1. In the Moon Data Mode, press A to
display the Moon Age Screen.
2. Set the date whose tide data you want to
view.
• The initial default date for the Moon Age
Screen when you enter the Moon Data
Mode is the current date as kept in the
Timekeeping Mode.
• Use D (+) and B (–) to change the date
setting.
• You can select any date from 1995 to 2039.
Press A to switch to the Tide Data Screen.
Set the timeframe for which you want to display tide data.
Use D (+) and B (–) to change the time setting in one-hour steps.
The tide data appears in the tide graph.
9. While the longitude setting is flashing, use
D (+) and B (–) to change it.
• Longitude can be specified in the range of
179°W to 180°E, in 1-degree steps.
Longitude
1. In the Moon Data Mode, press A to
display the Moon Age Screen.
• The initial default date for the Moon Age
Screen when you enter the Moon Data
Mode is the current date as kept in the
Timekeeping Mode.
2. Use D (+) and B (–) to change the date
setting.
• You can select any date from 1995 to 2039.
• The Moon age appears a few seconds after
you select a date.
You can set a Daily Alarm that sounds at the
same time each day, while it is turned on. You
can also turn on an Hourly Time Signal that
causes the watch to beep twice every hour on
the hour.
Setting the Alarm Time
Hour : Minutes
Hourly time signal
on indicator
1. In the Alarm Mode, hold down A until the
hour digits of the alarm time start to flash,
which indicates the setting screen.
• This operation automatically turns on the
Daily Alarm.
2. Press C to move the flashing in the
sequence shown below to select other
settings.
MOON DATA MODE
Hour
The Moon Data Mode lets you view the Moon age on any date and tide data
during a particular timeframe for the site currently selected in the Site Mode.
Displaying Moon Data
The Moon Data Mode has two screens: a Moon Age Screen and a Tide Data
Screen. Press A to toggle between the two screens.
Moon Age Screen
Tide Data Screen
Month – Day
Tide graph
Minutes
3. While the hour or minutes setting is flashing, use D (+) and B (–) to
change it.
• When setting the alarm time using the 12-hour format, take care to set the
time correctly as am (A indicator) or pm (P indicator).
4. Press A to exit the setting screen.
Daily Alarm Operation
The alarm sounds at the preset time each day for about 20 seconds, or until
you stop it by pressing any button.
To test the alarm
In the Alarm Mode, hold down D to sound the alarm.
Site name
Press A.
Turning the Daily Alarm and Hourly Time Signal on
and off
Moon phase
indicator
Moon age
Timeframe
• The data that appears on the screen in the Moon Data Mode is for the site
that is currently selected in the Site Mode. This means you have to enter
the Site Mode, select the site whose data you want to view, and then enter
the Moon Data Mode to view it.
• If the site name is longer than four characters, the display alternates
between the first four characters and the remaining characters.
In the Alarm Mode, press B to cycle through the on and off settings as
shown below.
[Alarm ON Indicator / Hourly Time Signal ON Indicator]
ALM ■
SIG ■
Alarm On
Signal On
ALM
SIG
Alarm Off
Signal Off
ALM ■
SIG
ALM
SIG ■
Alarm On
Signal Off
Alarm Off
Signal On
2030-4
BACKLIGHT
Auto light switch on indicator
The backlight uses an EL (electro-luminescent)
panel that causes the entire display to glow for
easy reading in the dark. The watch’s auto light
switch automatically turns on the backlight
when you angle the watch towards your face.
• The auto light switch must be turned on
(indicated by the auto light switch on
indicator) for it to operate.
• See “Backlight Precautions” for other
important information about using the
backlight.
Turning on the Backlight Manually
In any mode, press L to illuminate the display for about two seconds.
• The above operation turns on the backlight regardless of the current auto
light switch setting.
About the Auto Light Switch
Turning on the auto light switch causes the backlight to turn on for about two
seconds, whenever you position your wrist as described below in any mode.
Moving the watch to a position that is parallel to the ground and then tilting
it towards you more than 40 degrees causes the backlight to light.
• The left-right orientation of the Moon phase is reversed when viewing from
the Southern Hemisphere or from a point near the equator.
• The Moon phase indicator displayed in the Timekeeping Mode and Alarm
Mode is based on Timekeeping Mode (home site) data. The indicator
displayed in the Site Mode and Moon Data Mode is based on data for the
site that is currently selected in the Site Mode. There is no Moon phase
indicator in the Thermo Scanner Mode.
Moon Phases and Moon Age
The Moon goes through a regular 29.53-day cycle during which it appears to
wax and wane due to how the Sun illuminates the Moon and the relative
positioning of the Earth, Moon, and Sun. The greater the angular distance
between the Moon and the Sun,* the more we see illuminated.
* The angle to the Moon in relation to the direction at which the Sun is visible
from the Earth.
The Moon age indicates the number of days from the New Moon to any
particular phase. It is normally calculated using either noon or midnight as a
reference point. This watch calculates the Moon age based on the angular
distance of the Moon at noon, which can result in an error of ±1 day. Because
of this, the appearance of the Moon phase indicator may be different from
that of the actual Moon.
The watch uses the following formula to calculate Moon age.
Moon Age (days) = 29.53 × (Moon angular distance / 360°)
Tide Graph
The black bar on the watch’s tide graph indicates the current tide.
More
than
40°
Parallel to
ground
Warning!
• Never try to read your watch when mountain climbing or hiking in areas
that are dark or in areas with poor footing. Doing so is dangerous and
can result in serious personal injury.
• Never try to read your watch when running where there is danger of
accidents, especially in locations where there might be vehicular or
pedestrian traffic. Doing so is dangerous and can result in serious
personal injury.
• Never try to read your watch when riding on a bicycle or when operating
a motorcycle or any other motor vehicle. Doing so is dangerous and can
result in a traffic accident and serious personal injury.
• When you are wearing the watch, make sure that its auto light switch
is turned off before riding on a bicycle or operating a motorcycle or
any other motor vehicle. Sudden and unintended operation of the
auto light switch can create a distraction, which can result in a traffic
accident and serious personal injury.
To turn the auto light switch on and off
In the Timekeeping Mode, hold down B for two seconds to turn the auto light
displayed) and off (
not displayed).
switch on (
) is on the display in all modes
• The auto light switch on indicator (
while the auto light switch is turned on.
REFERENCE
This section contains more detailed and technical information about watch
operation. It also contains important precautions and notes about the various
features and functions of this watch.
High tide
Low tide
High tide
• The tide graph displayed in the Timekeeping Mode and Alarm Mode is
based on Timekeeping Mode (home site) data. The graph displayed in the
Site Mode and Moon Data Mode is based on data for the site that is
currently selected in the Site Mode. There is no tide graph in the Thermo
Scanner Mode.
Tidal Movements
Tides are the periodic rise and fall of the water of oceans, seas, bays, and
other bodies of water caused mainly by the gravitational interactions between
the Earth, Moon and Sun. Tides rise and fall about every six hours. The tide
graph of this watch indicates tidal movement based on the Moon’s transit
over the meridian and the lunitidal interval. The lunitidal interval differs
according to your current location, so you must specify a lunitidal interval in
order to obtain the correct tide graph readings.
Lunitidal Interval
Theoretically, high tide is at the Moon’s transit over the meridian and low tide is
about six hours later. Actual high tide occurs somewhat later, due to factors
such as viscosity, friction, and underwater topography. Both the time differential
between the Moon’s transit over the meridian until high tide and the time
differential between the Moon’s transit over the meridian until low tide are
known as the “lunitidal interval.” When setting the lunitidal interval for this
watch, use the time differential between the Moon’s transit over the meridian
until high tide.
Auto Return Features
• If you leave a screen with flashing digits or a cursor on the display for two
or three minutes without performing any operation, the watch automatically
saves anything you have input up to that point and exits the setting screen.
• If you leave the watch in any mode for about three minutes without
performing any operation, it automatically changes to the Timekeeping
Mode.
Data and Setting Scrolling
Moon Phase Indicator
The Moon phase indicator of this watch indicates the current phase of the
Moon as shown below.
12-hour/24-hour Timekeeping Formats
Graph
Moon Age
The B and D buttons are used in various modes and screens to scroll
through data on the display. In most cases, holding down these buttons
during a scroll operation scrolls through the data at high speed.
0, 1, 29
Moon Phase New
Moon
2–5
6–9
First
Quarter
(Waxing)
10–13
14–16
Full
Moon
17–20
21–24 25–28
Last
Quarter
(Waning)
• The light part of the Moon phase indicator shows the part of the Moon that
is visible in the sky during each particular phase.
• The Moon phase indicator shows the Moon as viewed at noon from a
position in the Northern Hemisphere looking south. Note that at times the
image shown by the Moon phase indicator may differ from that of the
actual Moon in your area.
The 12-hour/24-hour timekeeping format you select in the Timekeeping Mode
is also applied in all modes.
• With the 12-hour format, the P (PM) indicator appears to the left of the hour
digits for times in the range of noon to 11:59 p.m. and the A (AM) indicator
appears to the left of the hour digits for times in the range of midnight to
11:59 a.m.
• With the 24-hour format, times are indicated in the range of 0:00 to 23:59,
without any indicator.
2030-5
Site Mode
Measurement Range
• The current time in all Site Mode sites is calculated in accordance with the
Greenwich Mean Time (GMT) differential for each site, based on the
current time setting in the Timekeeping Mode.
• GMT differential is calculated by this watch based on Universal Time
Coordinated (UTC) data.
The area measured by the Thermo Scanner increases the further you are
from the object. Make sure you are close enough to the object so the area
measured remains within the surface area of the object.
Also, remember that the temperature value displayed by the watch is the
average temperature for the entire area measured.
Backlight Precautions
• The electro-luminescent panel loses illuminating power after very long use.
• The illumination provided by the backlight may be hard to see when viewed
under direct sunlight.
• The watch will emit an audible sound whenever the display is illuminated. It
does not indicate malfunction of the watch.
• The backlight automatically turns off whenever an alarm sounds.
Too far
Best
Auto light switch precautions
• Avoid wearing the watch on the inside of your wrist. Doing so causes the
auto light switch to operate when it is not needed, which shortens battery
life. If you want to wear the watch on the inside of your wrist, turn off the
auto light switch feature.
More than 15 degrees
too above
• The backlight may not light if the face of the
watch is more than 15 degrees above or
below parallel. Make sure that the back of
your hand is parallel to the ground.
• The backlight turns off in about two
seconds, even if you keep the watch
pointed towards your face.
• Static electricity or magnetic force can interfere with proper operation of the
auto light switch. If the backlight does not light, try moving the watch back
to the starting position (parallel with the ground) and then tilt it back toward
you again. If this does not work, drop your arm all the way down so it
hangs at your side, and then bring it back up again.
• Under certain conditions the backlight may not light until about one second
after you turn the face of the watch towards you. This does not necessarily
indicate malfunction of the backlight.
• In order to protect against running down the battery, the auto light switch is
automatically turned off approximately six hours after you turn it on.
Thermo Scanner Mode
Measurement Precautions
• The temperature reading produced by the Thermo Scanner indicates only
the surface temperature and not the actual temperature of the object.
Measuring the temperature of your hand, for example, displays the
temperature of your skin surface, not your body temperature. Note that
surface temperature is affected by surrounding temperature and other
factors.
• Accurate measurements are not possible for the following types of objects.
Type of Object
Description
Metal objects, objects coated
with shiny paint (gold, silver,
etc.) and other objects with
low emissivity
• Such objects reflect surrounding infrared
radiation.
• Measurements are possible for dull
painted metal and dark metal with no
visible shininess.
Flame
• Temperatures are too high
• Some infrared radiation may also be
picked up from background objects.
Air or gas
• The Thermo Scanner can pick up infrared
radiation from solids and liquids only.
• Take care to keep the sensor lens free of dirt, dust, chemicals, and other
foreign matter. A dirty or damaged lens makes accurate measurement
impossible.
• Leaving the watch in a closed automobile under direct sunlight or
otherwise subjecting it to high temperatures can cause the sensor to
overheat, which makes accurate measurement impossible.
• Fluctuation of the temperature of the watch itself (due to taking the watch
outdoors on a cold day, etc.) can cause unstable sensor temperature,
making accurate measurement impossible.
• Avoid keeping the watch too close for long periods to objects that
continuously generate high heat (like a hot plate), which can cause
overheating of the watch.
• Any of the following causes the measurement operation to be cancelled:
changing to another mode, sounding of an alarm or hourly time signal,
turning on the backlight, display of the emissivity value, changing the
emissivity value setting, measurement error.
Diameter of the area measured can be approximated by the formula:
d (diameter) = Distance × 0.78 (cm)
Distance
Diameter of
Area Measured
Distance
Diameter of
Area Measured
10
7.8
50
39.0
20
15.6
80
62.4
30
23.4
100
78.0
Measurement Range: –20 to 200°C / –4 to 392°F
Measurement Units: 0.1°C (10.1 to 39.9°C) / 0.2°F (50.2 to 103.8°F)
1°C (–20 to 10°C and 40 to 200°C)
1°F (–4 to 50°F and 104 to 392°F)
Measurement Time: Approximately 3 seconds
Emissivity
The intensity of infrared radiation that an object emits (due to the material it is
made out of and its surface properties) is called its emissivity. Fixed
emissivity values have been established for a number of objects. Emissivity is
expressed as a value that represents the ratio of the radiation intensity of a
real body to the radiation intensity of a blackbody*, which is 1.
* blackbody: A total absorber that absorbs all the energy that falls upon it.
Generally speaking, the emissivity of human skin, wood, and paper is high,
while that of aluminum, and other metals is low. Metals whose surfaces are
oxidized (non-lustrous finish) tend to have high emissivity, while polished
(lustrous) surfaces tend to have low emissivity.
Note
• Low emissivity objects (especially those with a lustrous, metallic finish)
tend to reflect infrared radiation emitted by surrounding objects, and so
accurate temperature readings are impossible.
• For more accurate Thermo Scanner readings from a particular type of
object, measure the temperature of the object using another measurement
device you know to be accurate, and then use the Thermo Scanner to take
a reading of the object. Next, adjust the emissivity value until the reading
produced by the Thermo Scanner is the same as the other instrument.
• The “EMISSIVITY VALUES” provides emissivity values for a number of
different objects. Note that these values are for reference purposes only.
Other factors can also affect emissivity.
To change the temperature units
1. In the Thermo Scanner Mode, hold down
A until the emissivity value start to flash,
which indicates the setting screen.
2. Press C to move the flashing to the unit
setting (°C or °F).
3. Press D toggle between the two settings.
4. Press A to exit the setting screen.
2030-6
Troubleshooting
PRE-PROGRAMMED SITE DATA
ERR. Messages
The following shows the error messages that can appear and what you need
to do to correct the situation.
Error
Message
ERR.
NO. 1
ERR.
NO. 2
ERR.
NO. 3
ERR.
NO. 4
ERR.
NO. 5
Meaning
Cause
What to do
Overheat
error
Watch temperature
is outside the range
of –20°C to 60°C
(–4°F to 140°F).
Keep watch out or direct
sunlight and other areas where
it is exposed to temperature
extremes.
Out of
range
error
Measured
temperature is
outside the range of
–20°C to 200°C
(–4°F to 392°F).
Perform measurements only on
objects whose temperatures
are within the allowable range.
Abnormal
temperature error
Sudden rise or fall
of watch temperature.
Wait for about 10 minutes to
allow watch temperature to
stabilize.
Sensitivity error
Sensor sensitivity
could not be
calibrated correctly.
Cancel the measurement
(press C to return to the
Timekeeping Mode) and try
again.
Battery power is
low
Contact your CASIO Service
Center to have the battery
replaced.
Watch temperature
is too cold
The error should clear when the
watch returns to normal
temperature. Try measuring
again after the watch returns to
normal temperature.
Battery
error
Thermo Scanner Measured Value Problems
Problem
Measured value
is considerably
higher or lower
than the actual
temperature of
the object.
Large differences
between
temperatures or
the same
temperature value
for various
objects
Possible Cause
What to do
Wrong emissivity value
setting
Set the emissivity value that
matches the object.
Dirty sensor lens
Rinse the lens with cold or
warm water and then wipe off
all remaining moisture with a
cotton swab.
Scratched sensor lens
Damaged sensor
Contact your CASIO Service
Center.
Sensor malfunction
Contact your CASIO Service
Center.
Flashing (Emissivity) Indicator during a Thermo Sensor
Measurement
Check the current setting and change it if necessary. If the setting is correct,
you can perform measurements even though is flashing on the display.
Location
Sensor lens
To clean the lens
Rinse the lens with cold or warm water and then wipe off
all remaining moisture with a cotton swab, taking care
not to scratch the lens.
The lens may be dirty, even though you cannot see any
dirt or dust on it. Because of this, you should make it a
habit to clean the lens periodically.
Important!
• Acids (including fruit juices, etc.) can permanently damage the lens and
make accurate measurements impossible. Should any acidic matter get
onto the lens, rinse it off immediately.
• Accurate measurements are impossible whenever there is condensation,
water droplets, snow, or any other moisture on the lens. Before
measurements, wipe off all moisture with a cotton swab, taking care not to
scratch the lens.
• Avoid scratches by keeping scissors, needles, and other pointed objects
away from the lens.
Longitude
GMT
Differential
Lunitidal
Interval
TOKYO
Tokyo
140°E
+9.0
5:20
PALAU
Palau
134°E
+9.0
7:30
GUAM
Guam
145°E
+10.0
7:40
GBR
Great Barrier Reef,
Cairns
146°E
+10.0
9:40
CHRISTMS
Christmas Island
157°W
+14.0
4:00
HAWAII
Kona, Hawaii
156°W
–10.0
4:00
BAJA CA
Baja, California
110°W
–7.0
8:40
BAHAMAS
Bahamas
77°W
–5.0
7:30
MAURITIS
Mauritius
57°E
+4.0
0:50
MALDIVES
Maldives
74°E
+5.0
0:10
Based on data as of August 1999.
CITY DATA LIST
City
ANCHORAGE
BANGKOK
BOSTON
BUENOS AIRES
CASABLANCA
DAKAR
HAMBURG
HONG KONG
HONOLULU
JAKARTA
JEDDAH
KARACHI
LIMA
LISBON
LONDON
LOS ANGELES
MANILA
MELBOURNE
MIAMI
NOUMEA
PAGO PAGO
PANAMA CITY
PAPEETE
RIO DE JANEIRO
SEATTLE
SHANGHAI
SINGAPORE
SYDNEY
VANCOUVER
WELLINGTON
GMT Differential
–9.0
+7.0
–5.0
–3.0
+0.0
+0.0
+1.0
+8.0
–10.0
+7.0
+3.0
+5.0
–5.0
+0.0
+0.0
–8.0
+8.0
+10.0
–5.0
+11.0
–11.0
–5.0
–10.0
–3.0
–8.0
+8.0
+8.0
+10.0
–8.0
+12.0
• Based on data as of January 2000.
Cleaning the Sensor Lens
A clean sensor lens helps to ensure more accurate
temperature readings.
Site Name
Longitude
150°W
100°E
71°W
58°W
8°W
17°W
10°E
114E
158°W
107°E
39°E
67°E
77°W
9°W
0°E
118°W
121°E
145°E
80°W
166°E
171°W
80°W
150°W
43°W
122°W
121°E
104°E
151°E
123°W
175°E
Lunitidal Interval
5:40
4:40
11:20
6:00
1:30
7:40
4:50
9:10
3:40
0:00
6:30
10:10
5:20
2:00
1:10
9:20
10:30
2:10
7:30
8:30
6:40
3:00
0:10
3:10
4:20
1:20
10:20
8:40
5:10
4:50
2030-7
EMISSIVITY VALUES
Objects
1.00
0.95
Paper
Cloth (Black)
Plastics
Asphalt
Sand
Charcoal
Bricks
Concrete
Ceramics
Oil
Water
Ice
Glass
Plants
Rubber
Ground
Wood
Skin
Blackbody
0.80
0.70
0.30
0.25
Stainless steel
0.60
0.55
0.50
0.45
0.40
0.35
Polished
0.10
Oxidized
Emissivity
Aluminum
0.15
Polished
0.20
Oxidized
0.75
Snow
0.85
Iron
0.65
Pottery
0.90