1
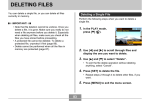
Printer Software Guide
(For Canon CP Printer Solution Disk Version 4)
Macintosh
1
Contents
Safety Precautions ....................................................................................3
Read This First ..........................................................................................4
About the Manuals ............................................................................4
Printing Flow Diagram .......................................................................5
Printing .......................................................................................................7
Starting ImageBrowser .....................................................................8
Selecting an Image for Printing .........................................................8
Selecting a Layout Type .................................................................10
Setting the Printer Driver for Printing ..............................................13
Printing Duplicate Images on an 8-Label Sheet ..............................16
Printing Different Images on an 8-Label Sheet ...............................19
Merging Images to Print a Panorama .............................................21
Printing Part of an Image (Trimming) ..............................................22
Printing with Image Quality Correction ............................................24
Appendices ..............................................................................................26
About the Print Area and Pixels ......................................................26
Print Area ...................................................................................26
Number of Pixels .......................................................................28
Troubleshooting ..............................................................................29
Error Messages ...............................................................................30
2
Safety Precautions
The precautions noted within this guide are intended to instruct you in the safe and
correct use of the products and to prevent injuries or damage to yourself, other
persons and property. Please read and ensure that you understand them before
proceeding to other sections of the guide.
Warning
This symbol indicates topics that could lead to death or serious injury if ignored
or handled incorrectly.
Warning
Do not play the supplied CD-ROM(s) in any CD player that does not support data CD-ROMs. Playing the
CD-ROM(s) in an audio CD player (music player) could damage the speakers. It is also possible to suffer
from hearing loss from listening with headphones to the loud sounds of a CD-ROM played on a music CD
player.
Disclaimer
• While every effort has been made to ensure that the information contained in this guide is accurate and
complete, no liability can be accepted for any errors or omissions. Canon reserves the right to change
the specifications of the hardware and software described herein at any time without prior notice.
• No part of this guide may be reproduced, transmitted, transcribed, stored in a retrieval system, or
translated into any language in any form, by any means, without the prior written permission of Canon.
• Canon makes no warranties for damages resulting from corrupted or lost data due to a mistaken
operation or malfunction of the camera, the software, memory cards, personal computers, peripheral
devices, or use of non-Canon memory cards.
Trademark Acknowledgments
• Macintosh and Mac OS are trademarks of Apple Computer Inc., registered in the United States and other
countries.
• Other names and products not mentioned above may be registered trademarks or trademarks of their
respective companies.
Copyright © 2005 Canon Inc. All rights reserved.
Symbols Used in This Document
Indicates important items or prohibited actions that should always be observed when
operating the machine. These should always be read to avoid damage to the
machine or improper operation.
Indicates items for reference or supplementary information that should be noted by
users.
3
Read This First
About the Manuals
These user guides describe how to connect the printer to your computer and
print images.
Printer User Guide
Contains the information necessary to print from your
computer, including printer preparation and handling
notes, names of parts, installation of necessary software
and the printer driver, and connection of the printer to
your computer. Please read before using the printer.
Describes how to print using the software provided on the
supplied CD-ROM (Canon CP Printer Solution Disk).
This user guide
Explanations are based on Mac OS X (v10.3). If you are using another version of
Mac OS, the actual screen contents and procedures may vary slightly from these
shown.
Detailed explanations of operating procedures are given in the [Help]
accompanying each software application.
If a problem occurs, refer to the following:
• Trouble with the printer itself:
• Printing problems:
See the Printer User Guide.
See this user guide.
4
Printing Flow Diagram
Follow the steps outlined below to prepare the printer and install the
necessary software on your computer to enable printing.
Prepare the printer.
Insert the paper cassette and ink cassette into the printer.
See the Printer User Guide.
Install the software and printer driver on your
computer.
Install the necessary software and printer driver on your
computer from the CP Printer Solution disk.
See the Printer User Guide.
Connect the printer to your computer.
Connect the printer with a commercially available USB
cable, and the turn on the printer.
See the Printer User Guide.
Continued next page.
5
Select an image to print.
Start ImageBrowser and select an image to print.
See
Starting ImageBrowser (➡ p.8),
Selecting an Image for Printing (➡ p.8)
in this user guide.
Printing.
Print on standard sheet or full-size labels.
See
Selecting a Layout Type (➡ p.10),
Setting the Printer Driver for Printing (➡ p.13)
in this user guide.
To print on an 8-label sheet,
see
Printing Duplicate Images on an 8-Label Sheet (➡ p.16) or
Printing Different Images on an 8-Label Sheet (➡ p.19) in this
user guide.
6
Printing
ImageBrowser is an application included on the Canon CP Printer Solution
Disk. This application makes it easy to print. This section describes how to
use ImageBrowser to print images with the printer.
Before printing, verify that the printer is on, and that the printer is properly
connected to your computer with a USB cable.
Printers and computer displays use different color reproduction methods,
and lighting conditions and display settings affect the appearance of colors
on your computer’s display. Therefore, the colors in prints may differ from
what you see on the screen. This is not a printer malfunction.
For information on how to install ImageBrowser, see the Printer User Guide.
7
Starting ImageBrowser
1
Double-click the [Canon ImageBrowser] icon on the desktop.
If the [Canon ImageBrowser] icon does not appear on the desktop, double-click
the [Canon Utilities] folder, [ImageBrowser] folder, and [ImageBrowser] icon.
Selecting an Image for Printing
1
Select an image you want to print from the browser area. Click the
(Print) button to display a menu. From the menu, select
[Layout printing].
Browser
area
To use index printing, display the Index Printing window by clicking the
(Print) button and selecting [Index printing] from the menu that
appears. Set thumbnail and paper sizes, then click the [Start printing]
button to start index printing.
8
The Print window and Layout Options window appear.
Print window
You can check the
layout of the
image.
Layout Options
window
You can adjust the
settings for
printing.
When [Prints to the Canon Compact Photo Printer] is not
displayed, install the printer driver.
9
Selecting a Layout Type
This example prints a single image, fit to a whole postcard size sheet, with
no borders.
1
In the Layout Options window, select “Prints to the Canon
Compact Photo Printer”, select “Photo printer standard printing”,
and then click the [Next] button.
The image to be
printed appears.
Select the desired image layout in the [Layout Options] window.
Custom layout printing
Photo printer standard printing
Photo printer multiple printing
10
Freely specify the size and position of
print images.
Prints one image over the entire page.
Prints on an 8-label sheet.
• Printing duplicate images on an
8-label sheet (➡ p.16)
• Printing different images on an
8-label sheet (➡ p.19)
2
Click the [Page Setup] button.
3
Select your printer in [Format for], specify [Paper Size] and
[Orientation], and then click the [OK] button.
Select your printer.
Select the paper size.
Select the paper
orientation.
11
4
After returning to the Layout Options window, select “Bordered”
or “Borderless”, then click the [OK] button.
If you select “Bordered”, the image is automatically resized to fit within the print.
The layout settings are reflected in the Print window.
[LAYOUT OPTIONS] button
Redisplays the Layout Options
window, where you can change
the settings.
You can also use this option to add text in the Print window to create greeting
cards and so on. There are 3 methods for adding text, as shown below.
• To add a caption to an image: Click the image and select [Edit Caption]
from the [Edit] menu.
• To edit the page title:
Select [Edit Header] from the [Edit] menu.
• To insert text:
Select [Add Text] from the [Edit] menu.
12
Setting the Printer Driver for Printing
This section describes printing with modified printer driver settings.
1
Click the
2
Select your printer in [Printer].
(PRINT) button.
This pop-up menu
contains various settings.
(Do not change the
[Layout] setting.)
3
After selecting [Color], adjust the brightness and color of the print
result.
For details, check the help menu.
Adjust the color of
print results.
Adjust the brightness
and contrast of print
results.
13
4
Select [Copies & Pages], and set the various options.
When printing in the background, printing cannot be resumed if the
printer runs out of paper while printing. To avoid this, load more sheets
of paper than required for the number of images to be printed.
To print multiple
copies of images,
enter the number of
prints desired.
When selecting
multiple images,
specify the pages
(images) to be printed.
Selecting [Save As] ([Save Custom Setting] for Mac OS X v10.1) from the
[Presets] pull-down menu allows you to save the current settings for [Copies
& Pages], [Layout], [Output Options] and [Color].
To enable the saved settings, select the name you specified when saving
with [Save As] (or select [Custom] for Mac OS X v10.1) from the [Presets]
pull-down menu.
14
5
Click the [Print] button.
Printing starts.
If you stop printing while printing is in progress, paper is ejected to the
paper handling slot and a printing error may occur. This is not a
malfunction, but a mechanism for protecting the print head.
If you interrupt printing while it is in progress, be sure to check the printer
status.
• If the indicator lights green:
You can continue to print.
• If the indicator lights red:
Temporarily remove paper from the paper handling slot. Turn the
printer off and then back on again. Confirm that the indicator lights
green before printing again.
Note that when printing is interrupted, one print's equivalent of the ink
cassette's ink sheet is used.
15
Printing Duplicate Images on an 8-Label
Sheet
ImageBrowser allows you to print duplicate images. This makes it possible
to print multiple copies of the same image on an 8-label sheet.
1
In the Layout Options window, select “Prints to the Canon
Compact Photo Printer”, select “Photo printer multiple printing”,
and then click the [Next] button.
16
2
Click the [Page Setup] button.
3
Select your printer in [Format for], and select [CP_C size (L)] in
[Paper Size]. Then, specify the printing orientation and click the
[OK] button.
Images are resized to fit the label dimensions and are displayed in the Print
window.
Select landscape
orientation when
printing to an
8-label sheet.
4
After returning to the Layout Options window, click the [OK]
button.
17
5
Click the image and select [Copy Image] from the ImageBrowser
[Edit] menu.
6
Enter 7 and click the [OK] button.
The images are laid out in replicate, with their positions adjusted for the eight
labels on the 8-label sheet.
7
Click the
(PRINT) button to start printing.
18
Printing Different Images on an 8-Label
Sheet
You can also print a combination of different images on an 8-label sheet.
1
In the Layout Options window, select “Prints to the Canon
Compact Photo Printer”, select “Photo printer multiple printing”,
and then click the [Next] button.
2
Click the [Page Setup] button.
19
3
Select your printer in [Format for], and select [CP_C size (L)] in
[Paper Size]. Then, specify the printing orientation and click the
[OK] button.
Select landscape
orientation when
printing to an
8-label sheet.
4
After returning to the Layout Options window, click the [OK]
button.
5
From the browser area, drag and drop the images to be printed
onto the Print window.
The different images are laid out with their positions adjusted for the eight labels
on the 8-label sheet.
6
Click the
(PRINT) button to start printing.
20
Merging Images to Print a Panorama
You can create panoramic images by merging multiple images, and then
printing them on wide paper. This operation is performed using the
PhotoStitch software.
When you use images captured with a Canon digital camera in Stitch Assist
mode, PhotoStitch determines the order and direction of the composition
automatically, facilitating the composition process.
1
Select the series of images you want to merge from the
ImageBrowser’s Browser area.
2
Select [PhotoStitch] from the [Edit] menu.
PhotoStitch starts.
3
Merge the images following the instructions in the guidance panel
at the top of the PhotoStitch window.
Instructions
4
Save your panoramic image, and then close PhotoStitch.
5
Print the panoramic image.
To print the merged images, see Selecting an Image for Printing (➡ p.8).
21
Printing Part of an Image (Trimming)
You can select and then print a portion of an image (trimming).
This is useful when you only want to print part of an image, or if the part you
are most interested in is not at the center of the image.
• You can print portions of images selected from any type of layout.
• The length-to-width ratio cannot be modified if you select “Photo printer
standard printing” in the Layout Options window, and then specify
“Borderless”, or if you select “Photo printer multiple printing”. Also,
because a 1 - 3 mm border is trimmed from the image during printing, we
recommend that you select an area that is slightly larger than the part of
the image you want to print.
1
Click the image you want to print in the Print window (➡ p.9),
then select [Trimming] from the ImageBrowser [Edit] menu.
22
2
Select the portion of the image to be printed, then close the
Trimming window.
After selecting
the portion to be
printed, clicking
this closes the
window.
The area inside
the dotted line is
the portion of the
image to be
printed.
Changes the
size of the
window.
The Trimming window closes and the selected area appears in the Print
window.
3
Click the
(PRINT) button to start printing.
23
Printing with Image Quality Correction
ImageBrowser has a function that supports Exif 2.2 (referred to as Exif Print),
allowing you to automatically optimize print quality and print clearer, betterlooking images.
The image quality correction is adopted for all images printed from
ImageBrowser.
1
Click the image you want to print, and select [Preferences] from
the ImageBrowser [ImageBrowser] menu.
24
2
Select [Print] in the Preferences window, set image quality
correction, and then click the [OK] button.
Be sure to place a check mark in the check box
when using image quality correction.
Automatically corrects
images captured with
Exif 2.2 compatible
cameras and other
images.
Automatically corrects
only images captured
with Exif 2.2 compatible
cameras.
3
Click the
(PRINT) button to start printing.
Camera information such as scene and photographic conditions are
embedded in images captured with cameras compatible with Exif 2.2
(referred to as Exif Print). This information can be passed onto the
printer through ImageBrowser (Exif Print-compatible software) so that
prints are clearer.
25
Appendices
About the Print Area and Pixels
Print Area
The shaded area (
) in the following diagrams indicates the maximum
printable area.
Note that because the print area is larger than the actual paper size, a
border is trimmed from the image when it is printed.
(shown in millimeters)
Postcard size sheet
3.0
2.0
100.0
2.0
2.0
148.0
26
L size sheet
2.6
2.0
89.0
2.0
2.6
119.0
Credit card size sheet (Standard sheets, full-size label sheets and
8-label sheets are available)
1.0
1.0
54.0
1.0
1.0
86.0
With 8-label sheets, the images are laid out to fit the page. The borders
around each label are trimmed when printing, so verify the preview
image(s) on the screen before printing.
27
Wide size sheet
2.0
2.0
100.0
2.0
2.0
200.0
Number of Pixels
Total number of
pixels (dots)*
Effective number of
pixels (dots)
Postcard size sheet
1232 × 1808
approx. 1180 × 1748
L size sheet
1100 × 1456
approx. 1050 × 1406
Credit card size sheet
(Standard sheets, full-size
label sheets and 8-label
sheets are available)
672 × 1066
approx. 638 × 1016
Wide size sheet
1232 × 2416
approx. 1180 × 2362
Paper Type
* Number of pixels of print area. This also includes the border that is
trimmed from around an image during printing.
28
Troubleshooting
This section describes how to troubleshoot problems.
If the problem still exists after trying these solutions, restart your computer.
If the problem still persists, uninstall the printer driver and then install it again.
The printer cannot be selected.
Cause :
The printer driver is not installed.
Correction : Follow the procedure in the Printer User Guide to install the printer
driver. Reinstall it if you suspect that it was not installed correctly.
Cause :
The printer does not appear in the Printers list.
Correction : Add your printer to the Printers list.
Printing does not start.
Cause :
No power is supplied to the printer.
Correction : Turn the printer on.
Cause :
The USB cable is not connected correctly.
Correction : Check the USB cable to make sure it is connected correctly.
Printing stops while it is in progress.
Cause :
The USB cable is not connected correctly.
Correction : Check the USB cable to make sure it is connected correctly.
Cause :
A USB hub is being used for the connection.
Correction : Be sure to use the USB cable to connect the printer directly to your
computer. If you connect via a USB hub, the printer may not function
properly.
29
The color of an image seen on the screen is different from that
seen in prints.
Cause :
Printers and computer displays use different color reproduction
methods, and lighting conditions and display settings affect the
appearance of colors on your computer’s display.
Correction : You can adjust color using [Color] (➡ p.13).
Error Messages
If an error occurs while printing is in progress, an error message appears on
the screen of your computer.
This section contains a list of error messages as well as the information on
how to troubleshoot them.
• If the error does not go away after you have tried the recommended
solutions, consult your nearest Canon Customer Support Help Desk.
• Use the information in this section in conjunction with the Printer User
Guide.
■ Errors where printing can resume
If any of the following messages appear, printing can still resume. After
using the recommended solution to clear the error, printing restarts
automatically.
Printer error
Ink cassette is empty.
To resume printing, insert a new ink cassette.
Cause :
There is no more ink in the ink cassette.
Correction : Replace the ink cassette with a new one.
In the following cases, the number of prints specified for the installed
Color Ink/Paper Set may not be obtained:
• If printing has been interrupted in progress
• If the ink sheet has been wound too tightly (while removing slack
from the ink sheet)
30
Printer error
No ink cassette installed in printer.
To enable printing, insert an ink cassette.
Cause :
The ink cassette is not inserted into the printer.
Correction : Insert the ink cassette into the printer.
No paper.
Check that paper is correctly loaded in the paper cassette,
and that the paper cassette is correctly installed.
Cause :
The paper cassette is not inserted correctly.
Correction : Remove the paper cassette, and then insert it back into the printer
correctly.
Cause :
Paper is not inserted correctly in the paper cassette.
Correction : Remove the paper, and then insert it back into the paper cassette
correctly.
Cause :
There is no paper in the paper cassette.
Correction : Add more paper to the paper cassette.
When printing in the background, printing cannot be resumed if the printer
runs out of paper while printing. To avoid this, load more sheets of paper
than required for the number of images to be printed.
After using the recommended solution to clear the error, press the [Resume] button
to resume printing.
Printer is not responding. Check the printer power connection,
make sure the printer is switched on, and then try again.
Cause :
No power supplied to the printer.
Correction : Turn the printer on.
Cause :
The USB cable is not connected correctly.
Correction : Check the USB cable to make sure it is connected correctly.
31
No Paper Cassette has been found. Insert an appropriate Paper
Cassette.
Cause :
The paper cassette is not inserted.
Correction : Insert the paper cassette into the printer.
Wrong type of paper. Replace the Paper.
Cause :
The paper is not suitable for the print settings.
Correction : Replace the paper with the correct size.
Wrong type of Paper Cassette. Check the Paper Cassette.
Cause :
The paper cassette in the printer is not suitable for the print
settings.
Correction : Insert the correct paper cassette.
The specified Ink Cassette cannot be found.
Replace the Ink Cassette.
Cause :
The ink cassette in the printer is not suitable for the print
settings.
Correction : Insert the correct ink cassette.
The specified Ink Cassette and Paper cannot be found.
Replace the Ink Cassette and Paper.
Cause :
The ink cassette and paper in the printer are not suitable for the
print settings.
Correction : Insert the correct ink cassette and paper.
32
The battery capacity of the printer is insufficient.
Please connect AC adapter,
or stop printing and replace the battery.
Cause :
The printer’s battery charge is running low. The printer will not
work.
Correction : Use a new or fully charged battery pack, or use the printer with the
AC adapter (compact adapter) connected.
■ Errors where printing is canceled
If any of the following messages appear, printing is canceled. After using the
recommended solution to clear the error, you need to start the print job over
again.
Paper jammed in printer.
Clear the jam as follows, then try printing again.
1. Remove the paper that caused the error.
2. Turn printer off and back on.
Cause :
Paper is jammed inside the printer while printing, or there is
paper still inside the printer before printing starts.
Correction : After closing the dialog, turn the printer off and then back on again.
Paper is automatically ejected from the print receptacle or the paper
handling slot. Remove the paper and then turn the printer off and
back on again a second time, and start the print job over.
Problem with ink cassette.
Correct as follows, then try printing again.
1. Check the state of the ink cassette.
2. Turn printer off and back on.
3. Remove the paper that caused the error.
Cause :
There is a problem with the ink cassette.
Correction : Take out the ink cassette from the printer. Remove any slack from the
ink sheet and then insert the ink cassette back into the printer. If the
problem still continues, replace the ink cassette with a new one.
33
Communication error. Switch the printer off and on again, and then
start the print job again.
Cause :
There is a problem with communications.
Correction : Turn printer off and back on.
Error in printer.
Turn printer off and back on, then try printing again.
Cause :
The printer was not initialized successfully.
Correction : Turn printer off and back on, then try printing again.
Cause :
There is too much paper in the paper cassette.
Correction : Remove paper from the paper cassette, and then make sure to load
the correct amount of paper in the paper cassette.
In other cases, such as when you specify output for a file or other errors related to
your system occur, follow the error messages displayed to proceed.
CDP-E042
© 2005 CANON INC.
34