Download Canon imageRUNNER 2535 Operation Guide
Transcript
Easy Operation Guide CONTENTS Preface Manuals for the Machine.............................................. 01 What You Can Do with This Machine.......................... 03 Control Panel................................................................... 05 Copying Function Making a Copy................................................................ 07 Basic Copying Functions............................................... 09 Advanced Copying Functions...................................... 13 Printing Function Printing from a Computer............................................. 17 Specifying the Printer Driver Settings........................ 19 Sending/Facsimile Functions Sending a Document (E-mail, I-fax, File Server, and USB Memory Media Device)................................. 21 Sending a Fax.................................................................. 23 Send and Fax Functions................................................ 25 Scanning Function Scanning from a Computer (Remote Scan)............... 35 Other Functions & Troubleshooting Keep this guide near the machine for future reference. Operating the Machine from a Computer (Remote UI)...................................................................... 37 Customizing the Machine Settings............................. 39 Troubleshooting............................................................. 41 
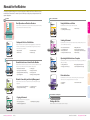
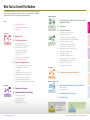
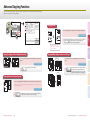
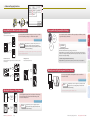
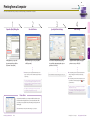
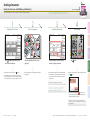
Manuals for the Machine The manuals included with the machine and optional equipment are listed below. Please read them as necessary to make full use of the machine. The manuals you receive will vary according to the products purchased and the system configurations. PDF on User Manual CD-ROM Using the Machine as a Printer Basic Operations and Function Overview Read this manual to quickly learn the basic operations and functionality of the machine. Always keep this manual near the machine for future reference. Easy Operation Guide Read this manual to learn how to use the machine as a printer. Printer Guide ▶ Managing Print Jobs ▶ Customizing the Printer Settings CONTENTS Preface Manuals for the Machine ............................................. 01 What You Can Do with This Machine ......................... 03 Control Panel.................................................................. 05 ▶ Troubleshooting Preface Paper Manual Printer Guide Copying Function Making a Copy ............................................................... 07 Basic Copying Functions .............................................. 09 Advanced Copying Functions ..................................... 13 Easy Operation Guide Printing Function Printing from a Computer............................................ 17 Specifying the Printer Driver Settings....................... 19 Sending/Facsimile Functions Sending a Document (E-mail, I-fax, File Server, and USB Memory Media Device) ................................ 21 Sending a Fax ................................................................. 23 Send and Fax Functions ............................................... 25 Scanning Function Please read this guide before operating this product. After you finish reading this guide, store it in a safe place for future reference. Scanning from a Computer (Remote Scan) .............. 35 ENG Other Functions & Troubleshooting Sending a Document Send and Fax Functions ............................................... 25 Sending a Fax ................................................................. 23 and USB Memory Media Device) ................................ 21 Sending a Document (E-mail, I-fax, File Server, Sending/Facsimile Functions Specifying the Printer Driver Settings....................... 19 Printing from a Computer............................................ 17 Printing Function Advanced Copying Functions ..................................... 13 Basic Copying Functions .............................................. 09 Making a Copy ............................................................... 07 Copying Function Control Panel.................................................................. 05 What You Can Do with This Machine ......................... 03 Manuals for the Machine ............................................. 01 Preface CONTENTS Startup and Safe Use of the Machine Read this manual first to learn important information regarding safe use of the machine. This manual also contains information you should know before using the machine, as well as an overview of how to use the machine. User’s Guide Guide Operation Easy User’s Guide ▶ Safety Instructions ▶ Basic Functions ▶ Routine Maintenance ▶ Troubleshooting Read this manual to learn how to send scanned documents by e-mail, I-fax, and fax, or to a file server and USB memory media device. Sending and Facsimile Guide Sending and Facsimile Guide Please read this guide before operating this product. After you finish reading this guide, store it in a safe place for future reference. ENG ▶ ▶ ▶ ▶ Basic Send and Fax Functions Specifying Destinations Receiving Documents Checking the Send/Receive Status ▶ ▶ ▶ ▶ Editing Address Book Printing Communication Reports Customizing the Send and Fax Settings Troubleshooting Read this guide first. Please read this guide before operating this product. After you finish reading this guide, store it in a safe place for future reference. ENG Operating the Machine from a Computer PDF on User Manual CD-ROM General Instructions on How to Use the Machine Read this manual to learn the basic operations common to the functions of the machine. Also read to learn routine maintenance and how to troubleshoot the problems. Reference Guide Reference Guide Please read this guide before operating this product. After you finish reading this guide, store it in a safe place for future reference. ENG ▶ ▶ ▶ ▶ Introduction to the Machine Operating the Touch Panel Display Specifying the Machine’s Basic Settings Optional Equipment ▶ ▶ ▶ ▶ Loading Paper Replacing Consumables Clearing Paper Jams Identifying and Isolating Problems Network Connectivity and Security Management Read this manual to learn how to connect the machine to a network and perform security management. System Settings Guide Please read this guide before operating this product. After you finish reading this guide, store it in a safe place for future reference. ▶ Instructions for the System Administrator ▶ Specifying the Network Settings ▶ Security Management ▶ Troubleshooting Read this manual to learn how to access the machine from a computer by using the Remote UI (Remote User Interface). Remote UI Guide Remote UI Guide Please read this guide before operating this product. After you finish reading this guide, store it in a safe place for future reference. ▶ Starting the Remote UI ▶ Managing Jobs and Job Logs ▶ Managing Department/User IDs ▶ Customizing the Machine Settings ENG Driver Instructions Read this manual to learn how to use the drivers for printing from a computer, using the machine as a scanner, and using the Fax function on a computer. Driver Software Guide Driver Software Guide Please read this guide before operating this product. After you finish reading this guide, store it in a safe place for future reference. ▶ Printer Drivers ▶ Fax Driver ▶ Color Network ScanGear ENG Other System Settings Guide ENG Included with the Barcode Printing Kit-B1 Copying a Document Bar Code Printing Guide Read this manual to learn how to copy originals. Copying Guide ▶ Basic Copying Functions ▶ Advanced Copying Functions ▶ Customizing the Copy Settings Printing a Bar Code Read this manual to learn how to print bar codes from a computer. Copying Guide Please read this guide before operating this product. After you finish reading this guide, store it in a safe place for future reference. ENG 01 Easy Operation Guide Preface Copy Scanning from a Computer (Remote Scan) .............. 35 Scanning Function Print Troubleshooting ............................................................ 41 Customizing the Machine Settings ............................ 39 (Remote UI)..................................................................... 37 Operating the Machine from a Computer Other Functions & Troubleshooting Send/Fax Keep this guide near the machine for future reference. Operating the Machine from a Computer (Remote UI)..................................................................... 37 Customizing the Machine Settings ............................ 39 Troubleshooting ............................................................ 41 Scan Keep this guide near the machine for future reference. Manuals for the Machine Easy Operation Guide 02 What You Can Do with This Machine Sending/Facsimile Functions † Optional for the imageRUNNER 2545/2535/2530/2525/2520 Copying Function 09 Basic Copying Functions 10 11 12 Making Enlarged/Reduced Copies Adjusting the Density of Copied Images Optimizing the Copy Output Quality Using Paper Not Loaded in the Drawers Copying on Both Sides of the Paper Stapling Collated Copies Making Copies in Sets Arranged in Page Order Making Copies Grouped by Page FAX † Optional 14 15 16 29 30 33 34 Specifying Destinations Easily and Quickly Recalling the Most Recent Settings Specifying the File Format for Sending Documents Printing the Sender Information When Sending I-Faxes/Faxes Setting the Send Screen to Suit Your Needs Automatically Forwarding Received Documents Scanning Documents Containing Photos Clearly Specifying the Scanning Area to Cover the Original Size Scanning Fine Text and Images Clearly Scanning Two-Sided Originals Scanning Different Size Originals Together Adjusting the Background Color of Sent Documents Adding the Reply Destination to Sent Documents Specifying the Time to Start Sending Affixing Stamps on Scanned Originals Scanning Function 35 Scanning from a Computer (Remote Scan) Remote SCAN Other Functions & Troubleshooting 37 Operating the Machine from a Computer (Remote UI) 17 Printing from a Computer 19 Specifying the Printer Driver Settings 20 Remote UI Configuring the Page Settings Selecting the Finishing Style Selecting the Paper Source Selecting the Print Output Quality What is the Remote UI? Accessing the Remote UI 39 Customizing the Machine Settings 41 Troubleshooting SECURITY 03 Easy Operation Guide Preface 38 Other Printing Function PRINT 27 28 31 32 13 Advanced Copying Functions Copying Facing Pages of Bound Originals Separately Copying Different Size Originals Together Copying ID Cards Copying Multiple Originals on One Sheet of Paper Erasing Dark Borders When Copying Bound Originals Adjusting the Sharpness of Copied Images Storing and Recalling Frequently Used Settings Making Copies in the Page Arrangement to Form a Booklet 25 Send and Fax Functions 26 07 Making a Copy COPY 23 Sending a Fax Copy SEND Print Manuals for the Machine What You Can Do with This Machine Control Panel Send/Fax 01 03 05 Preface 21 Sending a Document (E-mail, I-fax, File Server, and USB Memory Media Device) Preface Scan The imageRUNNER 2545i/2545/2535i/2535/2530/2525/2520 incorporates a rich array of input and output features that can greatly enhance your efficiency. Equipped with features that meet the needs of document work in a digitized office, the imageRUNNER 2545i/2545/2535i/2535/2530/2525/2520 represents the ultimate in digital multitasking machines. ▷ Department ID Management ▷ User ID Management See the System Settings Guide on the User Manual CD-ROM. Send, Remote Scan, and Remote UI are the network-based functions. NETWORK What You Can Do with This Machine Easy Operation Guide 04 Control Panel The control panel consists of the touch panel display, physical keys for various operations, numeric keys, and indicators. – COPY key Touch Panel Display Clear key SEND key Use to switch to the top screen of the Send and Fax functions. Press to clear entered numbers or characters. Press to log in to/out of the machine when it is managed with Department ID/User ID Management. ID (Log in/Out) key SCAN/OPTIONS key Use to switch to the top screen of the Remote Scan function. Copy Displays the menu screen for each function and the System Monitor screen. Numeric keys Use to enter numbers. Use to switch to the top screen of the Copy function. Preface If no messages or menu are displayed on the touch panel display with the Main Power Indicator lighting up, the machine is in the Sleep mode. Additional Functions key Press to access the Additional Functions menu. Counter Check key Press to display the Counter Check screen. Print Control Panel Power switch (Sub Power Supply) Press to clear or enter the Sleep Mode. Send/Fax Volume Control key Start key Press to start an operation such as copying and scanning. Scan Press to display the screen for the machine’s audible tone settings. Stop key Press to stop a job in progress such as copying and scanning. Display Contrast dial Use to adjust the brightness of the touch panel display. ● Viewing and Canceling Jobs Reset key Press to cancel the specified settings and return to the top screen. Processing/Data Indicator Flashes when the machine is in operation. Lights up when the machine has waiting jobs. Error Indicator Flashes or lights up when an error has occurred. ● Checking the Machine Status Main Power Indicator Press [System Monitor] to view the job status or cancel jobs. You can also check the machine status such as the amount of remaining paper. Lights up when main power is ON. 05 Easy Operation Guide Preface Other Control Panel Easy Operation Guide 06 Making a Copy Copying Guide PDF on User Manual CD-ROM This section describes the basic operation procedure for copying originals. Copying Guide After you finish reading this guide, store it in a safe place for future reference. Please read this guide before operating this product. 1 2 Display the Copy Screen 4 Specify the Number of Copies ENG Copying Guide Start Copying Print Copy Place Your Originals 3 ENG Preface Please read this guide before operating this product. After you finish reading this guide, store it in a safe place for future reference. (Power). ▶ Close the feeder/platen cover after placing your originals on the platen glass. How to Log in to the Machine ▶ To change the value you have entered, press the correct value. (Clear) → enter Press (Start). Send/Fax Enter the desired number of copies (1 to 999) using – (numeric keys). ▶ When the screen below appears, select the original size → press [OK] → (Start). ▶ The number of copies you specify is displayed on the upper right side of the touch panel display. Scan ▶ If the machine is in the Sleep mode, press Place your originals in the feeder or on the platen glass. ▶ To cancel copying, press (Stop). You can also cancel the current copy job by pressing [Cancel] on the screen indicating the copy processing status.* ▶ Enter your Department ID and password if the screen prompts you to do so → press (Log In/Out). ▶ Enter your User ID and password if the screen prompts you to do so → press (Log In/Out). ▶ Insert the control card if the screen prompts you to do so. ▶ When you have finished the operations, press (Log In/Out) or remove the control card to log out. * The canceling procedure differs depending on the job status. For more information, see Chapter 1, “Introduction to Copy Function,” in the Copying Guide. For more information, see Chapter 2, “Basic Operations,” in the Reference Guide. 07 Easy Operation Guide Copy Making a Copy Easy Operation Guide 08 Other Press (COPY) to display the top screen of the Copy function. Basic Copying Functions This section describes the operation procedures for the Copy functions you can access from the top screen of the Copy function. 4 2 3 Chapter 2❖Copying Guide TEXT TEXT/ PHOTO PHOTO Press the original type drop-down list box → select the original type from [Text], [Text/Photo], or [Photo]. 3 Copy 1 You can set the machine to optimize the copy output quality by selecting the type of your original. If your original contains both text and photo images, select [Text/Photo]. Preface Optimizing the Copy Output Quality You can use the stack bypass as a temporary paper source for the size of the paper that is not loaded in any paper drawers. Making Enlarged/Reduced Copies Print Using Paper Not Loaded in the Drawers Press [Copy Ratio] → select or set the desired ratio → press [Done] as indicated on the touch panel display. Press [Paper Select]. 4 Select the button for the stack bypass as shown left → press [Done].** You can automatically set the copy ratio by pressing [Auto] on the Copy Ratio screen. * When you load paper in the stack bypass, the Stack Bypass screen appears. ** The specified paper size and type are displayed on the button. Adjusting the Density of Copied Images You can optimize the copy density level for the original, automatically or manually. Chapter 2❖Copying Guide 2 Press [Light] to make the density lighter or press [Dark] to darken to the desired level. Press [A] (auto) to automatically set the density level. Stack Bypass—A Multi-purpose Paper Tray ● The stack bypass is a versatile paper source that enables you to print on special sizes and types of paper. ▶ You can use it as a temporary paper source, as described above. ▶ You can use special sizes and types of paper that are not available in the paper drawers: – Non-standard size paper – Special types of paper such as thicker paper or labels ● You can specify the default paper size/type for the stack bypass. Specifying the paper size and type is required when you use the stack bypass. To skip this procedure, you can set and store the default paper size and type by specifying [Stack Bypass Standard Settings] from the Additional Functions menu. For more information, see Chapter 3, “Configuring the Machine’s Basic Settings,” in the Reference Guide. 09 Easy Operation Guide Copy Basic Copying Functions Easy Operation Guide 10 Other 1 To manually select the stack bypass as the paper source after the paper is loaded and its size and type are specified: Scan Chapter 2❖Copying Guide To specify the paper size and type: Load the paper in the stack bypass as illustrated → select the paper size → press [Next] → select the paper type → press [OK] → [Done] as indicated on the touch panel display.* The stack bypass is now chosen as the paper source. Send/Fax Chapter 2❖Copying Guide You can make an enlarged or reduced copy from the original of a standard paper size, such as LTR original to 11" × 17" or LGL to LTR. The optimal copy ratio is automatically set by selecting the desired paper size from the paper size buttons. You can also set the copy ratio from 25% to 400% in 1% increments on the Copy Ratio screen. >> Basic Copying Functions 1 Making Copies in Sets Arranged in Page Order You can set the machine to output the copies in sets arranged in page order. Copying on Both Sides of the Paper 2 Press [Finishing] → [Collate] → [OK] as indicated on the touch panel display. † The 2 > 2-Sided and 2 >1-Sided mode are available on the imageRUNNER 2530/2525/2520 only when the optional Feeder (DADF-AB1) is attached. Copy Chapter 2❖Copying Guide You can copy two-sided originals or multiple one-sided originals on both sides of the paper. 1 > 2-Sided Preface 2 Making Copies Grouped by Page 2 > 1-Sided 2 > 2-Sided You can set the machine to output the copies in groups of individual pages. Print Chapter 2❖Copying Guide Book > 2-Sided (Front/Back 2-Sided) 2 2 1 1 2 3 2 4 3 3 4 4 Output Orientations 1 Press [2-Sided] → select the 2-Sided mode you want to use → press [OK] as indicated on the touch panel display. † For The Book > 2-Sided mode, you will be asked to select the type of original. Stapling Collated Copies You can set the machine to staple the collated copies on the specified position. When performing Collate or Group copying, you can select either “Rotate” or “Offset” as the output orientation. It is possible to combine the output orientation and the Collate or Group mode, such as Collate + Rotate, Group + Offset, etc. ● Rotate ● Offset Each printout group is output in alternating orientations. (Not available when the optional Inner Finisher-B1 is attached to the machine.) Each printout group is output with the same orientation, but staggered back and forth in alternating layers. (Available when the optional Inner Finisher-B1 is attached to the machine.) † The Staple mode is available only when the optional Inner Finisher-B1 is attached to the machine. Chapter 2❖Copying Guide Stapled 2 11 Easy Operation Guide Copy Press [Finishing] → [Staple] → [Next] → select the staple type and position → press [OK] as indicated on the touch panel display. Scan 1 Press [Finishing] → [Group] → [OK] as indicated on the touch panel display. Press [Rotate] → [Next] → select the paper source → press [OK] to use the Rotate mode. Press [Offset] → [OK] to use the Offset mode. Basic Copying Functions Easy Operation Guide 12 Other Book > 2-Sided (Left/Right 2-Sided) Send/Fax Chapter 2❖Copying Guide Advanced Copying Functions 1 2 3 4 Copying ID Cards You can copy both sides of an ID card on one side of paper at actual size. Preface This section describes the operation procedures for the Copy functions you can access from the [Special Features] button on the top screen of the Copy function. Press [ID Card Copy] → select the layout type → press [Next] → select the paper source → press [OK] → [Done] as indicated on the touch panel display. 3 Copy Chapter 3❖Copying Guide Copying Multiple Originals on One Sheet of Paper You can copy the facing pages of bound originals on separate sheets of paper. 1 2 on 1 You can reduce two or four original images to fit on one sheet of paper. Chapter 3❖Copying Guide 1 Chapter 3❖Copying Guide Press [2-Page Separation] → [Done]. 4 4 on 1 Press [Image Combination] → select the original size → press [Next] → select the combination mode → press [Next] → select the paper source → press [OK] → [Done] as indicated on the touch panel display. 1 2 3 4 Scan Copying Different Size Originals Together You can copy multiple originals of different sizes at the same time when using the feeder. 1 † The Different Size Originals mode is available on the imageRUNNER 2530/2525/2520 only when the optional Feeder (DADF-AB1) is attached. 2 3 4 13 Easy Operation Guide Copy Other Chapter 3❖Copying Guide 2 Send/Fax Copying Facing Pages of Bound Originals Separately Print † For the position of the copied images, you can select either top/ bottom or left/right. Press [Different Size Originals] → select [Same Width] or [Different Width] → press [OK] → [Done] as indicated on the touch panel display. Advanced Copying Functions Easy Operation Guide 14 >> Advanced Copying Functions You can erase shadows and lines that may appear on the copy. Select the erase mode depending on the type or condition of the original. 70% Text/Photo Group Chapter 3❖Copying Guide 1 ON Press [Frame Erase] → select the mode you want to use → press [Next] → select the original size → press [Next] → specify the erase width → press [OK] → [Done] as indicated on the touch panel display. Chapter 3❖Copying Guide 3 2 on 1 Photo To store the setting combination: First make a combination of the copy settings you want to store. Press [Mode Memory] → [Store/Erase] → select [Store] → select the memory button in which you want to store the setting in → press [Next]. Confirm the setting and press [Yes] → [OK] → [Done] as indicated on the touch panel display. † For the Binding Erase mode, select the side of the original on which to erase the shadow, instead of selecting the original size. Book Frame Erase mode: Binding Erase mode: Erases shadows on the edges and in the center of the copy of the bound original. Erases shadows of punch holes. To recall the setting combination from the memory: Press [Mode Memory] → select the memory button you want to recall → press [OK] → [Done]. OFF Making Copies in the Page Arrangement to Form a Booklet OFF You can copy the originals in such a way that the copies are made into a booklet when folded. ON Aptly nicknamed “Tropical Forests under the sea”, these spots of breathtaking beauty serve as home to countless varieties of life, and to us of the land, this alluring, dream-like world forms a tropical paradise filled with romance. Sharpness Higher The world's coral reefs, where brilliantly colored fish and a myriad of other tropical creatures come together. Aptly nicknamed “Tropical Forests under the sea”, these spots of breathtaking beauty serve as home to countless varieties of life, and to us of the land, this alluring, dream-like world forms a tropical paradise filled with romance. Sharpness Lower 15 Easy Operation Guide Copy 7 8 1 6 3 4 Adjusting the Sharpness of Copied Images Chapter 3❖Copying Guide 2 1 2 3 4 5 6 7 8 5 ON The world's coral reefs, where brilliantly colored fish and a myriad of other tropical creatures come together. Send/Fax OFF You can store the possible combinations of the copy settings to recall when you make a copy with the setting combination. 4 Press [Booklet] → select the original size → press [Next] → select the paper source → press [OK] → [Done] as indicated on the touch panel display. † You can also copy the first page of the originals as a cover. You can adjust the sharpness level. To make the text or lines sharper, increase the sharpness level. To make the halftone images softer, decrease the sharpness level. Chapter 3❖Copying Guide 2 Scan Erases shadows on the edges of the copy. Press [Sharpness] → [Low] or [High] to adjust the sharpness level → [OK] → [Done] as indicated on the touch panel display. Advanced Copying Functions Easy Operation Guide 16 Other Original Frame Erase mode: Storing and Recalling Frequently Used Settings Copy Erasing Dark Borders When Copying Bound Originals Print 2 4 Preface 1 3 Printing from a Computer Driver Software Guide PDF on User Manual CD-ROM This section describes the basic operation procedure for printing a document from a computer. Driver Software Guide After you finish reading this guide, store it in a safe place for future reference. Please read this guide before operating this product. 1 2 Select the Printer Specify the Print Settings 4 ENG Driver Software Guide Start Printing ▶ On this screen, you can specify the number of prints, and pages to print. If you need no detailed settings, click [OK]** to start printing. * The name of the button to display the printer setting sheet shown on step 3 may vary depending on the application you are using. ** The name of the button to start printing may vary depending on the application you are using. † The dialog boxes for print settings shown in steps 2 and 4 may vary depending on the application you are using. In each sheet of the printer setting dialog box, specify the print settings that suit your preferences → click [OK]. For more information on the print settings, see p. 19 and p. 20. Specify the number of prints and pages to print as necessary → click [OK].* ▶ To cancel printing on your computer, click [Cancel] in the dialog box that appears when the print data is being processed. ▶ To cancel printing on the machine’s control panel, use the System Monitor screen displayed by pressing (Stop) or [System Monitor].** * The name of the button to start printing may vary depending on the application you are using. ** The canceling procedure differs depending on the job status. For more information, see Chapter 2, “Managing Print Jobs,” in the Printer Guide. Printer Driver The printer driver installed on your computer enables the machine to print the documents from the applications on your computer. The printer driver also enables you to specify the various print settings such as paper size and finishing style. ▶ For more information on the printer driver settings, see p. 19 and p. 20. 17 Easy Operation Guide Print Printing from a Computer Easy Operation Guide 18 Scan In the [Print] dialog box, select your printer → click [Properties]*. Other In the application you open the document to print from, click the [File] menu → select [Print]. Send/Fax Print Copy Open the [Print] Dialog Box 3 ENG Preface Please read this guide before operating this product. After you finish reading this guide, store it in a safe place for future reference. Specifying the Printer Driver Settings This section describes the instructions on how to specify printer driver settings, such as the finishing style and print quality. †The printer driver screens shown below may differ from the ones displayed on your computer, depending on the machine and optional equipment, printer driver, or operating system you are using. 1 Select by Enables you to select the paper supply method from Paper Source or Paper Type. 2 Paper Selection Enables you to select either you use the same paper source or type for all pages or use a different paper source or type for the specified pages. This setting is useful, for example, when you want to print the covers of your document on a different kind of paper. 1 2 3 3 Paper Source/Paper Type* Enables you to select a desired paper source or type when making prints. Configuring the Page Settings Driver Software Guide 3 Output Size Enables you to select the size of the paper to print on. 4 Page Layout Enables you to print multiple pages onto one sheet of paper, or in other multiple layouts. Driver Software Guide Selecting the Print Output Quality On the [Quality] sheet, you can specify the print output quality to match the purpose of the printing. 1 Objective Enables you to print a document with the print settings that best suit the content of the document. When you select an item, a comment is displayed below the list. 1 2 Manual Grayscale Settings Enables you to manually specify the settings such as brightness or contrast for your grayscale prints. Driver Software Guide Selecting the Finishing Style Send/Fax 4 2 Page Size Enables you to select the size of the document you have created in an application. Scan 2 3 1 Profile Enables you to set the printer driver simply by selecting it from the list. Printer driver settings for different purposes are registered. Print * When you select [Paper Type] on <Select by>, [Paper Type] is displayed instead of [Paper Source], allowing you to select the paper type to print your document on. On the [Page Setup] sheet, you can specify the page settings. 1 Copy On the [Paper Source] sheet, you can specify the paper source and type. Preface Selecting the Paper Source 2 1 Print Style Enables you to select the print style such as 1-sided or 2-sided Printing. 1 2 Binding Location Enables you to select the binding location such as Long Edge (Left) of Short Edge (Top). 2 3 3 Finishing Enables you to select the finishing style such as Collate or Group. On each sheet, click [OK] to return to the [Print] window after you have specified the settings. Other On the [Finishing] sheet, you can specify the finishing style. [Help] Button Driver Software Guide Click [Help] on each sheet to display the further information about the print settings. 19 Easy Operation Guide Print Specifying the Printer Driver Settings Easy Operation Guide 20 Sending a Document Sending and Facsimile Guide (E-mail, I-fax, File Server, and USB Memory Media Device) PDF on User Manual CD-ROM †The Send function is available only when the Color Send Kit-Y1 Sending and Facsimile Guide (optional for the imageRUNNER 2545/2535/2530/2525/2520) is activated. Please read this guide before operating this product. After you finish reading this guide, store it in a safe place for future reference. After you finish reading this guide, store it in a safe place for future reference. Please read this guide before operating this product. 1 Place Your Originals 3 4 Specify the Destination ENG Sending and Facsimile Guide Start Sending Print Copy Display the Send Screen 2 ENG Preface This section describes the basic operation procedure for sending a document. ▶ If the machine is in the Sleep mode, press (Power). ▶ Enter your ID and password or insert the control card if the screen prompts you to do so. For more information on logging in to the machine, see “How to Log in to the Machine,” on p. 07. ▶ Close the feeder/platen cover after placing your originals on the platen glass. Press [New Address] → select the sending method → specify the destination. ▶ You can also specify the destination by using [Address Book], [Favorites Buttons], or [One-touch Buttons]. These functions save you the effort of entering a destination each time you send documents. Press (Start). Send/Fax Place your originals in the feeder or on the platen glass. ▶ When the screen below appears, select the original size → press [OK] → (Start). Scan Press (SEND) to display the top screen of the Send and Fax functions. † Some USB memory media devices are not compatible with the machine. For more information, see Chapter 2, “Sending Documents,” in the Sending and Facsimile Guide. ▶ To cancel scanning originals, press (Stop). You can also cancel scanning originals by pressing [Cancel] on the screen indicating the send processing status. For instructions on how to cancel sending a document during transmission, see Chapter 2, “Sending Documents,” in the Sending and Facsimile Guide. 21 Easy Operation Guide Send/Fax Sending a Document (E-mail, I-fax, File Server, and USB Memory Media Device) Easy Operation Guide 22 Other For information on specifying destinations, see p. 25. Sending a Fax Sending and Facsimile Guide PDF on User Manual CD-ROM †The Fax function is available only when the optional Super G3 Fax Board-AG1 is attached to the machine. Sending and Facsimile Guide Please read this guide before operating this product. After you finish reading this guide, store it in a safe place for future reference. After you finish reading this guide, store it in a safe place for future reference. Please read this guide before operating this product. 1 Place Your Originals 3 4 Enter the Fax Number ENG Sending and Facsimile Guide Start Sending Print Copy Display the Send Screen 2 ENG Preface This section describes the basic operation procedure for sending a fax. ▶ If the machine is in the Sleep mode, press (Power). ▶ Enter your ID and password or insert the control card if the screen prompts you to do so. For more information on logging in to the machine, see “How to Log in to the Machine,” on p. 07. ▶ Close the feeder/platen cover after placing your originals on the platen glass. Enter the fax number using (numeric keys). – ▶ You can also specify the destination by using [Address Book], [Favorites Buttons], or [One-touch Buttons]. These functions save you the effort of entering a fax number each time you send documents. Press (Start). Send/Fax Place your originals in the feeder or on the platen glass. ▶ When the screen below appears, select the original size → press [OK] → (Start). Scan Press (SEND) to display the top screen of the Send and Fax functions. ▶ To cancel scanning originals, press (Stop). You can also cancel scanning originals by pressing [Cancel] on the screen indicating the fax processing status. For instructions on how to cancel sending a document during transmission, see Chapter 2, “Sending Documents,” in the Sending and Facsimile Guide. 23 Easy Operation Guide Send/Fax Sending a Fax Easy Operation Guide 24 Other For information on specifying destinations, see p. 25. Send and Fax Functions This section describes the operation procedures for the Send and Fax functions you can access from the top screen of the Send and Fax functions. The Recall function enables you to send a document using any of the last three addresses, scan settings, and send settings that were used. 4 Chapter 4❖Sending and Facsimile Guide 5 Press [Recall]. Copy 2 4 3 Print Specifying Destinations Easily and Quickly [Address Book], [One-touch Buttons], and [Favorites Buttons] enable you to streamline and customize the procedures for specifying destinations. These functions enable you to register recipient destinations so that you can send documents by pressing only a few keys. 1 Select [1 Before], [2 Before], or [3 Before]. 2 Confirm the settings → press [OK]. 1 Press [Address Book]. 2 Press [Favorites Buttons]. 3 Send/Fax Chapter 4❖Sending and Facsimile Guide Specifying the File Format for Sending Documents Press [One-touch Buttons]. You can send documents in a variety of file formats, including TIFF, PDF, and JPEG. This gives you the freedom to send documents in a manner that is suited to the purpose of the document, as well as the recipient’s document handling environment. Scanned original images are converted to the specified file format and sent via e-mail or to a file server or USB memory media device. Chapter 3❖Sending and Facsimile Guide Press [File Format]. Select the desired favorites button → press [Done]. Other 5 Select the desired destination → press [OK]. Select the desired one-touch button → press [Done]. File Formats In addition to standard TIFF, PDF, and JPEG file formats, the machine also supports PDF (Compact) and PDF (OCR) files. ▶ PDF (Compact) files are archived with a higher compression ratio than normal PDF. The resulting file data size is smaller than normal PDF, and therefore recommended for jobs that are to be sent over the network. ▶ PDF (OCR) files perform OCR (Optical Character Recognition) on scanned documents to create a PDF with searchable text. † PDF (OCR) is available only when the Color Send Searchable PDF Kit-C1 (optional for the imageRUNNER 2545/2535/2530/2525/2520) is activated. 25 Easy Operation Guide Send/Fax Scan 1 Preface Recalling the Most Recent Settings 1 Select the desired file format. † You cannot select the file format when sending I-faxes or faxes. 2 If you want to separate multiple images and send them as separate files, press [Divide into Pages] → [Done]. Send and Fax Functions Easy Operation Guide 26 >> Send and Fax Functions This section describes the operation procedures for specifying the useful Additional Functions settings related to the Send and Fax functions. You can specify the screen to display first when you press (SEND). You can select Favorites Buttons screen, Onetouch screen, or the top screen of the Send and Fax functions as the screen to display first. Preface Setting the Send Screen to Suit Your Needs Chapter 7❖Sending and Facsimile Guide (Additional Functions). Copy Press Printing the Sender Information When Sending I-Faxes/Faxes The sender information is printed at the top of the documents that you send via I-fax/fax. Information such as your I-fax address, name and fax number is printed, enabling the recipient to know who sent the document. 1 Press [Communication Settings] → [TX Settings] under <Common Settings>. 2 Press [▼] or [▲] until [Default Screen for Send] appears → press [Default Screen for Send]. 3 Select the desired setting item → press [OK]. To return to the top screen, press (Reset). Automatically Forwarding Received Documents 1 Press [Communication Settings] → [TX Settings] under <Common Settings>. 2 Press [▼] or [▲] until [TX Terminal ID] appears → press [TX Terminal ID]. 3 Press [Option]. You can set the machine to automatically forward the received I-fax/fax documents to any desired destination. If a received document matches the forwarding conditions you set, it is forwarded to the destination. You can also specify a forwarding destination for received documents that do not match the forwarding conditions. Chapter 4❖System Settings Guide (Additional Functions). Other Press Send/Fax (Additional Functions). Scan Press Print Chapter 7❖Sending and Facsimile Guide 4 Select the print position of the sender information → select the type of marking* → press [OK]. To return to the top screen, press (Reset). * The [Telephone # Mark] setting is available only when the optional Super G3 Fax Board-AG1 is attached. † For details of the optional settings with illustrations, see Chapter 7, “Customizing the Machine’s Settings,” in the Sending and Facsimile Guide. 1 27 Easy Operation Guide Send/Fax Press [System Settings]* → [Forwarding Settings]. * To make changes to the System Settings, log in to the machine as the System Manager. 2 Press [Register] → register the forwarding conditions and destinations as indicated on the touch panel display. 3 Select the desired forwarding setting → press [Validate/ Invalidate] → [Done]. To return to the top screen, press (Reset). Send and Fax Functions Easy Operation Guide 28 >> Send and Fax Functions This section describes the operation procedures for the Send and Fax functions you can access from the [Scan Settings] button on the top screen of the Send and Fax functions. 1 When the edges of the scanned image are missing, change the Document Size setting to a size that is larger than the actual original size. Preface Specifying the Scanning Area to Cover the Original Size Chapter 3❖Sending and Facsimile Guide Press [Scan Settings]. Copy 1 1 1 2 3 Press [Document Size]. Select the document size that is larger than the original size → press [Done] → [OK]. Press [Scan Settings]. Scanning Fine Text and Images Clearly You can scan fine text in documents more clearly by setting a higher resolution. Note, however, that the file size increases as you increase the resolution. Chapter 3❖Sending and Facsimile Guide 1 2 Press [Scan Settings]. Press the original type drop-down list box → select [Photo] or [Text/Photo] → press [OK]. Other 1 Press [Option]. 1 29 Easy Operation Guide Send/Fax Send/Fax Chapter 3❖Sending and Facsimile Guide Press [Option]. Scan You can improve the image quality of scanned images by selecting the original type setting that best suits your originals. When originals containing photos are not scanned clearly, select [Photo] or [Text/Photo] from the original type dropdown list box to obtain better results. Print Scanning Documents Containing Photos Clearly Press [Option]. 2 Press the [Resolution] drop-down list box → select the desired resolution → press [OK]. Send and Fax Functions Easy Operation Guide 30 >> Send and Fax Functions 1 Preface Scanning Different Size Originals Together You can scan multiple originals of different sizes at the same time when using the feeder. 1 Chapter 3❖Sending and Facsimile Guide Copy † The Different Size Originals mode is available on the imageRUNNER 2530/2525/2520 only when the optional Feeder (DADF-AB1) is attached. Press [Scan Settings]. Scanning Two-Sided Originals Print You can scan both sides of the originals set in the feeder. † The 2-Sided Original mode is available on the imageRUNNER 2530/2525/2520 only when the optional Feeder (DADF-AB1) is attached. 1 Press [Scan Settings]. 2 Press [Option]. Press [Different Size Origin]. 3 Select [Same Width] or [Different Width] → press [OK] → [OK]. Adjusting the Background Color of Sent Documents You can adjust the density of the background color when scanning color originals. You can adjust red, green, and blue separately. Chapter 3❖Sending and Facsimile Guide Press [Option]. 2 Press [2-Sided Original]. 3 Select [Book Type] or [Calendar Type] → press [OK] → [OK]. 1 Press [Scan Settings]. Other 1 Scan 1 Send/Fax Chapter 3❖Sending and Facsimile Guide 1 31 Easy Operation Guide Send/Fax Press [Option]. 2 Press [Adjust Background]. 3 Press [-] or [+] to adjust the amount of each color → press [OK] → [OK]. Send and Fax Functions Easy Operation Guide 32 >> Send and Fax Functions This section describes the operation procedures for the Send and Fax functions you can access from the [Send Settings] button on the top screen of the Send and Fax functions. Specifying the Time to Start Sending You can specify the time for sending the document. This function is useful, for example, when you want to send a document at a future time when you may not be near the machine. Preface 1 Chapter 2❖Sending and Facsimile Guide Press [Send Settings]. Copy 1 Print Adding the Reply Destination to Sent Documents You can specify the reply-to address for your e-mails/I-faxes. 1 Press [Delayed Send]. 2 Enter the time to send the document using – (numeric keys) → press [OK]. 3 Press [Done]. Send/Fax Chapter 2❖Sending and Facsimile Guide First, register the e-mail address you want to use as the reply-to address. Press [Send Settings]. 1 Affixing Stamps on Scanned Originals Scan You can set the machine to affix a stamp on the front side of scanned originals to indicate they have been scanned. † The Stamp mode is available only when the optional Stamp Unit-B1 is attached to the feeder (optional for the imageRUNNER 2530/2525/2520). Chapter 3❖Sending and Facsimile Guide 1 Press [▼]. 2 Press [Reply-to]. 3 Other 1 Press [Send Settings]. Select the reply-to address → press [OK] → [Done]. 1 33 Easy Operation Guide Send/Fax Press [Stamp]. 2 Press [Done]. Send and Fax Functions Easy Operation Guide 34 Scanning from a Computer Driver Software Guide (Remote Scan) PDF on User Manual CD-ROM †The screen shots shown below may differ from the ones displayed on your computer, depending on the application or operating system you are using. Driver Software Guide Please read this guide before operating this product. After you finish reading this guide, store it in a safe place for future reference. After you finish reading this guide, store it in a safe place for future reference. Please read this guide before operating this product. 1 Place Your Originals 3 Open the Color Network ScanGear 4 ENG Driver Software Guide Start Scanning ▶ If the machine is in the Sleep mode, press (Power). ▶ Enter your ID and password or insert the control card if the screen prompts you to do so. For more information on logging in to the machine, see “How to Log in to the Machine,” on p. 07. Place your originals in the feeder or on the platen glass. ▶ Close the feeder/platen cover after placing your originals on the platen glass. From the menu of the application, select the command* to start the scanning operation. ▶ Make sure that the Color Network ScanGear is selected as the scanner to be used. For more information, see the documentation that comes with your TWAIN-compliant application. ▶ On the Color Network ScanGear dialog box, specify the settings such as the color mode and resolution. ▶ To cancel scanning, click [Cancel] in the dialog box that appears when the scan data is being processed. ▶ When scanning is complete, press [Offline] on the Remote Scan screen in step 1. For instructions on how to specify the settings on the Color Network ScanGear dialog box, see the Driver Software Guide. Other * Command names include [Scan New], [Acquire], and others, depending on the application you are using. Specify the scan settings that suit your preferences → click [Scan]. Scan Press (SCAN/OPTIONS) to display the Remote Scan screen → press [Online]. Send/Fax Print Copy Display the Remote Scan Screen 2 ENG Preface This section describes the basic operation procedure for scanning originals to load the scanned images to a computer. 35 Easy Operation Guide Scan Scanning from a Computer (Remote Scan) Easy Operation Guide 36 Operating the Machine from a Computer Remote UI Guide (Remote UI) PDF on User Manual CD-ROM This section describes the basic operation procedure for accessing the machine from a computer by using the Remote UI. Remote UI Guide After you finish reading this guide, store it in a safe place for future reference. Please read this guide before operating this product. ■ What is the Remote UI? ENG ENG ■ Accessing the Remote UI The Remote UI (Remote User Interface) is software built into the machine that enables users to access machine functions and settings from a web browser on a computer. Some examples of what you can do on the Remote UI include: ▶ Checking the machine status such as paper or toner amount ▶ Checking the job status ▶ Registering or editing the addresses.* * The Address Book can be protected by a password. 1 Log in to the Remote UI Copy Start Your Web Browser 2 Remote UI Guide Preface Please read this guide before operating this product. After you finish reading this guide, store it in a safe place for future reference. If you log in to the Remote UI as the System Manager, you can use further functions such as setting Department ID/User Management and customizing the various machine settings. * The IP address in the screen shots in this section is for illustrative purposes only. Ask your network administrator for the IP address of your machine. ▶ After successfully logging in, the Device Status page is displayed. Go to other pages as necessary by using the menu on the left side of the page. Other Network On the Remote UI top page displayed in step 1, enter your Department ID or User ID and password* → click [OK]. Scan Start your web browser → enter the IP address* of the machine into the Web browser on your computer to access the Remote UI → press [ENTER] key on your computer keyboard. Send/Fax Print Viewing the Jobs Checking the consumables Editing the Address Book * The ID and password you have to enter when logging in depend on the Remote UI setting. Ask your system administrator for your ID and password. 37 Easy Operation Guide Other Operating the Machine from a Computer (Remote UI) Easy Operation Guide 38 Customizing the Machine Settings From the Additional Functions screen, you can customize the machine settings to suit your needs. 2 [Copy Settings] Enables you to specify the settings for the Copy function. ▶Chapter 4 in the Copying guide 3 [Timer Settings] Enables you to specify the timer-related settings for the machine, such as the time for the machine to enter the Sleep mode. ▶Chapter 3 in the Reference Guide Enables you to specify the settings for the Send and Fax functions. ▶Chapter 7 in the Sending and Facsimile Guide 7 [Report Settings] Enables you to print various reports such as the User’s Data List. ▶Chapter 2 in the Reference Guide ▶Chapter 8 in the Sending and Facsimile Guide 8 [Address Book Settings] Enables you to register, edit, or delete destinations. ▶Chapter 4 in the Sending and Facsimile Guide 9 [System Settings]* Enables you to specify the machine’s system settings such as the network- or security-related settings. Mainly used by the administrator. * To make changes to the System Settings, log in to the machine as the System Manager. ▶System Settings Guide 5 [Adjustment/Cleaning] Displaying the screen for the function you frequently use If you frequently use the Copy function, for example, you can set the Copy screen to be displayed first. (Chapters to refer to depend on the setting items.) Saving electricity or toner There are two settings for saving electricity and toner. Various settings for the Copy function can be stored and recalled as a setting combination. Setting the time for the machine to enter the Sleep mode You can adjust the time for the machine to enter the Sleep mode. To save toner: Preventing misdialing when sending a fax When you dial a fax number, the machine prompts you to enter the fax number again, which will prevent dialing mistakes. Other To save electricity: Storing and recalling the copy settings you prefer Send/Fax Enables you to adjust and optimize the machine settings for better results when printing on special paper or under other conditions. Also enables you to perform automatic machine cleaning. ▶Chapter 5 and 6 in the Reference Guide Examples of Useful Settings Preface Enables you to specify the settings for the Print function. ▶Chapter 3 in the Printer Guide Scan The Additional Functions screen is displayed by pressing (Additional Functions) on the machine’s control panel. From this screen, you can change and customize the machine’s various settings. When these settings are changed or specified, they are saved as default settings and remain in effect until they are changed again. 4 [Communications Settings] 6 [Printer Settings] Copy Enables you to specify the settings that are fundamental to the machine operations. ▶Chapter 3 in the Reference Guide Print 1 [Common Settings] Press [Initial Function] and make the desired settings. Chapter 3 in the Reference guide 39 Easy Operation Guide Other Press [Energy Consumption in Sleep Mode] and make the desired settings. Chapter 3 in the Reference guide Press [Toner Save Mode] and make the desired settings. Chapter 3 in the Reference guide First make the copy settings as you prefer. Press [Standard Settings] and make the desired settings. Press [Auto Sleep Time] and make the desired settings. Press [Restrict the Send Function] → [Confirm Entered Fax Numbers] and make the desired settings. Chapter 4 in the Copying Guide Chapter 3 in the Reference guide Chapter 4 in the System Settings Guide Customizing the Machine Settings Easy Operation Guide 40 Troubleshooting This section describes which other guides to check when seeking solutions to problems that may occur when using the machine. The list also includes where to find descriptions of the procedures for replacing or refilling the consumables such as paper, toner, and staples. Chapter Guide Problem Section Title Chapter Guide Preface Section Title Other Paper Paper has run out. Paper Drawers 5 Reference A paper jam has occurred. Clearing Paper Jams 6 Reference Paper jams occur frequently. Identifying and Isolating Problems 6 Reference The power does not turn ON. Main Power and Control Panel Power 2 User’s A message appears on the touch panel display. Self-diagnostic Display 6 Reference An error code like “E******” appears on the touch panel display. Service Call Message 6 Reference Copy Problem Toner has run out. Replacing the Toner 5 Reference A staple jam has occurred. Clearing Staple Jams 6 Reference Staples have run out. Replacing the Staple Cartridge 5 Reference The scanned images of the originals scanned with the platen glass/feeder have marks or stains. Routine Cleaning 5 Reference Memory becomes full during scanning. If Memory Becomes Full during Scanning... 6 Reference Specifying Common Settings 3 Reference Settings Menu 3 Printer Routine Cleaning 5 Reference Cannot send documents. Identifying and Isolating Problems 9 Sending and Facsimile Cannot receive documents. Identifying and Isolating Problems 9 Sending and Facsimile Transmissions are slow. Identifying and Isolating Problems 9 Sending and Facsimile Print Toner Send/Fax Staples Scan Scanning The density of a copy or print is different from the original. Printouts are dirty. Other Printing Communications 41 Easy Operation Guide Other Troubleshooting Easy Operation Guide 42 CANON INC. 30-2, Shimomaruko 3-chome, Ohta-ku, Tokyo 146-8501, Japan CANON U.S.A., INC. One Canon Plaza, Lake Success, NY 11042, U.S.A. CANON CANADA INC. 6390 Dixie Road Mississauga, Ontario L5T 1P7, Canada CANON EUROPA N.V. Bovenkerkerweg 59-61 1185 XB Amstelveen, The Netherlands (See http://www.canon-europe.com/ for details on your regional dealer) CANON LATIN AMERICA, INC. 703 Waterford Way Suite 400 Miami, Florida 33126 U.S.A. CANON AUSTRALIA PTY. LTD 1 Thomas Holt Drive, North Ryde, Sydney, N.S.W. 2113, Australia CANON CHINA CO., LTD 15F Jinbao Building No.89 Jinbao Street, Dongcheng District, Beijing 100005, China CANON SINGAPORE PTE. LTD. 1 HarbourFront Avenue #04-01 Keppel Bay Tower, Singapore 098632 CANON HONGKONG CO., LTD 19/F., The Metropolis Tower, 10 Metropolis Drive, Hunghom, Kowloon, Hong Kong FT5-2703 (000) xxxxxxxxxx © CANON INC. 2009 PRINTED IN CHINA