1
Printer Relocation
Printer Driver
Installation
Large-Format Printers
3
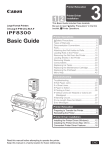
This Basic Guide includes three booklets.
Be sure to read " Safety Precautions" in the first
booklet, Printer Operations.
Printer Operations
Basic Guide
1
Safety Precautions ........................................2
Types of Manuals .............................................5
Documentation Conventions ............................6
Parts .................................................................8
Attaching the Roll Holder to Rolls ...................12
Loading Rolls in the Printer ............................14
Removing the Roll from the Printer ................18
Loading Sheets in the Printer .........................22
Removing Sheets ...........................................24
Consumables..................................................25
Replacing Ink Tanks .......................................26
Replacing the Maintenance Cartridge ............32
Replacing the Printhead .................................37
Menu Map.......................................................42
Troubleshooting
2
Troubleshooting ................................................2
If Roll Paper Jams ..........................................18
If a Sheet Jams...............................................21
If Paper is Soiled ............................................23
If Printing is Faint ............................................25
If Vertical Lines are Warped or Colors are
Misaligned ..................................................26
If Banding Occurs ...........................................28
If Line Length Does Not Match .......................30
Error Messages ..............................................32
Printer Relocation
3
Preparing to Transfer the Printer ......................2
Reinstalling the Printer .....................................8
Printer Driver Installation
Installing the Printer Driver (Windows) ...........12
Installing the Printer Driver (Mac OS X) .........14
Convenient Printer Driver Features ................16
Read this manual before attempting to operate the printer.
Keep this manual in a handy location for future referencing.
ENG
Preparing to Transfer the Printer
Prepare to transfer the printer as follows.
To protect the internal parts in transit, always follow the steps below before transferring the printer to a new
location. Refer to the Setup Guide for details on packing the printer and installing it after transfer.
• Be sure to contact your Canon dealer before transferring the printer to a new location. Ink may leak and damage
the printer if you do not prepare the printer correctly and it is tipped or stood on end in transit.
• It is not possible to prepare the printer for transfer if the Display Screen requests Maintenance Cartridge
replacement or checking of the remaining capacity. Replace the Maintenance Cartridge before transfer
preparations. (→ , Replacing the Maintenance Cartridge)
• Depending on the state of the printer, part replacement may be necessary when preparing to transfer the printer
(that is, when you execute the printer menu item to prepare for transfer).
• Ink must be drained before Level 2 or Level 3 printer transfer, as described in the following table. Prepare a
Maintenance Cartridge in advance.
• Always follow the instructions of the service representative when transferring the printer under Level 3 conditions.
Level
1
Shipping Method
(Example)
By truck
Permitted Angle of Inclination
Lengthwise: 0°–30°
Amount of Ink
to Dispose of
Required
Maintenance
Cartridges(*1)
0
0 or 1
Rotation: 0°–10°
2
By plane
All directions: 0°–30°
Approx. 200 ml
1 or 2
3
Tipping the printer or
holding it upright for
elevators or stairs
Lengthwise: 0°–90°
Rotation: 0°–30°
Approx. 700 ml
2 or 3
*1: The quantity of maintenance cartridges required depends on the capacity of the Maintenance Cartridge in use.
2
Preparing to Transfer the Printer
Remove paper
1
2
Remove the Wheeled Output Stacker from the printer
(iPF825 only).
Remove the paper.
Rolls: (→ , Removing the Roll from the Printer)
Sheets: (→ , Removing Sheets)
Access the menu for moving the printer
1
2
3
4
5
Press the Menu button to display MAIN MENU.
OK
Press ▲ or ▼ to select Maintenance, and then press the
► button.
Press ▲ or ▼ to select Move Printer, and then press the
► button.
Press ▲ or ▼ to select the level of transfer, and then
press the OK button.
After the message Always contact service before
preparing to move the printer. is shown on the Display
Screen, press the OK button.
• If you have selected Level 1, after processing in
preparation to move the printer is finished, the
message Finished preparing to move printer. Turn
off printer. is shown on the Display Screen. In this
case, follow the instructions in "Pack the printer."
• When you are finished preparing to transfer the printer
after selecting Level 2 or Level 3 conditions, the
Display Screen requests you to open the Ink Tank
Cover. In this case, follow the instructions in "Remove
the ink tanks."
• If consumables must be replaced, the message Consumables must be replaced. Call for service. is
shown on the Display Screen and preparation is not possible. If this message is displayed, press the
OK button and contact your Canon dealer for assistance.
3
Preparing to Transfer the Printer
Remove the ink tanks
1
2
Open the Ink Tank Cover.
A
Lift the stopper (a) of the Ink Tank Lock Lever (a). Lift the
Ink Tank Lock Lever until it stops, and then push it down
to the front.
A
A
A
GG
B
B
B
a
3
Remove the Ink Tank.
A
A
Y
GY
MBK
BK
M
• Store the Ink Tank you removed in the box with the ink
holes (a) facing up. Otherwise, ink may leak and cause
stains.
4
Repeat steps 2 and 3 to remove all ink tanks.
4
a
Preparing to Transfer the Printer
5
Push down the release lever (a) as shown as you gently
return all ink tank lock levers to the original position.
A
A
a
Y
GY
MB
K
BK
M
6
Close the Ink Tank Cover.
At this point, ink is drawn out from inside the tubes.
• Do not remove the Maintenance Cartridge during this process.
When the process is finished, Finished preparing to
move printer. Turn off printer. is displayed.
5
Preparing to Transfer the Printer
Pack the printer
1
Press the Power button and turn off the printer.
OK
• Turn off the printer before you unplug it. It may damage the printer if you unplug it before it is off and
transfer it in that state. If you accidentally unplug the printer, plug it in again, reinstall the Ink Tank, wait
until the printer comes online, and follow this procedure again.
2
3
Disconnect the power cord and interface cable. Also
disconnect the power cord of the Roll Unit and Media
Take-up Unit, if your model is equipped with these units.
Open the Top Cover, grasp the Belt, insert it between the
Belt Stopper, and affix the Belt Stopper with a hex screw
at the position indicated.
• Here, the Belt Stopper is the one that was removed and stored after initial installation. Neglecting to
attach the Belt Stopper may damage the printer.
4
Close the Top Cover.
6
Preparing to Transfer the Printer
5
6
7
8
Tape down printer covers to secure them, in the reverse
order of tape removal during installation.
Remove the Stand by reversing the installation procedure,
when it was attached to the printer.
Disassemble and repackage the Stand by following the
installation procedure in reverse.
Repack the Roll Holder, Holder Stopper, and printer in
shipping materials, and then package them in a shipping
box.
7
Reinstalling the Printer
The basic workflow for reinstalling the printer is as follows.
For detailed instructions, see the Setup Guide.
Assemble the stand
• The Stand must be assembled by at least two people on a flat surface. Attempting assembly by yourself poses a
risk of injury or bending the Stand.
• When assembling the Stand, lock the casters. In addition, always unlock the casters before moving the assembled
Stand. Attempting to move the stand when the casters are locked poses a risk of injury or damage to the location
site.
Referring to the Printer Stand Setup Guide, assemble the Stand.
For the iPF825, mount the Roll Unit on the Stand.
Install the printer
• The iPF815 or iPF825 alone weighs approximately 112 kg. Moving the printer requires at least six people, holding it
on both sides. Be careful to avoid back strain and other injuries.
• When moving the printer, firmly grasp the Carrying Handles (a)
under each side. The printer may be unsteady if you hold it at other
positions, which poses a risk of injury from dropping the printer.
a
Mount the printer on the assembled Stand and tighten the screws
firmly.
8
Reinstalling the Printer
Install the output stacker
When installing the Stationary Output Stacker, refer to the
Printer Stand Setup Guide.
When installing the Wheeled Output Stacker, refer to the
Wheeled Output Stacker Setup Guide.
Attach the media take-up unit (iPF815: optional)
Referring to the Setup Guide included with the Media Take-up
Unit, attach the Media Take-up Unit.
Remove the packaging material
Remove tape and packaging material attached to the printer. Also
open the Top Cover and remove stoppers and spacers inside the
printer.
9
Reinstalling the Printer
Connect the power cord
Connect the power cord to the Power Supply Connector on the
back of the printer.
Plug the power cord into the outlet.
Turn the printer on
Press the power button to turn the printer on.
When the message Has printer been reinstalled? (Do not load
ink tanks yet.) is displayed, select Yes and press the OK button.
Install the ink tanks
Open the Ink Tank Cover and install the ink tanks.
10
OK
Reinstalling the Printer
Attach the roll holder to rolls
Attach the Roll Holder to the Roll Media. (→
Holder to Rolls)
, Attaching the Roll
Load rolls in the printer
Load the Roll Media in the printer. (→
Printer)
, Loading Rolls in the
Install the printer driver and manual
Note that the driver installation procedure varies depending on the
type of connection.
(→ , Installing the Printer Driver (Windows))
(→ , Installing the Printer Driver (Mac OS X))
11
Installing the Printer Driver (Windows)
The basic instructions for installing the printer driver are as follows.
For detailed instructions, see the Setup Guide.
Compatible operating systems
Windows 7, Windows Server 2008, Windows Vista, Windows Server 2003, Windows XP and Windows 2000
Supported connection methods
The printer driver works over USB or network (TCP/IP) connections.
The driver installation procedure varies depending on the type of connection.
Follow these steps to install the printer driver and User Manual.
Installing the printer driver and User Manual
• When setting up a USB connection, connect the printer and computer with the USB cable during printer driver
installation following the instructions displayed.
If you accidentally connect the USB cable first, the printer driver may not be installed correctly.
• When the printer is connected to a network (via TCP/IP), the printer's IP address may be changed if you reinstall
the printer. In this case, be sure to reconfigure the printer's IP address.
1
2
When setting up a TCP/IP (network) connection, after
making sure the printer is on, connect the Ethernet Port
on the back of the printer to your network hub port using
the LAN cable.
Insert the provided User Software CD-ROM for the
appropriate operating system in the CD-ROM drive.
12
Installing the Printer Driver (Windows)
3
Follow the instructions displayed to complete installation.
• For USB connections, when the dialog box at right is displayed,
make sure the printer is on and connect the printer and computer
with the USB cable.
4
5
On the Finish window, select Restart my computer now
and click Restart.
Printer driver settings take effect after the computer
restarts.
Next, install the User Manual.
When the Install User Manual dialog box is displayed,
insert the provided User Manuals CD-ROM in the CDROM drive to start the installation process.
13
Installing the Printer Driver (Mac OS X)
The basic instructions for installing the printer driver are as follows.
For detailed instructions, see the Setup Guide.
Compatible operating systems
Mac OS X 10.3.9 or later
Supported connection methods
The printer driver works over USB or network (Bonjour or IP) connections.
Follow these steps to install the printer driver and user manual.
Installing the printer driver and User Manual
• When the printer is used over a network, the printer's IP address may be changed if you reinstall the printer. In
this case, be sure to reconfigure the printer's IP address.
1
2
3
4
Connect the computer directly to the printer or to the
network using the cable.
Turn the printer and computer on.
Insert the provided User Software CD-ROM for the
appropriate operating system in the CD-ROM drive.
Follow the instructions displayed to complete installation.
14
Installing the Printer Driver (Mac OS X)
5
6
After installation, click Quit.
Next, install the User Manual.
Insert the provided User Manuals CD-ROM in the CDROM drive to start the installation process.
15
Convenient Printer Driver Features
This section summarizes some convenient features of the printer driver.
For detailed printer driver instructions, see the User Manual.
Ros
eW
ine
Print Preview
Using the print preview function enables the following.
• Check an image of the document as arranged on the paper, in
the position it will be printed.
You can reduce printing costs by checking how documents will
be printed beforehand, without the need to print them.
• Change the layout orientation relative to the paper.
You can save paper by correcting the direction in which the
document is arranged on the paper, if necessary.
Instructions for Windows and Mac OS
Windows
• Access the Main sheet.
• Select the Open Preview When Print Job Starts check
box.
Check details in the Information dialog box displayed next
and click OK to close the Information dialog box.
• After you click OK, when you print a job, either the
imagePROGRAF Preview or PageComposer window will
be displayed, depending on your environment.
• Under some settings and in some environments, PageComposer may be started.
Mac OS X
• In the File menu of the source application, choose the
appropriate menu item for printer settings to display the
Print dialog box.
• Access the Main pane.
• Select the Print Preview check box.
• After you click Print, the Canon imagePROGRAF Preview
window will be displayed.
16
Convenient Printer Driver Features
Rotate Page 90 degrees (Conserve Paper)
You can conserve roll paper by specifying particular settings as
suitable for your original.
When you print an original that is in portrait orientation, the original
is rotated 90 degrees before printing if it fits within the roll width.
This enables you to conserve paper.
• If the page would exceed the roll paper width after rotation, you can use this function with Scale to fit Roll Paper
Width to print rotated pages.
Instructions for Windows and Mac OS
Windows
• Access the Page Setup sheet.
• Select the Rotate Page 90 degrees (Conserve Paper)
check box.
Mac OS X
• Access the Page Setup pane.
• Select the Rotate Page 90 degrees check box.
17
Convenient Printer Driver Features
Borderless Printing
In regular printing, a margin required by the printer is added
around the original. With borderless printing, you can print
documents without the margin, so that the printed image covers
the entire surface of the paper.
3mm
3mm
Instructions for Windows and Mac OS
Windows
• Access the Page Setup sheet.
• Select the Borderless Printing check box to display the
Information dialog box.
• Click the width of the loaded roll in the Roll Paper Width
list.
• Click OK to close the Information dialog box.
• Select Fit Paper Size, Scale to fit Roll Paper Width, or
Print Image with Actual Size.
Mac OS X
•
•
•
•
Access the Page Setup pane.
Select the Enlarged/Reduced Printing check box.
Select the Borderless Printing check box.
Select either Fit Paper Size or Fit Roll Paper Width.
• Borderless printing is possible when the Page Size setting matches the size of paper loaded in the
printer and you select XXXX-Borderless (where XXXX is the size of the original) in Paper Size in the
Page Attributes dialog box. (Mac OS X only)
18
Convenient Printer Driver Features
Large-format printing
You can create vertical or horizontal banners by printing originals
in banner formats on rolls.
Originals created in Microsoft Word or other applications in your
preferred size can be enlarged to fill the width of roll paper by
completing simple printer driver settings.
Instructions in Windows and Mac OS
Windows
• Access the Page Setup sheet.
• Click Size Options and register the size of the original as
specified in the source application.
• Select the Enlarged/Reduced Printing check box.
• After you click Fit Roll Paper Width, the Information dialog
box is displayed.
• Click the width of the loaded roll in the Roll Paper Width
list, and then click OK.
Mac OS X
• Access the Page Setup pane.
• Make sure the width of the loaded roll is displayed in Roll
Width.
• Make sure the size of the original you have prepared is
displayed in Page Size.
If you have not registered a size in Custom Page Sizes,
resize the original to fit the roll width.
• Select the Enlarged/Reduced Printing check box.
• Click Fit Roll Paper Width.
19
Roll width
Create an original 100 x 500 mm
Print
Automatically
Enlarged
About five times
as long as
the roll width
Convenient Printer Driver Features
Enlarged/Reduced Printing
Originals can be printed at larger or smaller sizes, as desired.
Instructions for Windows and Mac OS
Windows
• Access the Page Setup sheet.
• Click the width of the loaded roll in the Roll Paper Width
list.
• In the Page Size list, click the size of the original as
specified in the source application.
• Select the Enlarged/Reduced Printing check box.
• Select Fit Paper Size, Fit Roll Paper Width, or Scaling.
Mac OS X
• Access the Page Setup pane.
• Make sure the width of the loaded roll is displayed in Roll
Width.
• Make sure the size of the original you have prepared is
displayed in Page Size.
• Select the Enlarged/Reduced Printing check box.
• Select Fit Paper Size, Fit Roll Paper Width, or Scaling.
20
Convenient Printer Driver Features
Using the HDI Driver to Print (Windows)
Main features of the HDI Driver are as follows.
• This is a specialized printer driver compatible with the HDI(Heidi Device Interface) architecture of
Autodesk CAD software such as AutoCAD and AutoCAD LT (both referred to as AutoCAD in this manual,
for convenience).
• The driver enables optimal printing for the type of paper used, so that drawings created in AutoCAD are
printed distinctly.
• The version of operating system required for the HDI Driver varies depending on the version of AutoCAD used.
For details, refer to the User Manual.
• Display the Plot dialog box.
• Make sure the printer name (indicated in the format
iPFxxxx.pc3) is shown by Name under Printer/plotter.
• Click the Properties button.
The Plotter Configuration Editor dialog box is displayed.
• Complete the settings required for printing.
• Click the OK button to close the Plotter Configuration
Editor dialog box.
The Plot dialog box is displayed.
• After completing required settings in the Plot dialog box,
click the OK button.
The printer now starts printing the print job.
21
Index
a
s
AppleTalk .................................................................... 14
Stand ............................................................................ 8
Stationary Output Stacker ............................................ 9
b
t
Belt Stopper .................................................................. 6
Bonjour ....................................................................... 14
Borderless printing...................................................... 18
Transfer preparations ................................................... 2
w
c
Wheeled Output Stacker .............................................. 9
Windows ..................................................................... 12
Canon imagePROGRAF Preview............................... 16
Carrying Handles .......................................................... 8
e
Enlarged/reduced printing .......................................... 20
i
imagePROGRAF Preview .......................................... 16
Ink Tank Cover........................................................ 4, 10
Ink tank installation ..................................................... 10
Ink Tank Lock Lever...................................................... 4
Ink tank removal ........................................................... 4
IP address ............................................................ 12, 14
l
Large-format printing .................................................. 19
m
Mac OS X ................................................................... 14
Media Take-up Unit....................................................... 9
o
Output stacker installation ............................................ 9
p
Packing the printer........................................................ 6
Page Composer.......................................................... 16
Paper removal .............................................................. 3
Power Supply Connector ............................................ 10
Printer driver installation ....................................... 12, 14
r
Reinstalling the printer .................................................. 8
Roll Holder .................................................................. 11
22
Canon Inc.
30-2, Shimomaruko 3-chome, Ohta-ku, Tokyo 146-8501, Japan
Canon U.S.A., Inc.
One Canon Plaza, Lake Success, NY 11042 U.S.A
Canon Europe Ltd.
3 The Square, Stockley Park, Uxbridge, Middlesex, UB11 1ET United Kingdom
Canon (China) Co., Ltd.
15F Jinbao Building No.89 Jinbao Street, Dongcheng District, Beijing 100005, China
Canon Australia Pty. Ltd.
1 Thomas Holt Drive, North Ryde, Sydney, N.S.W.2113, Australia
*
QT5-3260-V1
© CANON INC. 2010
Q
T
5
3
2
6
0
V
1
*
PRINTED IN JAPAN