1
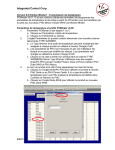
USB Hard Drive with Encryption HDS-PHU2 Series User's Manual Part Names........................................2 1 Safety Precautions...........................3 2 How to Use with Windows...............6 3 How to Use with Macintosh.............9 4 If You Forget Your Password..........12 5 Specifications.................................15 6 Using This Manual The symbols used in the manual are explained here to ensure proper use of this manual. Symbols Caution symbol.......................... Next operation symbol........... CAUTION This indicates an operation that requires caution when handling the product. Failure to follow the caution can result in personal injury or damage to the product. Next This indicates the next page to go to. Terms Used in This Manual • The instructions in this manual are described using the following drive configuration in Windows. C: Hard drive D: CD-ROM drive • Brackets [ ] indicate the names of dialog boxes and the names of menus, buttons, and checkboxes that can be selected during operations. • The hard disk capacity described in this manual is calculated as 1 GB = 1,0003 bytes. Operating systems and applications use the calculation 1 GB = 1,0243 byte, so the displayed capacity differs. ■ The copyright of this manual belongs to Buffalo Technology, Inc. It is prohibited to copy, reproduce, or modify this manual, in whole or in part, without permission. ■ BUFFALO™ is a trademark of Melco Holdings Inc. All other products mentioned herein are the trademarks or registered trademarks of their respective owners. ■ The specifications, design, and other contents in this manual are subject to change without notice and may differ from those of the actual product. ■ Every effort has been made to ensure the accuracy of the information in this manual. If, however, you notice any missing information or errors, please contact the retailer from which the product was purchased or Buffalo Technology Technical Support. ■ This product was developed for general office and household use. Buffalo Technology, Inc. shall not be responsible whatsoever for any damage resulting from the use of this product for a purpose other than general office and household use. ■ ■ ■ ■ • Do not use this product in applications requiring a high level of safety, such as systems that are directly or indirectly related to medical equipment or human safety. • When using this product in mechanical or computer system applications that require higher reliability than general office equipment, make every effort to provide a safety design for the system and adequate failsafe measures. Follow the operations described in this manual when using this product. Be sure to follow all safety precautions for handling this product. Buffalo Technology, Inc. provides repair of the product under certain circumstances, but it is not responsible for any loss or corruption of recorded data during repair. Follow all safety precautions described herein when using the product as a data recording device, such as a hard disk drive, or when using the product connected to a data recording device. Be sure to back up all necessary data on a regular basis. Buffalo Technology, Inc. shall not be responsible for any loss or corruption of data as a result of the customer violating the safety precautions or failing to back up data recorded on the product. Regarding liability due to default or illegal activities resulting from the use of this product, with the exception of any intentional or gross negligence on the part of Buffalo Technology, Inc., Buffalo Technology, Inc. shall compensate the customer up to the purchase cost of the product. If this product is deemed defective, Buffalo Technology, Inc. shall repair the product at no cost or replace the product with the same or similar product. Buffalo Technology, Inc. is not responsible for any damage as a result of a product defect. Table of Contents 1 Layout............................................................... 2 Diagram.........................................................................................................2 2 Safety Precautions........................................... 3 Safety Precautions.......................................................................................3 Locking the Drive After Authentication.....................................................5 Uninstalling the Password Authentication Software (Macintosh)..................5 3 How to Use with Windows............................... 6 Configuring (Changing) the Password Default Settings...........................6 Authenticating the Password to Use..........................................................7 4 How to Use with Mac OS X............................... 9 Installing the Password Authentication Software.....................................9 Configuring (Changing) the Password Default Settings...........................9 Authenticating the Password to Use........................................................10 5 If You Forget Your Password..........................12 If You Forget Your Password (Formatting the Device).............................12 Windows........................................................................................................................................... 12 Macintosh........................................................................................................................................ 13 6 Specifications.................................................15 Specifications..............................................................................................15 1 Layout Familiarize yourself with your MiniStation. Layout Power/Access indicator Lights green when the power is on. Blinks orange when accessing the hard drive. You can wrap the USB cable around the edge of the device, inserting it into groove, for ease of portability. USB port (Mini-B) DC jack HDS-PHU2��������������������� Series User's Manual 2 Safety Precautions This describes the safety precautions for use with this product. Safety Precautions CAUTION Do not perform any of the following, as this can result in a loss of data. • Setting this device as the save destination of virtual memory. • Removing the USB cable or power cable or turning off the power of the connected computer while this device is being accessed. • Enabling the power-saving mode (standby, hibernation, or sleep) of the connected computer. (The device may not resume operations after entering the power-saving mode.) ● After you are done using this device, be sure to disconnect it from the computer. The device automatically locks when disconnected from the computer. If the computer is turned off or restarted without first disconnecting the device, the device may not lock. ● If you forget the password, you will not be able access the data recorded on this device, so take measures so you do not forget the password. ● Keep your password secret and do not tell it to others. ● In Windows 2000, after the password is authenticated, the [Unplug or Eject Hardware] notification appears, but the device operates normally. Click [Close] to close the notification. You can continue to use the device. ● In Macintosh, multiple devices cannot be used at the same time. ● In Macintosh, install the password authentication software before using the device. (In Windows, there is no need to install the software.) In Macintosh, if multiple operating systems are installed, install the password authentication software on all Macintosh operating systems. ● The maximum size for a file stored to a FAT32 formatted hard drive is 4 GB. This device is formatted as a FAT32 hard drive, so the maximum file size is 4 GB. If you reformat this device with an NTFS format or Macintosh format, you can store files that are larger than 4 GB ● In Windows 2000, the [Found New Hardware Wizard] dialog box may appear during setup. Click [Finish] on the dialog box. The [The software for this device is now installed, but may not work correctly.] message appears, but the device operates normally. HDS-PHU2 Series User's Manual ● This device can be hot-plugged. This means you can plug and unplug the USB cable of the device to and from a computer when both devices are on. CAUTION Never unplug the USB cable while the hard drive is being accessed (the power/access indicator is blinking orange), as this can damage the recorded data on the hard drive. ● To use this device in a configuration with multiple USB devices, use a USB hub (not supplied) or similar device. ● Be sure to read the manuals of the computer and peripheral equipment. ● This device cannot be used to boot the operating system. ● Do not place other objects against this device. This can damage the device. ● In Windows XP and Vista, if this device is connected to a USB 1.1 port, the [HI-SPEED USB Device Plugged into non-HI-SPEED USB Hub] warning message may appear. To continue operations, click [X] to close the dialog box. ● This device may emit a sound during operation, such as at startup and when accessing the hard drive. This is normal. ● Installing the drivers of this device adds the following devices to to the Device Manager*. * Use the following procedures to display the Device Manager. Windows Vista..........................................Click [Start] right-click [Computer] click [Manage] click [Continue] when [Windows needs your permission to continue] appears click [Device Manager] Windows XP..............................................Click [Start] right-click [My Computer] click [Manage] click [Device Manager] Windows 2000.........................................Right-click [My Computer] click [Manage] click [Device Manager] Operating System Windows Vista Windows 2000/XP Location Added Device Name Universal Serial Bus controllers USB Mass Storage Device Disk drives BUFFALO Disk Drive USB Device DVD/CD-ROM drives BUFFALO USB-ATA Bridge USB Device Universal Serial Bus controllers USB Mass Storage Device Disk drives BUFFALO Disk Drive USB Device DVD/CD-ROM drives BUFFALO USB-ATA Bridge USB Device HDS-PHU2��������������������� Series User's Manual Locking the Drive After Authentication To lock the Secure Disk after the password has been authenticated, disconnect the device from the computer. The device does not lock unless it is disconnected from the computer, so it is recommended that you disconnect it after use. Uninstalling the Password Authentication Software (Macintosh) Use the following procedure to uninstall the password authentication software from a Macintosh computer. 1 2 3 Turn on the computer, and log in with the administrator account. Connect this device to the computer. Click [Utility] on the desktop [Mac X] folder [Secure Disk Tool Uninstaller VJx.xx] folder (where "x.xx" is a number), and double-click [Uninstall Secure Disk Tool]. Follow the on-screen instructions for uninstalling the software. HDS-PHU2 Series User's Manual 3 How to Use with Windows To use this device with Windows, use the following procedure. I Configuring (Changing) the Password Default Settings Because the factory password is disclosed, make sure to change the password before you use this device. *For Windows XP/2000, log in with the administrator account. When logged in with a user account, password cannot be set. CAUTION 1 Factory password is [12345]. Connect this device to the computer. *When the following screen appears, click [Run Password.exe]. Click. 2 Click [Option]. *If the screen above doesn’t appear, you may double-click [Password.exe] in [Utility] from [Computer] ([My Computer]). Continued HDS-PHU2 Series User's Manual 3 1 Enter the current password. *Enter [12345] (factory setting) when you use this device for the first time. 2 Enter a new password (4 to 10 characters) in 2 places. 3 Enter a hint phrase (5 to 75 characters). 4 Click [OK]. *Copy and Paste are disabled for password and hint entry. 4 5 When the [Password Security enabled successfully.] message appears, click [OK]. Disconnect the device from the computer. Password default settings are configured. II Authenticating the Password to Use Authenticate the password and prepare the device to read and write data. 1 2 Connect this device to the computer. 1 Enter the current password. *Enter the password changed in section I. 2 Click [OK]. *If you enter wrong passwords 3 times, you can check the hint phrase you entered from the [Hint] button (for Windows XP/2000, when logged in with the administrator account only). Continued HDS-PHU2 Series User's Manual 3 Click [OK]. 4 Make sure [Secure Disk] is added in [Computer] ([My Computer]). Make sure [Secure Disk] is added. Procedure is completed. [Secure Disk] is ready to read and write data same as a normal hard disk. To Store Files Larger Than 4 GB Format the Secure Disk with NTFS format. The device is formatted with FAT32 format when it is shipped, and cannot store files larger than 4 GB. This is a limitation of FAT32. When the device is formatted with NTFS format, files larger than 4 GB can be stored. To use this device with Mac OS computers as well, use as is without formatting. FAT32 works with both Windows and Mac computers. NTFS cannot be used with MAC OS. HDS-PHU2 Series User's Manual 4 How to Use with a Mac To use this device with Mac OS X, use the following procedure. I Installing the Password Authentication Software Install the password authentication software Secure Disk Tool. 1 Turn on the computer, and log in with the administrator account. 2 Connect this device to the computer. 3 Open [Utility] on the desktop and double-click [Secure Disk Tool InstallerVJ1_xx.pkg] in the [Mac X] folder. *Where "xx" in [Secure Disk Tool Installer VJ1_xx.pkg] is a version number. Follow the on-screen instructions for installing the software. II Configuring (Changing) the Password Default Settings Because the factory password is disclosed, make sure to change the password before you use this device. CAUTION 1 Factory password is [12345]. Double-click [Secure Disk Tool] on the desktop. 2 Click [Option]. Continued HDS-PHU2 Series User's Manual 3 1 Enter the current password. *Enter [12345] (factory setting) when you use this device for the first time. 2 Enter a new password (4 to 10 characters) in 2 places. 3 Enter a hint phrase (5 to 75 characters). 4 Click [OK]. *Copy and Paste are disabled for password and hint entry. 4 5 When the [Password Security enabled successfully.] message appears, click [OK]. Disconnect the device from the computer. Password is changed. III Authenticating the Password to Use Authenticate the password and prepare the device to read and write data. 1 Connect this device to the computer. 2 Double-click [Secure Disk Tool] on the desktop. 3 1 Enter the password. 2 Click [Authenticate]. *When you enter wrong passwords 3 times, you can check the hint phrase you entered from the [Hint] button. Continued 10 HDS-PHU2 Series User's Manual 4 5 When the [Login successful.] message appears, click [OK]. *A warning message similar to [Set disk contains unreadable volume with Mac OS X.] may appear. Click [OK]. Make sure [Secure Disk] ( ) is displayed on the desktop. Procedure is completed. [Secure Disk] is ready to read and write data same as a normal hard disk. To Store Files Larger Than 4 GB Format the Secure Disk with Mac OS extended format. The device is formatted with FAT32 when it is shipped, and cannot store files larger than 4 GB. This is a limitation of FAT32. When the device is formatted with Mac OS extended format, files larger than 4 GB can be stored. To use this device with Windows computers as well, use as is without formatting. FAT32 works with both Windows and Mac computers. Mac OS extended format cannot be used with Windows computers. HDS-PHU2 Series User's Manual 11 5 If You Forget Your Password If you forget your password, you must format the device to be able to use it again. This describes the procedure for formatting the device. If You Forget Your Password (Formatting the Device) If you forgot your password and cannot remember it, you must format the device. Formatting the device erases all stored data on the device and resets the password. You should only format the device if you forget your password. CAUTION The following proceedure reformats the DriveStation as a FAT32 hard drive and erases all stored data. Before formatting the device, move all necessary data to a computer or other storage device. To be able to store files greater than 4 GB to this device, reformat the hard drive with an NTFS or Macintosh format. Windows CAUTION To format the device in Windows 2000 or XP, you must log in with the administrator account. 1 2 3 4 5 Connect this device to the computer. When the password authentication window appears, close it. In Windows Vista, the AutoPlay window may appear. Close this window. Right-click [Utility] ( ) in [Computer] ([My Computer]) and select [Open]. Double-click [menu.exe]. Select [Initialize Device] on the open window, and then click [Start]. Click [Reset Password]. Continued 12 HDS-PHU2 Series User’s Manual 6 1 Enter the new password (two times). The password must be between 4 and 10 characters. 2 Enter a hint phrase. The hint phrase must be between 5 and 75 characters. 3 Click [Reset Password]. Note: Do not use copy and paste for password and hint entry. 7 The following window is displayed three times. Confirm the content and click [Yes]. 1 Confirm the content. 2 Click [Yes]. 8 When the [The password has been reset successfully.] message appears, click [OK], and then disconnect the device from the computer. The device is formatted and the password is reset. Macintosh 1 2 3 Connect this device to the computer. Double-click [Secure Disk Tool] ( ) on the desktop. Click [Option]. 4 Click [Reset Password]. Continued HDS-PHU2 Series User’s Manual 13 5 Click [Reset Password]. 6 1 Enter the new password twice. The password must be between 4 and 10 characters. 2 Enter a hint phrase. The hint phrase must be between 5 and 75 characters. 3 Click [Reset Password]. Note: Copy and Paste are disabled for password and hint entry. 7 The following window is displayed three times. Confirm the content and click [Yes]. 4 Confirm the content. 5 Click [Yes]. 8 When the [The password has been reset successfully.] message appears, click [OK], and then disconnect the device from the computer. The device is formatted and the password is reset. 14 HDS-PHU2 Series User’s Manual 6 Specifications Specifications * See the Buffalo Technology, Inc. catalog or website (www.buffalotech.com) for the latest product information and supported models. Interface USB USB Standard USB Specification Rev. 2.0 Port USB Mini-B port Capacity 512 bytes/sector Seek time Max. 13 msec Transmission speed (theoretical) Max. 480 Mbps* Format at time of purchase FAT32 (single partition) Dimensions 127 (W) × 84 (H) × 23 (D) mm (excluding projecting parts) Power consumption Max. 2.5 W Power supply DC 5V±5% Operating environment Temperature 0–45ºC Humidity 10-85% (non-condensing) Supported models The following computer models with a standard USB port: • DOS/V (OADG specifications) • Apple Mac series (with Intel processor) Supported OS DOS/V Windows Vista/XP (including Media Center Edition), Windows 2000 Service Pack 3 or later Macintosh Mac OS X 10.4 or later * T o use this device with HS mode (at a max. transmission speed of 480 Mbps), as defined by USB 2.0 specifications, a USB 2.0 interface is required. Macintosh and Mac OS are trademarks of Apple Inc., registered in the U.S. and other countries. Windows is a registered trademark of Microsoft Corporation in the United States and other countries. HDS-PHU2 Series User's Manual 15 HDS-PHU2 Series User's Manual First Edition, May 30, 2008 Published by�������������������������� ������������������������ Buffalo Technology, Inc.