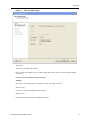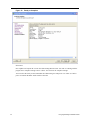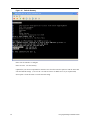
1
ET0010A
ET0100A
ET1000A
ET10000A
EncrypTight Installation Guide
The EncrypTight™ Manager Installation Guide
provides detailed information BLACK
on how BOX
to install
and configure EncrypTight Manager software.
®
Customer
Support
Information
Order toll-free in the U.S.: Call 877-877-BBOX (outside U.S. call 724-746-5500)
FREE technical support 24 hours a day, 7 days a week: Call 724-746-5500 or fax 724-746-0746
Mailing address: Black Box Corporation, 1000 Park Drive, Lawrence, PA 15055-1018
Web site: www.blackbox.com • E-mail: [email protected]
Table Of Contents
About This Document ...................................................................................................5
EncrypTight Manager 3.3 Installation Options ..............................................................7
Virtual Machine Options ................................................................................................7
EncrypTight-Manager-3.3-standalone ................................................................................. 7
EncrypTight-Manager-3.3 .................................................................................................... 8
Hardware Options .........................................................................................................8
Installation Options .............................................................................................................. 8
Firewall Information .......................................................................................................9
Installation Examples ....................................................................................................9
Single Server Install ............................................................................................................. 9
Configuring Networking Parameters .................................................................................... 10
Running the Installation Script ............................................................................................. 11
System Requirements ................................................................................................... 11
Virtual Machine Cluster Install ............................................................................................. 11
Hardware Cluster Install ......................................................................................................12
Disaster Recovery Option ............................................................................................. 14
Run the installation scripts: ........................................................................................... 14
Ordering of actions is important. .................................................................................. 15
Disaster Recovery Install .....................................................................................................15
Using Single Server For Main Site ................................................................................ 15
Testing Disaster Recovery ............................................................................................ 16
EncrypTight Manager Upgrade of an Existing ETM Instance .......................................17
Upgrade Non-Cluster Instance of ETM ............................................................................... 17
SCP upgrade file to ETM (Non-Cluster) ........................................................................ 17
Execute the upgrade on the ETM server (Non-Cluster) ................................................ 18
Upgrade ETM Cluster Instances ......................................................................................... 21
SCP upgrade file to ETM (Cluster) ................................................................................ 21
Node Shut Down ........................................................................................................... 22
Execute the upgrade on EACH Server in the Cluster in ORDER ................................. 22
Start up EACH Server in the Cluster in ORDER ........................................................... 24
Backing out of an upgrade ................................................................................................... 25
Backup and Restore of EncrypTight Manager ..............................................................25
General Guidelines .............................................................................................................. 25
Backup components provided by ETM ................................................................................ 26
Hardware Server specifics ................................................................................................... 26
Drive failures ................................................................................................................. 26
Other hardware component failures .................................................................................... 27
Damage to the ETM software or database ........................................................................... 27
Damage to the OS or filesystem .......................................................................................... 27
Example backup and restore procedures ............................................................................ 27
EncrypTight Manager Installation Guide
3
Procedure 0. copying drives with dd (only for non-RAID systems!!!!) ........................... 27
Procedure 1. Backing up the entire filesystem .............................................................. 27
Procedure 2. Restoring the complete filesystem, including the OS .............................. 28
Procedure 3. Backing up the ETM software and data ................................................... 28
Procedure 4. Restoring the ETM software and data ..................................................... 29
Procedure 5. Backing up the ETM database ................................................................ 29
Procedure 6. Restoring the ETM database ................................................................... 29
Restoring to factory defaults ......................................................................................... 30
VM Server specifics ............................................................................................................. 30
Appendices ...................................................................................................................31
Hardware Disaster Recovery Cluster Install ........................................................................ 31
Run the installation scripts: ........................................................................................... 32
Ordering of actions is important. .................................................................................. 33
Preparation for DR listening .......................................................................................... 33
Actions on DR activation (failover occurs) .................................................................... 33
Failback ......................................................................................................................... 33
EncrypTight Manager OVA Deployment Using vSphere Client ........................................... 34
Applications ......................................................................................................................... 34
Installing the CSM OVA ....................................................................................................... 34
Setup Networking ................................................................................................................ 44
4
EncrypTight Manager Installation Guide
Preface
About This Document
Purpose
The EncrypTight Manager Installation Guide provides detailed information on how to install and
configure EncrypTight Manager software.
Intended Audience
This document is intended for network managers and security administrators who are familiar with setting
up and maintaining network equipment. Some knowledge of network security issues and encryption
technologies is assumed.
Assumptions
This document assumes that its readers have an understanding of the following:
•
Black Box encryption appliance features, installation and operation
•
Basic principles of network security issues
•
Basic principles of encryption technologies and terminology
•
Basic principles of TCP/IP networking, including IP addressing, switching and routing
•
Personal computer (PC) operation, common PC terminology, use of terminal emulation software and
FTP operations
•
Basic knowledge of the Linux operating system
Conventions used in this document
Bold
Indicates one of the following:
•
a menu item or button
•
the name of a command or parameter
Italics
Indicates a new term
Monospaced
Indicates machine text, such as terminal output and filenames
Monospaced bold Indicates a command to be issued by the user
How to comment
Customer comments on Black Box documents are welcome. Send your comments to:
EncrypTight Manager Installation Guide
5
Preface
Black Box Corporation
1000 Park Drive
Lawrence, PA 15055-1018
email: [email protected]
Contacting Customer Support
Technical support services are accessible through the Black Box support center.
US (toll free)
1-877-877-BBOX
International
outside U.S. call 724-746-5500
Email
[email protected]
Web
www.blackbox.com
FREE technical support 24 hours a day, 7 days a week: Call 724-746-5500 or fax 724-746-0746
6
EncrypTight Manager Installation Guide
EncrypTight Manager 3.3 Installation Options
EncrypTight Manager 3.3 Installation Options
•
•
Virtual Machines
•
EncrypTight-Manager-3.3-standalone
•
EncrypTight-Manager-3.3
•
single server
•
cluster high availability
•
single server disaster recovery
Hardware
•
EncrypTight-Manager-3.3
•
single server
•
cluster high availability
•
single server disaster recovery
We will be using RedHat kickstart technology to install directly to hardware and to build the Virtual
Machines. This allows us to define the exact same packaging for both Virtual Machines and bare metal.
The base operating system used will be CentOS 6 with the current released updates applied.
Virtual Machine Options
EncrypTight-Manager-3.3-standalone
•
These virtual machine appliances will be distributed as zip files that contain the VMware files that
can be used in VMware Player.
•
Once started the standalone version will boot up and become available on the network.
•
VMware will startup without any modification to the configuration and will use dhcp to connect to
the hosts bridged network
•
Standalone will be started with 1024MB of RAM and 20G of disk, the 20G of disk will be an auto
expanding disk.
•
Standalone will be preconfigured with everything necessary to run, no user interaction will be needed
before it is available to the end user.
•
The Standalone version will be only available as a 32 bit appliance. So it can be run on both 32 bit
and 64 bit hosts.
•
Standalone will only have access to 25 concurrent threads for PEP communication.
Supported Virtual Machines for EncrypTight-Manager-3.3-standalone
•
VMware Player
EncrypTight Manager Installation Guide
7
EncrypTight-Manager-3.3
•
Available in 32 and 64 bit architectures
•
Expects to be run in an environment where the VM has at least 2GB of RAM and 40GB of disk
•
This virtual machine is setup so that when it first boots it will initialize the operating system for use
by EncrypTight Manager. It will not be fully configured until there is some user interaction to finish
the installation options of EncrypTight Manager.
Installation Options
•
Single server
•
•
High Availability cluster
•
•
1 VM
Minimum 2 VMs on different hardware
Disaster recovery server
•
1 VM
•
Communication over ports must be possible to the Main site. Port 22 must be available on the DR
server and port 8764 must be available on each server in the main cluster.
NOTE
These ports are made available by default.
Supported Virtual Machines for EncrypTight-Manager-3.3
•
VMware
Hardware Options
•
Hardware is provided, (either Dell r310s or r200s, with a minimum of 4GB of RAM).
•
Hardware versions are exactly the same as the Virtual Machine offerings, they are just installed
directly to hardware.
Installation Options
8
•
Single server - 1 server
•
High Availability cluster - Minimum 2 servers
•
Disaster recovery server - 1 server, communication over ports must be possible to the Main site: 22
and 8764
EncrypTight Manager Installation Guide
Firewall Information
Firewall Information
Servers in cluster must have the following ports available:
TCP
TCP
TCP
TCP
TCP
TCP
TCP
TCP
TCP
TCP
TCP
21
2221
22
80
8080
443
8443
8764
5432
47788
47799
UDP
UDP
UDP
UDP
45588
46688
45599
46699
NOTE
These ports are made available by default.
Installation Examples
Single Server Install
Either deploy the EncrypTight Manager virtual machine using management software such as VMware
vSphere or power on the ETM server hardware. When the machine is ready, switch to the console view.
You should see a screen similar to this:
EncrypTight Manager Installation Guide
9
Figure 1
EncrypTight Manager Console view
Configuring Networking Parameters
Once the machine is running, you can configure networking parameters. This includes assigning a static
IP address, netmask, and gateway address.
To configure an IP address and netmask:
1 Click in the console window to activate it.
2 Use the arrow keys to highlight Configure Network and press Enter.
3 At the Network Configuration Main Menu, type 6 and press Enter.
4 At the prompt to configure an IPv4 address, type y and press Enter.
5 At the prompt to use DHCP, type n and press Enter.
6 At the IPv4 prompt enter the IP address that you want to use and press Enter.
7 At the Netmask prompt, enter the netmask that you want to use and press Enter.
8 When you are prompted for confirmation, type y and press Enter.
To configure the gateway address:
1 At the Main Menu, type 2 and press Enter.
2 At the prompt to choose an interface to associate with the default gateway, type the number and press
Enter.
3 At the IPv4 default Gateway prompt, type the IP address of the gateway and press Enter.
10
EncrypTight Manager Installation Guide
Installation Examples
4 Type 1 and press Enter to exit the menu.
Note that you can use the same menu to assign a hostname, specify a DNS server, set up a proxy server,
or view the current networking configuration.
Running the Installation Script
Once the virtual machine has been deployed and networking parameters are configured, you need to run a
script to specify the type of installation you are setting up. The options include:
•
Stand alone - a single virtual machine
•
Cluster - multiple virtual machines
•
Disaster recovery - a virtual machine that services as a disaster recovery server for either a stand
alone installation or a cluster.
You must log into the virtual machine in order to complete the installation. Log in using the default
account of root with the password pserver.
To run the stand alone installation script:
•
In the console window, use the arrow keys to highlight Login and press Enter.
•
At the login prompt, type root and press Enter.
•
At the Password prompt, type pserver and press Enter.
If you would like to modify settings you can edit /opt/scripts/policyserver-init.conf. Emacs, nano, and vi
are available on the OS.
Once modified you can run the installation script:
/etc/init.d/policyserver-install
System Requirements
VM
•
2G of RAM
•
40G of disk space
•
1 processor core
Hardware
•
2G of RAM
•
40G of disk space
•
1 processor core
Virtual Machine Cluster Install
These install options are valid in a VM or on hardware
If you are going to have the cluster on node1 = 192.168.80.1 and node2 = 192.168.80.2 then you would
run like this on both installs:
EncrypTight Manager Installation Guide
11
•
Modify the /opt/scripts/policyserver-init.conf and set the following. Emacs, nano, and vi are available
on the OS.
########################################################################
#######
#######
####### Cluster options
#######
#
## for a clustered installation node1 and node2 must be set the same
## on each of the hosts in the cluster, same ordering
node1=192.168.80.1
node2=192.168.80.2
#
# clusterJdbcMcast=229.10.10.10
# clusterMcast=228.10.10.10
# clusterName=policyserver
#
###############################################################################
Run the installation script:
/etc/init.d/policyserver-install
It is important that the ordering of IP addresses stays the same for node1 and node2 on both machines in
the cluster.
Ordering of actions is important.
You should install in the following steps:
1 Deploy OVA app server #1 (See Appendices - EncrypTight Manager OVA Deployment Using
vSphere Client)
2 Deploy OVA app server #2 (See Appendices - EncrypTight Manager OVA Deployment Using
vSphere Client)
3 Assign IP of app server #1
4 Assign IP of app server #2
5 Run cluster install on app server #1 ( same order of IP addresses on both )
6 IMPORTANT: WAIT for app server #1 to fully start
7 Run cluster install on app server #2 ( same order of IP addresses on both )
Once installation is complete you can view the web interface from either of the cluster nodes IP
addresses.
To verify that the cluster is in place check the Platform -> Utilities page DB Nodes and Appserver Nodes.
Hardware Cluster Install
If you are going to have the cluster on node1 = 192.168.80.1 and node2 = 192.168.80.2 then you would
run like this on both installs:
Modify the /opt/scripts/policyserver-init.conf and set the following. Emacs, nano, and vi are available on
the OS.
12
EncrypTight Manager Installation Guide
Installation Examples
NOTE
Support for a crossover cable connection between node1 and node2 has been added in the hardware
cluster installation.
########################################################################
#######
#######
####### Cluster options
#######
#
## for a clustered installation node1 and node2 must be set the same
## on each of the hosts in the cluster, same ordering
node1=192.168.80.1 - THE IP OF NODE 1
node2=192.168.80.2 - THE IP OF NODE 2
#
# clusterJdbcMcast=229.10.10.10
# clusterMcast=228.10.10.10
# clusterName=policyserver
#
########################################################################
#######
########################################################################
#######
#######
####### VM tuning options
#######
#
## max number of workder threads in the application server, MUST be more
than 2 x mdbQueueThreads
maxServerThreads=500
## max number of high queue threads, max number of low queue threads
mdbQueueThreads=200
#
## at least 2G of RAM
# minMemory=512
# maxMemory=768
# permSize=128
# maxPermSize=256
#
## at least 4G of RAM
minMemory=768
maxMemory=1280
permSize=128
maxPermSize=384
#
## additional JVM options
# javaOpts="-XX:+UseFastAccessorMethods"
#
###############################################################################
EncrypTight Manager Installation Guide
13
Disaster Recovery Option
If this cluster is going to have a disaster recovery site assigned to it then you need to modify the
following section of the /opt/scripts/policyserver-init.conf:
########################################################################
#######
#######
####### Disaster Recovery options
#######
#
## When this server will use a disaster recovery site set the following:
heartbeatEnabled=true
disasterEnabled=true
disasterHost=192.168.80.X - THE IP OF THE DISASTER RECOVERY SERVER
# disasterUser=pserver
# disasterPass=pserver
# heartbeatPort=8764
#
#
## When this server IS the disaster recovery site set the following:
# disasterServer=true
# disasterServerUser=admin
# heartbeatInterval=30000
## comma separated list of hosts to check
# heartbeatHosts= COMMA SEPARATED LIST OF SERVERS IN THE MAIN SITE
#
#
###############################################################################
Run the installation scripts:
It is important that the ordering of IP addresses stays the same for node1 and node2 on both machines in
the cluster.
Be sure that the following TCP and UDP ports are available between each server in the cluster:
14
TCP
TCP
TCP
TCP
TCP
TCP
TCP
TCP
TCP
TCP
TCP
21
2221
22
80
8080
443
8443
8764
5432
47788
47799
UDP
UDP
UDP
UDP
45588
46688
45599
46699
EncrypTight Manager Installation Guide
Installation Examples
Ordering of actions is important.
You should install in the following steps:
1 Power on both servers
2 Assign IP to server #1
3 Assign IP to server #2
4 Make sure that server #1 can see server #2 on the network
5 Run /etc/init.d/policyserver-install on server #1 ( same order of IP addresses on both )
6 IMPORTANT: WAIT for server #1 to fully complete the install and startup
7 Run /etc/init.d/policyserver-install on server #2 ( same order of IP addresses on both )
Once installation is complete you can view the web interface from either of the cluster nodes IP
addresses.
To verify that the cluster is in place check the Platform -> Utilities page DB Nodes and Appserver Nodes.
Disaster Recovery Install
Using Single Server For Main Site
Main Site
•
Assign an IP to the Main site installation.
•
Modify the /opt/scripts/policyserver-init.conf and set the following. Emacs, nano, and vi are available
on the OS.
NOTE
The disasterHost IP should be the IP of the Disaster Recovery server.
########################################################################
#######
#######
####### Disaster Recovery options
#######
#
## When this server will use a disaster recovery site set the following:
heartbeatEnabled=true
disasterEnabled=true
disasterHost=192.168.80.X - THE IP OF THE DISASTER RECOVERY SERVER
disasterUser=pserver
disasterPass=pserver
heartbeatPort=8764
#
#
## When this server IS the disaster recovery site set the following:
# disasterServer=true
# disasterServerUser=admin
# heartbeatInterval=30000
EncrypTight Manager Installation Guide
15
## comma separated list of hosts to check
# heartbeatHosts=
#
#
########################################################################
#######
Run the installation script on the Main site:
/etc/init.d/policyserver-install
Disaster Recovery Site
•
Assign an IP to the DR site installation.
•
Modify the /opt/scripts/policyserver-init.conf and set the following. Emacs, nano, and vi are available
on the OS.
NOTE
The heartbeatHosts IP should be the IP of the Main Site server.
########################################################################
#######
#######
####### Disaster Recovery options
#######
#
## When this server will use a disaster recovery site set the following:
# heartbeatEnabled=true
# disasterEnabled=true
# disasterHost=
# disasterUser=pserver
# disasterPass=pserver
# heartbeatPort=8764
#
#
## When this server IS the disaster recovery site set the following:
disasterServer=true
disasterServerUser=admin
heartbeatInterval=30000
## comma separated list of hosts to check
heartbeatHosts=
#
#
###############################################################################
Run the installation script on the DR site:
/etc/init.d/policyserver-install
Testing Disaster Recovery
You can bring down the Main Site using the init.d script on the Main Site machine:
16
EncrypTight Manager Installation Guide
EncrypTight Manager Upgrade of an Existing ETM Instance
> /etc/init.d/policyserver stop
Once that is down you can see that the disaster recovery picks up rekeys by viewing the DR logs on the
DR Machine:
> tail -f /opt/jboss/server/policyserver/log/server.log
To bring the Main Site back up use the init.d script again on the Main Site machine:
> /etc/init.d/policyserver start
\
EncrypTight Manager Upgrade of an Existing
ETM Instance
The following information covers upgrading an existing EncrypTight Manager instance.
CAUTION
The ordering of actions is important when upgrading EncrypTight Manager. When performing an upgrade
on an existing EncrypTight Manager instance, first stop the policy servers on all machines. Next, upgrade
the main site first, and wait for the upgrade to complete. After the upgrade of the main site is completed, if
there is a disaster recovery server being utilized, you must upgrade the disaster recovery site last.
NOTE
•
Requires ETM 3.0 or higher
•
All instructions must be executed from the ETM server Command Line while logged in as root/pserver
Upgrade Non-Cluster Instance of ETM
EncrypTight Manager can be installed either as a single node server or as a Cluster. These instructions are
for how to upgrade a Non-Clustered ETM Instance. Upgrading a ETM Cluster is very different from
upgrading a ETM Non-Cluster instance. Instruction for both are provided below.
SCP upgrade file to ETM (Non-Cluster)
CAUTION
These instructions load the upgrade executable in the directory /opt/upgrade on the ETM server, /opt/
upgrade is only a suggested path.
•
Download the policyserver-upgrade-<VERSION>.bin executable to your local machine
•
scp the .bin file to your ETM server as root (default UID/PWD is root/pserver) to /opt/upgrade
# scp policyserver-upgrade-<VERSION>.bin [email protected]
EncrypTight Manager Installation Guide
17
Optional - Verify the downloaded upgrade bin file.
•
Download and scp the public key pubkey.txt over to the ETM server.
# scp pubkey.txt [email protected]:/opt/upgrade/
•
Scp the external signature for the upgrade bin:
# scp policyserver-upgrade-<VERSION>.bin.asc [email protected]:/opt/upgrade/
•
Import the public key and verify the upgrade bin:
# cd /opt/upgrade
# gpg --import pubkey.txt
gpg: directory `/root/.gnupg' created
gpg: new configuration file `/root/.gnupg/gpg.conf' created
gpg: WARNING: options in `/root/.gnupg/gpg.conf' are not yet active during
this run
gpg: keyring `/root/.gnupg/secring.gpg' created
gpg: keyring `/root/.gnupg/pubring.gpg' created
gpg: /root/.gnupg/trustdb.gpg: trustdb created
gpg: key 9B705669: public key "Black Box (Policy Server)
<[email protected]>" imported
gpg: Total number processed: 1
gpg:
imported: 1
# gpg --verify policyserver-upgrade-<VERSION>.bin.asc policyserver-upgrade<VERSION>.bin
gpg: Signature made Mon 12 Dec 2011 03:19:38 PM EST using DSA key ID
9B705669
gpg: Good signature from "Black Box (Policy Server) <[email protected]>"
gpg: WARNING: This key is not certified with a trusted signature!
gpg:
There is no indication that the signature belongs to the
owner.
Primary key fingerprint: B7B6 1E4C EA5A 9FE0 19AB 6130 9830 42A5 9B70 5669
Execute the upgrade on the ETM server (Non-Cluster)
CAUTION
The ETM instance will be unavailable/restarted during the upgrade process.
•
ssh to your ETM server as root
•
Make sure the bin is executable:
# chmod +x policyserver-upgrade-<VERSION>.bin
•
Run the desired policyserver-upgrade-<VERSION>.bin executable
•
You will receive an Upgrade warning, type yes to continue
•
When the upgrade has completed, the upgrade script will create a new directory, /opt/upgradebackup
where the previous instance is stored for rollback. If there is already a previously backed up
version(s), the new directory created will be /opt/upgradebackup_<TIMESTAMP>
EXAMPLE: Upgrade from 3.1.3451 to 3.2.3971:
[root@policyserver ~]# ./policyserver-upgrade-3.2.3971.bin
Verifying archive integrity... All good.
Uncompressing Upgrade to 3.2.3971........................................
18
EncrypTight Manager Installation Guide
EncrypTight Manager Upgrade of an Existing ETM Instance
*************************************************************************
********
UPGRADE:
Examining System, Please Wait...
*************************************************************************
*************************************************************************
********
********
UPGRADE WARNING
********
********
This will upgrade from: 3.1.3451 to 3.2.3971
********
*************************************************************************
WARNING: This will upgrade your policyserver from 3.1.3451 to 3.2.3971
Are you sure you want to continue the upgrade [yes / no]: yes
#######################################################################
Upgrade process started, will upgrade from: 3.1.3451 to 3.2.3971
#######################################################################
getInitConf: node1=localhost
getInitConf: node2=localhost
getConfig: ftpServerDir=/opt/ftpserverdir
getConfig: fileStoreDir=/opt/filestore
getConfig: companyName=Black Box
Checking policyserver status
Policyserver is running, stopping...
Shutdown message has been posted to the server.
Server shutdown may take a while - check logfiles for completion
Waiting for Server to stop
Waiting for Server to stop............
Server has stopped
Disconnecting any database users...
Backing up the current system
Backing up the db...
Compressing backup...
scp_host not set, not scp-ing /opt/upgradebackup/db-backup-2011-12-14-0811.sql.gz backup anywhere
keeping backup 1: /opt/upgradebackup/db-backup-2011-12-14-08-11.sql.gz
Finished db-backup
done.
Backing up the server dirs: /opt/ftpserverdir /opt/filestore /opt/jboss/server/
policyserver...
tar cfzh policyserver-backup-2011-12-14-08-11.tar.gz /opt/ftpserverdir /opt/
filestore /opt/jboss/server/policyserver --exclude "/opt/jboss/server/
policyserver/work" --exclude "/opt/jboss/server/policyserver/tmp" --exclude "/
opt/jboss/server/policyserver/data"
tar: Removing leading `/' from member names
scp_host not set, not scp-ing policyserver-backup-2011-12-14-08-11.tar.gz backup
anywhere
EncrypTight Manager Installation Guide
19
Finished server backup
Running through the upgrades available
***********************************************************************
Performing upgrade to 3.1
Application upgrade...
upgrade ../../common/ear/cipher.ear /opt/jboss/server/policyserver/deploy/
upgrade jbossweb.jar /opt/jboss/server/policyserver/deploy/jbossweb.sar/
Database upgrade...
Finished upgrade to 3.1
***********************************************************************
***********************************************************************
Performing upgrade to 3.2
Application upgrade...
upgrade ../../common/deploy/cipher.ear /opt/jboss/server/policyserver/deploy/
upgrade server.xml /opt/jboss/server/policyserver/deploy/jbossweb.sar/
upgrade policyserversecuritydomain-service.xml /opt/jboss/server/policyserver/
deploy/
getInitConf: certPass=XXXXXXXX
getInitConf: keystoreType=JCEKS
getInitConf: asAlias=policyserver
getInitConf: rootCertSubjCN=PolicyServer CA
Updating 'policyserver' in /opt/jboss/server/policyserver/conf/private/
keystore.jks
Updating 'policyserver ca' in /opt/jboss/server/policyserver/conf/private/
keystore.jks
Client truststore upgrade...
/opt/jboss/server/policyserver/conf/private/truststore.jks exists; not
overwriting it.
Datasource upgrade...
Database init scripts upgrade...
App server config upgrade...
App server startup script upgrade...
Create certs script upgrade...
Create client certs script upgrade...
Install script upgrade...
Init conf upgrade...
Database upgrade...
Updated database schema version to 2
Database upgrade...
Updated database schema version to 3
Database upgrade...
Updated database schema version to 4
Database upgrade...
Updated database schema version to 5
Database upgrade...
Updated database schema version to 6
Database upgrade...
Updated database schema version to 7
Database upgrade...
Updated database schema version to 8
Finished upgrade to 3.2
***********************************************************************
Finished all available upgrades
20
EncrypTight Manager Installation Guide
EncrypTight Manager Upgrade of an Existing ETM Instance
Upgrading the policyserver-init.conf
Upgrading the database schema sql
Upgrading the system scripts
#######################################################################
Upgrade process complete.
Application version is: 3.2.3971
#######################################################################
Finishing Server Startup ...
[root@policyserver ~]#
Upgrade ETM Cluster Instances
CAUTION
Order Matters - All of these instructions MUST be done in the order indicated below.
SCP upgrade file to ETM (Cluster)
These instructions load the upgrade executable in the the directory /opt/upgrade on the ETM server, /opt/
upgrade is only a suggested path
•
Download the policyserver-upgrade-<VERSION>.bin executable to your local machine
•
scp the .bin file to your ETM server as root (default UID/PWD is root/pserver) to /opt/upgrade
# scp db-backup-2011-12-14-07-34.sql.gz [email protected]:/opt/upgrade/
Optional - Verify the downloaded upgrade bin file.
•
Download and scp the public key pubkey.txt over to the ETM server.
# scp pubkey.txt [email protected]:/opt/upgrade/
•
Scp the external signature for the upgrade bin:
# scp policyserver-upgrade-<VERSION>.bin.asc [email protected]:/opt/upgrade/
•
Import the public key and verify the upgrade bin:
# cd /opt/upgrade
# gpg --import pubkey.txt
gpg: directory `/root/.gnupg' created
gpg: new configuration file `/root/.gnupg/gpg.conf' created
gpg: WARNING: options in `/root/.gnupg/gpg.conf' are not yet active during
this run
gpg: keyring `/root/.gnupg/secring.gpg' created
gpg: keyring `/root/.gnupg/pubring.gpg' created
gpg: /root/.gnupg/trustdb.gpg: trustdb created
gpg: key 9B705669: public key "Black Box (Policy Server)
<[email protected]>" imported
gpg: Total number processed: 1
gpg:
imported: 1
# gpg --verify policyserver-upgrade-<VERSION>.bin.asc policyserver-upgrade<VERSION>.bin
EncrypTight Manager Installation Guide
21
gpg: Signature made Mon 12 Dec 2011 03:19:38 PM EST using DSA key ID
9B705669
gpg: Good signature from "Black Box (Policy Server) <[email protected]>"
gpg: WARNING: This key is not certified with a trusted signature!
gpg:
There is no indication that the signature belongs to the
owner.
Primary key fingerprint: B7B6 1E4C EA5A 9FE0 19AB 6130 9830 42A5 9B70 5669
Node Shut Down
CAUTION
ALL NODES in the ETM Cluster MUST be shut down in the following order:
•
Shutdown EncrypTight Manager Cluster Node 1
[root@PIT-ETM-N1 upgrade]# /etc/init.d/policyserver stop
Shutdown message has been posted to the server.
Server shutdown may take a while - check logfiles for completion
Waiting for Server to stop.........
Server has stopped
•
Shutdown EncrypTight Manager Cluster Node 2
[root@PIT-ETM-N2 upgrade]# /etc/init.d/policyserver stop
Shutdown message has been posted to the server.
Server shutdown may take a while - check logfiles for completion
Waiting for Server to stop.........
Server has stopped
•
Shutdown Disaster Recovery Server Node 1
[root@PIT-ETM-DR1 upgrade]# /etc/init.d/policyserver stop
Shutdown message has been posted to the server.
Server shutdown may take a while - check logfiles for completion
Waiting for Server to stop.........
Server has stopped
•
Shutdown Disaster Recovery Server Node 2 (Assuming DR Servers are also clustered)
[root@PIT-ETM-DR2 upgrade]# /etc/init.d/policyserver stop
Shutdown message has been posted to the server.
Server shutdown may take a while - check logfiles for completion
Waiting for Server to stop.........
Server has stopped
Execute the upgrade on EACH Server in the Cluster in ORDER
1 1Execute the upgrade on EncrypTight Manager Cluster Node 1
YOU MUST wait for the upgrade to complete before continuing
2 Execute the upgrade on EncrypTight Manager Cluster Node 2
YOU MUST wait for the upgrade to complete before continuing
3 Execute the upgrade on Disaster Recovery Server Node 1
YOU MUST wait for the upgrade to complete before continuing
4 Execute the upgrade on Disaster Recovery Server Node 2 (Assuming DR Servers are also clustered)
22
EncrypTight Manager Installation Guide
EncrypTight Manager Upgrade of an Existing ETM Instance
YOU MUST wait for the upgrade to complete before continuing
EXAMPLE: Upgrade from 3.2.3971 to 3.3.4364:
[root@PIT-ETM-N1 upgrade]# ./policyserver-upgrade-3.3.4364.bin
Verifying archive integrity... All good.
Uncompressing Upgrade to 3.3.4364............................................... ...........................................................
*************************************************************************
********
UPGRADE:
Examining System, Please Wait...
*************************************************************************
*************************************************************************
********
********
UPGRADE WARNING
********
********
This will upgrade from: 3.2.3971 to 3.3.4364
********
*************************************************************************
WARNING: This will upgrade your policyserver from 3.2.3971 to 3.3.4364
Are you sure you want to continue the upgrade [yes / no]: yes
Application precheck for version 3.3 ...
ERROR: invalid input syntax for integer: ""
LINE 1: select count(*) from co_policies where encryption_oid=''
^
ERROR: invalid input syntax for integer: ""
LINE 1: select count(*) from co_policies where authentication_oid=''
^
#######################################################################
Upgrade process started, will upgrade from: 3.2.3971 to 3.3.4364
#######################################################################
getInitConf: node1=10.10.10.10
getInitConf: node2=10.10.10.11
getConfig: ftpServerDir=/opt/ftpserverdir
getConfig: fileStoreDir=/opt/filestore
getConfig: companyName=Black Box
Checking policyserver status
Disconnecting any database users...
pg_terminate_backend
---------------------(0 rows)
Backing up the current system
Backing up the db...
Compressing backup...
EncrypTight Manager Installation Guide
23
scp_host not set, not scp-ing /opt/upgradebackup/db-backup-2012-02-15-18-54-v.sq
l.gz backup anywhere
keeping backup 1: /opt/upgradebackup/db-backup-2012-02-15-18-54-v.sql.gz
Finished db-backup
done.
Backing up the server dirs: /opt/ftpserverdir /opt/filestore /opt/jboss/server/p
olicyserver...
tar cfzh policyserver-backup-2012-02-15-18-54-v.tar.gz /opt/ftpserverdir /opt/fi
lestore /opt/jboss/server/policyserver --exclude "/opt/jboss/server/policyserver
/work" --exclude "/opt/jboss/server/policyserver/tmp" --exclude "/opt/jboss/serv
er/policyserver/data"
tar: Removing leading `/' from member names
scp_host not set, not scp-ing policyserver-backup-2012-02-15-18-54-v.tar.gz back
up anywhere
Finished server backup
Running through the upgrades available
***********************************************************************
Performing upgrade to 3.3
Application upgrade...
upgrade ../../common/deploy/cipher.ear /opt/jboss/server/policyserver/deploy/
Post Database upgrade...
Checking for Mesh Policies with apply to all traffic set...
Finished checking for Mesh Policies with apply to all traffic set.
Finished upgrade to 3.3
***********************************************************************
Finished all available upgrades
Upgrading the policyserver-init.conf
Upgrading the database schema sql
Upgrading the system scripts
#######################################################################
Upgrade process complete.
Application version is: 3.3.4364
#######################################################################
The policyserver is ready to be started.
Start up EACH Server in the Cluster in ORDER
CAUTION
ALL NODES in the ETM Cluster MUST be started in the following order:
1 Start the policyserver on EncrypTight Manager Cluster Node 1
YOU MUST wait for the startup to complete before continuing
24
EncrypTight Manager Installation Guide
Backup and Restore of EncrypTight Manager
[root@PIT-ETM-N1 upgrade]# /etc/init.d/policyserver start
Server is starting, check the log files for application status
2 Start the policyserver on EncrypTight Manager Cluster Node 2
YOU MUST wait for the startup to complete before continuing
[root@PIT-ETM-N2 upgrade]# /etc/init.d/policyserver start
Server is starting, check the log files for application status
3 Start the policyserver on Disaster Recovery Server Node 1
YOU MUST wait for the startup to complete before continuing
[root@PIT-ETM-DR1 upgrade]# /etc/init.d/policyserver start
Server is starting, check the log files for application status
4 Start the policyserver on Disaster Recovery Server Node 2 (Assuming DR Servers are also clustered)
YOU MUST wait for the startup to complete before continuing
[root@PIT-ETM-DR2 upgrade]# /etc/init.d/policyserver start
Server is starting, check the log files for application status
Backing out of an upgrade
Once the upgrade has completed if there are any problems you can back completely out of the upgrade.
•
Go to /opt/upgradebackup
Execute the downgrade.sh
•
•
./downgrade.sh
This will take the server back to the version before the upgrade.
Backup and Restore of EncrypTight Manager
General Guidelines
There are a variety of failure scenarios that can occur in a production environment, and recovering from
these scenarios will not always involve the same procedures. The procedures to follow will be specific to
what type of failure occurred, and how much data loss there was as a result. The common failure cases,
addressed here are:
•
disk drive failures
•
other hardware component failures
•
damage to the ETM software or database
•
other filesystem damage
•
complete loss of the OS
Every IT organization will have policies or practices related to backing up servers, so we should learn
what a given customer does and ensure that they include the ETM servers in their procedures. We should
also ensure that their practices include creating, or already having, some form of bootable media (e.g.
DVD) so that they can access the disk drives of a ETM server in case some radical damage is done to the
OS (such as 'rm -rf /'). Common examples would be a bootable Linux CD/DVD, a recovery CD made
from Clonezilla, a Ghost recovery DVD, or a generic rescue CD (or even USB stick) such as this
EncrypTight Manager Installation Guide
25
Backup components provided by ETM
EncrypTight Manager provides mechanisms for backing up its database, and also for backing up the ETM
software. Customers who do not do full server backups regularly can use those tools to ensure that they
can recover as close to a point of failure as possible, while backing up the minimal amount of data
necessary to restore. Using these tools also reduces the need for frequent full system backups.
•
Database Backup: To capture a known good point in time configuration, users can take database
snapshots. It is recommended that this be done each time they deploy a production set of policies, at a
minimum. See procedure 5 below.
•
Database Restore: To restore to a known good point in time, a database backup can be used to restore
from. See procedure 6 below. If restoring an entire cluster, this only needs to be done on one node,
and then the other node should be sync'd via the UI.
•
ETM Backup: A full ETM backup does not need to be performed as frequently as the database
backup, as the changes to a ETM distribution are much less frequent than changes to the database.
However, whenever changes are made, it is advisable to take a backup. Such changes would include:
•
•
Upgrading the ETM software
•
Staging new ETEP software on the ETM ftp server
•
Topology changes to a cluster (adding or removing a node)
ETM Restore: Restoring from a ETM backup would be necessary if some damage had occurred
within the ETM install directories, such as unintentional deletion of the policyserver config files or
binaries. The ETM backup includes a database backup within the archive (tar file), however, it may
not be necessary to restore the database. If the intention of the restore is to simply fix the filesystem,
the database does not need to be restored. If, however, a full system recovery is being performed, then
the most recent ETM backup and database backup should be used for restoration. If the most recent
database backup is that contained within the ETM backup, then that should be used.
Hardware Server specifics
Drive failures
A hardware ETM server has two possible configurations: a non-RAID dual drive system, or a RAID 1
dual drive system (mirroring).
•
RAID system
For a drive failure in a RAID configuration, simply replacing the failed drive is all that is necessary.
non-RAID system. There are two possibilities:
•
•
Failure of the main drive
Boot from the backup drive (change the BIOS order), and restore with either procedure 2., 4., or 6.
below, depending on how many changes were made outside of the ETM software. Then replace the
failed drive and dd the main drive to the new drive, which is now the new backup drive.
•
Failure of the backup drive
Replace the backup drive and repeat the dd operation to copy the main drive to the backup drive
26
EncrypTight Manager Installation Guide
Backup and Restore of EncrypTight Manager
Other hardware component failures
If some component other than a drive has failed, that component could be replaced in the field, or the
server could be RMA'd back to Black Box.
Damage to the ETM software or database
If some damage is done to the ETM installation, such as unintentional removal of key configuration files
or binaries under /opt/jboss/server/policyserver, then the ETM software should be restored. If that is all
that occurred, then the database does not need to be restored. See procedure 4 below for restoring the
ETM software.
Damage to the OS or filesystem
If damage is done to other areas of the filesystem, such as unintentional removal of OS files, or files
outside of the ETM root directory, then a restore from backup will be necessary. Depending on what was
damaged, either part of the backup or all of the backup may be necessary for the restore. For example, if
the only damage was to /etc, then only that portion of the backup would be needed to recover. If
something as drastic as 'rm -rf /' had occurred, then the full backup would be needed, and then a
subsequent ETM backup or database backup might also need to be applied. That would be necessary if
such a backup existed that was more recent than the full backup. See procedures 2, 4 and 6 below.
Example backup and restore procedures
Procedure 0. copying drives with dd (only for non-RAID systems!!!!)
An example command, run as root to copy drive a to drive b:
dd if=/dev/sda of=/dev/sdb bs=100M conv=notrunc,noerror
Be careful with order of if and of. You can write a blank disk to a good disk if you get confused.
More info on dd can be found on wikipedia, and also on linuxquestions.org
The above procedure could be run regularly to snapshot a drive as it is modified, to keep the backup as
current as desired.
This procedure can serve as a full filesystem backup (alternate for Procedure 1. below) for non-RAID
configured servers. However, it is subject to drive failure of this backup drive.
Procedure 1. Backing up the entire filesystem
As stated in the General Guidelines, each IT organization will/should have standardized backup practices.
At a minimum, they should retain a full snapshot of a ETM filesystem at least once, after the installation
script has been run and they have made whatever configuration changes they wanted to for a given site
(such as changes to files in /etc). There are many ways to accomplish this. One simple method is using
the tar command. An example is provided here (this should be run as root).
cd /
EncrypTight Manager Installation Guide
27
tar cvpzf backup.tgz --exclude=/proc --exclude=/lost+found --exclude=/backup.tgz
--exclude=/mnt --exclude=/sys /
Please familiarize yourself with the tar command and its arguments. The man pages are included in the
ETM distro.
As noted above, the dd operation for non-RAID configured servers also serves as a full filesystem
backup. It can be performed at important milestones to keep the backup current.
Procedure 2. Restoring the complete filesystem, including the OS
Restoring the complete filesystem will depend on how the backup was taken. If it was via the example tar
command above, then restoring would involve untarring the backup like so:
cd /
tar xvpfz backup.tgz -C /
NOTE
If restoring a completely destroyed filesystem on the boot partition, the server bootup will have to be done
via other media: either a CD/DVD/drive as mentioned at the beginning of this document, or a secondary
drive if the system is non-RAID and the secondary drive holds a backup.
If using a dd version of backup to restore from, the dd operation should be performed in the same manner
as was done initially, but the "if" and "of" arguments should be reversed. For example:
dd if=/dev/sdb of=/dev/sda bs=100M conv=notrunc,noerror
Alternative *nix backup methods
There are many other methods for backing up and restoring a *nix operating system. Methods include
dar, rsync, cp, scp, tar, dd, clonezilla, ghost, amanda, and many more. As mentioned previously, it is
expected that a customer's IT organization will have already established backup policies and procedures.
If not, or, for general reference, there are many sites available on the internet that discuss this topic. For
reference, the following are listed here:
http://www.halfgaar.net/backing-up-unix
http://www.cyberciti.biz/faq/rhel-backup-linux-server/
http://www.linuxlinks.com/article/20090105114152803/Backup.html
http://stackoverflow.com/questions/15208/whats-the-best-linux-backup-solution
http://en.wikipedia.org/wiki/NetVault_Backup
Procedure 3. Backing up the ETM software and data
To backup the ETM software and data, navigate to the Platform->Utilities page, then the AppServer
Nodes tab, then select the server you are logged into, right-click, and choose Backup. This will perform a
database backup, and then create a tar archive file containing the ETM software, the root directory where
ETM is installed, the database backup, and other directories used by ETM, specifically the ftp dir and
filestore dir. It will also optionally scp the backup to a remote server if those configuration properties are
setup. For convenience, these properties are listed here. They are named as such in the Admin->ETM
Config page:
28
•
Backup Server (ip)
•
Backup Server scp Directory
EncrypTight Manager Installation Guide
Backup and Restore of EncrypTight Manager
•
Backup Server scp User
•
Backup Server scp Password
Also note that the ETM root dir is /opt/jboss/server/policyserver, and that the /opt/scripts directory is a
symlink to /opt/jboss/server/policyserver/scripts, so that directory will be backed up. It contains the config
files that were used during installation.
Files in /etc/init.d are not included in this tar, so those should be backed up separately, after installation.
They should never change after installation.
Whether or not the backup is scp'd to a remote host, a copy will be left in the /opt/jboss/server/
policyserver/log dir, and can be downloaded via the browser from the Admin->Server Files page (from
the logs folder). Double clicking on it will download it. The database backup will also be located there.
The names are of the following format:
<host ip address>-backup-YYYYMMDD-HH-MM.tar.gz
db-backup-YYYYMMDD-HH-MM.sql.gz
Procedure 4. Restoring the ETM software and data
To restore from a ETM server backup, obtain the backup that was taken for the particular host (note that
the ip address of the host is part of the backup file name), scp it to the ETM host, and untar it. (The
application server should be stopped before doing this: /etc/init.d/policyserver stop) For example:
scp 192.168.80.77-backup-20110101-16-35.tar.gz root@etmserver:/
ssh root@etmserver
cd /
gunzip -c 192.168.80.77-backup-20110101-16-35.tar.gz | tar xvpf -
At this point, the database backup that is located in /opt/jboss/server/policyserver/log can be used (only if
necessary) to restore the database. See procedure 6. Once completed, the application server can be
restarted, /etc/init.d/policyserver start. See notes below on details related to cluster nodes and DR servers.
Procedure 5. Backing up the ETM database
To backup the just the ETM database, navigate to the Platform->Utilities page, then the DB Nodes tab,
then select the database for the server you are logged into, right-click, and choose Backup. This will
create a backup that can be downloaded from the Admin->Server Files page, in the logs folder. It will be
named like db-backup-YYYYMMDD-HH-MM.sql.gz. Double clicking on it will download it to your
local disk, from where it should be safely archived.
Procedure 6. Restoring the ETM database
To restore the database from a backup, scp the backup to the host being restored, and execute the dbimport.sh script. For example:
scp db-backup-20110915-15-14.sql.gz root@etmserver:/opt/filestore
ssh root@etmserver
cd /opt/filestore
gunzip db-backup-20110915-15-14.sql.gz
/opt/scripts/db-import.sh --importFile=db-backup-20110915-15-14.sql
EncrypTight Manager Installation Guide
29
If you changed the database userid or password, you will have to supply those options as well.
[root@policyserver log]# /opt/scripts/db-import.sh --help
db-import.sh
--help
--dbUser=dbUser
--dbPass=dbPassword
--dbType=dbType
--importFile=importFile
--disasterServer=[true/false]
Cluster notes
Restoring a cluster node should not include restoring the database if another cluster node with a database
is still active. Instead, the database on the restored node should be synchronized via the ETM web
application. On the Platform->Utilities page, on the DB Nodes tab, find the inactive database, right click
on it and choose Activate.
DR notes
If restoring a DR datbase (which should really never be necessary, since the backup can be pushed from
the main ETM site via the UI), you must supply the --disasterServer=true command line option.
Restoring to factory defaults
If for some reason a server needs to be set back to the state in which it was delivered from Black Box,
the /opt/scripts/factory-restore.sh script can be run. The user will be prompted twice before proceeding.
This script will stop the ETM server, delete the database and reset all configuration files to their original
state. The installer can be re-run after performing this operation.
VM Server specifics
VMware specific information is found on the VMware website.
VMWare backup guide
http://www.vmware.com/pdf/vi3_301_201_vm_backup.pdf
NOTE
Note that VMWare does not consider VM snapshots backups. For more information about snapshots, read
the following knowledge base articles.
Understanding VM snapshots
http://kb.vmware.com/selfservice/microsites/
search.do?language=en_US&cmd=displayKC&externalId=1015180
Best Practices for VM snapshots
http://kb.vmware.com/selfservice/microsites/
search.do?language=en_US&cmd=displayKC&externalId=1025279
30
EncrypTight Manager Installation Guide
Appendices
Appendices
Hardware Disaster Recovery Cluster Install
If you are going to have the disaster recovery cluster on node1 = 192.168.80.3 and node2 = 192.168.80.4
then you would run like this on both installs:
•
Modify the /opt/scripts/policyserver-init.conf and set the following. Emacs, nano, and vi are available
on the OS.
########################################################################
#######
#######
####### Cluster options
#######
#
## for a clustered installation node1 and node2 must be set the same
## on each of the hosts in the cluster, same ordering
node1=192.168.80.3 - THE IP OF DR NODE 1
node2=192.168.80.4 - THE IP OF DR NODE 2
#
#clusterJdbcMcast=229.10.10.20
#clusterMcast=228.10.10.20
#clusterName=disasterrecovery
#
########################################################################
#######
########################################################################
#######
#######
####### Disaster Recovery options
#######
#
## When this server will use a disaster recovery site set the following:
# heartbeatEnabled=true
# disasterEnabled=true
# disasterHost=
# disasterUser=pserver
# disasterPass=pserver
# heartbeatPort=8764
#
#
## When this server IS the disaster recovery site set the following:
disasterServer=true
disasterServerUser=admin
heartbeatInterval=30000
## comma separated list of hosts to check
heartbeatHosts=192.168.80.1,192.168.80.2 -- COMMA SEPARATED LIST OF
SERVERS IN THE MAIN SITE
#
#
EncrypTight Manager Installation Guide
31
########################################################################
#######
########################################################################
#######
#######
####### VM tuning options
#######
#
## max number of workder threads in the application server, MUST be more
than 2 x mdbQueueThreads
maxServerThreads=500
## max number of high queue threads, max number of low queue threads
mdbQueueThreads=200
#
## at least 2G of RAM
# minMemory=512
# maxMemory=768
# permSize=128
# maxPermSize=256
#
## at least 4G of RAM
minMemory=768
maxMemory=1280
permSize=128
maxPermSize=384
#
## additional JVM options
# javaOpts="-XX:+UseFastAccessorMethods"
#
###############################################################################
Run the installation scripts:
It is important that the ordering of IP addresses stays the same for node1 and node2 on both machines in
the disaster recovery cluster.
Be sure that the following TCP and UDP ports are available between each server in the disaster recovery
cluster:
TCP
TCP
TCP
TCP
TCP
TCP
TCP
TCP
TCP
TCP
TCP
21
2221
22
80
8080
443
8443
8764
5432
47788
47799
UDP 45588
UDP 46688
32
EncrypTight Manager Installation Guide
Appendices
UDP 45599
UDP 46699
Ordering of actions is important.
You should install in the following steps:
1 Power on both servers
2 Assign IP to server #1
3 Assign IP to server #2
4 Make sure that server #1 can see server #2 on the network
5 Run /etc/init.d/policyserver-install on server #1 ( same order of IP addresses on both )
6 IMPORTANT: WAIT for server #1 to fully complete the install and startup
7 Run /etc/init.d/policyserver-install on server #2 ( same order of IP addresses on both )
Once installation is complete you can view the web interface from either of the cluster nodes IP
addresses.
To verify that the cluster is in place check the Platform -> Utilities page DB Nodes and Appserver Nodes.
Preparation for DR listening
Until EncrypTight supports a fully replicated data layer at the DR cluster site, you must shut-down the
database server on the second node. Login as root and issue the following command:
% /etc/init.d/postgresql-9.0 stop
This will cause that DB node to go inactive. You can verify this in the Platform -> Utilities page on the
DB Nodes Tabd.
Actions on DR activation (failover occurs)
When failover occurs, in order to ensure the DR cluster is fully redundant, including at the data-layer,
you must restart the database server on the second node, and activate it via the UI. Login to the second
server as root and issue the following command:
% /etc/init.d/postgresql-9.0 start
Once the database has started, login to EncrypTight Manager as a Platform Admin, navigate to the
Platform-> Utilities page, locate the inactive database on the DB tab, select it, right-click and select
"Activate". This will synchronize the database and the DR site will be fully HA.
Failback
When the DR site fails back to the main site, you should once again stop the database on the second DR
appserver.
EncrypTight Manager Installation Guide
33
EncrypTight Manager OVA Deployment Using vSphere
Client
Applications
You need to install vSphere Client onto your workstation.
The vSphere Client software is only available for Windows platforms.
Open up the VMware vSphere Client software. You will see the login prompt for the client to connect to
the server.
Figure 2
Running vSphere Client
Enter the IP address of ESX server
Select the checkbox for "Use Windows session credentials"
Select Login.
Installing the CSM OVA
Once you have logged into vSphere Client you will see the main interface.
34
EncrypTight Manager Installation Guide
Appendices
Figure 3
Installing the CSM OVA
Click on the menu option File -> Deploy OVF Template...
This will bring up the OVF Template Deploy dialog:
EncrypTight Manager Installation Guide
35
Figure 4
Deploy OVF Template
Select the "Deploy from file" option.
Copy and paste the ova link that is generated from the CSM build server.
Select Next.
You will see the OVF Template Details
36
EncrypTight Manager Installation Guide
Appendices
Figure 5
OVF Template Details
Select Next.
You will see the Name and Location.
Here you will enter a Name for your virtual machine that will be created. Use the following naming
convention:
INITIALS-BUILDNUMBER-SERVERNUMBER
Example:
So for User “XX” deploying an ova build 2653 server 1 the name would be:
XX-2653-AS1
For server 2 of the same build the name would be:
XX-2653-AS2
For Inventory Location select the "Simulators" section:
EncrypTight Manager Installation Guide
37
Figure 6
Name and Location
Select Next.
You will see the Host / Cluster selection. Select the Simulators -> vmhost1.blackbox.com
38
EncrypTight Manager Installation Guide
Appendices
Figure 7
Host / Cluster
vmhost1.blackbox.com
Select Next.
You will see the Resource Pool selection. Select the vmhost1.blackbox.com -> CSM Testing
EncrypTight Manager Installation Guide
39
Figure 8
Resource Pool
Select Next.
You will see the Datastore selection. You can select any of the available Datastores. Ensure there is at
least 45G of Free space available.
40
EncrypTight Manager Installation Guide
Appendices
Figure 9
Datastore
Select Next.
You will see the Ready to Complete screen.
EncrypTight Manager Installation Guide
41
Figure 10
Ready to Complete
Select Next.
Now vSphere will import the ova into the CSM Testing Resource Pool. You will see a dialog with the
progress and a complete message once it is done. You can close the complete message.
You can select the newly created VM under the CSM Testing tree and power it on. There is a link to
power it on under the Basic Tasks section of the VM.
42
EncrypTight Manager Installation Guide
Appendices
Figure 11
Basic Tasks
Once the VM begins to power up you right click on the VM and select “Open Console”.
You will see the VM operating system boot up and get to the main blue screen.
EncrypTight Manager Installation Guide
43
Figure 12
Main Screen
Setup Networking
Once you are on the main blue screen of the virtual machine appliance you can click your mouse inside
of it. The virtual machine now has control of your mouse. You will have to type "Ctrl+Alt" to release the
mouse from it.
You can use the arrow keys in the appliance to select "Configure Network"
You will see the main network config menu. Enter 6 and press Enter.
44
EncrypTight Manager Installation Guide
Appendices
Figure 13
Main Network Config
Now you will be able to enter your IPv4 address information:
Configure an IPv4 address for eth0? y/n n: y
Use a DHCPv4 Server instead of a static IPv4 address? y/n n: n
IPv4 Address []: 192.168.4.X
Netwmask []: 255.255.192.0
Is this correct? y/n y: y
Make sure you use 255.255.192.0 as the netmask. Valid static IP range for the QA CSM VM's are 4.20 to
4.50.
Next select option 2 from the menu.
EncrypTight Manager Installation Guide
45
Figure 14
Default Gateway
Enter 0 for the interface to configure.
Enter 192.168.1.1 for the Gateway.
(Optional) If you need to setup DNS for external access from the VM select option 4 from the menu and
enter the DNS IP settings. ( Use 192.168.1.10 and 192.168.4.2 for DNS servers if you require DNS)
Select option 1 from the menu to exit the network config.
46
EncrypTight Manager Installation Guide
Black Box Tech Support: FREE! Live. 24/7.
Tech support the
way it should be.
Great tech support is just 30 seconds away at 724-746-5500 or blackbox.com.
About Black Box
Black Box Network Services is your source for an extensive range of networking and infrastructure products. You’ll find everything
from cabinets and racks and power and surge protection products to media converters and Ethernet switches all supported by
free, live 24/7 Tech support available in 30 seconds or less.
© Copyright 2012. All rights reserved. Black Box and the Double Diamond logo are registered trademarks, and EncrypTight is a
trademark, of BB Technologies, Inc. Any third-party trademarks appearing in this manual are acknowledged to be the property of
their respective owners.
ET0010A Manager Installation Guide, rev2
724-746-5500 | blackbox.com