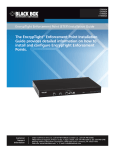
1
ET0010A
ET0100A
ET1000A
EncrypTight Enforcement Point (ETEP) Installation Guide
EncrypTight acts as a transparent overlay that
BLACK
BOX
integrates easily into any existing
network
architecture, providing encryption rules and keys
to EncrypTight Enforcement Points.
®
EncrypTight consists of a suite of tools that performs various tasks of
appliance and policy management, including Policy Manager (PM),
Key Management System (KMS), and EncrypTight Enforcement Points
(ETEPs).
Customer
Support
Information
Order toll-free in the U.S.: Call 877-877-BBOX (outside U.S. call 724-746-5500)
FREE technical support 24 hours a day, 7 days a week: Call 724-746-5500 or fax 724-746-0746
Mailing address: Black Box Corporation, 1000 Park Drive, Lawrence, PA 15055-1018
Web site: www.blackbox.com • E-mail: [email protected]
Table of Contents
About This Document................................................................................................................. 7
Contacting Black Box Technical Support ............................................................................................... 7
Chapter 1: Product Overview..................................................................................................... 9
ETEP Introduction .................................................................................................................................. 9
ET0010A Physical Description............................................................................................................. 11
Front Panel Connectors................................................................................................................. 11
Status Indicators............................................................................................................................ 12
Rear Panel..................................................................................................................................... 13
ET0100A Physical Description............................................................................................................. 13
Front Panel Connectors................................................................................................................. 14
LED Indicators ............................................................................................................................... 14
Rear Panel..................................................................................................................................... 15
ET1000A Physical Description............................................................................................................. 16
Front Panel Connectors................................................................................................................. 16
LED Indicators ............................................................................................................................... 16
Rear Panel..................................................................................................................................... 18
Features ............................................................................................................................................... 19
Specifications ....................................................................................................................................... 20
Chapter 2: Installation .............................................................................................................. 23
Before You Start................................................................................................................................... 23
Safety Guidelines .......................................................................................................................... 23
Software Requirements ................................................................................................................. 24
ETEP Site Preparation .................................................................................................................. 25
Firewall Ports ................................................................................................................................. 26
Installing the ET0010A ......................................................................................................................... 26
Cabling Requirements: ET0010A ..................................................................................................27
Unpacking the Shipping Carton: ET0010A .................................................................................... 27
Installation Instructions: ET0010A ................................................................................................. 28
Rack Mount Installation...........................................................................................................28
Solid Surface Installation......................................................................................................... 31
Connecting the Cables: ET0010A .................................................................................................33
Powering On the ET0010A............................................................................................................ 34
Installing the ET0100A ......................................................................................................................... 35
Cabling Requirements: ET0100A ..................................................................................................35
Unpacking the Shipping Carton: ET0100A .................................................................................... 36
Rack-Mount Installation: ET0100A ................................................................................................ 36
Connecting the Cables: ET0100A .................................................................................................37
Powering on the ET0100A............................................................................................................. 38
Installing the ET1000A ......................................................................................................................... 39
Cabling Requirements: ET1000A ..................................................................................................40
Unpacking the Shipping Carton: ET1000A .................................................................................... 41
Rack Mount Installation: ET1000A ................................................................................................ 41
Table of Contents
Connecting the Cables: ET1000A .................................................................................................42
Powering on the ET1000A............................................................................................................. 43
Shutting Down the ETEP ..................................................................................................................... 45
Chapter 3: Initial Setup............................................................................................................. 47
Overview .............................................................................................................................................. 47
Logging In Through a Serial Link ......................................................................................................... 47
Configuring the Management Port ...................................................................................................... 48
Setting the Date and Time ................................................................................................................... 51
Entering a Throughput License ............................................................................................................ 52
Configuration Example......................................................................................................................... 53
Managing the ETEP ............................................................................................................................. 53
Chapter 4: Maintenance ........................................................................................................... 55
Preventative Maintenance.................................................................................................................... 55
What To Do If an Appliance Fails......................................................................................................... 56
Obtaining a License for Replacement Units .................................................................................. 56
Replacing the ET1000A Power Supply ......................................................................................... 56
Tamper Switch and Zeroization ...........................................................................................................58
Cable Pinouts....................................................................................................................................... 59
RS-232 Serial Cable: ET0010A..................................................................................................... 59
RS-232 Serial Cable: ET0100A/ET1000A..................................................................................... 60
Chapter 5: Troubleshooting..................................................................................................... 61
Symptoms and Solutions ..................................................................................................................... 61
LED Indicators ............................................................................................................................... 61
Error State ..................................................................................................................................... 62
Temperature Threshold and Discarded Traffic ....................................................................... 62
Diagnostic Code Display ...................................................................................................................... 63
Status Codes: ET0010A ................................................................................................................ 63
Diagnostic Codes: ET0100A and ET1000A ................................................................................. 64
Appendix A: Environmental and Regulatory Information..................................................... 65
WEEE Directive.................................................................................................................................... 65
RoHS Directive..................................................................................................................................... 65
Regulatory Information......................................................................................................................... 66
ET0010A Regulatory Information .................................................................................................. 66
Safety ...................................................................................................................................... 66
Immunity.................................................................................................................................. 66
Emissions................................................................................................................................ 66
FCC Information (USA) ...........................................................................................................66
Interference-Causing Equipment Standard Compliance Notice (Canada).............................. 67
European Notice ..................................................................................................................... 67
ET0100A Regulatory Information .................................................................................................. 67
Safety ...................................................................................................................................... 67
Immunity.................................................................................................................................. 67
Emissions................................................................................................................................ 67
FCC Information (USA) ...........................................................................................................67
Interference-Causing Equipment Standard Compliance Notice (Canada).............................. 68
European Notice ..................................................................................................................... 68
4
ETEP Installation Guide
Table of Contents
ET0100A Cabling .................................................................................................................... 68
ET1000A Regulatory Information .................................................................................................. 68
Safety ...................................................................................................................................... 68
EMI/EMC................................................................................................................................. 68
FCC Information (USA) ...........................................................................................................69
Interference-Causing Equipment Standard Compliance Notice (Canada).............................. 69
European Notice ..................................................................................................................... 69
Normas Oficiales Mexicanas (NOM): Electrical Safety Statement ................................................ 69
Index........................................................................................................................................... 71
ETEP Installation Guide
5
Table of Contents
6
ETEP Installation Guide
About This Document
Purpose
The ET VSE-series Installation Guide describes how to cable and install the Black Box™ ETEP
EncrypTight Enforcement Points.
Intended audience
This document is intended for use by network technicians and security administrators who are familiar
with setting up and maintaining network equipment.
Assumptions
This document assumes that its readers have an understanding of the following:
●
Basic principles of TCP/IP networking, including IP addressing, switching and routing.
●
Personal computer (PC) operation and common PC terminology
●
Terminal emulation software and FTP operations.
Conventions used in this document
Bold
Indicates one of the following:
●
a menu title
●
the name of a command
●
the name of a parameter
Italics
Indicates a new term
Monospaced
Indicates machine text, such as terminal output or a file name
Monospaced bold
Indicates a command to be issued by the user
Contacting Black Box Technical Support
Contact our FREE technical support, 24 hours a day, 7 days a week:
Phone
724-746-5500
Fax
724-746-0746
e-mail
[email protected]
Web site
www.blackbox.com
ETEP Installation Guide
7
About This Document
8
ETEP Installation Guide
1
Product Overview
This section includes the following topics:
●
ETEP Introduction
●
ET0010A Physical Description
●
ET0100A Physical Description
●
ET1000A Physical Description
●
Features
●
Specifications
ETEP Introduction
The EncrypTight Enforcement Point (ETEP) Variable Speed Encryptors (VSEs) are purpose-built
encryption appliances that provide multi-layer data protection. With straightforward setup and
configuration, the ETEP has the flexibility to provide Ethernet frame encryption for Layer 2 networks, IP
packet encryption for Layer 3 networks, and Layer 4 data payload encryption for MPLS networks.
The ETEP’s variable speed capability lets you enable just the bandwidth you need, using a software
license. As your bandwidth needs increase, simply update your license. No need to replace your
hardware. The ET VSE-series offer full-duplex, line rate encryption from 3 Mbps to 1 Gbps using the
AES-256 encryption algorithm.
ETEP Installation Guide
9
Product Overview
Figure 1
Multipoint Ethernet Encryption using EncrypTight
The ETEP interfaces with network equipment through two data ports, the local port and the remote port.
Unencrypted traffic that originates from a trusted, local network is received on the local port, where the
ETEP applies security processing to it. The encrypted traffic is then sent from the remote port to an
untrusted network such as the Internet. At the opposite endpoint the process is reversed. Encrypted traffic
is received on the ETEP remote port and decrypted. Then the decrypted traffic is sent from the local port
to the destination.
The ETEP is managed in-line or out-of-band through a dedicated Ethernet management interface. The
ETEP can be managed in two ways, depending on the size and complexity of your deployment:
●
Command Line Interface (CLI)
The CLI is all you need to manage a standalone deployment, typically a pair of ETEPs. CLI
commands are available to perform initial setup of the ETEP, along with diagnostic and
troubleshooting commands. In Layer 2 deployments, you can configure the ETEPs for operation and
create Layer 2 point-to-point policies using the CLI commands.
●
EncrypTight Policy and Key Manager™
EncrypTight is an application for managing group encryption deployments. EncrypTight separates the
functions of policy management, key generation and distribution, and policy enforcement. As a result,
multiple ETEPs can use common keys. This works for complex mesh, hub and spoke, and multicast
networks, as well as in straightforward point-to-point topologies. Figure 1 shows ETEPs deployed in a
multipoint Ethernet network.
EncrypTight includes the following components:
10
●
EncrypTight Element Management System (ETEMS) for appliance configuration and management
●
EncrypTight Policy Manager (ETPM) for policy definition and deployment
●
EncrypTight Key Management System (ETKMS) for key generation and distribution
ETEP Installation Guide
ET0010A Physical Description
ET0010A Physical Description
The ET0010A is a rack-mountable encryptor that can run at speeds ranging from 3-50 Mbps. It has three
data ports on the front panel labeled Remote, Local, and Aux1. The following sections describe the
ET0010A connectors and LED indicators.
Front Panel Connectors
The ET0010A front panel connectors are shown in Figure 2.
Figure 2
ET0010A Front Panel Connectors
Elements in Figure 2:
1)
RS-232 management port
2)
Ethernet management port
3)
Auxiliary port (not enabled in this release)
4)
Remote port (encrypted traffic):
5)
Local port (clear traffic):
ETEP Installation Guide
11
Product Overview
Status Indicators
The ET0010A status indictors are shown in Figure 3. The status indications are described in Table 1.
Figure 3
ET0010A Status Indicators
Elements of Figure 3:
1)
Power LED
2)
Alarm LED
3)
Status indicators
4)
Link indicators
The following table describes how to interpret the ET0010A status indicators.
Table 1
ET0010A Status Indicators
Indicator Light
State
Indication
Power (green)
Off
Unit is powered off.
On
Unit is powered on.
Off
Loss of signal on the 10/100 link.
On
The 10/100 link is up but no traffic is passing over the link.
Blinking
Indicates the presence of traffic on the 10/100 link.
Off
Loss of signal on the Gigabit link.
On
The Gigabit link is up but no traffic is passing over the link.
Blinking
Indicates the presence of traffic on the Gigabit link.
Off
Normal operation.
On
The unit is in an error state. This occurs when the
diagnostics detect a boot failure, a critical error threshold is
exceeded, or a FIPS test fails when the ETEP is in FIPS
mode.
Off
Unit is up and operational.
On
Displays diagnostic codes during boot up.
10/100 link status
(green)a
Gigabit link status
(amber)a
Alarm (green)
Status (1,2,3,4)
a. The link status LEDs are on the remote and local data ports, Ethernet management port, and Aux1 port.
12
ETEP Installation Guide
ET0100A Physical Description
Rear Panel
The ET0010A rear panel and external power supply are shown in Figure 4.
Figure 4
ET0010A Rear Panel and External Power Supply
Elements of Figure 4:
1)
External power supply power connector
2)
Rear panel power connector
ET0100A Physical Description
The ET0100A is a rack-mountable encryptor that can run at speeds ranging from 100–250 Mbps. The
following sections describe the connectors and LED indicators that appear on the front and rear panels of
the ET0100A.
ETEP Installation Guide
13
Product Overview
Front Panel Connectors
The ET0100A front panel connectors are shown in Figure 5.
Figure 5
ET0100A Front Panel Connectors
Elements of Figure 5:
1)
10/100 Ethernet management port
2)
RS-232 port
3)
Remote port (encrypted traffic)
4)
Local port (clear traffic)
LED Indicators
The ET0100A LED indictors are shown in Figure 6. The LED indications are described in Table 2.
Figure 6
ET0100A LED Indicators
Elements of Figure 6:
14
1)
Diagnostic display
2)
Alarm LED
3)
Link indicators
4)
Power indictor
ETEP Installation Guide
ET0100A Physical Description
The following table describes how to interpret the LEDs on the ET0100A front panel.
Table 2
ET0100A Front Panel LED Indicators
Indicator Light
State
Indication
Power (green)
Off
Unit is powered off.
On
Unit is powered on.
Off
Loss of signal on the 10/100 link.
On
The link is up but no traffic is passing over the link.
Blinking
Indicates the presence of traffic on the 10/100 link.
Off
Loss of signal on the Gigabit link.
On
The Gigabit link is up but no traffic is passing over the link.
Blinking
Indicates the presence of traffic on the Gigabit link.
Off
Normal operation.
On
The unit is in an error state. This occurs when the
diagnostics detect a boot failure, a critical error threshold is
exceeded, or a FIPS test fails when the ETEP is in FIPS
mode.
On
Displays diagnostic codes during boot up. After boot up, it
reflects the operational state of the appliance and error
conditions.
Ethernet port status
(green)a
Gigabit link status
(amber)a
Alarm (green)
Diagnostic code display
a. The link status LEDs are on the remote and local data ports, and Ethernet management port.
Rear Panel
The ET0100A rear panel is shown in Figure 7.
Figure 7
ET0100A Rear Panel
Elements of Figure 7:
1)
Power receptacle
2)
Fan
3)
Product ID label
ETEP Installation Guide
15
Product Overview
ET1000A Physical Description
The ET1000A is a rack-mountable 1 Gbps encryptor with dual power supplies. It can operate at speeds
ranging from 500 Mbps–1 Gbps. The following sections describe the ET1000A connectors and LED
indicators.
Front Panel Connectors
The ET1000A front panel connectors are shown in Figure 8.
Figure 8
ET1000A Front Panel Connectors
Elements of Figure 8:
1)
RS-232 serial port
2)
10/100 Ethernet management port
3)
Gigabit Ethernet management port (not enabled in this release)
4)
Aux1 port (not enabled in this release)
5)
Remote port (encrypted traffic)
6)
Local port (clear traffic)
LED Indicators
The ET1000A LED indicators are shown in Figure 9. The LEDs are described in Table 3.
16
ETEP Installation Guide
ET1000A Physical Description
Figure 9
ET1000A LED Indicators
Elements of Figure 9:
1)
Power LED
2)
Alarm LED
3)
Diagnostic display
4)
Link indicators: 10/100 Ethernet management port
5)
Link indicators: Gigabit management port
6)
Link indicators: Aux1, Remote and Local ports
7)
Power supply status LEDs
Table 3 describes how to interpret the LEDs on the ET1000A front panel.
Table 3
ET1000A Front Panel LED Indicators
Indicator Light
State
Indication
Power (green)
Off
Unit is powered off.
On
Unit is powered on.
Off
Normal operation.
On
The unit is in an error state. This occurs when the
diagnostics detect a boot failure, a critical error threshold is
exceeded, or a FIPS test fails.
Diagnostic code display
On
Displays diagnostic codes during boot up. After boot up, it
reflects the operational state of the appliance and error
conditions.
10/100 link status (green)
Off
Loss of signal on the 10/100 link.
On
The 10/100 link is up but no traffic is passing over the link.
Blinking
Indicates the presence of traffic on the 10/100 link.
Off
Loss of signal on the Gigabit link.
On
The Gigabit link is up but no traffic is passing over the link.
Blinking
Indicates the presence of traffic on the Gigabit link.
Off
Power supply is not operational. Possible causes include
power supply unplugged, power supply removed from
chassis, or a malfunction.
On
Power supply is operational.
Alarm (green)
Gigabit link status
(green)a
Power supply status
a. Gigabit links include the remote and local data ports, gigabit Ethernet management port, and Aux1 port.
ETEP Installation Guide
17
Product Overview
Rear Panel
The ET1000A rear panel is shown in Figure 10.
Figure 10
ET1000A Rear Panel
Elements of Figure 10:
Power Supply # 2
1)
Release lever for power supply 2
2)
Power supply 2 receptacle
3)
Power cord clip for power supply 2
4)
Status LED for power supply 2. Green indicates normal operation. Red indicates a
power fail state.
Power Supply # 1
18
5)
Power cord clip for power supply 1
6)
Status LED for power supply 1. Green indicates normal operation. Red indicates a
power fail state.
7)
Release lever for power supply 1
8)
Power supply 1 receptacle
ETEP Installation Guide
Features
Features
ETEPs share many of the same features and capabilities across hardware models, as shown in Table 5.
Hardware differences between the ETEP models are summarized in Table 4.
Table 4
ETEP Hardware Comparison
Form
Factor
Data Port
Speed
Data Port
Interface
Mgmt Port
Interface
Auxiliary
port
Dual
Power
Supplies
ET0010A
1u rackmount
(2) 3–50
Mbps
RJ-45
RJ-45
Yes
No
ET0100A
1u rackmount
(2) 100–
250 Mbps
RJ-45
RJ-45
No
No
ET1000A
1u rackmount
(2) 500–
1000 Mbps
SFP
RJ-45 and
SFP
Yes
Yes
Model
The ETEP features are summarized in Table 5.
Table 5
ETEP Feature Summary
Category
Feature
Throughput
•
ET0010A: Supports encrypted throughput rates of 3, 6, 10, 25
and 50 Mbps
•
ET0100A: Supports encrypted throughput rates of 100, 155, and
250 Mbps
•
ET1000A: Supports encrypted throughput rates of 500, 650, and
1000 Mbps
•
Advanced Encryption Standard (AES): FIPS 197 (256 bit keys)
•
3DES: ANSI X9.52 (168 bit keys), standard CBC mode
•
User-configurable for Layer 2 Ethernet or Layer 3 IP encryption,
with option to encrypt only the Layer 4 payload
•
X.509 v3 digital certificates (management interface)
•
HMAC-SHA-1-96
•
HMAC-MD5-96
•
Layer 2: Ethernet payload encryption
•
Layer 3: IPSec Tunnel mode with original IP header preservation
•
IPSec Transport mode for Layer 4 payload encryption option
•
EncrypTight software for device and policy management
•
Out-of-band management
•
Alarm condition detection and reporting
•
Syslog support
•
SNMPv2c and SNMPv3 managed object support
•
Audit logging
•
Management access using X.509 v3 digital certificates
•
Security options include TLS, SSH, IKE/IPsec
Encryption Support
Authentication Methods
Encapsulation Modes
Device Management
ETEP Installation Guide
19
Product Overview
Table 5
ETEP Feature Summary
Category
Feature
Network Support
•
Ethernet
•
VLAN tag preservation
•
MPLS tag preservation
•
Jumbo frame support (ET0100A, CEP100-XSA, CEP1000,
ET1000A)
•
Link state pass-through
•
IPv4
•
IPv6 (Layer 2 Ethernet encryption mode)
•
NTP
•
Host or gateway packet reassembly option
•
Source or destination IP address
•
Source or destination port number
•
Protocol ID (Layer 3 IP packet and Layer 4 payload options)
•
VLAN ID (Layer 2 encryption option)
•
Multicast address
Policy Selector Options
Specifications
This section lists the mechanical and environmental specifications for the following ETEP models:
●
ET0010A specifications are listed in Table 6
●
ET0100A specifications are listed in Table 7
●
ET1000A specifications are listed in Table 8
Table 6
ET0010A Mechanical and Environmental Specifications
Category
Specification
Interfaces
(2) 10/100 Mbps Ethernet ports for encrypting and decrypting
traffic
(1) 10/100 Mbps Ethernet auxiliary port (ET0010A only, not
enabled)
10/100/1000 Mbps auto-sensing Ethernet LAN port for
management
RS-232 port for management
20
ETEP Installation Guide
Specifications
Table 6
ET0010A Mechanical and Environmental Specifications
Category
Specification
ET0010A
Electrical/Mechanical Dimensions
19 inch rack mount design
1u tamper evident chassis
Dimensions: 1.6” H x 8.0” W x 5.8” D
Weight (without external power supply),1 pound 4 ounces
External power supply:
•
Weight: 11 ounces
•
Input voltage: 100-240 VAC @ 1.5 amps, 50/60 Hz, autosensing
•
Output voltage: 12 VDC @ 5 amps
Nominal input current: 0.25 amps
Nominal power dissipation: 36 watts
Thermal power: In-rush 102 BTU/hour, steady state 102 BTU/
hour
Environmental
Operating temperature: 0 to 40 degrees C (32 to 104 degrees F)
Operating humidity: Up to 90% (non-condensing)
Operating altitude: -200 to 10,000 feet AMSL
Regulatory
Table 7
See “ET0010A Regulatory Information” on page 66.
ET0100A Mechanical and Environmental Specifications
Category
Specification
Interfaces
(2) 10/100/1000 Mbps Ethernet ports for encrypting and decrypting
traffic
10/100 Mbps auto-sensing Ethernet LAN port for management
RS-232C port for management
Electrical/Mechanical
Dimensions
19 inch rack mount design
1U tamper evident chassis
Dimensions: 1.75” H x 17” W x 10” D
Weight: 6 pounds
100-240 VAC @ 4 amps, 50/60 Hz, auto-sensing
Nominal input current: 1.0A
Nominal power dissipation: 65 watts
Thermal power: In-rush 380 BTU/hour, steady state 140 BTU/hour
Environmental
Operating temperature: 0 to 40 degrees C (32 to 104 degrees F)
Operating humidity: Up to 90% (non-condensing)
Operating altitude: -200 to 10,000 feet AMSL
Regulatory
ETEP Installation Guide
See “ET0100A Regulatory Information” on page 67.
21
Product Overview
Table 8
ET1000A Mechanical and Environmental Specifications
Category
Specification
Interfaces
(2) Gigabit Ethernet ports for encrypting and decrypting traffic
(single mode, multimode, or copper)
10/100 Mbps auto-sensing Ethernet LAN port for management
RS-232C port for management
(1) Auxiliary Gigabit port for data traffic (not enabled)
(1) Gigabit Ethernet port for management (not enabled)
ET1000A
Electrical/Mechanical
Dimensions
19 inch rack mount design
1U tamper evident chassis
Dimensions: 1.75” H x 17” W x 15.5” D
Weight: 10 pounds
100-240 VAC @ 3-1.5A, 47-63 Hz, auto-sensing
Nominal input power: 72 watts
Maximum power: 90 watts
Nominal input current: 0.65 A @ 110V
Thermal power, single power supply: In-rush 266 BTU/hour, steady
state 222 BTU/hour
Thermal power, dual power supplies: In-rush 440 BTU/hour, steady
state 263 BTU/hour
Environmental
Operating temperature: 0 to 40 degrees C (32 to 104 degrees F)
Operating humidity: Up to 90% (non-condensing)
Operating altitude: -200 to 10,000 feet AMSL
Regulatory
22
See “ET1000A Regulatory Information” on page 68.
ETEP Installation Guide
2
Installation
This section includes the following topics:
●
Before You Start
●
Installing the ET0010A
●
Installing the ET0100A
●
Installing the ET1000A
●
Shutting Down the ETEP
Before You Start
Before you prepare the ETEP for installation, review the following information:
●
“Safety Guidelines” on page 23
●
“Software Requirements” on page 24
●
“ETEP Site Preparation” on page 25
●
“Firewall Ports” on page 26
Safety Guidelines
The ETEP does not contain any field-replaceable internal parts. Do not remove the unit’s cover for any
reason. The cover is to be removed only by authorized Black Box service personnel.
Authorized service personnel should review the following safety information prior to performing service
or maintenance procedures on the ETEP.
CAUTION
Disconnect all power cords before servicing.
ETEP Installation Guide
23
Installation
WARNING
The ETEP contains a lithium battery, which users should not attempt to replace. Battery replacement must
be performed by qualified Black Box personnel. Risk of explosion if battery is replaced by an incorrect
type. Used batteries should be disposed of according to the manufacturer’s instructions.
CAUTION
Electrostatic discharge (ESD) can damage electronic components and equipment. ESD occurs when
electronic components are improperly handled and can result in complete or intermittent failures. Always
follow ESD-prevention procedures when removing and replacing components.
Qualified service personnel should use the following guidelines to prevent ESD damage:
●
Always use an ESD wrist or ankle strap and ensure that it makes skin contact.
●
Connect the equipment end of the strap to an unpainted metal chassis surface.
●
If no wrist strap is available, ground yourself by touching the metal chassis.
Software Requirements
ETEP software is factory installed on the appliance. A backup copy of the software is provided on the
ETEP CD. To learn how to reinstall your software or install an update, refer to the user guide for your
management software.
If you are using EncrypTight to manage your ETEPs, you will need to install the EncrypTight software
on the management station to configure the ETEPs for network operation and to create and deploy
policies. See the EncrypTight User Guide for more information about using ETEPs in a EncrypTight
deployment.
The third party software listed in Table 9 is used when managing the ETEP in a standalone deployment.
See the EncrypTight User Guide for additional third party software you may want to install when using in
EncrypTight to manage EncrypTight appliances.
Table 9
24
Third party management station software
Software
How it’s used
Vendor
FTP server
Copies files to and from
EncrypTight appliances,
including log files and new
firmware
Microsoft FTP server, included
with Windows XP
SFTP server (optional: available
with ETEP 1.6 and later)
Secures file transfers to and
from EncrypTight appliances
Cerberus FTP Server 4 –
Professional Edition
PDF reader
Opens the user documentation
files on the product CD
Adobe Acrobat Reader version
6.0 or higher. Free download
available from www.adobe.com.
SSH client (ETEPs)
Securely connects to the ETEP
CLI
PuTTY, included with the
ETEMS installation
ETEP Installation Guide
Before You Start
ETEP Site Preparation
Most ETEP models can be mounted in a standard 19-inch rack using the supplied mounting kit, or simply
placed on a rack shelf or solid surface. Before installing the ETEP in a 19-inch rack, consider the
following guidelines:
●
Ambient temperature
Install the ETEP in an environment compatible with the 40ºC maximum recommended ambient
temperature. Extra clearance above or below the unit on the rack is not required; however, be aware
that equipment placed in the rack beneath the ETEP can add to the heat load. Therefore, avoid
installing in an overly congested rack. Air flowing to or from other equipment in the rack might
interfere with the normal flow of cooling air through the ETEP, increasing the potential for
overheating.
●
Air flow
Make sure that there is sufficient flow of air around the ETEP so that safe operation is not
compromised. Maintain a clearance of at least 3 inches (7.62 cm) at the sides of the ETEP to ensure
adequate air intake and exhaust. If installing in an enclosed rack, make sure the rack has adequate
ventilation or an exhaust fan. An enclosed rack with a ventilation system that is too powerful can
prevent proper cooling by creating negative air pressure around the ETEP.
●
Mechanical Loading
Keep the center of gravity in the rack as low as possible. This ensures that the weight of the ETEP
will not make the rack unstable. Make sure that the rack is secured and use the proper mounting
hardware to secure the ETEP to the rack.
●
Circuit Loading
Consider the connection of the ETEP to the supply circuit and the effect that overloading of circuits
might have on overcurrent protection and supply wiring. Consult the voltage and amperage ratings on
the UL label affixed to the unit’s rear panel when addressing this concern.
●
Grounding
Maintain reliable grounding of a rack-mounted ETEP. Pay particular attention to supply connections
other than direct connections to the branch circuit, such as the use of power strips.
●
Maintenance
Allow at least 19 inches (48.3 cm) of clearance at the front of the rack for maintenance. Use a cablemanagement system to help keep cables organized, out of the way, and free from kinks or bends that
degrade cable performance.
ETEP Installation Guide
25
Installation
Firewall Ports
Table 10 lists the protocols that are used by the ETEPs and the EncrypTight system. Make sure that any
firewalls in your system are configured to allow for the protocols that are required for your deployment:
standalone ETEPs used for point-to-point encryption or ETEPs used in an EncrypTight system.
Table 10
Firewall ports
Standalone
ETEPs
CipherEngine
Used for upgrading the software on the
ETEP and retrieving appliance log files.
Yes
Yes
Used to check connectivity with a device.
Yes
Yes
Protocol
Port
Description
FTP
TCP 20,
21
ICMP/Ping
IKE /
ISAKMP
UDP 500
Used to establish security associations in
IKE policies.
Yes
IPSec ESP
IP
protocol
50
Used in encryption policies.
Yes
Yes
SFTP
TCP 22
Used for secure FTP operations.
Yes
Yes
SNMP
UDP
161, 162
Used to send SNMP traps from the ETEPs
to a management workstation.
Yes
SNTP
UDP 123
Used for time synchronization among
EncrypTight components.
Yes
SSH
TCP 22
Used to securely access the CLI on ETEPs.
Syslog
UDP 514
Used to send syslog messages from the
ETEPs to a syslog server.
Yes
TLS
(HTTPS)
TCP 443
A secure method of communicating
management information between ETEMS
and the ETEPs.
Yes
XML-RPC
TCP 443
Used for communications between
EncrypTight components.
Yes
Yes
Yes
Installing the ET0010A
This section describes how to install ET0010A. To prepare the ET0010A for installation, review the
installation steps in Table 11, unpack the shipping carton, and prepare a space for the installation of the
appliance.
26
ETEP Installation Guide
Installing the ET0010A
The steps to perform for a typical installation are listed below.
Table 11
Installation Steps
Step
Action to Perform
Description
1
Review the cabling requirements.
on page 27
2
Unpack the shipping package.
on page 27
3
Install the ETEP in a rack or on a solid surface.
on page 28
4
Connect the cables.
on page 33
5
Apply power to the ETEP.
on page 34
Cabling Requirements: ET0010A
Table 12 outlines the standard cables used with each port on the ETEP. The connector type listed
indicates only what is required to connect to the ETEP port, and may or may not be the same connector
type required for the other end of the cable. Some cables are supplied by Black Box and others are usersupplied.
Table 12
ET0010A Standard Cables
ETEP Port
Cabling
Supplied by...
Power receptacle
Power supply and power cable
Black Box
RS-232 port
1.8 meter shielded null modem
cable with an RJ45 connector at
one end and a DB9 female
connector at the opposite end.
Black Box
Ethernet Management Port
Unshielded Category 5 straight
through cable (UTP), RJ-45
connectora.
Black Box
Aux1 port
Not applicable. Port is not
enabled in this release.
Not applicable
Remote and Local ports
(2) Unshielded Category 5
straight through cables (UTP),
RJ-45 connectora
User
a. The local, remote, and Ethernet management ports are auto-sensing for polarity. You can use shielded Category 5
straight through cables or crossover cables when connecting to these ports.
Unpacking the Shipping Carton: ET0010A
Remove all product components from the shipping carton and compare the contents to the packing list.
Keep all packaging in case it is necessary to return the unit.
The ETEP is packaged with the standard items listed below. Additional cables, country-specific power
cords, and other accessories can be ordered separately.
1 ET0010A
●
Firmware and software is factory-installed on the unit.
2 Accessory Kit
●
(1) Power cable (US)
●
(1) Power supply
ETEP Installation Guide
27
Installation
●
(1) Shielded null modem cable with an RJ-45 connector at one end and a DB-9 female connector
at the opposite end.
●
(1) Unshielded Category 5 straight through cable (UTP) with RJ-45 connectors
●
Rack mount kit includes 2 mounting brackets, 4 large screws (#10-32), and 4 small black screws.
The kit also includes 4 rubber feet and 4 small silver-toned screws with built-in washers for solid
surface installations (see Figure 11).
●
CD containing user documentation and a backup copy of the ETEP software
Figure 11
Accessory screws and feet
Elements of Figure 11:
1)
Large screws (#10-32), used to attach the mounting brackets to the rack
2)
Small black screws, used to attach the mounting brackets to the ETEP
3)
Rubber feet, used for solid surface installation
4)
Small silver-toned screws with built in washers, used to attach rubber feet to the
bottom of the ETEP
Installation Instructions: ET0010A
The ET0010A can be mounted in a standard 19-inch rack using the mounting kit, or simply placed on a
rack shelf or solid surface. Before installing the ETEP in a 19-inch rack, review the mounting guidelines
listed in “ETEP Site Preparation” on page 25.
Rack Mount Installation
To mount the ETEP in a standard 19-inch equipment rack, have the following tools and materials
available:
28
ETEP Installation Guide
Installing the ET0010A
●
External power supply
●
Two mounting brackets, supplied in the Accessory Kit
●
(4) small black screws and (4) large #10-32 screws, supplied in the Accessory Kit
●
#1 Phillips and #2 Phillips screwdrivers (user-supplied)
To install the ETEP in a rack:
1 Place the unit on a solid surface, with the bottom panel facing up.
When looking at the ET0010A from the bottom rear, the bracket that holds the power supply is on the
right, as shown in Figure 12.
Figure 12
Bottom rear view of the ET0010A, with rack mount brackets
Elements of Figure 12:
1)
Mounting bracket
2)
Regulatory label on the bottom of the unit
3)
Rear panel
4)
Power supply connector
5)
Mounting bracket with power supply cradle
6)
Front panel
2 Attach the mounting brackets to each side of the unit using the four small black screws provided in
the Accessory Kit (item 2 in Figure 11), and a #1 Phillips screwdriver.
When looking at the ET0010A from the bottom rear, the bracket that holds the power supply is on the
right, as shown in Figure 13.
ETEP Installation Guide
29
Installation
Figure 13
Attach mounting brackets to the bottom panel. ET0010A is shown below.
3 Turn the ETEP face up and locate the external power supply. With the label side facing down, place
the power supply in the mounting bracket cradle and snap it into place, as shown in Figure 14.
Figure 14
Power supply installed in mounting bracket cradle on the ET0010A
4 Connect the power supply cable to the rear panel connector.
Figure 15 shows the ET0010A power connector.
30
ETEP Installation Guide
Installing the ET0010A
Figure 15
Insert the power supply cable into the connector on the rear panel
5 Attach the mounting brackets to the rack’s front supports with the large #10-32 screws (item 1 in
Figure 11), using a #2 Phillips screwdriver. Insert two screws in each bracket, using the top and
bottom holes.
Figure 16
Front view of ET0010A mounting brackets and power supply
Solid Surface Installation
When installing the ET0010A on a solid surface, have the following tools and materials available to
attach the rubber feet to the bottom of the unit:
●
External power supply
●
(4) rubber feet, supplied in the Accessory Kit (item 3 in Figure 11).
●
(4) small silver screws with built-in washers, supplied in the Accessory Kit (item 4 in Figure 11).
●
#1 Phillips screwdriver (user-supplied)
To install the ETEP on a solid surface:
1 Place the unit on a solid surface, with the bottom panel facing up.
2 Locate the four screw holes on the bottom of the unit (Figure 17).
ETEP Installation Guide
31
Installation
Figure 17
Screw holes for rubber feet installation on bottom of unit
3 Place one of the rubber feet over the hole and insert a screw into the opening (Figure 18). Tighten the
screw.
Figure 18
Rubber feet installed
4 Repeat step 3 for the remaining feet.
5 Turn the unit over so that it is resting on the rubber feet.
6 Attach the external power supply to the power connector on the rear panel.
Figure 19 shows the ET0010A rear panel and power supply.
32
ETEP Installation Guide
Installing the ET0010A
Figure 19
ET0010A rear panel connector for external power supply.
Connecting the Cables: ET0010A
Follow the instructions below to connect the ET0010A to the appropriate network devices (see Figure
20).
To cable the ET0010A:
1 For initial setup, connect the RS-232 serial port directly to a PC or workstation. Using the null
modem cable supplied by Black Box, insert the RJ-45 connector in the RS-232 port and connect the
DB-9 female connector to your PC. This cable can be removed after initial setup is complete.
2 Connect the Ethernet management port to a LAN using a Category 5 cable with an RJ-45 connector.
3 Connect the remote port to the untrusted network, typically via a router port, using a Category 5 cable
with an RJ-45 connector.
4 Connect the local port to the local device, such as a server or switch, using a Category 5 cable with an
RJ-45 connector.
ETEP Installation Guide
33
Installation
Figure 20
ET0010A Cabling
NOTE
The Aux1 port on the ET0010A is not enabled in this release.
Powering On the ET0010A
Use the following procedure to power up the ETEP.
Figure 21
34
Attaching the power cables on the ET0010A
ETEP Installation Guide
Installing the ET0100A
To power on the ETEP:
1 Check that the power supply cable is properly inserted in the power connector on the ETEP rear
panel. The ET0010A is shown in Figure 21.
2 Plug the power cord into the ETEP power supply. Attach the opposite end to a power source to apply
power to the appliance.
When the appliance powers up, all LEDs illuminate. The power LED remains lit until the unit is powered
off.
During the boot process the ETEP cycles through its startup tests, and the corresponding status LEDs are
illuminated (see “Status Codes: ET0010A” on page 63). After the tests execute successfully, the status
indicators turn off.
NOTE
During the boot process the ETEP discards all traffic on its data ports. Once the appliance is operational,
the default mode of operation passes all packets in the clear until you deploy security policies.
Installing the ET0100A
To prepare the ET0100A for installation, review the installation steps in Table 13, unpack the shipping
carton, and prepare a space for the installation of the appliance.
The steps to perform for a typical installation are listed below.
Table 13
ET0100A Installation Steps
Step
Action to Perform
Description
1
Review the cabling requirements.
on page 35
2
Unpack the shipping package.
on page 36
3
Prepare a space for installation of the ET0100A.
on page 36
4
Connect the cables.
on page 37
5
Apply power to the ET0100A.
on page 38
Cabling Requirements: ET0100A
Table 14 outlines the standard cables used with each port on the ET0100A. The connector type listed
indicates only what is required to connect to the ET0100A port, and may or may not be the same
ETEP Installation Guide
35
Installation
connector type required for the other end of the cable. Some cables are supplied by Black Box and others
are user-supplied.
Table 14
ET0100A Standard Cables
ET0100A Port
Cabling
Supplied by...
Power receptacle
Power supply cable certified
and approved for use in the
country of interest
Black Box
RS-232 Port
Shielded copper null modem
cable, RS-232 DB9 connector
(female to male)
Black Box
10/100 Ethernet Management
Port
Shielded Category 5 straight
through cable (STP), RJ-45
connectora
Black Box
Remote and Local ports
Shielded Category 5 straight
through cables (STP), RJ-45
connectora
User
a. The local, remote, and Ethernet management ports are auto-sensing for polarity. You can use shielded Category 5
straight through cables or crossover cables when connecting to these ports.
NOTE
To meet the requirements of FCC Part 15 and the EU EMC Directive 2004/108/EC, use only shielded
cables with the ET0100A (DB-9 null modem cables and Category 5 STP cables).
Unpacking the Shipping Carton: ET0100A
Remove all product components from the shipping carton and compare the contents to the packing list.
Keep all packaging in case it is necessary to return the unit.
The ET0100A is packaged with the standard items listed below. Additional cables, country-specific power
cords, and other accessories can be ordered separately.
1 ET0100A chassis
●
Firmware and software is factory-installed on the unit.
2 Accessory Kit
●
Rack mount kit containing two mounting brackets and 10 screws
●
(1) Power cable (US)
●
(1) Shielded DB-9 null modem cable (female to male)
●
(1) Shielded Category 5 straight through cable (STP) with RJ-45 connector
●
CD containing user documentation and a backup copy of the ETEP software
Rack-Mount Installation: ET0100A
The ET0100A can be mounted in a standard 19-inch rack using the mounting kit, or simply placed on a
rack shelf or solid surface. Before installing the ET0100A in a 19-inch rack, review the rack-mounting
guidelines listed in “ETEP Site Preparation” on page 25.
36
ETEP Installation Guide
Installing the ET0100A
To mount the ETEP in a standard 19-inch equipment rack, have the following tools and materials
available:
●
Two mounting brackets, supplied in the Accessory Kit
●
(6) small screws and (4) large screws, supplied in the Accessory Kit
●
#1 Phillips and #2 Phillips screwdrivers (user-supplied)
To install the ETEP in a rack:
1 Attach a mounting bracket to each side of the ETEP (near the front panel). Attach each bracket with
three small screws provided in the Accessory Kit, using a #1 Phillips screwdriver.
2 Attach the ETEP to the rack’s front supports with the large screws, using a #2 Phillips screwdriver
(Figure 22). Insert two screws in each bracket, using the top and bottom holes.
Figure 22
Rack Mounted ETEP, Front Panel View
Connecting the Cables: ET0100A
The procedure in this section describes how to connect the ET0100A to your network devices, as shown
in Figure 23.
To cable the ET0100A:
1 For initial setup, connect the RS-232 port directly to a PC or workstation using a DB-9 null modem
cable. This cable can be removed after initial setup is complete.
2 Connect the 10/100 Ethernet management port to a LAN using a Category 5 shielded twisted pair
(STP) cable with an RJ-45 connector.
3 Connect the remote port to the untrusted network, typically via a router port, using a Category 5 STP
cable with an RJ-45 connector.
4 Connect the local port to the local device, such as a server or switch, using a Category 5 STP cable
with an RJ-45 connector.
ETEP Installation Guide
37
Installation
Figure 23
ET0100A Cabling
Powering on the ET0100A
Use the following procedure to power up the ET0100A.
To power on the ET0100A:
●
On the appliance’s rear panel, plug the power cord into the ET0100A power receptacle. Attach the
opposite end to a power source to apply power to the appliance.
Due to the shielding in the power cable, you must exert significant pressure to properly insert the power
cord into the ET0100A power receptacle. A properly seated power cord cannot be moved within the
receptacle (Figure 24). Wiggling or jostling an improperly seated power cord may cause the appliance to
reboot (Figure 25).
Figure 24
38
Properly seated ET0100A power cable
ETEP Installation Guide
Installing the ET1000A
Figure 25
Improperly seated ET0100A power cable
When the appliance powers up, all LEDs illuminate (see Figure 26). The Alarm LED illuminates briefly
and the diagnostic code LED displays 88 to verify that the diagnostic display segments are functioning.
The power LED remains lit until the unit is powered off.
During the boot process the ET0100A cycles through its startup tests, and the corresponding diagnostic
codes are displayed (see “Diagnostic Codes: ET0100A and ET1000A” on page 64). After the tests
execute successfully, the diagnostic code display is solidly illuminated with code 00.
NOTE
During the boot process the ET0100A discards all traffic on its data ports. Once the appliance is
operational, the default mode of operation passes all packets in the clear until you deploy security policies.
Figure 26
ET0100A Front Panel Status Indicators
Elements of Figure 26:
1)
Diagnostic display
2)
Alarm LED
3)
Power indicator
Installing the ET1000A
To prepare the ET1000A for installation, review the installation steps in Table 15, unpack the shipping
carton, and prepare a space for the installation of the appliance.
ETEP Installation Guide
39
Installation
The steps to perform for a typical installation are listed below.
Table 15
ET1000A Installation Steps
Step
Action to Perform
Description
1
Review the cabling requirements.
on page 40
1
Unpack the shipping package.
on page 41
2
Prepare a space for installation of the ET1000A.
on page 41
3
Connect the cables.
on page 42
4
Apply power to the ET1000A.
on page 43
Cabling Requirements: ET1000A
Table 16 outlines the standard cables used with each port on the ET1000A. The connector type listed
indicates only what is required to connect to the ET1000A port, and may or may not be the same
connector type required for the other end of the cable. Some cables are supplied by Black Box and others
are user-supplied.
Table 16
ET1000A Standard Cables
ET1000A Port
Cabling
Supplied by...
Power receptacles
Power supply cables certified
and approved for use in the
country of interest
Black Box
RS-232 Port
Shielded copper null modem
cable, RS-232 DB9 connector
(female to male)
Black Box
Ethernet Management Port
(RJ-45)
Shielded Category 5 straight
through cable (STP), RJ-45
connectora
Black Box
Ethernet Management port
(SFP)
Not applicable. Port is not
enabled in this release.
Not applicable
Local and Remote Gigabit
Ethernet ports
•
Available as accessory options
•
Optical SFP transceivers
1000Base-LX SFPs
9/125μm single-mode duplex
fiber or simplex fiber pair (1
transmit, 1 receive), 1310 nm
nominal wavelength, LC
connector
OR
•
Local and Remote Gigabit
Ethernet ports
•
Copper SFP transceivers
Aux1 port (SFP)
1000Base-SX SFPs
62.5/125μm multi-mode
duplex fiber or simplex fiber
pair (1 transmit, 1 receive),
850nm nominal wavelength,
LC connector
Shielded Category 5 straight
through cable (STP), RJ-45
connector
Available as accessory options
Not applicable. Port is not
enabled in this release.
Not applicable
a. The 10/100 Ethernet management port is auto-sensing for polarity. You can use a shielded Category 5 straight
through cable or a shielded crossover cable when connecting to this port.
40
ETEP Installation Guide
Installing the ET1000A
NOTE
To meet the requirements of FCC Part 15 and the EU EMC Directive 2004/108/EC, use only shielded
Category 5 cables with the ET1000A Ethernet management port.
Unpacking the Shipping Carton: ET1000A
Remove all product components from the shipping carton and compare the contents to the packing list.
Keep all packaging in case it is necessary to return the unit.
The ET1000A is packaged with the standard items listed below. Additional cables, country-specific power
cords, SFPs, and other accessories can be ordered separately. A list of approved transceivers is included
in the ETEP Release Note.
1 ET1000A chassis
●
Firmware and software is factory-installed on the unit.
2 Accessory Kit
●
Rack mount kit includes 2 mounting brackets, 4 large screws (#10-32), and 8 small black screws
●
(2) Power cables (US)
●
(1) 6 ft. shielded DB-9 null modem cable (female to male)
●
(1) 6 ft. shielded Category 5 straight through cable (STP) with RJ-45 connector
●
CD containing user documentation and a backup copy of the ETEP software
Rack Mount Installation: ET1000A
The ET1000A can be mounted in a standard 19-inch rack using the mounting kit, or simply placed on a
rack shelf or solid surface. Before installing the ET1000A in a 19-inch rack, review the rack-mounting
guidelines listed in “ETEP Site Preparation” on page 25.
To mount the ET1000A in a standard 19-inch equipment rack, have the following tools and materials
available:
●
Two mounting brackets, supplied in the Accessory Kit
●
8 small black screws and (4) large #10-32 screws, supplied in the Accessory Kit
●
#1 Phillips and #2 Phillips screwdrivers (user-supplied)
CAUTION
In order to safely and securely and install the ET1000A in a rack, you must use the mounting brackets
supplied in the Accessory Kit. Other brackets may fail to properly support the weight of the ET1000A.
ETEP Installation Guide
41
Installation
To install the ET1000A in a rack:
1 Place the unit on a solid surface, with the top facing up. Position the mounting brackets on each side
of the appliance, as shown in Figure 27.
Figure 27
Mounting bracket orientation
2 Attach the mounting brackets to each side of the unit using the 8 small black screws provided in the
accessory kit, and a #1 Phillips screwdriver, as shown in Figure 28.
Figure 28
Each bracket is attached to the side of the ET1000A using four screws
3 Attach the mounting brackets to the rack’s front support with the large #10-32 screws, using a #2
Phillips screwdriver. Insert two screws in each bracket, using the top and bottom holes (Figure 29).
Figure 29
Front view of mounting brackets
Connecting the Cables: ET1000A
Follow the instructions below to connect the ET1000A to the appropriate network devices (see Figure
30).
42
ETEP Installation Guide
Installing the ET1000A
To cable the ET1000A:
1 For initial setup, connect the RS-232 port directly to a PC or workstation using a DB-9 null modem
cable. This cable can be removed after initial setup is complete.
2 Connect the Ethernet management port to a LAN using a Category 5 shielded twisted pair (STP)
cable with an RJ-45 connector.
3 Plug an SFP Gigabit transceiver into the ET1000A remote port. If you are using an optical SFP, insert
the fiber cable in the SFP and connect the other end to the untrusted network, typically via a router
port. If you are using a copper SFP, use a shielded Category 5 straight through cable.
4 Plug a second SFP Gigabit transceiver into the ET1000A local port. If you are using an optical SFP,
insert the fiber cable in the SFP and connect the other end to the local device, such as a server or
switch. If you are using a copper SFP, use a shielded Category 5 straight through cable.
Figure 30
ET1000A Cabling
NOTE
The Gigabit management and Aux1 ports are not enabled in this release.
Powering on the ET1000A
Review the following guidelines prior to powering up the ET1000A:
●
The ET1000A has two power supplies. We recommend that you connect the power cords to separate
live circuits to provide redundancy in the case of a power outage on one of the circuits.
●
When manually cycling the power, remove power on both circuits, wait five seconds, and then
reapply power on both circuits.
ETEP Installation Guide
43
Installation
Figure 31
Dual power supplies on the ET1000A rear panel
Elements of Figure 31:
1)
Power cord clips
2)
Status LED for power supply 2
3)
Power receptacle for power supply 2
4)
Power receptacle for power supply 1
5)
Status LED for power supply 1
To power on the ET1000A:
1 On the appliance’s rear panel, plug the power cords into the power receptacles for each power supply.
2 Attach the opposite end of the first power cord to a power source. Attach the second power cord to a
a power source on a different circuit. The power supply status LED illuminates when power is
applied.
3 After the power cords are plugged in, secure the cords using the clips on the rear of the unit.
Figure 32
44
The power cord for power supply # 1 is secured with a clip
ETEP Installation Guide
Shutting Down the ETEP
When the appliance powers up, all of the front panel LEDs illuminate (see Figure 33). The Alarm LED
illuminates briefly and the diagnostic code LED displays 88 to verify that the diagnostic display segments
are functioning. The power LED remains lit until the unit is powered off. The Power Supply LEDs
illuminate for each operational power supply.
During the boot process the ET1000A cycles through its startup tests, and the corresponding diagnostic
codes are displayed (see “Diagnostic Codes: ET0100A and ET1000A” on page 64). After the tests
execute successfully, the diagnostic code display is solidly illuminated with code 00.
NOTE
During the boot process the ET1000A discards all traffic on its data ports. Once the appliance is
operational, the default mode of operation passes all packets in the clear until you deploy security policies.
Figure 33
ET1000A Front Panel Status Indicators
Elements of Figure 33:
1)
Alarm LED
2)
Diagnostic display
3)
Power indicator
4)
Power supply LEDs
Shutting Down the ETEP
It is important that a proper system shutdown is performed prior to powering off the appliance. The
shutdown command halts all running tasks on the ETEP and prepares it for being powered off. Failure to
perform a shutdown may lead to file system corruption and potential appliance failure.
The ETEP remains in a shutdown state until the power is cycled. The shutdown state is indicated with an
operational code on the status/diagnostic display as shown in Table 17.
Table 17
Shutdown operational codes
Appliance model
Operational code
ET0010A
2, 3, 4
ET0100A, CEP100-XSA, CEP1000, ET1000A
––
ETEP Installation Guide
45
Installation
You can perform a shutdown using a CLI command or ETEMS. The following procedure describes the
CLI command.
To shut down the ETEP from the CLI:
1 Log in as Administrator (user name admin) or Ops (user name ops).
2 At the command prompt, type shutdown. After the system shutdown is complete, the following
message is displayed on the terminal.
Power cycle required to reboot appliance
3 Unplug the power cable from the back of the unit or from the power outlet.
Example
In the following example the user logs in as admin and shuts down the ETEP.
pep login: admin
Password:
Last login: Tue Apr 8 15:12:21 2008 on ttyS0
Welcome admin it is Tue Apr 8 15:17:57 UTC 2008
admin> shutdown
Related topic:
●
46
“shutdown” on page 148
ETEP Installation Guide
3
Initial Setup
This section includes the following topics:
●
Overview
●
Logging In Through a Serial Link
●
Configuring the Management Port
●
Setting the Date and Time
●
Entering a Throughput License
●
Configuration Example
●
Managing the ETEP
Overview
The following steps are required for initial setup of the ETEP:
1 Log in through a serial link.
2 Configure the management port.
3 Set the date and time.
4 Enter the throughput license.
Logging In Through a Serial Link
Initial setup is performed through a serial link to the RS-232 port. The initial setup commands are
available to the Admin and Ops users. The procedures and examples in this chapter assume that the
Admin user is performing the setup tasks.
ETEP Installation Guide
47
Initial Setup
To log in to the CLI via a serial link:
1 Connect the RS-232 serial port directly to a PC or workstation, as described in Chapter 2.
2 Open a terminal session through a VT-100 terminal emulation program such as HyperTerminal. Enter
the connection name, the appropriate serial port (usually COM1 or COM2), and the following serial
port parameters:
Baud Speed
38,400
Parity
None
Data Bits
8
Stop Bits
1
Flow Control
None
3 In the terminal session window, press ENTER. The login prompt displays.
Linux 2.6.16.17 on mips
pep login:
4 At the login prompt, type the default user name admin and press ENTER. User names and
passwords are case-sensitive.
5 At the password prompt, type the default password admin and press ENTER.
6 When you are successfully logged in, the command line prompt displays as shown below (password
text is not displayed).
pep login: admin
Password:
Last login: Tue Jan 29 19:18:59 2008 on ttyS0
Welcome admin it is Tue Jan 29 19:37:12 UTC 2008
admin>
It is strongly recommended that you change the default passwords when you configure the ETEP for
operation. For more information about user management see the documentation for your management
software: ETEP CLI User Guide or the EncrypTight User Guide.
Configuring the Management Port
The ETEP can be managed in-line or out-of-band through a dedicated Ethernet management interface.
Management port configuration consists of the following items:
●
Setting the IP address and default gateway
●
Reviewing the auto-negotiation settings
About the management port IP address, mask and gateway
The management port must have an assigned IP address in order to be managed remotely and
communicate with other devices. An IPv4 IP address is mandatory, even when the ETEP is operating in
an IPv6 network. When the ETEP is operating in an IPv6 network, configure the ETEP for dual-homed
operation by assigning an IPv4 and an IPv6 address to the management port.
48
ETEP Installation Guide
Configuring the Management Port
The Ethernet management port IP address identifies the ETEP to the management workstation. The
subnet mask is the portion of the IP address that identifies the network or subnetwork for routing
purposes.
When the ETEP management port and the management workstation are on different subnets, the ETEP
uses a default gateway to route packets to the other devices. The default gateway identifies the local
router port that is on the same subnet as the ETEP Ethernet management port. The appliance sends all
packets to the specified router for forwarding to the management station or other EncrypTight
components (key generation server, time server). When the management port and workstation are on the
same subnet a default gateway is not needed to route packets between the devices.
Figure 34 shows an example of a default gateway when the management station and ETEP are on
different subnets. The management station’s IP address is 192.168.1.10, and the ETEP’s management port
IP address is 192.168.10.10. To send packets between the two devices, the local port on Router #1 is
specified as the default gateway (192.168.10.1). The gateway address must match the subnet of the
management port.
Figure 34
Management Port Default Gateway
About auto-negotiation
The default setting for the ETEP enables auto-negotiation, which negotiates the link speed, duplex setting,
and flow control. Use the autoneg command if the device that the ETEP connects to from a particular
port does not support auto-negotiation or flow control.
It is important to configure the ETEP and the other device the same way. Both devices should either autonegotiate or be set manually to the same speed and duplex mode. Having one device set manually and the
other auto-negotiate can cause problems that make the link perform slowly. When manually setting the
ETEP link speed, configure the speed and duplex mode to match that of the other device.
On the management port, the ETEPs can negotiate to the following link speeds:
Table 18
Link speeds on the management port
Auto-negotiate
Auto-negotiate
Fixed Speed
Link speed
ET0010A
ET0100A, ET1000A
All ETEPs
10 Mbps Half-duplex
3
3
3
3
3
3
3
3
3
3
3
3
10 Mbps Full-duplex
100 Mbps Half-duplex
100 Mbps Full-duplex
ETEP Installation Guide
49
Initial Setup
Table 18
Link speeds on the management port
Auto-negotiate
Auto-negotiate
Fixed Speed
Link speed
ET0010A
ET0100A, ET1000A
All ETEPs
1000 Mbps Full-duplex
3
3
1000 Mbps Half-duplex
To configure the management port:
1 At the command prompt, type configure to enter configuration mode.
2 At the config> prompt, type management-interface.
3 Assigning an IPv4 address to the management port is mandatory. To set the management port IPv4
address, mask, and gateway, type
ip <ip address> <subnet mask> [gateway]
ip address
Management port IP address, entered in dotted decimal notation.
subnet mask
IP subnet mask, entered in dotted decimal notation.
gateway
Specifies how to route traffic between the ETEP management port and the
management station. When the management port is on a different subnet than
the management station, specify the IP address of the router’s local port on
the same subnet as the ETEP management port (see Figure 34). If the
devices are on the same subnet, you do not need to enter a default gateway.
After entering the new IP address, it takes 10-20 seconds for the ETEP to set the address on the
management port. During that time you cannot enter any CLI commands. When the operation is
complete, the man-if> prompt is displayed.
4 Optional. If the ETEP is operating in an IPv6 network you can also assign an IPv6 address to the
management port. To do so, type
ip6 {<ip address>/<prefix-length>} [gateway]
ip address
IPv6 address of the ETEP management port. This is a 128-bit address
consisting of eight hexadecimal groups that are separated by colons. Each
group is a 4-digit hexadecimal number. The hexadecimal letters in IPv6
addresses are not case sensitive.
prefix-length
A decimal value that indicates the number of contiguous, higher-order bits of
the address that make up the network portion of the address. The decimal
value is preceded by a forward slash (/).
gateway
IPv6 address of the router port that is on the same local network as the ETEP
management port.
5 Auto-negotiation is enabled by default. If you want to disable auto-negotiation and manually set the
link speed and flow control, configure the autoneg command. Attributes are described in Table 19.
autoneg {enable} | {disable [<speed>] [<flow-control>]}
6 Type exit to return to the config prompt, or type top to return to the command prompt.
50
ETEP Installation Guide
Setting the Date and Time
Table 19
Management port autoneg command description
Attribute
Description
enable
Enables auto-negotiation on the management port. This is the default
setting.
disable
Disables auto-negotiation on the management port. Use this setting to
manually configure link speed and flow control.
speed
[100m-full | 10m-full | 100m-half | 10m-half]
When auto-negotiation is disabled, the speed attribute specifies the link
speed and duplex setting. The speed defaults to 100m-full.
flow control
[on | off]
When auto-negotiation is disabled, this attribute configures the flow control
setting to be on or off. The flow control setting defaults to on.
Example
The following example sets the management port IPv4 address, subnet mask, and gateway for the
ETEP as shown in Figure 34. Auto-negotiation is left at its default setting of enabled.
admin> configure
config> management-interface
man-if> ip 192.168.10.10 255.255.255.0 192.168.10.1
man-if> exit
The next example sets the management IPv4 address and subnet mask, and omits the default gateway.
The default gateway can be omitted when the management station and the ETEP management port
and are wired directly to each other on the same subnet. Auto-negotiation is disabled. The link speed
is set to 100 Mbps full-duplex and flow control is turned on.
admin> configure
config> management-interface
man-if> ip 192.168.10.10 255.255.255.255
man-if> autoneg disable 100m-full on
man-if> exit
The following example sets an IPv6 address, prefix length, and default gateway on the management
port.
admin> configure
config> management-interface
man-if> ip6 2001:DB8::211:11FF:FE58:743/64 2001:DB8::20F:F7FF:FE84:BFC2
man-if> exit
config>
Setting the Date and Time
Setting the date and time on the ETEP helps ensure that the appliance’s time can be synchronized
properly with other ETEPs or components in the EncrypTight system.
The time zone on the ETEP is set to UTC 0 (Coordinated Universal Time), and is not user configurable.
Enter the date and time relative to UTC 0, also referred to as Greenwich Mean Time (GMT). To calculate
ETEP Installation Guide
51
Initial Setup
the local time relative to UTC, add or subtract the offset hours from UTC for the local time zone (UTC ±
n). The following examples give the local time at various locations at 12:00 UTC when daylight saving
time is not in effect:
●
New York City, United States: UTC-5; 07:00
●
New Delhi, India: UTC+5:30; 17:30
To set the date and time:
1 At the command prompt, type configure to enter configuration mode.
2 At the config> prompt, type date <year> <month> <day> <hour> <minutes>
<seconds>
year
2008-2037
month
01-12
day
01-31
hour
00-23
minutes
00-59
seconds
00-59
3 Type exit to return to the command prompt.
Example
admin> configure
config> date 2008 10 11 15 30 00
config> exit
Entering a Throughput License
The method for entering licenses on the ETEP depends on your management software:
●
For ETEPs that are managed exclusively through the command line, follow the procedure in this
section.
●
For EncrypTight deployments, throughput licenses must be managed with the EncrypTight software.
Licenses entered from the CLI are not recognized as valid in an EncrypTight deployment. See the
EncrypTight User Guide for more information.
Each ETEP is capable of transmitting traffic at a range of speeds that varies by model. When you install
the license you purchased, ETEPs transmit traffic at the speed specified by the license.Table 20 lists the
available speeds for each ETEP model.
Table 20
52
ETEP Throughput Speeds
Model
Available Throughput
ET0010A
3, 6, 10, 25, 50 Mbps
ET0100A
100, 155, 250 Mbps
ET1000A
500, 650 Mbps, 1 Gbps
ETEP Installation Guide
Configuration Example
You need to install a license on each ETEP that you use. Licenses are linked to the serial number of the
ETEP on which they are installed. You cannot install a license intended for one ETEP on a different
ETEP.
If you upgrade from a command line-only installation to a full EncrypTight deployment, you can no
longer use the command line-only license and must acquire an EncrypTight license.
To add a license from the command line:
1 At the command prompt, type configure to enter configuration mode.
2 At the config> prompt, type license <string>, where string is the license provided by
Customer Support. The license is case sensitive. Enter the license exactly as provided. It will look
something like this: 1:0:0508C482:10:258482fab2
To view the ETEP throughput speed:
1 At the command prompt, type show throughput-speed.
Configuration Example
The following example illustrates the commands used for initial setup of the ETEP to configure the
following parameters: management IP address, subnet mask, and default gateway, auto-negotiation, date
and time. The autoneg command needs to be configured only if you want to disable auto-negotiation and
configure the link speed and flow control manually.
pep login: admin
Password: *****
admin> configure
config> management-interface
man-if> ip 192.168.10.10 255.255.255.0 192.168.10.1
man-if> autoneg disable 100m-full on
man-if> exit
config> date 2008 10 15 12 30 00
config> exit
admin>
Managing the ETEP
The ETEP can be managed in two ways, depending on the size and complexity of your deployment:
●
Command Line Interface (CLI)
You can configure the ETEPs for operation and create Layer 2 point-to-point policies using the CLI
commands.
To manage the ETEP using the CLI, you can attached a PC directly to the serial port or use any SSH
client for a secure remote connection through the Ethernet management port.
●
EncrypTight Policy and Key Manager™
EncrypTight can distribute keys to a large number of ETEPs. It works for complex mesh, hub and
spoke, and multicast networks, as well as in straightforward point-to-point topologies. EncrypTight
ETEP Installation Guide
53
Initial Setup
includes tools for appliance configuration, policy definition and deployment, and key generation and
distribution.
To prepare the ETEP for operation in the network, you will need to perform the following tasks:
1 Assign passwords
2 Configure the ETEP
3 Define security policies
If you plan to operate the ETEP in FIPS mode, we recommend enabling FIPS mode as your first
configuration task. Entering FIPS mode resets many configuration items, such as passwords, policies, and
certificates. To avoid having to reconfigure the ETEP, enable FIPS mode and then perform the rest of the
appliance and policy configuration tasks.
See the user guide for your management software for details:
54
●
ETEP CLI User Guide
●
EncrypTight User Guide
ETEP Installation Guide
4
Maintenance
This section includes the following topics:
●
Preventative Maintenance
●
What To Do If an Appliance Fails
●
Tamper Switch and Zeroization
●
Cable Pinouts
Preventative Maintenance
Periodically perform maintenance on your ETEP. Keep components free of dust and other particulate
matter. Examine cables for damage and ensure that airflow requirements have been met. On ETEP
models that have fans, check the fans for reduced airflow caused by dust build-up and clean as necessary.
No special maintenance is required.
The ETEP is housed in a tamper evident chassis. Periodically check the chassis for evidence of
tampering. Items to look for include stripped screws and damage to the tamper-evident seal. The tamperevident seal is located on the rear panel;
The frequency of a physical inspection depends on the value of the intellectual property being protected
and the security of the environment in which the ETEP is located. For example, a locked equipment
closet is more secure than an open server room. At a minimum, it is recommended that the unit’s physical
integrity be checked on a monthly basis.
CAUTION
The ETEP does not contain any field-replaceable internal parts. Do not remove the unit’s cover for any
reason. Removing the cover will zeroize the ETEP, returning it to its factory default state. All configuration
data and keys are destroyed during the zeroization process. The cover is to be removed only by
authorized service personnel. Unauthorized cover removal voids the product warranty.
CAUTION
Disconnect all power cords before servicing.
ETEP Installation Guide
55
Maintenance
What To Do If an Appliance Fails
Most ETEP models do not contain any field-replaceable parts. If you experience an appliance failure,
contact Customer Support for a replacement ETEP and throughput license.
The ET1000A has field-replaceable power supplies. Contact Customer Support to obtain a replacement
power supply in the event of a failure. See “Replacing the ET1000A Power Supply” on page 56 for
removal and installation instructions.
Related topics:
●
“Obtaining a License for Replacement Units” on page 56
●
“Replacing the ET1000A Power Supply” on page 56
Obtaining a License for Replacement Units
When replacing an ETEP with a spare, the replacement ETEP will run at full throughput for a grace
period. During the grace period, contact customer support to report the RMA unit and to receive a new
license for the replacement. Licenses are linked to the serial number of the ETEP on which they are
installed. You cannot install a license intended for one ETEP on a different ETEP.
Upon receipt of the new license, install it on the ETEP as described in “Entering a Throughput License”
on page 52.
Replacing the ET1000A Power Supply
The ET1000A comes with dual internal power supplies. In the event of a failure, each power supply can
be removed and replaced in the field.
CAUTION
Disconnect all power cords before servicing the ET1000A.
To replace a power supply in the ET1000A:
1 Unplug both power supplies at the power source.
2 On the rear panel, lift the power cord clip on the affected power supply, and then remove the power
cord from the receptacle (Figure 35).
56
ETEP Installation Guide
What To Do If an Appliance Fails
Figure 35
Power cord is removed from power supply # 2
3 Locate the release lever on the left of the power supply (Figure 36). Press the release lever inward
toward the metal support to release the power supply latch. Pull the power supply outward to remove
it from the chassis.
Figure 36
Release lever on power supply # 2
4 On the replacement power supply, press the release lever toward the metal support and insert the new
power supply until it latches (Figure 37). When the power supply is correctly inserted, you should not
be able to remove it by pulling on it. It can only be removed when the latch is disengaged.
ETEP Installation Guide
57
Maintenance
Figure 37
Slide the replacement power supply into the slot on the rear panel
5 Insert the power cord in the replacement power supply and secure it with the clip.
6 Reconnect power supplies 1 and 2 to their respective power sources.
7 Return the failed power supply to Black Box as directed by Customer Support.
Tamper Switch and Zeroization
The following ETEP models include a tamper switch: ET0010A, ET0100A, and ET1000A. The switch is
activated if the ETEP cover is removed while the unit is operating or if the ETEP detects that the cover is
open while it is booting. When the ETEP detects that the switch is activated it enters an error state,
zeroizes the appliance’s keying material, and discards all traffic. Zeroization has the same effect as
issuing the filesystem-reset command.
Zeroization occurs under the following conditions:
●
When operating in FIPS mode, the FIPS self-tests fail during boot
●
When operating in FIPS mode, signature errors are detected on critical files pertaining to policies and
keys
●
The tamper switch is activated when the cover is removed
The following events occur when the ETEP is zeroized:
●
Alarm LED illuminates
●
The ETEP sends a critical error trap
●
The ETEP discards all packets that it receives on the local and remote ports
●
Ethernet management port communication is disabled. You will be unable to manage the ETEP using
ETEMS.
●
CLI login is disabled via the serial port and Ssh
●
Data files are permanently deleted, including log files
●
The file system is reset to factory defaults
The zeroization process takes about 20 minutes to complete.
58
ETEP Installation Guide
Cable Pinouts
To recover the ETEP following zeroization:
Wait approximately 20 minutes for the zeroization process to complete. If you are connected to the ETEP
through the serial port, you will see the following message:
Power cycle required to reboot appliance
After cycling the power, you will be able to configure and manage the ETEP from its factory default
settings. If you cycle the power prior to the completion of the zeroization process the appliance will enter
an unrecoverable state, which requires returning the ETEP to the factory.
Related topic:
●
“filesystem-reset” on page 132
Cable Pinouts
This section lists the serial cable pinouts for the following ETEPs:
●
ET0010A
●
ET0100A/ET1000A
RS-232 Serial Cable: ET0010A
The RS-232 serial cable on the ET0010A is a null modem cable with an RJ-45 connector to the
ET0010A and a DB-9 female connector to a PC or laptop.
Figure 38
ET0010A Null Modem Serial Cable
Table 21
ET0010A Null Modem Pin Connection
RJ-45 Pin
DB-9 Pin
3 Receive Data
3 Transmit Data
6 Transmit Data
2 Receive Data
5 Signal Ground
5 Signal Ground
ETEP Installation Guide
59
Maintenance
RS-232 Serial Cable: ET0100A/ET1000A
The RS-232 serial cable on the ET0100A and ET1000A is a null modem cable with DB-9 connectors
(female to male).
60
Figure 39
ET0100A/ET1000A Null Modem Serial Cable
Table 22
ET0100A/ET1000A Null Modem Pin Connection
Pin
Pin
2 Receive Data
3 Transmit Data
3 Transmit Data
2 Receive Data
5 Signal Ground
5 Signal Ground
ETEP Installation Guide
5
Troubleshooting
This section includes the following topics:
●
Symptoms and Solutions
●
Diagnostic Code Display
Symptoms and Solutions
The following tables provide some solutions to common problems that may occur with your ETEP.
LED Indicators
Table 23
LED Indicators
Symptom
Explanation and Possible Solution
No power light.
•
Make sure the power cable is attached and plugged in to both
the device and the power outlet.
Alarm light is lit.
•
The ETEP is in an error state. See “Error State” on page 62 for
information about possible causes and recovery procedures.
Port status LED is off (no link).
•
Check the network cable. Verify correct transmit and receive
cable polarity.
•
Check the operational status of the equipment being connected.
•
Verify that the auto-negotiation and flow control settings on the
local or remote port in question match the settings of the
equipment to which they are connected.
•
If the problem is not resolved, the network may not be
functioning properly. Consult a local network administrator.
•
Check physical connectivity.
•
Verify that the policies are set up to allow traffic to pass through
the appliance.
•
Check with your Network Administrator to ensure proper
placement in the network.
Port status LED is not blinking
(no traffic).
ETEP Installation Guide
61
Troubleshooting
Table 23
LED Indicators
Symptom
Explanation and Possible Solution
Power supply LED is off
The power supply is unplugged or is unable to recover from a
power interruption.
•
Make sure the power cable is attached and plugged in to the
power supply and the power outlet.
•
Check the status LED on the power supply on the rear of the
unit. If the LED is off, the power supply is not receiving power. If
the LED is red, the power supply requires a manual power
cycle. Unplug the power cord, wait 5 seconds, and then reapply
power. The LED is green during normal operation. If a manual
power cycle does not restore power, contact customer support.
Error State
Table 24
Error State Symptoms and Solutions
Symptom
Explanation and Possible Solutions
The Alarm LED is illuminated
The ETEP enters an error state when a boot test fails, the
operating temperature threshold is exceeded, signature errors are
detected on critical files pertaining to policies and keys. or a FIPS
test fails when the ETEP is in FIPS mode.
When the ETEP is in an error state the Alarm LED illuminates, and
the appliance discards all packets it receives. Depending on the
error, other notifications may be sent (traps, status messages to the
ETEMS or the terminal).
To recover from an error state when FIPS mode is disabled:
•
When the ETEP detects a corrupted policy, it enters an error
state and sends a critical error trap to the management station.
To recover, redeploy the policies and then reboot the ETEP.
•
For non-policy errors, reboot the appliance. If the operating
temperature threshold is exceeded, cycle the power to restart
the ETEP.
•
If a failure occurs during the boot process, refer to “Diagnostic
Code Display” on page 63 for additional troubleshooting
information.
•
If the actions listed above do not clear the error, contact
customer support.
To recover from an error state when the ETEP is in FIPS mode:
•
A FIPS test failure or signature error will cause the ETEP to
zeroize. To learn more about the zeroization process and
recovery from that state, see “Tamper Switch and Zeroization”
on page 58.
Temperature Threshold and Discarded Traffic
When the ETEP enters an alarm state due to a temperature failure, the Alarm indicator illuminates and
the ETEP discards traffic. The ETEP remains in an error state until it is rebooted. However, once the
temperature drops below the critical threshold, the alarm indicator turns off and the ETEP stops reporting
an alarm state to ETEMS, even though the alarm state has not been cleared and the ETEP continues to
discard traffic.
62
ETEP Installation Guide
Diagnostic Code Display
If the ETEP is discarding traffic, check the system log for temperature warning notices to confirm that a
temperature error occurred. Reboot the ETEP to resume normal operation.
Diagnostic Code Display
ETEPs display self-test codes during boot up, in addition to operational status and error conditions. See
the following sections for information about your appliance model:
●
“Status Codes: ET0010A” on page 63
●
“Diagnostic Codes: ET0100A and ET1000A” on page 64
Status Codes: ET0010A
The ET0010A status LEDs display self-test codes during boot up. After the ET0010A boots, the status
LEDs reflect the operational state of the appliance.
When the appliance powers up, the Alarm LED illuminates briefly and the four status LEDs illuminate to
verify that they are functioning. As the ET0010A cycles through its self-tests the status LEDs indicate the
self-test that is in progress (see Table 25). After the tests execute successfully, the status LEDs turn off.
If the ET0010A fails to boot properly the illuminated status LEDs indicate the number of the last test that
completed successfully, and a message describing the failure is displayed on the terminal. In addition, the
Alarm light illuminates if any of the first four self-tests fail (status LEDs 1, 2, 1&2, or 3). In the event of
a failure, make a note of the status code and of the error message on the console, and then contact Black
Box customer support.
Table 25
ET0010A Self-Tests
Status LEDs Illuminated
Description
1, 2, 3, 4
LED display test.
1
Bootflash CRC test.
2
DRAM test #1.
1, 2
Initialize IO devices. DRAM test #2.
3
Initialize compact flash.
1,3
Complete bootloader initialization.
2,3
Download operating system.
1, 2, 3
Start operating system, IPSec dataplane code, and management
and control software.
All status LEDs off
Up and operational.
After the ET0010A boots up, the status LEDs reflect the operational state of the appliance.
.
Table 26
ET0010A Operational Codes
Code
Description
All status LEDs off
Up and operational.
2, 3, 4
The ET0010A is in a shutdown state.
ETEP Installation Guide
63
Troubleshooting
Diagnostic Codes: ET0100A and ET1000A
The 7-segment diagnostic display on the front panel of the following models displays self-test codes
during boot up: ET0100A and ET1000A. After the ETEP boots, the display reflects the operational state
of the appliance and error conditions.
When the appliance powers up, all LEDs illuminate. The Alarm LED illuminates briefly and the
diagnostic code LED displays 88 to verify that the diagnostic display segments are functioning. As the
ETEP cycles through its self-tests the corresponding diagnostic code is displayed (see Table 27). After the
tests execute successfully, the diagnostic code display is solidly illuminated with code 00.
If the ETEP fails to boot properly the diagnostic code display indicates the number of the last test that
completed successfully, and a message describing the failure is displayed on the terminal. In addition, the
Alarm light illuminates if diagnostic tests 01-04 fail. In the event of a failure, make a note of the code
and of the error message on the console, and then contact Black Box customer support.
Table 27
ET0100A/ET1000A Self-Tests
Code
Description
88
7-segment display test.
01
Bootflash CRC test.
02
DRAM test #1.
03
Initialize IO devices. DRAM test #2.
04
Initialize compact flash.
05
Complete bootloader initialization.
06
Download operating system.
07
Start operating system, IPSec dataplane code, and management
and control software.
00
Up and operational.
After the ETEP boots up, the diagnostic display reflects the operational state of the appliance.
.
Table 28
64
ET0100A/ET1000A Operational Codes
Code
Description
00
Up and operational.
rb
The ETEP is in a reboot required state.
AL
An alarm condition or error condition has been reported.
dL
The ETEP is downloading new software.
––
The ETEP is in a shutdown state.
ETEP Installation Guide
Appendix A
Environmental and
Regulatory Information
This section includes the following topics:
●
WEEE Directive
●
RoHS Directive
●
Regulatory Information
WEEE Directive
Black Box is committed to environmentally responsible behavior. As part of this commitment, we have
put in place a product end-of-life management solution that meets the European Union’s Waste Electrical
and Electronic Equipment (WEEE) Directive. All products shipped from the Black Box manufacturing
facility have the appropriate WEEE markings and qualify for the recycling program. Black Box products
that have reached the end of their useful life are to be recycled. Send all requests for recycling to Black
Box, and we will arrange for pick up and transport to a recycling location that complies in an
environmentally responsible manner with the EU WEEE Directive.
RoHS Directive
The Restriction of Hazardous Substances (RoHS) Directive restricts the use of certain materials that are
commonly found in electronic products. Restricted substances are heavy metals, including lead, and polybrominated materials.
Black Box has eliminated or substantially reduced its usage of the prohibited materials. However, the
RoHS Directive allows a lead-in-solder exemption for Category 3 Telecommunications Products. It is
Black Box’s position that its network security products qualify for the lead-in-solder exemption.
Black Box is committed to completely eliminating its use of RoHS prohibited materials as that becomes
technically feasible. We are constantly monitoring the availability of lead-free components and the
progress of the lead-free manufacturing processes. We pledge to continually evolve and refine our
products and processes as viable alternatives that do not impact product reliability or performance
become available.
ETEP Installation Guide
65
Environmental and Regulatory Information
For more information on the status of our RoHS efforts or product-specific environmental questions,
please e-mail us at [email protected].
Regulatory Information
This section contains regulatory information for the following Black Box appliances:
●
ET0010A
●
ET0100A
●
ET1000A
ET0010A Regulatory Information
The ET0010A (part number 410-032-402) has received a statement of compliance for the items listed in
the following sections:
●
Application of Regulations: FCC Title 47, Part 15, Subpart B, EMC Directive 2004/108/EC
●
Class of Equipment: Class A
Safety
●
UL: IEC 60950-1:2005, Second Edition; EN 60950-1:2006
●
CSA-C22.2 No. 60950-1
Immunity
●
EN 55024:1998/A1:2001/A2:2003 (IEC 61000-4-2:1995/A2:2000, IEC 61000-4-3:2002, IEC 61000-44:2004, IEC 61000-4-5:1995/A1:2000, IEC 61000-4-6:1996/A1:2000, IEC 61000-4-8:1993/A1:2000,
IEC 61000-4-11:1994/A1:2000)
Emissions
●
FCC Part 15, Subpart B, Class A
●
EN55022: 2006, Class A
●
EN61000-3-2:2006, EN61000-3-3:1995/A1:2001/A2:2005
●
AS/NZS CISPR 22:2006 Class A
FCC Information (USA)
This equipment has been tested and found to comply with the limits for a Class A digital device, pursuant
to Part 15 of FCC rules. Operations are subject to the following conditions:
66
●
This device may not cause harmful interference
●
This device must accept any interference received, including interference that may cause undesirable
operation.
ETEP Installation Guide
Regulatory Information
Interference-Causing Equipment Standard Compliance Notice (Canada)
“The Class A digital apparatus complies with Canadian ICES-003.”
“Cet appareil numerique de la class A est conforme a la norme NMB-003 du Canada.”
European Notice
Products with the CE Marking comply with both the EMC Directive (2004/108/EC) and the Low Voltage
Directive (2006/95/EC) issued by the Commission of the European Community.
ET0100A Regulatory Information
The ET0100A, part number 410-032-002, has received a statement of compliance for the items listed in
the following sections.
●
Application of Regulations: FCC Title 47, Part 15, Subpart B, EMC Directive 2004/108/EC
●
Class of Equipment: Class B
Safety
●
UL 60950-1
●
CSA-C22.2 No. 60950-1
Immunity
●
EN 55024:1998/A1:2001/A2:2003 (IEC 61000-4-2:1995/A2:2000, IEC 61000-4-3:2002, IEC 61000-44:2004, IEC 61000-4-5:1995/A1:2000, IEC 61000-4-6:1996/A1:2000, IEC 61000-4-8:1993/A1:2000,
IEC 61000-4-11:1994/A1:2000)
Emissions
●
EN55022: 2006, ANSI C63.4:2006, EN61000-3-2:2006, EN61000-3-3:1995/A1:2001/A2:2005
FCC Information (USA)
This equipment has been tested and found to comply with the limits for a Class B digital device, pursuant
to Part 15 of the FCC Rules. These limits are designed to provide reasonable protection against harmful
interference in a residential installation. This equipment generates, uses, and can radiate radio frequency
energy and, if not installed and used in accordance with the instructions, may cause harmful interference
to radio communications. However, there is no guarantee that interference will not occur in a particular
installation. If this equipment does cause harmful interference to radio or television reception, which can
be determined by turning the equipment off and on, the user is encouraged to try to correct the
interference by one or more of the following measures:
●
Reorient or relocate the receiving antenna.
●
Increase the separation between the equipment and receiver.
●
Connect the equipment into an outlet on a circuit different from that to which the receiver is
connected. Consult the dealer or an experienced radio/TV technician for help.
ETEP Installation Guide
67
Environmental and Regulatory Information
Interference-Causing Equipment Standard Compliance Notice (Canada)
“The Class B digital apparatus complies with Canadian ICES-003.”
“Cet appareil numerique de la class B est conforme a la norme NMB-003 du Canada.”
European Notice
Products with the CE Marking comply with both the EMC Directive (2004/108/EC) and the Low Voltage
Directive (2006/95/EC) issued by the Commission of the European Community.
ET0100A Cabling
WARNING
Use only shielded cables to connect I/O devices to this equipment. You are cautioned that changes or
modifications not expressly approved by the party responsible for compliance could void your authority to
operate the equipment.
ET1000A Regulatory Information
The ET1000A, part number 410-032-103, has received statements of compliance for the items listed in
the following sections:
●
Application of Regulations: FCC Title 47, Part 15, Subpart B (US), Canada Standard ICES-003,
European Council Directive 2004/108/EC
●
Class of Equipment: Class B
Safety
●
UL 60950-1, 2nd Edition, 2007-03-27
●
CSA-C22.2 No. 60950-1-07, 2nd Edition, 2007-03
●
IEC 60950-1, 2nd Edition
●
EN 60950-1:2006+A11:2009
EMI/EMC
68
●
ANSI C63.4:2003
●
FCC Title 47, Part 15 Subpart B
●
Canada Standard ICES-003
●
European Council Directive 2004/108/EC
●
EN55022: 2006/A1:2007 Class B
●
EN61000-3-2:2006, EN61000-3-3:1995/A1:2001/A2:2005
ETEP Installation Guide
Regulatory Information
●
EN 55024:1998/A1:2001/A2:2003 (IEC 61000-4-2:1995/A2:2000, IEC 61000-4-3:2002, IEC 61000-44:2004, IEC 61000-4-5:1995/A1:2000, IEC 61000-4-6:1996/A1:2000, IEC 61000-4-8:1993/A1:2000,
IEC 61000-4-11:1994/A1:2000)
●
Australian Standard AS/NZS CISPR 22:2006 Class B
FCC Information (USA)
This equipment has been tested and found to comply with the limits for a Class B digital device, pursuant
to Part 15 of FCC rules.
Interference-Causing Equipment Standard Compliance Notice (Canada)
“The Class B digital apparatus complies with Canadian ICES-003.”
“Cet appareil numerique de la class B est conforme a la norme NMB-003 du Canada.”
European Notice
Products with the CE Marking comply with the European Council Directive 2004/108/EC.
Normas Oficiales Mexicanas (NOM): Electrical Safety
Statement
INSTRUCCIONES DE SEGURIDAD
1 Todas las instrucciones de seguridad y operación deberán ser leídas antes de que el aparato eléctrico
sea operado.
2 Las instrucciones de seguridad y operación deberán ser guardadas para referencia futura.
3 Todas las advertencias en el aparato eléctrico y en sus instrucciones de operación deben ser
respetadas.
4 Todas las instrucciones de operación y uso deben ser seguidas.
5 El aparato eléctrico no deberá ser usado cerca del agua—por ejemplo, cerca de la tina de baño,
lavabo, sótano mojado o cerca de una alberca, etc..
6 El aparato eléctrico debe ser usado únicamente con carritos o pedestales que sean recomendados por
el fabricante.
7 El aparato eléctrico debe ser montado a la pared o al techo sólo como sea recomendado por el
fabricante.
8 Servicio—El usuario no debe intentar dar servicio al equipo eléctrico más allá a lo descrito en las
instrucciones de operación. Todo otro servicio deberá ser referido a personal de servicio calificado.
9 El aparato eléctrico debe ser situado de tal manera que su posición no interfiera su uso. La colocación
del aparato eléctrico sobre una cama, sofá, alfombra o superficie similar puede bloquea la ventilación,
no se debe colocar en libreros o gabinetes que impidan el flujo de aire por los orificios de ventilación.
10 El equipo eléctrico deber ser situado fuera del alcance de fuentes de calor como radiadores, registros
de calor, estufas u otros aparatos (incluyendo amplificadores) que producen calor.
11 El aparato eléctrico deberá ser connectado a una fuente de poder sólo del tipo descrito en el
instructivo de operación, o como se indique en el aparato.
ETEP Installation Guide
69
Environmental and Regulatory Information
12 Precaución debe ser tomada de tal manera que la tierra fisica y la polarización del equipo no sea
eliminada.
13 Los cables de la fuente de poder deben ser guiados de tal manera que no sean pisados ni pellizcados
por objetos colocados sobre o contra ellos, poniendo particular atención a los contactos y receptáculos
donde salen del aparato.
14 El equipo eléctrico debe ser limpiado únicamente de acuerdo a las recomendaciones del fabricante.
15 En caso de existir, una antena externa deberá ser localizada lejos de las lineas de energia.
16 El cable de corriente deberá ser desconectado del cuando el equipo no sea usado por un largo periodo
de tiempo.
17 Cuidado debe ser tomado de tal manera que objectos liquidos no sean derramados sobre la cubierta u
orificios de ventilación.
18 Servicio por personal calificado deberá ser provisto cuando:
a El cable de poder o el contacto ha sido dañado; u
b Objectos han caído o líquido ha sido derramado dentro del aparato; o
c
El aparato ha sido expuesto a la lluvia; o
d El aparato parece no operar normalmente o muestra un cambio en su desempeño; o
e
70
El aparato ha sido tirado o su cubierta ha sido dañada.
ETEP Installation Guide
Index
A
alarm LED
ET0010A, 12
ET0100A, 15
ET1000A, 17
autoneg command, 50
B
battery replacement, 24
booting the appliance
ET0010A, 34
ET0100A, 38
ET1000A, 43
C
cables
connecting the cables
ET0010A, 33
ET0100A, 37
ET1000A, 42
pinouts, 59
requirements
ET0010A, 27
ET0100A, 35
ET1000A, 40
command line interface
logging in, 47
connectors
ET0010A connectors, 11
ET0100A connectors, 14
ET1000A connectors, 16
customer support, 7
D
default gateway configuration, management port,
48
diagnostics
power up codes
CEP100-XSA description, 64
ETEP Installation Guide
ET0010A description, 63
ET0100A description, 64
ET1000A description, 64
diagrams
ET0010A
front panel connectors, 11
front panel LEDs, 12
rear panel connectors, 13
ET0100A
front panel connectors, 14
front panel LEDs, 14
rear panel, 15
ET1000A
front panel connectors, 16
front panel LEDs, 16
rear panel, 18
E
environmental compliance, 65
error state, 62
F
failures
replacing appliances, 56
replacing ET1000A power supplies, 56
FIPS mode operation, 54
firewall ports, 26
front panel diagrams
ET0010A, 11, 12
ET0100A, 14
ET1000A, 16, 17
I
initial setup
auto-negotiation settings, 49
logging in through the serial port, 47
overview, 47
setting the management IP address, 48
installation
71
Index
ET0010A
applying power, 34
connecting the cables, 33
rack mounting, 28
table top installation, 31
unpacking the shipping carton, 27
ET0100A
applying power, 38
connecting the cables, 37
rack mounting, 25
unpacking the shipping carton, 36
ET1000A
applying power, 43
cabling requirements, 40
connecting the cables, 42
rack mounting, 41
unpacking the shipping carton, 41
firewall ports, 26
IP address, setting on the management port, 48
L
LEDs
ET0010A indicator description, 12
ET0100A indicator description, 15
ET1000A indicator description, 17
troubleshooting, 61
license
entering, 52
for replacement units, 56
viewing, 53
lithium battery warning, 24
logging in through the serial port, 47
M
maintenance
recommendations, 55
replacing appliances, 56
management interface
auto-negotiation, 49
default gateway, 48
description, 48
IP address, 48
P
packing list
ET0010A, 27
ET0100A, 36
ET1000A, 41
pinouts
ET0010A, 59
ET0100A/ET1000A, 60
72
port status
ET0010A LED description, 12
ET0100A LED description, 15
ET1000A LED description, 17
ports, configuring your firewall, 26
power indicator LED
ET0010A, 12
ET0100A, 15
ET1000A, 17
power supply
replacing on the ET1000A, 56
powering up the appliance
ET0010A, 34
ET0100A, 38
ET1000A, 43
R
rack mount
CEP10-602 instructions, 28
ET0010A instructions, 28
ET0100A/ET1000A mounting instructions, 37
preparation, 25
rear panel diagrams
ET0010A, 13
ET0100A, 14, 15
ET1000A, 18
regulatory information
ET0010A, 66
ET0100A, 67
ET1000A, 68
requirements
ET0010A cables, 27
ET0100A cables, 35
ET1000A cables, 40
safety guidelines, 23
software, 24
RoHS directive, 65
S
safety guidelines, 23
self-tests
ET0010A, 63
ET0100A/ET1000A, 64
serial port, logging in to the CLI, 47
SFTP server
third party software, 24
shutting down the ETEP, 45
software
ETEP software requirements, 24
specifications
ET0010A, 20
ET0100A, 21
ETEP Installation Guide
Index
ET1000A, 22
status LEDs
ET0010A self-tests, 63
ET0100A/ET1000A self-tests, 64
T
tamper-evident seal, 55
technical support, 7
throughput license
See also license
entering, 52
licensed ETEP speeds, 52
traffic status LED
ET0010A, 12
ET0100A, 15
ET1000A, 17
troubleshooting
diagnostic code display
ET0010A, 63
ET0100A/ET1000A, 64
error state, 62
LED indicators, 61
power up codes
ET0010A, 63
ET0100A/ET1000A, 64
U
unpacking the shipping carton
ET0010A, 27
ET0100A, 36
ET1000A, 41
W
WEEE directive, 65
Z
zeroization
how it works, 58
recovery from, 59
ETEP Installation Guide
73
Index
74
ETEP Installation Guide
Black Box Tech Support: FREE! Live. 24/7.
Tech support the
way it should be.
Great tech support is just 30 seconds away at 724-746-5500 or blackbox.com.
About Black Box
Black Box Network Services is your source for more than 118,000 networking and infrastructure products. You’ll find everything
from cabinets and racks and power and surge protection products to media converters and Ethernet switches all supported by
free, live 24/7 Tech support available in 30 seconds or less.
© Copyright 2011. All rights reserved. Black Box and the Double Diamond logo are registered trademarks of BB Technologies, Inc.
Any third-party trademarks appearing in this manual are acknowledged to be the property of their respective owners.
ET0010A Installation Guide, version 1
724-746-5500 | blackbox.com