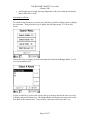
1
Badger®-Radix®
Data Collector
User Guide
Installation &
Operation Manual
Badger®, ORION ®, Recordall ® , DIALOG®, BadgerTouch ®, ADE® and RTR ® are
registered trademarks of Badger Meter, Inc.
Radix® is a registered trademark of Radix International Corporation, USA.
DIALOG® is aregistered trademark of Master Meter, Inc.
Microsoft® and Windows ® are registered trademarks of Microsoft Corporation.
VersaProbe™ is a trademark of Northrop Grumman.
Hitachi® is a registered trademark of Hitachi, Ltd.
RAD-IOM-01
BadgerMeter, Inc.
®
P/N 64944-001 Rev. 3
2-07
THE BADGER®-RADIX® User Guide
February 2007
THE Badger-Radix ORION® HANDHELD
- INTRODUCTION Welcome
Welcome to using the Badger-Radix Data Collector, the handheld computer to use for
meter reading technologies. The Badger-Radix is a flexible and easy-to-use tool that
provides utilities with a handheld interrogator that can be operated with the easy-to-use
customized keypad for data entry.
The Badger-Radix Data Collector can gather meter readings in these ways.
• It accepts meter readings from meters equipped with Badger ORION transmitters.
• It accepts meter readings that are visually read and manually entered.
• It accepts meter readings gathered from the VersaProbe™ reading wand
To Our New Friends
If you are new to Badger Meter Automated Meter Reading (AMR) products, or are new
to AMR products in general, please take some time to go through all the sections of the
user manual. We think it will be well worth your time. In particular, please pay attention
to how each segment of the Badger-Radix performs its function in relation to the goal:
getting a meter reading from the meter to the billing system in the quickest and easiest
way possible. Keeping this goal in mind as you learn about the Badger-Radix features
will make your learning easier, too.
To Our Established Friends
If you are already familiar with Badger Meter AMR products, you will still find it helpful
to go through the Introduction and Details sections in order to understand how the
features in the Badger-Radix work together, and what information is needed to perform
each feature.
What Is The Badger-Radix FW 500?
The Badger-Radix FW 500 is the Handheld Computer used with Badger CONNECT
Software for reading AMR products. It reads meters equipped with Badger ORION
transmitters or touch-type modules that can be read with Universal Reading wands. It
can also accept manual reads for any meter regardless of the technology installed on each
meter.
The Badger-Radix Features
When using a route management software package such as Badger CONNECT, the
Badger-Radix can perform these types of meter reading:
• Reading Badger ORION transmitters
Page 1 of 73
THE BADGER®-RADIX® User Guide
February 2007
•
•
Reading manually read meters including high and low audit checking
Reading touch-type meters via the VersaProbe™ connected to the Badger-Radix
In addition, the Badger-Radix performs a number of additional functions to make
working with AMR much easier.
• The Badger-Radix contains a feature called “Quick Read” with which you can
enter a Badger ORION® transmitter’s serial number and perform an immediate
meter reading. The Quick Read feature can also read touch-type modules with the
VersaProbe. This feature makes Final Reads and trouble shooting much easier to
perform.
• The Badger-Radix allows you to easily search through the meters you are reading
for ANY information that is displayed on the reading screen
• The Badger-Radix allows you to send Trouble or Reader codes as well as text
messages back to the PC host software.
• The Badger-Radix can be used to clear tamper conditions and program Badger
ORION transmitters.
• The Badger-Radix reports its meter reading progress at your request. The
Progress feature displays the current statistics for the meters being read.
• The Badger-Radix has an easy to use keypad with hotkeys that make using the
data collector simple.
• The Badger-Radix responses to different meter reading conditions can be
customized. For example, you can choose how the Badger-Radix responds when
a meter’s transmitter does not report, or reports a tamper. In this way, the BadgerRadix responds to the way you read meters.
• Clearing tamper conditions and programming Badger DIALOG® modules via the
VersaProbe
About This Manual
The manual is divided into these sections:
• Introduction - What is the Badger-Radix?
• The Badger-Radix Glossary
• The Makeup of the Badger-Radix
• The Details – a number of sections explaining how to perform the Badger-Radix’s
functions
• What If Things Go Wrong
You’ve almost completed the Introduction section. The Glossary section will introduce
you to the terminology of automatic meter reading and the Badger-Radix. The Makeup
of the Badger-Radix describes the different features of the Badger-Radix. The Details
devotes a chapter to each of the Badger-Radix features, showing you everything you need
to know about each one. Finally, the What If Things Go Wrong section details the steps
you need to follow to successfully solve just about any problem you might run into.
Page 2 of 73
THE BADGER®-RADIX® User Guide
February 2007
THE Badger-Radix GLOSSARY
Listed below in alphabetical order are a number of terms used in the Badger-Radix. Take
a few minutes to look them over. It will help to make the following chapters easier to
understand. (You may want to mark this page so that if you have a question about a term
later on, you can reach this page quickly.)
TERM
BadgerTouch
Comment code
DIALOG
Field
Final read
Main menu
Module
Programming menu
Quick read
Potential Leak
Reader Codes
Reading menu
DEFINITION
Badger Meter’s current touch product.
A comment code is a message from the office to the meter reader
that is displayed as soon as the meter is displayed on the read
screen. The possible messages are defined and maintained by the
user in Badger CONNECT and chosen from the defined list.
Badger Meter’s previous generation touch technology product.
A piece of information in the Badger-Radix, such as the service
address or the meter serial number, that resides on the screen.
A meter reading that is taken at the end of a customer’s
relationship with the utility in order to send the customer their final
bill.
The screen in the Badger-Radix that is displayed immediately after
successfully logging in.
In general, an electronic product used to report a meter’s reading.
For example, the Badger DIALOG® electronics which is needed to
perform a touch read, or the Badger ORION® electronics which is
needed to perform a radio read, are examples of modules.
The Badger-Radix screen that allows programming of modules.
The Badger-Radix feature that reads a meter whose module serial
number you enter. You can perform quick read for touch modules
or Badger ORION transmitters. When quick reading Badger
ORION transmitters, you can also display the readings from up to
50 of the transmitters in range of your Badger ORION receiver,
not just one transmitter.
A status reported by an ORION transmitter showing that the meter
has registered continuous flow and may have a potential leak.
Reader codes consist of up to three messages to the utility office
for each meter to be read. The possible messages are defined in
Badger CONNECT and chosen by the meter reader from the
defined list.
The Badger-Radix screen holding the list of different functions
that you can perform when reading meters
Page 3 of 73
THE BADGER®-RADIX® User Guide
February 2007
Receive meters
Route
Route Management
software
Route progress
Send readings
Service
Settings
Tamper
Text message
Trouble code
VersaProbe
The Badger-Radix function that communicates with the Badger
CONNECT software to transfer meters from the PC to the BadgerRadix. Meter files are created in Badger CONNECT and transfer
to the Badger-Radix Data Collector via the Loader-Charger
cradles, which can be purchased separately.
A list of meters to read
The software product or system that loads route information into
the handheld computer, and accepts completed meter readings
from the handheld computer (such as Badger CONNECT).
The Badger-Radix function that displays the number of meters
read in the current route, along with other related information.
The Badger-Radix function that prepares gathered meter readings
and transfers them to the Badger CONNECT software.
The type of utility being measured by the meter, for example
Water, Gas or Electric.
The Badger-Radix values that can be changed by the user to
control behavior to certain functions.
A status reported by an Badger® ORION transmitter showing that
the lead line between the register and the transmitter is cut or
shorted
A message entered by the meter reader to be sent to the utility
office via the Badger CONNECT software
A message that is chosen by the meter reader from a list stored in
the Badger-Radix and sent to the utility office describing a
condition or status at the meter
A meter reading wand that can be used to send meter readings to
the Badger-Radix.
Page 4 of 73
THE BADGER®-RADIX® User Guide
February 2007
THE MAKEUP OF THE Badger-Radix
The Badger-Radix Handheld is made up of a number of functions that all work together
to perform meter reading quickly and easily.
•
•
•
•
•
The Badger-Radix has an internal computer utilizing a Hitachi® Super SH3
processor running at 120 MHz using the Microsoft® Windows® CE 3.0 operating
system. The processor is Industrial grade, providing very low power consumption
and a very wide range of operating temperatures.
The Badger-Radix uses a 240 X 240 pixel white screen with black graphics
The Badger-Radix has two RS232 serial ports:
o 115.2K baud data rate
o External power / battery charging capability
o 12 pin sealed connectors
The Badger-Radix has an easily rechargeable lithium ion battery that will provide
power for a days worth of meter reading
The Badger-Radix has a hand strap that makes holding the unit seem almost
effortless.
Page 5 of 73
THE BADGER®-RADIX® User Guide
February 2007
THE BADGER-RADIX LOADER-CHARGER
The Main Line Loader-Charger is a cradle for the Badger-Radix for charging and
communication purposes. A Secondary Loader-Charger is also available. Up to two
Secondary Loader-Chargers can be connected to a Main Line Loader-Charger.
Customers must have a Main Line Loader-Charger to be able to communicate meter data
to and from the Badger-Radix and the Badger CONNECT computer.
Page 6 of 73
THE BADGER®-RADIX® User Guide
February 2007
For instructions on how to assemble your Loader-Charger assemblies and prepare your
Badger CONNECT computer for uploading and downloading account information,
please see Badger’s installation manual RAD-IOM-02 (Main Line and Secondary
Loader-Chargers). Information on the communications method used for route transfer
can be found in the Communications with the Badger CONNECT Software portion of
The Details section of this manual.
CONSERVING THE BATTERY
The Badger-Radix conserves battery power by turning itself off when not in use. You
can also turn off the unit with the Off function on the main menu a well as the Off
Page 7 of 73
THE BADGER®-RADIX® User Guide
February 2007
function Hot Key. Pressing any key on the keypad for a few seconds will turn the unit
back on and the Badger-Radix will show the same screen that was displayed when the
unit turned off.
Note that when the Badger-Radix is on the Read screen or the Quick Read screen, it will
NOT turn off automatically, because the Badger ORION® Reading functions are active.
If you wish to conserve the battery, be sure to return to the main menu.
CHARGING THE BATTERY
The battery charges when the unit is placed in the Loader-Charger. Charging time for the
Badger-Radix, from completely discharged to fully charged, is approximately 2 to 3
hours. The battery charging light on the front of the Badger-Radix will be steady while
the unit is charging, and will flash rapidly once the battery is fully charged.
If you place the Badger-Radix in the charger and the battery charging light begins
flashing slowly, the batteries need conditioning. Leave the unit in the Loader-Charger.
The battery conditioning will take about an hour, and the charging will take another 2 to
3 hours. The process is complete when the battery charging light is flashing rapidly.
The battery pack is designed with a feature that senses when the battery is fully charged
and stops the charging process to eliminate over charging. If desired, the Badger-Radix
can reside in the cradle after the battery is fully charged.
If you are using the Badger-Radix and the battery is becoming too low to continue
operation, the Badger-Radix will show you a message stating that the battery is very low.
At this point, the Badger-Radix must be charged before any other functions can be
performed. Return the Badger-Radix to the charger as soon as you can. NOTE THAT
ALL READINGS STORED IN THE BADGER-RADIX WILL BE SAFE AND
WILL BE AVAILABLE ONCE YOU HAVE CHARGED THE BADGER-RADIX.
INITIAL SETUP – SETTING THE DATE AND TIME
During training, the Badger-Radix will be started and the initial settings will completed
by your trainer. These initial settings include setting the time, the date, the time zone,
and the unit’s name. (Each Badger-Radix will have a unique name to make loading and
unloading easier.)
If you wish to update the time or date, you can use the Date function in the Utilities
section. Please refer to the Utilities section below for more information.
Page 8 of 73
THE BADGER®-RADIX® User Guide
February 2007
GENERAL CARE OF THE Badger-Radix
Cleaning the Badger-Radix is easy. Use a mild detergent and a clean soft cloth to clean
the body of the Badger-Radix. Do not use solvents, such as paint thinners, to clean the
Badger-Radix. Use only a lint free cloth to clean the infrared port. Do not use detergents
or solvents to clean the infrared port window.
Protect your Badger-Radix from extreme temperatures. Do not leave it on the dashboard
of a vehicle on a hot day. Keep it away from other heat sources as well. Exposure to
heat can cause battery drainage.
Page 9 of 73
THE BADGER®-RADIX® User Guide
February 2007
THE DETAILS – THE Badger-Radix OPERATION
THE READING CYCLE USING THE Badger-Radix
Using the Badger-Radix for meter reading is easy. The reading cycle consists of these
steps:
• STEP 1 – Prepare the Badger-Radix to accept the meters from the Badger
CONNECT software by inserting it into the Loader-Charger and performing the
Receive Route function. From Badger CONNECT, use the Load Collector
function to send the meter information to the Badger-Radix.
• STEP 2 – From the Main Menu of the Badger-Radix Data Collector press the “R”
key to begin the meter reading. The Badger-Radix will display the Reading
screen that allows you to
o read meters equipped with Badger ORION transmitters,
o read meters equipped with touch modules using a VersaProbe™,
o or enter manual meter readings for those meters without a transmitter.
• STEP 3 – When all the readings have been gathered, place the Badger-Radix into
the Loader-Charger and perform the Send Readings function. In Badger
CONNECT, use the Unload Collector function to transfer the readings, process
them, and add them to the database.
Restarting The Badger-Radix
There may be cases when you need to reboot, or restart the Badger-Radix computer. To
perform a restart, hold down the R, W, and delete keys simultaneously (lower right
corner vertical keys) until the screen goes blank. The Badger-Radix will restart.
Readings will not be lost if the Badger-Radix Data Collector is restarted using the abovementioned steps. Be sure to let the Badger-Radix completely restart before placing it
in the Loader-Charger.
If the restart process above does not clear the condition you are experiencing, please call
Badger Meter Technical Support for assistance. Please see the chapter “What If Things
Go Wrong” for more information.
Starting the Badger-Radix Software
The Badger-Radix begins its processing by displaying the copyright screen.
Page 10 of 73
THE BADGER®-RADIX® User Guide
February 2007
Pressing the Enter button brings you to the Login screen.
Logging-in to The Badger-Radix
The Login screen looks like this.
The Log-in screen accepts your 3 to 5 character personal ID (PIN). Your PIN can be
your name, your initials, an ID number, etc. When you have entered your PIN, the screen
looks like this.
Page 11 of 73
THE BADGER®-RADIX® User Guide
February 2007
Next, press the Enter button. If you enter a valid PIN, the Badger-Radix displays the
Main Menu. If your PIN is not valid, the Badger-Radix will tell you so. The screen
looks like this.
Press the Retry “R” button on the screen and reenter your PIN correctly to display the
Main Menu.
If you press the Cancel “C” button, you will return to the Copyright screen.
The Badger-Radix Main Menu
After successfully logging into the Badger-Radix, you will see the Main Menu.
Page 12 of 73
THE BADGER®-RADIX® User Guide
February 2007
There are seven functions on the main menu to choose from:
• Read Route “R” – Begin reading meters
• Quick Read and Program “Q” – Use the Badger-Radix to read meters when you
do not have any loaded (i.e., for checking a Badger ORION® transmitter, for
obtaining final reads, troubleshooting, etc.) and program Badger ORION
transmitters to set an odometer, clear a tamper or stop/start a transmitter. You can
also read touch modules and program/clear tamper flags for Badger DIALOG®
modules.
• Route Transmit “T” – Send readings back to Badger CONNECT, Receive a new
route from Badger CONNECT, and view information of when the current route
was last loaded
• Utilities “U” – Display the Utilities Menu screen
• Turn Off “O” – Turn off the Badger-Radix handheld to save the battery power
• Update UDC Software “A” – Send the newest version of UDC software to the
Badger-Radix unit from Badger CONNECT
• Back to Copyright Screen “X” – Go back to the Copyright Screen so that
someone else can use the Badger-Radix handheld
The Badger-Radix also displays the current time on the bottom of the screen. Pressing
any of the above buttons begins that function’s operation. If you press any other buttons,
they will be ignored.
Communications with the Badger CONNECT Software
The Badger-Radix communicates with Badger CONNECT through the Loader-Charger.
Up to three Loader-Chargers can be connected to the Badger CONNECT PC through the
serial cable: one Main Line Loader-Charger and two Secondary Loader-Chargers. When
your Badger-Radix is placed in a Loader-Charger, the Badger-Radix battery will charge
while communications with Badger CONNECT takes place.
When you wish to load or unload the Badger-Radix, you must begin the process on the
handheld before performing the load or unload at Badger CONNECT. This insures that
Page 13 of 73
THE BADGER®-RADIX® User Guide
February 2007
the Badger-Radix is ready to communicate with Badger CONNECT. From the Main
Menu, press the Route Transmit “T” key. You’ll see this screen.
To load new meters into the Badger-Radix, press the Receive Route “R” key. To send
meter readings back to Badger CONNECT, press the Send Route “S” key. Let’s assume
the Badger-Radix is sitting in the Loader-Charger and you wish to load a new route.
When you press the “R” key, you’ll see this screen.
If you do not wish to load a new route into the Badger-Radix, press the “C” key. To
perform the Load function, press the “Enter” key. You will see a screen like this.
Page 14 of 73
THE BADGER®-RADIX® User Guide
February 2007
Make a note of the large number you see in the center of the screen. CONNECT will ask
you about this number during the load function if you have more than one Badger-Radix
handheld.
In Badger CONNECT, choose the Load Collector page for the Badger Radix collector
type. Steps 1 and 2 (choosing the route to load and verifying that it is correct) remain the
same. When you are ready to load the route, click on the Load Route button (step 3).
Badger CONNECT will make the connection to the Loader-Charger(s). If you have one
Loader-Charger connected, the meters will be loaded. If you have two or three LoaderChargers, Badger CONNECT will display a list of “communications addresses”. Choose
the one that matches the number on the display and click OK. The meters will be sent to
the Badger-Radix.
Unloading the Badger-Radix is very similar. From the Route Transmit screen, press the
Send Route “S” key. You’ll see this screen.
If you do not wish to send the readings, press the “C” key. To send the readings back to
Badger CONNECT, press the “Enter” key. You will see a screen like this.
Page 15 of 73
THE BADGER®-RADIX® User Guide
February 2007
Make a note of the large number you see in the center of the screen. Badger CONNECT
will ask you about this number during the load function.
In Badger CONNECT, choose the Unload Collector page for the Badger-Radix collector
type. To start the process, click on the Unload Collector button. Badger CONNECT will
make the connection to the Loader-Charger(s). If you have one Loader-Charger
connected, the meters will be unloaded. If you have two or three Loader-Chargers,
Badger CONNECT will display a list of “communications addresses”. Choose the one
that matches the number on the display and click OK. The meters will be unloaded.
Steps 2 and 3 on the Unload Collector page remain the same. Verify that the readings are
correct by Viewing Unloaded Reading and then save reading by Uploading Accounts.
Route Information
If you wish to view information about the meters that are currently loaded, from the
Route Transfer screen press the Route Info “I” button.
Page 16 of 73
THE BADGER®-RADIX® User Guide
February 2007
•
•
•
•
The name / number of the route (Route File Description)
This time of the last captured reading (Route file timestamp)
The time when this route was transferred from the PC (Last trans. from
Badger CONNECT)
The time the previous route was transferred to the PC (Last trans. to Badger
CONNECT)
For more details, see the Route Operations portion of the Details section. To return to the
Route Transfer screen, press “C”.
THE DETAILS – READING METERS WITH THE
BADGER-RADIX
The Read Screen
After loading the Badger-Radix, the next step in the reading cycle is to read the meters in
the route(s). To begin reading, press the (Read Route) “R” button on the keyboard (from
the Main Menu on the screen). You will see the first meter to read.
If you are reading meters with Badger ORION® AMR, pressing the “R” button to begin
reading also begins reading Badger ORION meters. When you display the first meter,
you may have already captured some Badger ORION transmitter readings. When
reading with Badger ORION AMR, the Badger-Radix displays the next account.
The Read screen looks like this.
The reading screen display shows customer information in the top section of the screen,
and three functions along the bottom of the screen. The first two of the bottom functions
allow you to browse through the meters. When you press the “P” for Previous Account,
Page 17 of 73
THE BADGER®-RADIX® User Guide
February 2007
the Badger-Radix will display the meter just before the current one. When you press the
“N” for Next Account, the Badger-Radix will display the next meter.
Navigation
If the current meter is the first one in the route and you press the Previous Account
button, the Badger-Radix will ask you if you want to stay at the beginning of the route or
if you wish to go to the end of the route.
Pressing the “S” key will keep you at the first meter in the route. Pressing the “D” key
will take you to the last meter in the route.
Similarly, if you press the Next Account button, the Badger-Radix will display the next
meter in the route. If you are viewing the last meter in the route, the Badger-Radix will
ask you if you want to stay at the end of the route or if you want to display the first meter
in the route.
Page 18 of 73
THE BADGER®-RADIX® User Guide
February 2007
Pressing the “S” key will keep you at the last meter in the route. Pressing the “F” key
will display the first meter in the route.
Reading Meters
The Read Screen shows specific information about the meter to be read including:
• Meter information appears on the first five lines of the display. This information
can be customized by the user through Badger CONNECT Software. See the
Badger CONNECT Software manual for information on setting the account
information loaded to the Badger-Radix.
• The type of meter reading technology in use for this meter (ORION, MANUAL,
DIALOG, TOUCH) is shown on the sixth line.
• The service that this meter is measuring (Water, Gas, Electric, Reclaim, etc.) is
also shown on the sixth line.
• The meter reading (after the reading has been gathered) is shown on the seventh
line.
Here is an example.
In this example, the information chosen for the first five lines are the address, the
customer name, the meter serial number, the AMR serial number, and the route and
sequence numbers of the meter. In the picture above, the customer’s name is Mickey
Dolenz, and he lives at 111 1st St.. The meter serial number is 00550001 and the Badger
ORION® transmitter number is 71160024. Finally, the route and sequence numbers are
055 and 380. (Note that when displaying a name, the Badger CONNECT software
determines the display order. If Badger CONNECT downloads the last name first, the
Badger-Radix will display the name in that manner. If Badger CONNECT downloads
the first name first, the Badger-Radix will display the name in that way.)
Gathering Meter Readings
The Badger-Radix performs meter readings both automatically and manually. When in
automatic mode, the Badger-Radix will accept Badger ORION meter readings and store
Page 19 of 73
THE BADGER®-RADIX® User Guide
February 2007
them in the proper account. The Badger-Radix will update the display with the next
unread meter, or the meter that was last displayed on the screen. If a reading is received
for the meter shown on the screen, the screen is updated with the next unread meter.
The mode of the screen is shown vertically on the far right side of the read screen.
“MANUAL” denotes manual reading mode and “AUTO” denotes automatic reading
mode. The Read screen for automatic mode looks like this.
To change the mode of the reading screen, either from manual to auto or from auto to
manual, press the “A” key. The screen will change to show the new mode on the far right
hand side of the screen.
Reading Badger ORION® Meters
Each Badger ORION meter reading is received from the ORION receiver, which is
located inside the Badger-Radix. If a meter reading is received and the meter has not yet
been read, the reading is stored. If the meter has already been read, the reading is
discarded.
When in auto mode, the Badger-Radix screen always shows the next unread meter. If the
reading for that meter is received, the screen is updated to show the next unread meter. If
the reading is received for a meter that is not the next unread meter, the reading will be
stored. Using this method, the Badger-Radix display always shows the next unread meter
according to the reading sequence downloaded to the data collector.
A number of possible results can occur when an Badger ORION transmitter sends a
reading.
• The Badger ORION receiver receives the transmission and the Badger-Radix
stores the reading. If the meter was displayed on the screen, the next unread
meter is then displayed. If the meter was not displayed on the screen when the
transmission was received, the reading is stored and the account is removed from
the unread list. Once an account is read, it will not be displayed as an unread
meter in auto mode.
Page 20 of 73
THE BADGER®-RADIX® User Guide
February 2007
•
•
•
The Badger ORION® receiver receives the transmission that reports either a
tamper condition or a potential leak. The Badger-Radix stores the reading and
logs the condition. If the meter was displayed on the screen, the Badger-Radix
will prompt you to process the tamper condition before displaying the next unread
meter.
The Badger ORION receiver receives a transmission but not all of the
transmission was received. The transmission is ignored and no meters are
updated.
No transmission is received from the meter. To increase your chances of a
successful read, move closer to the meter. If you choose to skip this meter, press
the “N” (NEXT) button. Here are some reasons for not receiving the
o The Badger-Radix is too far away from the transmitter
o There may be something obstructing the line of site between the BadgerRadix and the transmitter.
In any of these cases, getting closer to the transmitter or improving the line of site may
result in receiving the meter reading. Note that if you decide to skip the meter, press the
“A” button to switch from AUTO to MANUAL mode, and press the “N” (NEXT) button
to move to the next unread meter. If the next meter is a Badger ORION meter, be sure to
place the route back into automatic mode by pressing the “A” key. If the next meter is a
manual or a touch-type meter, you can read that meter in its normal way.
Keep in mind that a Badger ORION transmitter’s radio transmissions can be affected by
many variables. As a result, a transmitter’s response may be received from slightly
different locations each reading cycle. Keep this in mind when trouble shooting a
transmitter.
Processing the Badger ORION Meter Reading
Once the Badger-Radix has received a meter reading from a Badger ORION transmitter,
it processes the information in a number of steps:
• Determines if the message from the transmitter was received correctly
• Determines the tamper status and potential leak status of the transmitter
• Determines the reading value reported by the transmitter
• Evaluates the reading value against the high and low audit values to determine if
the reading is high or low
The Badger-Radix first analyzes the meter reading to determine if the communication
was completed without errors. If an error is found, the Badger-Radix ignores the
transmission. If no error is found, the Badger-Radix advances to the next step and
determines if a tamper or leak status was reported. If a tamper or leak condition was
reported, the Badger-Radix assigns the correct tamper or leak status. Next, the reading is
compared to the high and low audit values that were sent to the Badger-Radix from the
Badger CONNECT software. If the reading value is greater than the high audit value or
lower than the low audit value, the Badger-Radix assigns either the High or Low Reading
Page 21 of 73
THE BADGER®-RADIX® User Guide
February 2007
status. If the reading is within the audit values, the Badger-Radix assigns a Good
Reading status.
Processing Tamper Reports
If the meter being displayed reports a tamper, the Badger-Radix will sound the special
tamper audio signal. You’ll see the tamper processing screen.
Choose one of these options by pressing the corresponding button.
• “S” (Skip) – You can skip this meter and go on to the next one. This is a handy
option if someone will come back later to troubleshoot the meter or the
transmitter.
• “M” (Manual Read) – This option allows the user to input a manual read using the
Badger-Radix keypad. This is handy if the meter is in a pit, but less helpful if the
meter is inside (unless you can access the meter).
• “T” (Trouble Code) – Using this option you can enter a trouble code to report the
status of the meter to the office. See the Trouble Code section for more details.
If you choose Trouble Code, the Badger-Radix will return to the Tamper Menu screen
once the code is entered and stored so that you can also enter a manual reading.
If you choose to enter a Manual Read, you’ll see this screen.
Page 22 of 73
THE BADGER®-RADIX® User Guide
February 2007
Enter the reading and press the “Enter” button. If you wish to skip the manual read, press
the “C” key.
When you have completed entries for this meter, press the “S” (Skip) button. It returns
the Badger-Radix to the read screen in automatic mode.
Clearing a Tamper
If a Badger ORION transmitter reports a tamper condition, you must perform
maintenance on the unit to clear the tamper condition. Once the condition that caused the
tamper is cleared, the unit must be reprogrammed if it is connected to a Badger
Recordall® Transmitter Register (RTR®) using the ORION programming tool. If the
Badger ORION transmitter is connected to a position-based encoder like Badger Meter’s
Absolute Digital Encoder (ADE®), no programming is required. Successfully resetting
the odometer value will clear the tamper report. Please refer to the Badger ORION
PROGRAMMER section for more information.
Switching to Manual Mode Meter Reading
The Badger-Radix switches from automatic to manual mode when the “A” key is pressed
or an action by the meter reader is required. For example:
• The Badger-Radix will switch to manual mode when the meter reader uses the
hotkey function on the keypad, such as a search, or to enter a trouble code or
comment code.
• The Badger-Radix will automatically switch to manual mode when the next
unread meter is a manually read meter or a touch-type meter.
The read screen for manual mode looks like this.
Page 23 of 73
THE BADGER®-RADIX® User Guide
February 2007
When in manual mode, the meter reader can read touch-type meters using the
VersaProbe™, enter readings for manually read meters, or perform any other BadgerRadix function such as searching for a particular meter or viewing progress. When the
manual and touch-type meters have been read and the next meter to read is a Badger
ORION® transmitter, you can return to automatic mode by pressing the “A” key. This
action will return the Badger-Radix to automatic meter reading.
Starting the Reading Process for a Manual or Touch-type Meter
To gather a reading for a manual meter, enter the meter reading on the keyboard. To
gather a reading for a touch-type meter, squeeze and release the trigger on the
VersaProbe™ once the meter is displayed as the next unread meter. (Be sure that the
probe is connected to the bottom left port of the Badger-Radix.)
Manual Meter Reading
To enter a manual meter reading once the numeric keypad is displayed, view the meter’s
register and note the reading. Next, enter the reading onto the Badger-Radix keyboard
buttons.
Manual Meter Reading Direction
Water meters are typically read from left to right, while electric meters are typically read
right to left. The Badger-Radix can handle meter readings gathered in either direction.
For example, if you entered the reading as 382 going from left to right, you’d see this
screen.
Page 24 of 73
THE BADGER®-RADIX® User Guide
February 2007
To change the direction of the meter reading, press the “A” Hot Key. The Badger-Radix
will display the direction of the reading by showing an arrow pointing to the left next to
the reading field. When you enter a meter reading now, the reading will be shown on the
display from right to left. Using the same example, if you entered 382 going from right
to left (the arrow pointing to the left), you’d see this screen.
In either case, when the meter reading is completely entered, press the “Enter” key
located on the upper left hand corner of the keypad. To cancel the entry, press the “C”
key. To switch back to Left to Right manual reads, press the “D” Hot Key.
High and Low Limits for Manual Meter Readings
If the reading is within the high and low limits, the Badger-Radix will record the meter
reading and advance the display to the next meter. If the reading is above the high limit
or below the low limit, the Badger-Radix will beep twice for high and three times for low
and tell you that the entered meter reading was high or low. It will ask you to re-enter the
reading. This is what you will see if you enter a reading that is above the high limit.
Page 25 of 73
THE BADGER®-RADIX® User Guide
February 2007
Here is what you will see if you enter a reading below the low limit.
Press the OK “Enter” button and the Badger-Radix will display the read screen again.
Re-enter the meter reading and press Enter.
If the second meter reading matches the first meter reading, the Badger-Radix records the
reading and displays the next meter. If the meter readings do not match, the BadgerRadix will alert you that the two readings are different and will return to the read screen
for this meter as if nothing happened.
Page 26 of 73
THE BADGER®-RADIX® User Guide
February 2007
In this case, the meter reading process begins again for this meter.
The method used to verify a high or low manual meter reading is controlled by one of the
settings: Hi/Low Manual Re-key. If the setting box is checked, the above method of reentering a manual meter reading is used to verify the high or low reading value. If the
box is not checked, the Badger-Radix will display the reading entered and ask if it is the
correct reading. If you’ve entered a low reading, you might see this screen.
If the value shown is the correct value, press the Yes button. The reading will be
accepted and stored. The Badger-Radix will then advance to the next meter. If the value
shown does not match the reading for this meter, press the No button. The Badger-Radix
will return you to the reading screen for this meter. The meter reading process can then
begin again.
Advancing the Display
In the case of a high or low reading, the Badger-Radix allows you to control the advance
of the display through the settings. If there are tasks to perform when a meter reading is
high or low (such as dropping off a brochure on finding leaks when a high meter reading
Page 27 of 73
THE BADGER®-RADIX® User Guide
February 2007
is received or checking the meter itself on a low reading or a tamper), not advancing the
display allows you to perform the necessary tasks and report information via codes and
messages. Once the steps are performed and any necessary codes or messages are
entered, you can press the Next button on the display and continue reading.
Reading BadgerTouch® Modules
Reading meters equipped with BadgerTouch® modules, Badger DIALOG® or with
competitive “touch” modules is similar to reading manual meters. The meter reading
process is started when the wand is connected to the Badger-Radix and in place, and the
reading is sent to the Badger-Radix from the reading wand. The Badger-Radix will
process the reading to determine a high and low reading status.
The VersaProbe™ connects to the Badger-Radix through the left connector at the bottom.
The small round end of the interface cable plugs into the Badger-Radix port while the
larger end connects with the VersaProbe. When using the VersaProbe, start the reading
process by placing the sensor on the read module and squeezing the trigger on the probe.
The wand will communicate with the module and forward the meter reading information
to the Badger-Radix, which will process the reading for high and low status, and store the
reading.
If a touch-type meter is read out of sequence, the Badger-Radix can search for the correct
meter. Searching is controlled by the Find On Wrong Setting. If the Find On Wrong
setting is checked, the meter reading will be stored and the next meter will be displayed.
If the meter that was read was not found, or the Find On Wrong setting is not checked,
you’ll see this message.
Verification Readings
Verification readings provide water utilities with an option to collect a visual reading
along with the AMR reading for each account. The Badger-Radix Verification Read is
built to perform this very function. If the Perform Verification Read setting is set, the
Page 28 of 73
THE BADGER®-RADIX® User Guide
February 2007
Badger-Radix will request a manual reading after each successful meter reading. This
second reading is stored separately and reported to the Badger CONNECT software,
which will report on any reading differences. Because it is a verification reading, the
normal checking for high and low entries will not occur. Once the verification reading is
entered, the Badger-Radix will advance the display to the next meter.
Error Conditions – Stopped Meters and Negative Consumption
The Badger-Radix can optionally check for two possible problem cases: stopped meters
and meters with a negative consumption. When either of the settings is set, the BadgerRadix will compare the reading just gathered with the previous reading. If the current
reading matches the previous reading, the Badger-Radix will show a message alerting
you to a possible stopped meter. If the current reading is less than the previous reading,
the Badger-Radix will show a message alerting you to possible negative consumption.
(The most common cause of this is a meter change-out that has not been recorded in the
billing system.)
Note that if the previous reading is zero for all meters, the Badger-Radix will not perform
the checks regardless of the status of the settings. Zero readings for all meters is an
indication that the billing system has not sent the previous reading values.
For the Badger-Radix to perform these comparisons, two things must occur:
1. The billing system must send the previous reading to Badger CONNECT.
2. The settings that control these features must be turned on.
The settings are stored at Settings Screen 5.
Pressing the “Z” key will turn the Zero Consumption check on and off. Pressing the “N”
key will turn the Negative Consumption check on and off.
If the Zero Consumption check is turned on, and the manual reading for a meter is the
same as the previous reading, you’ll see a screen like this.
Page 29 of 73
THE BADGER®-RADIX® User Guide
February 2007
Because the reading may be in error, you will be asked to verify the reading. If the
manual re-key setting is turned on, you will be asked to enter the reading again. If the
manual re-key setting is turned off, you will be asked if the reading is correct.
Touch read meters and radio read meters will also show an alert message but will not
require you to verify the reading.
If the Negative Consumption check is turned on, and the manual reading for a meter is
the lower than the previous reading, you’ll see a screen like this.
Because the reading may be in error, you will be asked to verify the reading. If the
manual re-key setting is turned on, you will be asked to enter the reading again. If the
manual re-key setting is turned off, you will be asked if the reading is correct.
Touch read meters and radio read meters will also show an alert message but will not
require you to verify the reading.
Page 30 of 73
THE BADGER®-RADIX® User Guide
February 2007
Other Reading functions – The Reading Menu
Pressing the “M” (Menu) button from the Read screen will show you the other reading
functions that can be performed.
The functions are:
• “S” – Searching for specific accounts by name, address, meter serial number, or
transmitter ID number (these fields may change depending on which 5 fields the
utility elects to display in the Badger-Radix for each account)
• “O” – Entering comment codes and messages to be returned to the utility office
• “R” – Perform a manual read for this meter
• “V” – View the High and Low audit limits for this meter (if you have the
permission to do so – more on this later)
• “A” – Define a new account
• “U” – View the Utilities Menu screen
• “U” – View Progress, settings, or other information via the Badger-Radix Utilities
• “X” – Return to the main menu
• “C” – Return to the Read screen
Hot Keys
The Badger-Radix software contains a number of Hot Keys that will allow you, with one
key press, to perform a meter reading function. Each of these Hot Keys is shown on the
keyboard.
Page 31 of 73
THE BADGER®-RADIX® User Guide
February 2007
To perform a Hot Key Function, first press the B key, and then the Hot Key for the
function you wish to perform. Here is the list of Hot Keys and the functions they
perform.
• A: When on the READ screen, the “◄” function will set the read direction for
manual reads to Right to Left. When on a screen with text entry, the function will
move the cursor one character to the left.
• B: The Battery function will display the current battery status
• C: The contrast function will allow you to change the screen contrast
• D: When on the READ screen, the “►”function will set the read direction for
manual reads to Left to Right. When on a screen with text entry, the function will
move the cursor one character to the right.
• F: The Route Start function will reset the current route back to the first meter
• H: The High/Low function will display the high/low screen for the current meter
• M: The Manual Read function will bring up the Manual Read entry screen (used
with Radio and Touch meters)
• N: The Messages function will bring up the Text Message screen allowing you to
enter a text message for this meter
• O: The Progress function displays the progress screen
• P: The Program function displays the Programming screen chosen in the
handheld settings (Quick Read Menu, Orion or VersaProbe)
• Q: The Quick Read function displays the Quick Read function chosen in the
handheld settings (Quick Read Menu, Orion or VersaProbe)
Page 32 of 73
THE BADGER®-RADIX® User Guide
February 2007
•
•
•
•
•
•
R: The Reader Code function displays the Reader Code screen allowing you to
enter up to three reader codes for this meter
S: The Search function will display the Search Menu
T: The Trouble Code function displays the Trouble Code screen allowing you to
enter a trouble code for this meter
U: The Unread function will display the Unread Menu page allowing you to
choose how to find Unread Meters
CLEAR: The Clear function will clear a field of data entry
Z: The Sleep function will turn off the Badger-Radix. To turn it back on, press
any key on the keyboard until the Badger-Radix turns on.
Searching
The Badger-Radix gives you a number of ways to find a particular meter through the
searching menu. When you are displaying a meter to read, press the menu button to
display the Read Menu screen.
From the reading menu, press the Search button. The Badger-Radix will show you the
Search Menu.
Page 33 of 73
THE BADGER®-RADIX® User Guide
February 2007
You can also bring up the Search Menu screen using the “S” Hot Key.
There are three different ways to search for a particular meter.
• “F” – Find a meter that has a particular value in one of the five read screen fields
• “R” – Select a route to search (see the Route Operations section for more details)
• “S” – Go to the first account in the current route
• “U” – Go to the next unread meter in the current route.
If you wish to go to the start of the current route or the next unread meter in the current
route, press the appropriate key. The Badger-Radix will display the read screen for that
meter.
If you wish to find a meter that has a particular name or is at a particular address, press
the Search Fields “F” button. The Badger-Radix will display the Search Fields screen to
allow you to specify the information. In our example, the five fields being used are
name, address, meter location, meter serial number, and the meter model field. In
addition, the account number and the AMR module number can also be searched.
Page 34 of 73
THE BADGER®-RADIX® User Guide
February 2007
Use the “U” key to move the highlight field up and the “D” key to move it down. When
the field you wish to search is highlighted, press the “T” key to enter the information you
for which you wish to search via the keyboard.
In our example, we will search for a particular name. After choosing Name with the “U”
or “D” keys to highlight it, press the “T” button. You can then enter the text you wish to
search for. For example, if you entered “TORK” in the Text field, the Badger-Radix will
display this screen.
Note that the Cancel function is “MESSAGES”, which is the B key and the “N” key. To
save the text, press the “Enter” key.
Enter the letters of the name you are searching for. You do not need to enter the entire
name, just a small segment of the name. Let’s say that you entered the letters T and O.
Press the “O” Hot Key. If this is what you want to search for (a name with the letters TO
in it), press the “S” key to begin the search. The Badger-Radix will display the first
account it finds and ask you if this is the one you are searching for.
Page 35 of 73
THE BADGER®-RADIX® User Guide
February 2007
If this is the meter you are looking for, press the “Y” button. If this is not the meter you
are looking for, press the “N” button and the Badger-Radix will continue searching. If
you wish to stop the search, press the Cancel “C” button and you will return to the Search
Menu.
If the Badger-Radix cannot find a meter with the information you entered, you’ll see this
screen.
Searching for accounts using the other fields on the read screen works in exactly the same
way.
Trouble Codes and Reader Codes
If you find that you need to send information about a meter you are reading back to the
office, the Badger-Radix provides a number of ways to do so. They are:
• The Trouble Code
• The three Reader Codes
• The Text Message
The Trouble Code and Reader Codes are messages you can send to the utility office. The
Badger CONNECT software allows you to define up to 99 different messages each to use
for Trouble and Reader codes. The Trouble Code is usually used to specify a problem.
The Reader Codes are usually used to provide additional information about the meter or
the process of reading it. For example, you might enter a Trouble Code that would
indicate that the meter needs repair, while the Reader Codes might indicate information
about accessing the meter, such as a problem dog.
Page 36 of 73
THE BADGER®-RADIX® User Guide
February 2007
To log a Trouble Code or one or more Reader Codes, touch the Comments “O” button
from the Reading Menu. You’ll see this screen.
From there you can choose the Trouble Code button “T” or the Reader Code button “R”,
depending on which code you wish to use. If you choose Trouble Code, you’ll see this
screen.
Page 37 of 73
THE BADGER®-RADIX® User Guide
February 2007
You can also bring up the Trouble code screen by using the “T” Hot Key.
Pressing the “1” key shows the different trouble code messages from which to choose.
Choose the message by using the up “U” and down “D” keys to highlight your choice.
(If you decide that you do not wish to enter a Trouble code, press the “C” key. If you
wish to delete the stored trouble code, select the blank line at the top of the list.) Then
press the “Enter” key to return to the Trouble Code screen. The message will be
displayed on the Trouble Code screen like this.
Page 38 of 73
THE BADGER®-RADIX® User Guide
February 2007
Press the “Enter” key to store the chosen trouble code and return to the Comment menu,
or press the “C” key to cancel any entry of a trouble code. If you wish to reenter the
message, press the Trouble Code button “1” again.
The process for entering one or more Reader Codes is exactly the same as entering a
Trouble code. Pressing the Reader Code button “R” will bring up this menu.
You can also bring up the Reader code screen by using the “R” Hot Key.
To enter a Reader Code, enter the number of the code (either 1, 2, or 3) to display the
choices for that code. Choose the reader code message with the up “U” and down “D”
keys and press the “Enter” key when you are finished. You can press the “C” key to
cancel the entry of a reader code. Again if you choose to clear a Reader Code entry,
choose the blank line at the top of the list and press the “Enter” key.
Page 39 of 73
THE BADGER®-RADIX® User Guide
February 2007
If you have chosen a message, you might see a screen like this.
As was with the Trouble Codes, the “C” key will cancel any changes you made, while the
“Enter” key will accept the changes.
When the readings are unloaded, Badger CONNECT will store and display the Reader
Codes and Trouble codes in the Customer Record for that meter. You can use the
Standard Reports to see any and all of the Reader Codes and Trouble Codes that were
entered when reading the meters.
Text Messages
To enter a text message, press the text message “M” button. The Badger-Radix will
display the Notes function of the handheld.
You can also bring up the Text Message screen by using the “N” Hot Key.
Page 40 of 73
THE BADGER®-RADIX® User Guide
February 2007
To clear a message already entered, press the “D” button. To cancel the message, press
the “C” key. If you are happy with the message, press the “Enter” key.
To enter or change a message, press the “E” key. You’ll see this screen.
Use the alpha-numeric keypad below the screen to enter your message. When the
message is entered, press the Progress Hot Key to complete the message. Then you’ll see
the notes screen that looks like this.
Page 41 of 73
THE BADGER®-RADIX® User Guide
February 2007
Pressing the “Enter” key will store the message for this meter and return you to the
Comments menu.
Viewing High and Low Audit Values
If you wish to see the high and low audit values, the account number, or the previous
reading, from the Read Menu press the View Hi/Lo button “V”. The Badger-Radix will
display the account number for the meter being read, and the high, low, and previous
reading values for the meter.
You can also bring up the High Low screen by using the “H” Hot Key.
To return to the Read screen, press the “C” button.
In some cases, the Badger-Radix might not display the high, low, or previous readings.
On the Settings screen in the Utilities section, there are two choices that control the
display of this screen. The high and low audit values will be displayed if you have
Page 42 of 73
THE BADGER®-RADIX® User Guide
February 2007
chosen the Show High / Low setting. The previous reading will be displayed if you have
chosen the Show Previous Reading setting. If these settings are not chosen, you will not
be able to view the associated information on the View High/ Low screen.
Utilities
The Badger-Radix provides you with a number of functions to provide you with
information that can be helpful while meter reading. Pressing the Menu button on the
read screen accesses these functions.
From the Read Menu, press the Utilities “U” button and you’ll see this screen.
The functions on the Utilities Menu are:
• Progress “P” – a display of meter reading statistics to help you determine how far
along you are in the route
• Settings “S” – which displays the settings currently being used by the BadgerRadix
Page 43 of 73
THE BADGER®-RADIX® User Guide
February 2007
•
•
•
Battery Info “B” – this screen shows information being reported by the processor
within the battery pack that might be useful when investigating a problem
Date / Time “D” – this screen allows you to set the date, the time, and the time
zone for the Badger-Radix
Close “C” – this function returns you to the Read Menu
Progress
The Badger-Radix keeps records on the total number of meters, the number of meters
read, the number of meters that failed to report, the number of tamper reports received,
etc. If you wish to view this information, press the Utilities “U” button from the Read
Menu followed by the Progress “P” button from the Utilities Menu.
You can also display the Progress screen by using the “O” Hot Key.
The Badger-Radix Progress screen displays these statistics:
• Total number of meters stored in the Badger-Radix
• Current number of meters for which readings have not yet been attempted
• The total number of meters for which readings have been obtained or have been
unsuccessful (number attempted)
• The total number of failed reads
• The percentage of meters of the total meters in the Badger-Radix that have been
attempted
• The number of tamper conditions reported (this total does not include any meters
in which the tampers have been reset)
• The number of unexpected manual reads (of meters equipped with automatic
meter reading equipment)
The screen looks like this.
If your Badger-Radix has a thousand or more meters, it may take 10 to 15 seconds to see
the numbers displayed on this screen. This is because the Badger-Radix is examining
each meter in the database in order to build the values for this screen.
Page 44 of 73
THE BADGER®-RADIX® User Guide
February 2007
When you have finished examining the statistics and information, press the “C” key to
return to the Utilities menu screen.
Date/Time
To change the date, the time, or the time zone, press the Date and Time “D” button from
the Utilities menu. The Badger-Radix will display the Date and Time screen.
To change the date or time, press the “D” or “T” buttons. In either case, you’ll see this
screen.
To change the time, press the “H” button to change the hours and/or the “M” button to
change the minutes. To change the date, press the “N” button to change the month,
and/or the “D” button to change the date, and/or the “Y” button to change the year.
When the time and date are correct, press the “Enter” key. If you wish to cancel, press
the “C” key. When you are finished and ready to save the date and time, press the
“Enter” key.
Page 45 of 73
THE BADGER®-RADIX® User Guide
February 2007
Battery Info
If you need additional information regarding the electronics of the battery, press the
Battery Info “B” button from the Utilities menu. The Badger-Radix will display the
additional battery information as follows:
You can also access the Battery screen by using the “B” Hot Key.
The screen shows you the power remaining for the main battery. Pressing the “C” button
returns you to the previous screen.
Settings
As mentioned earlier, the Badger-Radix has the ability to change how it operates or what
it displays based on your choices. These choices are called Settings, and are accessed
from the Settings button from the Utilities Menu. The Settings are displayed and
changed in a series of screens. Each setting describes a behavior in the Badger-Radix
that you can control. If the box has an “✔” in it, the Badger-Radix will perform that
function. If the box has no “✔” in it, the Badger-Radix will not perform the function.
Here are samples of the Settings screens.
Page 46 of 73
THE BADGER®-RADIX® User Guide
February 2007
Page 47 of 73
THE BADGER®-RADIX® User Guide
February 2007
To choose a setting, press the action key shown for that item. A check mark will appear
or disappear from the box as you press the key. The check mark denotes that the setting
behavior specified will be carried out. No check mark in the box denotes that the setting
Page 48 of 73
THE BADGER®-RADIX® User Guide
February 2007
behavior will not be carried out. Choosing the values for these settings allows you to
customize the Badger-Radix operation to fit your needs.
To move to the next Settings screen, press the “M” key. To move to the previous
Settings screen, press the “P” key. If you are done, press the “C” key at any of the
settings screens to return to the Utilities menu.
Here’s the list of each of the different settings and how it controls the Badger-Radix’s
operation.
SETTING
Advance on
High/Low
Beep on
High/Low
Show High and
Low
WHAT IT DOES
HOW YOU MIGHT USE
IT
When a high or low reading is
If you wish to investigate a
encountered and this setting is
high or low reading, leave a
chosen, the Badger-Radix will
brochure with the customer,
advance the display to the next
or perform some other
account. If not chosen, the Badger- function on a high or low
Radix will continue to display the
reading, clear this setting (and
current meter being read after the
choose the next one as well).
reading is stored. To move to the
You will be alerted to the
next meter you must press the “N”
high and low meters by the
for NEXT button.
audio tones and the display.
When a high or low reading is
If you wish to investigate a
encountered for a meter and this
high or low reading, leave a
setting is chosen, the Badger-Radix brochure to the customer, or
will sound the high and low audio
perform some other function
signals. If not chosen, the Badgeron a high or low reading,
Radix will sound the successful read choose this setting (and clear
audio tone.
the previous one). You will
be alerted to the high and low
meters by the audio tones and
the display.
This setting and the Show Previous To insure accuracy of the
Read setting control the amount of
meter readings, some utilities
information available to the meter
will choose to clear this
reader. When this setting is chosen, setting. Other utilities will
the high and low audit values are
choose this setting so that if
displayed when the View High/Low an investigation on the
button is pressed.
operation of the meter is
needed, this information is
available. You need to
determine which option is
right for you.
Page 49 of 73
THE BADGER®-RADIX® User Guide
February 2007
Find on Wrong
Run Consumption
Auto Clear
Tamper
Verification
Show Previous
Reading
Hi / Low
Readings Fail
This setting pertains only to touch
meter reading. The gathered meter
reading information contains the
module ID number. If the number
is different than the ID number for
the current meter on the read screen
(the meter was read out of
sequence), the Badger-Radix will
search for the correct meter if this
setting is chosen. If the setting is
not chosen, the Badger-Radix will
alert you to the fact that the reading
indicates that the wrong meter is
being read.
Not used at this time
This setting is used with older
technology radio systems.
When this setting is chosen, the
Badger-Radix will request a manual
reading for each successful reading.
This manual verification of the
interrogated reading can be used to
satisfy requirements in some states.
This setting is very handy for
touch meter reading because
it allows you to read meters
out of the normal reading
sequence. If you need to
resequence the route, using
this setting you can read the
route in the new reading
sequence order with ease.
You can then resequence the
route using the new read
date/times.
Not used at this time
This setting is not used within
the Badger-Radix.
If you are required by state
law to periodically verify an
interrogated meter reading
with a visual reading, the
Badger-Radix will request
your required visual reading
when this setting is chosen.
This setting (as well as Show High
To insure accuracy of the meter
and Low) controls the amount of
readings, some utilities will
information available to the meter
choose to clear this setting.
reader. When this setting is chosen, Other utilities will choose this
the previous reading value is
setting so that if an
displayed when the View High/Low investigation on the operation
button is pressed.
of the meter is needed, this
information is available. You
need to determine which option
is right for you.
This setting allows you to choose how If you use the last meter
the high and low limits are used in the reading as the low limit and
Badger-Radix. If the setting is
you wish to be alerted to
checked, the Badger-Radix will label a conditions of no usage, check
reading as High if the reading is
this setting. Note that the
greater than or equal to the high limit. high and low limit checking
Similarly, the reading will be labeled
is only in the Badger-Radix.
low if the value is less than or equal to It does not extend to Badger
the low limit. When the setting is
CONNECT.
unchecked, the high and low
processing is strictly greater than the
high limit or less than the low limit.
Page 50 of 73
THE BADGER®-RADIX® User Guide
February 2007
Hi/Low Manual
Rekey
Manual Route
Advance
Three controls for
manual meter
readings for the
three possible
services (usually
water, gas, and
electric)
Read Screen
Show Comments
Show Zero
Consumption
This setting allows you to choose
how you will verify a high or low
manual reading. There are two
methods for manual reading
verification: reentering the reading,
or visually verifying the reading. If
you choose to reenter the reading,
the Badger-Radix will expect an
exact match to the original manual
reading to verify the reading. If you
choose to visually verify the
reading, the Badger-Radix will ask
if the entered reading is correct.
You visually compare the reading
with the register odometer and enter
your response.
When checked, the Badger-Radix
will not move to the next account
automatically. All changes of
accounts must be done manually.
The field sets the default manual
reading entry direction for each of
the supported services. When the
button shows R-L, the default
reading entry direction is Right to
Left. When the button shows L-R,
the default reading entry direction is
Left To Right.
When checked, the messages from
the office to the meter reader for a
particular meter will be shown on
the read screen when that meter is
displayed.
When checked, the Badger-Radix
will compare the current reading
with the previous reading and alert
you to possible stopped meters.
Page 51 of 73
If the box is checked, the
Badger-Radix will prompt
you to reenter the manual
reading to verify it is correct.
If the box is not checked, the
Badger-Radix will ask if the
reading is correct. If it is,
press the Yes button. If it
does not match the odometer,
press the NO button.
We strongly suggest that this
setting be left unchecked. If
the setting is checked and you
do not realize it is checked,
the resulting operation of the
Badger-Radix can look as if
the unit is malfunctioning.
If the direction on the button
is not the direction you’d like
to use, press the button to
switch the direction to the
other value.
If you wish to see these
messages, check the box.
However, if you are reading
meters from a vehicle, the
messages may not apply and
will definitely slow the
reading process. In that
event, you may wish to clear
the box.
If you wish to see these
messages, check the box.
THE BADGER®-RADIX® User Guide
February 2007
Show Negative
Consumption
IR Port
When checked, the Badger-Radix
will compare the current reading
with the previous reading and alert
you to possible negative
consumption. The most common
cause for this condition is a meter
that has been changed but the
billing system has not been updated
with the new meter information.
Sets the port used by the software
for programming Badger ORION
transmitters
ORION
Sets the port used by the software to
gather Badger ORION readings
VersaProbe
Sets the port used by the software to
gather touch readings
If you wish to see these
messages, check the box.
Press the I key to set the
value. In almost all cases, the
Built-in Center port will be
used
Press the O key to set the
value. In almost all cases, the
Built-in port will be used
Press the V key to set the
value. In almost all cases, the
Bottom Left port will be used
Entering New Accounts
The Badger-Radix can add accounts to the list of stored accounts it received from the
Badger CONNECT software. But before you add a new account in the Badger-Radix, be
aware that the Badger CONNECT software can display the accounts that you add but
cannot permanently add them to its database. Information from accounts added in the
Badger-Radix can be printed when the accounts are downloaded to Badger CONNECT,
but the accounts will not be added to the Badger CONNECT database. New accounts are
added to Badger CONNECT when the list of meters to read is sent from the billing
system.
Note that if you need to read a few meters for testing purposes, there is no need to create
a new account. Simply use the Badger-Radix Quick Read feature. See the Quick Read
section of this manual for more information.
If you need to enter a new account into the Badger-Radix, press the New Account “N”
button from the Read Menu.
Page 52 of 73
THE BADGER®-RADIX® User Guide
February 2007
Pressing the New Account button will bring up this screen.
The buttons perform these functions.
• Edit Name “5” – Enter the name for the new account
• Edit Addr “1” – Enter the service address for the customer
• Enter AMR # “A” – Enter the transmitter number if this is a TRACE account
• Read Method “T” – Press the box to choose the method by which the meter will
be read: manual, touch, ORION RF.
• Cancel “C” – Return to the Read Menu (if you have not saved the new account
information, the new account will not be added)
• OK “Enter” – Saves the new account information, and clears the entries
Pressing the Name, Address, or Trans # action keys will produce the same result. You’ll
see a text entry screen.
Page 53 of 73
THE BADGER®-RADIX® User Guide
February 2007
Enter the information for this field from the keyboard. When you are finished, press the
“Enter” key. You’ll see the new account screen updated with the information you just
entered in your chosen field.
Pressing the AMR # key “A” will change the value of the type of automatic meter
reading for this meter. Press the “A” button until the field shows the correct AMR type.
If you entered the AMR number, you might see a screen like this one.
Pressing the OK “O” key will add the account and clear the fields. Pressing Cancel “C”
key will cancel the entry of the new account and return you to the Read menu.
Route Operations
The Badger-Radix software performs a number of functions on a per route basis. They
are:
• Searching for the first meter in a specific route,
• Reviewing the progress of meter reading on a per route basis,
Page 54 of 73
THE BADGER®-RADIX® User Guide
February 2007
•
And, displaying a message showing completion of the route when the last unread
meter of the route is read.
Searching for a Route
To search for the first meter in a route, press the M key from the reading screen to display
the read menu. Then press the S key to display the Searching menu. You’ll see this
screen.
Choose the R key to display all of the routes that are loaded in the Badger-Radix. You’ll
se a screen similar to this.
Use the U and D keys to move the selector line up or down to choose the route you wish
to display and press the Enter key. The Badger-Radix will display the read screen for the
first meter in the selected route. If you wish to cancel the search, press the C key.
Page 55 of 73
THE BADGER®-RADIX® User Guide
February 2007
Progress Reporting by Route
To view the progress of meter reading, use the Progress function: from the read screen
press M for the menu, U for Utilities, and P for Progress. You can also use the Progress
Hot Key. Either way, you’ll see a screen similar to this.
Press the R key to display the progress for the first route in the Badger-Radix. You’ll see
a screen like this.
Use the N and P keys to view the progress screens for the next and previous routes loaded
in the Badger-Radix. Notice that the route being displayed is the current route. If the
route being displayed was not the one currently being read, you would see a screen like
this.
Page 56 of 73
THE BADGER®-RADIX® User Guide
February 2007
When you are done viewing the progress details, press the C key to close the screen.
Route Completion messages
While you are reading meters, the Badger-Radix software is monitoring your progress
within all of your meters in all the loaded routes. If the last meter in a route is read,
you’ll see a message like this denoting that the Route is completed.
Press the Enter key to acknowledge that you have seen the alert message.
The Route Completion messages will also be displayed if you are entering the read screen
after displaying the Copyright screen. This is handy as a reminder of your progress when
coming back from lunch, or resuming reading after a long break.
When all of the Routes in the Badger-Radix have been read, you’ll see this message.
Page 57 of 73
THE BADGER®-RADIX® User Guide
February 2007
Summary of the Meter Reading Process in The Badger-Radix
The process of meter reading using the Badger-Radix is simple and easy to remember.
Here’s a summary of the steps in the meter reading process that includes the buttons you
need to press to perform the Badger-Radix function.
•
•
•
Choose the Account Group you wish to read in the Badger CONNECT software
o Place the Badger-Radix into the Loader-Charger and perform the Receive
Route function.
o Use the Load Collector function in Badger CONNECT to create the files
and send them to the Badger-Radix
Read the meters in the route or routes
o Read/Program Meters from the Badger-Radix Main Menu
o Badger ORION meter readings will be gathered as they are received when
the Badger-Radix is in automatic mode. The next unread meter will
always be displayed.
o Change to a different meter using the Next Meter and Previous Meter
buttons in Manual Mode if you need to
o Press the Menu button to choose the different reading functions you might
need to perform
When finished, transfer the readings from the Badger-Radix back to the Badger
CONNECT software
o When you are ready to send readings back to the PC, insert the BadgerRadix into the Loader-Charger and perform the Send Readings function.
o Use the Unload Collector function in Badger CONNECT to unload the
readings, view the readings to be sure they are correct, and store the
readings.
Page 58 of 73
THE BADGER®-RADIX® User Guide
February 2007
THE DETAILS – PROGRAMMING METERS USING THE
Badger-Radix
Programming Badger ORION® Transmitters
To access the ORION Programming functions press the “P” key from the ORION Quick
Read screen. You’ll see this screen.
You can also display the ORION Program Screen using the “P” Hot Key.
Note that you must perform a Read function before you can perform any other function.
The Program screen for ORION transmitters allows you to perform these functions:
• Read “Enter” a transmitter’s information through the optical LED
• Start “S” a transmitter’s radio
• Stop “T” a transmitter’s radio
• Enter a reading “R” to program to a transmitter
• Program a transmitter’s odometer value “P” to match the RTR
• Pause “U” a transmitters radio until water flows through the meter
• Close “C” to return back to the Orion Quick Read screen
Reading the Transmitter through the Optical port
To use the Programmer to Read the transmitter’s meter reading information, align the
optical port on the bottom of the handheld computer and the LED and press the “Enter”
key. If the port and the LED are aligned, you’ll see this message in the Status field:
• Reading
Once the transmitter information has been read, the other fields on the screen will be
updated. Once all the information is gathered, you’ll hear a beep and see this screen.
Page 59 of 73
THE BADGER®-RADIX® User Guide
February 2007
Starting the Badger ORION® Transmitter without the Programmer
All Badger ORION Transmitters are programmed at the factory to begin sending its
meter reading as soon as the Encoder/Register registers flow through the meter. As a
result, you can install Badger ORION transmitters on meters without having to manually
start the transmitter.
Using the Programmer to start a Transmitter
If a Badger ORION Transmitter is required to start its meter reading broadcast prior to
registering usage, align the optical port and the LED and touch the Start Radio button
“S”. If the port and the LED are aligned, you’ll hear a beep and see these messages that
indicate success:
• Turn on
• Done
Here’s what you would see if you started transmitter # 72110115.
Page 60 of 73
THE BADGER®-RADIX® User Guide
February 2007
Stopping a Transmitter
To use the Programmer to Stop the transmitter’s meter reading broadcast, align the
optical port and the LED and touch the Stop Radio button “T”. If the port and the LED
are aligned, you’ll hear a beep and see these messages that indicate success:
• Stop
• Done
Here’s what you would see if you stopped transmitter # 72110115.
Changing the Odometer setting
The most common use of the SET ODOMETER function is to clear a Tamper condition
reported by a Transmitter. Besides clearing the tamper, the SET ODOMETER function
will also allow you to change the meter reading stored in the transmitter.
Changing the odometer setting is performed in two steps:
•
Perform a READ function
•
Enter the new odometer value and perform the SET ODOMETER function
The READ function is described above. Once the Badger ORION® transmitter has been
successfully read, you can continue with the SET ODOMETER function.
To use the Programmer to clear the tamper (the transmitter’s meter reading matches the
odometer value), press the PROGRAM “P” key once the READ function has completed.
The Programmer will clear the tamper without changing the stored meter reading.
To use the Programmer to change the transmitter’s stored meter odometer value, enter the
odometer value you want the transmitter to store into the odometer field as follows. First,
use the delete key on the keyboard below the screen (upper left corner, first press the
Badger-Radix key) to remove the current reading from the field. Next, enter the desired
reading by pressing the number keys on the keyboard. Finally, align the optical port and
the LED and touch the Set Odometer button “O”. If the port and the LED are aligned,
you’ll hear two beeps and see these messages that indicate success:
Page 61 of 73
THE BADGER®-RADIX® User Guide
February 2007
•
•
Program
Done
Note that if the transmitter’s radio is stopped, the odometer value will be stored but the
transmitter will remain stopped. If the radio is running, the odometer value will change
and the radio will remain running.
Example: Changing the Odometer
Here’s an example to help you through the steps of setting an Odometer value.
Let’s assume that you are installing a Badger ORION® transmitter on an active meter
with usage on the RTR®. You need to follow these steps to insure that the value in the
transmitter matches the current odometer value on the RTR once the transmitter is
connected to the RTR.
When programming Badger ORION transmitters, you need to enter the six moveable
odometer wheels plus the sweep hand for all meter types (gallons, cubic feet, etc.) and all
meter models.
For this example, we’ll assume that the odometer value (both black digits and white
digits) is "001234". The RTR odometer would look like this.
Let’s also assume that the sweep hand is pointing between the "5" and the "6". Because
the sweep hand has not yet hit the "6", use the value of "5" as the last digit of the meter
reading. Therefore, the value to be entered into the Badger ORION Transmitter is
"0012345".
Page 62 of 73
THE BADGER®-RADIX® User Guide
February 2007
Now we follow the steps for setting the Odometer value. In this example, we will use
transmitter number 72110068. First, we must place the optical port over the transmitter’s
LED and perform the READ function.
Next, we must update the odometer value on the display. Use the back space key to
delete the current odometer value from the Read step, and enter the desired odometer
reading (12345).
Now touch on the Set Odometer button. Once the messages show that the
communications between the optical port and the transmitter have completed
successfully, the transmitter holds the new odometer value.
To check the odometer value, place the optical port over the LED and perform the READ
function again. You should see the new odometer value of "12345" in the Odometer #
field.
Example: Setting the Odometer for a 4" or 6" Compound
NOTE:
It is recommended that when a Badger RTR® is being read that the sweep hand be
between the twelve o-clock position and the six o-clock position. If the sweep hand is in
between two increments read the lower of the two, i.e. if the sweep hand is in between the
200 and 300 increments use the 200.
1. To accurately program a Badger ORION® transmitter for a compound meter with a
summator, both the low flow and high flow totals must be added together to determine
the total flow. We’ll use this picture of a compound series meter with separate low and
high flow Badger RTRs in the example.
Page 63 of 73
THE BADGER®-RADIX® User Guide
February 2007
2. Determine the low flow reading (read the six moveable dials and the sweep hand). In
the picture above, the Low flow register value is 0001232. Note that the sweep hand
reading is rounded up.
3. Determine the high flow reading. Read all movable (live) dials and add the sweep
hand digit. In the picture above, the high flow is 456 (moveable dials) and the sweep
hand is on the 2. This gives a reading of 4562. Note that the register has three
painted zeroes. The sweep hand value takes the place of the first painted zero.
Adding the other two painted zeroes to the reading gives a high flow reading down to
the gallon of 456200.
4. Next, add the low flow and high flow together as follows:
Low Flow = 00001232
High Flow = 000456200
The total odometer reading to use for the Badger ORION® transmitter is 457432.
The 32 is dropped from the totalized reading to account for the resolution of the
Badger RTR® on the high flow side.
5. The reading to be entered into the odometer field is 0004574.
6. The process for Setting an Odometer for a Compound now is the same as for other
meters: Using the READ button to read the transmitter, changing the odometer value to
0004574, and using the SET ODOMETER button to store the new odometer value.
If water is flowing through the meter while you are trying to program it, it may be
necessary to set up the programmer at an advanced reading and wait for the meter to get
to that reading and then set the odometer. ALWAYS verify the programming by letting
some water flow through the meter and take another reading to ensure accuracy.
Page 64 of 73
THE BADGER®-RADIX® User Guide
February 2007
Programming DIALOG Modules
To program Badger Meter’s previous version of touch product, Badger DIALOG®, select
Quick Read/Program Meters to display the choice of technologies from the Badger-Radix
Main Menu.
Choose the technology of the meter reading module. Choose VersaProbe “V” since that
wand is the one used in Programming Badger DIALOG modules. You’ll see this screen.
To program a Badger DIALOG module’s reading and clear its tamper status, you must
first get the specific information about that module. The easiest way to do that is to
perform a Quick Read. Connect the VersaProbe™ to the Badger-Radix, place the sensor
on the module, and squeeze and release the trigger on the probe. The probe will read the
module and display the current status on the screen.
Page 65 of 73
THE BADGER®-RADIX® User Guide
February 2007
Clearing a Tamper
To clear a tamper condition, visually read the module to get the odometer value. Next,
press the Reading “R” button and enter the reading via the keypad. When the reading is
entered, the screen will look like this.
Once the data is correct, press the PROG button “P” on the Badger-Radix screen. Note
that the trigger button on the probe will NOT program the unit, but instead
perform a quick read. Once the programming operation is completed, you’ll see the
Successful message. If an error occurred, an error message will state the problem.
Setting the Odometer Reading
To adjust the AMR reading to match the registers odometer reading, first perform a quick
read function with the VersaProbe™. When completed, press the Reading “R” key and
enter the correct odometer value. When the new odometer value is correct, press the “O”
key. The programming screen should now show the correct information. Place the
VersaProbe sensor on the module and press the Program “P” button. Once the
programming operation is completed, you’ll see the Successful message. If an error
occurred, an error message will state the problem.
Programming a Badger DIALOG® Module’s Network ID
To program a network ID, read the module with the VersaProbe and enter the new
network ID by pressing the new ID “N” key and entering the ID number via the keypad.
Then press the PROG button as described above.
Note that the only time you need to change an ID number is when you are implementing
a Badger DIALOG network of meters to be read with one touch pad. Please refer to the
Badger DIALOG Network Tech Brief for more information.
Page 66 of 73
THE BADGER®-RADIX® User Guide
February 2007
THE DETAILS – OTHER USES FOR THE BADGER-RADIX
The Badger-Radix can be used to perform a number of functions other than reading
meters.
• Read a Badger ORION® transmitter whose meter reading you need for a special
use (such as testing and troubleshooting, gathering a final meter reading, etc.)
• Interrogate a BadgerTouch® module or other touch module using a VersaProbe™
Some of these functions may be performed at customer sites while others may be
performed in the meter shop. But they all use the Badger-Radix Quick Read function.
The Quick Read function allows you to read one meter at a time without having meters
loaded in the Badger-Radix. The Quick Read function can be performed for Badger
ORION transmitters and touch modules. The Badger-Radix gathers the meter reading
and displays the result on the screen. The Badger-Radix does not store the reading
information and cannot send any Quick Reads back to the Badger CONNECT
software.
The most common uses of the Quick Read feature are:
• Gathering a final reading from a meter
• Reading a transmitter or module when troubleshooting or testing at a customer’s
site
• Reading one or more transmitters or modules that are about to be installed at
customer sites, to verify that they are working correctly
• Testing a newly installed transmitter
• Performing meter testing at the meter shop
The Quick Read Menu is accessed from the Badger-Radix Main Menu, and looks like
this.
The Quick Read Choice screen allows you to perform quick reads for each type of
reading technology you use by pressing the button for that technology.
Page 67 of 73
THE BADGER®-RADIX® User Guide
February 2007
Badger® ORION® Quick Reads
Badger ORION Quick Reads offer you great flexibility. Because the Badger ORION
Receiver will forward all Badger ORION readings it receives, you can view up to 50
readings received or you can request to view readings from a specific Badger ORION
transmitter. Press the “O” key to display the Orion Quick Read screen. It looks like this.
The ORION Quick Read screen can also be reached by using the “Q” Hot Key.
If you wish to look for a reading from a specific Badger ORION receiver, touch the “O”
key to place a check mark in the Select One Serial Number field. Next touch the “S” key
to enter the Serial Number. The numeric entry screen will come up to allow you to enter
the serial number of the transmitter you want to read. Enter the serial number and press
the “Enter” key. The Badger-Radix will display the Quick Read screen with your chosen
serial number, and will begin listening or that transmitter. When a reading is received,
the Badger-Radix will sound the reading tone and display the reading. Every time a
reading is received from that transmitter, the screen will be updated and the tone will
sound. Here are tree examples of Quick Read displays, one with a Badger ADE® and no
tamper reported, another with a Badger RTR® but a tamper condition reported, and a
quick read of a Badger ORION Gas transmitter.
Page 68 of 73
THE BADGER®-RADIX® User Guide
February 2007
If you wish to monitor all of the readings that the Badger ORION® Receiver finds, clear
the box next to Select One Serial Number by pressing the “O” key. When the RESET
button “R” key is pressed, the Badger-Radix software will build a list of up to 50
received readings. Use the NEXT button “N” to view each of the readings in the list.
When there are no more readings to display, the Badger-Radix will show this screen.
Page 69 of 73
THE BADGER®-RADIX® User Guide
February 2007
If you wish to rebuild the list of received readings, press the RESET “R” button. You
can then view the readings within the new list using the NEXT “N” button.
When you have completed your Quick Reads, press the Close “C” button.
VersaProbe™ Quick Reads
To perform a quick read using a VersaProbe, press the “V” button on the Quick Read
menu for the VersaProbe. You’ll see this screen.
To start the read process for a VersaProbe, squeeze and release the trigger on the probe.
The probe will read the module and forward the information to the Quick Read screen.
Page 70 of 73
THE BADGER®-RADIX® User Guide
February 2007
This screen shows that module number 96410104 has a reading of 152.
Page 71 of 73
THE BADGER®-RADIX® User Guide
February 2007
WHAT IF THINGS GO WRONG
In the unlikely event that you experience difficulty using the Badger-Radix, we’d like
you to take some steps to help us return your Badger-Radix to proper operation. This
section gives you guidelines on how to respond to the times when the Badger-Radix
reports a problem.
Restarting Windows
There are times that occur in which the Windows® operating system receives conflicting
information. In these cases, you might see a function stop working that worked fine just
a few minutes ago. When these types of cases occur, a restart of the handheld computer
is necessary.
To restart the computer, simultaneously hold down the “R”, “W”, and “Delete” keys (the
three keys in the lower right hand corner, vertically) until the screen goes blank.
Windows will restart and the Badger-Radix software will begin. In most cases, these
steps will clear the problem. Be sure to let the Badger-Radix completely restart before
placing it in the Loader-Charger. If you perform this restart and the problem is not
cleared, please call Badger Meter Technical Support.
Questions
If the Badger-Radix displays something out of the ordinary, there is no need to panic. If
you see information on the screen that you do not understand, please record the
information that you see and call the Badger Meter Technical Support telephone number:
1-800-456-5023. The technical support specialist will help you gather any additional
information, and will assist you in restarting the Badger-Radix if need be. Your
telephone call will alert the Badger Meter software engineers to your problem, who will
investigate to find the cause of the problem.
It is also very helpful for you to record the situation that led to the strange behavior.
Record the steps you took, and the entries you made, that brought about the display. This
information will be very valuable in the investigation, and will help find the solution
more quickly.
When You Call the Technical Support Hotline
When you call the 800 technical support number, a support specialist will answer.
Explain the situation, and go over the information you recorded. This is where your
notes on the display or the behavior and the steps you took will be very valuable. If
possible, give this information to the support specialist:
• The Badger-Radix screen that was active
• The steps being performed at the time
• Any entries that were made on the screen
• Any error message displayed, including any error code or explanation that is
shown
Page 72 of 73
THE BADGER®-RADIX® User Guide
February 2007
•
The current state of the Badger-Radix
Your support specialist may ask you to fax notes or other information to Badger Meter to
assist in the resolution of the problem.
What To Report To Technical Support
It is important that you report all occurrences of errors to the Technical Support Hotline.
It allows Badger Meter to improve its products and improve your system at the same
time. In some cases, the problem may have already been solved, and the Specialist can
send you a software upgrade to correct the problem. In other cases, the Specialist can
direct you to perform a function in a certain way so that the error does not occur.
In some cases, the Specialist will direct you to perform some steps if the problem
happens again. This will gather very valuable information that will speed the
investigation of the problem. If the problem does happen again, please follow those steps
and call the Hotline. The Specialist will gather the information for that particular
problem, and direct you if further action is needed.
Faxing the Technical Support Group
The Badger Meter Technical Support Group can also be reached by fax at 1-888-3715982. This may be a convenient way to follow up with your support specialist on
particular steps. The number is available 24 hours per day, 7 days per week.
E-Mailing the Technical Support Group
The Badger Meter Technical Support Group is also available via electronic mail through
the Internet. To send questions or comments to the Technical Support group, address
your e-mail to [email protected]. The Technical Support Group can
respond to your comments or questions via phone, fax, or e-mail. Just let us know in
your message the type of response you would prefer.
Page 73 of 73
Please see our website at
Due to continuous research, product improvements and enhancements,
Badger Meter reserves the right to change product or system specifications
without notice, except to the extent an outstanding contractual obligation exists.
www.badgermeter.com
BadgerMeter, Inc.
for specific contacts.
Copyright © Badger Meter, Inc. 2007. All rights reserved.
®
P.O. Box 245036, Milwaukee, WI 53224-9536
(800) 876-3837 / Fax: (888) 371-5982
www.badgermeter.com